java注解在Android开发中主要有两种使用方式;一种是在程序运行期间获取类的信息进行反射调用;另一种是使用注解处理,在编译期间生成相关代码,然后在运行期间通过调用这些代码来实现相关功能。
我们先了解一下注解的分类和关键字
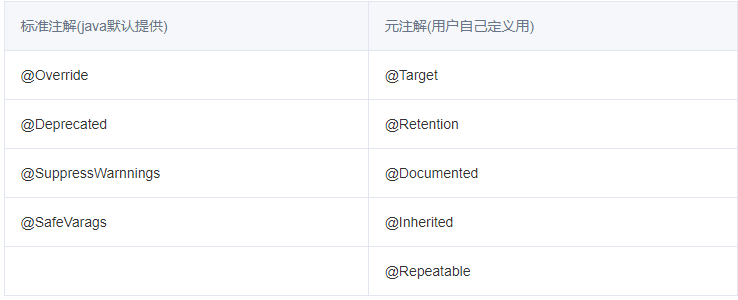
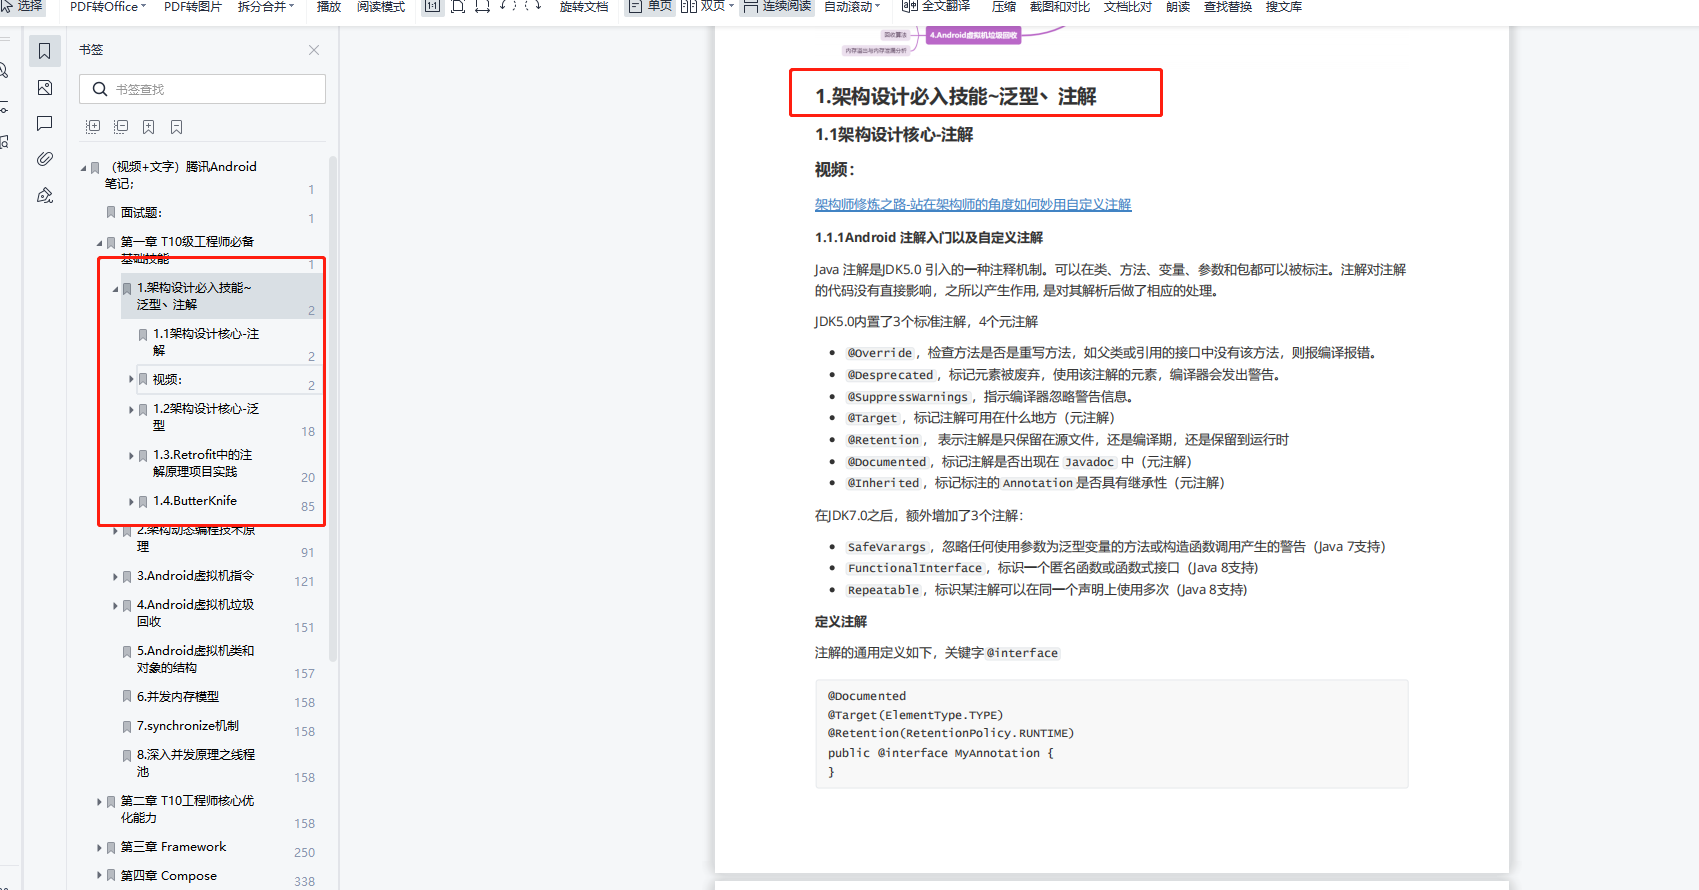
从上图中可以看出java中的注解主要分为两类,分别是标准注解和元注解。标准注解是 Java 为我们提供的预定义注解,这个我们没多大关系,主要是元注解,元注解是用来提供给用户自定义注解用的,接下来我们来学习一下元注解。
JAVA 元注解
先解释每个注解的含义:
1.元注解之Target
@Target: 注解的作用:
- @Target(ElementType.TYPE) //类、接口、枚举、注解
- @Target(ElementType.FIELD) //类成员(构造方法、方法、成员变量)
- @Target(ElementType.METHOD) //方法
- @Target(ElementType.PARAMETER) //方法参数
- @Target(ElementType.CONSTRUCTOR) //构造函数
- @Target(ElementType.LOCAL_VARIABLE)//局部变量
- @Target(ElementType.ANNOTATION_TYPE)//注解
- @Target(ElementType.PACKAGE)//包
- @Target(ElementTypeTYPE_PARAMETER) //类型参数声明
- @Target(ElementType.TYPE_USE) //使用类型
2.元注解之Retention
@Retention:注解的保留位置
- @Retention(RetentionPolicy.SOURCE) //注解仅存在于源码中,在class字节码文件中不包含,注解将被编译器丢弃.
- @Retention(RetentionPolicy.CLASS) //默认的保留策略,注解会在class字节码文件中存在,但运行时无法获得,会被JVM丢弃.
- @Retention(RetentionPolicy.RUNTIME) //注解会在class字节码文件中存在,在运行时可以通过反射获取到
3.元注解之Document
- @Document:说明该注解将被包含在javadoc中
4.元注解之Inherited
- @Inherited:说明子类可以继承父类中的该注解
5.元注解之Repeatable
- @Repeatable:在需要对同一种注解多次使用应用于指定对象,往往需要借助@Repeatable,为java8新增。
了解完这些注解的含义,我们来自定义一个,java注解有两种实现方式。
JAVA自定义注解
1.基于反射使用注解
首先我们的目标是制作一个用户信息表,是一个User对象,表中有其对应的属性,将注解和属性等关联,然后再通过反射拿到对应的注解值和属性值打印,思路如下:
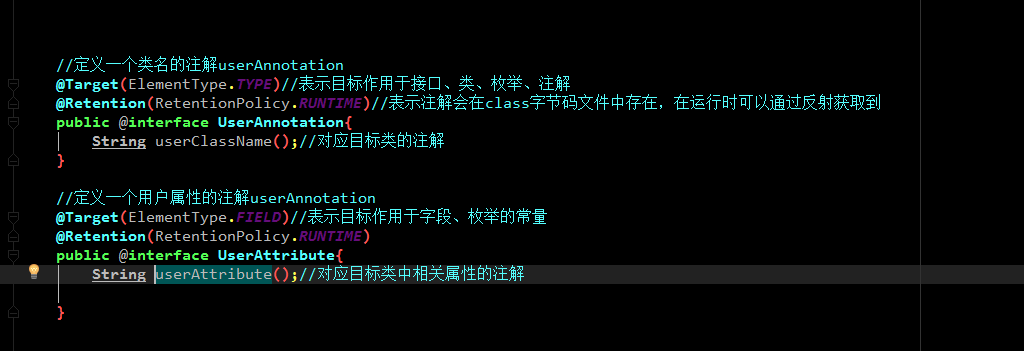
1.1. 首先定义两个注解UserAnnotation和UserAttribute,创建一个注解遵循: public @interface 注解名 {方法参数}
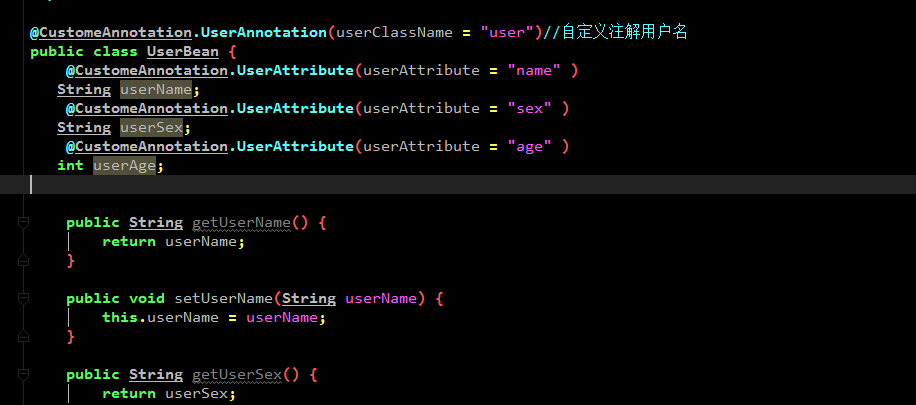
1.2. 将注解和User对象关联给用户赋值。
1.3. 获取注解,打印注解的注解值和属性值。
定义注解代码如下
将注解和User对象绑定
主要通过获取注解打印
public static void main(String [] args){
      UserBean mUserBean =new UserBean();
        mUserBean.setUserName("张三");
        mUserBean.setUserSex("男");
        mUserBean.setUserAge(18);
      StringBuffer mStringBuffer= printData(mUserBean);
      System.out.println(mStringBuffer);

    }
我们主要看一下printData这个打印的代码,都有注释不解释
   private static StringBuffer printData(UserBean userBean){
        //创建一个StringBuffer对象拼接数据
        StringBuffer mStringBuffer =new StringBuffer();

        //根据对象获取注解Class
        Class annotationClass =userBean.getClass();
        //判断对象中有没有我们定义的userAnnotation注解
        boolean bUserAnnotation =annotationClass.isAnnotationPresent(CustomeAnnotation.UserAnnotation.class);
        if(bUserAnnotation){
            //获取userAnnotation注解
            CustomeAnnotation.UserAnnotation mUserAnnotation= (CustomeAnnotation.UserAnnotation) annotationClass.getAnnotation(CustomeAnnotation.UserAnnotation.class);
            //获取获取userAnnotation注解的值
            String userAnnotationName =mUserAnnotation.userClassName();
            mStringBuffer.append(userAnnotationName+"信息如下:");

            //进而获取对象中的所有属性
            //获取对象中的所有属性
            Field[] fields = annotationClass.getDeclaredFields();
            //便遍历属性
             for(Field field : fields){
                 //判断属性中是否有我们定义的UserAttribute
                 boolean bUserAttribute =field.isAnnotationPresent(CustomeAnnotation.UserAttribute.class);
                 if(bUserAttribute){
                     //获取自定义UserAttribute注解
                    CustomeAnnotation.UserAttribute userAttribute = field.getAnnotation(CustomeAnnotation.UserAttribute.class);
                     //获取去userAttribute中的值
                     String name = userAttribute.userAttribute();
                     Object value = "";
                     try {
                         //获取对应属性的值,toUpperCase()把字符串转换为大写
                         Method method = annotationClass.getMethod("get" + field.getName().substring(0, 1).toUpperCase() + field.getName().substring(1));
                         value = method.invoke(userBean);
                     } catch (Exception e) {
                         e.printStackTrace();
                     }
                     //string类型
                     if (value instanceof String) {
                         mStringBuffer.append(name + "=").append(value).append(",");
                     } else if (value instanceof Integer) {
                         mStringBuffer.append(name + "=").append(value).append(",");
                     }

                 }else{
                     throw new NullPointerException("UserAttribute not find");
                 }
             }

        }else{//如果不存在抛一个异常
            throw new NullPointerException("userAnnotation not find");
        }
        return mStringBuffer;
    }
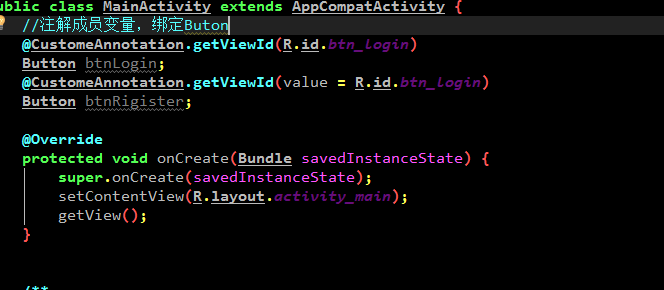
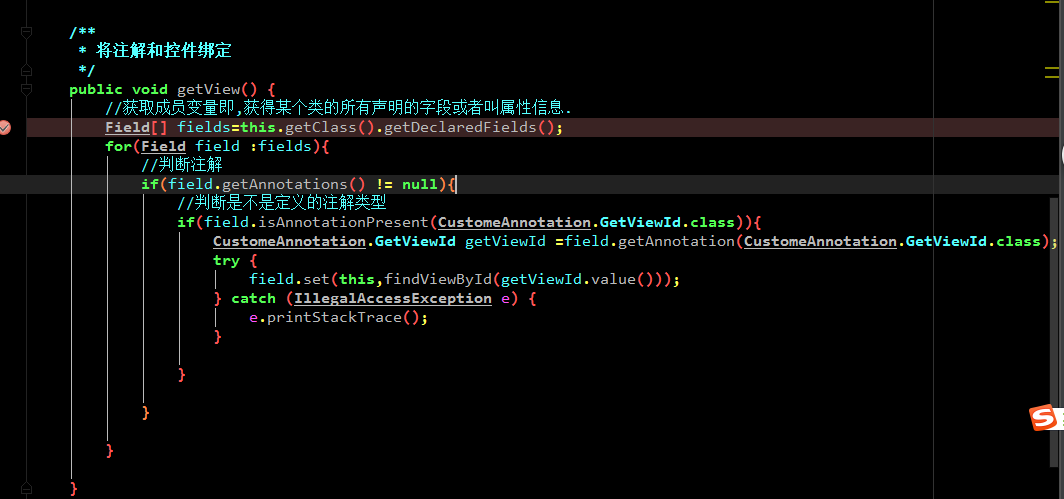
这样的话我们就可以成功打印出信息了,请问明白了没,如果没有明白,没关系我们继续在写一个,类似Butterknife的:
- 第一步定义注解
- 第二步将注解应用于控件
- 在App运行时,通过反射将findViewbyId得到的控件,注入到注解描述的成员变量中完成绑定。
第一步:

第二步:
第三步:
2. 基于 annotationProcessor 使用注解
这个看到过一篇文章比较专业,我就不再这里说了,详细知识点可以查看这份Android高级进阶学习手册。
