文章目录
- kubernetes 安装 Harbor 仓库
- 1. 下载 Harbor
- 2. 安装 docker
- 3. 优化 docker 配置
- 4. 下载 docker-compose
- 5. 安装 Harbor
- :one: 上传 harbor 文件包
- :two: 解压
- :three: 修改配置文件
- :four: 执行安装脚本安装
- :five: 配置开机自启
- 6. 登陆测试
- :one: 浏览器登陆
- :two: 命令行登陆
- 7. 测试上传和下载
- :one: 新建项目
- :two: 推送镜像
- :three: 下载镜像
- 8. 内容补充
- 9. 总结
kubernetes 安装 Harbor 仓库
Harbor是构建企业级私有docker镜像的仓库的开源解决方案,它是Docker Registry的更高级封装,它除了提供友好的Web UI界面,角色和用户权限管理,用户操作审计等功能外,它还整合了K8s的插件(Add-ons)仓库,即Helm通过chart方式下载,管理,安装K8s插件,而chartmuseum可以提供存储chart数据的仓库【注:helm就相当于k8s的yum】。另外它还整合了两个开源的安全组件,一个是Notary,另一个是Clair,Notary类似于私有CA中心,而Clair则是容器安全扫描工具,它通过各大厂商提供的CVE漏洞库来获取最新漏洞信息,并扫描用户上传的容器是否存在已知的漏洞信息,这两个安全功能对于企业级私有仓库来说是非常具有意义的。
简单来说harbor就是VMWare公司提供的一个docker私有仓库构建程序,功能非常强大.
支持多租户签名和认证 支持安全扫描和风险分析 这次日志审计 基于角色的访问控制 支持可扩展的API和GUI Image replication between instances 国际化做的很好(目前仅支持英文和中文)
1. 下载 Harbor
下载地址:https://github.com/goharbor/harbor/releases
本次使用版本为
harbor-offline-installer-v2.5.3
2. 安装 docker
# 下载阿里的 yum 源
wget https://mirrors.aliyun.com/docker-ce/linux/centos/docker-ce.repo -O /etc/yum.repos.d/docker-ce.repo

# 使用 yum 安装 docker,安装最新版本(本次测试直接安装最新版)
yum -y install docker-ce

# 安装指定版本
yum install docker-ce-19.03.14 docker-ce-cli-19.03.14 containerd.io -y

# 查看可安装的版本
[root@dockerTest ~]# yum list docker-ce --showduplicates | sort -r
已加载插件:fastestmirror
可安装的软件包
 * updates: mirrors.aliyun.com
Loading mirror speeds from cached hostfile
 * extras: mirrors.aliyun.com
docker-ce.x86_64            3:20.10.9-3.el7                     docker-ce-stable
docker-ce.x86_64            3:20.10.8-3.el7                     docker-ce-stable
docker-ce.x86_64            3:20.10.7-3.el7                     docker-ce-stable
docker-ce.x86_64            3:20.10.6-3.el7                     docker-ce-stable
docker-ce.x86_64            3:20.10.5-3.el7                     docker-ce-stable
docker-ce.x86_64            3:20.10.4-3.el7                     docker-ce-stable
docker-ce.x86_64            3:20.10.3-3.el7                     docker-ce-stable
docker-ce.x86_64            3:20.10.2-3.el7                     docker-ce-stable
docker-ce.x86_64            3:20.10.21-3.el7                    docker-ce-stable
docker-ce.x86_64            3:20.10.20-3.el7                    docker-ce-stable
docker-ce.x86_64            3:20.10.19-3.el7                    docker-ce-stable
docker-ce.x86_64            3:20.10.18-3.el7                    docker-ce-stable
docker-ce.x86_64            3:20.10.17-3.el7                    docker-ce-stable
docker-ce.x86_64            3:20.10.16-3.el7                    docker-ce-stable
docker-ce.x86_64            3:20.10.15-3.el7                    docker-ce-stable
docker-ce.x86_64            3:20.10.14-3.el7                    docker-ce-stable
docker-ce.x86_64            3:20.10.1-3.el7                     docker-ce-stable
docker-ce.x86_64            3:20.10.13-3.el7                    docker-ce-stable
docker-ce.x86_64            3:20.10.12-3.el7                    docker-ce-stable
docker-ce.x86_64            3:20.10.11-3.el7                    docker-ce-stable
docker-ce.x86_64            3:20.10.10-3.el7                    docker-ce-stable
docker-ce.x86_64            3:20.10.0-3.el7                     docker-ce-stable
docker-ce.x86_64            3:19.03.9-3.el7                     docker-ce-stable
docker-ce.x86_64            3:19.03.8-3.el7                     docker-ce-stable
docker-ce.x86_64            3:19.03.7-3.el7                     docker-ce-stable
docker-ce.x86_64            3:19.03.6-3.el7                     docker-ce-stable
docker-ce.x86_64            3:19.03.5-3.el7                     docker-ce-stable
docker-ce.x86_64            3:19.03.4-3.el7                     docker-ce-stable
docker-ce.x86_64            3:19.03.3-3.el7                     docker-ce-stable
docker-ce.x86_64            3:19.03.2-3.el7                     docker-ce-stable
docker-ce.x86_64            3:19.03.15-3.el7                    docker-ce-stable
docker-ce.x86_64            3:19.03.14-3.el7                    docker-ce-stable
docker-ce.x86_64            3:19.03.1-3.el7                     docker-ce-stable
docker-ce.x86_64            3:19.03.13-3.el7                    docker-ce-stable
docker-ce.x86_64            3:19.03.12-3.el7                    docker-ce-stable
docker-ce.x86_64            3:19.03.11-3.el7                    docker-ce-stable
docker-ce.x86_64            3:19.03.10-3.el7                    docker-ce-stable
docker-ce.x86_64            3:19.03.0-3.el7                     docker-ce-stable
docker-ce.x86_64            3:18.09.9-3.el7                     docker-ce-stable
docker-ce.x86_64            3:18.09.8-3.el7                     docker-ce-stable
docker-ce.x86_64            3:18.09.7-3.el7                     docker-ce-stable
docker-ce.x86_64            3:18.09.6-3.el7                     docker-ce-stable
docker-ce.x86_64            3:18.09.5-3.el7                     docker-ce-stable
docker-ce.x86_64            3:18.09.4-3.el7                     docker-ce-stable
docker-ce.x86_64            3:18.09.3-3.el7                     docker-ce-stable
docker-ce.x86_64            3:18.09.2-3.el7                     docker-ce-stable
docker-ce.x86_64            3:18.09.1-3.el7                     docker-ce-stable
docker-ce.x86_64            3:18.09.0-3.el7                     docker-ce-stable
docker-ce.x86_64            18.06.3.ce-3.el7                    docker-ce-stable
docker-ce.x86_64            18.06.2.ce-3.el7                    docker-ce-stable
docker-ce.x86_64            18.06.1.ce-3.el7                    docker-ce-stable
docker-ce.x86_64            18.06.0.ce-3.el7                    docker-ce-stable
docker-ce.x86_64            18.03.1.ce-1.el7.centos             docker-ce-stable
docker-ce.x86_64            18.03.0.ce-1.el7.centos             docker-ce-stable
docker-ce.x86_64            17.12.1.ce-1.el7.centos             docker-ce-stable
docker-ce.x86_64            17.12.0.ce-1.el7.centos             docker-ce-stable
docker-ce.x86_64            17.09.1.ce-1.el7.centos             docker-ce-stable
docker-ce.x86_64            17.09.0.ce-1.el7.centos             docker-ce-stable
docker-ce.x86_64            17.06.2.ce-1.el7.centos             docker-ce-stable
docker-ce.x86_64            17.06.1.ce-1.el7.centos             docker-ce-stable
docker-ce.x86_64            17.06.0.ce-1.el7.centos             docker-ce-stable
docker-ce.x86_64            17.03.3.ce-1.el7                    docker-ce-stable
docker-ce.x86_64            17.03.2.ce-1.el7.centos             docker-ce-stable
docker-ce.x86_64            17.03.1.ce-1.el7.centos             docker-ce-stable
docker-ce.x86_64            17.03.0.ce-1.el7.centos             docker-ce-stable
 * base: mirrors.aliyun.com

# 启动 docker 并设置开机自启
systemctl start docker
systemctl enable docker
3. 优化 docker 配置
cat > /etc/docker/daemon.json <<'EOF'
{
    "registry-mirrors": [
        "https://2oka4vlk.mirror.aliyuncs.com",
        "https://registry.docker-cn.com",
        "https://docker.mirrors.ustc.edu.cn",
        "https://dockerhub.azk8s.cn",
        "http://hub-mirror.c.163.com"
    ],
    "exec-opts": ["native.cgroupdriver=systemd"],
    "max-concurrent-downloads": 10,
    "max-concurrent-uploads": 5,
    "log-driver": "json-file",
    "log-opts": {
       "max-size": "300m",
       "max-file": "2"
    },
    "live-restore": true,
    "insecure-registries": ["192.168.137.150:8080"]
}
EOF

systemctl daemon-reload
systemctl restart docker

参数解析:
# registry-mirrors:自定义的镜像地址
# exec-opts:修改docker Cgroup Driver 为systemtd启动管理,是k8s需要,默认是cgroupfs
# max-concurrent-downloads: 最大并发下载
# max-concurrent-uploads: 最大并发上传
# log-driver: 日志格式化为 JSON。这是 Docker 默认的日志驱动程序。
# log-opts: 日志设置,单文件最大,最大几个文件
# 容器的日志都在 /var/lib/docker/containers/容器名/xxx.log
# live-restore: 在docker守护进程不可用时使容器保持活动状态
4. 下载 docker-compose
可参考文档:传送门
# 官方链接(不推荐,太慢了)
curl -L "https://github.com/docker/compose/releases/download/1.29.2/docker-compose-$(uname -s)-$(uname -m)" -o /usr/local/bin/docker-compose

# 下面的官方链接会快一点
curl -L https://get.daocloud.io/docker/compose/releases/download/1.29.2/docker-compose-`uname -s`-`uname -m` > /usr/local/bin/docker-compose

# 修改文件权限
chmod +x /usr/local/bin/docker-compose

# 查看 docker-compose 版本
docker-compose --version
5. 安装 Harbor
1️⃣ 上传 harbor 文件包
harbor-offline-installer-v2.5.3.tgz
2️⃣ 解压
[root@dockerTest ~]# tar -xvf harbor-offline-installer-v2.5.3.tgz
harbor/harbor.v2.5.3.tar.gz
harbor/prepare
harbor/LICENSE
harbor/install.sh
harbor/common.sh
harbor/harbor.yml.tmpl

# 将解压文件移动到自定义目录
[root@dockerTest ~]# mv harbor /tools/
[root@dockerTest ~]# ls /tools/
harbor
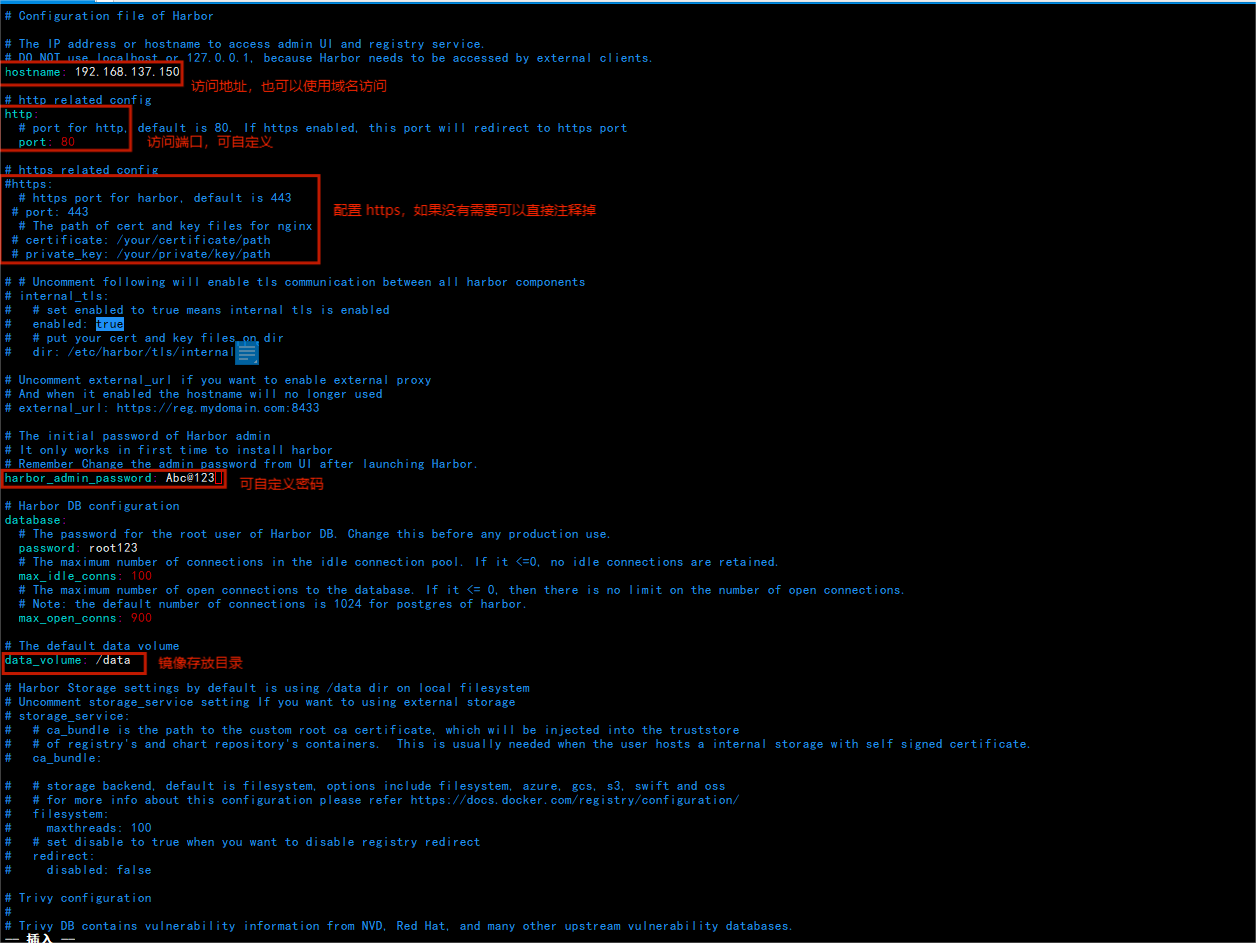
3️⃣ 修改配置文件
# 备份一个配置文件
[root@dockerTest harbor]# cp harbor.yml.tmpl harbor.yml
# 修改配置文件
[root@dockerTest harbor]# vim harbor.yml
4️⃣ 执行安装脚本安装
[root@dockerTest harbor]# sh install.sh

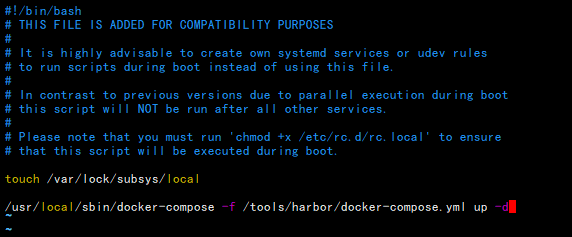
5️⃣ 配置开机自启
vim /etc/rc.local
/usr/local/sbin/docker-compose -f /tools/harbor/docker-compose.yml up -d

chmod +x /etc/rc.local
6. 登陆测试
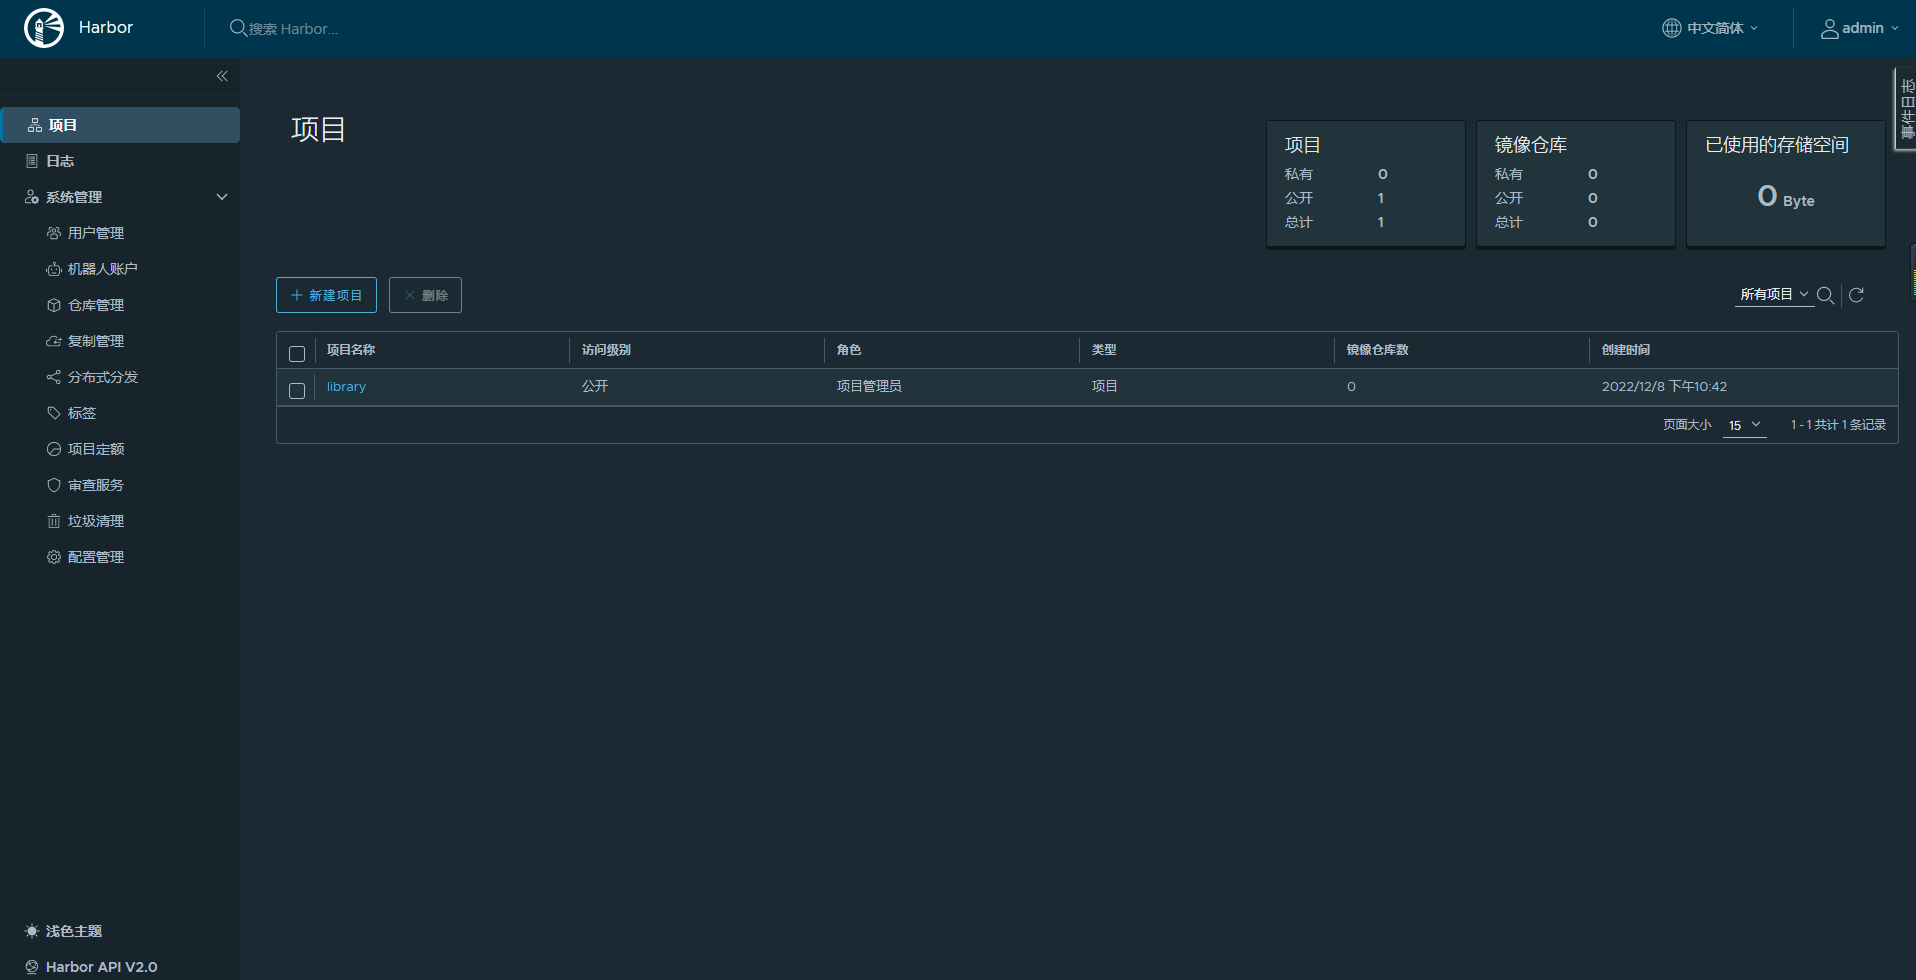
1️⃣ 浏览器登陆
浏览器输入安装服务器 ip:port (192.168.137.150:8080)

2️⃣ 命令行登陆
登陆问题
- 问题:这里登陆时报错了
- 原因:是因为在 docker 的 配置文件 daemon.json 中少加了一个配置
"insecure-registries": ["192.168.137.150:8080"],将仓库地址添加上去,然后重启 docker 就可以了
[root@dockerTest ~]# docker login -u admin -p Abc@123 192.168.137.150:8080
WARNING! Using --password via the CLI is insecure. Use --password-stdin.
Error response from daemon: Get "https://192.168.137.150:8080/v2/": http: server gave HTTP response to HTTPS client
- 修改完成之后,如果还报错如下,则可以尝试重启 docker-compose,在网上查找这个报错解决方案的时候很多说需要修改 docker.service 配置文件内容,这里并没有进行修改
[root@dockerTest harbor]# docker login -u admin -p Abc@123 192.168.137.150:8080
WARNING! Using --password via the CLI is insecure. Use --password-stdin.
Error response from daemon: Get "http://192.168.137.150:8080/v2/": dial tcp 192.168.137.150:8080: connect: connection refused
# 重启 docker-compose ,要在 harbor 目录中和 docker-compose.yml 同级的路径下执行,不然执行的时候会报错
docker-compose start | stop | restart
7. 测试上传和下载
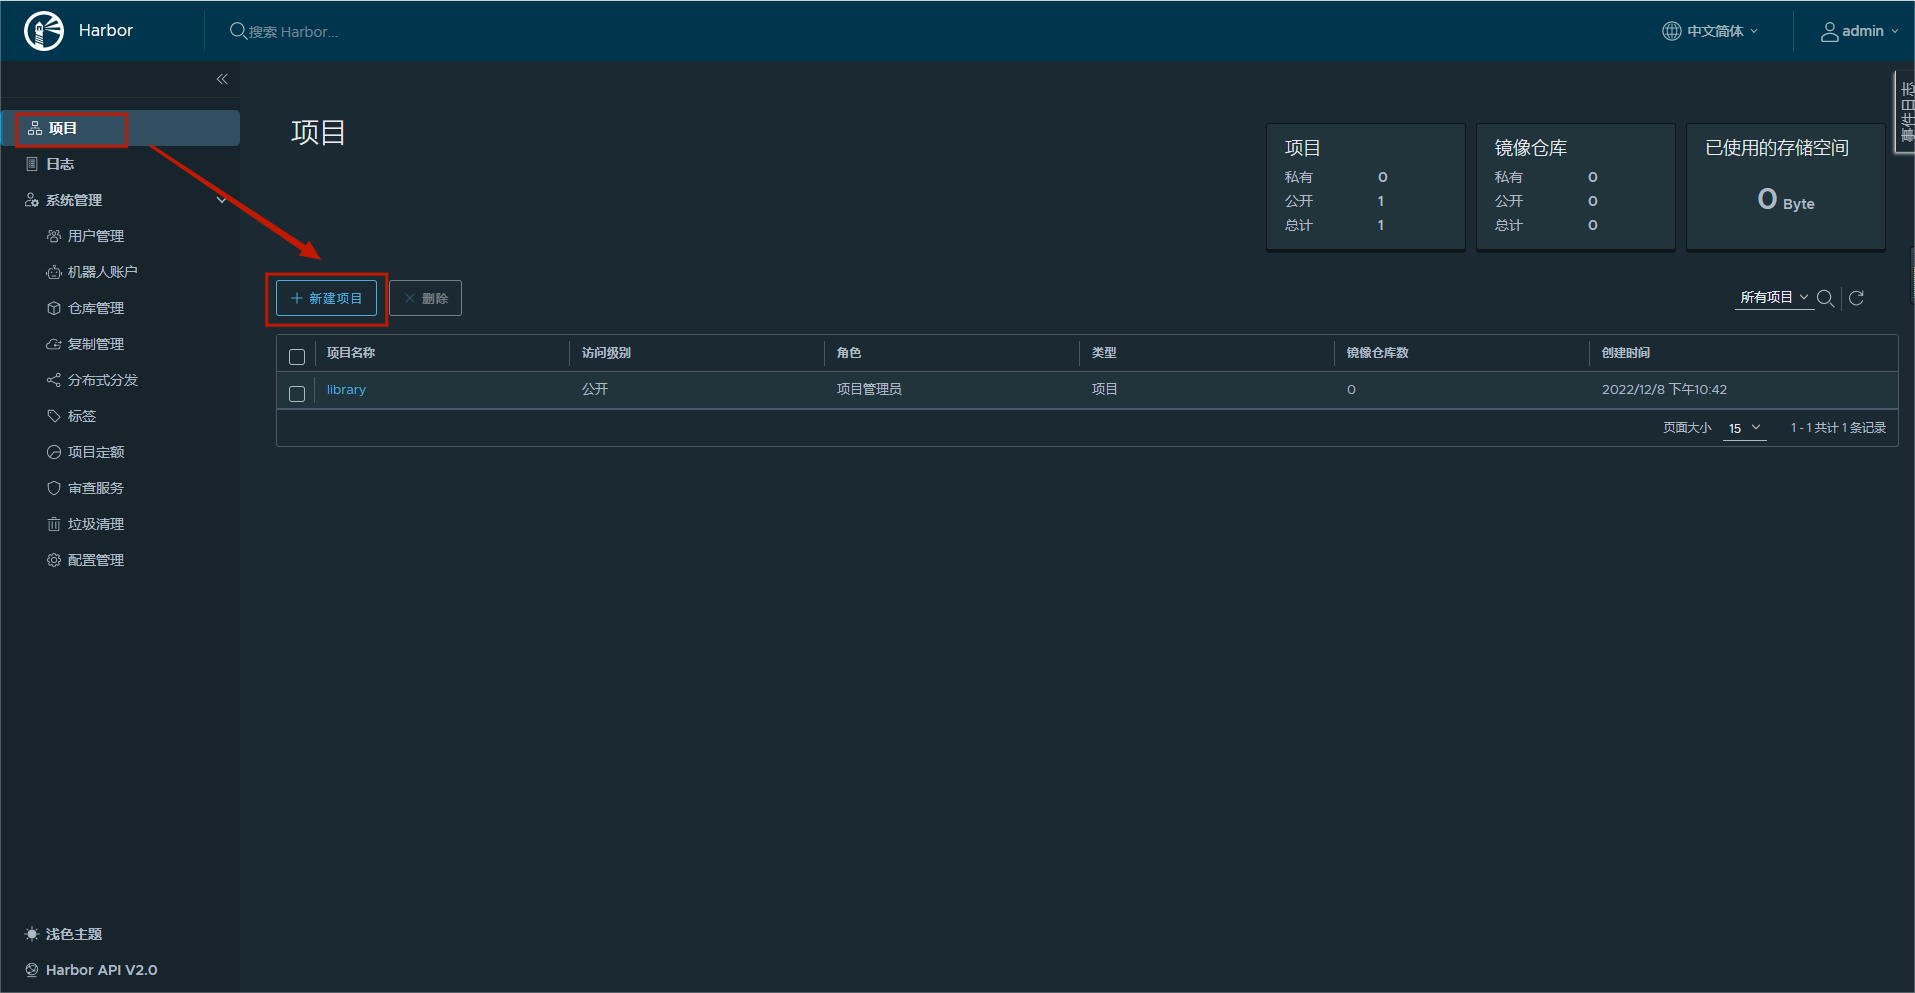
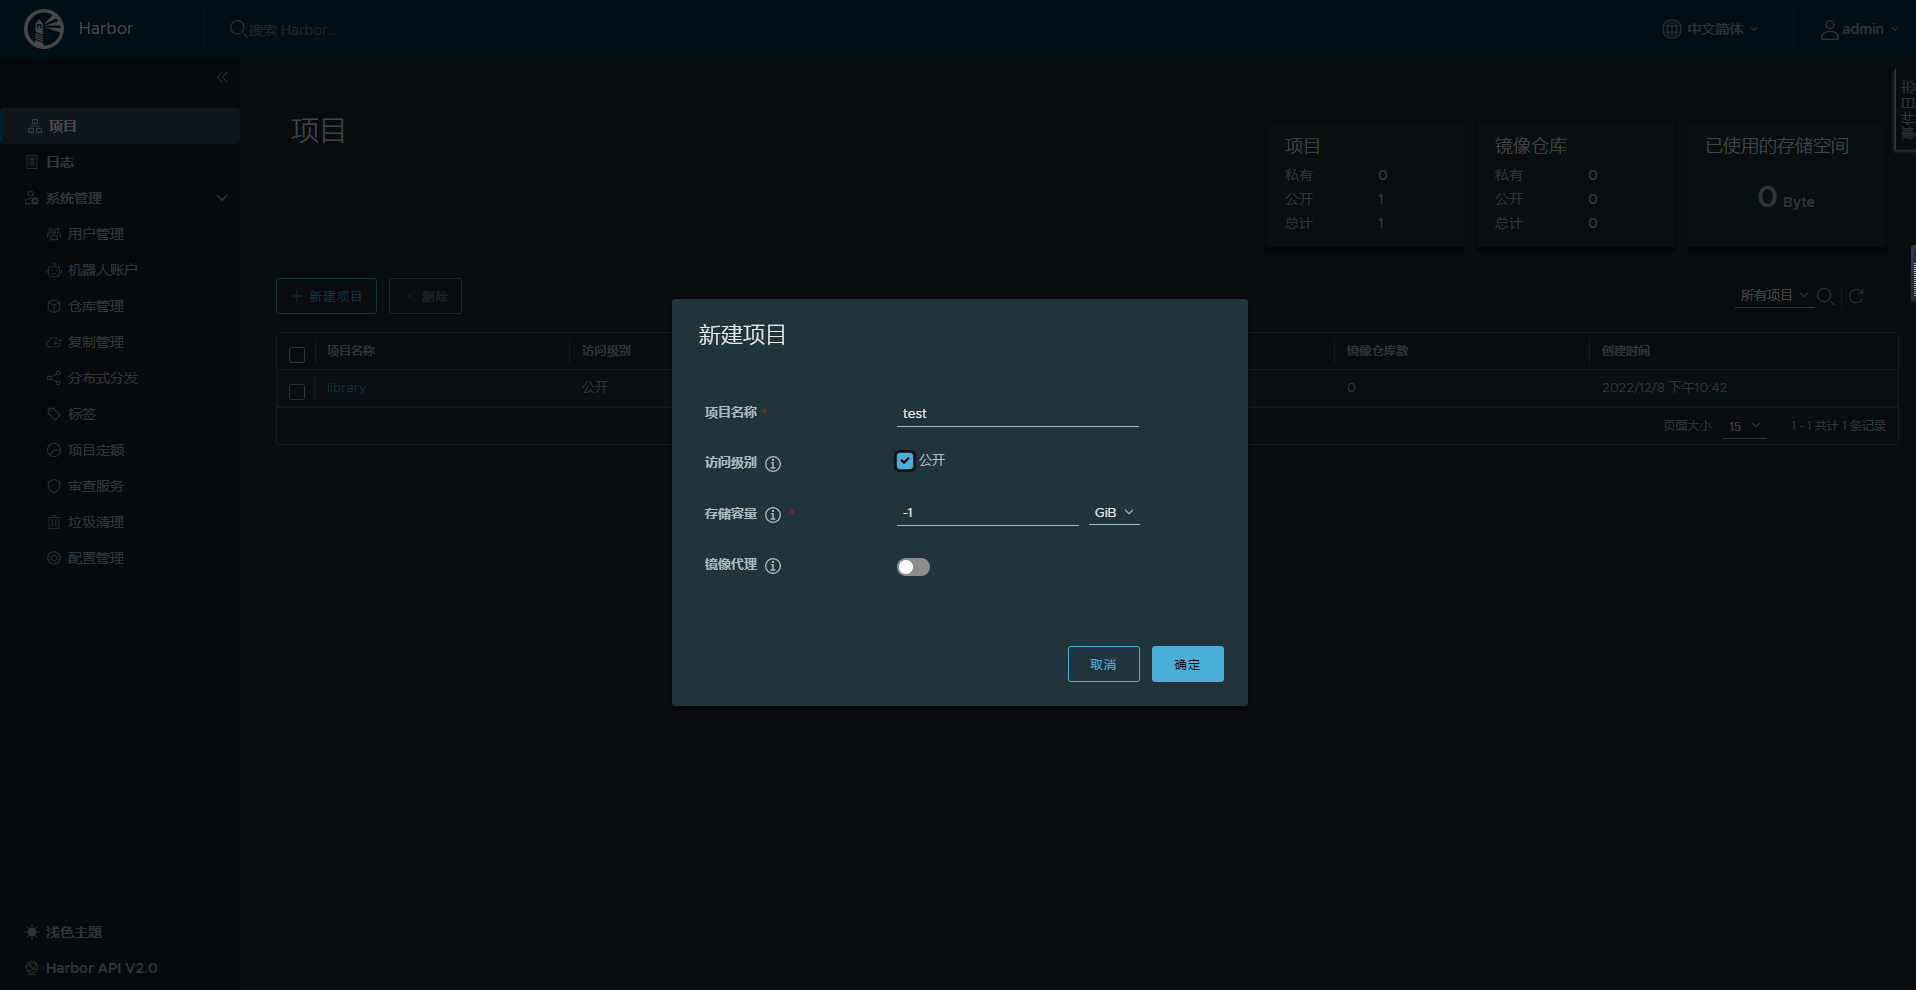
1️⃣ 新建项目
2️⃣ 推送镜像
点击新建项目,可以看到推送镜像的演示命令
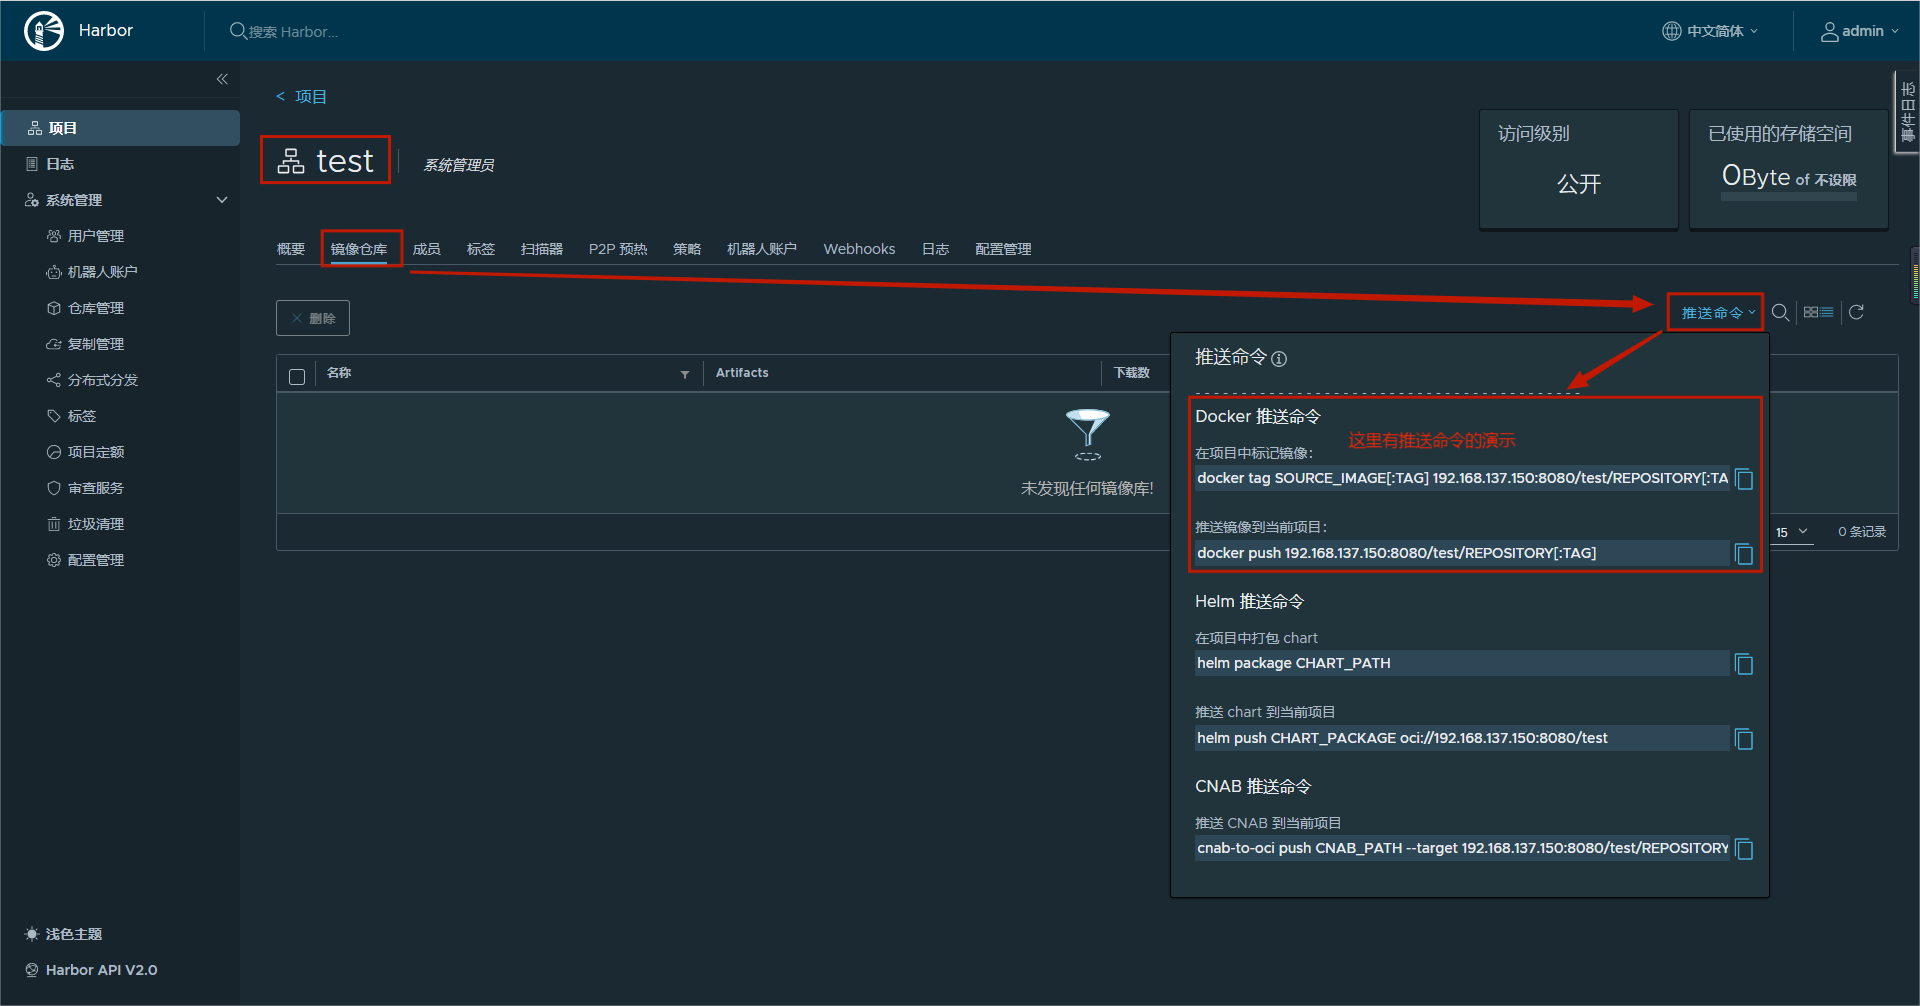
这里以 nginx 镜像为例
# harbor 的 docker 命令演示
docker tag SOURCE_IMAGE[:TAG] 192.168.137.150:8080/test/REPOSITORY[:TAG]

# 以 nginx 镜像测试
[root@dockerTest ~]# docker images| grep nginx
goharbor/nginx-photon           v2.5.3    91877cbc147a   5 months ago    44.3MB
nginx                           latest    605c77e624dd   11 months ago   141MB
# 在项目中标记镜像
[root@dockerTest ~]# docker images| grep nginx
goharbor/nginx-photon           v2.5.3    91877cbc147a   5 months ago    44.3MB
nginx                           latest    605c77e624dd   11 months ago   141MB
[root@dockerTest ~]# docker tag nginx:latest 192.168.137.150:8080/test/nginx:latest
[root@dockerTest ~]# docker images | grep nginx
goharbor/nginx-photon             v2.5.3    91877cbc147a   5 months ago    44.3MB
nginx                             latest    605c77e624dd   11 months ago   141MB
192.168.137.150:8080/test/nginx   latest    605c77e624dd   11 months ago   141MB

# 推送镜像到当前项目
docker push 192.168.137.150:8080/test/REPOSITORY[:TAG]

[root@dockerTest ~]# docker push 192.168.137.150:8080/test/nginx:latest
The push refers to repository [192.168.137.150:8080/test/nginx]
d874fd2bc83b: Pushed
32ce5f6a5106: Pushed
f1db227348d0: Pushed
b8d6e692a25e: Pushed
e379e8aedd4d: Pushed
2edcec3590a4: Pushed
latest: digest: sha256:ee89b00528ff4f02f2405e4ee221743ebc3f8e8dd0bfd5c4c20a2fa2aaa7ede3 size: 1570
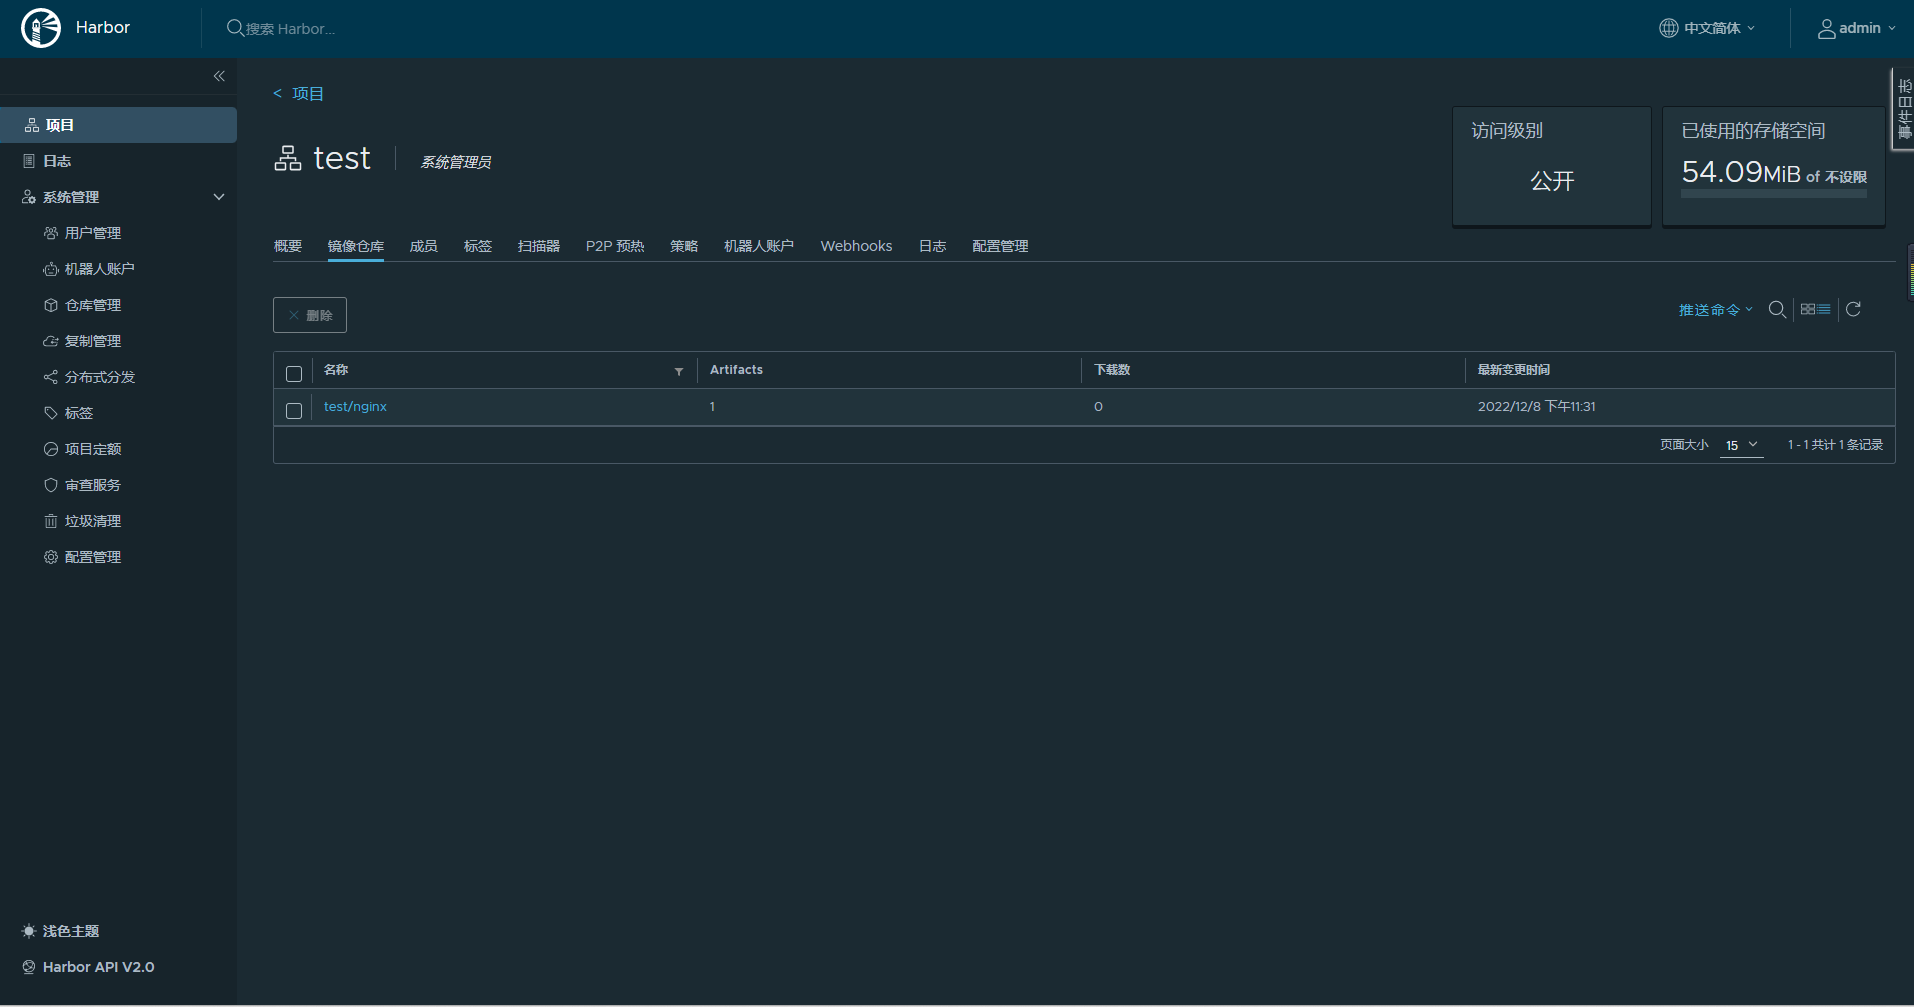
刷新页面就可以在这里看到刚推送的镜像
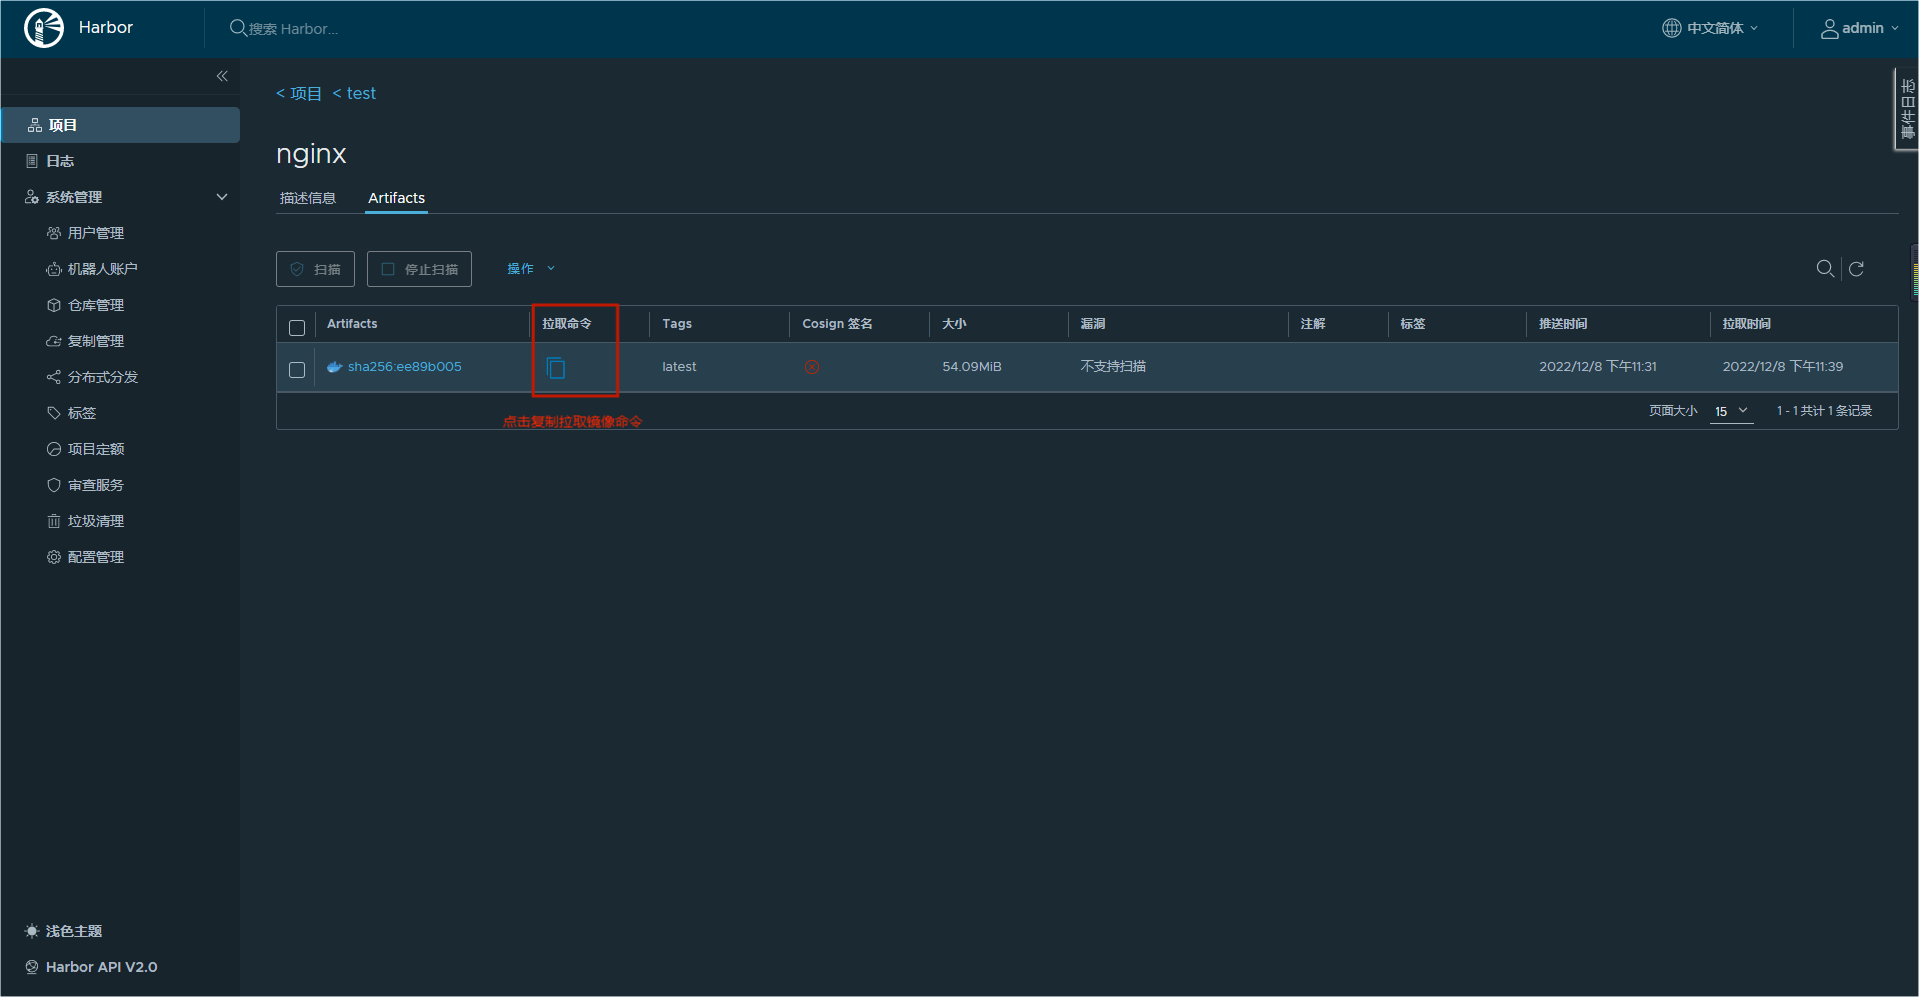
3️⃣ 下载镜像
# 为了演示删除之前的 nginx 镜像
[root@dockerTest ~]# docker rmi nginx
Untagged: nginx:latest
Untagged: nginx@sha256:0d17b565c37bcbd895e9d92315a05c1c3c9a29f762b011a10c54a66cd53c9b31

[root@dockerTest ~]# docker rmi 192.168.137.150:8080/test/nginx
Untagged: 192.168.137.150:8080/test/nginx:latest
Untagged: 192.168.137.150:8080/test/nginx@sha256:ee89b00528ff4f02f2405e4ee221743ebc3f8e8dd0bfd5c4c20a2fa2aaa7ede3
Deleted: sha256:605c77e624ddb75e6110f997c58876baa13f8754486b461117934b24a9dc3a85
Deleted: sha256:b625d8e29573fa369e799ca7c5df8b7a902126d2b7cbeb390af59e4b9e1210c5
Deleted: sha256:7850d382fb05e393e211067c5ca0aada2111fcbe550a90fed04d1c634bd31a14
Deleted: sha256:02b80ac2055edd757a996c3d554e6a8906fd3521e14d1227440afd5163a5f1c4
Deleted: sha256:b92aa5824592ecb46e6d169f8e694a99150ccef01a2aabea7b9c02356cdabe7c
Deleted: sha256:780238f18c540007376dd5e904f583896a69fe620876cabc06977a3af4ba4fb5
Deleted: sha256:2edcec3590a4ec7f40cf0743c15d78fb39d8326bc029073b41ef9727da6c851f
# 下载镜像
[root@dockerTest ~]# docker pull 192.168.137.150:8080/test/nginx:latest
latest: Pulling from test/nginx
a2abf6c4d29d: Pull complete
a9edb18cadd1: Pull complete
589b7251471a: Pull complete
186b1aaa4aa6: Pull complete
b4df32aa5a72: Pull complete
a0bcbecc962e: Pull complete
Digest: sha256:ee89b00528ff4f02f2405e4ee221743ebc3f8e8dd0bfd5c4c20a2fa2aaa7ede3
Status: Downloaded newer image for 192.168.137.150:8080/test/nginx:latest
192.168.137.150:8080/test/nginx:latest
[root@dockerTest ~]# docker images | grep nginx
goharbor/nginx-photon             v2.5.3    91877cbc147a   5 months ago    44.3MB
192.168.137.150:8080/test/nginx   latest    605c77e624dd   11 months ago   141MB
也可以在仓库中复制下载命令

8. 内容补充
注:以下启动命令执行都需要在 harbor 目录下和 docker-compose.yaml 文件同级才可以执行
-
如果以后修改了
harbor.yml文件,那么先停止使用docker-compose down,再去修改harbor.yml文件,重新启动部署./install.sh -
正常启动
harbor启动:
docker-compose up -d
- 未修改配置文件,重启
Harbor命令:
docker-compose start | stop | restart
9. 总结
- 问题总结可参考: 命令行登陆