简介
在three.js中,摄像机的作用就是不断的拍摄我们创建好的场景,然后通过渲染器渲染到屏幕中。想通过不同的角度观看场景,就需要修改摄像机的位置来拍摄场景。本文详细介绍的是透视相机(PerspectiveCamera) 它是用来模拟人眼所看到的景象,它也是3D场景的渲染中使用得最普遍的投影模式。
透视相机(PerspectiveCamera)
- 根据视锥的范围给
渲染器提供需要渲染的场景范围。 - 实例化
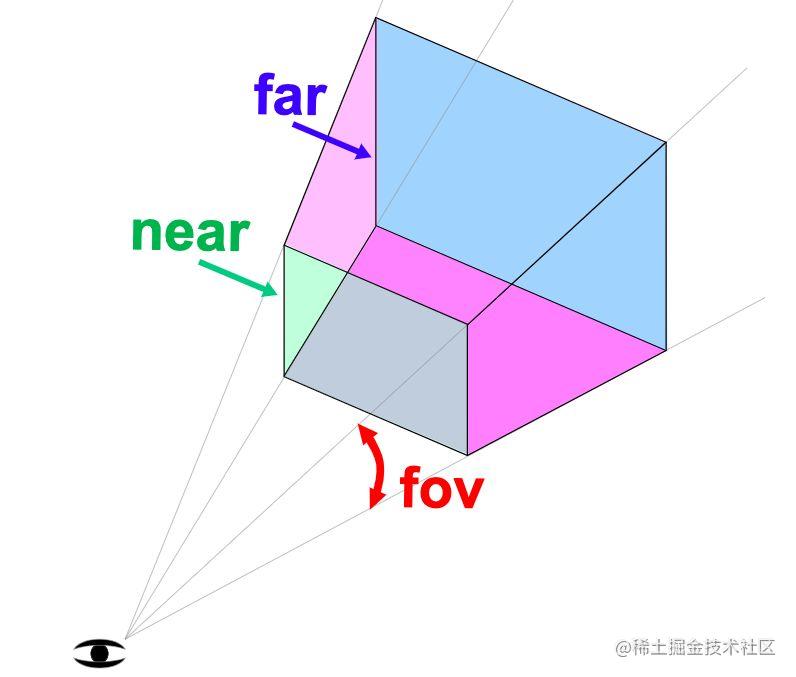
new THREE.PerspectiveCamera()接受4个参数来确认视锥的范围。只要在视锥范围内的场景才会渲染。
fov摄像机视锥体垂直视野角度。aspect摄像机视锥体长宽比。near摄像机视锥体近端面。far摄像机视锥体远端面。
属性
- 大多数属性发生改变之后,都需要调用
.updateProjectionMatrix()来使得这些改变生效。 - 常见属性:
.fov、.aspect、.near、.far后期可修改这四个参数,来实现动画效果。.zoom获取或者设置摄像机的缩放倍数,默认值为1
方法
- 常见方法:
.setViewOffset()设置偏移量,对于多窗口或者多显示器的设置是很有用的。.clearViewOffset()清除任何由.setViewOffset()设置的偏移量。.getEffectiveFOV()结合.zoom(缩放倍数),以角度返回当前垂直视野角度。.updateProjectionMatrix()更新摄像机投影矩阵。在任何参数被改变以后必须被调用。
位置
PerspectiveCamera对象的基类是Object3D,它具有:
.position设置相机在三维坐标中的位置。
camera.position.set(0,0,0);
.up设置相机拍摄时相机头顶的方向。
camera.up.set(0,1,0);
.lookAt设置相机拍摄时指向的方向。
camera.lookAt(0, 0, 0);
开始使用
<!DOCTYPE html>
<html lang="en">
  <head>
    <meta charset="UTF-8" />
    <title>学习</title>
  </head>
  <body>
    <canvas id="c2d" class="c2d" width="1000" height="500"></canvas>
    <script type="module">
      import * as THREE from 'https://threejs.org/build/three.module.js'

      const canvas = document.querySelector('#c2d')
      // 渲染器
      const renderer = new THREE.WebGLRenderer({ canvas })

      const fov = 40 // 视野范围
      const aspect = 2 // 相机默认值 画布的宽高比
      const near = 0.1 // 近平面
      const far = 1000 // 远平面
      // 透视投影相机
      const camera = new THREE.PerspectiveCamera(fov, aspect, near, far)
      camera.position.set(0, 10, 20)
      camera.lookAt(0, 0, 0)

      // 场景
      const scene = new THREE.Scene()
      scene.background = new THREE.Color('black')

      {
        // 地面 平铺
        const planeSize = 20
        const loader = new THREE.TextureLoader()
        const texture = loader.load('https://threejs.org/manual/examples/resources/images/checker.png')
        texture.wrapS = THREE.RepeatWrapping
        texture.wrapT = THREE.RepeatWrapping
        texture.magFilter = THREE.NearestFilter
        const repeats = planeSize / 2
        texture.repeat.set(repeats, repeats)
        const planeGeo = new THREE.PlaneGeometry(planeSize, planeSize)
        const planeMat = new THREE.MeshPhongMaterial({
          map: texture,
          side: THREE.DoubleSide
        })
        const mesh = new THREE.Mesh(planeGeo, planeMat)
        mesh.rotation.x = Math.PI * -0.5
        scene.add(mesh)
      }

      {
        // 方块
        const cubeSize = 4
        const cubeGeo = new THREE.BoxGeometry(cubeSize, cubeSize, cubeSize)
        const cubeMat = new THREE.MeshPhongMaterial({ color: '#8f4b2e' })
        const mesh = new THREE.Mesh(cubeGeo, cubeMat)
        mesh.position.y = 2
        scene.add(mesh)
      }

      {
        // 灯光
        const color = 0xffffff
        const intensity = 1
        // 方向光
        const light = new THREE.DirectionalLight(color, intensity)
        light.position.set(0, 10, 0)
        light.target.position.set(-5, 0, 0)
        scene.add(light)
        scene.add(light.target)
      }

      // 渲染
      function render() {
        renderer.render(scene, camera)
        requestAnimationFrame(render)
      }

      requestAnimationFrame(render)
    </script>
  </body>
</html>
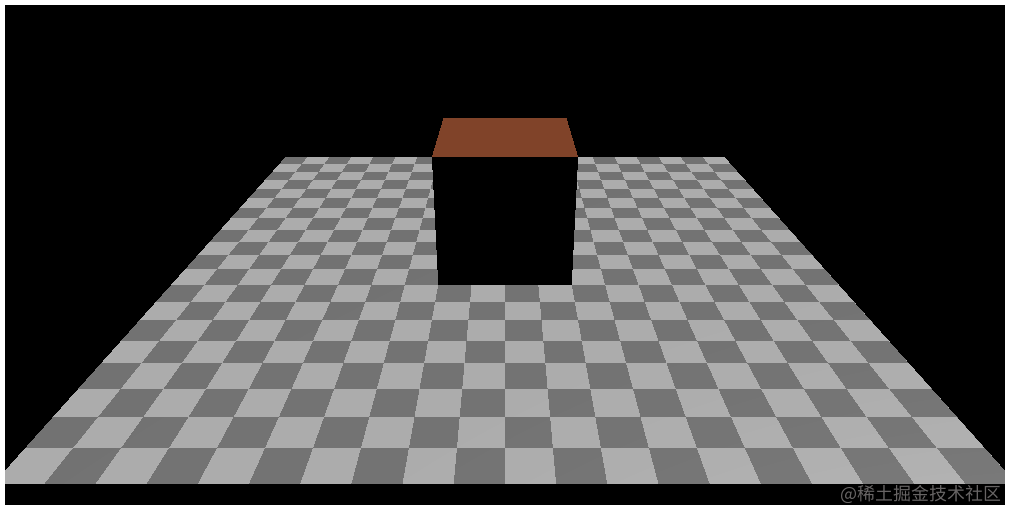
- 本节我们详细了解
透视相机,其他内容只需要先熟悉。
修改相机
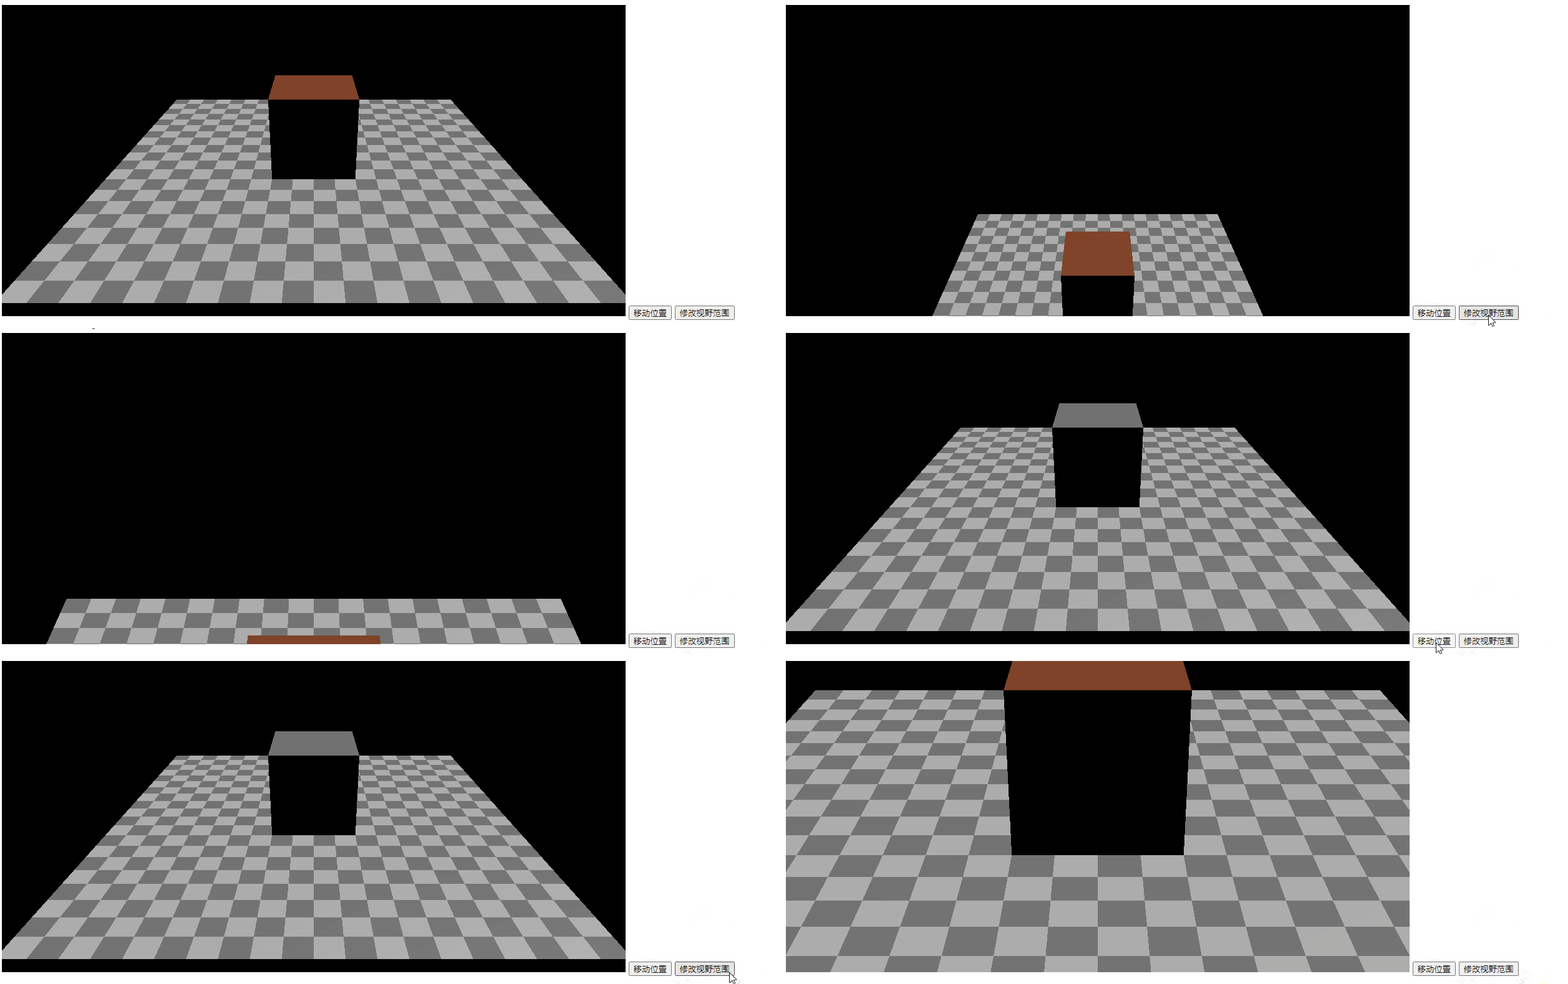
- 在页面上添加按钮,修改相机。
- 需要注意的是
透视相机的矩阵信息修改后,都需要执行.updateProjectionMatrix()来应用改变。
    ...
    <canvas id="c2d" class="c2d" width="1000" height="500"></canvas>
    <input id="onPosition" type="button" value="移动位置" />
    <input id="onView" type="button" value="修改视野范围" />
    ...

    // 透视投影相机
    ...

    // 点击 移动相机
    document.querySelector('#onPosition').addEventListener('click', function () {
        camera.position.set(0, 20, 20)
    })

    // 点击 修改相机 视野范围
    document.querySelector('#onView').addEventListener('click', function () {
        camera.fov = 20
        camera.updateProjectionMatrix()
    })

    ...
添加相机控件
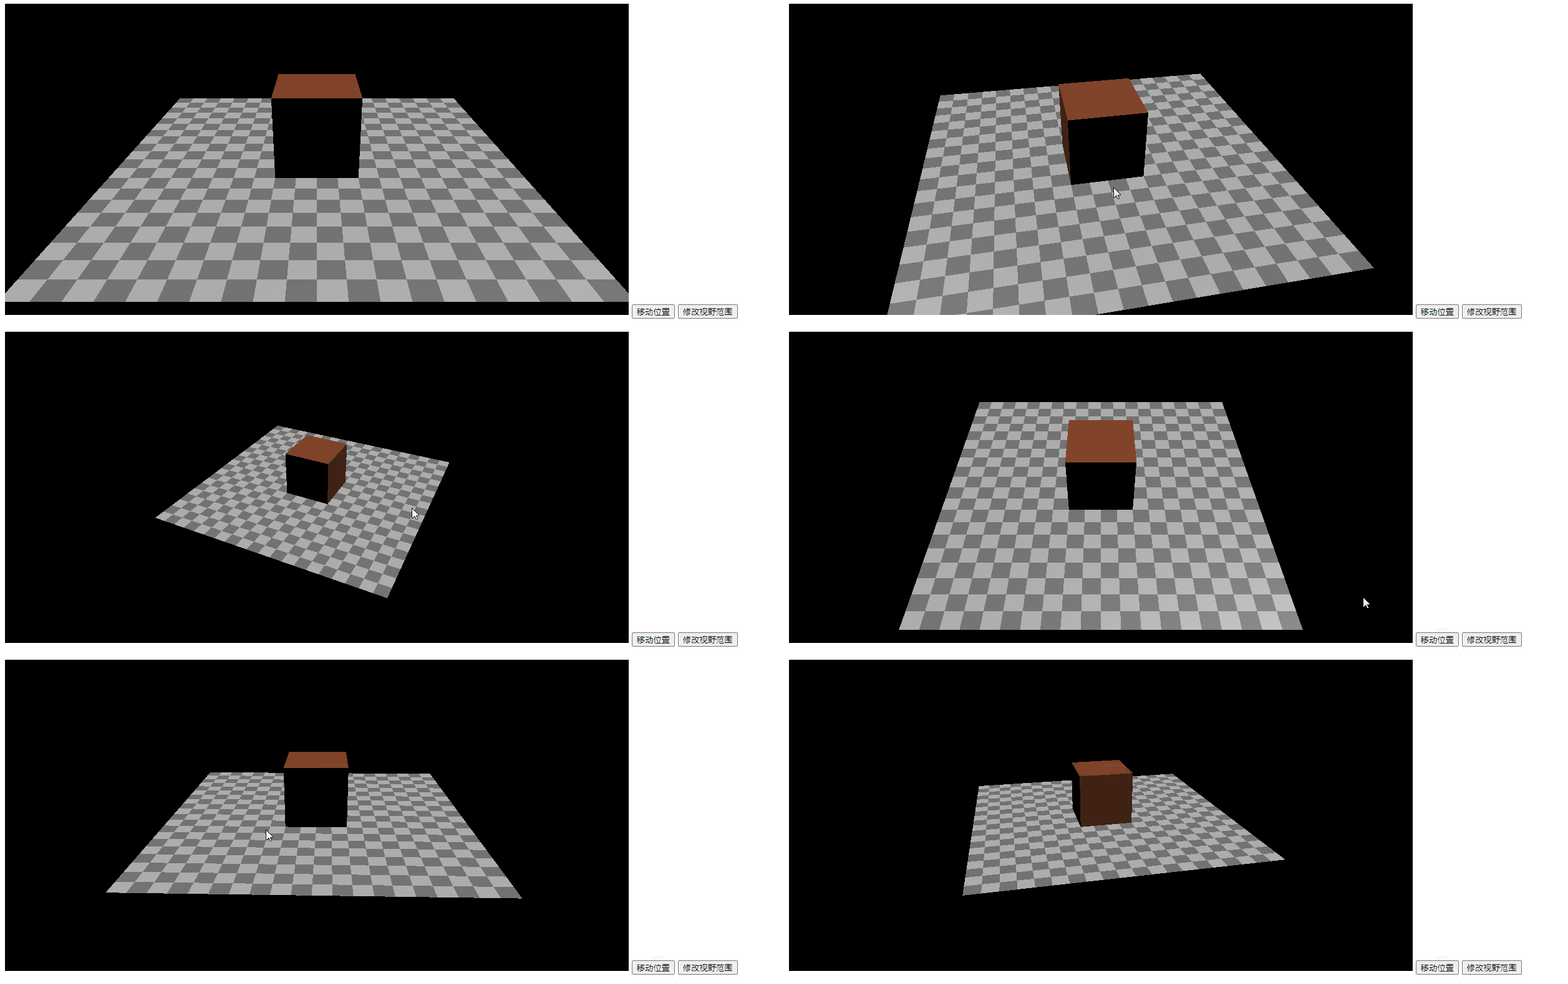
Three.js提供了许多控件OrbitControls是最常用的相机控件。
...
import { OrbitControls } from 'https://threejsfundamentals.org/threejs/resources/threejs/r132/examples/jsm/controls/OrbitControls.js'
...

// 透视投影相机
...

// 控制相机
const controls = new OrbitControls(camera, canvas)
...

// 渲染
function render() {
    controls.update()
    ...
}
添加相机辅助线
Three.js提供了一个函数(CameraHelper)用于模拟相机视锥体。要展示模拟相机视锥体,需要两个相机才能查看。
...
<input id="cameraBol" type="button" value="切换相机" />

...
// 场景
...
// 辅助相机
const camera1 = new THREE.PerspectiveCamera(20, aspect, 10, 50)
camera1.position.set(0, 5, 20)
camera1.lookAt(0, 0, 0)
const cameraHelper = new THREE.CameraHelper(camera1)
// 辅助线加入 场景
scene.add(cameraHelper)
let cameraBol = true
// 点击 切换相机
document.querySelector('#cameraBol').addEventListener('click', function () {
cameraBol = !cameraBol
})
...

// 渲染
function render() {
    ...

    cameraHelper.update()
    if (cameraBol) {
      renderer.render(scene, camera)
    } else {
      renderer.render(scene, camera1)
    }

    ...
}

- 黄色线的范围表示相机视锥体的范围
- 这里通过切换
渲染器传入的相机参数,来展示辅助相机需要渲染的内容。
