一、自动清理构建目录
避免构建前每次都要手动删除dist
使用 clean-webpack-plugin(默认删除output指定的输出目录)
(1)依赖安装
npm i clean-webpack-plugin -D(2)使用 --- webpack.prod.js
const CleanWebpackPlugin = require('clean-webpack-plugin'); // 3.0版本以前的写法
const { CleanWebpackPlugin } = require('clean-webpack-plugin'); // 3.0版本以后的写法


// ....

    plugins: [
        // ...
        new CleanWebpackPlugin()
    ],
二、自动补齐CSS3前缀
Trident(-ms) Geko(-moz) Webkit(-webkit) Presto(-o)
.box {
    -moz-border-radius: 10px;
    -webkit-border-radius: 10px;
    -o-border-radius: 10px;
    border-radius: 10px;
}
使用 autoprefixer 添加厂商前缀。
(1)依赖安装
npm install --save-dev postcss-loader postcss
npm install --save-dev autoprefixer
(2)使用(webpack.prod.js)
            {
                test: /\.css$/,
                // use数组中是从后往前调用的
                use: [
                    MiniCssExtractPlugin.loader,
                    {
                        loader: "css-loader",
                        options: {
                            importLoaders: 1,
                            // 0 => no loaders (default);
                            // 1 => postcss-loader;
                            // 2 => postcss-loader, sass-loader
                        },
                    },
                    {
                        loader: 'postcss-loader',
                        options: {
                            postcssOptions: {
                                plugins: [
                                    [
                                        // 'postcss-preset-env',
                                        'autoprefixer',
                                        {
                                            // 其他选项
                                            overrideBrowserslist: [
                                                'Android 4.1',
                                                'iOS 7.1',
                                                'Chrome > 31',
                                                'ff > 31',
                                                'ie >= 8',
                                                '>0.01%'
                                                //'last 10 versions', // 所有主流浏览器最近2个版本
                                            ]
                                        },
                                    ],
                                ],
                            },
                        },
                    }
                ]
            },
三、移动端px自动转换为rem
px2rem-loader
lib-flexible库,页面渲染时动态计算根元素的font-size值
(1)依赖安装
npm i px2rem-loader -D

npm i lib-flexible -S
(2)使用
修改webpack配置
{
    test: /\.css$/,
    // use数组中是从后往前调用的
    use: [
        MiniCssExtractPlugin.loader,
        {
            loader: "css-loader",
            options: {
                importLoaders: 1,
                // 0 => no loaders (default);
                // 1 => postcss-loader;
                // 2 => postcss-loader, sass-loader
            },
        },
        {
            loader: 'postcss-loader',
            options: {
                postcssOptions: {
                    plugins: [
                        [
                            // 'postcss-preset-env',
                            'autoprefixer',
                            {
                                // 其他选项
                                overrideBrowserslist: [
                                    'Android 4.1',
                                    'iOS 7.1',
                                    'Chrome > 31',
                                    'ff > 31',
                                    'ie >= 8',
                                    '>0.01%'
                                    //'last 10 versions', // 所有主流浏览器最近2个版本
                                ]
                            },
                        ],
                    ],
                },
            },
        },
        {
            loader: 'px2rem-loader',
            options: {
                remUnit: 75,
                remPrecesion: 8
            }
        }
    ]
},
修改reactTest.html(暂未实现静态资源内联,先copy lib-flexible包的内容使用)
<!DOCTYPE html>
<html lang="en">

<head>
    <meta charset="UTF-8">
    <meta http-equiv="X-UA-Compatible" content="IE=edge">
    <meta name="viewport" content="width=device-width, initial-scale=1.0">
    <title>Document</title>
    <script type="text/javascript">

        ; (function (win, lib) {
            var doc = win.document;
            var docEl = doc.documentElement;
            var metaEl = doc.querySelector('meta[name="viewport"]');
            var flexibleEl = doc.querySelector('meta[name="flexible"]');
            var dpr = 0;
            var scale = 0;
            var tid;
            var flexible = lib.flexible || (lib.flexible = {});

            if (metaEl) {
                console.warn('将根据已有的meta标签来设置缩放比例');
                var match = metaEl.getAttribute('content').match(/initial\-scale=([\d\.]+)/);
                if (match) {
                    scale = parseFloat(match[1]);
                    dpr = parseInt(1 / scale);
                }
            } else if (flexibleEl) {
                var content = flexibleEl.getAttribute('content');
                if (content) {
                    var initialDpr = content.match(/initial\-dpr=([\d\.]+)/);
                    var maximumDpr = content.match(/maximum\-dpr=([\d\.]+)/);
                    if (initialDpr) {
                        dpr = parseFloat(initialDpr[1]);
                        scale = parseFloat((1 / dpr).toFixed(2));
                    }
                    if (maximumDpr) {
                        dpr = parseFloat(maximumDpr[1]);
                        scale = parseFloat((1 / dpr).toFixed(2));
                    }
                }
            }

            if (!dpr && !scale) {
                var isAndroid = win.navigator.appVersion.match(/android/gi);
                var isIPhone = win.navigator.appVersion.match(/iphone/gi);
                var devicePixelRatio = win.devicePixelRatio;
                if (isIPhone) {
                    // iOS下,对于2和3的屏,用2倍的方案,其余的用1倍方案
                    if (devicePixelRatio >= 3 && (!dpr || dpr >= 3)) {
                        dpr = 3;
                    } else if (devicePixelRatio >= 2 && (!dpr || dpr >= 2)) {
                        dpr = 2;
                    } else {
                        dpr = 1;
                    }
                } else {
                    // 其他设备下,仍旧使用1倍的方案
                    dpr = 1;
                }
                scale = 1 / dpr;
            }

            docEl.setAttribute('data-dpr', dpr);
            if (!metaEl) {
                metaEl = doc.createElement('meta');
                metaEl.setAttribute('name', 'viewport');
                metaEl.setAttribute('content', 'initial-scale=' + scale + ', maximum-scale=' + scale + ', minimum-scale=' + scale + ', user-scalable=no');
                if (docEl.firstElementChild) {
                    docEl.firstElementChild.appendChild(metaEl);
                } else {
                    var wrap = doc.createElement('div');
                    wrap.appendChild(metaEl);
                    doc.write(wrap.innerHTML);
                }
            }

            function refreshRem() {
                var width = docEl.getBoundingClientRect().width;
                if (width / dpr > 540) {
                    width = 540 * dpr;
                }
                var rem = width / 10;
                docEl.style.fontSize = rem + 'px';
                flexible.rem = win.rem = rem;
            }

            win.addEventListener('resize', function () {
                clearTimeout(tid);
                tid = setTimeout(refreshRem, 300);
            }, false);
            win.addEventListener('pageshow', function (e) {
                if (e.persisted) {
                    clearTimeout(tid);
                    tid = setTimeout(refreshRem, 300);
                }
            }, false);

            if (doc.readyState === 'complete') {
                doc.body.style.fontSize = 12 * dpr + 'px';
            } else {
                doc.addEventListener('DOMContentLoaded', function (e) {
                    doc.body.style.fontSize = 12 * dpr + 'px';
                }, false);
            }


            refreshRem();

            flexible.dpr = win.dpr = dpr;
            flexible.refreshRem = refreshRem;
            flexible.rem2px = function (d) {
                var val = parseFloat(d) * this.rem;
                if (typeof d === 'string' && d.match(/rem$/)) {
                    val += 'px';
                }
                return val;
            }
            flexible.px2rem = function (d) {
                var val = parseFloat(d) / this.rem;
                if (typeof d === 'string' && d.match(/px$/)) {
                    val += 'rem';
                }
                return val;
            }

        })(window, window['lib'] || (window['lib'] = {}));

    </script>
</head>

<body>
    <div id="root"></div>
</body>

</html>
四、静态资源内联
意义:
(1)代码层面
- 页面框架的初始化脚本
- 上报相关打点
- css内联避免页面闪动
(2)请求层面:减少HTTP网络请求数
- 小图片或者字体内联(url-loader)
1、HTML和JS内联
webpack5之前:raw-loader内联html 和js
webpack5:asset/source 替换 raw-loader
(1)新建meta.html
<meta charset="UTF-8">
<meta name="viewport" content="viewport-fit=cover,width=device-width,initial-scale=1,user-scalable=no">
<meta name="format-detection" content="telephone=no">
<meta name="keywords" content="now,now直播,直播,腾讯直播,QQ直播,美女直播,附近直播,才艺直播,小视频,个人直播,美女视频,在线直播,手机直播">
<meta name="name" itemprop="name" content="NOW直播—腾讯旗下全民视频社交直播平台"><meta name="description" itemprop="description" content="NOW直播,腾讯旗下全民高清视频直播平台,汇集中外大咖,最in网红,草根偶像,明星艺人,校花,小鲜肉,逗逼段子手,各类美食、音乐、旅游、时尚、健身达人与你24小时不间断互动直播,各种奇葩刺激的直播玩法,让你跃跃欲试,你会发现,原来人人都可以当主播赚钱!">
<meta name="image" itemprop="image" content="https://pub.idqqimg.com/pc/misc/files/20170831/60b60446e34b40b98fa26afcc62a5f74.jpg"><meta name="baidu-site-verification" content="G4ovcyX25V">
<meta name="apple-mobile-web-app-capable" content="no">
<meta http-equiv="X-UA-Compatible" content="IE=Edge,chrome=1">
<link rel="dns-prefetch" href="//11.url.cn/">
<link rel="dns-prefetch" href="//open.mobile.qq.com/">
(2)webpack配置修改
        rules: [
            {
                resourceQuery: /raw/,
                type: 'asset/source',
            },
        ]
(3)修改reactTest.html
<!DOCTYPE html>
<html lang="en">
<head>
    <%= require('./meta.html?raw') %>
    <title>Document</title>
    <script type="text/javascript">
        <%= require('../node_modules/lib-flexible/flexible.js?raw') %>
    </script>
</head>
<body>
    <div id="root"></div>
</body>
</html>
2、CSS内联
方案一:借助style-loader
方案二:html-inline-css-webpack-plugin(推荐)
(1)方案一:
rules: [
      {
        test: /\.scss$/,
        use: [
          {
            loader: 'style-loader',
            options: {
              insertAt: 'top', // 样式插入到<head>
              singleton: true, //将所有的style标签合并成一个
            }
          },
          "css-loader",
          "sass-loader"
        ],
      },
    ]
(2)方案二
npm i html-inline-css-webpack-plugin -Dconst MiniCssExtractPlugin = require("mini-css-extract-plugin");
const HtmlWebpackPlugin = require('html-webpack-plugin');
const HTMLInlineCSSWebpackPlugin = require("html-inline-css-webpack-plugin").default;
module.exports = {
plugins: [
new MiniCssExtractPlugin({
filename: "[name].css",
chunkFilename: "[id].css"
}),
new HtmlWebpackPlugin(),
new HTMLInlineCSSWebpackPlugin(),
],
module: {
rules: [
{
test: /\.css$/,
use: [
MiniCssExtractPlugin.loader,
"css-loader"
]
}
]
}
}五、多页面应用打包通用方案
(1)多页面应用(MPA)概念
每一次页面跳转的时候,后台服务器都会返回一个新的html文档,这种类型的网站也就是多页网站,也叫做多页应用
(2)多页没看打包基本思路
每个页面对应一个entry,一个html-webpack-plugin
缺点:每次新增或删除页面都要改webpack配置
(3)多页面打包通用方案
动态获取entry 和设置 html-webpack-plugin数量
利用glob.sync
(4)实现
npm i glob -D'use strict'
const path = require('path');
const MiniCssExtractPlugin = require('mini-css-extract-plugin');
const CssMinimizerPlugin = require("css-minimizer-webpack-plugin");
const HtmlWebpackPlugin = require('html-webpack-plugin');
const { CleanWebpackPlugin } = require('clean-webpack-plugin');
const HTMLInlineCSSWebpackPlugin = require("html-inline-css-webpack-plugin").default;
const glob = require('glob');
const setMPA = () => {
const entry = {};
const htmlWebpackPlugins = [];
const entryFiles = glob.sync(path.join(__dirname, './src/*/index.js'));
console.log('entryFiles', entryFiles);
Object.keys(entryFiles).map((index) => {
const entryFile = entryFiles[index];
// console.log(entryFile);
const match = entryFile.match(/src\/(.*)\/index\.js/);
const pageName = match && match[1];
entry[pageName] = entryFile;
htmlWebpackPlugins.push(
new HtmlWebpackPlugin({
template: path.join(__dirname, `src/${pageName}/index.html`),
filename: `${pageName}.html`,
chunks: [pageName],
inject: true,
minify: {
html5: true,
collapseWhitespace: true,
preserveLineBreaks: false,
minifyCSS: true,
minifyJS: true,
removeComments: false
}
}),
);
})
return {
entry,
htmlWebpackPlugins
}
}
const { entry, htmlWebpackPlugins } = setMPA();
module.exports = {
entry,
output: {
path: path.join(__dirname, 'dist'),
filename: '[name]_[chunkhash:8].js'
},
mode: 'production',
module: {
rules: [
{
resourceQuery: /raw/,
type: 'asset/source',
},
{
test: /\.js$/,
use: 'babel-loader'
},
{
test: /\.css$/,
// use数组中是从后往前调用的
use: [
MiniCssExtractPlugin.loader,
{
loader: "css-loader",
options: {
importLoaders: 1,
// 0 => no loaders (default);
// 1 => postcss-loader;
// 2 => postcss-loader, sass-loader
},
},
{
loader: 'postcss-loader',
options: {
postcssOptions: {
plugins: [
[
// 'postcss-preset-env',
'autoprefixer',
{
// 其他选项
overrideBrowserslist: [
'Android 4.1',
'iOS 7.1',
'Chrome > 31',
'ff > 31',
'ie >= 8',
'>0.01%'
//'last 10 versions', // 所有主流浏览器最近2个版本
]
},
],
],
},
},
},
{
loader: 'px2rem-loader',
options: {
remUnit: 75,
remPrecesion: 8
}
}
]
},
{
test: /\.less$/,
use: [
MiniCssExtractPlugin.loader,
'css-loader',
'less-loader'
]
},
{
test: /\.(png|jpg|gif|jpeg)$/,
type: 'asset/resource'
},
{
test: /\.(woff|woff2|eot|ttf|otf)/,
type: 'asset/resource'
},
]
},
plugins: [
new MiniCssExtractPlugin({
filename: '[name]_[contenthash:8].css',
}),
new CleanWebpackPlugin(),
new HTMLInlineCSSWebpackPlugin()
].concat(htmlWebpackPlugins),
optimization: {
minimize: true,
minimizer: [
new CssMinimizerPlugin(),
],
},
}六、使用source map
开发环境开启,线上环境关闭
通过source map 定位到源码
source map关键字
- eval:使用eval报过模块代码
- source map:产生的.map文件
- cheap:不包含列信息
- inline:将,map作为dataUrl嵌入,不单独生成.map文件
- moudle:包含loader的sourcemap
详细选项参考:Devtool | webpack 中文文档
devtool: 'eval-cheap-module-source-map',//开发环境配置 定位错误根源七、基础库分离(externals)
防止将某些
import的包(package)打包到 bundle 中,而是在运行时(runtime)再去从外部获取这些扩展依赖(external dependencies)。
例如,从 CDN 引入 jQuery,而不是把它打包:
(1)index.html
<script crossorigin src="https://unpkg.com/react@18.2.0/umd/react.production.min.js"></script>
<script crossorigin src="https://unpkg.com/react-dom@18.2.0/umd/react-dom.production.min.js"></script>
(2)webpack配置
module.exports = {
  //...
  externals: {
        'react': 'React', // 页面inport时也需要是React
        'react-dom': 'ReactDOM',  // 页面inport时也需要是ReactDOM
    }
};
参考:外部扩展(Externals) | webpack 中文文档
八、提取页面公共资源
1、SplitChunksPlugin
chunks 参数:
- 有效值为
all,async和initial。设置为all可能特别强大,因为这意味着 chunk 可以在异步和非异步 chunk 之间共享- async异步银土的库进行分离(默认)
- initial同步引入的库进行分离
- all 所有引入的库进行分离(推荐)
    optimization: {
        splitChunks: {
            chunks: 'async',
            minSize: 20000, // 生成 chunk 的最小体积(以 bytes 为单位)。
            minRemainingSize: 0, // 通过确保拆分后剩余的最小 chunk 体积超过限制来避免大小为零的模块
            minChunks: 1, // 设置某一个方法最小的使用次数
            maxAsyncRequests: 30, // 同时请求异步资源的数量
            maxInitialRequests: 30, //入口点的最大并行请求数。
            enforceSizeThreshold: 50000, // 强制执行拆分的体积阈值和其他限制(minRemainingSize,maxAsyncRequests,maxInitialRequests)将被忽略。
            cacheGroups: {
                defaultVendors: {
                    test: /[\\/]node_modules[\\/]/,
                    priority: -10,
                    reuseExistingChunk: true,
                },
                default: {
                    minChunks: 2,
                    priority: -20,
                    reuseExistingChunk: true,
                },
            },
            // commons此配置会把 react或react-dom 分离出来,分离出来的文件是 vendors.js
            commons: {
                test: /(react|react-dom)/,  // 匹配出需要分离的包
                // cacheGroupKey here is `commons` as the key of the cacheGroup
                // name(module, chunks, cacheGroupKey) {
                //     const moduleFileName = module
                //         .identifier()
                //         .split('/')
                //         .reduceRight((item) => item);
                //     const allChunksNames = chunks.map((item) => item.name).join('~');
                //     return `${cacheGroupKey}-${allChunksNames}-${moduleFileName}`;
                // },
                name: 'vendors',
                chunks: 'all',
                minChunks: 2, // 设置最小引用次数为2次,如果只有一个页面用到,是不会提取出来的
            },
        },
    },
九、Tree Shaking的原理和使用
tree shaking 是一个术语,通常用于描述移除 JavaScript 上下文中的未引用代码(dead-code)。它依赖于 ES2015 模块语法的 静态结构 特性,例如 import 和 export。这个术语和概念实际上是由 ES2015 模块打包工具 rollup 普及起来的。
webpack 2 正式版本内置支持 ES2015 模块(也叫做 harmony modules)和未使用模块检测能力。新的 webpack 4 正式版本扩展了此检测能力,通过package.json的"sideEffects"属性作为标记,向 compiler 提供提示,表明项目中的哪些文件是 "pure(纯正 ES2015 模块)",由此可以安全地删除文件中未使用的部分。
1、DCE
- 代码不会被执行,不可达到
- 代码执行的结果不会被用到
- 代码只会影响死变量(只写不读)
2、原理
利用ES6模块的特点
- 只能作为模块顶层的语句出现
- import 的模块名只能是字符串常量
- import binding 是 immutable的
代码擦除:uglify阶段删除无用代码
3、webpack默认开启tree-shaking
4、实践
(1)编写文件tree-shaking.js
export function add(a, b) {
    return a + b;
}


export function sub(a, b) {
    return a - b;
}
(2)在reactTest下的indexjs引入
import { add, sub } from './tree-shaking';(3)修改webpack.prod.js中mode为none查看打包效果
(4)修改webpack.prod.js中mode为production查看打包效果
十、Scope Hoisting的原理和使用
1、webpack模块机制
现象:构建后的代码存在大量必报代码
会导致的问题:
大量函数闭包包裹代码,导致体积增大(模块越多越明显)
运行代码时创建的函数作用域变多,内存开销变大
模块转换:被webpack转换后的模块会带上一层包裹
import会被转换成__webpack_require
模块机制:
打包出来的是一个IIFE(匿名闭包)
moudle是一个数组,每一项是一个模块初始化函数
__webpack_require用来加载模块,返回moudle.exports
通过WEBPACK_REQUIRE_METHOD(0)启动程序
2、Scope Hoisting的原理
原理:将所有模块的代码按照引用顺序放在一个函数作用域里,然后适当的重命名一些变量,防止命名冲突
对比:通过 scope hoisting 可以减少函数声明代码和内存开销
3、 Scope Hoisting的使用
webpack mode 为 production 默认开启
必须是ES6语法,CJS不支持
十一、代码分割和动态import
1、代码分割的意义
对于大的web应用来讲,将所有的代码都放在一个文件中显然是不够高效的,特别是当你的某些代码块是在某些特殊的时候才会使用到。webpack有一个功能就是将你的代码库分割成chunks(语块),当代码运行到它们的时候再进行加载。
适用的场景:
抽离相同代码到一个共享块
脚本懒加载,使得初始下载的代码更小
2、懒加载js的方式
CommonJS:require.ensure
ES6:动态import(需要babel转换)
3、如何使用动态import?
(1) 安装babel插件
npm install --save-dev @babel/plugin-syntax-dynamic-import(2)ES6:动态import(.babelrc)
{
    "presets": [
        "@babel/preset-env",
        "@babel/preset-react"
    ],
    "plugins": [
        "@babel/plugin-syntax-dynamic-import"
    ]
}
(3)添加test.js
import React from "react";

export default() =>  <div>动态import</div>;
(4)修改index.js
'use strict';
import React from "react";
import ReactDOM from "react-dom";
import './reactTest.css';
import back from './images/back.png';
import { add, sub } from './tree-shaking';

class ReactComponents extends React.Component {

    constructor() {
        super(...arguments);
        this.state = {
            Text: null
        };
    }

    testImport() {
        import('./test').then((Text) => {
            this.setState({
                Text: Text.default
            })
        })
    }
    render() {
        const { Text } = this.state;

        return <div className="react-test">
            <div onClick={this.testImport.bind(this)}>Hello React!!!!!!!!----</div>
            {
                Text ? <Text /> : null
            }
            <img src={back} />
        </div>;
    }
}

ReactDOM.render(
    <ReactComponents />,
    document.getElementById('root')
)
十二、在webpack中使用ESLint
1、行业中优秀的ESLint规范实践
Airbnb:esline-config-airbnb、esline-config-airbnb-base
腾讯:
alloyteam团队:eslint-config-alloy(https://github.com/AlloyTeam/eslint-config-alloy)
ivweb团队:eslint-config-ivweb(https://github.com/feflow/eslint-config-ivweb)

2、制定eslint规范
- 不重复造轮子,基于eslint.recommend进行改造
- 能够帮助发现代码错误的规则全部开启
- 帮助保持团队的代码风格统一,而不是限制开发体验
3、ESLint落地
方案一:webpack与CI/CD集成
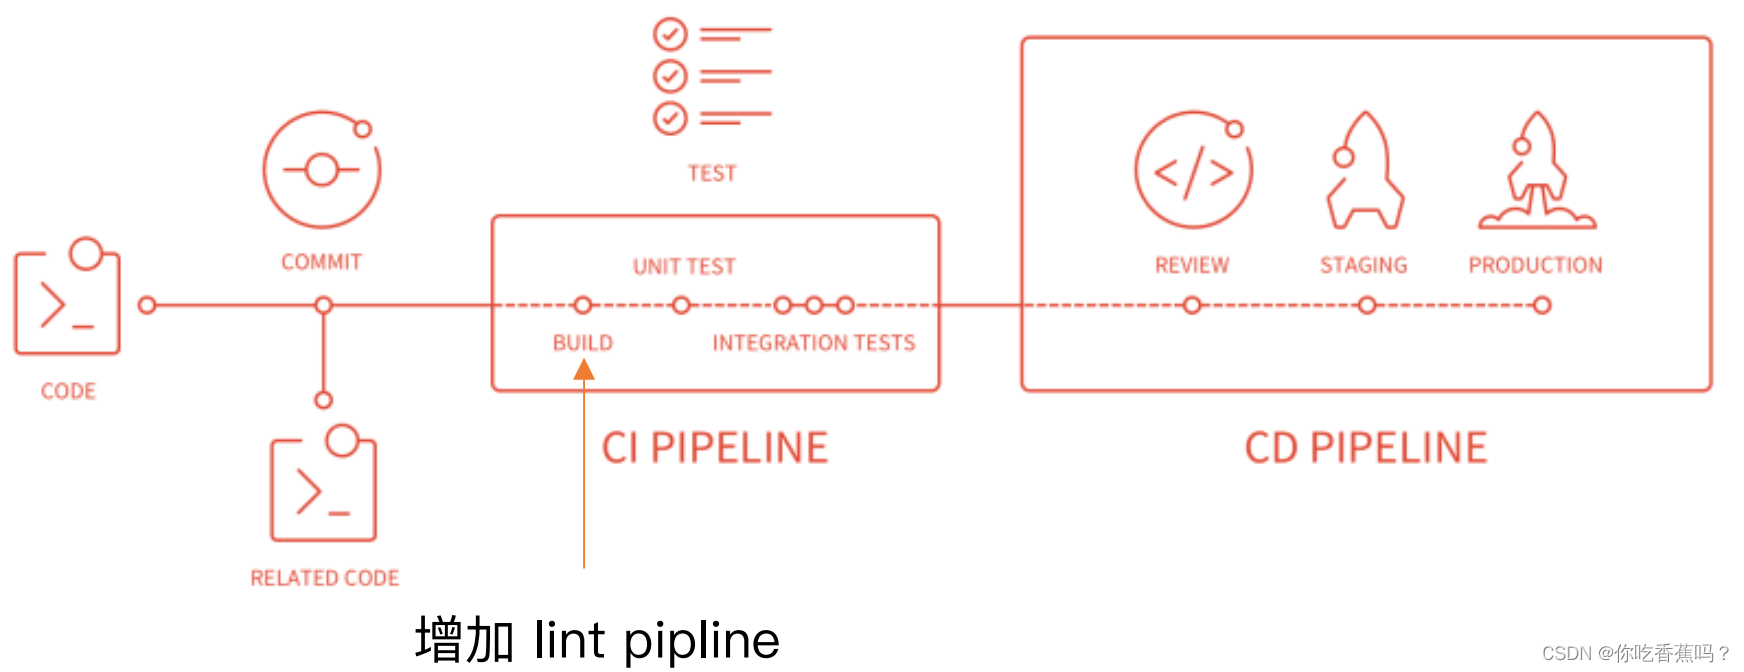
(1)安装 husky
npm install husky --save-dev(2)增加 npm script,通过 lint-staged 增量检查修改的⽂件
  "scripts": {
    "precommit": "lint-staged"
  },
  "lint-staged": {
    "linters": {
      "*.{js,scss}": [
        "eslint --fix",
        "git add"
      ]
    }
  },
方案二:webpack与eslint集成(eslint-config-airbnb为例)
(1)依赖安装
npm i eslint eslint-plugin-import eslint-plugin-react eslint-plugin-react-hooks eslint-plugin-jsx-a11y -Dnpm i eslint-loader -D注:eslint安装8版本时,安装eslint-loader(4版本)会报错,需要eslint版本6或7
npm ERR! code ERESOLVE
npm ERR! ERESOLVE unable to resolve dependency tree
npm ERR!
npm ERR! While resolving: webpackExercise@1.0.0
npm ERR! Found: eslint@8.29.0
npm ERR! node_modules/eslint
npm ERR! dev eslint@"^8.29.0" from the root project
npm ERR!
npm ERR! Could not resolve dependency:
npm ERR! peer eslint@"^6.0.0 || ^7.0.0" from eslint-loader@4.0.2
npm ERR! node_modules/eslint-loader
npm ERR! dev eslint-loader@"4.0.2" from the root project
npm ERR!
npm ERR! Fix the upstream dependency conflict, or retry
npm ERR! this command with --force, or --legacy-peer-deps
npm ERR! to accept an incorrect (and potentially broken) dependency resolution.
npm ERR!
npm ERR! See /Users/liangchenyang/.npm/eresolve-report.txt for a full report.npm ERR! A complete log of this run can be found in:
(2) 修改webpack配置
// webpack.prod.js
{
    test: /\.js$/,
    use: [
        'babel-loader',
        'eslint-loader'
    ]
},
(3)新建.eslintrc.js
npm i eslint-config-airbnb -Dmodule.exports = {
"parser": "esprima",
"extends": "airbnb",
"env": {
"browser": true,
"node": true
},
"rules": {
"indent": ["error", 4]
},
}十三、webpack打包库和组件
1、实现一个大整数加法库的打包
- 未压缩版的库名称:large-number.js
- 压缩版的库的名称:large-number.min.js
2、支持的使用方式
- 支持ES module
import * as largeNumber from 'large-number';- 支持CJS
const largeNumbers = require('large-number');- 支持AMD
require(['large-number'],function(large-number){
    // ...
});- 直接通过script方式引入
<script src="....." />3、如何将库暴露出去?
- library:指定库的全局变量
- libraryTarget:指定库引入的方式
4、实操
(1)新建 large-number 文件夹,并且初始化
npm init -y
npm i webpack webpack-cli -D
(2)新建src/index.js
// src/index.js
export default function add(a, b) {
    let i = a.length - 1;
    let j = b.length - 1;


    let carry = 0;
    let ret = '';
    while (i>=0 || j>=0) {
        let x = 0;
        let y = 0;
        let sum;
        if (i>= 0) {
            x = a[i] - '0';
            i--;
        }

        if (j>= 0) {
            y = b[j] - '0';
            j--;
        }

        sum = x + y + carry;

        if (sum >= 10) {
            carry = 1;
            sum -= 10;
        } else {
            carry = 0;
        }

        ret = sum + ret;
    }
    if (carry) {
        ret = carry + ret;
    }

    return ret;
}
(3)新建webpack.config.js
module.exports = {
    entry: {
        'large-number': './src/index.js',
        'large-number.min': './src/index.js',
    },
    output: {
        filename: '[name].js',
        library: 'large-number', // 打包出来的库的名字
        libraryTarget: 'umd', // 支持上边说的三种使用方式
        libraryExport: 'default'
    }
}
(4)修改package.json
  "scripts": {
    "test": "echo \"Error: no test specified\" && exit 1",
    "build": "webpack"
  },
(5)此时打包出来的全部都是压缩后的代码,需要通过include设置只对.min.js结尾的文件进行压缩
npm i terser-webpack-plugin -Dconst TerserPlugin = require('terser-webpack-plugin');
module.exports = {
mode: 'none',
entry: {
'large-number': './src/index.js',
'large-number.min': './src/index.js',
},
output: {
filename: '[name].js',
library: 'large-number', // 打包出来的库的名字
libraryTarget: 'umd',
libraryExport: 'default'
},
optimization: {
minimize: true,
minimizer: [
new TerserPlugin({
include: /\.min\.js$/,
})
]
}
}(6)设置入口文件
{
  "name": "large-number",
  "version": "1.0.0",
  "description": "大整数加法",
  "main": "index.js",
  "scripts": {
    "test": "echo \"Error: no test specified\" && exit 1",
    "build": "webpack",
    "prepublish": "webpack"
  },
  "keywords": [],
  "author": "",
  "license": "ISC",
  "devDependencies": {
    "terser-webpack-plugin": "^5.3.6",
    "webpack": "^5.75.0",
    "webpack-cli": "^5.0.1"
  }
}
(7)在package.json的同级目录新建 index.js
// 如果将webpack.config.js中的mode设置为 production,
// 打包时 process.env.NODE_ENV 就是 production,否则就等于 development
if (process.env.NODE_ENV === 'production') {
    module.exports = require('./dist/large-number.min.js');
} else {
    module.exports = require('./dist/large-number.js');
}
(8)发布到npm
npm publish
执行 npm publish 时,会运行 package.json 中 script 下的 prepublish


![[附源码]JAVA毕业设计校园失物招领管理系统(系统+LW)](https://img-blog.csdnimg.cn/263507da4c1f42d9929222d1dda90125.png)


