一、业务场景:
最近在使用Antd-Vue组件库的时候,发现在累加表单 时没有直接可以用的,必须自己在官网上手动合并几个才能实现,为了大家后面遇到和我一样的问题,给大家分享一下
二、具体实现步骤:
<template>
  <div>
    <a-table :columns="columns" :data-source="data" bordered :pagination="false">
      <template
        v-for="col in ['name', 'age', 'address']"
        :slot="col"
        slot-scope="text, record, index"
      >
        <div :key="col">
          <a-input
            v-if="record.editable"
            style="margin: -5px 0"
            :value="text"
            @change="e => handleChange(e.target.value, record.key, col)"
          />
          <template v-else>
            {{ text }}
          </template>
        </div>
      </template>
      <template slot="name" slot-scope="text, record, index">
        <a-select default-value="lucy" style="width: 100%" v-model="record.name" :disabled="ifdisabled">
          <a-select-option value="jack">
            Jack
          </a-select-option>
          <a-select-option value="lucy">
            Lucy
          </a-select-option>
          <a-select-option value="disabled" disabled>
            Disabled
          </a-select-option>
          <a-select-option value="Yiminghe">
            yiminghe
          </a-select-option>
        </a-select>

      </template>
      <template slot="age" slot-scope="text, record, index">
        <a-input v-model="record.age" :disabled="ifdisabled"/>
      </template>

      <template slot="operation" slot-scope="text, record, index">
        <div class="editable-row-operations">
        <span v-if="record.editable">
          <a @click="() => save(record.key)">保存</a>
          <a-popconfirm title="您确定要取消吗?"
                        okText="确定"
                        cancelText="取消" @confirm="() => cancel(record.key)">
            <a>取消</a>
          </a-popconfirm>
        </span>
          <span v-else>
          <a :disabled="editingKey !== ''" @click="() => edit(record.key)">编辑</a>
        </span>
          <a-popconfirm
            v-if="data.length"
            title="您确定要删除吗?"
            okText="确定"
            cancelText="取消"
            @confirm="() => onDelete(record.key)"
          >
            <a href="javascript:;">删除</a>
          </a-popconfirm>
        </div>
      </template>
    </a-table>
    <a-button class="editable-add-btn" @click="handleAdd">
      添加
    </a-button>
  </div>
</template>
<script>
  const columns = [
    {
      title: '账号类型',
      dataIndex: 'name',
      width: '25%',
      scopedSlots: {customRender: 'name'},
    },
    {
      title: '账号信息',
      dataIndex: 'age',
      width: '15%',
      scopedSlots: {customRender: 'age'},
    },
    // {
    //   title: 'address',
    //   dataIndex: 'address',
    //   width: '40%',
    //   scopedSlots: { customRender: 'address' },
    // },
    {
      title: '操作',
      dataIndex: 'operation',
      scopedSlots: {customRender: 'operation'},
    },
  ];

  const data = [];
  for (let i = 0; i < 0; i++) {
    data.push({
      key: i.toString(),
      name: `Edrward ${i}`,
      age: ``,
    });
  }
  export default {
    data() {


      return {
        ifdisabled: true,
        data,
        columns,
        editingKey: '',
      };
    },
    mounted() {
      this.cacheData = this.data.map(item => ({...item}));
      console.log(this.cacheData)
    },
    methods: {
      handleChange(value, key, column) {
        const newData = [...this.data];
        const target = newData.find(item => key === item.key);
        if (target) {
          target[column] = value;
          this.data = newData;
        }
      },

      handleAdd() {
        // 如果文本框是禁用的状态,就可以继续添加
        if (this.ifdisabled == true) {
          const {count, data} = this;
          const newData = {
            key: JSON.stringify(new Date()),
            name: ``,
            age: ``,
            address: ``
          };
          this.data = [...data, newData];
          this.count = count + 1;
          // this.ifdisabled = true
          this.cacheData = this.data.map(item => ({...item}));
          // 表格的数据
          console.log(this.cacheData)
        } else {
          this.$message.warning('请先进行保存再添加下一条信息')
          return false
        }


      },
      onDelete(key) {
        const dataSource = [...this.data];
        this.data = dataSource.filter(item => item.key !== key);
      },

      edit(key) {
        console.log(key)

        const newData = [...this.data];
        const target = newData.find(item => key === item.key);
        this.editingKey = key;
        if (target) {
          this.ifdisabled = false
          target.editable = true;
          this.data = newData;
        }
      },
      save(key) {
        this.ifdisabled = true
        console.log(key)
        const newData = [...this.data];
        const newCacheData = [...this.cacheData];
        const target = newData.find(item => key === item.key);
        const targetCache = newCacheData.find(item => key === item.key);
        if (target && targetCache) {
          delete target.editable;
          this.data = newData;
          Object.assign(targetCache, target);
          this.cacheData = newCacheData;
        }
        this.editingKey = '';
      },
      cancel(key) {
        const newData = [...this.data];
        const target = newData.find(item => key === item.key);
        this.editingKey = '';
        if (target) {
          Object.assign(target, this.cacheData.find(item => key === item.key));
          delete target.editable;
          this.data = newData;
        }
      },
    },
  };
</script>
<style scoped>
  .editable-row-operations a {
    margin-right: 8px;
  }
</style>
三、效果展示:
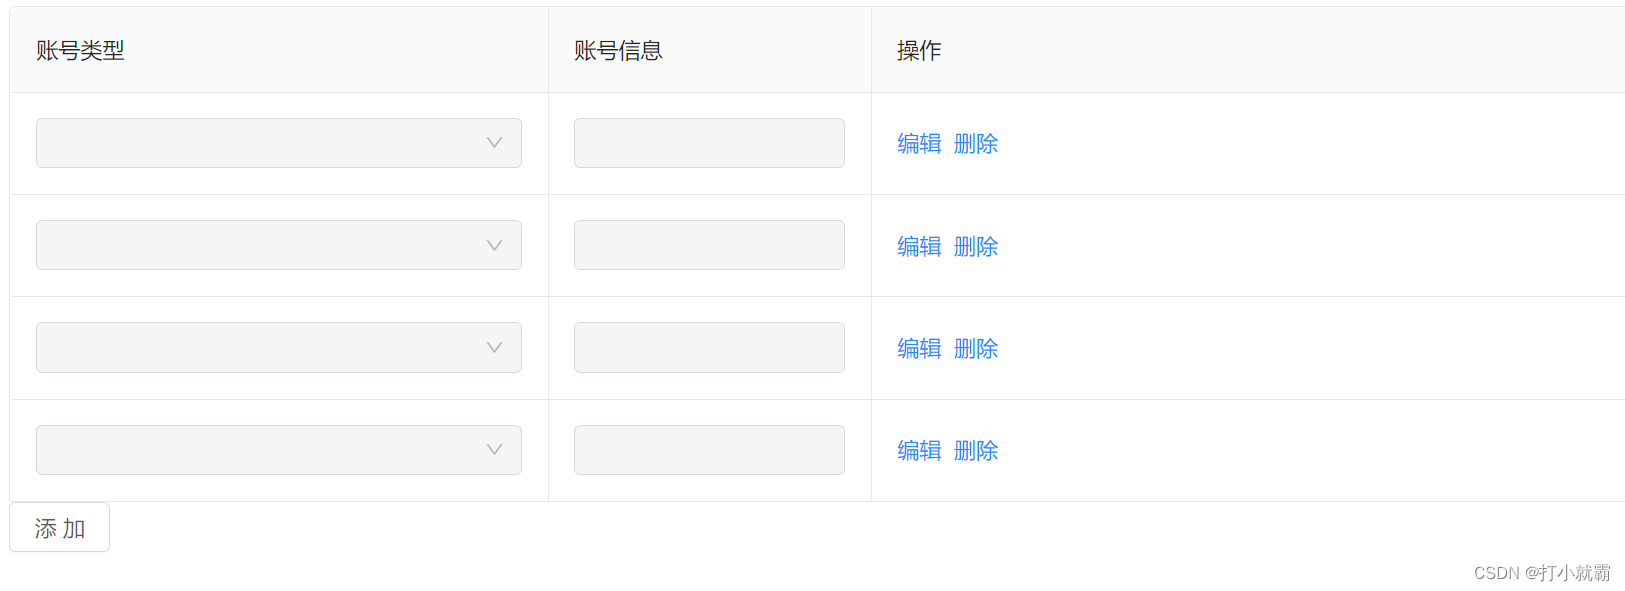
你已经成功了,撒花。
今天的分享到此结束,欢迎小伙伴们一起交流



![[附源码]Python计算机毕业设计Django在线教育系统](https://img-blog.csdnimg.cn/d9d8c81e2a1b4367b2e5d03d343be793.png)
