关于个人项目是在找实习以及参加秋招非常重要的简历内容,今天博主来介绍一下自己的一个项目。
开发环境:CentOS7、Makefile、g++、vscode、MySQL Workbench
所用技术:C++ STL 标准库、Boost 准标准库(字符串切割)、cpp-httplib 第三方开源网络库
、ctemplate 第三方开源前端网页渲染库、jsoncpp 第三方开源序列化、反序列化库、负载均衡设计、多进程、多线程(在这里没有实现)、MySQL C connect、Ace前端在线编辑器(了解)
、html/css/js/jquery/ajax (了解)项目介绍:在 OnlineJudge 中,用户可以编写自己的代码,然后提交给后台,后台再根据负载情况选择合适的主机提供服务,这样就可以在自己搭建的项目中刷题了。
目录
项目整体介绍
项目代码
comm
util.hpp
log.hpp
compile_run_server
compile.hpp
run.hpp
compile_run.hpp
compile_run_server.cc
Makefile
oj_server
整体介绍
oj_model.hpp
oj_view.hpp
oj_control.hpp
oj_server.cc
conf/service_machine.conf
Makefile
Makefile
前端代码
wwwroot/index.html(首页)
template_html/all_questions.html
template_html/one_question.html
项目补充
项目演示
首页
题目列表
做题页面
判题功能
负载均衡测试
项目整体介绍
项目有三个核心模块:
comm:模块
compile_server:编译与运行模块
oj_server:获取题目列表,查看编写题目界面,负载均衡,其他功能

客户端向发起请求,后端模块oj_server 首先获取用户请求,然后把请求交给后面对应的编译模块运行或者提供题目页面模块,把请求结果返回给客户端。
补充:
为什么要有oj_server模块?
因为来自用户客户端的请求是多样化的,可能是编译运行请求;也有可能是获取首页请求等等。所以oj_server要对用户请求进行处理分析后,再把请求交给对应的后台主机进行处理,并把结果返回给用户。
oj_server是随机把客户端请求交给后台任意一个主机吗?
不是,如果无脑式的请客户端大量请求交给后台主机,可能会导致资源分配不均的情况,比如一台主机正在处理大量请求,该主机资源都快被消耗完了,而其他主机还很悠闲似的,这种情况就极为不合理,这就是所说的"饥饿问题"。所以在oj_server模块里面设计一个算法能够根据主机负载情况选择当前主机负载最小的,并把任务交给它进行处理。
项目代码
comm
util.hpp
#pragma once
#include<string>
#include<iostream>
#include<unistd.h>
#include<sys/types.h>
#include<sys/stat.h>
#include<sys/time.h>
#include<atomic> //原子性递增计数器
#include<fstream>
#include<vector>
#include<boost/algorithm/string.hpp>

namespace ns_util
{
    const std::string temp_name = "./temp/"; //生成文件都在该目录下
    class PathUtil
    {
    public:
        static std::string AddSuffix(const std::string& file_name, const std::string suffix)
        {
            std::string path_name = temp_name;
            path_name += file_name;
            path_name += suffix;
            return path_name;
        }
        //编译时需要的文件
        //构建原文件: 路径 + 后缀的完整文件名 --> 要决定是那个路径下的文件
        //前面路径仅仅是位置查找,不会混到文件名中,会自动找后面的文件名
        //1234 -> ./temp/1234.cpp
        static std::string Src(const std::string& file_name)
        {
            return AddSuffix(file_name, ".cpp");
        }
        static std::string Exe(const std::string& file_name)
        {
            return AddSuffix(file_name, ".exe");
        }
        static std::string CompilerError(const std::string& file_name)
        {
            return AddSuffix(file_name, ".compiler_error");
        }

        //运行时需要的文件
        static std::string Stdin(const std::string& file_name)
        {
            return AddSuffix(file_name, ".stdin");
        }
        static std::string Stdout(const std::string& file_name)
        {
            return AddSuffix(file_name, ".stdout");
        }
        static std::string Stderr(const std::string& file_name)
        {
            return AddSuffix(file_name, ".stderr");
        }
    };

    class TimeUtil
    {
    public:
        static std::string GetTimeStamp()
        {
            struct timeval _time; //第一个参数是输出型参数
            gettimeofday(&_time, nullptr); //第二个参数是时域,我们不用管

            return std::to_string(_time.tv_sec);//只要s级别的,tv_usec微秒级别的不用管
        }
        static std::string GetTimeMs()
        {
            struct timeval _time;
            gettimeofday(&_time, nullptr);
            return std::to_string(_time.tv_sec * 1000 + _time.tv_usec / 1000);
        }
    };
    class FileUtil
    {
    public:
        static bool IsFileExists(const std::string& path_name)
        {
            struct stat st; //stat第二个参数是输出型参数,可以拿到该文件的属性
            if(stat(path_name.c_str(), &st) == 0) //根据返回值来判断文件是否存在
            {
                return true;
            }
            return false;
        }
        static std::string UniqFileName()
        {
            //毫秒级时间戳+原子性递增唯一值: 来保证唯一性
            static std::atomic_uint id(0);
            id++;
            std::string ms = TimeUtil::GetTimeMs();
            std::string uniq_id = std::to_string(id);
            return ms + "_" + uniq_id;//表示唯一的文件名
        }
        static bool WriteFile(const std::string& target, const std::string& content)
        {
            std::ofstream out(target);
            if(!out.is_open())
            {
                return false;
            }
            out.write(content.c_str()/*文件地址*/, content.size());
            out.close();
            return true;
        }
        static bool ReadFile(const std::string& target, std::string* content, bool keep = false)
        {
            (*content).clear();

            std::ifstream in(target);
            if(!in.is_open())
            {
                return false;
            }
            std::string line;
            while(getline(in, line))
            {
                (*content) += line;
                (*content) += (keep ? "\n" : "");
            }
            in.close();
            return true;
        }
    };
    class StringUtil
    {
    public:
        static void SplitString(std::string& str, std::vector<std::string>* target, std::string sep)
        {
            //boost split
            boost::split(*target, str, boost::is_any_of(sep), boost::algorithm::token_compress_on);
        }
    };
}
log.hpp
#pragma once
#include<iostream>
#include"util.hpp"


namespace ns_log
{
    using namespace ns_util;
    //日志等级
    enum //匿名
    {
        INFO,
        DEBUG,
        WARNING,
        ERROR,
        FATAL //系统出问题了
    };

    inline std::ostream& Log(const std::string& level, const std::string& file_name, int line)
    {
        //添加日志等级
        std::string messege = "[";
        messege += level;
        messege += "]";

        //添加报错文件名称
        messege += "[";
        messege += file_name;
        messege += "]";

        //添加报错行
        messege += "[";
        messege += std::to_string(line);
        messege += "]";

        //添加时间戳
        messege += "[";
        messege += TimeUtil::GetTimeStamp();
        messege += "]";

        //cout本身是包含缓冲区的
        std::cout << messege;//不要加endl, 后面可以跟错误信息

        return std::cout;
    }

    //我们想这样使用日志: LOG(level) << "\n"
    //开放式日志
    #define LOG(level) Log(#level/*带#保留原生字符串*/, __FILE__, __LINE__) //不要加分号
}
compile_run_server
compile.hpp
#pragma once
#include<iostream>
#include<string>
#include<unistd.h>
#include<sys/types.h>
#include<sys/stat.h>
#include<fcntl.h>
#include<sys/wait.h>
#include "../comm/util.hpp"
#include "../comm/log.hpp"

namespace ns_compile
{
    using namespace ns_util;
    using namespace ns_log;
    class Compiler
    {
    public:
        Compiler()
        {}
        ~Compiler()
        {}

        //编译模块
        //返回值: 编译成功: true 否则: false
        //输入参数: 编译的文件名(不带后缀)
        static bool Compile(const std::string& file_name)
        {
            pid_t pid = fork();
            if(pid < 0)
            {
                LOG(ERROR) << "内部错误, 创建子进程失败" << "\n";
                return false;
            }
            else if(pid == 0) //子进程
            {
                //对于编译失败情况,让子进程去处理
                umask(0);
                int _stderr = open(PathUtil::CompilerError(file_name).c_str(), O_CREAT | O_WRONLY, 0644);
                if(_stderr < 0) //打开文件失败
                {
                    LOG(WARNING) << "没有成功形成stderr文件" << "\n";
                    exit(1);
                }
                dup2(_stderr, 2);

                //execlp替换成功不会执行后面的代码
                execlp("g++", "g++", "-o", PathUtil::Exe(file_name).c_str(), PathUtil::Src(file_name).c_str(), "-D", "COMPILER_ONLINE", "-std=c++11", nullptr);
                LOG(ERROR) << "启动g++编译器失败, 可能是参数错误" << "\n";
                exit(2);//如果替换失败,直接终止子进程
            }
            else //父进程
            {
                waitpid(pid, nullptr, 0/*阻塞等待*/);//fork给父进程返回子进程的pid, 给子进程返回0
                //编译是否成功,查看是否形成了可执行程序
                if(FileUtil::IsFileExists(PathUtil::Exe(file_name)))
                {
                    LOG(INFO) << PathUtil::Src(file_name).c_str() << "编译成功" << "\n";
                    return true; //编译成功
                }
            }
            LOG(ERROR) << "编译失败, 没有形成可执行程序" << "\n";
            return false; //编译失败
        }
    };
}
run.hpp
#include<iostream>
#include<string>
#include<sys/types.h>
#include<sys/stat.h>
#include<fcntl.h>
#include<unistd.h>
#include<sys/wait.h>
#include<sys/time.h>
#include<sys/resource.h>
#include"../comm/util.hpp"
#include"../comm/log.hpp"

namespace ns_runner
{
    using namespace ns_util;
    using namespace ns_log;
    class Runner
    {
    public:
        Runner()
        {}
        ~Runner()
        {}

        static void SetProcLimit(int cpu, int mem)
        {
            //设置cpu时长
            struct rlimit cpu_rlimit;
            cpu_rlimit.rlim_cur = cpu;
            cpu_rlimit.rlim_max = RLIM_INFINITY;
            setrlimit(RLIMIT_CPU, &cpu_rlimit);

            //设置内存大小
            struct rlimit mem_rlimit;
            mem_rlimit.rlim_cur = mem * 1024; //转换成KB
            mem_rlimit.rlim_max = RLIM_INFINITY;
            setrlimit(RLIMIT_AS, &mem_rlimit);
            return;
        }

        static int Run(const std::string& file_name, int cpu_limit, int mem_limit) //返回值为进程崩溃的信号
        {
            //程序运行有三种情况
            //1、代码跑完结果对
            //2、代码跑完结果不对
            //3、代码没跑完,异常退出
            //运行模块不考虑前两种情况,他们是由上层判断的,这里只考虑第三种情况

            //运行时所需要的文件----形成的文件写到文件里
            std::string _execute = PathUtil::Exe(file_name);
            std::string _stdin = PathUtil::Stdin(file_name);
            std::string _stdout = PathUtil::Stdout(file_name);
            std::string _stderr = PathUtil::Stderr(file_name);


            umask(0);
            int _stdin_fd = open(_stdin.c_str(), O_CREAT | O_WRONLY, 0644);
            int _stdout_fd = open(_stdout.c_str(), O_CREAT | O_WRONLY, 0644);
            int _stderr_fd = open(_stderr.c_str(), O_CREAT | O_WRONLY, 0644);
            if(_stdin_fd < 0 || _stdout_fd < 0 || _stderr_fd < 0)
            {
                LOG(ERROR) << "运行时打开标准文件失败" << "\n";
                return -1; //表示打开文件失败
            }

            pid_t pid = fork();
            if(pid < 0)
            {
                LOG(ERROR) << "运行时创建子进程失败" << "\n";
                close(_stdin_fd);
                close(_stdout_fd);
                close(_stderr_fd);
                printf("运行时创建子进程失败\n");
                return -2;
            }
            else if(pid == 0)
            {
                dup2(_stdin_fd, 0);
                dup2(_stdout_fd, 1);
                dup2(_stderr_fd, 2);


                //设置进程资源限制
                SetProcLimit(cpu_limit, mem_limit);

                execl(_execute.c_str(), _execute.c_str(), nullptr);
                exit(1);//execl失败,就执行这,子进程退出
            }
            else
            {
                //父进程在这里也要关闭自己的文件描述符
                close(_stdin_fd);
                close(_stdout_fd);
                close(_stderr_fd);
                int status = 0;
                waitpid(pid, &status, 0);
                //程序运行异常,一定是收到了信号
                LOG(INFO) << "运行完毕, info: " << (status & 0x7F) << "\n";
                return status & 0x7f;
            }
        }
    };
}
compile_run.hpp
#pragma once
#include <iostream>
#include <jsoncpp/json/json.h>
#include "../comm/util.hpp"
#include "compile.hpp"
#include "runn.hpp"
#include<string>
#include<unistd.h>

namespace ns_compile_and_run
{
    using namespace ns_log;
    using namespace ns_util;
    using namespace ns_compile;
    using namespace ns_runner;
    class CompileAndRun
    {
    public:
        static void RemoveTempFille(std::string& file_name)
        {
            //清理文件的个数是不确定的, 但是我们可以判断要删除的文件是否存在
            std::string _src = PathUtil::Src(file_name);
            if(FileUtil::IsFileExists(_src))
            {
                unlink(_src.c_str());
            }

            std::string _compiler_error = PathUtil::CompilerError(file_name);
            if(FileUtil::IsFileExists(_compiler_error))
            {
                unlink(_compiler_error.c_str());
            }

            std::string _excute = PathUtil::Exe(file_name);
            if(FileUtil::IsFileExists(_excute))
            {
                unlink(_excute.c_str());
            }

            //运行时产生的临时文件
            std::string _stdout = PathUtil::Stdout(file_name);
            if(FileUtil::IsFileExists(_stdout))
            {
                unlink(_stdout.c_str());
            }

            std::string _stderr = PathUtil::Stderr(file_name);
            if(FileUtil::IsFileExists(_stderr.c_str()))
            {
                unlink(_stderr.c_str());
            }

            std::string _stdin = PathUtil::Stdin(file_name);
            if(FileUtil::IsFileExists(_stdin))
            {
                unlink(_stdin.c_str());
            }
        }
        // code > 0:: 进程收到了信号导致异常崩溃
        // code < 0: 整个过程非运行报错(代码为空, 编译报错)
        // code == 0: 整个过程全部完成

        //信号转化成为报错的原因
        static std::string CodeToDesc(int code, const std::string& file_name)
        {
            std::string desc;
            switch(code)
            {
            case 0:
                desc = "编译运行成功";
                break;
            case -1:
                desc = "提交的代码为空";
                break;
            case -2:
                desc = "未知错误";
                break;
            case -3:
                //代码编译时发生了错误,我们把编译错误信息作为返回值
                FileUtil::ReadFile(PathUtil::CompilerError(file_name), &desc, true);
                break;
            case SIGABRT: //6
                desc = "内存超过范围";
                break;
            case SIGXCPU: //24
                desc = "CPU使用超时";
                break;
            case SIGFPE: //8
                desc = "浮点数溢出";
                break;
            default:
                desc = "未知错误: " + std::to_string(code);
                break;
            }
            return desc; //临时变量, 不能引用返回
        }


        /*****************************************
        * 拿到输入的代码 -> 写到文件 -> 编译 -> 运行 ->status signo处理
        * 输入:
        * code: 用户自己提交的代码
        * input: 用户给自己提交的代码对应的输入, 不做处理
        * cpu_limit: 时间要求
        * men_limot: 空间要求
        *
        * 输出:
        * 必填:
        * status: 状态码(代码运行情况)
        * reason: 请求结果
        *选填(比如编译失败就没有下面文件了):
        * stdout: 程序运行完的结果
        * stderr: 程序运行完的错误结果
        * in_json: {"code": "#include...", "input": "", "cpu_limit": ...}
        * out_json: {"status": "0", "reason": "", stdout":"", "stderr": ""}
        *****************************************/
        static void Start(const std::string& in_json, std::string* out_json)
        {
            //反序列化, 将拿到的in_json数据提取出来
            Json::Value in_value; //kv模型的容器
            Json::Reader reader;
            reader.parse(in_json, in_value);

            std::string code = in_value["code"].asString(); //输入代码
            std::string input = in_value["input"].asString(); //测试用例
            int cpu_limit = in_value["cpu_limit"].asInt();
            int mem_limit = in_value["mem_limit"].asInt();


            int status_code = 0;
            Json::Value out_value;
            int run_result = 0;
            std::string file_name;
            if(code.size() == 0)
            {
                status_code = -1; //代码为空
                goto END;
            }

            //形成的文件名只具有唯一性, 没有目录没有后缀
            //毫秒级时间戳+原子性递增唯一值: 来保证唯一性
            file_name = FileUtil::UniqFileName(); //形成唯一文件名
            //在这里我们想把用户输入的代码自动自入到自动创建的文件中
            //输入的代码写入文件, 形成临时src文件
            if(!FileUtil::WriteFile(PathUtil::Src(file_name), code))
            {
                status_code = -2; //未知错误
                goto END;
            }
            if(!Compiler::Compile(file_name)) //编译模块
            {
                status_code = -3; //代码编译的时候发生了错误
                goto END;
            }
            //运行时看信号, 编译时看状态码
            //run_result = Runner::Run(file_name, cpu_limit, mem_limit); //运行模块
            run_result = Runner::Run(file_name, 1, 1024*30);
            if(run_result < 0)
            {
                //属于服务器内部错误
                status_code = -2; //未知错误
                goto END;
            }
            else if(run_result > 0)
            {
                //程序运行崩溃了
                status_code = run_result;
                goto END;
            }
            else
            {
                //运行成功
                status_code = 0;
                goto END;
            }
        END:
            // status_code
            out_value["status"] = status_code;
            out_value["reason"] = CodeToDesc(status_code, file_name);//退出信号转原因, run不关心结果是否正确
            if(status_code == 0) //运行成功才有这里的选填内容
            {
                //整个过程全部成功
                std::string _stdout;
                FileUtil::ReadFile(PathUtil::Stdout(file_name), &_stdout, true); //读文件
                out_value["stdout"] = _stdout;

                std::string _stderr;
                FileUtil::ReadFile(PathUtil::Stderr(file_name), &_stderr, true); //true表示保留行分隔符,false表示不保存
                out_value["stderr"] = _stderr;
            }
            Json::StyledWriter writer;
            *out_json = writer.write(out_value);

            //RemoveTempFille(file_name); //该函数必须设计成static,删除临时文件
        }

    };
}
compile_run_server.cc
#include<iostream>
#include "compile_run.hpp"
#include "../comm/httplib.h"

using namespace ns_compile_and_run;
using namespace httplib;

// int main()
// {
//     std::string content = "hello world";
//     std::string code = "code";
//     FileUtil::WriteFile(PathUtil::Src(code), content);
//     return 0;
// }

// int main()
// {
//     //通过http 让client给我们上传一个jsoncpp
//     // in_json: {"code": "#include...", "input": "", "cpu_limit": ...}
//     // out_json: {"status": "0", "reason": "", stdout":"", "stderr": ""}
//     //通过http让client给我们上传一个json string
//     //下面的工作, 充当客户端请求的json串

//     std::string in_json;
//     Json::Value in_value;
//     in_value["code"] = R"(#include<iostream>
//         int main()
//         {
//         std::cout << "你可以看见我了" << std::endl;
//         while(1);
//         int a = 10;
//         a /= 0;
//         return 0;
//         })";
//     in_value["input"] = "";
//     in_value["cpu_limit"] = 7;
//     in_value["mem_limit"] = 1024*1024 * 30;//30MB

//     Json::FastWriter writer;
//     //Json::StyledWriter writer;
//     in_json = writer.write(in_value);

//     //std::cout << in_json << std::endl;

//     std::string out_string; //这个是将来给客户端返回的字符串
//     CompileAndRun::Start(in_json, &out_string);
//     std::cout << out_string << std::endl;
//     return 0;
// }


void Usage(std::string proc)
{
    std::cout << "Usage" << "\n\t" << proc << " prot" << std::endl;
}
// 添加网络服务
int main(int argc, char* argv[])
{
    if(argc != 2)
    {
        Usage(argv[0]);
        return 1;
    }


    // Server svr;
    // svr.Get("/hello", [](const Request& req, Response& resp){
    //     //用来进行基本测试
    //     resp.set_content("hello httplib!你好", "text/plain;charset=utf-8");
    // });


    //服务端
    Server svr;
    svr.Post("/compile_and_run", [](const Request& req, Response& resp)
    {
        //用户请求的服务正文正是我们想要的json string
        std::string in_json = req.body; //body里面是json字符串
        std::string out_json;
        if(!in_json.empty())
        {
            CompileAndRun::Start(in_json, &out_json);
            resp.set_content(out_json, "application/json;charset=utf-8");//返回字符串类型,字符格式
        }
    });

    //在这里用来测试, 我们不需要提供万战级的服务
    //svr.set_base_dir("../wwwroot"); //请求的根目录

    svr.listen("0.0.0.0", atoi(argv[1])); //启动http服务
    return 0;
}
Makefile
compile_run_server:compile_run_server.cc
	g++ -o $@ $^ -std=c++11 -ljsoncpp -lpthread
.PHONY:clean
clean:
	rm -f compile_run_server
oj_server
整体介绍
基于MVC结构的oj服务设计。本质:建立一个小型网站
1. 获取首页,用题目列表充当
2. 编辑区域页面
3. 提交判题功能(编译并运行)
M: Model,通常是和数据交互的模块,比如,对题库进行增删改查(文件版,MySQL)
V: view, 通常是拿到数据之后,要进行构建网页,渲染网页内容,展示给用户的(浏览器)
C: control, 控制器,就是我们的核心业务逻辑(比如负载均衡)
oj_model.hpp
#pragma once
//文件版本
#include<iostream>
#include<string>
#include<vector>
#include<unordered_map>
#include<cassert>
#include<fstream>
#include"../comm/util.hpp"
#include"../comm/log.hpp"


//根据题目questions_list文件, 加载到所有的题目信息到内存中
//model: 主要用来和数据交互, 对外提供访问数据的接口

namespace ns_model
{
    using namespace std;
    using namespace ns_util;
    using namespace ns_log;

    struct Question
    {
        string number; //题目编号, 唯一
        std::string title; //题目的标题
        std::string star; //难度级别
        int cpu_limit; //题目的时间要求
        int mem_limit; //题目的空间要求
        std::string desc; //题目的描述
        std::string header; //题目预设给用户在线编辑器的代码
        std::string tail; //题目的测试用例, 需要和header拼接, 形成完整代码
    };

    const std::string question_list = "./questions/questions.list";
    const std::string question_path = "./questions/";

    class Model
    {
    private:
        // 题号 : 题目细节
        unordered_map<string, Question> questions;
    public:
        Model()
        {
            assert(LoadQuestionList(question_list));
        }

        //加载配置文件: question/questions.list + 题目编号文件
        bool LoadQuestionList(const std::string& question_list)
        {
            ifstream in(question_list); //文件路径
            if(!in.is_open())
            {
                LOG(FATAL) << "加载题库失败, 请检查是否存在题库文件" << "\n";
                return false;
            }

            //文件打开成功, 按行读取文本
            std::string line;
            while(getline(in, line))
            {
                vector<string> tokens;
                StringUtil::SplitString(line, &tokens, " ");
                // 1 判断回文串 简单 1 30000 --> 切割后共5份
                if(tokens.size() != 5)
                {
                    LOG(WARNING) << "加载部分题目失败, 请检查文件格式" << "\n";
                    continue;
                }
                //切割成功
                Question q;
                q.number = tokens[0];
                q.title = tokens[1];
                q.star = tokens[2];
                q.cpu_limit = atoi(tokens[3].c_str());
                q.mem_limit = atoi(tokens[4].c_str());

                //因为question.list里面信息不足以满足Question结点, 所以有下面的代码完善
                string path = question_path;
                path += q.number; //题目路径 + 题目编号就是对应的某一个题
                path += "/"; //  ./question/number/

                //true: 原来文本中有\n就保留, 因为getline天生不保留\n
                FileUtil::ReadFile(path+"desc.txt", &(q.desc), true);
                FileUtil::ReadFile(path+"header.cpp", &(q.header), true);
                FileUtil::ReadFile(path+"tail.cpp", &(q.tail), true);

                questions.insert({q.number, q});
            }
            LOG(INFO) << "加载题库...成功" << "\n";
            in.close();
            return true;
        }

        bool GetAllQuestions(vector<Question>* out) //获取所有题目信息
        {
            if(questions.size() == 0)
            {
                LOG(ERROR) << "用户获取题库成功" << "\n";
                return false;
            }
            for(const auto& q : questions) //获取题目细节
            {
                out->push_back(q.second);
            }
            return true;
        }

        bool GetOneQuestion(const std::string& number, struct Question* q) //获取一个题目信息
        {
            const auto& iter = questions.find(number);
            if(iter == questions.end()) //没有找到
            {
                LOG(ERROR) << "用户获取题目失败, 题目编号: " << number << "\n";
                return false;
            }
            (*q) = iter->second; //找到了, 获取对应编号的题目信息
            return true;
        }
        ~Model()
        {}
    };
}
oj_view.hpp
#pragma once
#include<iostream>
#include<string>
#include<vector>
#include <ctemplate/template.h>

#include "oj_model.hpp"

namespace ns_view
{
    using namespace ns_model;
    const std::string template_path = "./template_html/"; //要渲染代码的路径

    class View
    {
    public:
        View()
        {}
        ~View()
        {}

        void AllExpandHtml(const std::vector<struct Question>& questions, std::string* html)
        {
            //题目的编号 题目的标题 题目的难度
            //推荐使用表格显示
            //1. 形成路径
            std::string src_html = template_path + "all_questions.html";

            //2.形成字典数据
            ctemplate::TemplateDictionary root("all_questions"); //"all_questions"起的字典名字
            for(const auto& q : questions)
            {
                //往字典root里面添加字字典, 因为有很多待替换的number title star 类似于->{{}, {}, ...}
                ctemplate::TemplateDictionary* sub = root.AddSectionDictionary("question_list"); //形成root字典的子字典sub
                sub->SetValue("number", q.number);
                sub->SetValue("title", q.title);
                sub->SetValue("star", q.star);
            }
            //3. 获取被渲染的网页html
            ctemplate::Template* tpl = ctemplate::Template::GetTemplate(src_html/*你要获取谁*/, ctemplate::DO_NOT_STRIP);
            //4. 开始完成渲染功能
            tpl->Expand(html, &root);
        }
        void OneExpandHtml(const struct Question& q, std::string* html)
        {
            //1. 形成路径
            std::string src_html = template_path + "one_question.html";
            ctemplate::TemplateDictionary root("one_question"); //给字典树起的名字

            //2. 形成树字典
            root.SetValue("number", q.number);
            root.SetValue("title", q.title);
            root.SetValue("star", q.star);
            root.SetValue("desc", q.desc);
            root.SetValue("pre_code"/*预设代码*/, q.header);

            //3. 获取被渲染的html
            ctemplate::Template* tpl = ctemplate::Template::GetTemplate(src_html, ctemplate::DO_NOT_STRIP);

            //4. 开始完成渲染功能
            tpl->Expand(html, &root);
        }
    };
}
oj_control.hpp
#pragma once
#include <iostream>
#include <jsoncpp/json/json.h>
#include <vector>
#include <assert.h>
#include <fstream>
#include <string>
#include <mutex>

#include "oj_model.hpp"
#include "../comm/httplib.h"
#include "oj_view.hpp"
#include "../comm/log.hpp"

namespace ns_control
{
    using namespace ns_model;
    using namespace httplib;
    using namespace ns_view;
    using namespace ns_util;
    using namespace ns_log;
    using namespace std;

    //提供服务的主机
    class Machine
    {
    public:
        std::string ip; //编译服务的ip
        int port; //编译服务的端口
        uint64_t load; //编译服务的负载
        std::mutex* mtx; //mutex是禁止拷贝的, 使用指针来完成 -->该主机可能被多个用户同时使用
    public:
        Machine()
            :ip("")
            ,port(0)
            ,load(0)
            ,mtx(nullptr)
        {}
        ~Machine()
        {}
        void IncLoad() //增加主机负载
        {
            if(mtx)
            {
                mtx->lock();
            }
            load++;
            if(mtx)
            {
                mtx->unlock();
            }
        }
        void DecLoad() //减少主机负载
        {
            if(mtx)
            {
                mtx->lock();
            }
            load--;
            if(mtx)
            {
                mtx->unlock();
            }
        }
        void ResetLoad()
        {
            if(mtx)
            {
                mtx->lock();
            }
            load = 0;
            if(mtx)
            {
                mtx->unlock();
            }
        }
        //获取主机负载
        //这个代码没有太大的意义, 只是为了统一接口
        uint64_t Load()
        {
            uint64_t _load = 0;
            if(mtx)
            {
                mtx->lock();
            }
            _load = load;
            if(mtx)
            {
                mtx->unlock();
            }
            return _load;
        }
    };

    const std::string service_machine = "./conf/service_machine.conf";
    //负载均衡模块
    class LoadBlance
    {
    private:
        //可以给我们提供编译服务的所有主机
        //每一台主机都有自己的下标, 充当当前主机的id
        std::vector<Machine> machines;

        //所有在线的主机
        std::vector<int> online;

        //所有离线主机的id
        std::vector<int> offline;

        //保证LoadBlance它的数据安全
        std::mutex mtx;

    public:
        LoadBlance() //构建对象的时候就加载好主机
        {
            LOG(INFO) << "加载" << service_machine << " 成功" << "\n";
            assert(LoadConf(service_machine));
        }
        ~LoadBlance()
        {}

        bool LoadConf(const std::string& machine_conf)
        {
            std::ifstream in(machine_conf);
            if(!in.is_open())
            {
                LOG(FATAL) << " 加载: " << machine_conf << " 失败" << "\n";
                return false;
            }

            std::string line;
            while(getline(in, line))
            {
                std::vector<std::string> tokens;
                StringUtil::SplitString(line, &tokens, ":");
                if(tokens.size() != 2)
                {
                    LOG(WARNING) << " 切分: " << line << "失败" << "\n";
                    continue;
                }
                Machine m;
                m.ip = tokens[0];
                m.port = atoi(tokens[1].c_str());
                m.load = 0;
                m.mtx = new std::mutex(); //每一个主机都有自己new后的锁

                online.push_back(machines.size()); //第几台主机
                machines.push_back(m);
            }
            in.close();
            return true;
        }

        //id: 输出型参数
        //m: 输出型参数
        //外面定义的是Machine* m = nullptr;所以这里要用二级指针
        bool SmartChoice(int* id, Machine** m)
        {
            //1. 使用选择好的主机(更新该主机的负载)
            //2. 我们需要可能离线的主机
            mtx.lock();
            //负载均衡算法
            int online_num = online.size();
            if(online_num == 0)
            {
                LOG(FATAL) << " 所有的后端编译主机已经离线, 请运维的同学尽快查看" << "\n";
                mtx.unlock(); //注意, 这里一定要解锁
                return false;
            }
            //通过遍历的方式找到负载最小的主机
            *id = online[0];
            *m = &machines[online[0]];
            uint64_t min_load = machines[online[0]].Load(); //在在线的主机里面找
            for(int i = 1; i < online_num; i++)
            {
                uint64_t curr_load = machines[online[i]].Load();
                if(min_load > curr_load)
                {
                    min_load = curr_load;
                    *id = online[i];
                    *m = &machines[online[i]];
                }
            }
            mtx.unlock();
            return true;
        }
        void OfflineMachine(int which)
        {
            mtx.lock();
            for(auto iter = online.begin(); iter != online.end(); iter++)
            {
                if(*iter == which)
                {
                    machines[which].ResetLoad(); //主机离线前先把load负载数清零
                    //要离线的主机已经找到了
                    online.erase(iter);
                    offline.push_back(which);
                    break;
                }
            }
            mtx.unlock();
        }
        void OnlineMachine()
        {
            //当所有主机都离线的时候, 我们统一上线
            mtx.lock();
            //offline的所有主机插入到online中
            online.insert(online.end(), offline.begin(), offline.end());
            offline.erase(offline.begin(), offline.end());
            mtx.unlock();
            LOG(INFO) << "所有的主机又上线了~" << "\n";
        }
        //for test
        void ShowMachines()
        {
            mtx.lock();
            std::cout << "当前在线主机列表: ";
            for(auto& id : online)
            {
                std::cout << id << " ";
            }
            std::cout << std::endl;

            std::cout << "当前离线主机列表: ";
            for(auto& id : offline)
            {
                std::cout << id << " ";
            }
            std::cout << std::endl;
            mtx.unlock();
        }
    };


    class Control
    {
    private:
        Model model_;
        View view_; //提供网页html渲染功能
        LoadBlance load_blance_; //核心负载均衡器, 上面的类
    public:
        Control()
        {}
        ~Control()
        {}
        void RecoveryMachine() //重新上线所有主机
        {
            load_blance_.OnlineMachine();
        }
        //根据题目数据构建网页
        //html: 输出型参数
        bool AllQuestions(string* html)
        {
            bool ret = true;
            vector<struct Question> all;
            if(model_.GetAllQuestions(&all))
            {
                //对获得的题目进行排序
                sort(all.begin(), all.end(), [](const struct Question& q1, const struct Question& q2){
                    return atoi(q1.number.c_str()) < atoi(q2.number.c_str());
                });
                //获取题目成功
                view_.AllExpandHtml(all, html);
            }
            else
            {
                *html = "获取题目失败, 形成题目列表失败";
                ret = false;
            }
            return ret;
        }
        bool Question(const string& number, string* html)
        {
            bool ret = true;
            struct Question q;
            if(model_.GetOneQuestion(number, &q))
            {
                //获取指定题目信息成功, 将所有的题目构建成网页
                view_.OneExpandHtml(q, html);
            }
            else
            {
                ret = false;
                *html = "指定题目: " + number + "不存在";
            }
            return ret;
        }

        //id: 100
        //code: #include...
        //input: ""
        void Judge(const std::string& number, const std::string in_json/*用户提交的代码*/, std::string* out_json)
        {
            //0. 根据题目编号, 拿到对应的题目细节
            struct Question q;
            model_.GetOneQuestion(number, &q);
            //1. in_json进行反序列化, 得到题目id,得到用户提交的代码,input
            Json::Value in_value;
            Json::Reader reader;
            reader.parse(in_json, in_value);
            std::string code = in_value["code"].asString();
            //2. 重新拼接用户代码+测试用例代码, 形成新的文件
            Json::Value compile_value;
            compile_value["input"] = in_value["input"];
            compile_value["code"] = code + "\n" + q.tail; //用户代码+测试用例代码
            compile_value["cpu_limit"] = q.cpu_limit;
            compile_value["mem_limit"] = q.mem_limit;

            Json::FastWriter writer;
            std::string compile_string = writer.write(compile_value); //序列化

            //3. 选择负载最低的主机(差错处理)
            while(true)
            {
                int id = 0;
                Machine* m = nullptr;
                if(!load_blance_.SmartChoice(&id, &m)) //选择合适的主机
                {
                    //可以接给运维人员发邮件提示检修的逻辑代码
                    LOG(INFO) << "选择主机失败, 没有用可选择的主机了" << "\n";
                    break;
                }
                //4. 然后发起http请求, 得到结果
                Client cli(m->ip, m->port);
                m->IncLoad(); //不断请求,负载增多
                LOG(INFO) << " 选择主机成功, 主机id: " << id << " 详情: " << m->ip << ":" << m->port << " 当前主机的负载是: " << m->Load() << "\n";
                if(auto res = cli.Post("/compile_and_run"/*你要请求谁*/, compile_string/*请求参数*/, "application/json;charset=utf-8"))//给选择好的主机发送数据
                {
                    //5. *out_json = 将结果赋值给out_json
                    if(res->status == 200) //OK
                    {
                        *out_json = res->body;
                        m->DecLoad(); //处理完了, 负载减小
                        break;
                    }
                    m->DecLoad();
                }
                else
                {
                    //请求失败
                    LOG(INFO) << " 当前请求的主机, 主机id: " << id << " 详情: " << m->ip << ":" << m->port << " 可能已经离线" << "\n";
                    load_blance_.OfflineMachine(id); //请求失败就把这个online的主机id放入offline中
                    load_blance_.ShowMachines(); //仅仅为了调试
                }
            }
        }
    };
}
oj_server.cc
#include"../comm/httplib.h"
#include"oj_control.hpp"

#include<iostream>
#include<string>


using namespace httplib;
using namespace ns_control;

static Control* ctrl_ptr = nullptr; //这里要设置成指针, 因为信号捕捉的缘故,Recover访问不到model对象

void Recover(int signo)
{
    ctrl_ptr->RecoveryMachine();
    std::cout << "所有主机全上线了!" << "\n";
}

int main()
{
    signal(SIGQUIT, Recover);

    //用户请求的服务路由功能
    Server svr;
    Control ctrl; //当用户请求时,调用ctrl方法
    ctrl_ptr = &ctrl;

    //获取题目列表
    svr.Get("/all_questions", [&ctrl](const Request& req, Response& resp){
        //返回一张包含所有题目的一个网页
        std::string html;

        ctrl.AllQuestions(&html); //把所有题目构建成一个网页

        resp.set_content(html, "text/html; charset=utf-8");//构建网页返回给用户
    });

    //用户要根据题目编号, 获取题目的内容
    //\d: 表示匹配数字 +: 表示匹配多个
    //questions/100 -> 正则匹配    R"()" -> 原始字符串
    svr.Get(R"(/question/(\d+))", [&ctrl](const Request& req, Response& resp){
        std::string number = req.matches[1]; //获取题目编号, 1号下标就是保存对应的"100"
        std::string html;
        ctrl.Question(number, &html);//获取一个题目

        resp.set_content(html, "text/html; charset=utf-8");
    });

    //用户提交代码, 使用我们的判题功能(1. 每道题的测试用例 2. compile_and_run)
    svr.Post(R"(/judge/(\d+))", [&ctrl](const Request& req, Response& resp){
        std::string number = req.matches[1]; //题目编号
        std::string result_json;
        ctrl.Judge(number, req.body, &result_json);
        resp.set_content(result_json, "application/json; charset=utf-8"); //返回响应
    });

    //增加页面功能
    svr.set_base_dir("./wwwroot"); //设置当前默认首页
    svr.listen("0.0.0.0", 7777); //该server绑定一个端口号
    return 0;
}
conf/service_machine.conf
127.0.0.1:7778
127.0.0.1:7779
127.0.0.1:7780
Makefile
oj_server:oj_server.cc
	g++ -o $@ $^ -std=c++11 -ljsoncpp -lpthread -lctemplate

.PHONY:clean
clean:
	rm -f oj_server
Makefile
# \: 续航符,所以@后面不要连续加

.PHONY:all
all:
	@cd compile_server;\
	make;\
	cd -;\
	cd oj_server;\
	make;\
	cd -;

.PHONY:output
output:
	@mkdir -p output/compile_server;\
	mkdir -p output/oj_server;\
	cp -rf compile_server/compile_server output/compile_server;\
	cp -rf compile_server/temp output/compile_server;\

	cp -rf oj_server/conf output/oj_server/;\
	cp -rf oj_server/lib output/oj_server/;\
	cp -rf oj_server/questions output/oj_server/;\
	cp -rf oj_server/template_html output/oj_server/;\
	cp -rf oj_server/wwwroot output/oj_server/;\
	cp -rf oj_server/oj_server output/oj_server/;

.PHONY:clean
clean:
	@cd compile_server;\
	make clean;\
	cd -;\
	cd oj_server;\
	make clean;\
	cd -;\
	rm -rf output;
前端代码
wwwroot/index.html(首页)
<!DOCTYPE html>
<html lang="en">

<head>
    <meta charset="UTF-8">
    <meta http-equiv="X-UA-Compatible" content="IE=edge">
    <meta name="viewport" content="width=device-width, initial-scale=1.0">
    <title>这是我的oj系统</title>
    <style>
        /* 起手式, 百分百保证我们的样式设置可以不受默认影响 */
        * {
            /* 消除网页的默认外边距 */
            margin: 0px;
            /* 消除网页的默认内边距 */
            padding: 0px;
        }

        html,
        body {
            width: 100%;
            height: 100%;
        }

        .container .navbar {
            width: 100%;
            height: 50px;
            background-color: black;
            /* 给父级标签设置overflow, 取消后序float带来的影响 */
            overflow: hidden;
        }

        .container .navbar a {
            /* 设置a标签是行内块元素, 允许你设置宽度 */
            display: inline-block;
            /* 设置a标签的宽度, a便签默认是行内元素, 无法设置宽度 */
            width: 80px;
            /* 设置字体颜色 */
            color: white;
            /* 设置字体的大小 */
            font-size: large;
            /* 设置文字的高度,高度和导航栏一样 */
            line-height: 50px;
            /* 去掉a标签的下划线 */
            text-decoration: none;
            /* 设置a标签的文字居中 */
            text-align: center;
        }
        /* 设置鼠标事件 */
        .container .navbar a:hover {
            background-color: green;
        }
        .container .navbar .login{
            float: right;
        }

        .container .content {
            /* 设置标签的宽度 */
            width: 800px;
            /* 用来调试 */
            /* background-color: #ccc; */
            /* 整体居中 */
            margin: 0px auto;
            /* 设置文字居中 */
            text-align: center;
            /* 设置上外边距 */
            margin-top: 200px;
        }

        .container .content .font_ {
            /* 设置标签为块级元素, 独占一行, 可以设置高度宽度等属性 */
            display: block;
            /* 设置每个文字的上边距 */
            margin-top: 20px;
            /* 去掉a标签的下划线 */
            text-decoration: none;
            /* 设置字体大小
            font-size: larger; */
        }
    </style>
</head>

<body>
    <div class="container">
        <!-- 导航栏 功能不实现-->
        <div class="navbar">
            <a href="/">首页</a>
            <a href="/all_questions">题库</a>
            <!-- <a href="#">题库</a> -->
            <a href="#">竞赛</a>
            <a href="#">讨论</a>
            <a href="#">求职</a>
            <a class="login" href="#">登录</a>
        </div>
        <!-- 网页的内容 -->
        <div class="content">
            <h1 class="font_">欢迎来到我的OnlineJudge平台</h1>
            <p class="font_">这个是我独立开发的oj在线平台</p>
            <a class="font_" href="/all_questions">点击我开始编程啦</a>
        </div>
    </div>
</body>

</html>
template_html/all_questions.html
<!DOCTYPE html>
<html lang="en">
<head>
    <meta charset="UTF-8">
    <meta http-equiv="X-UA-Compatible" content="IE=edge">
    <meta name="viewport" content="width=device-width, initial-scale=1.0">
    <title>在线OJ-题目列表</title>
    <style>
        /* 起手式, 百分百保证我们的样式设置可以不受默认影响 */
        * {
            /* 消除网页的默认外边距 */
            margin: 0px;
            /* 消除网页的默认内边距 */
            padding: 0px;
        }

        html,
        body {
            width: 100%;
            height: 100%;
        }

        .container .navbar {
            width: 100%;
            height: 50px;
            background-color: black;
            /* 给父级标签设置overflow, 取消后序float带来的影响 */
            overflow: hidden;
        }

        .container .navbar a {
            /* 设置a标签是行内块元素, 允许你设置宽度 */
            display: inline-block;
            /* 设置a标签的宽度, a便签默认是行内元素, 无法设置宽度 */
            width: 80px;
            /* 设置字体颜色 */
            color: white;
            /* 设置字体的大小 */
            font-size: large;
            /* 设置文字的高度,高度和导航栏一样 */
            line-height: 50px;
            /* 去掉a标签的下划线 */
            text-decoration: none;
            /* 设置a标签的文字居中 */
            text-align: center;
        }
        /* 设置鼠标事件 */
        .container .navbar a:hover {
            background-color: green;
        }
        .container .navbar .login{
            float: right;
        }
        .container .question_list {
            padding-top: 50px;
            width: 800px;
            height: 100%;
            margin: 0px auto;
            /* background-color: #ccc; */
            text-align: center;
        }

        .container .question_list table {
            width: 100%;
            font-size:  large;
            font-family:Impact, Haettenschweiler, 'Arial Narrow Bold', sans-serif;
            margin-top: 50px;
            background-color: rgb(229, 235, 229);
        }
        .container .question_list h1 {
            color: green;
        }
        .container .question_list table .item {
            width: 100px;
            height: 40px;
            /* 5px是上下 auto是左右 */
            /* padding-top: 10px auto; */
            font-size:  large;
            font-family:'Segoe UI', Tahoma, Geneva, Verdana, sans-serif;
        }
        .container .question_list table .item a {
            /* 去掉下划线 */
            text-decoration: none;
            color: black;
        }
        .container .question_list table .item a:hover {
            color: blue;
            text-decoration: underline;
        }
        .container .footer {
            width: 100%;
            height: 50px;
            text-align: center;
            line-height: 50px;
            color: #ccc;
        }
    </style>
</head>
<body>
    <div class="container">
        <div class="navbar">
                    <!-- 导航栏 功能不实现-->
        <div class="navbar">
            <a href="/">首页</a>
            <a href="/all_questions">题库</a>
            <!-- <a href="#">题库</a> -->
            <a href="#">竞赛</a>
            <a href="#">讨论</a>
            <a href="#">求职</a>
            <a class="login" href="#">登录</a>
        </div>
        </div>
        <div class="question_list">
            <h1>OnlineJudge题目列表</h1>
            <table>
                <tr>
                    <th class="item">编号</th>
                    <th class="item">标题</th>
                    <th class="item">难度</th>
                </tr>
                <!-- 循环,需要被渲染的内容 -->
                {{#question_list}}
                <tr>
                    <td class="item">{{number}}</td>
                    <td class="item"><a href="/question/{{number}}">{{title}}</a></td>
                    <td class="item">{{star}}</td>
                </tr>
                {{/question_list}}
            </table>
        </div>
        <div class="footer">
        <h4>@暴走的橙子~</h4>
        </div>
    </div>

</body>
</html>
template_html/one_question.html
<!DOCTYPE html>
<html lang="en">

<head>
    <meta charset="UTF-8">
    <meta http-equiv="X-UA-Compatible" content="IE=edge">
    <meta name="viewport" content="width=device-width, initial-scale=1.0">
    <title>{{number}}.{{title}}</title>

    <!-- 引入ACE插件 -->
    <!-- 官网链接:https://ace.c9.io/ -->
    <!-- CDN链接:https://cdnjs.com/libraries/ace -->
    <!-- 使用介绍:https://www.iteye.com/blog/ybc77107-2296261 -->
    <!-- https://justcode.ikeepstudying.com/2016/05/ace-editor-
    %E5%9C%A8%E7%BA%BF%E4%BB%A3%E7%A0%81%E7%BC%96%E8%BE%91%E6%9E%81%E5%85%B6%E9%AB%98%E4%BA%AE/
    -->

    <!-- 引入ACE CDN -->
    <script src="https://cdnjs.cloudflare.com/ajax/libs/ace/1.2.6/ace.js" type="text/javascript"
        charset="utf-8"></script>
    <script src="https://cdnjs.cloudflare.com/ajax/libs/ace/1.2.6/ext-language_tools.js" type="text/javascript"
        charset="utf-8"></script>

    <!-- 引入jquery CDN -->
    <script src="http://code.jquery.com/jquery-2.1.1.min.js"></script>

    <style>
        * {
            margin: 0;
            padding: 0;
        }

        html,
        body {
            width: 100%;
            height: 100%;
        }

        div .ace_editor {
            width: 100%;
            height: 600px;
        }

        .container .navbar {
            width: 100%;
            height: 50px;
            background-color: black;
            /* 给父级标签设置overflow, 取消后序float带来的影响 */
            overflow: hidden;
        }

        .container .navbar a {
            /* 设置a标签是行内块元素, 允许你设置宽度 */
            display: inline-block;
            /* 设置a标签的宽度, a便签默认是行内元素, 无法设置宽度 */
            width: 80px;
            /* 设置字体颜色 */
            color: white;
            /* 设置字体的大小 */
            font-size: large;
            /* 设置文字的高度,高度和导航栏一样 */
            line-height: 50px;
            /* 去掉a标签的下划线 */
            text-decoration: none;
            /* 设置a标签的文字居中 */
            text-align: center;
        }

        /* 设置鼠标事件 */
        .container .navbar a:hover {
            background-color: green;
        }

        .container .navbar .login {
            float: right;
        }

        .container .part1 {
            width: 100%;
            height: 600px;
            overflow: hidden;
        }

        .container .part1 .left_desc {
            width: 50%;
            height: 550px;
            float: left;
            /* 添加滑动滑轮 */
            overflow: scroll;
        }

        .container .part1 .left_desc h3 {
            padding-top: 10px;
            padding-left: 10px;
        }

        .container .part1 .left_desc pre {
            padding-top: 10px;
            padding-left: 10px;
            font-size: large;
            font-family: 'Courier New', Courier, monospace;
            color: black;
        }

        .container .part1 .right_code {
            width: 50%;
            float: right;
        }

        .container .part1 .right_code .ace_editor {
            height: 550px;
        }

        .container .part2 {
            width: 100%;
            overflow: hidden;
        }

        .container .part2 .result {
            width: 300px;
            float: left;
        }

        .container .part2 .bt-submit {
            width: 80px;
            height: 50px;
            font-size: large;
            float: right;
            background-color: #26bb9c;
            color: #FFF;
            /* 给按钮带上圆角 */
            border-radius: 0.5pc;
            border: none;
            /* 设置上边距 */
            margin-top: 10px;
            /* 设置右边距 */
            margin-right: 10px;
        }

        /* 鼠标放上有颜色反应 */
        .container .part2 button:hover {
            color: green;
        }
        .container .part2 .result {
            margin-top: 15px;
            margin-left: 15px;
        }
        .container .part2 .result pre {
            font-size: large;
        }
    </style>
</head>

<body>
    <div class="container">
        <!-- 导航栏 功能不实现-->
        <div class="navbar">
            <a href="/">首页</a>
            <a href="/all_questions">题库</a>
            <!-- <a href="#">题库</a> -->
            <a href="#">竞赛</a>
            <a href="#">讨论</a>
            <a href="#">求职</a>
            <a class="login" href="#">登录</a>
        </div>
        <!-- 左右呈现, 题目描述和预设代码 -->
        <div class="part1">
            <div class="left_desc">
                <h3><span id="number">{{number}}</span>.{{title}}_{{star}}</h3>
                <pre>{{desc}}</pre>
            </div>
            <div class="right_code">
                <pre id="code" class="ace_editor"><textarea class="ace_text-input">{{pre_code}}</textarea></pre>
            </div>
        </div>
        <!-- 提交得到结果, 并显示 -->
        <div class="part2">
            <div class="result"></div>
            <button class="bt-submit" onclick="submit()">提交代码</button>
        </div>
    </div>
    <div class="navbar">

    </div>

    <!-- ace要的标签
    <div>
        <!-- pre_code替换自己的代码 -->
    <!-- <button class="bt" onclick="submit()">提交代码</button><br />
    </div> -->

    <script>
        //初始化对象
        editor = ace.edit("code");
        //设置风格和语言(更多风格和语言,请到github上相应目录查看)
        // 主题大全:http://www.manongjc.com/detail/25-cfpdrwkkivkikmk.html
        editor.setTheme("ace/theme/monokai");
        editor.session.setMode("ace/mode/c_cpp");
        // 字体大小
        editor.setFontSize(16);
        // 设置默认制表符的大小:
        editor.getSession().setTabSize(4);
        // 设置只读(true时只读,用于展示代码)
        editor.setReadOnly(false);
        // 启用提示菜单
        ace.require("ace/ext/language_tools");
        ditor.setOptions({
            enableBasicAutocompletion: true,
            enableSnippets: true,
            enableLiveAutocompletion: true
        });
        function submit() {
            // alert("嘿嘿!");
            // 1. 收集当前页面的有关数据, 1. 题号 2.代码
            // console.log("哈哈~");
            var code = editor.getSession().getValue();
            // console.log(code);
            var number = $(".container .part1 .left_desc h3 #number").text();
            // console.log(number);
            var judge_url = "/judge/" + number;
            console.log(judge_url);
            // 2. 构建json,并通过ajax后台发起基于http的json字符串请求
            $.ajax ({
                method: 'Post', //向后端发起请求的方式
                url: judge_url, //向后端指定的url发起请求
                dataType: 'json', //告知服务端我需要什么格式
                contentType: 'application/json;charset=utf-8', //告知server, 我给你的是什么格式
                data: JSON.stringify({
                    'code': code,
                    'input': ''
                }),
                success: function(data){
                    //成功得到结果
                    // console.log(data);
                    show_result(data);
                }
            });
            // 3. 得到结果,解析并显示到 result中
            function show_result(data)
            {
                // console.log(data.status);
                // console.log(data.reason);
                //拿到result结果标签
                var result_div = $(".container .part2 .result");

                //清空上一次的运行结果
                result_div.empty();
                //首先拿到结果的状态码和原因结果
                var _status = data.status;
                var _reason = data.reason;
                var reason_lable = $("<p>", {
                        text: _reason
                    });
                reason_lable.appendTo(result_div);
                if(status == 0)
                {
                    //请求是成功的, 编译运行过程没出问题, 但是结果是否通过看测试用例的结果
                    var _stdout = data.stdout;
                    var _stderr = data._stderr;

                    var stdout_lable = $("<pre>", {
                        text: _stdout
                    });
                    var stderr_lable = $("<pre>", {
                        text: _stderr
                    });
                    stdout_lable.appendTo(result_div);
                    stderr_lable.appendTo(result_div);
                }
                else
                {
                    //编译运行出错,donothing
                }
            }
        }
    </script>
</body>

</html>
项目补充
项目中我们还借助了开源库:boost库、cpp-httplib库、cppjson库、ctemplate网络渲染库...
关于这些库的安装属于环境搭建问题,在后面博客中博主再介绍这些库如何安装以及基本使用。盆友们可以自己百度查找相应的安装方法~
注意:关于使用cpp-httplib库是,编译时一定要检查自己gcc/g++的版本,最好是版本7以上的,这是一个坑的地方,否则代码就会出现编译错误或者运行时报错。
项目演示
首页

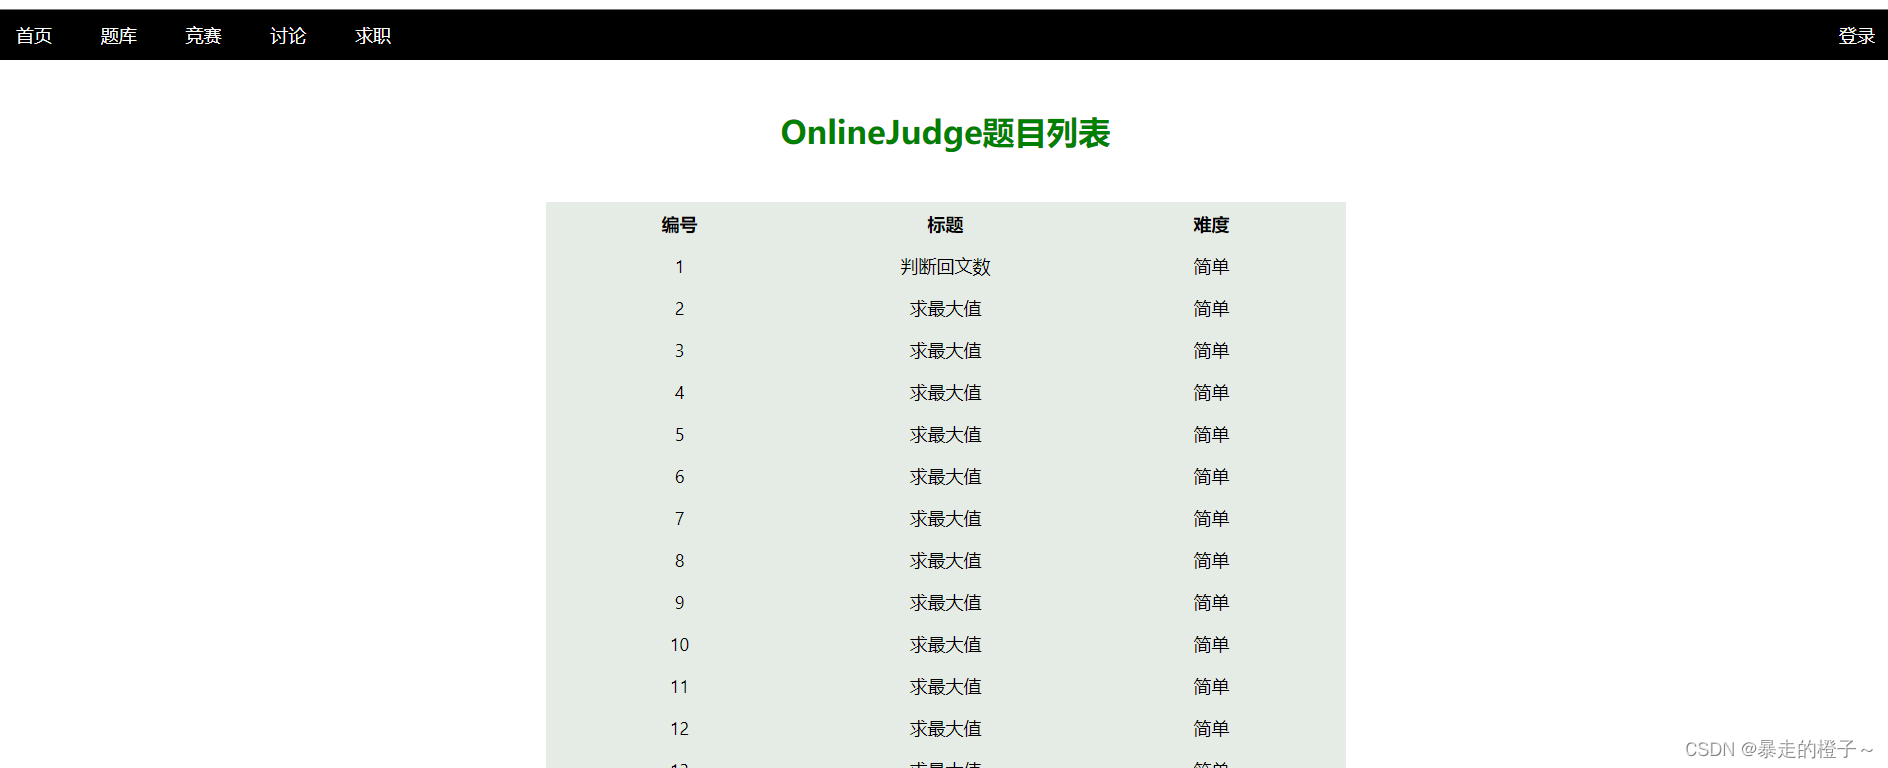
题目列表
做题页面
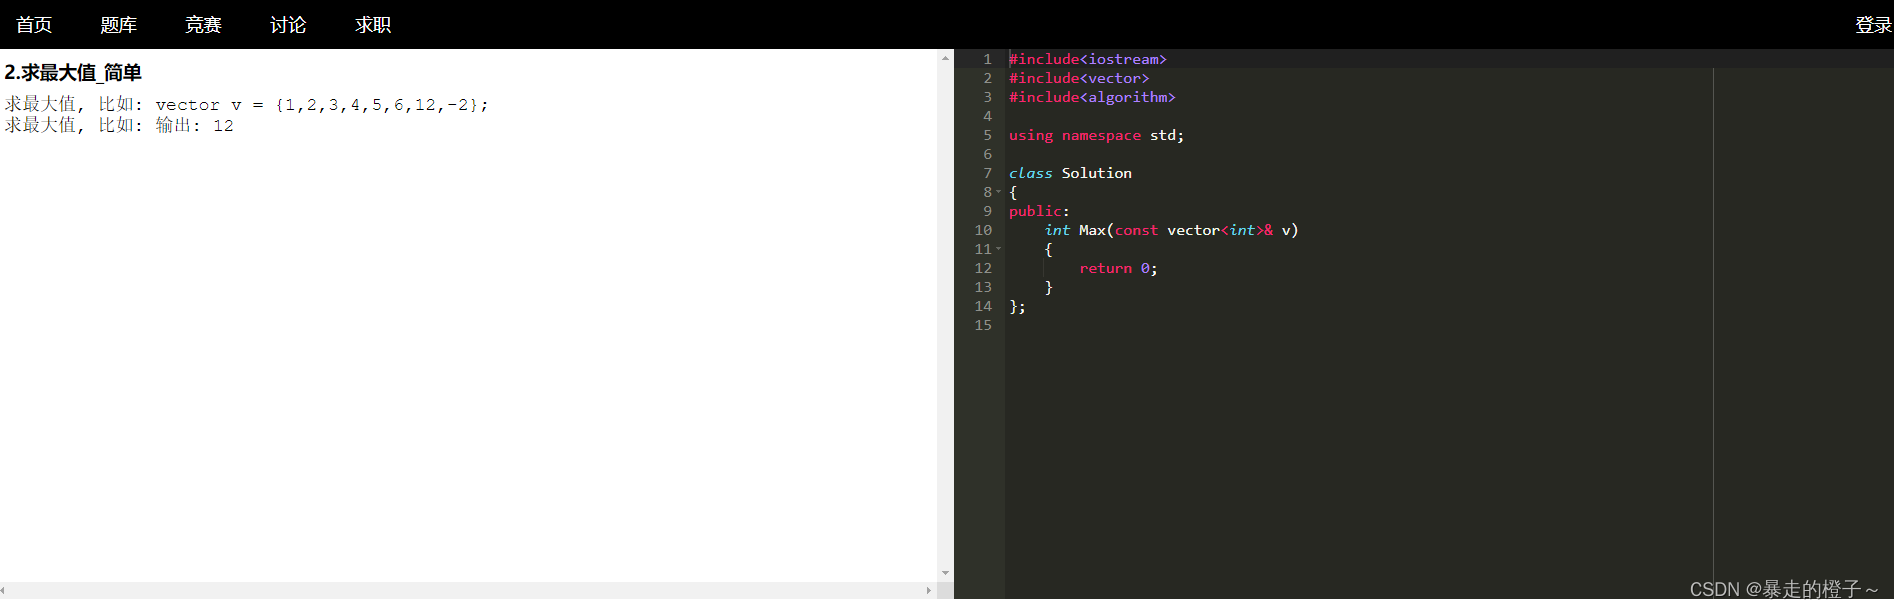
判题功能
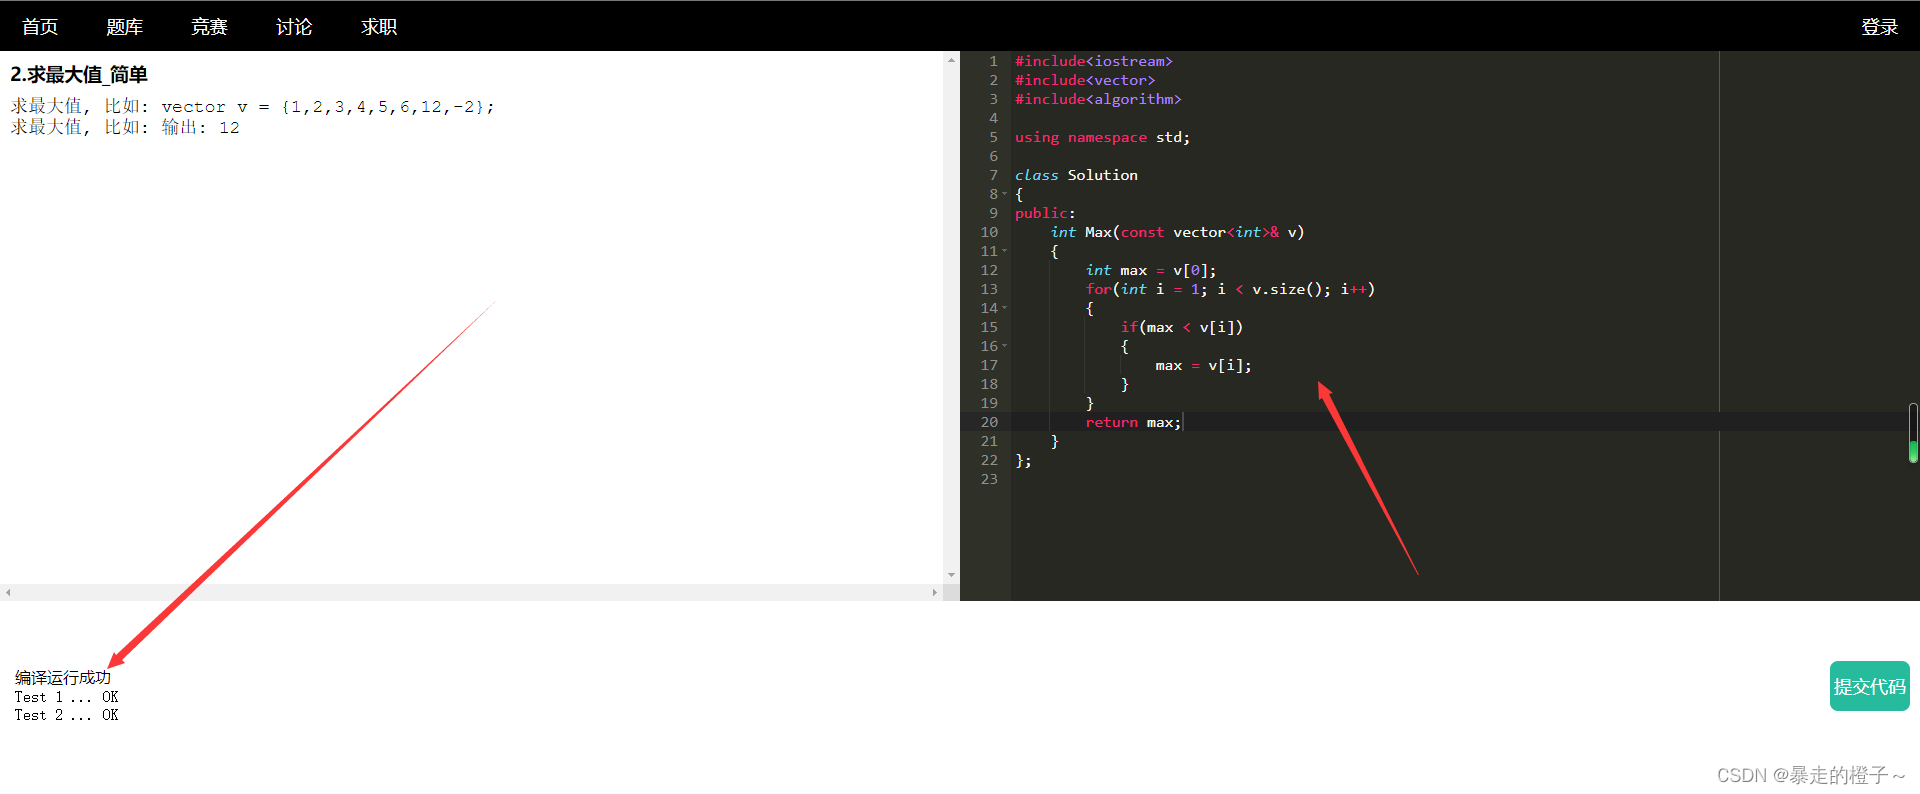
关于题库方面设计,博主做得不够完善,但是今天我们的重点不是在这,而是项目的整体设计结构,所以盆友们不要喷我~
负载均衡测试
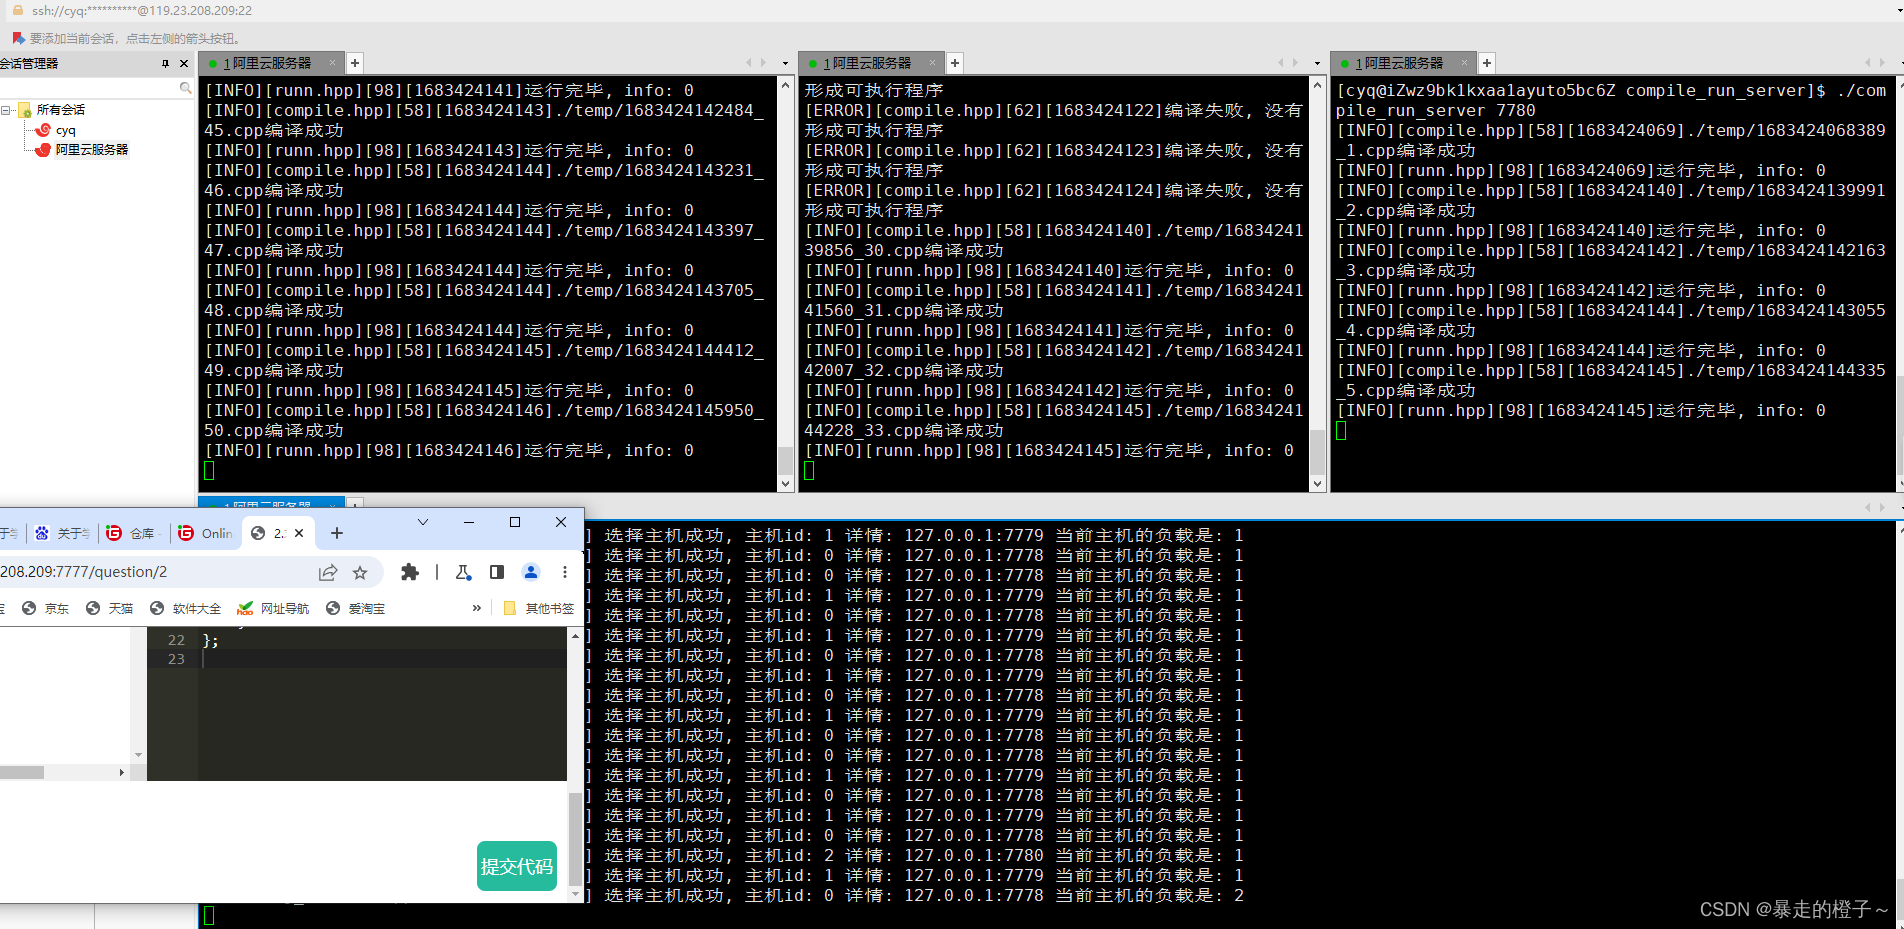
我们在客户端连续点击提交代码,这时候产生大量数据,这时候我们发现请求能够较为均匀的分配给后台主机进行处理。
OJ链接:http://119.23.208.209:7777/
看到这里,给博主点个赞吧~


![Mac电脑配置李沐深度学习环境[pytorch版本]使用vscode](https://img-blog.csdnimg.cn/0d6b06cc705442afa2290ef104e56e8a.png)