Dockerfile创建镜像并上传到Docker Hub
- 1. Dockerfile
- 1.1 准备文件
- 1.2 构建镜像
- 2. 上传docker hub
- 参考
1. Dockerfile
通过Dockerfile构建镜像
1.1 准备文件
-
在某个空文件夹(假设名为test)下编写Dockerfile文件
# 声明使用哪个基础镜像 FROM ubuntu:20.04 # 声明该镜像的维护者 MAINTAINER wh # 修改镜像中当前工作目录 WORKDIR /media # 在镜像中执行命令 RUN apt update \ && apt install python -y RUN touch 123.txt # 将Dockerfile所在文件夹中的123.txt # 拷贝到镜像/media中,重命名为456.txt COPY 123.txt ./456.txt # 查看一些信息 RUN python --version RUN pwd -
创建
123.txt,其中包含Hello world!
1.2 构建镜像
cd test
sudo docker build -f Dockerfile -t t:0.1 .
输出,(在拉取ubuntu镜像和安装python时会有其他输出,下面是已下载完之后构建镜像时的输出)
Sending build context to Docker daemon  3.072kB
Step 1/8 : FROM ubuntu:20.04
 ---> d5447fc01ae6
Step 2/8 : MAINTAINER wh
 ---> Using cache
 ---> 2e4af756d4ad
Step 3/8 : WORKDIR /media
 ---> Using cache
 ---> a5211ddd26c0
Step 4/8 : RUN apt update     && apt install python -y
 ---> Using cache
 ---> a49ce33d6b8b
Step 5/8 : RUN touch 123.txt
 ---> Using cache
 ---> 6013b73f3452
Step 6/8 : COPY 123.txt ./456.txt
 ---> Using cache
 ---> 401fae70f5d5
Step 7/8 : RUN python --version
 ---> Using cache
 ---> a0cead0f2cd9
Step 8/8 : RUN pwd
 ---> Using cache
 ---> 9d5a6e529f3a
Successfully built 9d5a6e529f3a
Successfully tagged t:0.1
查看镜像
sudo docker images
输出
REPOSITORY   TAG       IMAGE ID       CREATED          SIZE
t            0.1       9d5a6e529f3a   20 minutes ago   150MB
ubuntu       20.04     d5447fc01ae6   7 weeks ago      72.8MB
进入镜像
sudo docker run -it t:0.1 bash
2. 上传docker hub
-
注册账号
https://hub.docker.com/
-
本地登录账号。我的用户名是a171232886,注意进行替换
sudo docker login -u 用户名Your password will be stored unencrypted in /root/.docker/config.json.
-
修改镜像的repository,防止和其他用户的冲突
sudo docker tag t:0.1 a171232886/test:0.1
sudo docker images
输出
REPOSITORY TAG IMAGE ID CREATED SIZE t 0.1 9d5a6e529f3a 44 minutes ago 150MB a171232886/test 0.1 9d5a6e529f3a 44 minutes ago 150MB ubuntu 20.04 d5447fc01ae6 7 weeks ago 72.8MB -
在Docker Hub中创建自己的repository
可选pubilc还是private,只是private只能有一个

-
上传镜像
sudo docker push a171232886/test:0.1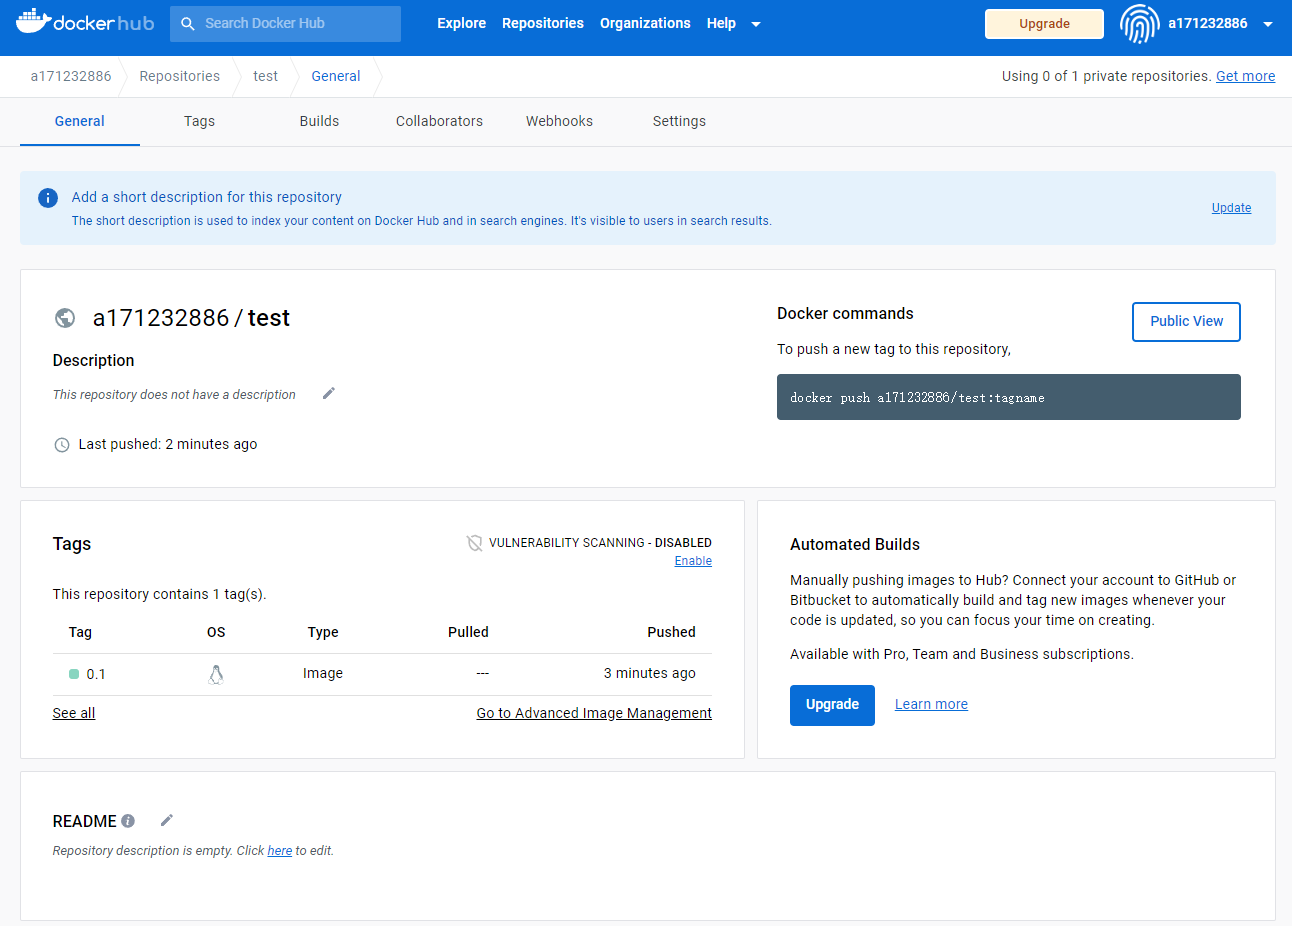
-
拉去镜像到本地
sudo docker pull a171232886/test:0.1
参考
- https://docs.docker.com/engine/reference/builder/





![[论文笔记]A ConvNet for the 2020s](https://img-blog.csdnimg.cn/434abf6df16e4b1dba1cbcd668ce8ca8.png)


