工院喵开发小结
这是一篇关于uniapp新手写微信小程序的收获和踩坑总结。
目录
- 工院喵开发小结
- 一、架构
- 二、收获
- 1. 一些扩展组件的使用
- a. uni-ui
- b. uni-list
- c. 栅格系统
- d. uni.scss辅助样式
- e. uni-easyinput 增强输入框
- f. uni-fab悬浮按钮
- g. swiper
- 2. api管理
- 3. 页面跳转传参
- 4. 顶部标题动态设置
- 5. 垂直居中
- 6. 分割线
- 7. 组件自动注册
- 8. 自定义组件
- 9. 正则判断是否是数字
- 三、踩坑以及注意事项
- 1. ref无效
- 2. 动态style问题
- 3. fab悬浮按钮受行高影响
- 4. uni-list注意 样式无法调整
一、架构
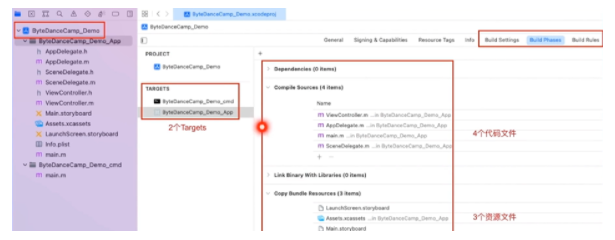
第一个uniapp程序,非常简单的结构

二、收获
1. 一些扩展组件的使用
注意点:
a. uni-ui
若要使用uni-ui组件库,可以在创建项目时就选择创建uni-ui项目(Hbuilder X)

b. uni-list
若想要快速实现一个列表展示功能,那么使用uni-list组件将会非常快:
文档:https://ext.dcloud.net.cn/plugin?id=24
可以使用插槽来自定义某一部分的内容(如下),若只是需要简单使用,那么只需要填上某些属性就可以了(查看官方文档)。
<uni-list id="cats_list" border="false" v-for="cat in cats" :key="cat.id">
	<uni-list-item clickable="true" @click="goCatDetails(cat)">
		<template v-slot:header>
			<view></view>
		</template>
		<template v-slot:body>
			<view></view>
		</template>
        <template v-slot:footer>
			<view></view>
		</template>
	</uni-list-item>
</uni-list>
| 名称 | 说明 |
|---|---|
| header | 左/上内容插槽,可完全自定义默认显示 |
| body | 中间内容插槽,可完全自定义中间内容 |
| footer | 右/下内容插槽,可完全自定义右侧内容 |
我实际使用的感受是,有点鸡肋,因为样式不能自定义(如背景颜色,高度等)。
所以我最后使用的是scroll-view + 自定义组件的方式。(具体查看后文 自定义组件)
c. 栅格系统
流式栅格系统,随着屏幕或视口分为 24 份,可以迅速简便地创建布局:
使用<uni-row></uni-row>和 <uni-col></uni-col>快速布局
官方:https://uniapp.dcloud.net.cn/component/uniui/uni-row.html
<uni-row class="cat_detail">
	<uni-col :span="12">
		<view class="teable_header uni-secondary-color">状况</view>
		<view class="table_body uni-main-color">{{ catStatus }}</view>
	</uni-col>
	<uni-col :span="12">
		<view class="teable_header uni-secondary-color">年龄</view>
		<view class="table_body uni-main-color"> {{ cat.age == null ? "未知" : cat.age }} </view>
	</uni-col>
</uni-row>
| span | Number | - | 24 | 否 | 栅格占据的列数 |
|---|---|---|---|---|---|
| offset | Number | - | - | 否 | 栅格左侧间隔格数 |
| push | Number | - | - | 否 | 栅格向右偏移格数 |
| pull | Number | - | - | 否 | 栅格向左偏移格数 |
| xs | Number/object | - | - | 否 | 屏幕宽度<768px时,要显示的栅格规则,如::xs="8"或:xs="{span: 8, pull: 4}" |
| sm | Number/object | - | - | 否 | 屏幕宽度≥768px时,要显示的栅格规则 |
| md | Number/object | - | - | 否 | 屏幕宽度≥992px时,要显示的栅格规则 |
| lg | Number/object | - | - | 否 | 屏幕宽度≥1200px时,要显示的栅格规则 |
| xl | Number/object | - | - | 否 | 屏幕宽度≥1920px时,要显示的栅格规则 |
d. uni.scss辅助样式
在uni.scss中加入:
/* 需要放到文件最上面 */
@import '@/uni_modules/uni-scss/variables.scss';

/*
 以下变量是默认值,如不需要修改可以不用给下面的变量重新赋值
 */
// 主色
$uni-primary: #2979ff;
$uni-primary-disable:mix(#fff,$uni-primary,50%);
$uni-primary-light: mix(#fff,$uni-primary,80%);

// 辅助色
// 除了主色外的场景色,需要在不同的场景中使用(例如危险色表示危险的操作)。
$uni-success: #18bc37;
$uni-success-disable:mix(#fff,$uni-success,50%);
$uni-success-light: mix(#fff,$uni-success,80%);

$uni-warning: #f3a73f;
$uni-warning-disable:mix(#fff,$uni-warning,50%);
$uni-warning-light: mix(#fff,$uni-warning,80%);

$uni-error: #e43d33;
$uni-error-disable:mix(#fff,$uni-error,50%);
$uni-error-light: mix(#fff,$uni-error,80%);

$uni-info: #8f939c;
$uni-info-disable:mix(#fff,$uni-info,50%);
$uni-info-light: mix(#fff,$uni-info,80%);

// 中性色
// 中性色用于文本、背景和边框颜色。通过运用不同的中性色,来表现层次结构。
$uni-main-color: #3a3a3a; 			// 主要文字
$uni-base-color: #6a6a6a;			// 常规文字
$uni-secondary-color: #909399;	// 次要文字
$uni-extra-color: #c7c7c7;			// 辅助说明

// 边框颜色
$uni-border-1: #F0F0F0;
$uni-border-2: #EDEDED;
$uni-border-3: #DCDCDC;
$uni-border-4: #B9B9B9;

// 常规色
$uni-black: #000000;
$uni-white: #ffffff;
$uni-transparent: rgba($color: #000000, $alpha: 0);

// 背景色
$uni-bg-color: #f7f7f7;

/* 水平间距 */
$uni-spacing-sm: 8px;
$uni-spacing-base: 15px;
$uni-spacing-lg: 30px;

// 阴影
$uni-shadow-sm:0 0 5px rgba($color: #d8d8d8, $alpha: 0.5);
$uni-shadow-base:0 1px 8px 1px rgba($color: #a5a5a5, $alpha: 0.2);
$uni-shadow-lg:0px 1px 10px 2px rgba($color: #a5a4a4, $alpha: 0.5);

// 蒙版
$uni-mask: rgba($color: #000000, $alpha: 0.4);
然后在App.vue的style中注册:
<style lang="scss">
	@import '@/uni_modules/uni-scss/index.scss';
</style>
使用的时候,添加类名就可以了,对应color样式:
<view class="uni-primary">主色</view>
<view class="uni-success">成功色</view>
<view class="uni-warning">警告色</view>
<view class="uni-error">错误色</view>
背景色可以在上面变量名的基础上加是 -bg,对元素快速应用background-color样式
<view class="uni-primary-bg">主色</view>
<view class="uni-success-bg">成功色</view>
<view class="uni-warning-bg">警告色</view>
<view class="uni-error-bg">错误色</view>
还有一些用法:https://uniapp.dcloud.net.cn/component/uniui/uni-sass.html
e. uni-easyinput 增强输入框
<uni-easyinput id="search_cat" class="uni-mt-5" trim="all" v-model="catName" placeholder="输入猫咪名称……"
	@iconClick="search" suffixIcon="search">
</uni-easyinput>
使用trim属性可以忽略空格,使用prefixIcon / suffixIcon 属性 ,可以自定义输入框左右侧图标。
f. uni-fab悬浮按钮
详细配置和组件体验:https://uniapp.dcloud.net.cn/component/uniui/uni-fab.html
<template>
	<view>
		<uni-fab
			:pattern="pattern"
			:content="content"
			:horizontal="horizontal"
			:vertical="vertical"
			:direction="direction"
			@trigger="trigger"
		></uni-fab>
	</view>
</template>
| 属性名 | 类型 | 默认值 | 说明 |
|---|---|---|---|
| pattern | Object | - | 可选样式配置项 |
| horizontal | String | ‘left’ | 水平对齐方式。left:左对齐,right:右对齐 |
| vertical | String | ‘bottom’ | 垂直对齐方式。bottom:下对齐,top:上对齐 |
| direction | String | ‘horizontal’ | 展开菜单显示方式。horizontal:水平显示,vertical:垂直显示 |
| popMenu | Boolean | true | 是否使用弹出菜单 |
| content | Array | - | 展开菜单内容配置项 |
事件有两个:
| 参数 | 类型 | 说明 |
|---|---|---|
| @trigger | Function | 展开菜单点击事件,返回点击信息 |
| @fabClick | Function | 悬浮按钮点击事件 |
<script>
    export default {
    	data() {
            pattern: {
        		color: '#3c3e49',
        		backgroundColor: '#fff',
            	selectedColor: '#007AFF',
        		buttonColor: '#007AFF',
    		},
    		content: [{
        		iconPath: '/static/icon/cookie_active.jpg',
        		selectedIconPath: '/static/icon/cookie_active.jpg',
        		text: '投食',
        		active: false
    		}]
        },
        methods: {
            trigger(e) {
				console.log(e)
				switch (e.index) {
					case 0:
						this.loveCats()
						break;
					default:
						break;
				}
			}
        }
    }
</script>
g. swiper
swiper不是扩展组件,而是内置的基础组件
可以很简单的实现轮播图,可以配置的属性很多,可以查看官方文档配置:
https://uniapp.dcloud.net.cn/component/swiper.html
简单示例:
<swiper :indicator-dots="true" :autoplay="true" :interval="3000" :duration="1000" current="0">
	<swiper-item v-for="(img, index) in cat.images" :key="index">
		<image class="swiper-item" :src="picurl + img" mode="aspectFit"></image>
	</swiper-item>
</swiper>
2. api管理
可以配合拦截器使用(我感觉有点鸡肋),拦截器封装请求,我们使用promise手动封装返回结果。
a. 封装请求组件
const baseUrl = 'http://xxx:xxx'; //域名或选取所有接口不变的那一部分
export const request = (options = {}) => {
	//异步封装接口,使用Promise处理异步请求
	return new Promise((resolve, reject) => {
		// 发送请求
		uni.request({
			url: baseUrl + options.url || '', //接收请求的API
			method: options.method || 'GET', //接收请求的方式,如果不传默认为GET
			data: options.data || {}, //接收请求的data,不传默认为空
			success(res) {
                // 根据自己的业务自定义
				let data = res.data
				if (data.code == 200)
					resolve(data.data)
				else
					reject(data.msg)
			},
			fail(e) {
				reject(e)
			}
		})
	})
}
b. 创建api目录管理项目需要的api,并提供index入口:

例如catAPi.js:
import { request } from "@/utils/request.js";
const url = '/catservicedemo/cat'

export default {
	getAllCats() {
		return request({
			url: url + "/all",
			method: "post",
		})
	}
}
提供index.js入口:
import catApi from "@/api/catApi"
import locationApi from "@/api/locationApi"

export default {
	catApi,
	locationApi
}
c. 在main.js中注册到Vue实例上,方便使用时调用:
import api from '@/api/index'
Vue.prototype.api = api
d. 使用
this.api.catApi.getAllCats().then(res => {
	console.log(res)
}).catch(e => {
	console.log(e)
})
3. 页面跳转传参
跳转:
uni.navigateTo({
	url: "/pages/catDetails/catDetails?cat=" + encodeURIComponent(JSON.stringify(cat)),
})
下一个页面接收:
onLoad(option) {
	this.cat = JSON.parse(decodeURIComponent(option.cat))
}
4. 顶部标题动态设置
使用uni自带api:
uni.setNavigationBarTitle({
	title: name,
})
5. 垂直居中
网上方法有很多,我是使用的这个方式:
.center {
	display: flex;
	justify-content: center;
	align-items: center;
}
6. 分割线
uni-app中没有一些html标签例如 hr 标签就没有。可以这样实现分割线:
新建一个css文件,我是在pages下新建了一个global.css,然后在App.vue的style中导入,这样这个css文件就成了全局的css。
然后在该css中写下:
.divider {
	background: #E0E3DA;
	width: 100%;
	height: 5rpx;
}
当我们需要分割线时,就可以这样写:
<view class="divider"></view>
7. 组件自动注册
uni-app的easycom组件规范,只要符合了这个规范,组件就可以不用注册,直接使用。
若不符合这个规范,就需要1. import导入组件 2. components里注册组件 3. template中使用组件
默认情况下,只要组件安装在项目的components目录下或uni_modules目录下,并符合components/组件名称/组件名称.vue目录结构。就可以不用引用、注册,直接在页面中使用。
也可以自定义easycom的路径,另见。
8. 自定义组件
由于uni-ui的uni-list无法满足我最简单的列表展示需求,所以我自定义了一个列表组件,内容非常简单:
<template>
	<view class="my-list-item" :style="{height: height,}" @click="$emit('goDetails')">
		<view class="catPhoto">
			<image :src="cat.profilePhoto" mode="aspectFit" style="height: 45px; width: 45px;border-radius: 100%;">
			</image>
		</view>
		<view class="catInfo">
			<view class="uni-main-color item_body cat_name"> {{ cat.name == null ? "未知" : cat.name }} </view>
			<view class="uni-secondary-color item_body cat_location">
				{{ cat.location.name == null ? "未知" : cat.location.name  }}
			</view>
		</view>
	</view>
</template>

<script>
	export default {
		props: [
			'height',
			'cat'
		]
	}
</script>

<style scoped>
	.catPhoto, .catInfo{
		display: inline-block;
	}
	.catInfo {
		border-bottom: 1px solid #E0E3DA;
		width: 70%;
	}

	.my-list-item {
		display: flex;
		/* justify-content: center; */
		align-items: center;
		border-bottom: ;
		padding: 0 20px;
		padding-top: 5px;
	}

	.my-list-item:active{
		background-color: #e1e1e1;
	}

	.item_body {
		margin-left: 10px;
	}

	.cat_location {
		font-size: 14px;
	}

	.cat_name {
		font-size: 16px
	}
</style>
这里让我学会了使用$emit暴露事件,复习了props传递属性。
由于uni-app easycom的组件规范,所以不用注册,可以直接使用。
<scroll-view scroll-y="true" enable-back-to-top="true" id="list">
	<view v-for="cat in cats" :key="cat.id">
		<list-item height="100%" :cat="cat" @goDetails="goCatDetails(cat)"/>
	</view>
</scroll-view>
9. 正则判断是否是数字
isNumber(num) {
    return /^[0-9]+.?[0-9]*$/.test(num)
}
三、踩坑以及注意事项
1. ref无效
像<view></view>这些内置组件是ref获取不到的,这个“坑坑”是由于这些组件不是vue组件,且和用户的代码不在同一个环境中(不在逻辑层而在视图层),获取不到。
2. 动态style问题
<view :style="test"></view>{fontSize: test.fontSize, color: test.color}
test: {
    fontSize: '80px',
        color: 'red'
}
这样写,不会生效,要这样写才可以:
<view :style="{fontSize: test.fontSize, color: test.color}"></view>
未知原因
3. fab悬浮按钮受行高影响
悬浮按钮的图标受行高的影响,会歪,去掉.container里面的行高就可以了。
4. uni-list注意 样式无法调整
除了无法调整样式,其他都还好。
