很久没有水文了,最近又得了新冠才好,学习也没什么进度,先复习下之前的组件的数据传输吧!
props传值
这个很简单就是在组件标签上转递数据,值得注意的是如果不使用v-bind:(:),转递的数据会全部认为是字符串
父组件的template
<demo :datas="datas"/>
子组件
数组写法:
props:["datas"]
对象写法
可以传的类型
String
Number
Boolean
Function
Object
Array
Symbol
props:{
     datas:{
     type:object,
     // required:true是不是必需要传值
     //defualt:function(){
     return {
     msg:"你好啊!"
     }
     }
比较特别的:validator
 "datas": {
    validator: function (value) {//传过来的value,其实也可以用computed实现一样的效果
        return value >= 0 && value <= 100;
    }
}
转递函数法(子传父)
普通的props只能用于父传子,借助函数的转递是引用转递不是值传递这一特性,我们可以让父组件用props传递一个函数给子组件去使用。
父组件
<demo :getdata="getdata"/>


methods: {
     getdata(name) {
      console.log("这是父组件的方法",name);
    },
  }
子组件
props: ["getdata"]

 methods: {
    handler() {
      this.getdata(this.name);
    },
  }

<button @click="handler">这是子组件的按钮</button>//通过按钮事件来触发
自定义事件
直接在标签里绑
适用于子传父,是事件总线的基础
自定义组件中
接收数据的一方给转递数据的组件绑定自定义事件;
<student v-on:hwk="demo" @t2="test"/>
传递数据的一方设置触发和解绑自定义事件
template:
`<button @click="sendStuentName">把学生名给app</button>`
js:
 sendStuentName(){
    this.$emit("hwk",this.name);
    this.$emit("t2");
  }
  解绑
   unbind(){
    //this.$off("hwk")单个解绑
    this.$off(["hwk","t2"]);//多个解绑用数组
    //this.$off()全部解绑
  }
用ref 来实现绑定
父组件:
<testref ref="testRef"/>
 mounted(){
   setTimeout(()=>{  this.$refs.testRef.$on("reftest",this.testRef)},3000)//.once只会触发一次
   //这里不能使用普通函数,因为普通函数this会指向调用者,setTimeout是window对象上的方法,故this指向window而不是vm,使用箭头函数this将一直指向缔造者vm
  }
子组件
this.$emit("reftest",this.msg,300,100,200);
全局总线(对于任意组件)
适用于任一组件之间的通信,可以说是结合了自定义事件和原型链的优点,
借助vue的原型是vm和vc都可以访问的,把一个组件专门用来传递数据,一般我们直接把vm作为这个中转站,我们这个类似于全局变量的就叫全局总线。
1安装全局事件总线
mian.js
new Vue({
  render: h => h(App),
 beforeCreate(){
   Vue.prototype.$bus=this;//安装全局事件总线
 },

}).$mount('#app')
转递数据的组件还是借助总线设置触发事件
<template>
  <div class="brother1">
    <h2>{{ name }}</h2>
    <button  @click="brothersendmsg">brother传参</button>
  </div>
</template>

<script>


export default {
data(){
    return {
        name:"brother1",
        datas:"brother1传参成功!"
    }
},
methods:{
    brothersendmsg(){
        this.$bus.$emit("brother",this.datas)
    }
}
}
</script>
接收数据的组件还是借助¥bus来绑定自定义事件,记得销毁组件的时候解绑事件
<template>
  <div class="broth2">
    <h2>{{ name }}</h2>
  </div>
</template>

<script>
export default {
   data(){
    return{
        name:"brother2"
    }
   },
   mounted(){
    this.$bus.$on("brother",this.showdatas);
   },
   methods:{
    showdatas(msg){
      console.log(msg);
    }
   },
   beforeDestroy(){
    this.$bus.$off("brother");//因为vm一直在,¥bus不会销毁,组件销毁后这个事件并不会自动销毁
   }
}
</script>
组件里的事件都会认为是自定义事件,若是想用vue自带的,要在事件后面加.native。
前面几个的运行截图:

消息订阅与发布
安装
·npm i pubsub-js@1.6.0
模型与事件总线差不多,但是用的第三方库,可支持跨框架使用
school.vue
  <template>
    <div class="school">
      {{ schollname}}

    </div>
  </template>
  <script>
    import pubsub from "pubsub-js"

  export default {
    // 通过父组件给子组件转递函数来实现子转递父(不支持驼峰命名法!)
    props: ["getdata"],
    mounted(){
      this.pubId= pubsub.subscribe('hello',(msgName,data)=>{//订阅hello消息,存储消息的id
        console.log("hello定义成功了",msgName,data)
      })
    },
    data(){
      return{
        name:"测试成功了",
        schollname:"湖应"
      }
    },
    beforeDestroy(){
      pubsub.unsubscribe(this.pubId)//vc销毁后,订阅被取消
    }
  };
  </script>
  <style>
  .school{
    background-color: #234;
    width:300px;
    color: yellow;
  }
  </style>
student.vue
<template>
    <div class="student">
    <h2>{{ name }}</h2>
    <h2>{{ sex }} </h2>
    <button @click="sendStuentName">开始发布消息</button>
    </div>
  </template>

  <script>
    import pubsub from 'pubsub-js';
  export default {
    props:[],
    data(){
      return{
          name:"张三丰",
          sex:"男"
      }
    },
   methods:{
    //自定义来传参数
    sendStuentName(){
      pubsub.publish("hello",666)//发布hello消息
    },

   },

  }
  </script>

  <style>
    .student {
      background-color: rgb(77, 178, 19);
      width: 300px;
      height: 100px;
    }
  </style>
运行截图:

Vuex
vuex更适合于组件共享,相比于事件总线,更加适用于大型项目,并且vuex支持内部模块化。
流程:

准备:
在不考虑内部模块化的情况下,我们一般在src文件夹下面创建store文件夹,并在这文件夹创建,index.js来存放vuex相关js代码。
提醒:
由于js执行是先预处理,所以import的语句会先执行,而我们创建store需要用到vuex的api,故vuex要先使用
Vue.use(Vuex),所以我们在index.js中引入Vuex和使用它。
state(状态)vuex用来存放普通数据的地方,类似于vm的data
getters 是用来将state的数据进行业务需求变化的地方,类似于vm的computed,在store里面代码比在vm里写computed更简洁
流程说明:
通过在实例化vm的时候将store加载上去,
vc通过this.$store.dispatch(context,value)来与Action交互,Action本质就是一个普通的object,用来处理数据的业务逻辑变化和后端的交互;
dipatch()这个api有两个形参,一个是context,这是裁剪版的store,用来调用commit这个api,将数据交给mutations去处理,也可以继续dispatch(将数据交给Actions的另一个函数去处理,提高复用性),第二个value就是传用来的数据
通过Actions的处理后,通过context.commit(state,value)数据到达了mutations这里,这里是真正修改数据的地方,通过state直接去修改数据,如果逻辑很简单,可以直接跳过,dispatch,直接commit。
这个需要用到一个插件nanoid和axios
在终端输入npm i nanoid安装
npm install axios --save
demo源码
main.js
import Vue from 'vue'
import App from './App.vue'
import store from "./store/index.js"
Vue.config.productionTip = false

new Vue({
  render: h => h(App),
  store,
}).$mount('#app')
index.js
//用于创建Vuex的store
//相应组件的动作
import Vue from "vue"
import Vuex from "vuex"
import axios from "axios"
import { nanoid } from "nanoid";


const countoption={
  namespaced:true,//命名空间开启
  actions:{
    jiaodd(context,value){
      if(context.state.sum%2){
        context.commit("JIA",value)
      }
    },
    jiawait(context,value){
      setTimeout(() => {
        context.commit("JIA",value)
      }, 500);
    }
  },
  mutations:{
    JIA(state,value){
      state.sum+=value
     },
     JIAN(state,value){
      state.sum-=value
     }
  },
  state:{
    sum:0,
    name:"hwk",
    subject:"前端",
  },
  getters:{
    bigSum(state){
      return state.sum*10
    }
  }
}

const personsoption={
  namespaced:true,
  actions:{
    addpeesonWang(context,value){
      if(value.name.indexOf("王")==0){
        context.commit("ADD_PERSON", value)
      }
      else{
        alert("添加的人必须姓王")
      }
    },
    addPersonServer(context){//与后端交互
      axios.get("https://api.uixsj.cn/hitokoto/get?type=social").then(
        Response=>{
          context.commit("ADD_PERSON",{id:nanoid(),name:Response.data})
        },
        error=>{
          alert(error.message)
        }
      )
    }
  },
  mutations:{
    ADD_PERSON(state,value){
      state.persons.unshift(value)
     }
  },
  state:{
    persons:[{id:"001",name:"张三"}]
  },
  getters:{
    firstPeronsName(state){
      return state.persons[0].name
    }
  }
}
//操作数据

//存储数据的

Vue.use(Vuex)
const store =new Vuex.Store(
    {
       modules:{
        countAbout:countoption,
        personsAbout:personsoption
       }
    }
)
export default store
count.vue
<template>
<div class="demo">
    <h1>当前求和{{ sum }}</h1>
    <h2>求和乘以10:{{ bigSum }}</h2>
    <h3>{{ name }}在学{{ subject }}</h3>
    <h2>下方组件的人数;{{ persons.length }}</h2>
<select v-model.number="n">
    <option value="1">1</option>
    <option value="2">2</option>
    <option value="3">3</option>
</select>
<button @click="add(n)">+</button>
<button @click="decrement(n)">-</button>
<button @click="odd(n)">当前为奇数再加</button>
<button @click="awaita(n)">等一等在加</button>
<hr>
</div>
</template>

<script>
import { mapState,mapGetters,mapMutations,mapActions } from 'vuex'
export default {
   name:"count",
   data(){
    return{
        n:1
    }
   },
   computed:{
    // sum(){
    //     return this.$store.state.sum
    // },
    // bigSum(){
    //     return this.$store.getters.bigSum
    // },
    ...mapState({sum:"sum",name:"name",subject:"subject",persons:"persons"}),  //借助vuex的mapState去生成computed代码,键值对都是字符串
    //...mapState(["sum","name","subject"])数组形式简写,键值是一样的
    ...mapGetters(["bigSum"])//借组vuex的mapgetters去生成computed
    // name(){
    //     return this.$store.state.name
    // },
    // subject(){
    //     return this.$store.state.subject
    // }
   },
   methods:{
    // add(){
    //  this.$store.commit("JIA",this.n)
    // },
    // decrement(){
    //  this.$store.commit("JIAN",this.n)
    // },
    ...mapMutations({add:"JIA",decrement:"JIAN"}),//用mapMutations去生成包含commit的函数,键值对都是字符串,键是VC的函数名,值是Mutations的属性名。
    ...mapActions({odd:"jiaodd",awaita:"jiawait"})//用mapMutations去生成包含dispatch的函数,键值对都是字符串。
    // odd(){
    //  if(this.$store.state.sum%2){
    //     this.$store.dispatch("jiaodd",this.n)
    //  }
    // },
    // awaita(){
    //     setTimeout(() => {
    //        this.$store.dispatch("jiawait",this.n)
    //     }, 500);
    // }
},
mounted(){

}
}
</script>

<style scoped>
   .demo button{
     margin: 10px;
   }
</style>
persons.vue
<template>
  <div>
    <h2>人员列表</h2>
    <h3>count组件的求和为{{ sum }}</h3>
    <h3>列表中第一个人的名字:{{firstPersonName}}</h3>
    <input type="text" placeholder="请输入名字。" v-model="name">
    <button @click="add">添加</button>
    <button @click="addwang">特殊的添加</button>
    <button @click="addPersonServer">向服务器请求数据</button>
    <ul>
        <li v-for="p in persons" :key="p.id">{{ p.name }}</li>
    </ul>
  </div>
</template>

<script>

import { nanoid } from 'nanoid';

export default {
name:"persons",
computed:{
  persons(){
    return this.$store.state.personsAbout.persons
  },
  sum(){
    return this.$store.state.countAbout.sum
  },
  firstPersonName(){
    return this.$store.getters["personsAbout/firstPeronsName"]
  }

},
data(){
  return{
    name:""
  }
},
methods:{
  add(){
    const person ={id:nanoid(),name:this.name}
    this.$store.commit("personsAbout/ADD_PERSON",person)
    this.name=""
  },
  addwang(){
    const person={id:nanoid(),name:this.name}
    this.$store.dispatch("personsAbout/addpeesonWang",person)
    this.name=""
  },
  addPersonServer(){
    this.$store.dispatch("personsAbout/addPersonServer")
  }
}
}
</script>

<style>
</style>
运行截图:

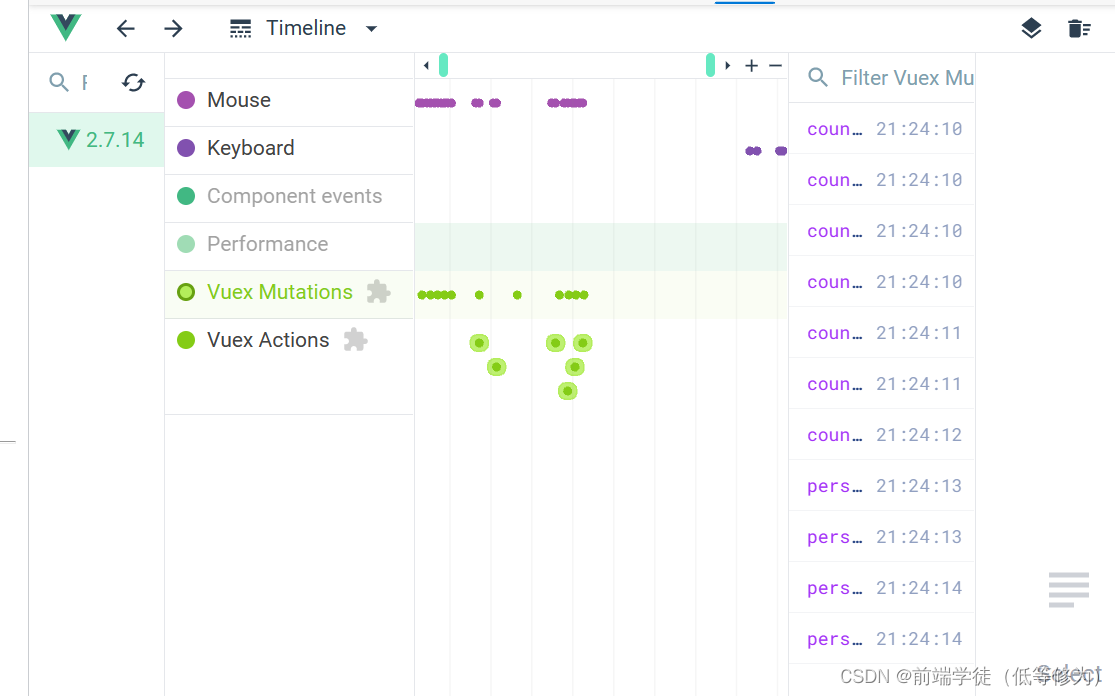
开发者工具:
