🎉call()
💕call()的参数
thisArg:在调用 func 时要使用的 this 值
arg1, …, argN (可选) 函数的参数
✨call()的描述:
首先声明 func是一个函数,person是一个对象
针对这段代码:func.call(person,‘a1’,‘a2’)
调用func方法并传递两个参数’a1’,‘a2’ ,以及把func中的this设置为person对象
🍧call()的代码解释
 function greet (a,b) {
	  console.log(this)
      console.log(this.animal, "的睡眠时间一般在", this.sleepDuration, "之间",a, b)
    }

    const obj = {
      animal: "猫",
      sleepDuration: "12 到 16 小时",
    }

    greet.call(obj, "哦", "!!!") // {animal: '猫', sleepDuration: '12 到 16 小时'}
    //猫 的睡眠时间一般在 12 到 16 小时 之间 哦 !!!
🎐 apply()
apply()和call()的差别只是传递的第一个参数之后的参数的形式不同,call()是分开写,apply是数组
func.call(person,1,2,3)
func.apply(person,[1,2,3])
所以在这里详细讲解一下call()方法的实现
apply()的实现只是在call()接受参数的时候使用剩余参数,
apply()使用一个数组,别的都一样
手写代码见本文末尾
🎡手写Call() :myCall()
❤️步骤
手写Call() 分为四步
- 定义myCall方法,加在Function原型上,使得所有函数都能点出来使用
- 设置this并调用原函数
- 接收剩余参数并返回结果
- 使用Symbol调优
🎶前置知识 this指向问题
全局执行环境中,指向全局对象window(非严格模式、严格模式)
函数内部,取决于函数被调用的方式
2.1. 直接调用的this值:
- 非严格模式:全局对象(window)
- 严格模式:undefined
2.2 对象方法调用的this值:
- 调用者
开启严格模式
- 脚本开启: ‘use strict’
- 函数内部开启:‘use strict’
- 注意:'use strict’写在代码顶端
 // ------------- 1.全局执行环境 -------------
    //  严格模式,非严格模式 全局对象(window)
    // 'use strict'
    // console.log(this)

    // ------------- 2.函数内部 -------------
    // 2.1 直接调用-非严格模式
    // function func() {
    //   console.log(this) // window
    // }
    // func()
    // 2.1 直接调用-严格模式
    // function func() {
    //   'use strict'
    //   console.log(this) // undefined
    // }
    // func()

    // 2.2 对象方法调用
    const food = {
      name: '猪脚饭',
      eat() {
        'use strict'
        console.log(this)
      }
    }
    // 非严格模式,严格模式
    food.eat() // 调用者 Object {eat: ƒ eat(),name: "猪脚饭"}
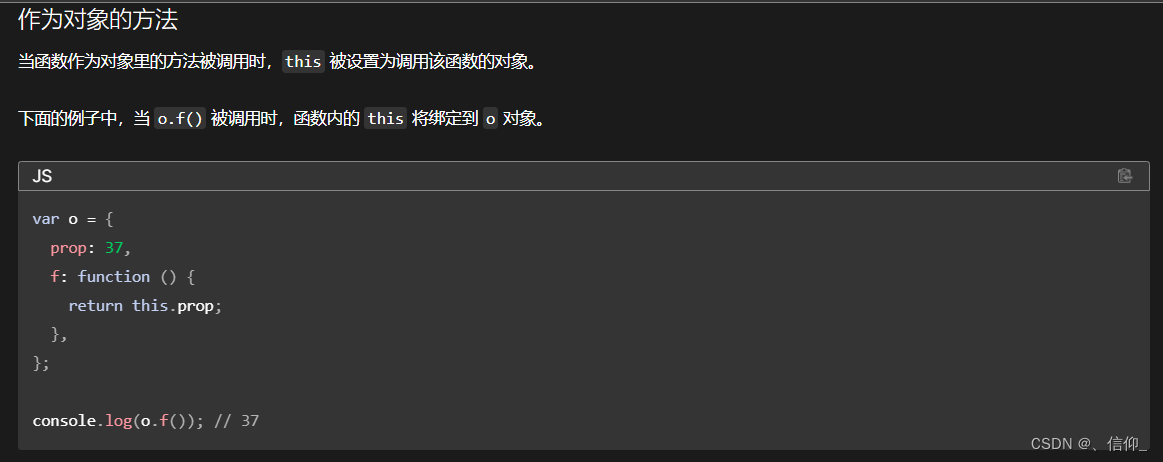
再来看一下MDN的解释 MDN地址
✨下面这点很重要
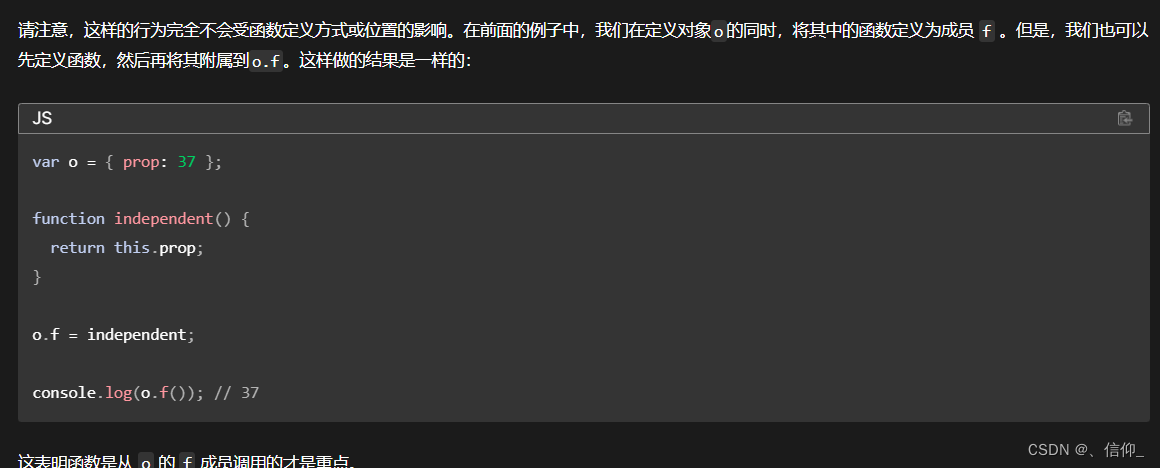
o.f() 就使得 函数 f 中的 this 指向 对象 o
先定义一个对象o,在定义一个函数independent(),然后把函数追加到对象o中和上述可以实现一样的效果
🎀第一步:定义myCall方法,加在Function原型上,使得所有函数都能点出来使用
在Function对象的原形上通过"."的方式添加myCall属性,并给这个对象赋值一个函数
  Function.prototype.myCall = function () {
      console.log("this is myCall")
    }
    function greet () { }
    greet.myCall()// this is myCall
🎶第二步:设置this并调用原函数
🎐图解

由于给person多加了一个f属性,所以后面需要使用 delete关键词 把f属性删掉
🎏代码
    Function.prototype.myCall = function (thisArg) {
      thisArg.f = this //这个this就是原函数func(因为 根据前置知识的讲解 func.mycall()使得函数myCall的this指向func )
      // ,这段代码是在person(thisArg在这里就是person)对象上面增加一个属性,属性名为f 属性值为func(){...}
      thisArg.f()//根据前置知识 f的this是thisArg,在这里f是func 这样就完成了第二步


    }
    // ------------- 测试代码 -------------
    const person = {
      name: 'zhangsan'
    }
    function func (numA, numB) {
      console.log(this)
      console.log(numA, numB)
      return numA + numB
    }
    const res = func.myCall(person) // {name: 'zhangsan', f: ƒ}
🎄第三步:接收剩余参数并返回结果
使用…args接收剩余参数,并用解构赋值的方法把参数传递给调用者
    Function.prototype.myCall = function (thisArg, ...args) {
      thisArg.f = this
      const res = thisArg.f(...args) //args=>[2,8] ...args=>2,8 把剩余参数传给func (numA=2,numB=8)
      delete thisArg.f //删除person中新加的f属性
      return res
    }


    // ------------- 测试代码 -------------
    const person = {
      name: 'zhangsan'
    }
    function func(numA, numB) {
      console.log(this) //Object{name:zhangsan}
      console.log(numA, numB) //2 8
      return numA + numB
    }
    const res = func.myCall(person, 2, 8)
    console.log('返回值为:', res) // 返回值为: 10
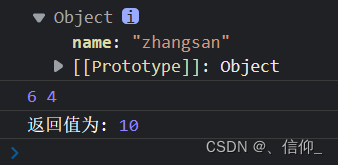
🎉 测试
    Function.prototype.myCall = function (thisArg, ...args) {
      thisArg.f = this
      const res = thisArg.f(...args)
      delete thisArg.f
      return res
    }

// ------------- 测试代码 -------------
    const student = {
      name: 'lisi'
    }
    function func2 (a, b, c) {
      console.log(this)
      console.log(a, b, c)
      return a + b + c
    }
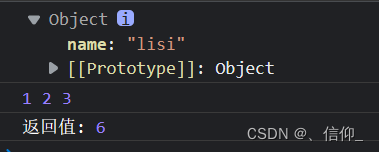
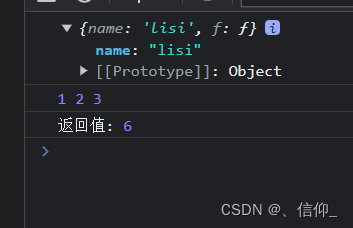
    const res2 = func2.myCall(student, 1, 2, 3)
    console.log('返回值:', res2)
✨第四步:使用Symbol调优
🎶关于Symbol
Symbol的MDN链接
symbol 是一种基本数据类型(primitive data type)。
Symbol() 函数会返回 symbol类型的值,该类型具有静态属性和静态方法。每个从 Symbol() 返回的 symbol 值都是唯一的。一个 symbol 值能作为对象属性的标识符;
🍧symbol的使用
直接使用Symbol()创建新的 symbol 类型,并用一个可选的字符串作为其描述。这个描述只是为了看着方便没有实际用处。(MDN解释:对 symbol 的描述,可用于调试但不是访问 symbol 本身。)
var sym1 = Symbol();
var sym2 = Symbol("foo");
var sym3 = Symbol("foo");
// 这三个都不相等
   Function.prototype.myCall = function (thisArg, ...args) {

      const key = Symbol('key')// 使用Symbol创建一个唯一的symbol值 作为对象的标识符
      // thisArg.key 是给thisArg对象增加一个名为字符串'key'的属性
      thisArg[key] = this //thisArg[key] 是把key作为一个变量 实际传过去的是Symbol('key')
      const res = thisArg[key](...args)//接受到原函数的返回值
      delete thisArg[key]
      return res //把原函数的返回值返回出去
    }
🎉测试
   Function.prototype.myCall = function (thisArg, ...args) {

      const key = Symbol('key')// 使用Symbol创建一个唯一的symbol值 作为对象的标识符
      // thisArg.key 是给thisArg对象增加一个名为字符串'key'的属性
      thisArg[key] = this //thisArg[key] 是把key作为一个变量 实际传过去的是Symbol('key')
      const res = thisArg[key](...args)//接受到原函数的返回值
      delete thisArg[key]
      return res //把原函数的返回值返回出去
    }
   // ------------- 测试代码 -------------
 	const student = {
      name: 'lisi'
    }
    function func2 (a, b, c) {
      console.log(this)
      console.log(a, b, c)
      return a + b + c
    }
    const res2 = func2.myCall(student, 1, 2, 3)
    console.log('返回值:', res2)
这个是谷歌浏览器的结果,谷歌这点有点显示bug
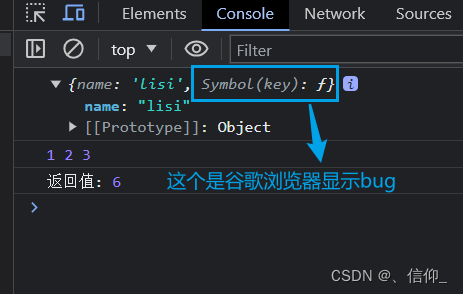
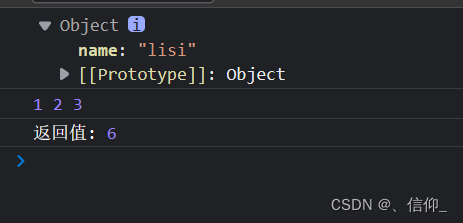
Edge就没有,下图是Edge浏览器的结果
✨手写apply() :myApply()
   Function.prototype.myApply = function (thisArg, args) {//相较于myCall() 只是 ...args=>args
      const key = Symbol('key')
      thisArg[key] = this
      const res = thisArg[key](...args)
      delete thisArg[key]
      return res
    }
    // ------------- 测试代码 -------------
    const student = {
      name: 'lisi'
    }
    function func2 (a, b, c) {
      console.log(this)
      console.log(a, b, c)
      return a + b + c
    }
    const res2 = func2.myApply(student, [1, 2, 3])
    console.log('返回值:', res2)
🎉测试
