一.vue3项目打包
vue3项目 使用vue-cli创建的,使用npm run build打包到dist
二.在服务器上安装nginx
1.去nginx的官网下载windows版本的nginx,下载地址:nginx: download
最好安装稳定版,下载完成后解压nginx压缩包:
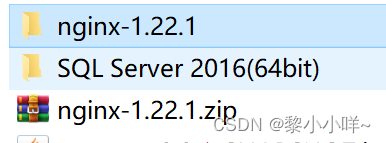
2.双击nginx.exe文件启动服务,命令窗口一闪而过就是启动完成,可以去任务管理器确认

3.在浏览器中键入:http://localhost:80,出现以下页面就是安装完成

三、修改nginx配置适应自己的环境
自己的nginx安装环境的conf目录下:C:\Users\Administrator\Desktop\ppc_pas\nginx-1.22.1\conf的nginx.conf文件,一般只用修改以下三处即可:
    server {
        listen       8886;
        server_name  localhost;

        #charset koi8-r;

        #access_log  logs/host.access.log  main;

        location / {
            root   C:\\Users\\Administrator\\Desktop\\ppc_pas\\nginx-1.22.1\\html\\static\\dist;
            index  index.html index.htm;
	try_files $uri $uri/ /index.html;
        }

      location /api/v1 {
           proxy_pass http://120.78.192.248:8888;
	rewrite "^/api/v1/(.*)$" /$1 break;
        }
1.监听端口和ip
设置自己的前端监听端口,server_name可以是localhost也可以是服务器ip地址
listen 8886;
server_name localhost;
2.前端项目放置目录
root代表项目的放置位置:新建了static目录,将前端打包好的dist放进去即可
index.html表示读取的页面
try_files是解决代码中使用history路由模式,页面刷新出现404问题
location / {
root C:\\Users\\Administrator\\Desktop\\ppc_pas\\nginx-1.22.1\\html\\static\\dist;
index index.html index.htm;
try_files $uri $uri/ /index.html;
}
3.后端代码部署位置
/api/v1表示后端接口读取的前缀
proxy_pass后端接口地址
rewrite改写前端发起请求的地址,如有http://120.78.192.248:8888/api/v1/ppc_pas/test/play更改为真正的后端接口地址http://120.78.192.248:8888/ppc_pas/test/play
location /api/v1 {
proxy_pass http://120.78.192.248:8888;
rewrite "^/api/v1/(.*)$" /$1 break;
}
四:重启nginx服务
使用 http://120.78.192.248:8886即可访问到前端项目,并反向代理到后端服务获取数据
