一、实现负载均衡🍉
1.什么是负载均衡🥝
通俗的讲, 负载均衡就是将负载(工作任务,访问请求)进行分摊到多个操作单元(服务器,组件)上进行执行。
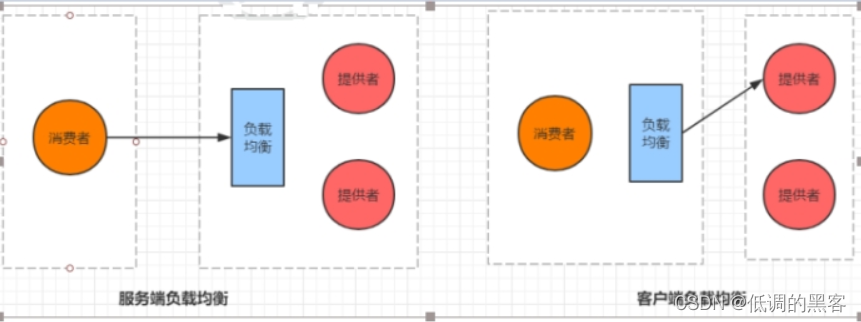
根据负载均衡发生位置的不同,一般分为服务端负载均衡和客户端负载均衡。
服务端负载均衡指的是发生在服务提供者一方,比如常见的nginx负载均衡
而客户端负载均衡指的是发生在服务请求的一方,也就是在发送请求之前已经选好了由哪个实例处理请求
2.实现负载均衡🥝
我们在微服务调用关系中一般会选择****客户端负载均衡****,也就是在服务调用的一方来决定服务由哪个提供者执行.
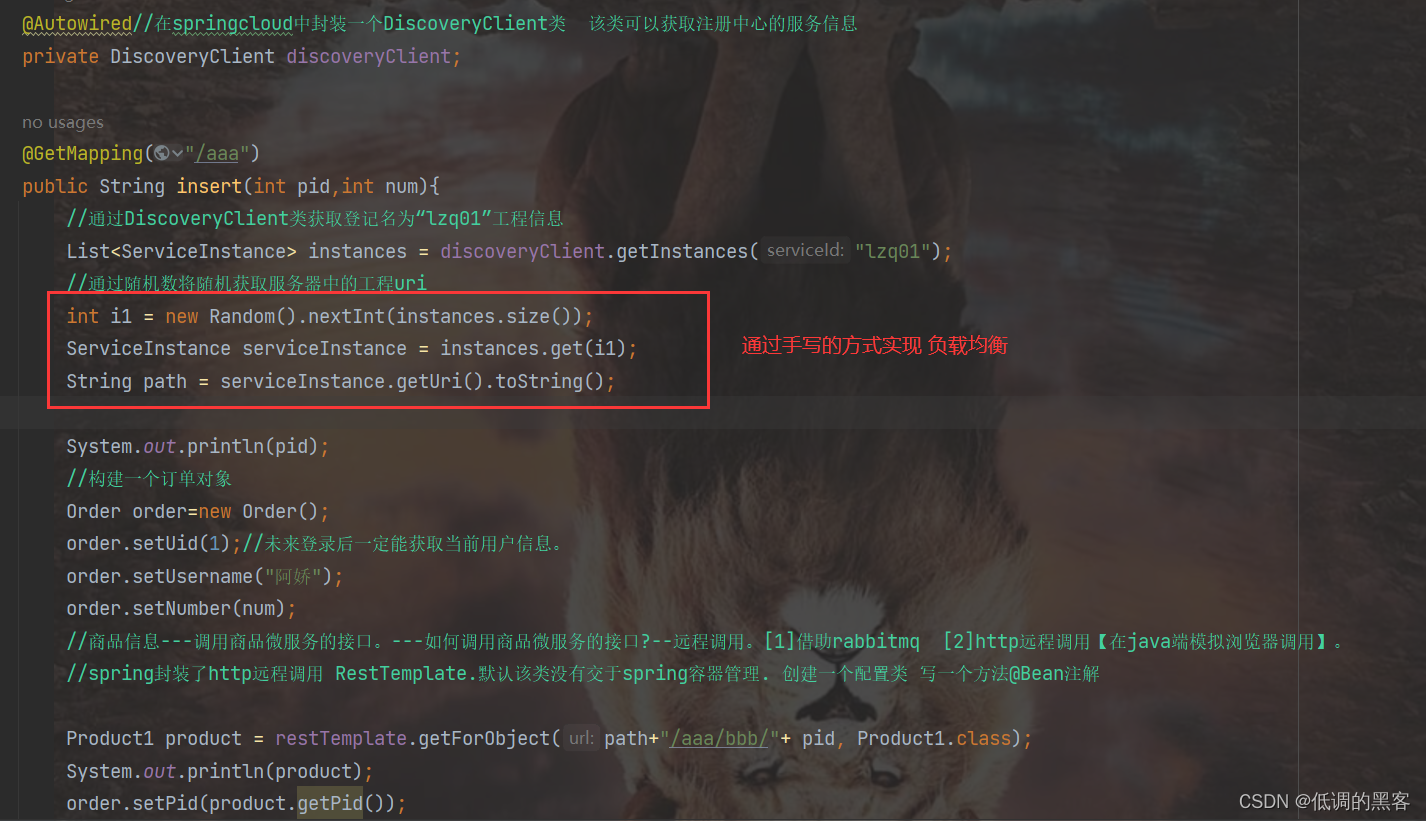
演示:—手动完成负载均衡
package com.lzq.controller;

import com.lzq.Order;
import com.lzq.Product1;
import com.lzq.service.OrderSercice;
import org.springframework.beans.factory.annotation.Autowired;
import org.springframework.cloud.client.ServiceInstance;
import org.springframework.cloud.client.discovery.DiscoveryClient;
import org.springframework.web.bind.annotation.GetMapping;
import org.springframework.web.bind.annotation.RequestMapping;
import org.springframework.web.bind.annotation.RestController;
import org.springframework.web.client.RestTemplate;

import java.util.List;
import java.util.Random;

@RestController
@RequestMapping
public class OrderController {
    @Autowired
    private OrderSercice orderSercice;
    @Autowired
    private RestTemplate restTemplate;

    @Autowired//在springcloud中封装一个DiscoveryClient类  该类可以获取注册中心的服务信息
    private DiscoveryClient discoveryClient;

    @GetMapping("/aaa")
    public String insert(int pid,int num){
        //通过DiscoveryClient类获取登记名为“lzq01”工程信息
        List<ServiceInstance> instances = discoveryClient.getInstances("lzq01");
        //通过随机数将随机获取服务器中的工程uri
        int i1 = new Random().nextInt(instances.size());
        ServiceInstance serviceInstance = instances.get(i1);
        String path = serviceInstance.getUri().toString();

        System.out.println(pid);
        //构建一个订单对象
        Order order=new Order();
        order.setUid(1);//未来登录后一定能获取当前用户信息。
        order.setUsername("阿娇");
        order.setNumber(num);
        //商品信息---调用商品微服务的接口。---如何调用商品微服务的接口?--远程调用。[1]借助rabbitmq  [2]http远程调用【在java端模拟浏览器调用】。
        //spring封装了http远程调用 RestTemplate.默认该类没有交于spring容器管理. 创建一个配置类 写一个方法@Bean注解

        Product1 product = restTemplate.getForObject(path+"/aaa/bbb/"+ pid, Product1.class);
        System.out.println(product);
        order.setPid(product.getPid());
        order.setPname(product.getPname());
        order.setPprice(product.getPprice());

        int i=orderSercice.inset(order);
        return i>0?"下单成功":"下单失败";
    }
}
上面通过手动完成了负载均衡的调用,存在的问题: 它采用的随机负载均衡,如何我想使用轮询负载均衡策略。只能修改源代码。耦合。—springcloud提供了一个组件–可以灵活的完成负载均衡。–ribbon
3.基于Ribbon实现负载均衡-----组件🥝
什么是ribbon?🍓
Spring Cloud Ribbon是一个基于HTTP和TCP的客户端负载均衡工具,它基于Netflix Ribbon实现,通过Spring Cloud的封装,可以让我们轻松地将面向服务的Rest模板请求自动转换成客户端负载均衡的服务调用。
Ribbon只具有负载均衡的能力,并不具有发送请求的能力。所以,需要配合服务通信组件,如:RestTemplate
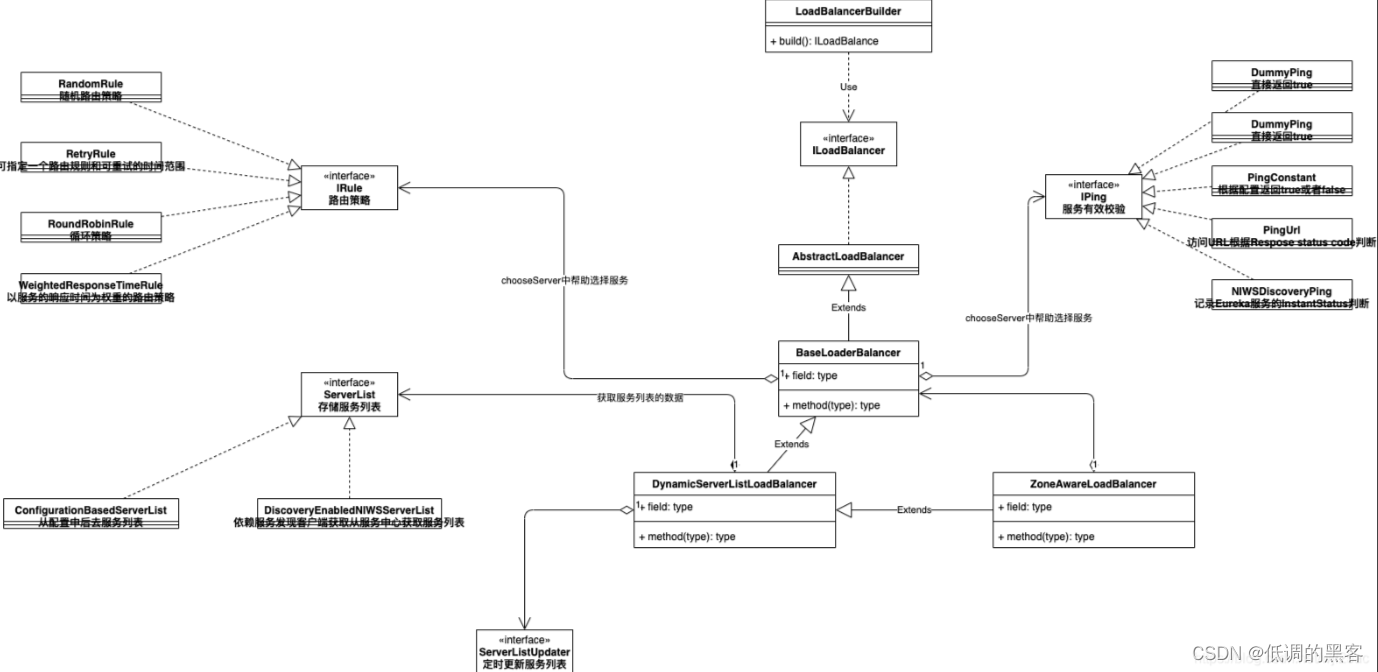
- ILoadBalancer:负载均衡器。
- LoadBalancerBuilder: 负载均衡器构造器
- ServerList: 服务列表
- ServerListUpdater: 定时更新的服务列表
- IRule: 路由策略
- IPing: 服务嗅探工具
快速使用🍓
(1)告诉restTemplate使用ribbon完成负载均衡

package com.lzq;


import org.springframework.boot.SpringApplication;
import org.springframework.boot.autoconfigure.SpringBootApplication;
import org.springframework.cloud.client.loadbalancer.LoadBalanced;
import org.springframework.cloud.openfeign.EnableFeignClients;
import org.springframework.context.annotation.Bean;
import org.springframework.web.client.RestTemplate;

@SpringBootApplication
@EnableFeignClients//开启openfeign注解驱动
public class Qy165Lzq03Application {

    public static void main(String[] args) {
        SpringApplication.run(Qy165Lzq03Application.class, args);

    }

    @Bean
    @LoadBalanced//告诉restTemplate使用ribbon作为负载均衡器
    public RestTemplate aaa(){
        RestTemplate restTemplate = new RestTemplate();
        return restTemplate;
    }

}
(2)修改controller
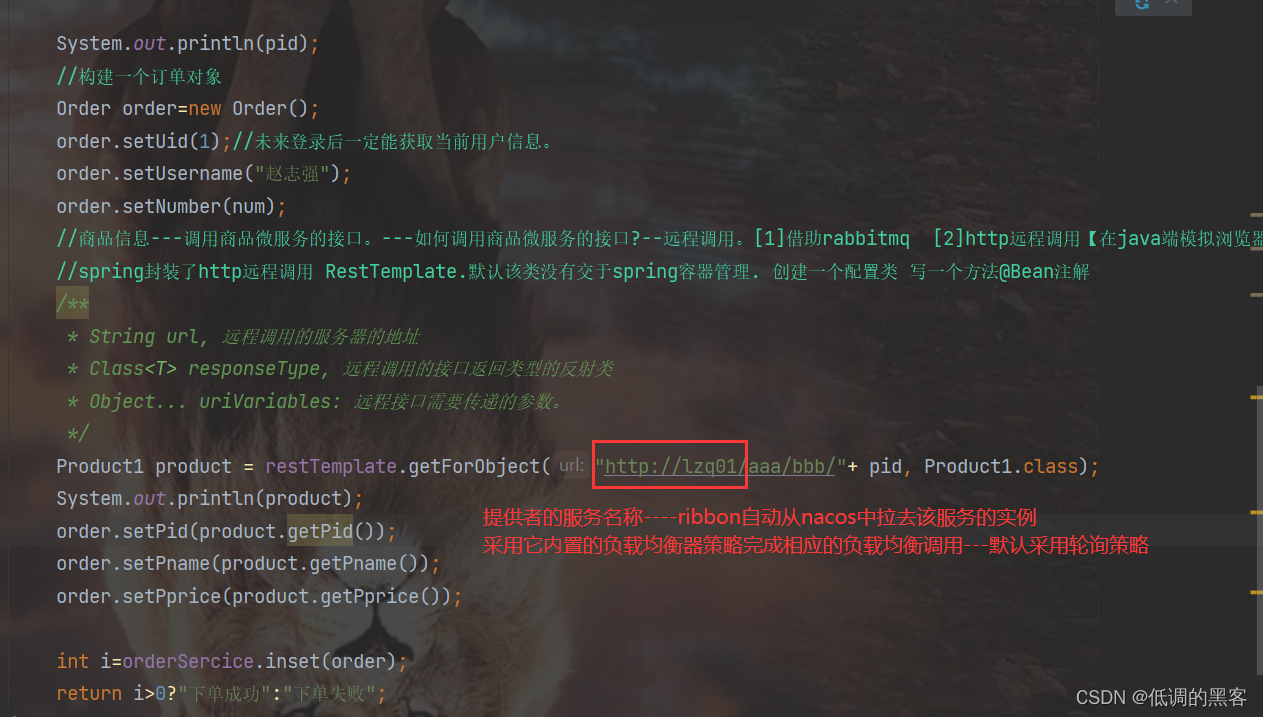
ribbon提供哪些负载均衡策略🍓
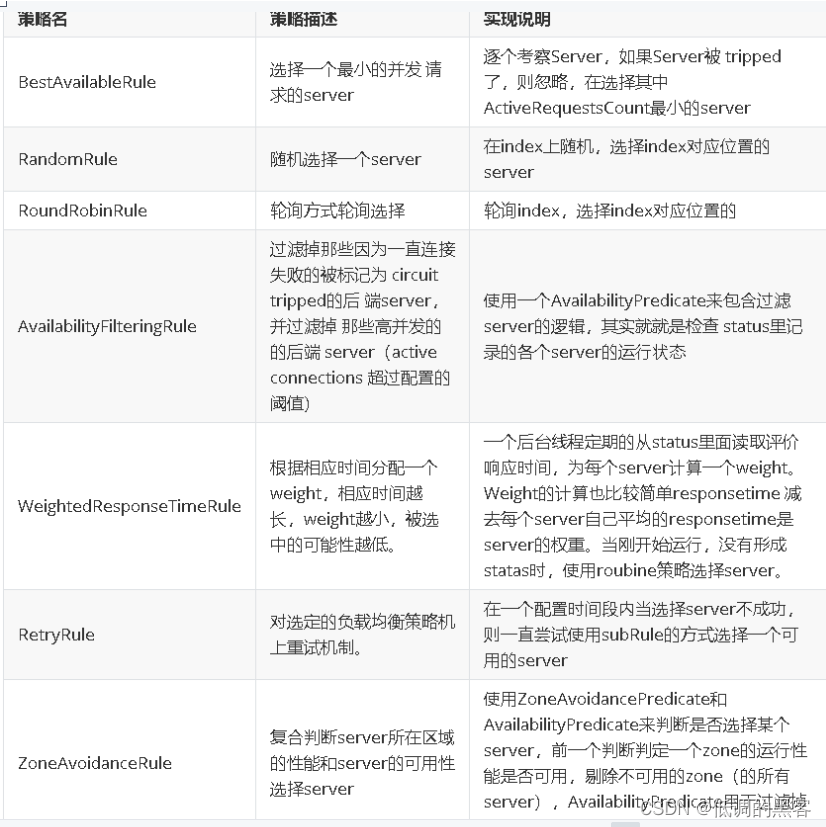
上面是ribbon内置的负载均衡策略,你也可以自定义负载均衡。
如何改变ribbon的负载均衡策略呢?—修改配置文件

#修改ribbon中的负载均衡策略为随机策略
lzq01.ribbn.NFLoadBalancerRuleClassName=com.netflix.loadbalancer.RandomRule

二、openfeign完成服务调用🍉
resttemplate在完成服务调用时存在什么不好的。
当微服务项目存在大量的服务起始,我们使用restTemplate 会调用大量的IP接口这样使用起来会很麻烦

我们的编写程序的习惯: controller—server—dao
controller注入一个service对象—调用该对象中的方法并传递参数----返回结果交于controller层。
而openfeign它就可以完成我们编程的调用风格。
1.什么是OpenFeign🥝
OpenFeign是Spring Cloud提供的一个声明式的伪Http客户端, 它使得调用远程服务就像调用本地方法一样简单, 只需要创建一个接口并添加一个注解即可。
Nacos很好的兼容了OpenFeign, OpenFeign负载均衡默认集成了 Ribbon, 所以在Nacos下使用OpenFeign默认就实现了负载均衡的效果。
2.完成openfeign的调用🥝
(1)依赖🍓

    <!--openfeign依赖-->
        <dependency>
            <groupId>org.springframework.cloud</groupId>
            <artifactId>spring-cloud-starter-openfeign</artifactId>
        </dependency>
(2)创建openfeign接口🍓

package com.lzq.feign;

import com.lzq.Product1;
import org.springframework.cloud.openfeign.FeignClient;
import org.springframework.web.bind.annotation.GetMapping;
import org.springframework.web.bind.annotation.PathVariable;

@FeignClient(value = "lzq01")
public interface ProductFeign {
    //接口的方法  必须和被调用者的接口的参数一致
    @GetMapping("/bbb/{id}")
    public Product1 getByid(@PathVariable Integer id);//springcloud  扫描到@FeignClient注解时--生产一个代理实现类

}
(3)开启openfeign注解驱动🍓
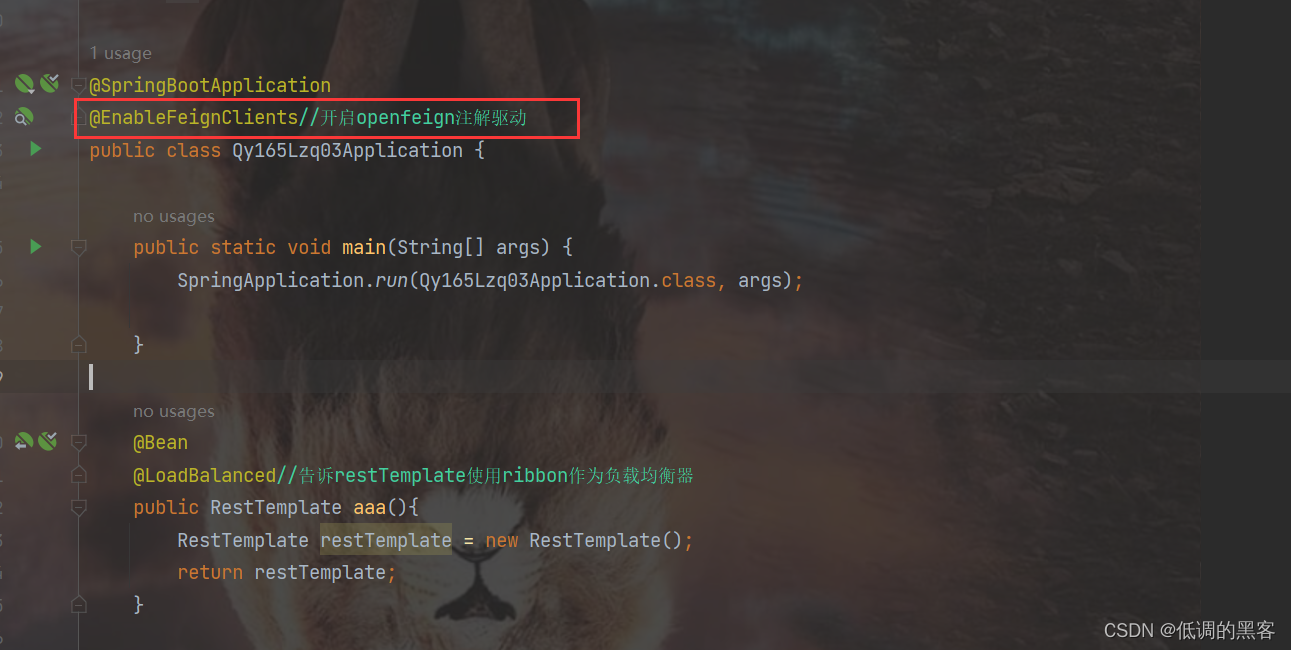
package com.lzq;


import org.springframework.boot.SpringApplication;
import org.springframework.boot.autoconfigure.SpringBootApplication;
import org.springframework.cloud.client.loadbalancer.LoadBalanced;
import org.springframework.cloud.openfeign.EnableFeignClients;
import org.springframework.context.annotation.Bean;
import org.springframework.web.client.RestTemplate;

@SpringBootApplication
@EnableFeignClients//开启openfeign注解驱动
public class Qy165Lzq03Application {

    public static void main(String[] args) {
        SpringApplication.run(Qy165Lzq03Application.class, args);

    }

    @Bean
    @LoadBalanced//告诉restTemplate使用ribbon作为负载均衡器
    public RestTemplate aaa(){
        RestTemplate restTemplate = new RestTemplate();
        return restTemplate;
    }

}
(4)修改controller🍓
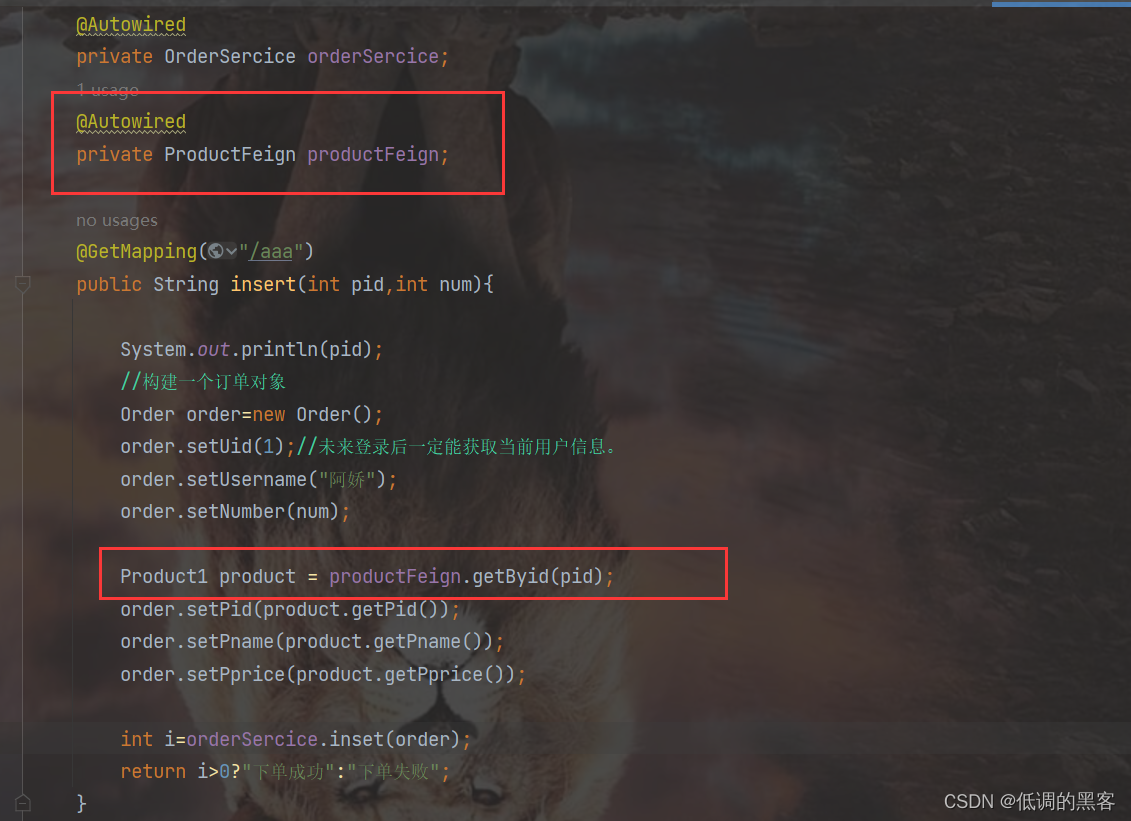
package com.lzq.controller;

import com.lzq.Order;
import com.lzq.Product1;
import com.lzq.feign.ProductFeign;
import com.lzq.service.OrderSercice;
import org.springframework.beans.factory.annotation.Autowired;
import org.springframework.cloud.client.ServiceInstance;
import org.springframework.cloud.client.discovery.DiscoveryClient;
import org.springframework.web.bind.annotation.GetMapping;
import org.springframework.web.bind.annotation.RequestMapping;
import org.springframework.web.bind.annotation.RestController;
import org.springframework.web.client.RestTemplate;

import java.util.List;
import java.util.Random;

@RestController
@RequestMapping
public class OrderController02 {
    @Autowired
    private OrderSercice orderSercice;
    @Autowired
    private ProductFeign productFeign;

    @GetMapping("/aaa")
    public String insert(int pid,int num){

        System.out.println(pid);
        //构建一个订单对象
        Order order=new Order();
        order.setUid(1);//未来登录后一定能获取当前用户信息。
        order.setUsername("阿娇");
        order.setNumber(num);

        Product1 product = productFeign.getByid(pid);
        order.setPid(product.getPid());
        order.setPname(product.getPname());
        order.setPprice(product.getPprice());

        int i=orderSercice.inset(order);
        return i>0?"下单成功":"下单失败";
    }
}
