前言:在工作中有各种各样的对话框,最多就是填写信息这些的,一般这样的内容都是el-input输入框,el-select选择框等等之内的,这时我们就可以封装成一个组件,想要什么内容就传一个json配置,像其他组件那样,这样可以极大的简化开发,不至于每次都要去写el-input这些细微根节的东西,那问题来了
问题:就是布局,元素少还好,要是多的话,比如有几个输入框,几个选择框,又有几个多选框等等,那就是一排排的排下来难看死了,
解决:我自己琢磨了好久,改进了好多遍,终于是搞出来一个这样的,判断当元素也就是输入框选择框这些加起来大于4个的话就改为一行两个,如图
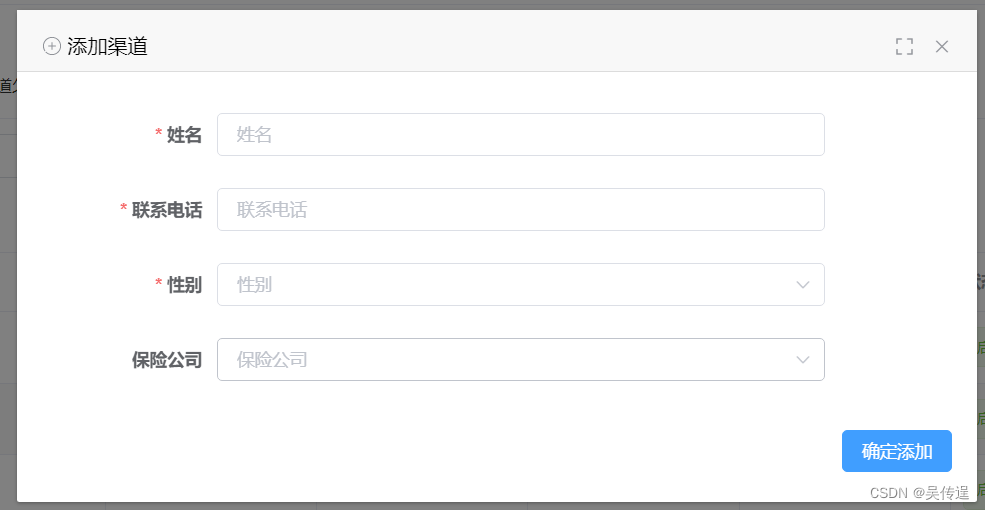
当四个的时候
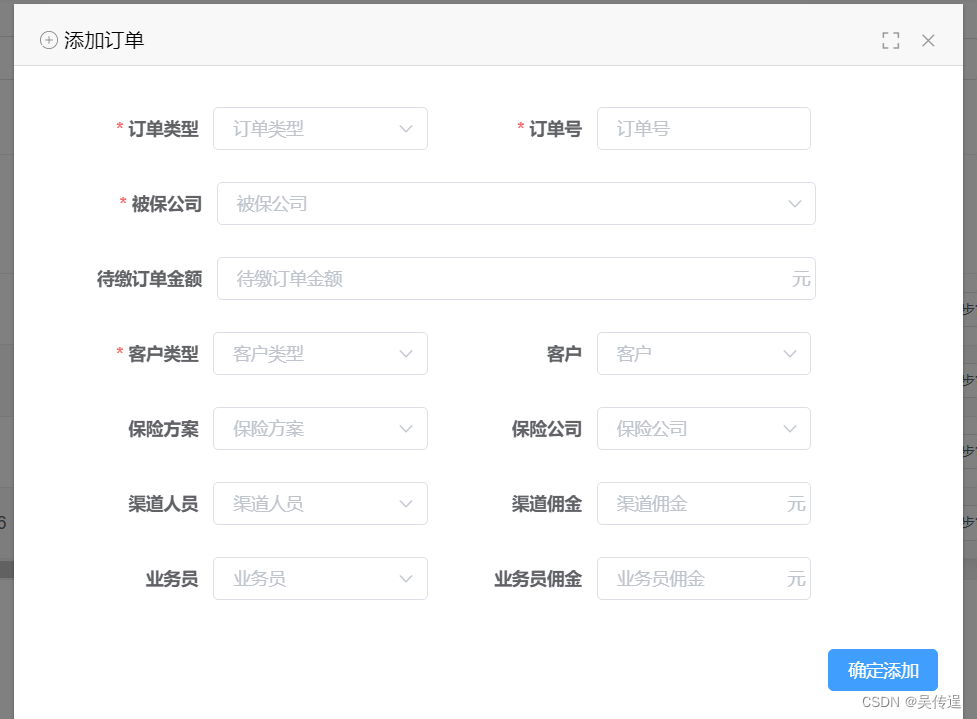
当大于四个的时候
虽然我觉得这样也没有多好看,但比一行一个的好看多了,没办法,封装组件就是这样,细节很难各个把控到位
有些东西就是那么长,比如这个待缴费金额,光字就五个,如果它所在行搞成两个的话,就太狭小了,所以我除了组件灵活布局外,参数还可以配置是否独占一行,所以当自己可以设置独占一行的时候问题就来了,没有外界的干扰下,我组件布局的逻辑是,元素大于4个时就添加一个class到根元素上,设置下面元素的宽度为50%,display为inline-block,再判断元素个数是否为奇数,为基数最后一个就独占一行,但是我给某个元素设置了独占一行的属性,那它的判断就不准确了,所以最后一个就不会独占一行了,而且设置的独占一行的元素在中间的话还会影响上面的元素,因为如果设置的独占一行的元素是偶数时说明它上面还有一个宽度为50%的元素,所以这个时候又要判断,总之至少要三种判断,话不多说,贴代码
组件代码
<template>
  <div _wid="wdialog">
    <el-dialog :fullscreen="fullscreen || fullscreen1" :class="{mobile:fullscreen,noMobile:!fullscreen}"
      :visible.sync="openSenior1">
      <template slot="title">
        <slot name="title">
        </slot>
        <template v-if="!fullscreen">
          <i v-show="!fullscreen1" class="el-icon-full-screen full" @click="fullscreen1=true"></i>
          <svg-icon icon-class="qxpp" v-show="fullscreen1" class="qxqp full" @click="fullscreen1=false"></svg-icon>
        </template>
      </template>
      <el-form v-if="options1" :validate-on-rule-change="false" :model="content"
        :class="[options1.length<=4?'senior1':'senior2']" :rules="rules" ref="formSenior">
        <el-form-item v-for="(item,index) in options1" :class="{w100:item.yes}" :label="item.label" :prop="item.name">
          <repeat :content="content" v-model="content[item.name]" :item="item"></repeat>
        </el-form-item>
        <el-form-item label="" class="footer">
          <el-button type="primary" @click="submit1('formSenior')">{{confrimLabel}}</el-button>
        </el-form-item>
      </el-form>
      <slot></slot>
    </el-dialog>
  </div>
</template>

<script>
  import repeat from "@/components/topOperation/components/repeat.vue"
  import {
    deepClone,
    judgeType
  } from "@/utils/deepClone.js"
  export default {
    name: "dialogA",
    props: {
      options: {
        type: Array
      },
      rules: {
        type: Object
      },
      openSenior: {
        type: Boolean,
        default: false
      },
      submit: {
        type: Function
      },
      confrimLabel: {
        type: String
      },
      contentP: {
        type: Object,
        default: function() {
          return {}
        }
      },
    },
    model: {
      prop: "openSenior", //用来接收 父组件 传给子组件的值
      event: "openSenior-event" //用来触发的事件
    },
    watch: {
      openSenior: {
        handler() {
          this.openSenior1 = this.openSenior
        },
        immediate: true
      },
      openSenior1: {
        handler() {
          this.$emit("openSenior-event", this.openSenior1);
        },
        immediate: true
      },
      contentP: {
        handler() {
          this.content = this.contentP
        },
        immediate: true,
        deep: true
      },
      options: {
        handler() {
          let o = deepClone(this.options);
          let len = 0;
          let oo = []
          for (var k in o) {
            if (o[k].options1 && judgeType(o[k].options1) == "string") {
              o[k].options1 = JSON.parse(o[k].options1)
            }
            if (o[k].options2 && judgeType(o[k].options2) == "string") {
              o[k].options2 = JSON.parse(o[k].options2)
            }
          }
          for(let k in oo){
            if ((k < oo.length - 1 && (parseInt(k) + 1) % 2 != 0 && (oo[parseInt(k) + 1].leGes || oo[parseInt(k) + 1].wyb ||
                oo[parseInt(k) + 1].type == 5 || oo[parseInt(k) + 1].type == 10 || oo[parseInt(k) + 1].type == 3)) || oo[k]
              .leGes || oo[k].wyb || oo[k].type == 5 || oo[k].type == 10 || oo[k].type == 3) {
              oo[k].yes = true
            } else {
              len++;
              if (k == oo.length - 1 && len % 2 != 0) {
                oo[k].yes = true
              }
            }
          }
          this.options1 = oo;
        },
        deep: true,
        immediate: true,
      }
    },
    data() {
      return {
        content: {},
        openSenior1: false,
        options1: [],
        fullscreen1: false,
      }
    },
    computed: {
      fullscreen() {
        if (this.$store.state.app.device == 'mobile') {
          return true;
        } else {
          return false;
        }
      },
    },
    created() {},
    components: {
      repeat
    }
  }
</script>

<style lang="scss">
  .full {
    float: right;
    margin-right: 30px;
    cursor: pointer;
    color: #909399;
    font-family: element-icons !important;
    speak: none;
    font-style: normal;
    font-weight: 400;
    font-variant: normal;
    text-transform: none;
    line-height: 1;
    vertical-align: baseline;
    display: inline-block;
    -webkit-font-smoothing: antialiased;
    margin-top: 1px;

    &:hover {
      color: #409EFF;
    }
  }

  div[_wid="wdialog"] {

    .ax {
      .el-form-item__content {
        width: 75% !important;
      }
    }

    .el-upload {
      width: 100%;

      .el-upload-dragger {
        width: 100%;

        .el-upload__text {
          padding: 20px;
        }
      }
    }

    .noMobile {
      .w100 {
        width: 100% !important;

        .el-form-item__content {
          width: 75% !important;

          .el-select {
            width: 100% !important;
          }

          .el-input {
            width: 100% !important;
          }
        }
      }

      .senior1 {
        width: 100%;

        .el-form-item {
          width: 100%;

          .el-input {
            width: 100% !important;
          }

          .el-form-item__content {
            width: 75%;
          }

        }
      }

      .el-select {
        width: 100%;
      }

      .senior2 {
        .w100 {
          .el-form-item__label {
            width: 16% !important;
          }
        }

        .el-form-item {
          width: 45%;

          .el-form-item__content {
            width: 62%;

            .el-input {
              width: 100%;
            }
          }
        }

        .el-form-item__label {
          width: 36%;
        }
      }

      .el-dialog__body {
        .el-form {
          padding: 0 30px;
        }
      }
    }

    .el-dialog__body {
      .el-form-item {
        padding: 10px;
      }

      .el-form-item__label {
        width: 100px;
      }
    }

    .footer {
      clear: both;
      float: none !important;
      display: block;
      text-align: right;
      width: 100% !important;
      position: absolute;
      bottom: 0;
      left: 0;

      .el-form-item__content {
        float: none !important;
        width: 100% !important;
      }

      padding: 20px !important;
    }

    .el-form-item__error {
      bottom: 100%;
      top: unset;
    }

    $tinput:35px;

    .el-input {
      width: 120px;

      .el-input__suffix {
        cursor: pointer;

        .el-input__icon {
          line-height: $tinput;
        }
      }

      .el-input__inner {
        height: $tinput;
        line-height: $tinput;
      }
    }

    .el-button {
      padding: 9px 15px;
    }

    .el-form {
      display: inline-block;

      .el-form-item {
        float: left;
        margin-right: 10px;
        margin-bottom: 0;

        .el-form-item__content {
          float: left;
        }

        .el-select__caret {
          line-height: 40px;
        }
      }
    }

    .el-date-editor {
      width: 100%;

      .el-range-input {
        width: 100%;
      }
    }
  }
</style>
写的有点乱,如果觉得可以删的话就自己删几个,因为这是我项目里面的,还穿插一些跟其他组件联动的代码,简单解释一下
这个是对话框组件,里面的
repeat:统一输入框,选择框等等组件,传item里面有个type确定类型
options:参数json数组,里面描述的就是多少个输入框,选择框这些,然后每个对象还有专门的配置
rules:校验,我这个对话框直接是填写信息,提交信息一起搞定了
openSenior:这个东西是控制对话框的打开和关闭,openSenior1是组件里面的,少个1的都是父组件传过来的,因为vue子组件不能修改父组件传过来的,所以子组件里面需要改的变量都要在data里面定义然后使其=父组件传过来的
content:数据,填写的数据存放的对象,提交就是把这个对象提交过去
fullscreen1:控制全屏
fullscreen:是否是手机上打开的,是手机上的话铺满屏幕
deepClone:克隆一个新对象
judgeType:校验类型
里面最核心的就是这段代码
for(let k in oo){
            if ((k < oo.length - 1 && (parseInt(k) + 1) % 2 != 0 && (oo[parseInt(k) + 1].leGes || oo[parseInt(k) + 1].wyb ||
                oo[parseInt(k) + 1].type == 5 || oo[parseInt(k) + 1].type == 10 || oo[parseInt(k) + 1].type == 3)) || oo[k]
              .leGes || oo[k].wyb || oo[k].type == 5 || oo[k].type == 10 || oo[k].type == 3) {
              oo[k].yes = true
            } else {
              len++;
              if (k == oo.length - 1 && len % 2 != 0) {
                oo[k].yes = true
              }
            }
          }
这段代码看起来很沉重,是因为我没改,哈哈,因为我想您可能用得着
这段代码就是控制元素是否独占一行的逻辑判断
deepClone.js
export function judgeType(obj) {
  // tostring会返回对应不同的标签的构造函数
  const toString = Object.prototype.toString;
  const map = {
    '[object Boolean]': 'boolean',
    '[object Number]': 'number',
    '[object String]': 'string',
    '[object Function]': 'function',
    '[object Array]': 'array',
    '[object Date]': 'date',
    '[object RegExp]': 'regExp',
    '[object Undefined]': 'undefined',
    '[object Null]': 'null',
    '[object Object]': 'object',
  };
  if (obj instanceof Element) {
    return 'element';
  }
  return map[toString.call(obj)];
}

export function deepClone(data) {
  const type = judgeType(data);
  let obj;
  if (type === 'array') {
    obj = [];
  } else if (type === 'object') {
    obj = {};
  } else {
    // 不再具有下一层次
    return data;
  }
  if (type === 'array') {
    // eslint-disable-next-line
    for (let i = 0, len = data.length; i < len; i++) {
      obj.push(deepClone(data[i]));
    }
  } else if (type === 'object') {
    // 对原型上的方法也拷贝了....
    // eslint-disable-next-line
    for (const key in data) {
      obj[key] = deepClone(data[key]);
    }
  }
  return obj;
}
repeat.vue
<template>
      <el-input :style="{width: item.width}" :placeholder="item.placeholder" v-model="valueTemp" clearable>
      </el-input>
    </template>
    <template v-if="item.type == 1">
      <el-select filterable :disabled="item.disabled" :style="{width: item.width}" clearable v-change:[valueTemp]="item.change" v-model="valueTemp"
        :placeholder="item.placeholder">
        <el-option v-for="item in item.options1" :key="item.value" :label="item.label" :value="item.value">
        </el-option>
      </el-select>
    </template>
    </template>
  </div>
</template>

<script>

  export default {
    name: "repeat",

    directives: {
      change: {
        // 指令的定义
        update: function(el, binding) {
          if (binding.value.change) {
            binding.value(binding.arg)
          }
        }
      }
    },
    props: {
      value: "",
      sign: "",
      item: {
        type: Object
      },
    },
    model: {
      prop: 'value',
      event: 'change'
    },
    data() {
      return {
        valueTemp: "",
      }
    },
    watch: {
      valueTemp(val) {
        this.$emit('change', val)
      },
      value: {
        handler(val) {
          this.valueTemp = val
        },
        immediate: true
      },
    },
  }
</script>

<style lang="scss">
  .w100 {
    width: 100%;

    .el-form-item__content {
      width: 45%;
    }
  }

  div[_wid="repeat"] {
    .el-radio {
      margin-right: 15px;
    }

    .xs {
      .el-input {
        width: 42% !important;
      }
    }

    .leGes {
      div[_wid='numberInput'] {
        display: inline-block;
        margin: 1px;
        .el-input{
          width: 100%;
          height: 33px;
          line-height: 33px;
          input{
            height: 33px;
            line-height: 33px;
          }
        }
      }
      .el-input__inner1{
        position: absolute;
        top: 0;
        left: 0;
        height: 35px;
      }
      box-sizing: border-box;
      display: inline-block;
      width: 220px;
      border-radius: 4px;
      line-height: 35px;
      .el-select {
        width: 20% !important;

        .el-input {
          width: 100% !important;
          line-height: 35px;
          input {
            border: none;
            text-align: center;
          }
        }

        .el-input__suffix {
          display: none;

        }
      }

      .el-date-editor {
        margin: 1px;
        .el-input__prefix {
          display: none;
        }
        .el-input__suffix {
          display: none;

        }
        height: 33px;
        line-height: 33px;
        input {
          cursor: pointer;
          padding: 0;
          padding-left: 20px;
          padding-right: 20px;
          height: 33px;
          line-height: 33px;
        }
      }

      .el-input {
        .el-input__prefix {
        }
        .el-input__suffix{
          top: 1px;
        }
        input {
          border: none;
        }
      }
    }

    .close {
      text-align: center;
      cursor: pointer;
      position: absolute;
      right: 20px;
      color: #C0C4CC;
      top: 1px;
    }
    .hover{
      border-color: #C0C4CC;
    }
  }

  .leGesDrop {
    margin: 0;
  }
</style>
里面就实现了type=0 输入框和type=1的选择框,我自己的是有10个类型了,但涉及太多,所以就放了这两个
使用
<template>
<div>
<dialogA confrimLabel="确定搜索"  :options="options" v-model="openSenior">
      <template slot="title">
        <svg-icon icon-class="sx" />高级筛选
      </template>
</dialogA>
<span @click="openSenior=true">打开高级筛选框</span>
<div>
</template>

<script>
export default{
    data(){
        return{
            options:  [{
              name: "name",
              label: "名称",
              placeholder: "名称",
              type: 0, //类型 0 输入框 1 选择框
              width: "120px",
              }, {
              name: "status",
              label: "状态",
              placeholder: "状态",
              type: 1, //类型 0 输入框 1 选择框
              width: "120px",
              options1: [{
                value: 0,
                label: "未通过"
              }, {
                value: 1,
                label: "通过"
              }],

            }],
            openSenior: false
      }
    }
}
</script>
这是简单示例
options 其他配置:
wyb:当前元素独占一行
change:选择框值改变触发,可以传多个值,在
v-change:[valueTemp]="{change:item.change,sign:sign}"
里设置,valueTemp是当前绑定的参数,item.change是配置的函数,sign就是你想传的其他参数,在自定义指令里面这样写就行
directives: {
      change: {
        // 指令的定义
        update: function(el, binding) {
          if (binding.value.change) {
            binding.value.change(binding.arg,binding.value.sign)
          }
        }
      }
    },
这就有关自定义指令的学习了,也简单,想了解的可以去官网看看
自定义指令 — Vue.js 中文文档
好了,也没啥好说的了,最核心的就是那段判断是否独占一行的代码,另外自行扩展


![[附源码]计算机毕业设计JAVA学生量化考核管理系统](https://img-blog.csdnimg.cn/4bfc93ece1fc425eb82c09fc58e3289b.png)


![[激光原理与应用-29]:典型激光器 -1- 固体激光器](https://img-blog.csdnimg.cn/img_convert/3c68ef503e77263219223b884a3937f7.png)