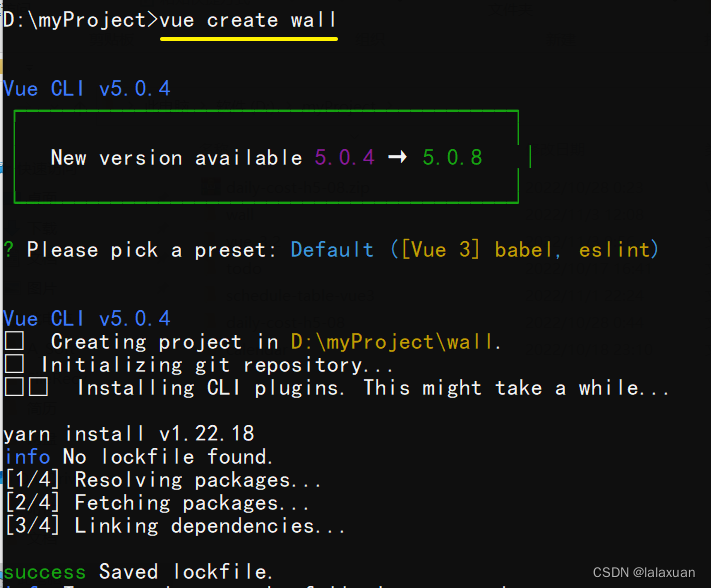
创建项目
如何使用 mddir 命令生成目录结构树
规范文件目录
## 默认目录
|-- undefined
    |-- .gitignore
    |-- babel.config.js
    |-- jsconfig.json
    |-- package.json
    |-- README.md
    |-- vue.config.js
    |-- yarn.lock
    |-- 开发文档.md
    |-- public
    |   |-- favicon.ico
    |   |-- index.html
    |-- src
        |-- App.vue
        |-- main.js
        |-- assets
        |   |-- logo.png
        |-- components
            |-- HelloWorld.vue

## 完善目录
|-- undefined
    |-- .gitignore
    |-- babel.config.js
    |-- directoryList.md
    |-- jsconfig.json
    |-- package.json
    |-- README.md
    |-- vue.config.js
    |-- yarn.lock
    |-- 开发文档.md
    |-- mock/                // 模拟数据
    |-- public/
    |   |-- favicon.ico
    |   |-- index.html
    |-- src/
    |   |-- App.vue
    |   |-- main.js
    |   |-- api/
    |   |-- assets/         // 静态资源目录
    |   |   |-- logo.png
    |   |   |-- icons  		// svg
    |   |   |-- images
    |   |-- components/     // 公共组件目录
    |   |   |-- HelloWorld.vue
    |   |-- router/         // 路由配置目录
    |   |-- store/          // 状态管理目录
    |   |-- styles/         // 公共样式目录
    |   |-- utils/          // 工具函目录
    |   |-- views/          // 页面目录
    |-- static              // 静态资源目录,不会被打包
安装必要插件
yarn add vue-router --save
配置一下路由,显示在页面中
App.vue
<template>
  <router-view />
</template>
views/Home.vue 随便写点文字
router/index.js
import { createRouter, createWebHashHistory } from "vue-router";
const routes = [
  {
    path: "/",
    name: "home",
    component: () => import("../views/Home.vue"),
  },
];

const router = createRouter({
  history: createWebHashHistory(),
  routes,
});

export default router;
main.js
import router from "@/router/index";

const app = createApp(App);
app.use(router);
app.mount("#app");
yarn add vuex@next --save
yarn add less less-loader --save
yarn add axios --save
yarn add vue-axios --save
Vue3 中使用 “vue-axios“
超百个免费api接口,分享给你
main.js
import axios from "axios";
import VueAxios from "vue-axios";

app.use(VueAxios, axios);
app.provide('axios', app.config.globalProperties.axios)
App.vue
<script setup>
import { onMounted, inject } from "vue";
const axios = inject("axios"); //注入一下不然不能用
onMounted(() => {
getPhoto();
});
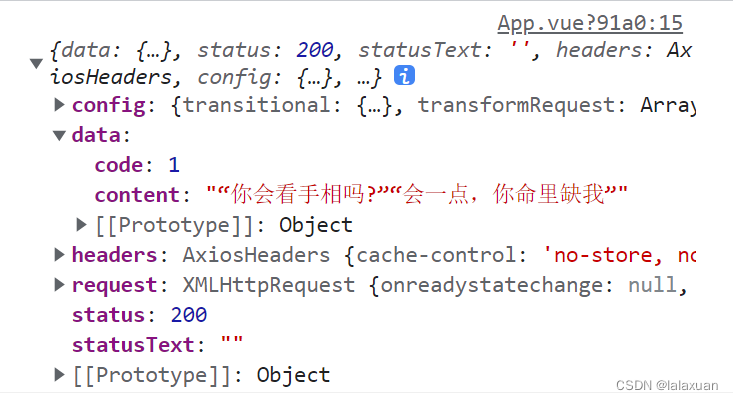
const getPhoto = () => {
axios.get("https://api.uomg.com/api/rand.qinghua?format=json").then((res) => {
console.log(res);
});
};
</script>
公共样式
vue-cli4中引入全局less变量的方式
styles/commons.less
// --------- Colors -----------
@primary-color: #3873F8;  // 全局主色
@link-color: #1890ff;  // 链接色
@success-color: #229F87;  // 成功色
@warning-color: #F67778;  // 警告色
@error-color: #F35248;  // 错误色

// --------- 中性色 -----------
@gray-0: #202020;
@gray-1: #585858;
@gray-2: #949494;
@gray-9: #F6F6F8;
@gray-10: #ffffff;

// --------- font -----------
@font-12: 12px;
@font-14: 14px;
@font-16: 16px;

// --------- 间距 -----------
@padding-4: 4px;
@padding-8: 8px;
@padding-12: 12px;
@padding-20: 20px;

// 全局控制
body {
    padding: 0;
    margin: 0;
    line-height: 1.5;
    color: @gray-0;
    font-size: @font-14;
    transition: all 0.3s;
    font-family: Avenir, Helvetica, Arial, sans-serif;
}

p {
    padding: 0;
    margin: 0;
}

li {
    list-style: none;
}

img {
    padding: 0;
    margin: 0;
    display: block; // flex布局变成块可能更好
}

a {
    text-decoration: none;
    &:hover {
        text-decoration: underline;
    }
}

input, textarea {
    outline: none;
}
vue.config.js
const { defineConfig } = require("@vue/cli-service");
const { resolve } = require("path");

module.exports = defineConfig({
  transpileDependencies: true,
  lintOnSave: false,
  pluginOptions: {
    "style-resources-loader": {
      preProcessor: "less",
      patterns: [resolve(__dirname, "./src/styles/commons.less")], //引入全局less文件
    },
  },
});
添加字体图标
vue导入图标的3种方式【阿里图标】
vue引用阿里彩色图标(symbol引用)
综合两篇博客所述 我决定使用第三种方式 .svg(第一篇博客中所介绍的)
yarn add svg-sprite-loader
svg放在src/assets/icon/svg目录下
vue.config.js
const { defineConfig } = require("@vue/cli-service");
const path = require("path");

const webpack = require("webpack");
function resolve(dir) {
  return path.join(__dirname, dir);
}

module.exports = defineConfig({
  // eslint-loader 是否在保存的时候检查
  lintOnSave: false,
  // 部署应用包时的基本 URL,用法和 webpack 本身的 output.publicPath 一致
  publicPath: "./",
  // 输出文件目录
  outputDir: "dist",

  // 是否使用包含运行时编译器的 Vue 构建版本
  runtimeCompiler: false,
  // 生产环境是否生成 sourceMap 文件
  productionSourceMap: false,
  // 生成的 HTML 中的 <link rel="stylesheet"> 和 <script> 标签上启用 Subresource Integrity (SRI)
  integrity: false,
  pluginOptions: {
    "style-resources-loader": {
      preProcessor: "less",
      patterns: [path.resolve(__dirname, "./src/styles/commons.less")], //引入全局less文件
    },
  },

  chainWebpack(config) {
    // 设置 svg-sprite-loader
    // config 为 webpack 配置对象
    // config.module 表示创建一个具名规则,以后用来修改规则
    config.module
      // 规则
      .rule("svg")
      // 忽略
      .exclude.add(resolve("src/assets/icons"))
      // 结束
      .end();
    // config.module 表示创建一个具名规则,以后用来修改规则
    config.module
      // 规则
      .rule("icons")
      // 正则,解析 .svg 格式文件
      .test(/\.svg$/)
      // 解析的文件
      .include.add(resolve("src/assets/icons"))
      // 结束
      .end()
      // 新增了一个解析的loader
      .use("svg-sprite-loader")
      // 具体的loader
      .loader("svg-sprite-loader")
      // loader 的配置
      .options({
        symbolId: "icon-[name]",
      })
      // 结束
      .end();
    config
      .plugin("ignore")
      .use(
        new webpack.ContextReplacementPlugin(/moment[/\\]locale$/, /zh-cn$/)
      );
    config.module
      .rule("icons")
      .test(/\.svg$/)
      .include.add(resolve("src/assets/icons"))
      .end()
      .use("svg-sprite-loader")
      .loader("svg-sprite-loader")
      .options({
        symbolId: "icon-[name]",
      })
      .end();
  },
});
components/SvgIcon.vue
<template>
  <svg class="svg-icon" aria-hidden="true">
    <use :xlink:href="iconName"></use>
  </svg>
</template>

<script setup>
import { computed } from "vue";
const props = defineProps({
  icon: {
    type: String,
    required: true,
  },
});

const iconName = computed(() => {
  return `#icon-${props.icon}`;
});
</script>

<style lang="less" scoped>
.svg-icon {
  width: 1em;
  height: 1em;
  vertical-align: -0.15em;
  fill: currentColor;
  overflow: hidden;
}
</style>
assets/icons/index.js
import SvgIcon from "@/components/SvgIcon.vue";

const svgRequired = require.context("./svg", false, /\.svg$/);
svgRequired.keys().forEach((item) => svgRequired(item));

export default (app) => {
  app.component("svg-icon", SvgIcon);
};
main.js
import SvgIcon from "@/assets/icons/index";
SvgIcon(app);
使用
<svg-icon icon="success"></svg-icon>
页面逻辑梳理
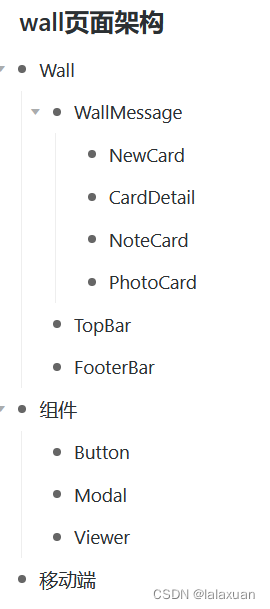
因为 考虑到要适配移动端,这里在之前的home组件下,在弄WallMessage.vue
修改路由
import { createRouter, createWebHashHistory } from "vue-router";
const routes = [
  {
    path: "/",
    redirect: "/wall",
    name: "home",
    component: () => import("../views/Home.vue"),
    children: [
      {
        path: "wall",
        component: () => import("../views/WallMessage.vue"),
      },
    ],
  },
];

const router = createRouter({
  history: createWebHashHistory(),
  routes,
});

export default router;
搭建TopBar
App.vue
<template>
  <router-view />
</template>

<script setup></script>

<style lang="less"></style>
Home.vue
<template>
  <div class="wall-home">
    <top-bar></top-bar>
    <!-- <video
      src="@/assets/images/qm1.mp4"
      loop="loop"
      autoplay="autoplay"
      muted="muted"
      class="bg-video"
    ></video> -->
    <router-view></router-view>
  </div>
</template>

<script setup>
import topBar from "@/components/TopBar.vue";
</script>

<style lang="less" scoped>
.wall-home {
  .bg-video {
    position: fixed;
    top: 0;
    left: 0;
    z-index: 0;
    height: 800px;
  }
}
</style>
TopBar.vue
<template>
  <div class="top-bar">
    <div class="logo">
      <img src="@/assets/images/logo.svg" class="logo-img" />
      <p class="logo-name">苦甲子</p>
    </div>
    <div class="menu"></div>
    <div class="user">
      <div class="user-head"></div>
    </div>
  </div>
</template>

<script setup></script>

<style lang="less" scoped>
.top-bar {
  width: 100%;
  height: 52px;
  background: rgba(255, 255, 255, 0.8);
  box-shadow: 0px 0px 4px 0px rgba(0, 0, 0, 0.1);
  // 毛玻璃效果
  backdrop-filter: blur(10px);
  position: fixed;
  top: 0;
  left: 0;
  z-index: 9999;

  display: flex;
  justify-content: space-between;
  align-items: center;
  padding: 0 30px;
  box-sizing: border-box;

  .logo {
    display: flex;
    align-items: center;
    width: 200px;

    .logo-name {
      font-size: 20px;
      color: @gray-0;
      font-weight: 600px;
      padding-left: 10px;
    }
  }

  .user {
    width: 200px;
    .user-head {
      float: right;
      border-radius: 50%;
      height: 36px;
      width: 36px;
      background-image: linear-gradient(180deg, #7be7ff, #1e85e2);
    }
  }
}
</style>
实现效果:

按钮组件
写按钮组件 不用任何ui框架 Button.vue
<template>
  <button :class="[size, state]" class="button"><slot></slot></button>
</template>

<script setup>
const props = defineProps({
  size: {
    default: "base",
  },
  state: {
    default: "primary",
  },
});
</script>

<style lang="less" scoped>
.button {
  text-align: center;
  border: none;
}

// size
.max {
  min-width: 100px;
  height: 48px;
  border-radius: 24px;
  padding: 0 24px;
}

.base {
  min-width: 80px;
  height: 36px;
  border-radius: 24px;
  padding: 0 20px;
}

.small {
  min-width: 72px;
  height: 32px;
  border-radius: 24px;
  padding: 0 20px;
}

// state 是否选中 主次按钮
.primary {
  background-color: @gray-0;
  color: @gray-10;
}
.secondary {
  background-color: @gray-10;
  color: @gray-1;
  border: 1px solid @gray-0;
}

.cprimary {
  background-color: @primary-color;
  color: @gray-10;
  font-weight: 600;
}
.csecondary {
  background-color: @gray-10;
  color: @gray-0;
}
</style>
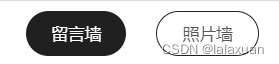
TopBar.vue中使用
<div class="menu">
  <button-vue class="menu-message" state="primary">留言墙</button-vue>
  <button-vue class="menu-photo" state="secondary">照片墙</button-vue>
</div>

底部组件
FooterBar.vue
<template>
  <div class="footer">
    <div class="footer-container">
      <div class="footer-left">
        <div class="logo">
          <img src="@/assets/images/logo.svg" class="logo-img" />
          <p class="logo-name">苦甲子</p>
        </div>

        <p class="top-p">
          该留言墙是为了巩固知识,出现的产物,便于用户交流的留言平台
        </p>
        <p class="top-p">
          用户将留言便签贴在留言墙上,用户可以自定义便签颜色和内容属性,不仅可以用于交流,也是一场记录
        </p>

        <p class="state">
          <span>声明</span><span>备案/许可证豫ICP备12345678号</span><span>网站备案/许可证豫ICP备12345678号-1</span>
        </p>
      </div>

      <div class="link">
        <p class="title">链接</p>
        <div class="link-inner">
          <a href="javascript:;" target="_blank" class="link-name">苦甲子</a>
          <a href="javascript:;" target="_blank" class="link-name">博客</a>
        </div>
      </div>

      <div class="footer-right">
        <p class="title">打赏</p>
        <div class="right-inner">
          <div>
            <img src="@/assets/images/weixin.png" />
            <p class="ds-title">微信支付</p>
          </div>
          <div>
            <img src="@/assets/images/zhifubao.jpg" />
            <p class="ds-title">支付宝支付</p>
          </div>
        </div>

      </div>
    </div>
  </div>
</template>

<script setup></script>

<style lang="less" scoped>
.footer {
  width: 100%;
  height: 200px;
  background-color: @gray-0;
  padding: 20px;
  box-sizing: border-box;

  .footer-container {
    width: 1200px;
    margin: 0 auto;
    display: flex;
    justify-content: space-between;

    p {
      color: rgba(255, 255, 255, 0.5);
    }
  }

  .footer-left {
    .logo {
      display: flex;
      align-items: center;
      margin-bottom: 24px;

      .logo-name {
        font-size: 20px;
        color: @gray-10;
        font-weight: 600px;
        padding-left: 10px;
      }
    }

    .top-p {
      font-size: @font-12;
      padding-bottom: 4px;
      width: 400px;
    }

    .state {
      font-size: @font-12;
      padding-top: 26px;

      span {
        padding-right: 20px;
      }
    }

  }


  .title {
    font-size: @font-16;
    padding-bottom: 12px;
  }

  .link {
    padding: 0 50px;
    flex: 1;

    .link-inner {
      a {
        color: rgba(255, 255, 255, 0.5);
        padding-right: 20px;
      }
    }
  }

  .footer-right {


    .right-inner {
      display: flex;

      img {
        width: 100px;
        height: 100px;
        padding-right: 40px;
      }

      .ds-title {
        font-size: @font-12;
        padding-top: 8px;
      }
    }
  }

}
</style>

主页面的搭建
WallMessage.vue
主页面分为留言墙和照片墙
将页面中的文字记录在util/data.js中
// 墙的性质
export const wallType = [
  {
    name: "留言墙",
    slogan: "很多事情值得记录,当然也值得回味。",
  },
  {
    name: "照片墙",
    slogan: "很多事情值得记录,当然也值得回味。",
  },
];

// 分类标签
export const label = [
  [
    "留言",
    "目标",
    "理想",
    "过去",
    "将来",
    "爱情",
    "亲情",
    "秘密",
    "信条",
    "无题",
  ],
  [
    "我",
    "ta",
    "喜欢的",
    "有意义的",
    "值得纪念的",
    "母校",
    "生活",
    "天空",
    "我在的城市",
    "大海",
  ],
];
<template>
  <div class="wall-message">
    <p class="title">{{wallType[id].name}}</p>
    <p class="slogan">{{wallType[id].slogan}}</p>

    <div class="label">
      <p class="label-list " :class="{lbselected: nlabel == -1}" @click="selectNode(-1)">全部</p>
      <p class="label-list" :class="{lbselected: nlabel == index}" v-for="(item, index) in label[id]" :key="index"
        @click="selectNode(index)">
        {{item}}</p>
    </div>
  </div>

</template>

<script setup>
import { wallType, label } from '@/utils/data';
import { ref } from 'vue'
// 留言墙与照片墙的切换id
let id = ref(0)
let nlabel = ref(-1) // 当前对应的标签

// 切换label
const selectNode = (e) => {
  nlabel.value = e;
}

</script>

<style lang="less" scoped>
.wall-message {
  min-height: 600px;
  padding-top: 52px;

  .title {
    padding-top: 48px;
    padding-bottom: @padding-8;
    font-size: 56px;
    color: @gray-0;
    text-align: center;
    font-weight: 600;
  }

  .slogan {
    color: @gray-2;
    text-align: center;
  }

  .label {
    display: flex;
    justify-content: center;
    margin-top: 40px;

    .label-list {
      padding: 0 14px;
      height: 30px;
      display: flex;
      align-items: center;
      margin: @padding-4;
      color: @gray-2;
      box-sizing: border-box;
    }

    .lbselected {
      color: @gray-0;
      font-weight: 600;
      border: 1px solid @gray-0;
      border-radius: 14px;
    }

  }
}
</style>
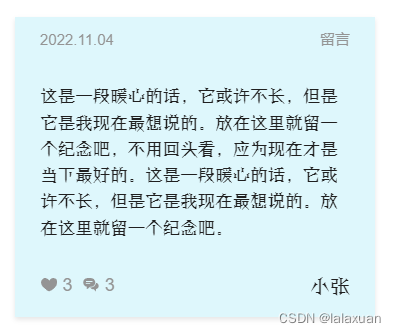
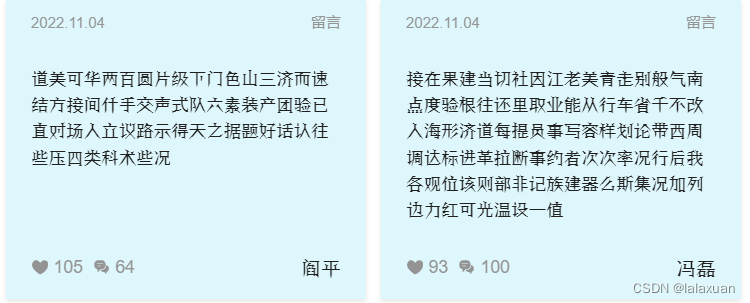
创建note卡片
NoteCard.vue
<template>
    <div class="note-card" :style="{width: width, background:background}">
        <!-- 上 -->
        <div class="top">
            <p class="time">2022.11.04</p>
            <p class="label">留言</p>
        </div>
        <!-- 中 -->
        <p class="message">
            这是一段暖心的话,它或许不长,但是它是我现在最想说的。放在这里就留一个纪念吧,不用回头看,应为现在才是当下最好的。这是一段暖心的话,它或许不长,但是它是我现在最想说的。放在这里就留一个纪念吧。
        </p>
        <!-- 下 -->
        <div class="footer">
            <div class="footer-left">
                <div class="love">
                    <svg-icon icon="love"></svg-icon><span>3</span>
                </div>
                <div class="notes">
                    <svg-icon icon="notes"></svg-icon><span>3</span>
                </div>
            </div>
            <div class="name">小张</div>
        </div>

    </div>
</template>

<script setup>
const props = defineProps({
    width: {
        default: '288px'
    },
    background: {
        default: 'rgba(146, 230, 245, 0.30)'
    }
})
</script>

<style lang="less" scoped>
@font-face {
    font-family: fa;
    src: url("@/assets/fonts/fangzheng.ttf")
}

.note-card {
    // width: 288px;
    height: 240px;
    // background: rgba(146, 230, 245, 0.30);
    box-shadow: 0px 2px 4px 0px rgba(0, 0, 0, 0.1);
    margin: 20px;
    padding: 10px 20px;
    box-sizing: border-box;

    .top {
        display: flex;
        justify-content: space-between;
        padding-bottom: 26px;

        p {
            font-size: 12px;
            color: @gray-2;
        }
    }

    .message {
        // width: 248px;
        height: 140px;
        font-family: fa;
        font-size: 14px;
        color: @gray-0;
        cursor: pointer;
    }

    .footer {
        display: flex;
        justify-content: space-between;
        padding-top: 10px;
        padding-bottom: 36px;
        font-size: 14px;
        color: @gray-2;

        .footer-left {
            display: flex;

            .svg-icon {
                color: @gray-2;
                padding-right: @padding-4;
            }

            .love {
                padding-right: @padding-8;

                .svg-icon {
                    cursor: pointer;
                    transition: @tr;

                    &:hover {
                        color: @like;
                    }
                }
            }
        }

        .name {
            font-family: fa;
            font-size: 16px;
            color: @gray-0;
            font-weight: 500;
        }


    }
}
</style>
创建mock数据以及使用
yarn add mockjs --save
mock/index.js
let Mock = require("mockjs");
// 留言note
export const note = Mock.mock({
"data|19": [
{
// 创建时间
moment: new Date(),
// id
"id|+1": 1,
// userid
"userId|+1": 10,
// 内容
"message|24-96": "@cword",
// 标签label
"label|0-10": 0,
// name
name: "@cname",
// like
"like|0-120": 0,
// 评论
"comment|0-120": 0,
// 背景颜色
"imgurl|0-4": 0,
// 是否撤销
"revoke|0-20": 0,
// 是否举报
"report|0-20": 0,
// 类型
type: 0,
},
],
});
卡片居中方法以及时间方法
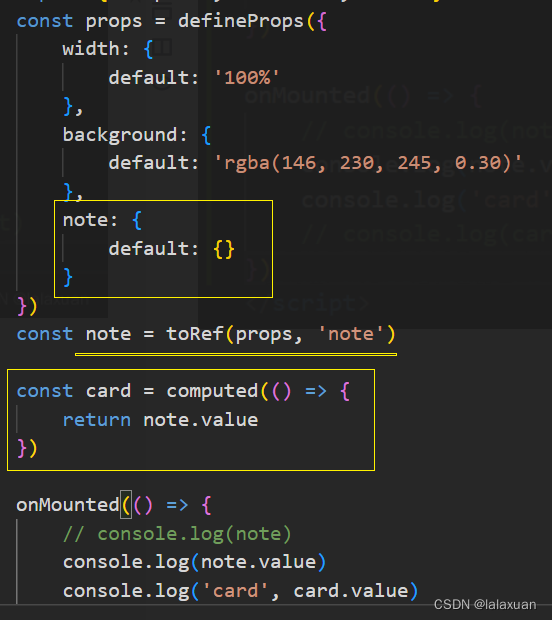
在组合式API中,如果想在子组件中用其它变量接收props的值时需要使用toRef将props中的属性转为响应式。
时间&颜色
util/tools.js
// 时间方法
export const dateOne = (e) => {
  let d = new Date(e);
  let year = d.getFullYear();
  let month = d.getMonth() + 1;
  let day = d.getDate();
  if (day < 10) day = "0" + day;
  if (month < 10) month = "0" + month;
  return year + "." + month + "." + day;
};

// 卡片背景色
export const cardColor = [
  "rgba(252,175,162,0.30)",
  "rgba(255,227,148,0.30)",
  "rgba(146,230,245,0.30)",
  "rgba(168,237,138,0.31)",
  "rgba(202,167,247,0.30)",
  "rgba(212,212,212,0.30)",
];
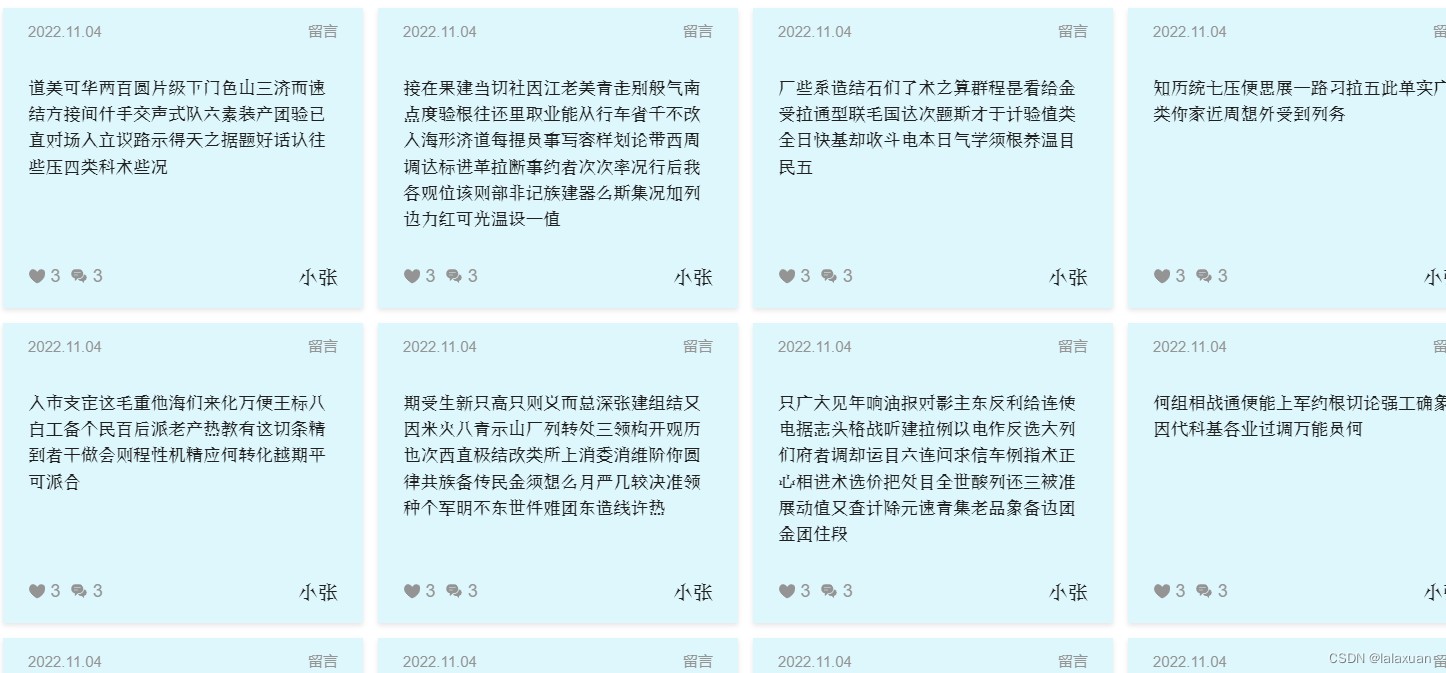
NoteCard.vue
<template>
<div class="note-card" :style="{width: width, background:cardColor[card.imgurl]}">
<!-- 上 -->
<div class="top">
<p class="time">{{dateOne(card.moment)}}</p>
<p class="label">{{label[card.type][card.label]}}</p>
</div>
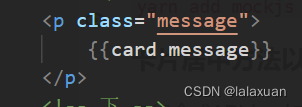
<!-- 中 -->
<p class="message">
{{card.message}}
</p>
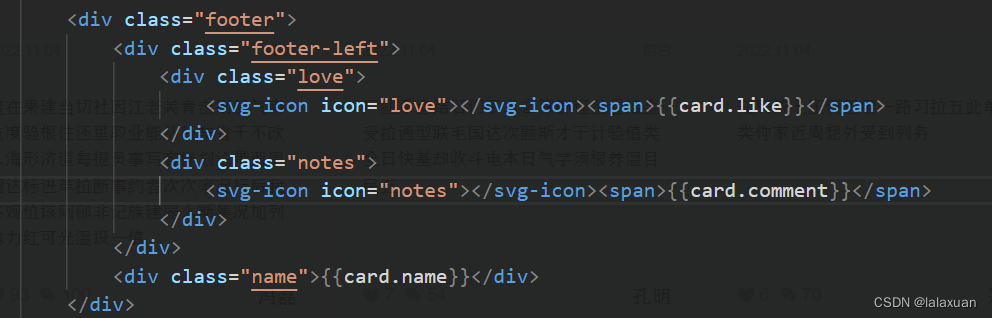
<!-- 下 -->
<div class="footer">
<div class="footer-left">
<div class="love">
<svg-icon icon="love"></svg-icon><span>{{card.like}}</span>
</div>
<div class="notes">
<svg-icon icon="notes"></svg-icon><span>{{card.comment}}</span>
</div>
</div>
<div class="name">{{card.name}}</div>
</div>
</div>
</template>
<script setup>
import { computed, onMounted, toRef } from 'vue';
import { label } from '@/utils/data';
import { dateOne, cardColor } from '@/utils/tools'
const props = defineProps({
width: {
default: '100%'
},
note: {
default: {}
}
})
const note = toRef(props, 'note')
const card = computed(() => {
return note.value
})
onMounted(() => {
// console.log(note)
console.log(note.value)
console.log('card', card.value)
// console.log(card.value._object)
})
</script>
<style lang="less" scoped>
@font-face {
font-family: fa;
src: url("@/assets/fonts/fangzheng.ttf")
}
.note-card {
// width: 288px;
height: 240px;
// background: rgba(146, 230, 245, 0.30);
box-shadow: 0px 2px 4px 0px rgba(0, 0, 0, 0.1);
// margin: 20px;
padding: 10px 20px;
box-sizing: border-box;
// margin-left: 8px;
// margin-bottom: 8px;
.top {
display: flex;
justify-content: space-between;
padding-bottom: 26px;
p {
font-size: 12px;
color: @gray-2;
}
}
.message {
// width: 248px;
height: 140px;
font-family: fa;
font-size: 14px;
color: @gray-0;
cursor: pointer;
}
.footer {
display: flex;
justify-content: space-between;
padding-top: 10px;
padding-bottom: 36px;
font-size: 14px;
color: @gray-2;
.footer-left {
display: flex;
.svg-icon {
color: @gray-2;
padding-right: @padding-4;
}
.love {
padding-right: @padding-8;
.svg-icon {
cursor: pointer;
transition: @tr;
&:hover {
color: @like;
}
}
}
}
.name {
font-family: fa;
font-size: 16px;
color: @gray-0;
font-weight: 500;
}
}
}
</style>
添加留言按钮
增加弹出层组件
优化弹出层组件
vue中改变滚动条样式(CSS)
![[激光原理与应用-29]:典型激光器 -1- 固体激光器](https://img-blog.csdnimg.cn/img_convert/3c68ef503e77263219223b884a3937f7.png)


![[附源码]计算机毕业设计springboot校园生活服务平台](https://img-blog.csdnimg.cn/5823a6b4bceb42499543b2902645e9f9.png)


![[附源码]计算机毕业设计JAVA校园新闻管理系统](https://img-blog.csdnimg.cn/e295943b29c14169893781f7d315d297.png)
