Vue-03
- (二十四)、浏览器存储(WebStorage)
- 1.本地缓存(LocalStorage)
- (1). 模仿本地缓存-未用JSON转字符串
- (2).模拟本地缓存-使用JSON转字符串
- 2.会话缓存(Session Storage)
- (1).模拟会话缓存
- (2).会话缓存和本地缓存的区别
- (3).JSON转换与JSON解析
- 3.todos案列_本地缓存版
- (1).mounted和watch的区别
- (2).本地缓存版本
- 4.todos案列_深度监视
- (1).发现问题
- (2).原理探究
- (3).深度监视和浅度监视
- (二十五)、自定义事件 (父子组件)
- 1.儿子传递数据给父亲 (原始)
- 2.儿子传递数据给父亲 (自定义事件 $emit) ⭐
- 3.儿子传递数据给父亲 (ref 自定义事件实现)
- 4.todoList更换为自定义事件
- (二十六)、全局事件总线 (兄弟组件)
- 1.全局事件分析
- 2.全局事件 $bus
- (1).Vue原型数据被所有人共享
- (2).在Vue原型上存放Vue的实列
- 3.全局事件总线 (Demo1接受Demo2的数据)
- 4.全局事件总线(双向发送数据)
- (二十六)、插槽 (slot)
- 1.问题探究
- 2.默认插槽
- 3.命名插槽
- (二十七)、Vue中的ajax
- 1.Vue项目中常用的2个ajax库
- (1).vue-resource
- (2).axios
- 2.解决开发环境Ajax跨域问题
- 3.Github搜索案列_axios_全局总线
- (1).静态资源
- (2).静态资源设置成组件
- (3).github搜索案列_发送请求
- (4).github搜索案列完成
- 4.Github搜索案列_订阅与发布_axios
- 5.Github搜索案列_vue-resource
(二十四)、浏览器存储(WebStorage)
1.本地缓存(LocalStorage)
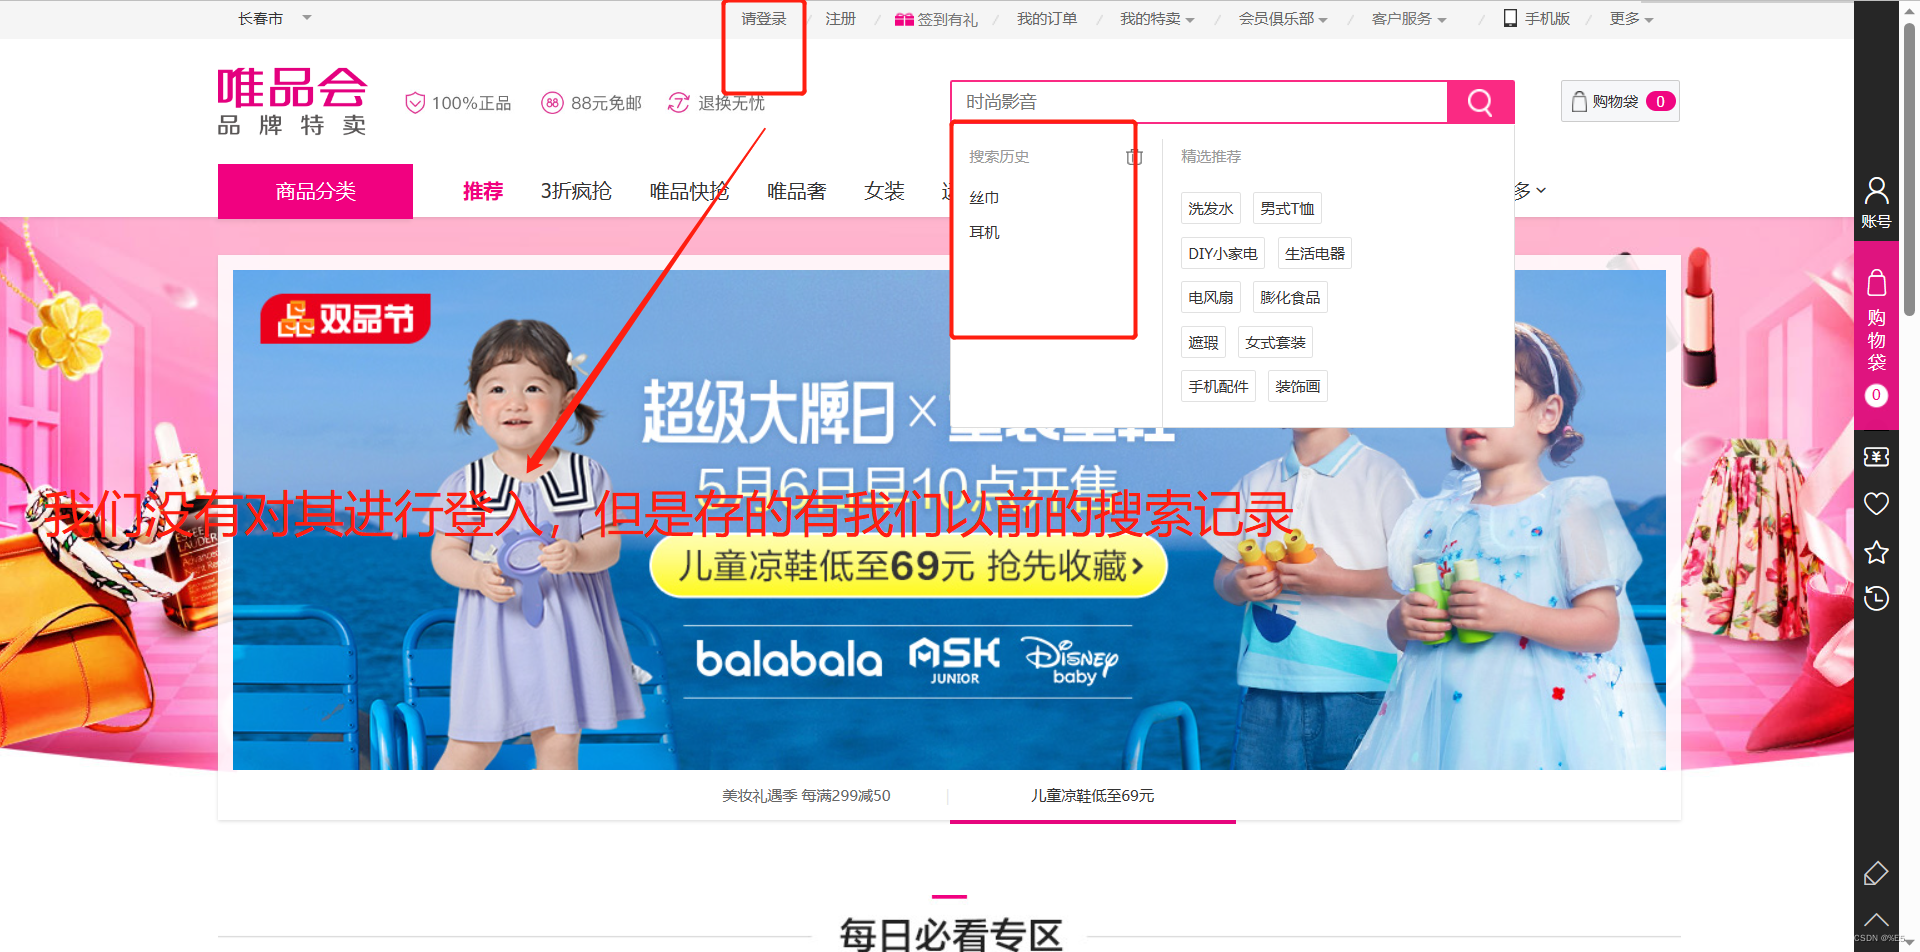
在我们没有登入唯品会之前的时候,我们搜索耳机和键盘。会在历史记录中给我们展示出:我们的搜索记录
前提是:没有开启无痕浏览的时候,才会显示我们的数据
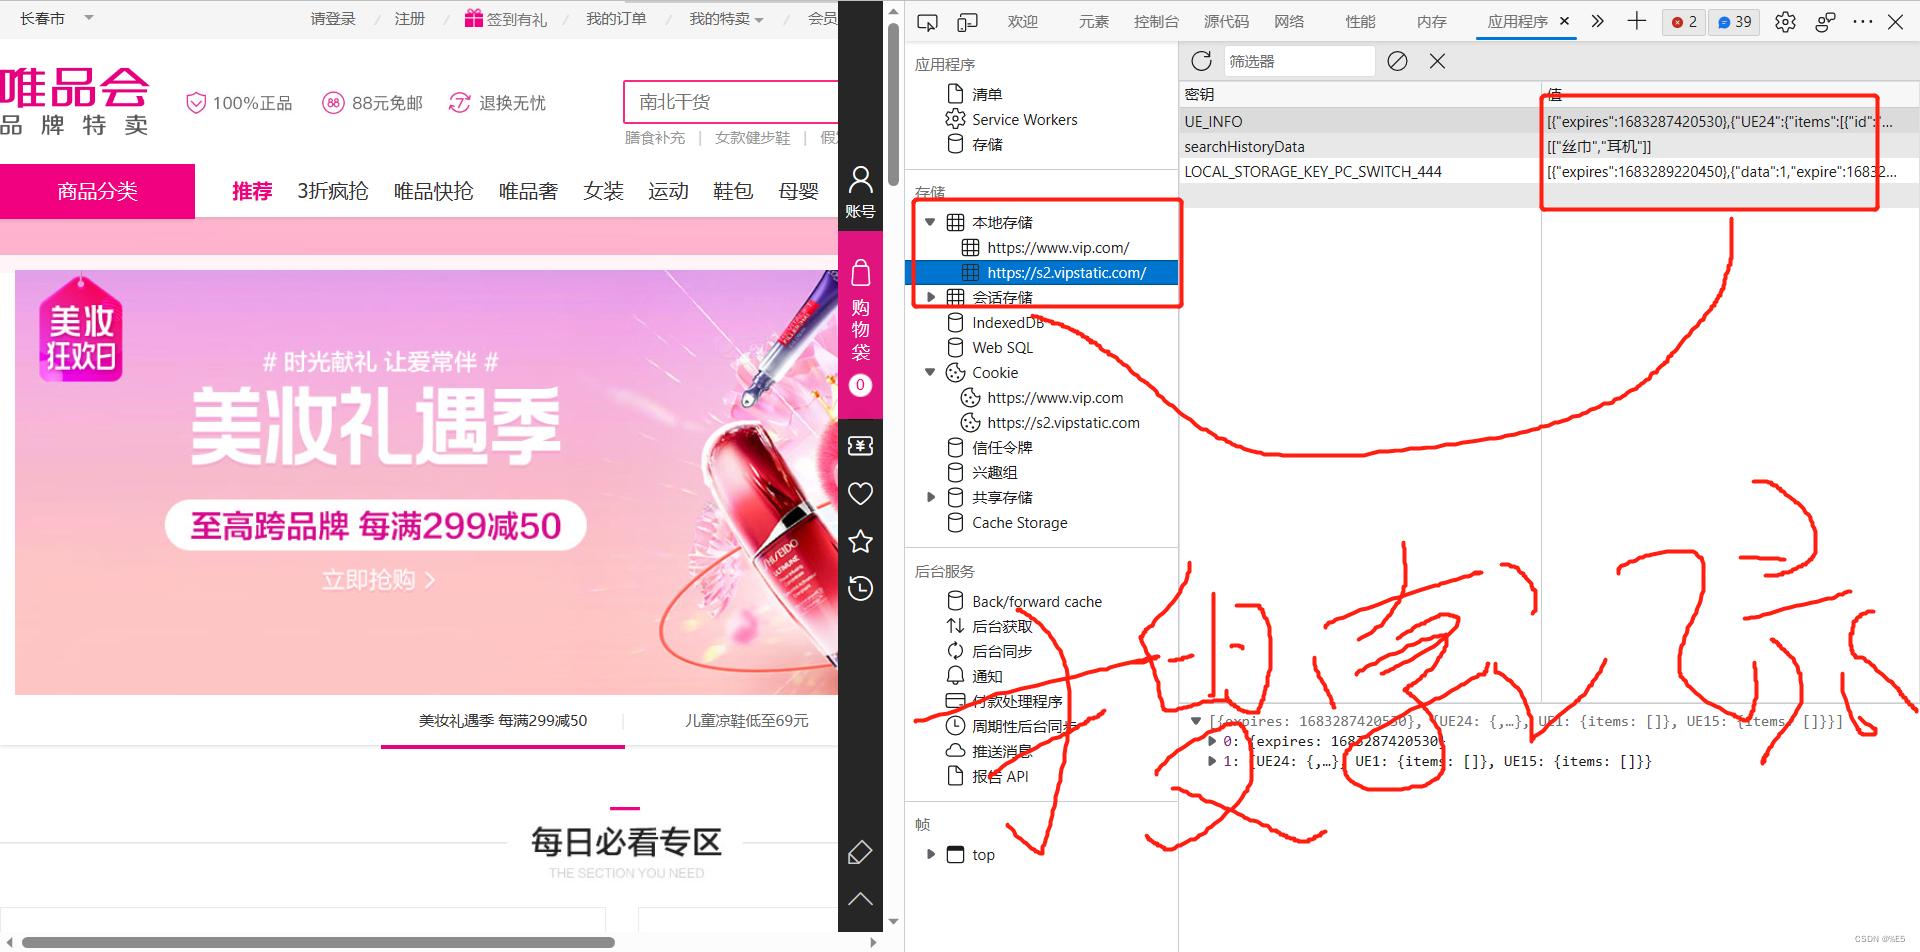
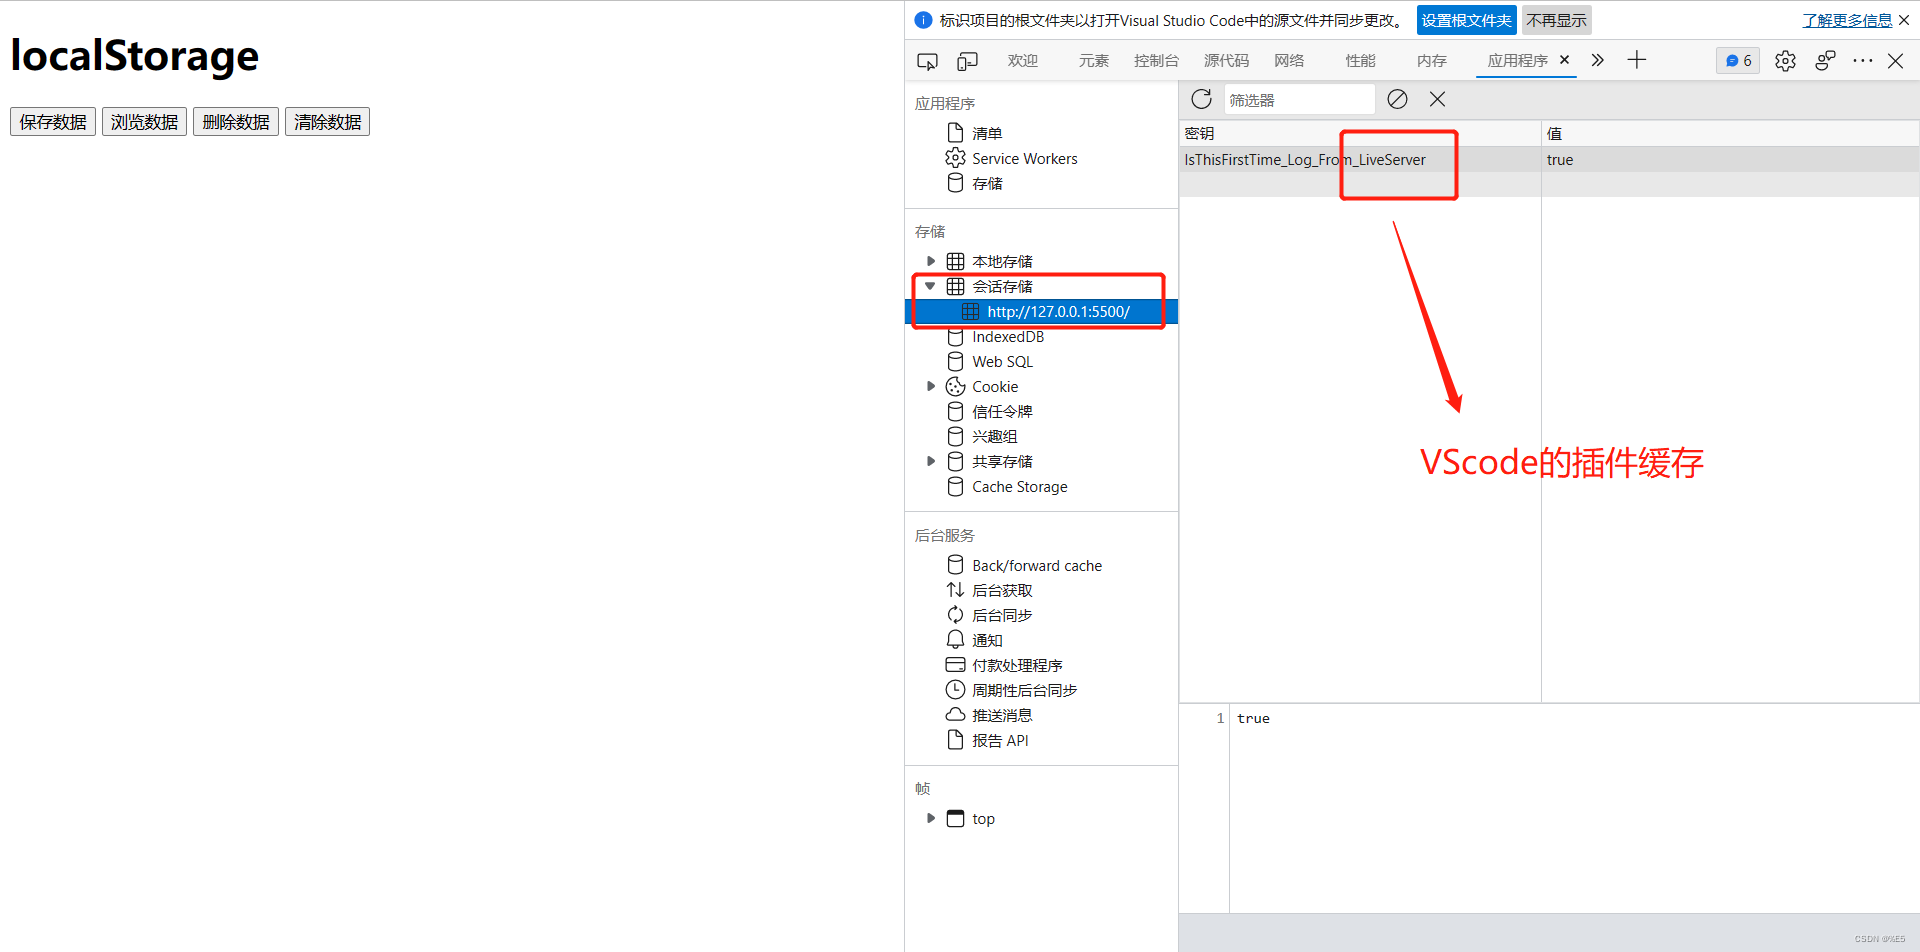
查看浏览器缓存放到哪里了
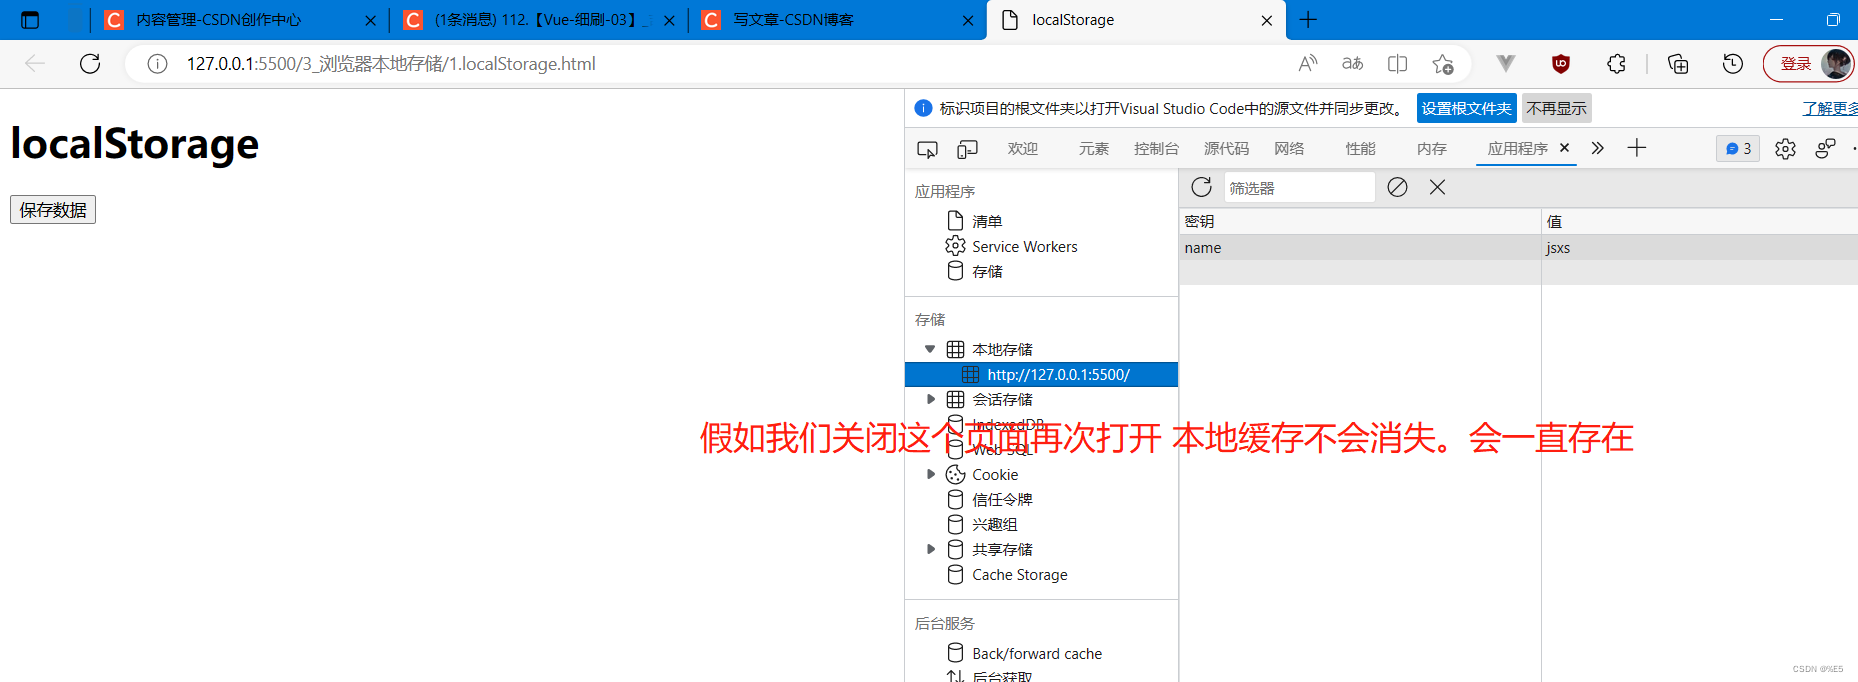
(1). 模仿本地缓存-未用JSON转字符串
window API: 这里的key和value都只能是字符串
window.localStorage.setItem('name','jsxs'); // 左边是 key 右边是 value
1.存字符串可以
<!DOCTYPE html>
<html lang="en">
<head>
    <meta charset="UTF-8">
    <meta http-equiv="X-UA-Compatible" content="IE=edge">
    <meta name="viewport" content="width=device-width, initial-scale=1.0">
    <title>localStorage</title>
</head>
<body>
    <h1>localStorage</h1>
    <button id="btn1">保存数据</button>
    <script>
        const btn=document.getElementById('btn1');
        btn.onclick= ()=>{
             window.localStorage.setItem('name','jsxs');  // 左边是 key 右边是 value
        }
    </script>
</body>
</html>

假如我们关闭这个页面的话,那么我们的缓存并不会因为我们关闭浏览器而清除换粗,除非我们清除浏览器缓存的时候,才会消失
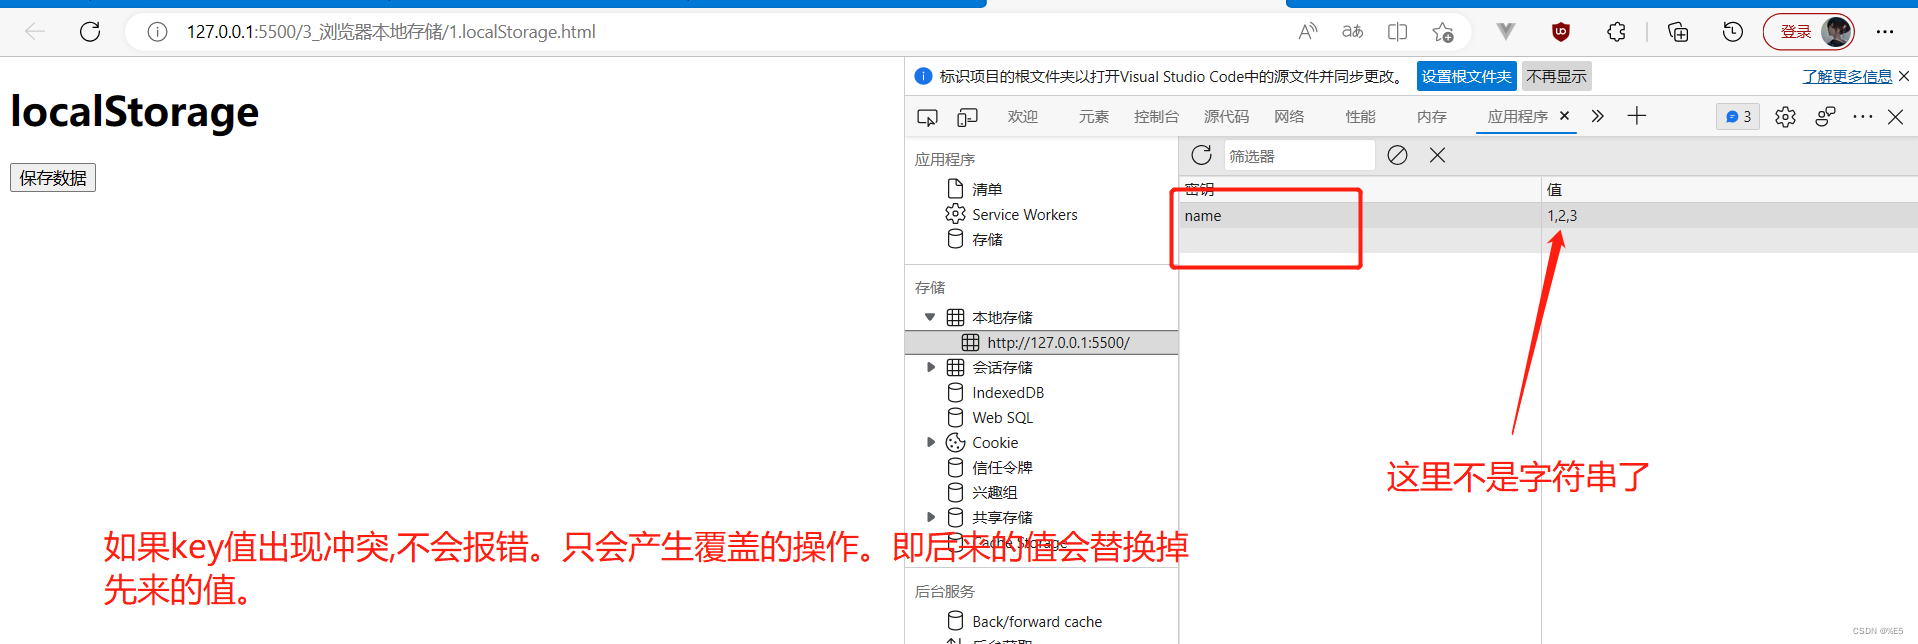
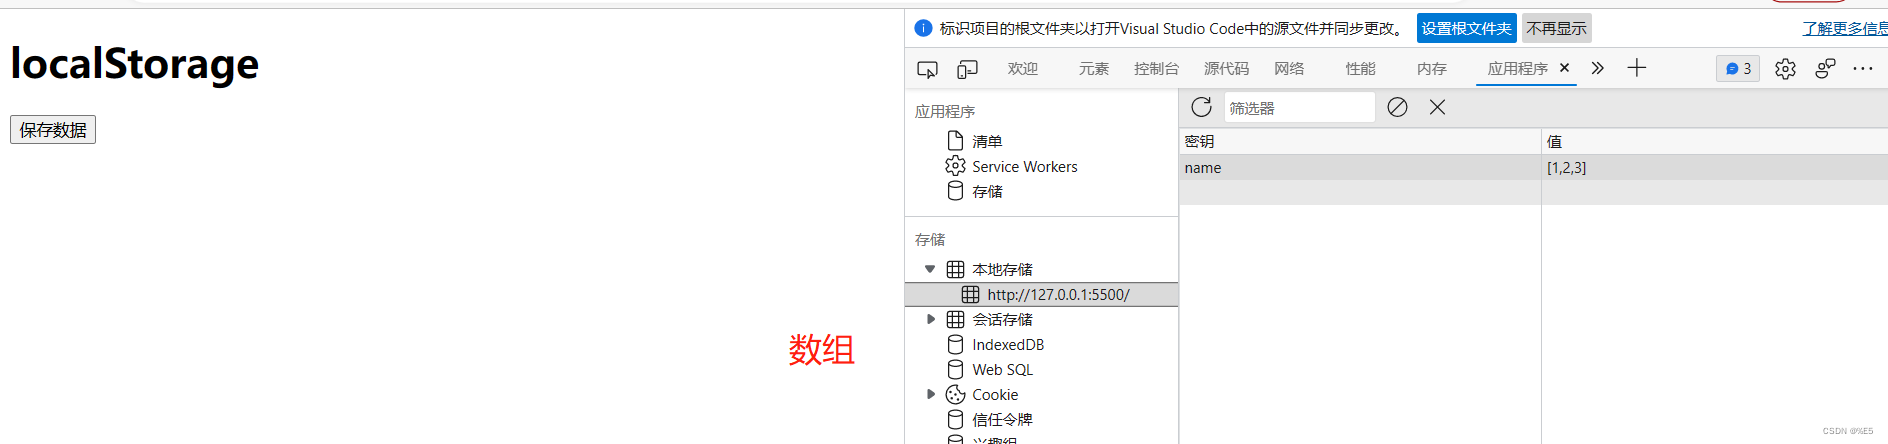
2.存数组: 会给我们展开
<!DOCTYPE html>
<html lang="en">

<head>
    <meta charset="UTF-8">
    <meta http-equiv="X-UA-Compatible" content="IE=edge">
    <meta name="viewport" content="width=device-width, initial-scale=1.0">
    <title>localStorage</title>
</head>

<body>
    <h1>localStorage</h1>
    <button id="btn1">保存数据</button>
    <script>
        const btn = document.getElementById('btn1');
        const arr = [1, 2, 3];
        btn.onclick = () => {
            window.localStorage.setItem('name', arr);  // 左边是 key 右边是 value
        }
    </script>
</body>

</html>
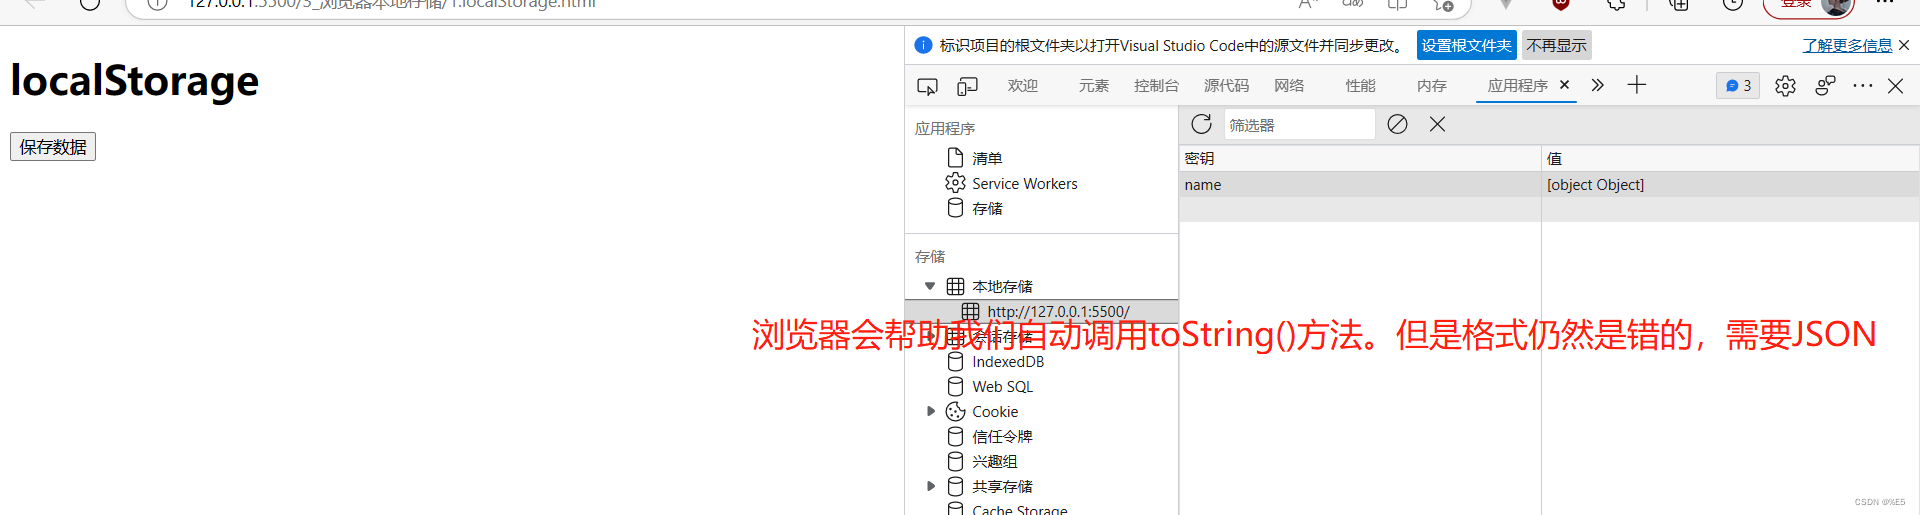
3.存对象:会出现错误
<!DOCTYPE html>
<html lang="en">

<head>
    <meta charset="UTF-8">
    <meta http-equiv="X-UA-Compatible" content="IE=edge">
    <meta name="viewport" content="width=device-width, initial-scale=1.0">
    <title>localStorage</title>
</head>

<body>
    <h1>localStorage</h1>
    <button id="btn1">保存数据</button>
    <script>
        const btn = document.getElementById('btn1');
        const arr = [1, 2, 3];
        const obj={age:'52',sex:'30'}
        btn.onclick = () => {
            window.localStorage.setItem('name', obj);  // 左边是 key 右边是 value
        }
    </script>
</body>

</html>
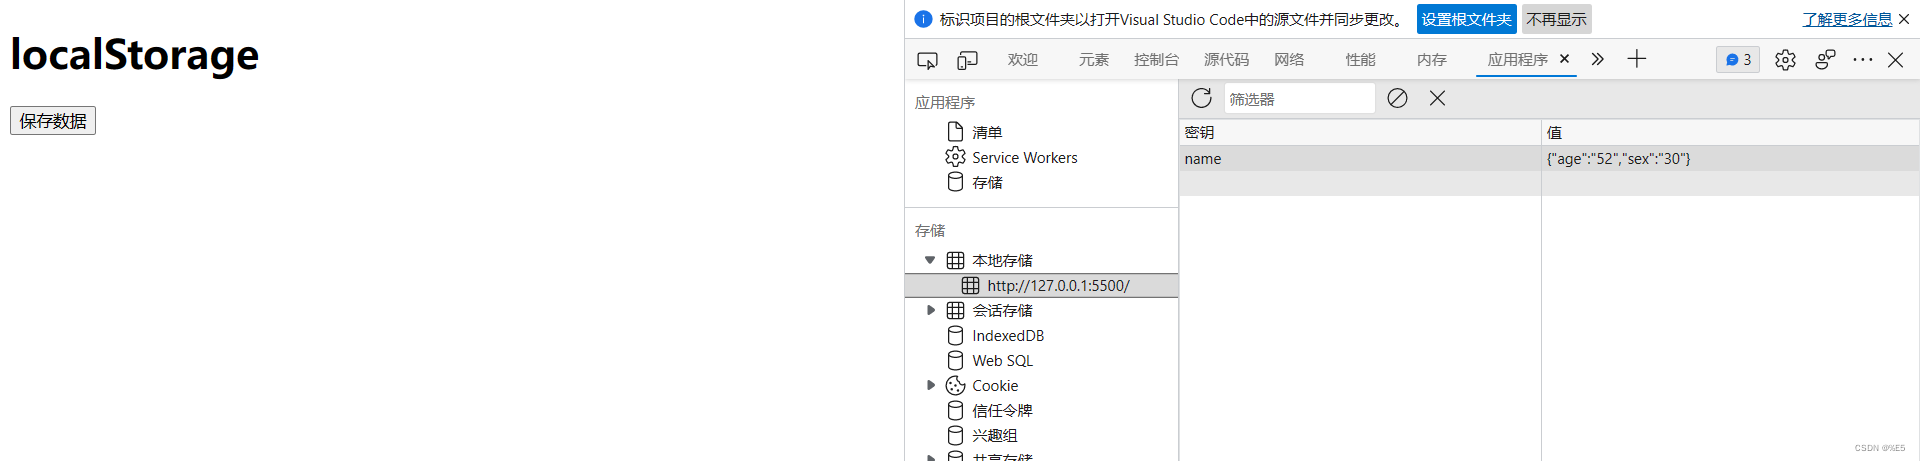
(2).模拟本地缓存-使用JSON转字符串
非字符串的数据尽量都转换为JSON数据、字符串的数据可以不用转换为JSON数据。
- 对象-转成JSON字符串之后就正常存储
<!DOCTYPE html>
<html lang="en">

<head>
    <meta charset="UTF-8">
    <meta http-equiv="X-UA-Compatible" content="IE=edge">
    <meta name="viewport" content="width=device-width, initial-scale=1.0">
    <title>localStorage</title>
</head>

<body>
    <h1>localStorage</h1>
    <button id="btn1">保存数据</button>
    <script>
        const btn = document.getElementById('btn1');
        const arr = [1, 2, 3];
        const obj={age:'52',sex:'30'}
        btn.onclick = () => {
            window.localStorage.setItem('name', JSON.stringify(obj));  // 左边是 key 右边是 value
        }
    </script>
</body>

</html>
- 数组-转JSON字符串之后也能正常存储
<!DOCTYPE html>
<html lang="en">

<head>
    <meta charset="UTF-8">
    <meta http-equiv="X-UA-Compatible" content="IE=edge">
    <meta name="viewport" content="width=device-width, initial-scale=1.0">
    <title>localStorage</title>
</head>

<body>
    <h1>localStorage</h1>
    <button id="btn1">保存数据</button>
    <script>
        const btn = document.getElementById('btn1');
        const arr = [1, 2, 3];
        const obj={age:'52',sex:'30'}
        btn.onclick = () => {
            window.localStorage.setItem('name', JSON.stringify(arr));  // 左边是 key 右边是 value
        }
    </script>
</body>

</html>
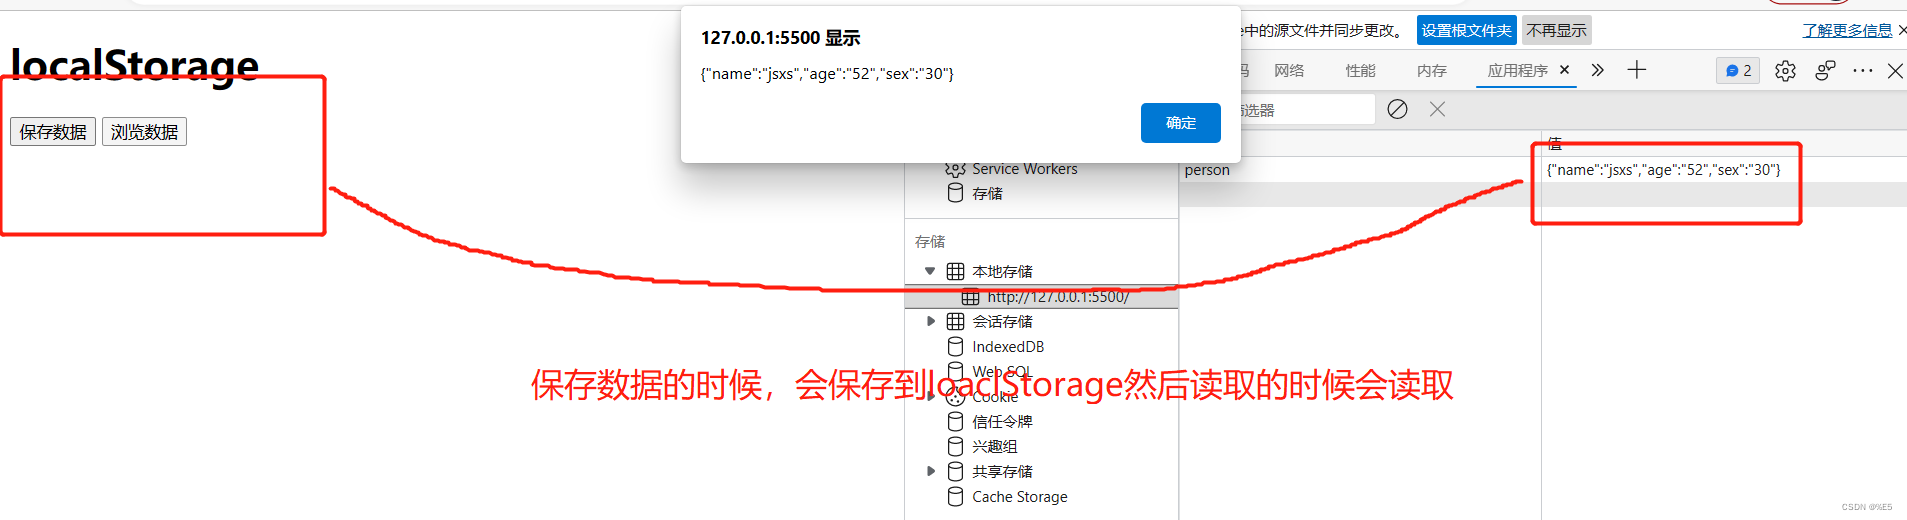
- 保存数据和浏览数据
<!DOCTYPE html>
<html lang="en">

<head>
    <meta charset="UTF-8">
    <meta http-equiv="X-UA-Compatible" content="IE=edge">
    <meta name="viewport" content="width=device-width, initial-scale=1.0">
    <title>localStorage</title>
</head>

<body>
    <h1>localStorage</h1>
    <button id="btn1">保存数据</button>
    <button id="btn2">浏览数据</button>
    <script>
        const btn = document.getElementById('btn1');
        const btn3 = document.getElementById('btn2');
        const person={name:'jsxs',age:'52',sex:'30'}
        btn.onclick = () => {
            window.localStorage.setItem('person', JSON.stringify(person));  // 左边是 key 右边是 value
        }
        btn3.onclick = () => {
           const result=window.localStorage.getItem('person');
           alert(result);
        }
    </script>
</body>

</html>
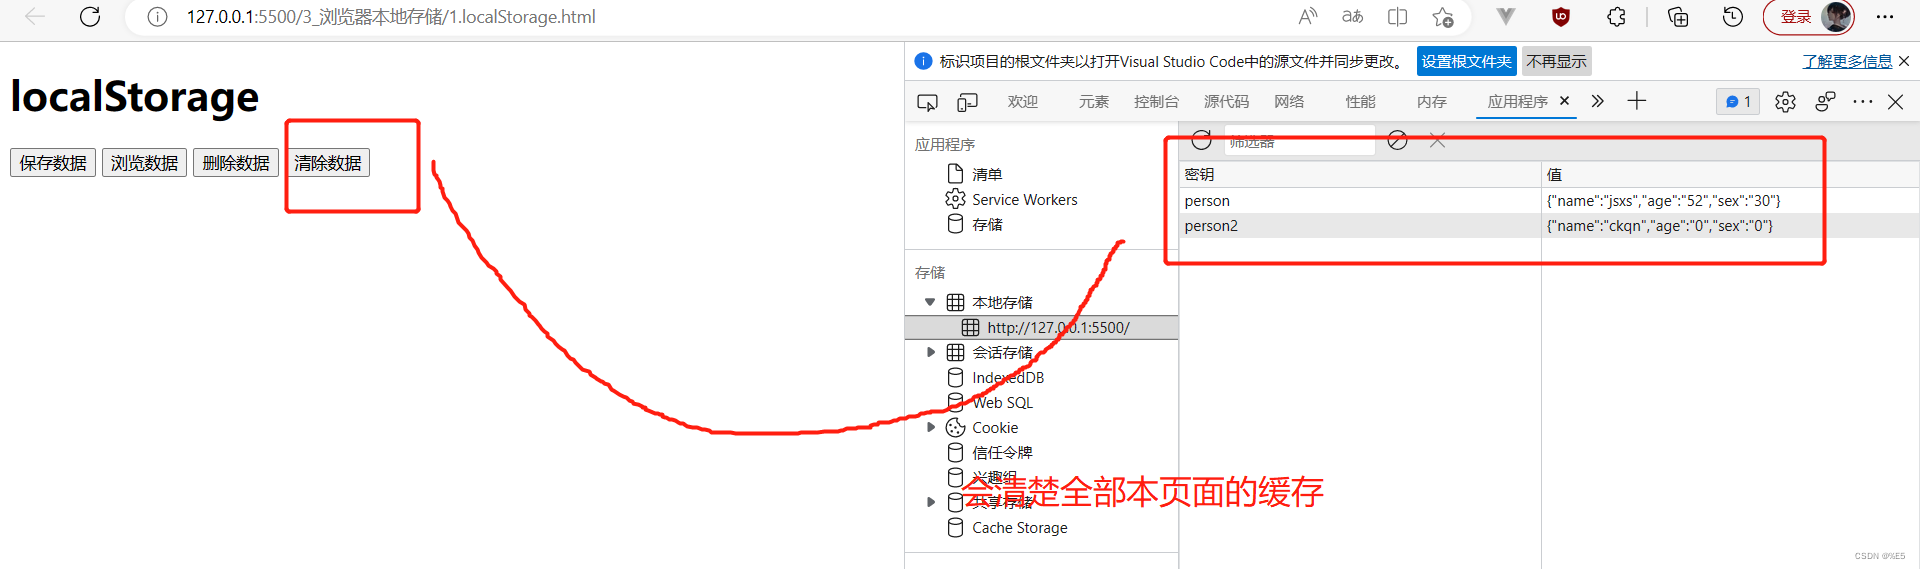
- 全部增删改
<!DOCTYPE html>
<html lang="en">

<head>
    <meta charset="UTF-8">
    <meta http-equiv="X-UA-Compatible" content="IE=edge">
    <meta name="viewport" content="width=device-width, initial-scale=1.0">
    <title>localStorage</title>
</head>

<body>
    <h1>localStorage</h1>
    <button id="btn1">保存数据</button>
    <button id="btn2">浏览数据</button>
    <button id="btn4">删除数据</button>
    <button id="btn5">清除数据</button>
    <script>
        const btn = document.getElementById('btn1');
        const btn3 = document.getElementById('btn2');
        const btn5 = document.getElementById('btn4');
        const btn6 = document.getElementById('btn5');
        const person = { name: 'jsxs', age: '52', sex: '30' }
        const person2 = { name: 'ckqn', age: '0', sex: '0' }
        // 添加存储
        btn.onclick = () => {
            window.localStorage.setItem('person', JSON.stringify(person));  // 左边是 key 右边是 value
            window.localStorage.setItem('person2', JSON.stringify(person2));  // 左边是 key 右边是 value
        }
        // 浏览存储
        btn3.onclick = () => {
            // 输出的是JSON字符串
            const result = window.localStorage.getItem('person');
            try {
                // JSON字符串转换为原生的
                alert(JSON.parse(result));
            } catch (error) { // 假如解析出错,那么清空该数据
                alert(error.message)
                window.localStorage.removeItem('person')
            }
        }
        // 移除存储
        btn5.onclick = () => {
            window.localStorage.removeItem('person');
        }
        // 清除存储
        btn6.onclick = () => {
            window.localStorage.clear();
        }

    </script>
</body>

</html>
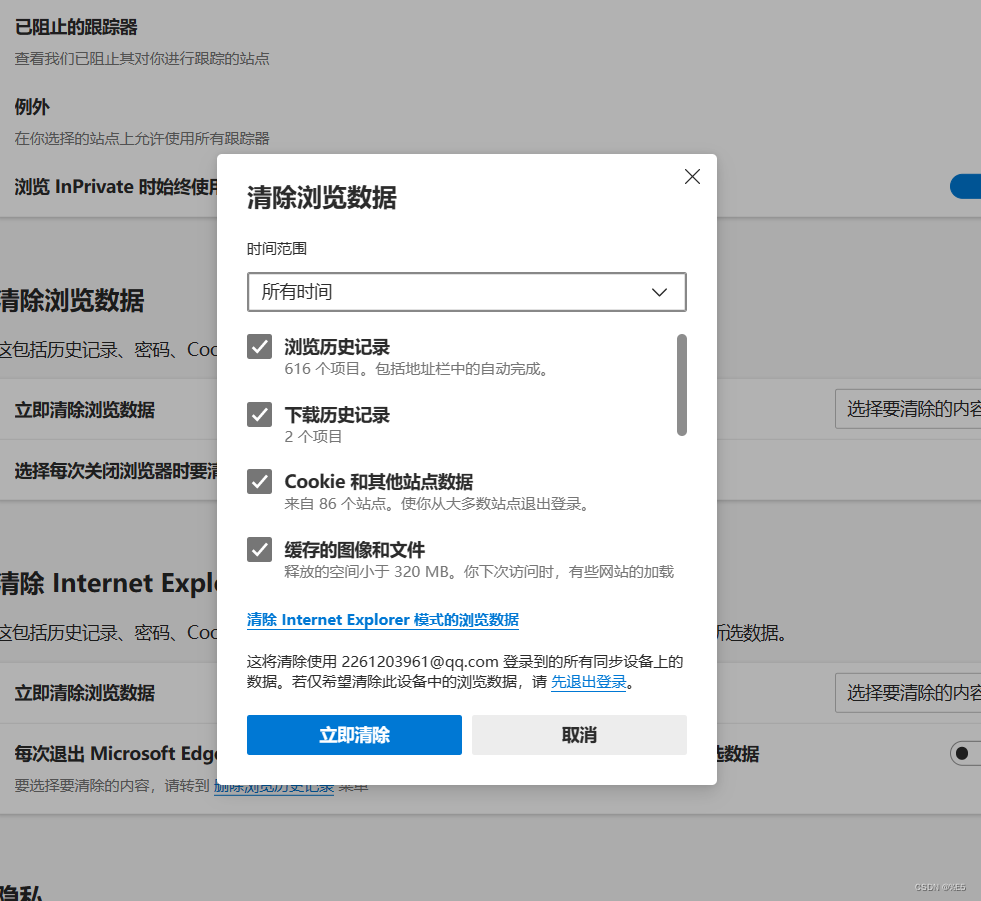
- localStorage的数据: 1.清除浏览器缓存记录 2.clear()清除数据。他不会随着页面的关闭而清除缓存,只有通过上面的两个方法才能清除。
这样做的好处就是: 用户访问的时候有一层缓存会访问的时候加快速度
2.会话缓存(Session Storage)
它会随着一个会话的开始而创建;随着会话的关闭而失效。也就是浏览器的开和关
(1).模拟会话缓存
<!DOCTYPE html>
<html lang="en">

<head>
    <meta charset="UTF-8">
    <meta http-equiv="X-UA-Compatible" content="IE=edge">
    <meta name="viewport" content="width=device-width, initial-scale=1.0">
    <title>SessionStorage</title>
</head>

<body>
    <h1>SessionStorage</h1>
    <button id="btn1">保存数据</button>
    <button id="btn2">浏览数据</button>
    <button id="btn4">删除数据</button>
    <button id="btn5">清除数据</button>
    <script>
        const btn = document.getElementById('btn1');
        const btn3 = document.getElementById('btn2');
        const btn5 = document.getElementById('btn4');
        const btn6 = document.getElementById('btn5');
        const person = { name: 'jsxs', age: '52', sex: '30' }
        const person2 = { name: 'ckqn', age: '0', sex: '0' }
        // 添加存储
        btn.onclick = () => {
            window.sessionStorage.setItem('person', JSON.stringify(person));  // 左边是 key 右边是 value
            window.sessionStorage.setItem('person2', JSON.stringify(person2));  // 左边是 key 右边是 value
        }
        // 浏览存储
        btn3.onclick = () => {
            // 输出的是JSON字符串
            const result = window.sessionStorage.getItem('person');
            try {
                // JSON字符串转换为原生的
                alert(JSON.parse(result));
            } catch (error) { // 假如解析出错,那么清空该数据
                alert(error.message)
                window.sessionStorage.removeItem('person')
            }
        }
        // 移除存储
        btn5.onclick = () => {
            window.sessionStorage.removeItem('person');
        }
        // 清除存储
        btn6.onclick = () => {
            window.sessionStorage.clear();
        }

    </script>
</body>

</html>
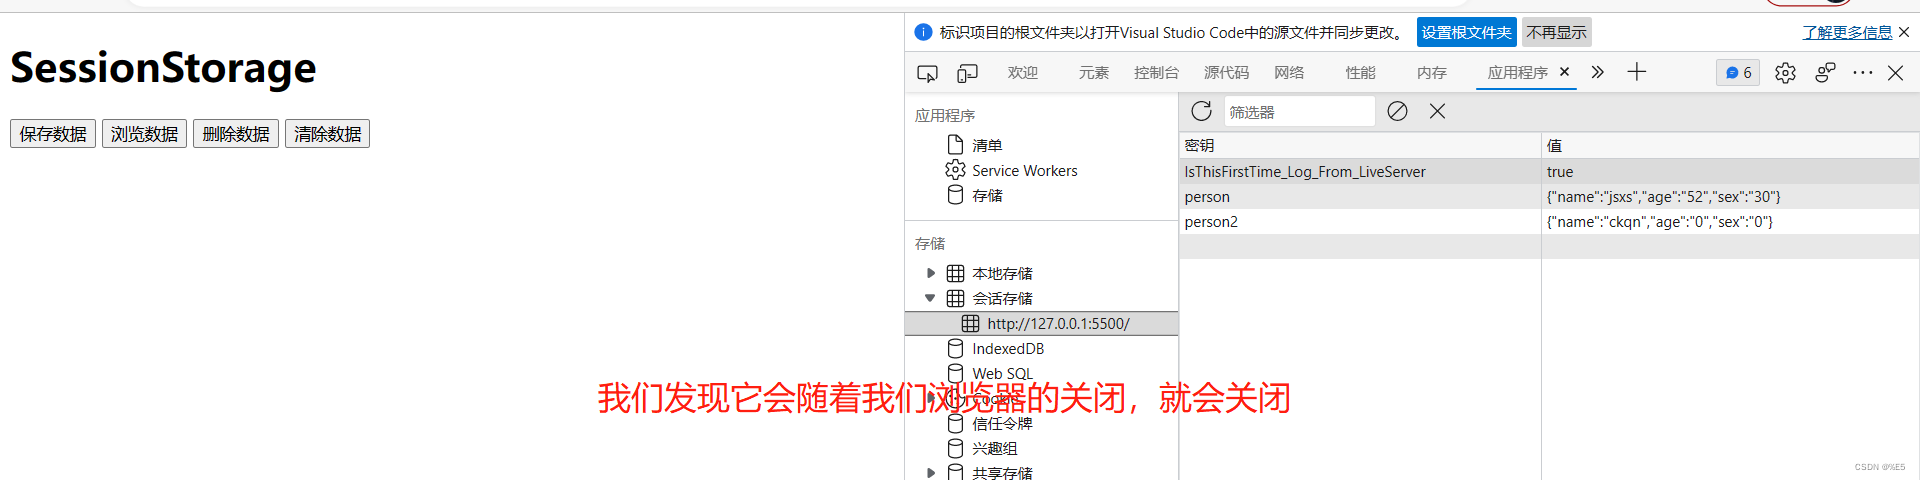
(2).会话缓存和本地缓存的区别
- 本地缓存不会随着浏览器的关闭而关闭;会话缓存会随着浏览器的关闭而关闭。
- 本地缓存清除只有两种方式;会话缓存关闭浏览器即可。
- 存储的内容一般支持 5~10MB(很大了)
(3).JSON转换与JSON解析
- xxx->转换为JSON字符串: JSON.stringify(xxx)
- JSON字符串解析为->原有的变量: JSON.parse(JSON.stringify(xxx))
- 假如说在JSON在解析的时候,解析的数据为null,那么返回值是 null值,而不是字符串。
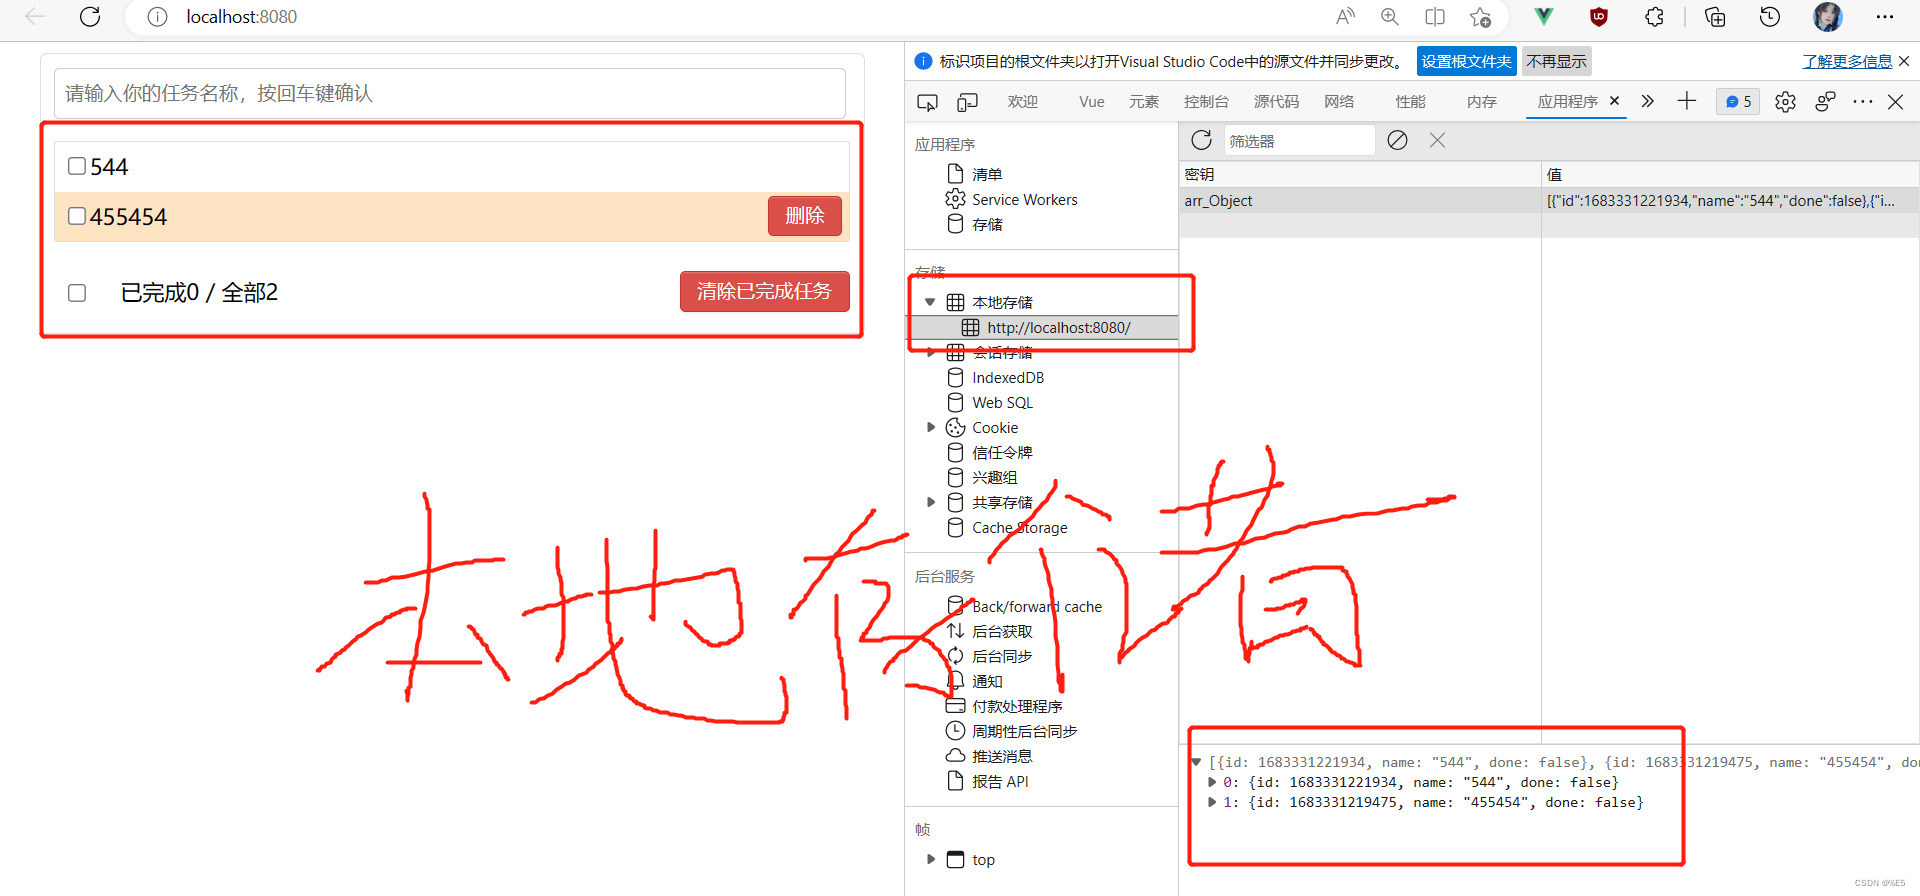
3.todos案列_本地缓存版
(1).mounted和watch的区别
- mounted: 挂载的意思: 就是和浏览器并发运行。第一次初始化页面的时候就会挂载上去。
- wathc: 监视的意思:当监视的属性发生变化的时候,就会发生相应的变化。但不会在第一次初始化页面的时候监视到数据。我们只需要添加一个命令即可和mounted有一样的效果。
immediate: true, // 若immediate为true则handle会在初始化时就会调用一次,以后就看firstName的改变了
(2).本地缓存版本
我们只修改App.vue这个组件就可以了。其余的不用修改.
App.vue
基本思路我们使用:watch进行监视挂载到浏览器上。然后和data区域的数据进行交互目的是为了浏览缓存的数据,假如说解析的时候为null我们就将数组设置为空数组。假如说不为空且数据格式有问题,我们就将其给重置掉数据并将数组继续重置为空数组。
<template>
  <div>
   <div class="todo-container">
    <div class="todo-wrap">
      <!-- 1.头部 将父APP.VUE的addFather方法传递给子组件-->
      <Header :addFatherA="addFather"/>
      <!-- 2.列表 : 将父APP.VUE的todos数组传递给子组件-->
      <list
      :todosA="todos"
      :updateFatherA="updateFather"
      :deleteFatherA="deleteFather"
      />
      <!-- 3.底部导航 -->
      <Footer
      :FooterTodos="todos"
      :updateAllFatherA="updateAllFather"
      :clearAllDoneFatherA="clearAllDoneFather"
      />
    </div>
  </div>
  </div>
</template>

<script>
  // 1.引入组件
  import Header from './components/Header.vue'
  import List from './components/List.vue'
  import Footer from './components/Footer.vue'
export default {
  name:'App', // 目的是在浏览器VUE插件中的名字都是App不会被改变。
  // 2.注册组件
  components:{
    Header,
    List,
    Footer
  },
  data() {
    const json_arr=localStorage.getItem('arr_Object'); // 这里我们直接得到的是json数组
    let parse_arr;   // 常量必须复制、let和var不需要
    try {// 有一种可能是用户修改了格式,出现错误。我们需要在这里进行捕获。
      // 把json数组转换为字符串。如果里面的数据为空也会被try到但是
      parse_arr=JSON.parse(json_arr) || [];  //当解析的数据JSON.parse(json_arr)为空的时候,会调用空数组。否则不调用空数组


    } catch (error) {
      alert('本地缓存的数据异常-请查看您的数据格式是否正确!!!')
      localStorage.removeItem('arr_Object')  // 重置我们的数据
      parse_arr=[]
    }

    return {

      todos:parse_arr
    }
  },
  methods: {
    addFather(todoObj){
      // 这个方法是对todos这个数组的尾部追加对象todoObj
      this.todos.unshift(todoObj)
    },
/*    利用id
    updateFather(id,doneA){

      // 利用map遍历数组todos,获取到的分别是数组对象和对象坐标
      this.todos=this.todos.map((value,index)=>{
          if(id===value.id){  // 假如说子类传递过来的值和map遍历的值一样,那么就返回 所有的属性+修改后的值
              return {...value,done:doneA}
          }else{
            return value
          }
      })
    }
*/
  // 更新
    updateFather(index,doneA){
      this.todos[index].done=doneA
    },
    // 删除
    deleteFather(index){
    // 根据坐标删除数据
    this.todos.splice(index,1)
  },
  // 全选或者不选
  updateAllFather(doneOption){
    // map():创建一个新数组,这个新数组由原数组中的每个元素都调用一次提供的函数后的返回值组成。
      this.todos=this.todos.map((value)=>{  // 这个参数是遍历的单个对象
        return {...value,done:doneOption} // 返回将done属性改编为doneOption的完整对象
      })
  },
   // 清除已经已经勾选的
   clearAllDoneFather(){
    this.todos=this.todos.filter((value)=>{
      // 假如说done值为false就不用过滤-保留,否则就需要过滤-不保留
      return value.done===false
    })
   }
  },
  watch:{// 我们初步设想的是利用,mounted目的是一上来就挂载上去。但是webStorage数据不会随着新增能新增...
  immediate: true,  // 若immediate为true则handle会在初始化时就会调用一次,以后就看firstName的改变了
    todos(newValue,oldValue){  // 会接受到改变前的值和改变后的值
        localStorage.setItem('arr_Object',JSON.stringify(newValue)); // 这里一定要转换为JSON字符串
    }
  }

}
</script>

<style>

  /*base*/
  body {
    background: #fff;
  }

  .btn {
    display: inline-block;
    padding: 4px 12px;
    margin-bottom: 0;
    font-size: 14px;
    line-height: 20px;
    text-align: center;
    vertical-align: middle;
    cursor: pointer;
    box-shadow: inset 0 1px 0 rgba(255, 255, 255, 0.2), 0 1px 2px rgba(0, 0, 0, 0.05);
    border-radius: 4px;
  }

  .btn-danger {
    color: #fff;
    background-color: #da4f49;
    border: 1px solid #bd362f;
  }

  .btn-danger:hover {
    color: #fff;
    background-color: #bd362f;
  }

  .btn:focus {
    outline: none;
  }

  .todo-container {
    width: 600px;
    margin: 0 auto;
  }
  .todo-container .todo-wrap {
    padding: 10px;
    border: 1px solid #ddd;
    border-radius: 5px;
  }

</style>
4.todos案列_深度监视
(1).发现问题
我们发现我们在勾选单个任务的时候,vue的done值是随着我们勾选变化而变化的但是localSroage本地缓存的数据是不会变化的。原因不是我们代码的问题,而是vue监视的问题。
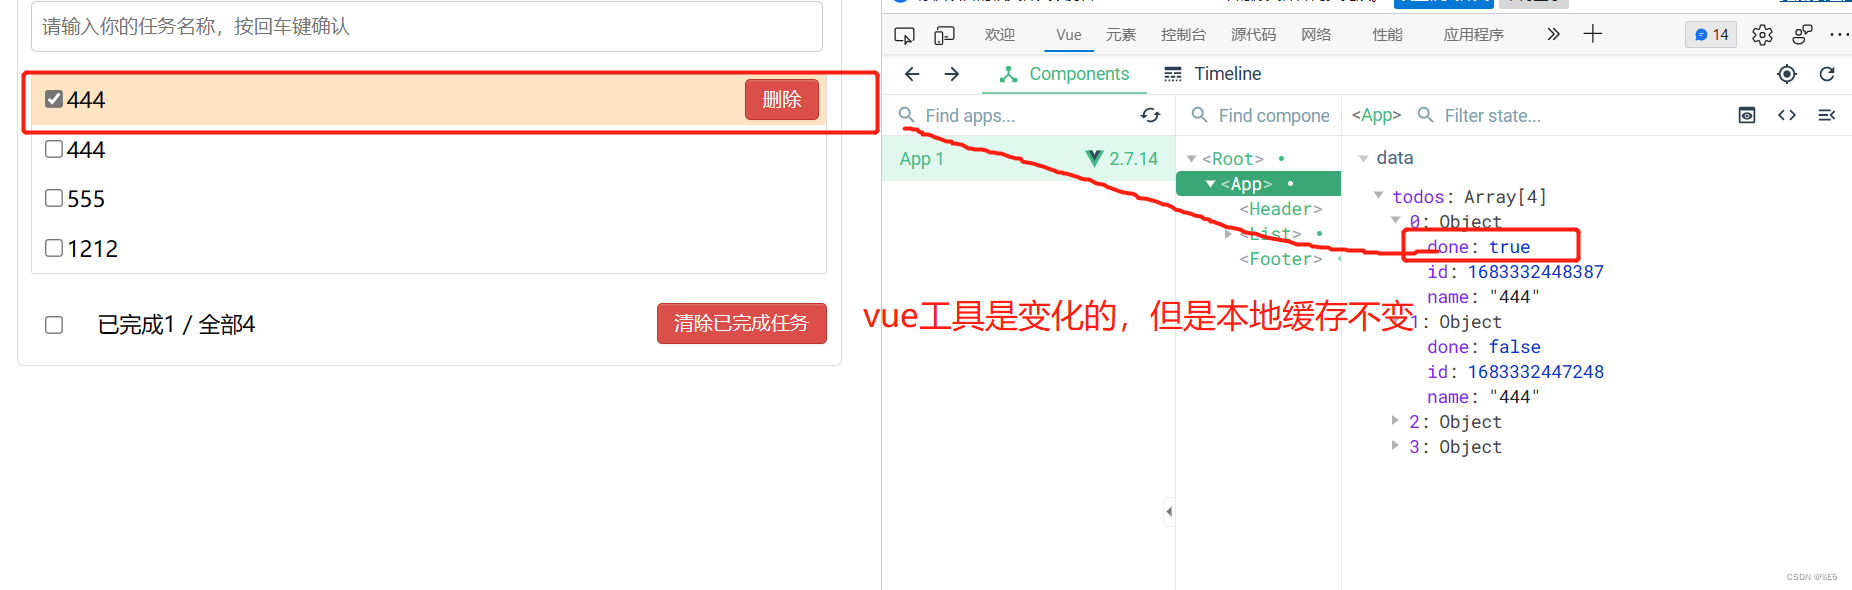
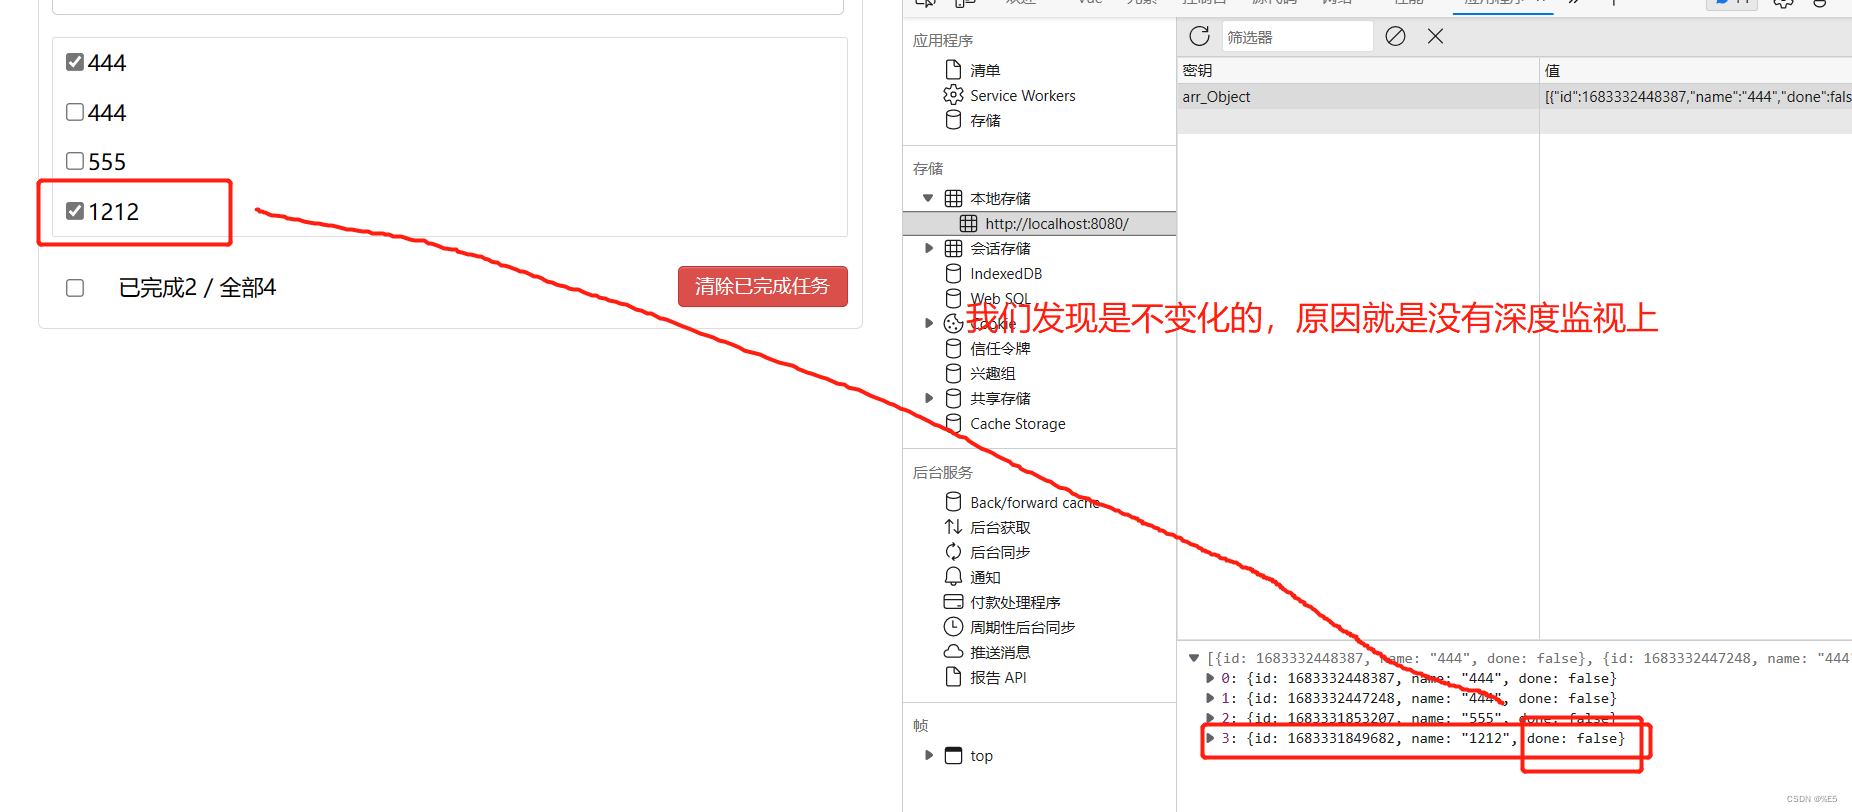
这里我们勾选最下面的全部任务,vue和loacalStorage才会全部变化。
(2).原理探究
- 监视问题
我们通常所说的监视有以下两种形式:
- Vue自带的监视:比如在我们没有手动添加watch的情况下,更改某一个数据,Vue会监视到并且给我们改变。
Vue会自动给监视data中所有层次对象的属性。 - Vue的watch手动写的监视。
Vue已经可以自动监视到数据了,为什么我们还要写watch呢?
- Vue默认能够监视到所有层次的属性,但Vue的监视它只做两件事情:“第一件事请: 帮我们更改数据”。“第二件事:帮我们更新模板,将页面更换为最新的” 。
- 我们自己写的watch监视,是因为Vue默认的监视完成不了我们所需要的业务逻辑,这就需要我们自己定义一个满足我们的业务需求的监视。
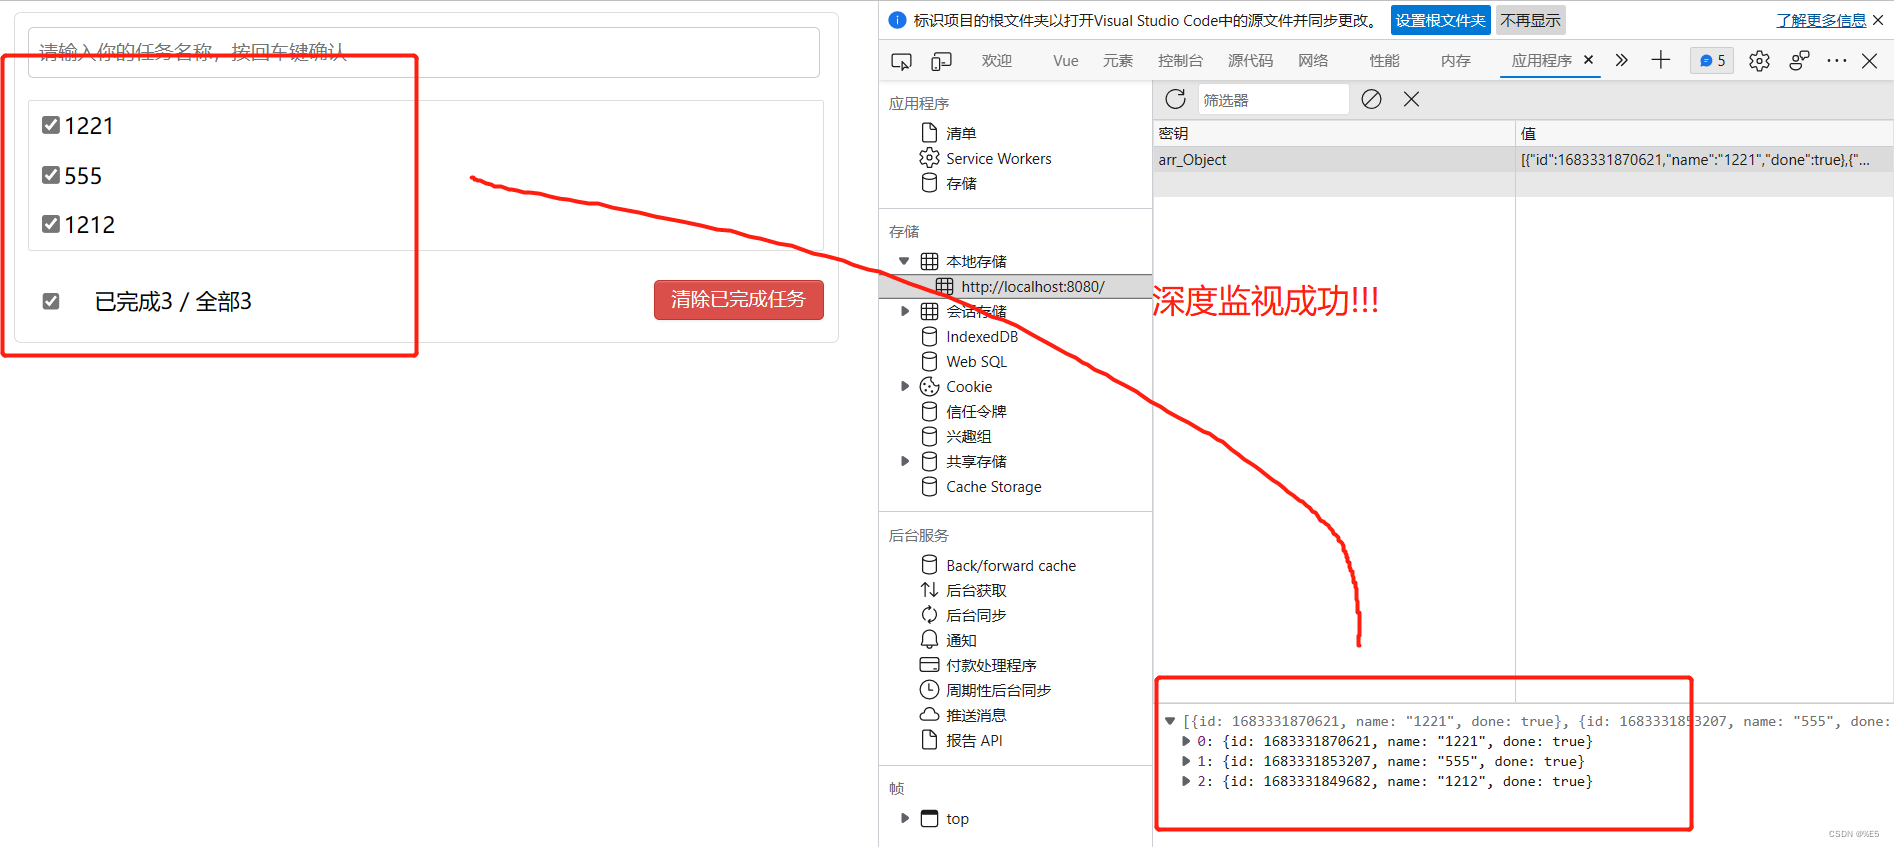
(3).深度监视和浅度监视
- 浅度监视(默认): 只能监视到数据的增加和删除,监视不到数据某一个属性内部的变化
- 深度监视:能监视到数据的增加和删除,也能监视的到数据某一个属性的变化。
- 深度监视
必须需要用到watch的完整写法且加上一个属性: deep:true。
只有完整的监视方法才能使用到属性。所以深度监视需要用到完整监视方法
  watch:{// 我们初步设想的是利用,mounted目的是一上来就挂载上去。但是webStorage数据不会随着新增能新增...
  todos:{
    immediate: true,  // 若immediate为true则handle会在初始化时就会调用一次,以后就看firstName的改变了
    deep: true, //开启深度监视
    handler(newValue,oldValue){  //假如data是方法旧值获取不到(旧址也是新值),假如data是对象就能获取到旧值
        localStorage.setItem('arr_Object',JSON.stringify(newValue)); // 这里一定要转换为JSON字符串
      }
    }
  }
<template>
  <div>
   <div class="todo-container">
    <div class="todo-wrap">
      <!-- 1.头部 将父APP.VUE的addFather方法传递给子组件-->
      <Header :addFatherA="addFather"/>
      <!-- 2.列表 : 将父APP.VUE的todos数组传递给子组件-->
      <list
      :todosA="todos"
      :updateFatherA="updateFather"
      :deleteFatherA="deleteFather"
      />
      <!-- 3.底部导航 -->
      <Footer
      :FooterTodos="todos"
      :updateAllFatherA="updateAllFather"
      :clearAllDoneFatherA="clearAllDoneFather"
      />
    </div>
  </div>
  </div>
</template>

<script>
  // 1.引入组件
  import Header from './components/Header.vue'
  import List from './components/List.vue'
  import Footer from './components/Footer.vue'
export default {
  name:'App', // 目的是在浏览器VUE插件中的名字都是App不会被改变。
  // 2.注册组件
  components:{
    Header,
    List,
    Footer
  },
  data() {
    // const json_arr=localStorage.getItem('arr_Object'); // 这里我们直接得到的是json数组
    // let parse_arr;   // 常量必须复制、let和var不需要
    // try {// 有一种可能是用户修改了格式,出现错误。我们需要在这里进行捕获。
    //   // 把json数组转换为字符串。如果里面的数据为空也会被try到但是
    //   parse_arr=JSON.parse(json_arr) || [];  //当解析的数据JSON.parse(json_arr)为空的时候,会调用空数组。否则不调用空数组


    // } catch (error) {
    //   alert('本地缓存的数据异常-请查看您的数据格式是否正确!!!')
    //   localStorage.removeItem('arr_Object')  // 重置我们的数据
    //   parse_arr=[]
    // }

    return {

      todos:[]
    }
  },
  methods: {
    addFather(todoObj){
      // 这个方法是对todos这个数组的尾部追加对象todoObj
      this.todos.unshift(todoObj)
    },
/*    利用id
    updateFather(id,doneA){

      // 利用map遍历数组todos,获取到的分别是数组对象和对象坐标
      this.todos=this.todos.map((value,index)=>{
          if(id===value.id){  // 假如说子类传递过来的值和map遍历的值一样,那么就返回 所有的属性+修改后的值
              return {...value,done:doneA}
          }else{
            return value
          }
      })
    }
*/
  // 更新
    updateFather(index,doneA){
      this.todos[index].done=doneA
    },
    // 删除
    deleteFather(index){
    // 根据坐标删除数据
    this.todos.splice(index,1)
  },
  // 全选或者不选
  updateAllFather(doneOption){
    // map():创建一个新数组,这个新数组由原数组中的每个元素都调用一次提供的函数后的返回值组成。
      this.todos=this.todos.map((value)=>{  // 这个参数是遍历的单个对象
        return {...value,done:doneOption} // 返回将done属性改编为doneOption的完整对象
      })
  },
   // 清除已经已经勾选的
   clearAllDoneFather(){
    this.todos=this.todos.filter((value)=>{
      // 假如说done值为false就不用过滤-保留,否则就需要过滤-不保留
      return value.done===false
    })
   }
  },
  watch:{// 我们初步设想的是利用,mounted目的是一上来就挂载上去。但是webStorage数据不会随着新增能新增...
  todos:{
    immediate: true,  // 若immediate为true则handle会在初始化时就会调用一次,以后就看firstName的改变了
    deep: true, //开启深度监视
    handler(newValue,oldValue){  //假如data是方法旧值获取不到(旧址也是新值),假如data是对象就能获取到旧值
        localStorage.setItem('arr_Object',JSON.stringify(newValue)); // 这里一定要转换为JSON字符串
      }
    }
  }

}
</script>

<style>

  /*base*/
  body {
    background: #fff;
  }

  .btn {
    display: inline-block;
    padding: 4px 12px;
    margin-bottom: 0;
    font-size: 14px;
    line-height: 20px;
    text-align: center;
    vertical-align: middle;
    cursor: pointer;
    box-shadow: inset 0 1px 0 rgba(255, 255, 255, 0.2), 0 1px 2px rgba(0, 0, 0, 0.05);
    border-radius: 4px;
  }

  .btn-danger {
    color: #fff;
    background-color: #da4f49;
    border: 1px solid #bd362f;
  }

  .btn-danger:hover {
    color: #fff;
    background-color: #bd362f;
  }

  .btn:focus {
    outline: none;
  }

  .todo-container {
    width: 600px;
    margin: 0 auto;
  }
  .todo-container .todo-wrap {
    padding: 10px;
    border: 1px solid #ddd;
    border-radius: 5px;
  }

</style>
watch监视 默认开启的是浅度监视并不是深度监视
(二十五)、自定义事件 (父子组件)
1.A组件想让B组件给自己传递数据,那么就要给B组件绑定自定义事件。
2.自定义回调放在哪里,哪里就能够接收数据。非$emit()是自定义回调函数
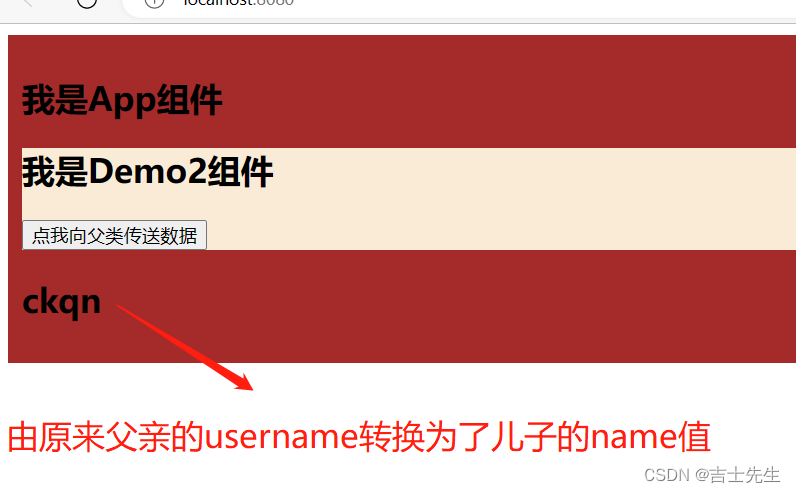
1.儿子传递数据给父亲 (原始)

App.vue
<template>
  <div class="app">
    <h2>我是App组件</h2>
    <!-- 2. 父亲传递给儿子 -->
    <Demo :receive_son="receive_one"/>
    <h2>{{username}}</h2>
  </div>
</template>

<script>
import Demo from "./components/Demo.vue";
export default {
  name: "App",
  components: {
    Demo,
  },
  data() {
    return {
        username:'111'
    }
  },
  // TODO: 1.父亲创建一个接受儿子传递过来的方法
  methods: {
    receive_one(data_one){
        this.username=data_one;
    }
  }
};
</script>

<style>
.app{
    background-color: brown;
    padding: 10px;
}
</style>
Demo.vue 儿子
<template>
  <div class="demo">
    <h2 >我是Demo2组件</h2>
    <button @click="send_data">点我向父类传送数据</button>
  </div>
</template>

<script>
export default {
  name: "Demo",
  data() {
    return {
        name:'ckqn'
    }
  },
//  TODO: 1.儿子接受数据
    props:['receive_son'],
// TODO: 2.儿子创建方法传递给父亲
    methods:{
        send_data(){
            this.receive_son(this.name)
        }
    }
};
</script>

<style>
    .demo{
        background-color: antiquewhite;
    }
</style>
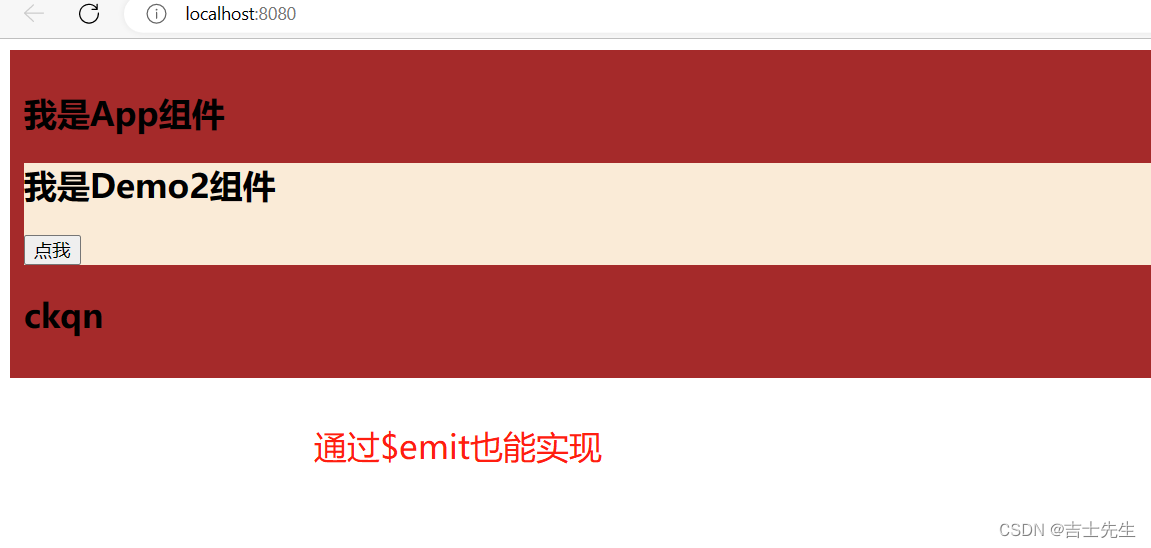
2.儿子传递数据给父亲 (自定义事件 $emit) ⭐
- (适用于父子组件、不适用兄弟组件):
一般自定义事件都会放在组件上
1.给子组件自定义事件:自定义事件会放在子组件的vc上
<Demo @jsxs="test"/>

methods: {
    test(data_one){
        this.username = data_one
    }
  },
App.vue
<template>
  <div class="app">
    <h2>我是App组件</h2>
    <!--
        如下代码是给Demo的组件实列对象定义一个jsxs事件,只要Demo组件实列对象触发了jsxs事件,那么就调用test函数
        组件->一般添加的是自定义事件
     -->
    <Demo @jsxs="test"/>
    <h2>{{username}}</h2>
  </div>
</template>

<script>
import Demo from "./components/Demo.vue";
export default {
  name: "App",
  components: {
    Demo,
  },
  data() {
    return {
        username:'111'
    }
  },
  methods: {
    test(data_one){
        this.username = data_one
    }
  },
};
</script>

<style>
.app{
    background-color: brown;
    padding: 10px;
}
</style>
Demo.vue
2.子组件通过$emit向父亲传递数据 : 第一个参数是自定义事件名,后面的是参数无限制
    methods:{
        send_data(){
        // 当jsxs这个自定义的事件被触发的时候会像父App.vue传递一个数据
            this.$emit('jsxs',this.name) //把子类的参数传递给父类
        }
    }
<template>
  <div class="demo">
    <h2 >我是Demo2组件</h2>
    <button @click="send_data">点我</button>
  </div>
</template>

<script>
export default {
  name: "Demo",
  data() {
    return {
        name:'ckqn'
    }
  },
    methods:{
        send_data(){
            this.$emit('jsxs',this.name) //把子类的参数传递给父类
        }
    }
};
</script>

<style>
    .demo{
        background-color: antiquewhite;
    }
</style>
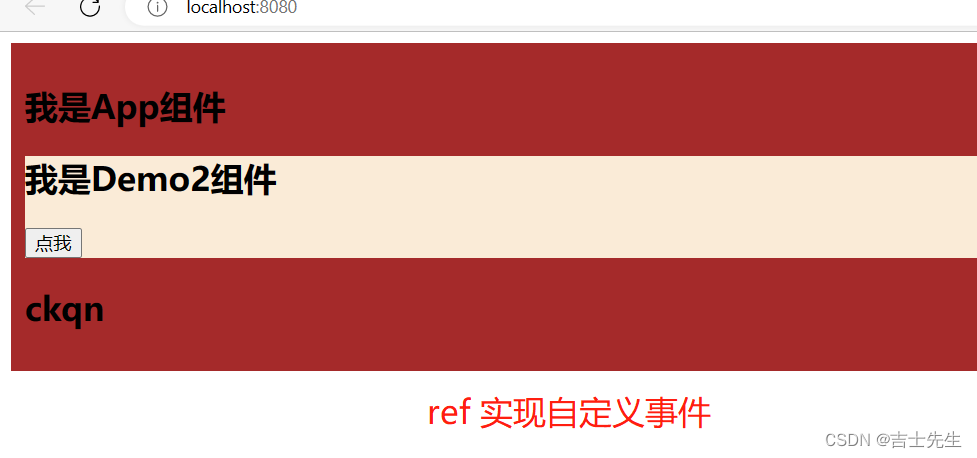
3.儿子传递数据给父亲 (ref 自定义事件实现)
1.给子组件设置ref。 在组件上设置ref就是获取的组件的实列对象
<Demo ref="demoA"/>
2.利用mounted进行挂载实现自定义
  mounted() {
    this.$refs.demoA.$on('jsxs',this.test)  //第一个参数是自定义自定义事件名和子组件emit对应,第二个是父App.vue绑定的函数
  },
App.vue
<template>
  <div class="app">
    <h2>我是App组件</h2>
    <!--
        如下代码是给Demo的组件实列对象定义一个jsxs事件,只要Demo组件实列对象触发了jsxs事件,那么就调用test函数
        组件->一般添加的是自定义事件
     -->
    <Demo ref="demoA"/>
    <h2>{{username}}</h2>
  </div>
</template>

<script>
import Demo from "./components/Demo.vue";
export default {
  name: "App",
  components: {
    Demo,
  },
  data() {
    return {
        username:'111'
    }
  },
  methods: {
    test(data_one){
        this.username = data_one
    }
  },
  mounted() {
    this.$refs.demoA.$on('jsxs',this.test)
  },
};
</script>

<style>
.app{
    background-color: brown;
    padding: 10px;
}
</style>
Demo.vue 不变
<template>
  <div class="demo">
    <h2 >我是Demo2组件</h2>
    <button @click="send_data">点我</button>
  </div>
</template>

<script>
export default {
  name: "Demo",
  data() {
    return {
        name:'ckqn'
    }
  },
    methods:{
        send_data(){
            this.$emit('jsxs',this.name) //把子类的参数传递给父类
        }
    }
};
</script>

<style>
    .demo{
        background-color: antiquewhite;
    }
</style>
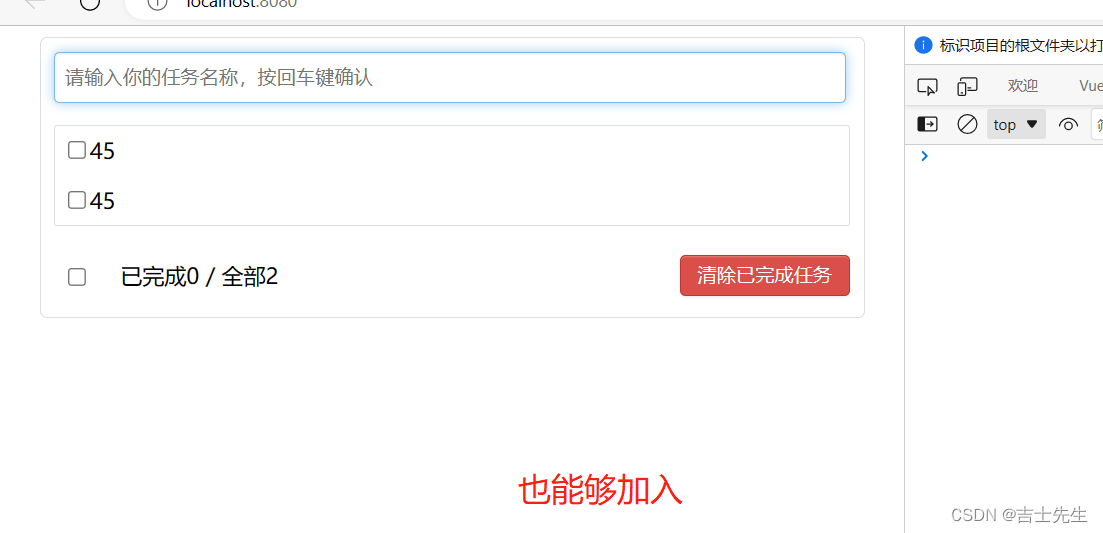
4.todoList更换为自定义事件
App.vue
<!-- 1.头部 将父APP.VUE的addFather方法传递给子组件-->
      <Header @addFatherA="addFather"/>
<template>
  <div>
   <div class="todo-container">
    <div class="todo-wrap">
      <!-- 1.头部 将父APP.VUE的addFather方法传递给子组件-->
      <Header @addFatherA="addFather"/>
      <!-- 2.列表 : 将父APP.VUE的todos数组传递给子组件-->
      <list
      :todosA="todos"
      :updateFatherA="updateFather"
      :deleteFatherA="deleteFather"
      />
      <!-- 3.底部导航 -->
      <Footer
      :FooterTodos="todos"
      :updateAllFatherA="updateAllFather"
      :clearAllDoneFatherA="clearAllDoneFather"
      />
    </div>
  </div>
  </div>
</template>

<script>
  // 1.引入组件
  import Header from './components/Header.vue'
  import List from './components/List.vue'
  import Footer from './components/Footer.vue'
export default {
  name:'App', // 目的是在浏览器VUE插件中的名字都是App不会被改变。
  // 2.注册组件
  components:{
    Header,
    List,
    Footer
  },
  data() {
    return {
      todos:[]
    }
  },
  methods: {
    addFather(todoObj){
      // 这个方法是对todos这个数组的尾部追加对象todoObj
      this.todos.unshift(todoObj)
    },
  // 更新
    updateFather(index,doneA){
      this.todos[index].done=doneA
    },
    // 删除
    deleteFather(index){
    // 根据坐标删除数据
    this.todos.splice(index,1)
  },
  // 全选或者不选
  updateAllFather(doneOption){
    // map():创建一个新数组,这个新数组由原数组中的每个元素都调用一次提供的函数后的返回值组成。
      this.todos=this.todos.map((value)=>{  // 这个参数是遍历的单个对象
        return {...value,done:doneOption} // 返回将done属性改编为doneOption的完整对象
      })
  },
   // 清除已经已经勾选的
   clearAllDoneFather(){
    this.todos=this.todos.filter((value)=>{
      // 假如说done值为false就不用过滤-保留,否则就需要过滤-不保留
      return value.done===false
    })
   }
  },
  watch:{// 我们初步设想的是利用,mounted目的是一上来就挂载上去。但是webStorage数据不会随着新增能新增...
  todos:{
    immediate: true,  // 若immediate为true则handle会在初始化时就会调用一次,以后就看firstName的改变了
    deep: true, //开启深度监视
    handler(newValue,oldValue){  //假如data是方法旧值获取不到(旧址也是新值),假如data是对象就能获取到旧值
        localStorage.setItem('arr_Object',JSON.stringify(newValue)); // 这里一定要转换为JSON字符串
      }
    }
  }

}
</script>

<style>

  /*base*/
  body {
    background: #fff;
  }

  .btn {
    display: inline-block;
    padding: 4px 12px;
    margin-bottom: 0;
    font-size: 14px;
    line-height: 20px;
    text-align: center;
    vertical-align: middle;
    cursor: pointer;
    box-shadow: inset 0 1px 0 rgba(255, 255, 255, 0.2), 0 1px 2px rgba(0, 0, 0, 0.05);
    border-radius: 4px;
  }

  .btn-danger {
    color: #fff;
    background-color: #da4f49;
    border: 1px solid #bd362f;
  }

  .btn-danger:hover {
    color: #fff;
    background-color: #bd362f;
  }

  .btn:focus {
    outline: none;
  }

  .todo-container {
    width: 600px;
    margin: 0 auto;
  }
  .todo-container .todo-wrap {
    padding: 10px;
    border: 1px solid #ddd;
    border-radius: 5px;
  }

</style>
Header.vue
$emit -> 属于vue实列的, vc是继承了vm
 add(){
        if(this.textA!==null){
           // 根据用户的输入生成一个todo对象
        const todo={id:Date.now(),name:this.textA,done:false}
        // 通知父App.vue添加这个数据
        this.$emit('addFatherA',todo)
        }
        this.textA=''
      }
<template>
  <div>
          <!-- 1.头部 -->
      <div class="todo-header">
        <input type="text" placeholder="请输入你的任务名称,按回车键确认" v-model="textA" @keyup.enter="add"/>
      </div>
  </div>
</template>

<script>
export default {
    name:'Header',
    data() {
      return {
        textA:''
      }
    },
    methods: {
      add(){
        if(this.textA!==null){
           // 根据用户的输入生成一个todo对象
        const todo={id:Date.now(),name:this.textA,done:false}
        // 通知父App.vue添加这个数据
        this.$emit('addFatherA',todo)
        }
        this.textA=''
      }
    },
}
</script>

<style scoped>
  /*header*/
  .todo-header input {
    width: 560px;
    height: 28px;
    font-size: 14px;
    border: 1px solid #ccc;
    border-radius: 4px;
    padding: 4px 7px;
  }

  .todo-header input:focus {
    outline: none;
    border-color: rgba(82, 168, 236, 0.8);
    box-shadow: inset 0 1px 1px rgba(0, 0, 0, 0.075), 0 0 8px rgba(82, 168, 236, 0.6);
  }

</style>
(二十六)、全局事件总线 (兄弟组件)
1.全局事件分析
$ emit是触发、$ on是绑定。
兄弟组件可以借助全局事件总线进行数据联系

- 都能够被全部组件能看得到
- 支持被绑定事件
满足上面的条件只能是 vm。因为vm被vc继承,放在vm上就能够实现共享。且每一个组件的vc都是经过一次extend(),所以每一个vc都是不一样的。只能放在vm上了。
1. $on('绑定的事件名',触发谁) 绑定自定义事件
2. $emit('触发的事件名',参数) 自定义分发事件
3. $off('解绑的事件名') 解绑自定义监视监听
4. $once('绑定的事件名',触发谁) 绑定事件监听,但只能处理一次
2.全局事件 $bus
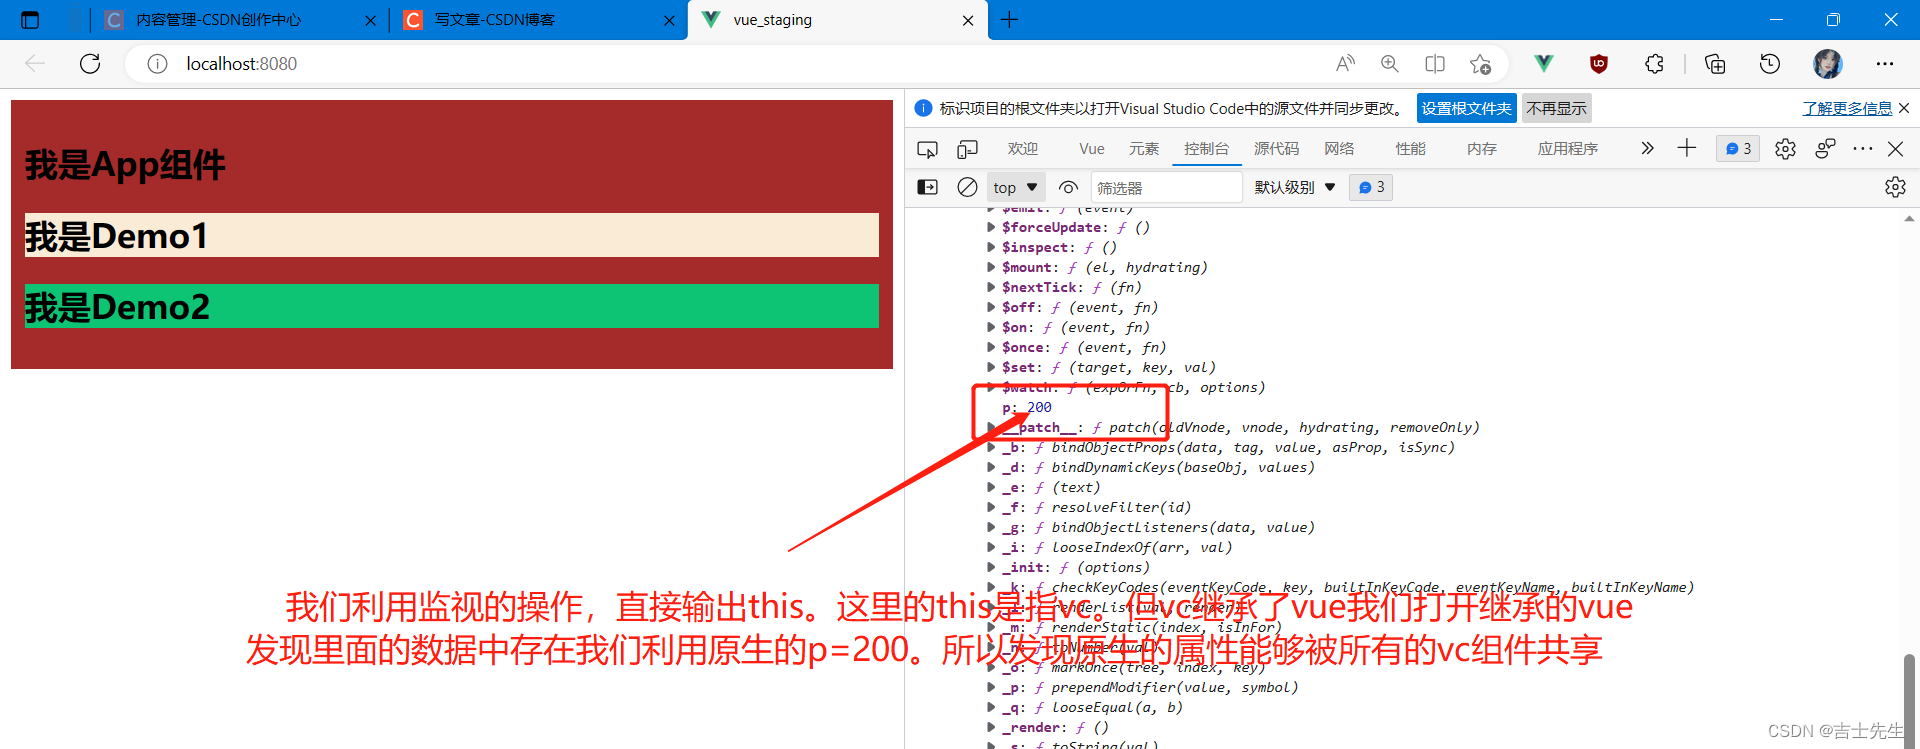
(1).Vue原型数据被所有人共享
提示:放在vue的原型上的数据谁都能看的到 Vue.prototype.x=vvv
我们希望越早放数据越好,所以我们想到main.js
import  Vue  from 'vue'  // 引入阉割版本的vue
import  App  from './App.vue' // 引入App.vue组件

Vue.config.productionTip = false;
Vue.prototype.p=200;  // eg: 原型上添加p值为200
new Vue({
    render:h=>h(App)

}).$mount('#app');
App.vue
<template>
  <div class="app">
    <h2>我是App组件</h2>
    <Demo1/>
    <Demo2/>
  </div>
</template>

<script>
import { watch } from 'vue'
// TODO: 引入组件
import Demo1 from './components/Demo1.vue'
import Demo2 from './components/Demo2.vue'
export default {
    name: "APP",
    // TODO: 注册组件
    components:{
      Demo1,
      Demo2,
    },
    data() {
      return {
        name:'jsxs'
      }
    },
    watch:{
      name:{
           immediate:true,
      handler(){
          console.log(this)
      }
      }

    }
}
</script>

<style>
    .app {
      background-color: brown;
      padding: 10px;
    }
</style>
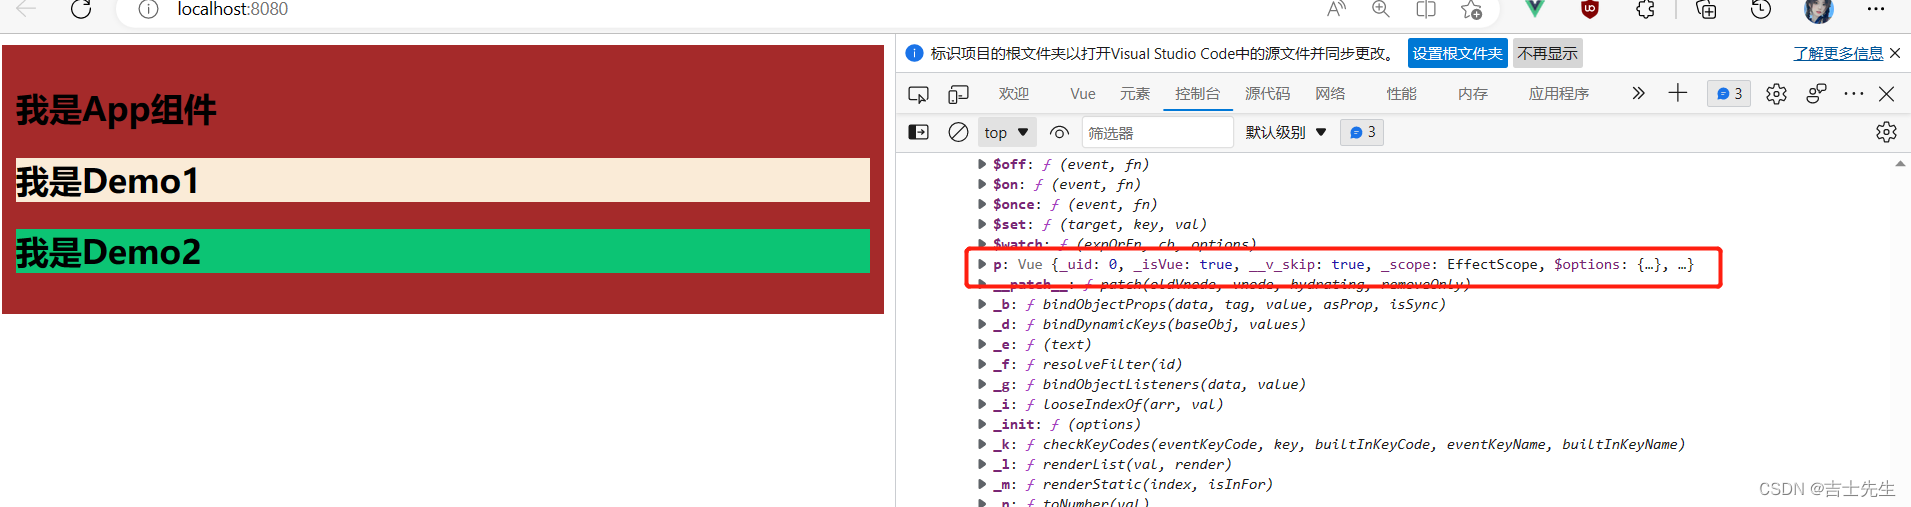
(2).在Vue原型上存放Vue的实列
利用main.js的生命周期钩子函数帮我们存放Vue的实列
import  Vue  from 'vue'  // 引入阉割版本的vue
import  App  from './App.vue' // 引入App.vue组件

Vue.config.productionTip = false;

new Vue({
    beforeCreate(){
        Vue.prototype.p=this;
    },
    render:h=>h(App)

}).$mount('#app');
我们可以在所有的组件中获取到属性p 也就是对应的Vue实列
官方推荐我们使用 $bus去替换掉属性p也就是如下。
- $ bus: 并不是Vue自带的,不像$emit等是Vue自带的
import  Vue  from 'vue'  // 引入阉割版本的vue
import  App  from './App.vue' // 引入App.vue组件

Vue.config.productionTip = false;

new Vue({
    beforeCreate(){
        Vue.prototype.$bus=this;  // 1.安装事件总线
    },
    render:h=>h(App)

}).$mount('#app');
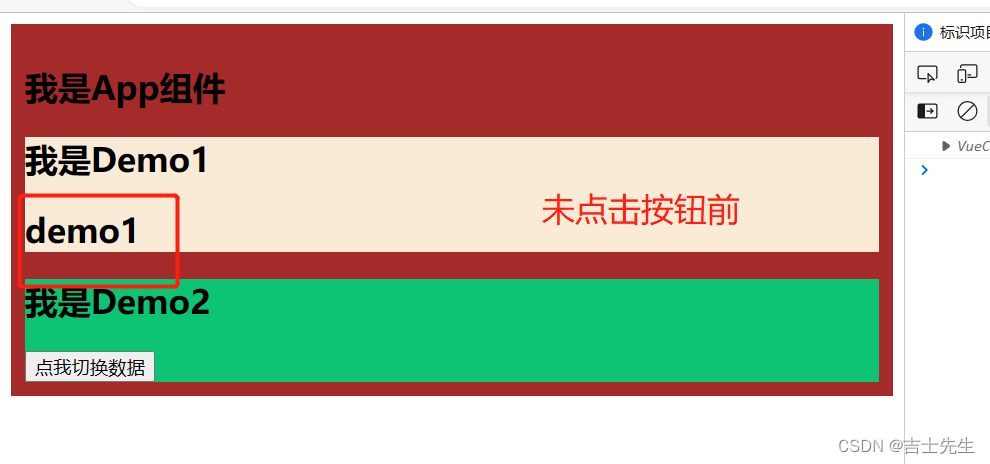
3.全局事件总线 (Demo1接受Demo2的数据)
main.js
import  Vue  from 'vue'  // 引入阉割版本的vue
import  App  from './App.vue' // 引入App.vue组件

Vue.config.productionTip = false;

new Vue({
    beforeCreate(){
        Vue.prototype.$bus=this;
    },
    render:h=>h(App)

}).$mount('#app');
App.vue
<template>
  <div class="app">
    <h2>我是App组件</h2>
    <Demo1/>
    <Demo2/>
  </div>
</template>

<script>
import { watch } from 'vue'
// TODO: 引入组件
import Demo1 from './components/Demo1.vue'
import Demo2 from './components/Demo2.vue'
export default {
    name: "APP",
    // TODO: 注册组件
    components:{
      Demo1,
      Demo2,
    },

}
</script>

<style>
    .app {
      background-color: brown;
      padding: 10px;
    }
</style>
Demo1.vue: 接受数据
发送数据用$on进行绑定事件
mounted() {
      this.$bus.$on('A',this.demo1);  // 假如demo2被触发,我们就调用demo1
    },
<template>
  <div class="demo1">
    <h2>我是Demo1</h2>
    <h2>{{username1}}</h2>
  </div>
</template>

<script>
export default {
    name: "Demo1",
    data() {
      return {
        username1:'demo1',
      }
    },
    methods: {
      demo1(x){
        this.username1=x;
      }
    },
    mounted() {
      this.$bus.$on('A',this.demo1);  // 假如demo2被触发,我们就调用demo1
    },

}
</script>

<style>
    .demo1 {
        background-color: antiquewhite;
    }
</style>
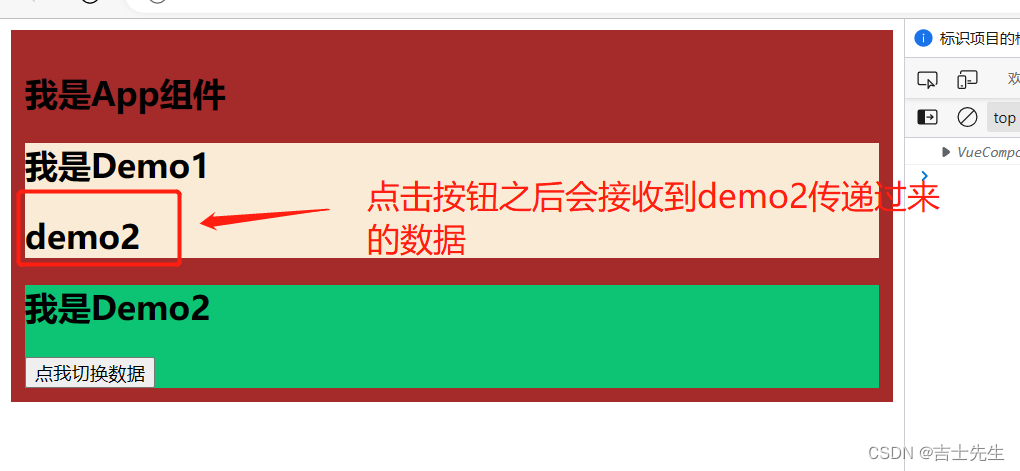
Demo2.vue: 发送数据
接受消息用$emit
$emit 是触发 $on是绑定
 methods: {
      send_data(){
        this.$bus.$emit('A',this.username2);
      }
    },
<template>
  <div class="demo2">
    <h2>我是Demo2</h2>
    <button @click="send_data">点我切换数据</button>
  </div>
</template>

<script>
export default {
    name: "Demo2",
    data() {
      return {
        username2:'demo2',
      }
    },
    methods: {
      send_data(){
        this.$bus.$emit('A',this.username2);
      }
    },
}
</script>

<style>
    .demo2 {
        background-color:  rgb(12, 196, 116);
    }
</style>
未点击按钮
点击按钮之后
4.全局事件总线(双向发送数据)
main.js
import  Vue  from 'vue'  // 引入阉割版本的vue
import  App  from './App.vue' // 引入App.vue组件

Vue.config.productionTip = false;

new Vue({
    beforeCreate(){
        Vue.prototype.$bus=this;
    },
    render:h=>h(App)

}).$mount('#app');
App.vue
<template>
  <div class="app">
    <h2>我是App组件</h2>
    <Demo1/>
    <Demo2/>
  </div>
</template>

<script>
import { watch } from 'vue'
// TODO: 引入组件
import Demo1 from './components/Demo1.vue'
import Demo2 from './components/Demo2.vue'
export default {
    name: "APP",
    // TODO: 注册组件
    components:{
      Demo1,
      Demo2,
    },
    data() {
      return {
        name:'jsxs'
      }
    },
    watch:{
      name:{
           immediate:true,
      handler(){
          console.log(this)
      }
      }

    }
}
</script>

<style>
    .app {
      background-color: brown;
      padding: 10px;
    }
</style>
Demo1.vue
<template>
  <div class="demo1">
    <h2>我是Demo1</h2>
    <h2>{{username1}}</h2>
    <button @click="send_data2">点击我发送数据到Demo2</button>
  </div>
</template>

<script>
export default {
    name: "Demo1",
    data() {
      return {
        username1:'demo1',
      }
    },
    methods: {
      demo1(x){
        this.username1=x;
      },
      // 发送消息到demo1
      send_data2(){
        console.log('xxxxxxxxx')
        this.$bus.$emit('B',this.username1);
      }

    },
    // 接受demo2传递过来的日记
    mounted() {
      this.$bus.$on('A',this.demo1);  // 绑定A事件,假如A被触发。就调用demo1这个方法
    },

}
</script>

<style>
    .demo1 {
        background-color: antiquewhite;
    }
</style>
Demo2.vue
<template>
  <div class="demo2">
    <h2>我是Demo2</h2>
    <button @click="send_data">点我切换数据</button>
    <h2>{{username2}}</h2>
  </div>
</template>

<script>
export default {
    name: "Demo2",
    data() {
      return {
        username2:'demo2',
      }
    },
    // 发送数据到demo1
    methods: {
      demo2(x){
        this.username2=x;
      },
      // 发送数据
      send_data(){
        this.$bus.$emit('A',this.username2);// 触发A事件 并传递参数
      }
    },
    // 接受数据
    mounted() {
      this.$bus.$on('B',this.demo2)  //绑定b事件,假如b事件被触发就调用demo2这个方法
    },
}
</script>

<style>
    .demo2 {
        background-color:  rgb(12, 196, 116);
    }
</style>

(二十六)、插槽 (slot)
1.问题探究
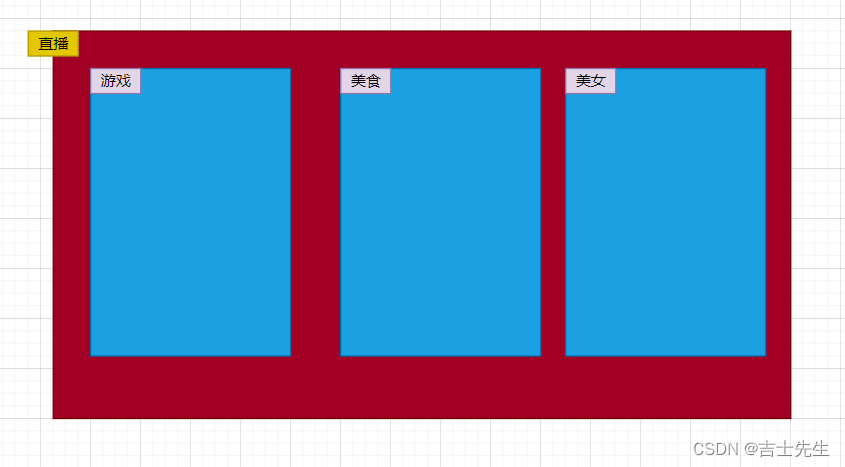
我们想复用一个组件,然而这个组件的各个数据是不同的。我们通过尝试发现:只能通过对复用的组件 v-show、v-if较为复杂的实现这个功能。否则不能实现
App.vue
<template>
<div class="app">
<!-- 组件可以传递静态的也可以传递动态的 -->
<Category title="游戏" :game_arr1="gamArr"/>
<Category title="美食" :food_url1="foodURL"/>
<Category/>
</div>
</template>
<script>
import Category from './components/Category.vue'
export default {
components:{
Category,
},
data() {
return {
gamArr:[
{id:'001',name:'王者荣耀',price:100},
{id:'002',name:'刺激战场',price:100},
{id:'003',name:'创越火线',price:100},
{id:'004',name:'反恐精英和',price:100},
],
foodURL:'https://image.baidu.com/search/detail?ct=503316480&z=&tn=baiduimagedetail&ipn=d&word=%E7%83%A7%E7%83%A4%20200%2A100&step_word=&ie=utf-8&in=&cl=2&lm=-1&st=-1&hd=&latest=©right=&cs=3049322705,2682672783&os=365147000,2674100539&simid=3049322705,2682672783&pn=0&rn=1&di=7214885350303334401&ln=1783&fr=&fmq=1683463448132_R&ic=&s=undefined&se=&sme=&tab=0&width=&height=&face=undefined&is=0,0&istype=2&ist=&jit=&bdtype=0&spn=0&pi=0&gsm=1e&objurl=https%3A%2F%2Fview-cache.book118.com%2Fview6%2FM05%2F27%2F16%2FwKh2BGEgidOASTYzAAMVLqY5WWU809.png&rpstart=0&rpnum=0&adpicid=0&nojc=undefined&dyTabStr=MCwxLDYsMyw0LDUsMiw3LDgsOQ%3D%3D'
}
},
}
</script>
<style>
.app{
width: 1000px;
height: 400px;
background-color: rgb(70, 193, 156);
/* 横向展开 */
display: flex;
/* 自适应排列 */
justify-content: space-around;
}
</style>
Category.vue
<template>
  <div class="cate">
    <h3 class="t1">{{title}}分类</h3>
    <ul>
        <li v-for="ga_obj in game_arr1" :key="ga_obj.id">{{ga_obj.name}}</li>
    </ul>
  </div>
</template>

<script>
export default {
    // TODO: 子组件可以接受传过来的动态数据、也可以接受动态的数据。
    props:['game_arr1','title','food_url1']
}
</script>

<style>
.cate {
    width:240px;
    height: 300px;
    background-color: aquamarine;
}
.t1 {
    text-align: center;
}

</style>
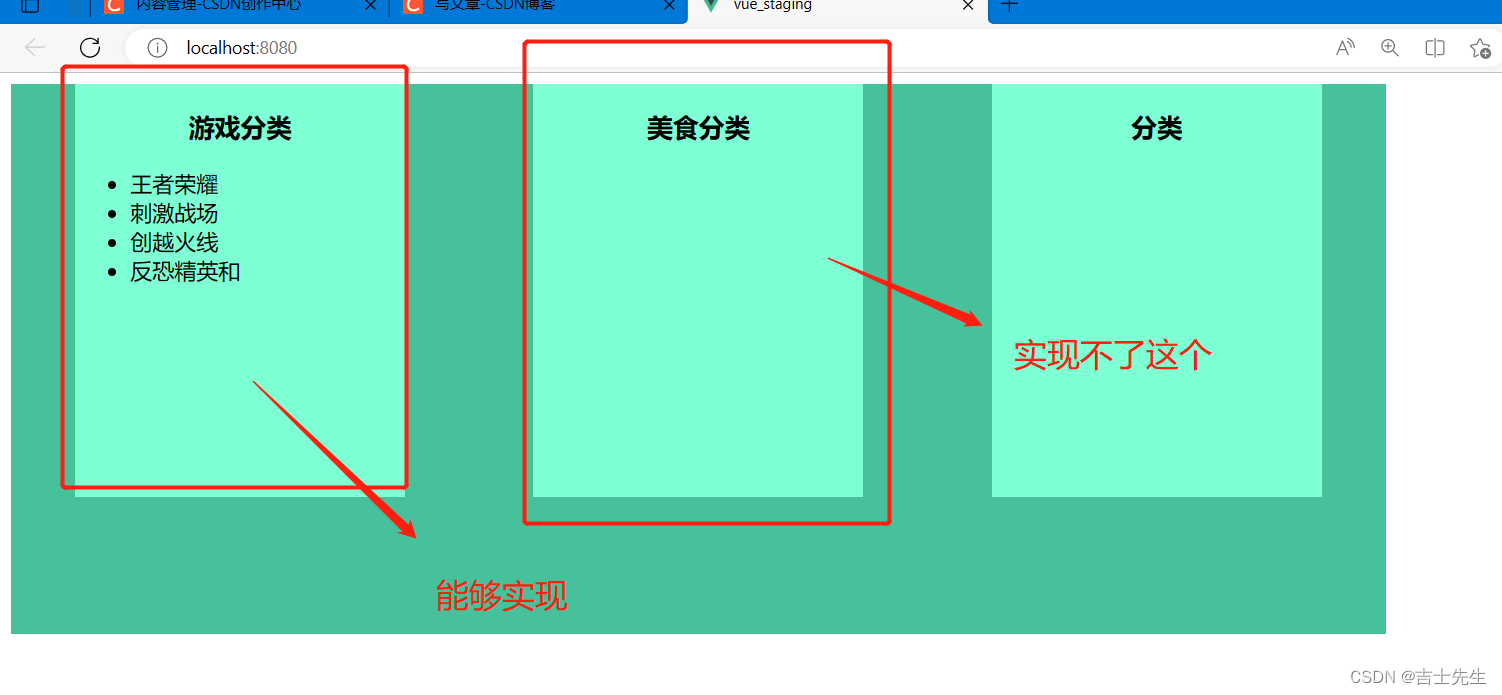
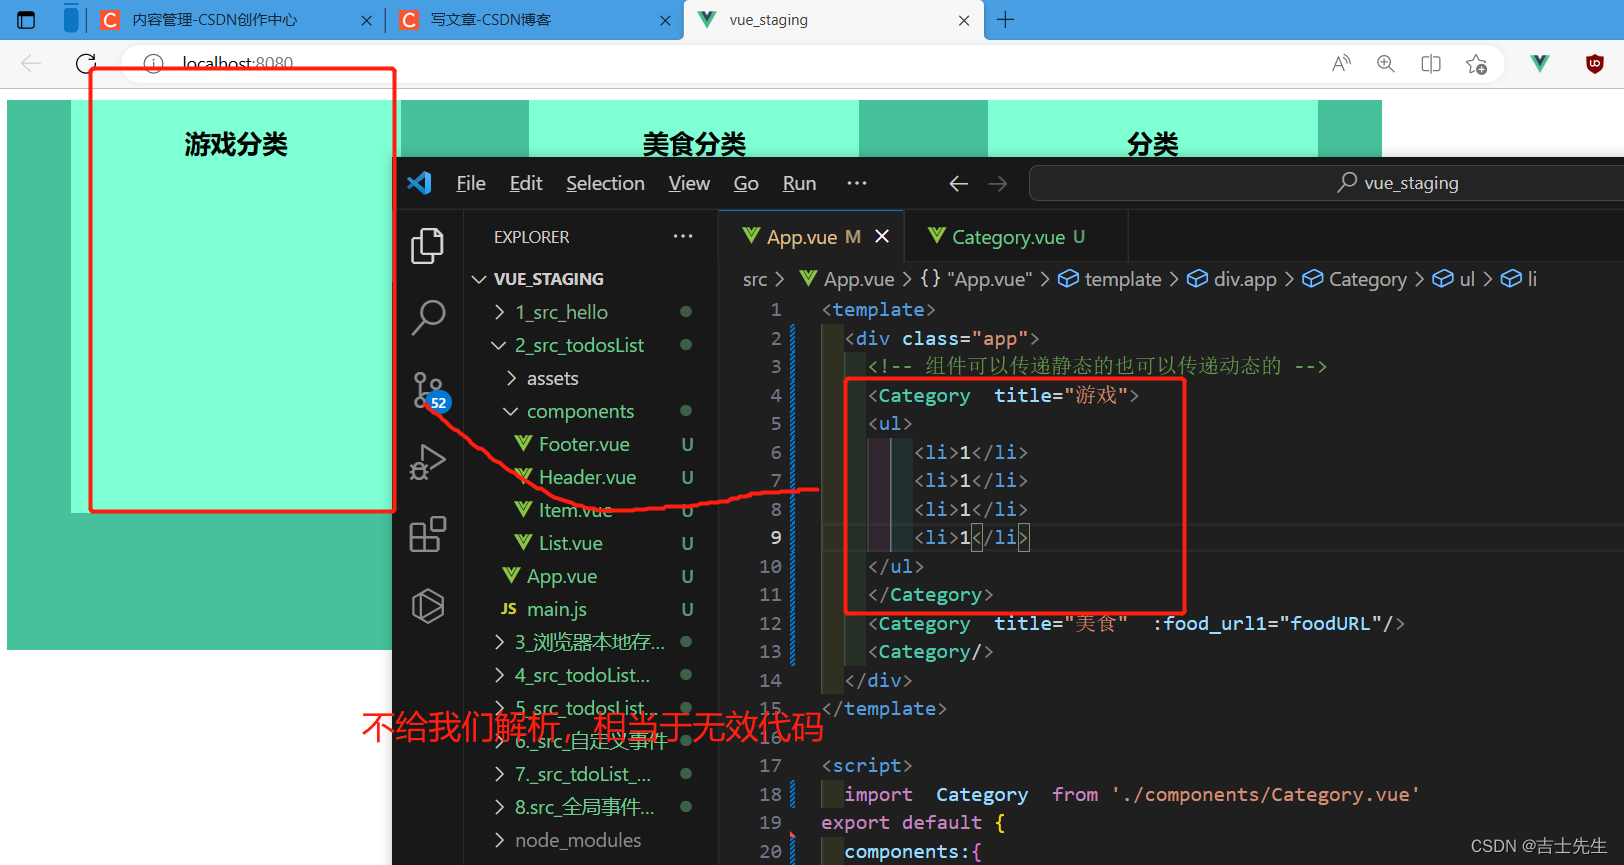
于是我们想: 这样好复杂啊。能不能直接在父组件中直接将一整个模板传递给子组件。
非自闭和标签:我们能够解析到组件中数据,但是不知道放到组件的哪个位置。所以只能弃掉!!!!
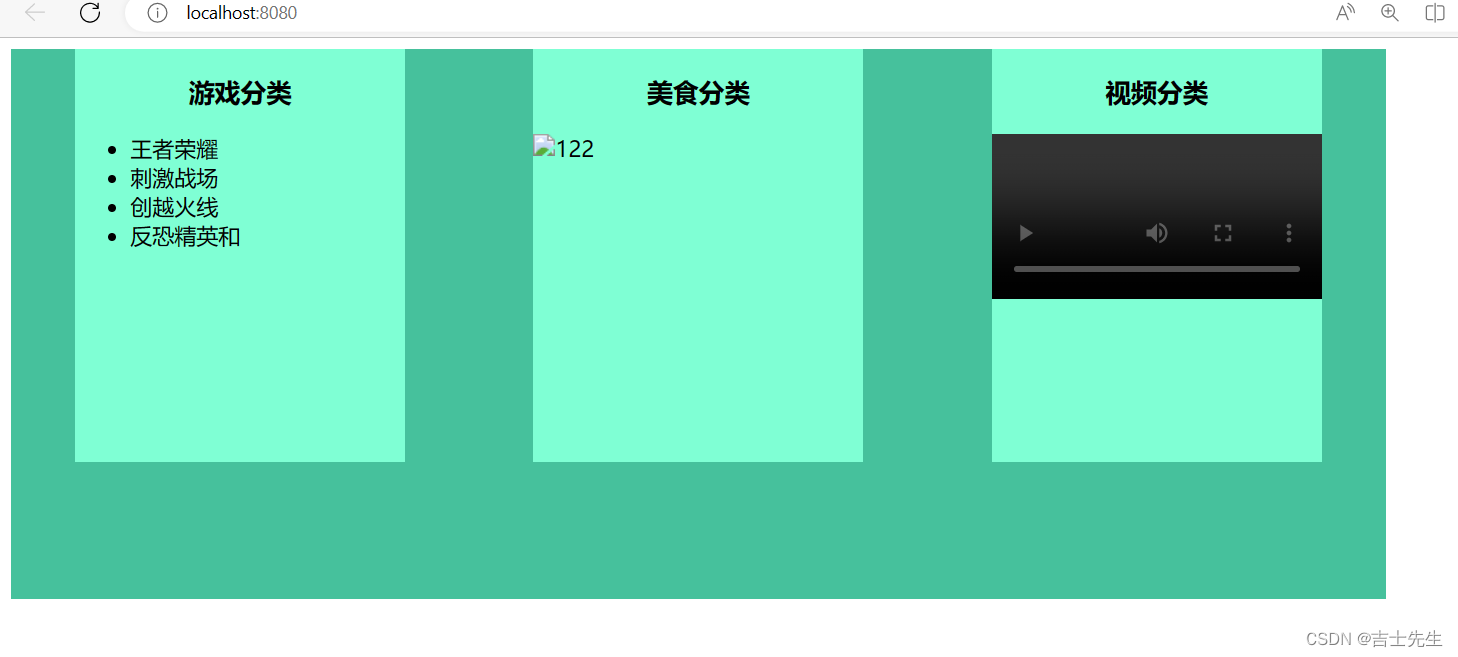
2.默认插槽
所以我们只要借助插槽就能够实现指定放的位置,然后开标签也就不会被丢弃。插槽放在哪里,就是放在哪里。
默认插槽都会接受掉…
App.vue
组件开区间
<template>
<div class="app">
<!-- 组件可以传递静态的也可以传递动态的 -->
<Category title="游戏">
<ul>
<li v-for="ga_obj in gamArr" :key="ga_obj.id">{{ga_obj.name}}</li>
</ul>
</Category>
<Category title="美食">
<img :src="foodURL" alt="122">
</Category>
<Category title="视频">
<video controls :src="videoUL"></video>
</Category>
</div>
</template>
<script>
import Category from './components/Category.vue'
export default {
components:{
Category,
},
data() {
return {
gamArr:[
{id:'001',name:'王者荣耀',price:100},
{id:'002',name:'刺激战场',price:100},
{id:'003',name:'创越火线',price:100},
{id:'004',name:'反恐精英和',price:100},
],
foodURL:'https://image.baidu.com/search/detail?ct=503316480&z=&tn=baiduimagedetail&ipn=d&word=%E7%83%A7%E7%83%A4%20200%2A100&step_word=&ie=utf-8&in=&cl=2&lm=-1&st=-1&hd=&latest=©right=&cs=3049322705,2682672783&os=365147000,2674100539&simid=3049322705,2682672783&pn=0&rn=1&di=7214885350303334401&ln=1783&fr=&fmq=1683463448132_R&ic=&s=undefined&se=&sme=&tab=0&width=&height=&face=undefined&is=0,0&istype=2&ist=&jit=&bdtype=0&spn=0&pi=0&gsm=1e&objurl=https%3A%2F%2Fview-cache.book118.com%2Fview6%2FM05%2F27%2F16%2FwKh2BGEgidOASTYzAAMVLqY5WWU809.png&rpstart=0&rpnum=0&adpicid=0&nojc=undefined&dyTabStr=MCwxLDYsMyw0LDUsMiw3LDgsOQ%3D%3D',
videoUL:'https://www.bilibili.com/video/BV12h4y1n7tt?t=3.5'
}
}
}
</script>
<style>
.app{
width: 1000px;
height: 400px;
background-color: rgb(70, 193, 156);
/* 横向展开 */
display: flex;
/* 自适应排列 */
justify-content: space-around;
}
video{
width: 100%; // 视频占的百分比
}
</style>
Category.vue
默认插槽
    <!-- 默认插槽 -->
    <slot></slot>
<template>
  <div class="cate">
    <h3 class="t1">{{title}}分类</h3>
    <!-- 默认插槽 -->
    <slot></slot>
  </div>
</template>

<script>
export default {
    // TODO: 子组件可以接受传过来的动态数据、也可以接受动态的数据。
    props:['title']
}
</script>

<style>
.cate {
    width:240px;
    height: 300px;
    background-color: aquamarine;
}
.t1 {
    text-align: center;
}

</style>
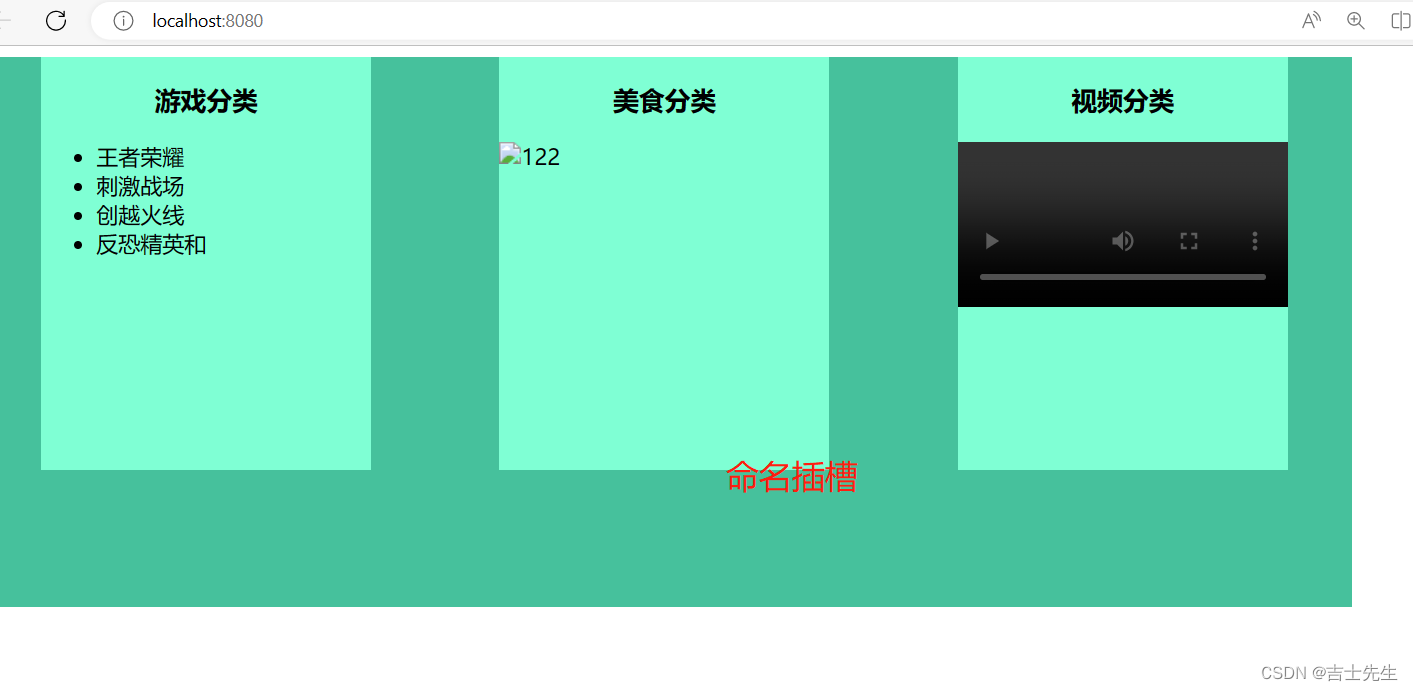
3.命名插槽
App.vue
内嵌一个template标签
    <Category  title="游戏">
      <template slot="game">
           <ul>
        		<li v-for="ga_obj in gamArr" :key="ga_obj.id">{{ga_obj.name}}</li>
          </ul>
      </template>
    </Category>
<template>
<div class="app">
<!-- 组件可以传递静态的也可以传递动态的 -->
<Category title="游戏">
<template slot="game">
<ul>
<li v-for="ga_obj in gamArr" :key="ga_obj.id">{{ga_obj.name}}</li>
</ul>
</template>
</Category>
<Category title="美食">
<template slot="food">
<img :src="foodURL" alt="122">
</template>
</Category>
<Category title="视频">
<template slot="vido">
<video controls :src="videoUL"></video>
</template>
</Category>
</div>
</template>
<script>
import Category from './components/Category.vue'
export default {
components:{
Category,
},
data() {
return {
gamArr:[
{id:'001',name:'王者荣耀',price:100},
{id:'002',name:'刺激战场',price:100},
{id:'003',name:'创越火线',price:100},
{id:'004',name:'反恐精英和',price:100},
],
foodURL:'https://image.baidu.com/search/detail?ct=503316480&z=&tn=baiduimagedetail&ipn=d&word=%E7%83%A7%E7%83%A4%20200%2A100&step_word=&ie=utf-8&in=&cl=2&lm=-1&st=-1&hd=&latest=©right=&cs=3049322705,2682672783&os=365147000,2674100539&simid=3049322705,2682672783&pn=0&rn=1&di=7214885350303334401&ln=1783&fr=&fmq=1683463448132_R&ic=&s=undefined&se=&sme=&tab=0&width=&height=&face=undefined&is=0,0&istype=2&ist=&jit=&bdtype=0&spn=0&pi=0&gsm=1e&objurl=https%3A%2F%2Fview-cache.book118.com%2Fview6%2FM05%2F27%2F16%2FwKh2BGEgidOASTYzAAMVLqY5WWU809.png&rpstart=0&rpnum=0&adpicid=0&nojc=undefined&dyTabStr=MCwxLDYsMyw0LDUsMiw3LDgsOQ%3D%3D',
videoUL:'https://www.bilibili.com/video/BV12h4y1n7tt?t=3.5'
}
}
}
</script>
<style>
.app{
width: 1000px;
height: 400px;
background-color: rgb(70, 193, 156);
/* 横向展开 */
display: flex;
/* 自适应排列 */
justify-content: space-around;
}
video{
width: 100%;
}
</style>
Category.vue
给插槽起名字,只有名字对应的插槽才能使用
    <slot name="game"></slot>
    <slot name="food"></slot>
    <slot name="vido"></slot>
<template>
  <div class="cate">
    <h3 class="t1">{{title}}分类</h3>
    <!-- 默认插槽 -->
    <slot name="game"></slot>
    <slot name="food"></slot>
    <slot name="vido"></slot>
  </div>
</template>

<script>
export default {
    // TODO: 子组件可以接受传过来的动态数据、也可以接受动态的数据。
    props:['title']
}
</script>

<style>
.cate {
    width:240px;
    height: 300px;
    background-color: aquamarine;
}
.t1 {
    text-align: center;
}

</style>
(二十七)、Vue中的ajax
1.Vue项目中常用的2个ajax库
(1).vue-resource
- vue插件,非官方库,vue1.x使用广泛、现在已经弃用。
(2).axios
- 通用的ajax请求库,官方推荐,vue2.x使用广泛。
2.解决开发环境Ajax跨域问题
- 使用代理服务器
3.Github搜索案列_axios_全局总线
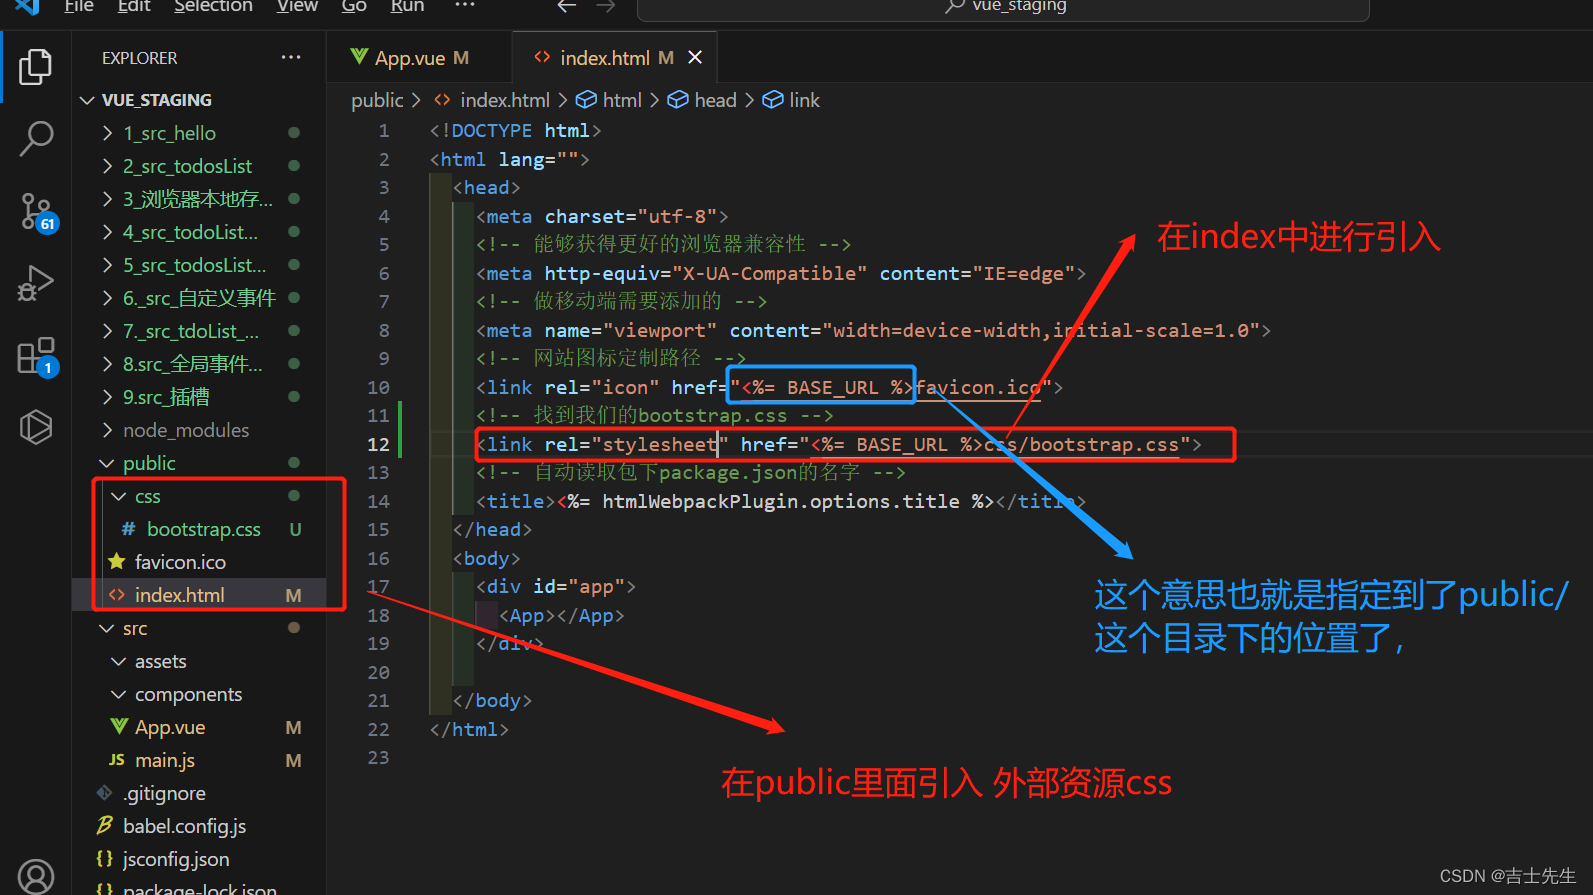
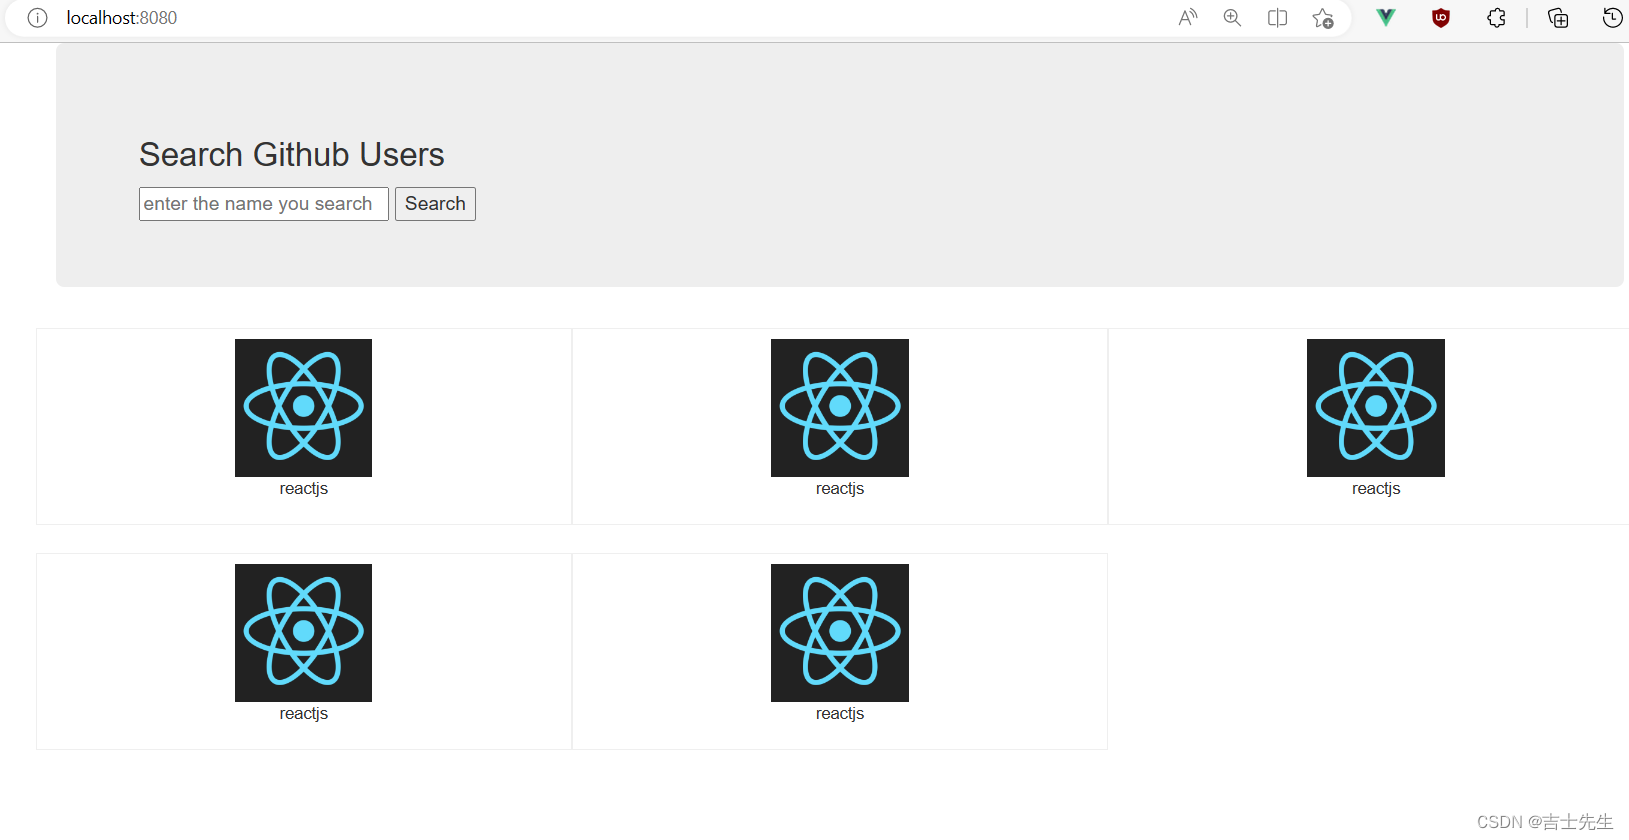
(1).静态资源
App.vue
<template>
<div>
<div class="container">
<section class="jumbotron">
<h3 class="jumbotron-heading">Search Github Users</h3>
<div>
<input type="text" placeholder="enter the name you search"/> <button>Search</button>
</div>
</section>
<div class="row">
<div class="card">
<a href="https://github.com/reactjs" target="_blank">
<img src="https://avatars.githubusercontent.com/u/6412038?v=3" style='width: 100px'/>
</a>
<p class="card-text">reactjs</p>
</div>
<div class="card">
<a href="https://github.com/reactjs" target="_blank">
<img src="https://avatars.githubusercontent.com/u/6412038?v=3" style='width: 100px'/>
</a>
<p class="card-text">reactjs</p>
</div>
<div class="card">
<a href="https://github.com/reactjs" target="_blank">
<img src="https://avatars.githubusercontent.com/u/6412038?v=3" style='width: 100px'/>
</a>
<p class="card-text">reactjs</p>
</div>
<div class="card">
<a href="https://github.com/reactjs" target="_blank">
<img src="https://avatars.githubusercontent.com/u/6412038?v=3" style='width: 100px'/>
</a>
<p class="card-text">reactjs</p>
</div>
<div class="card">
<a href="https://github.com/reactjs" target="_blank">
<img src="https://avatars.githubusercontent.com/u/6412038?v=3" style='width: 100px'/>
</a>
<p class="card-text">reactjs</p>
</div>
</div>
</div>
</div>
</template>
<script>
export default {
name:'App'
}
</script>
<style>
.album {
min-height: 50rem; /* Can be removed; just added for demo purposes */
padding-top: 3rem;
padding-bottom: 3rem;
background-color: #f7f7f7;
}
.card {
float: left;
/* 这个目的是一行放三个 */
width: 33.333%;
padding: .75rem;
/* 这个意思是每个div的行距是2分米 */
margin-bottom: 2rem;
border: 1px solid #efefef;
text-align: center;
}
.card > img {
margin-bottom: .75rem;
border-radius: 100px;
}
.card-text {
font-size: 85%;
}
</style>
bootstrap.css
太多了这里不展示
public: 就是我们引入第三方库的位置 比如:"layui.js,bootstrap.js"
<%= BASE_URL %> 相当于帮助我们找到了pubilic/
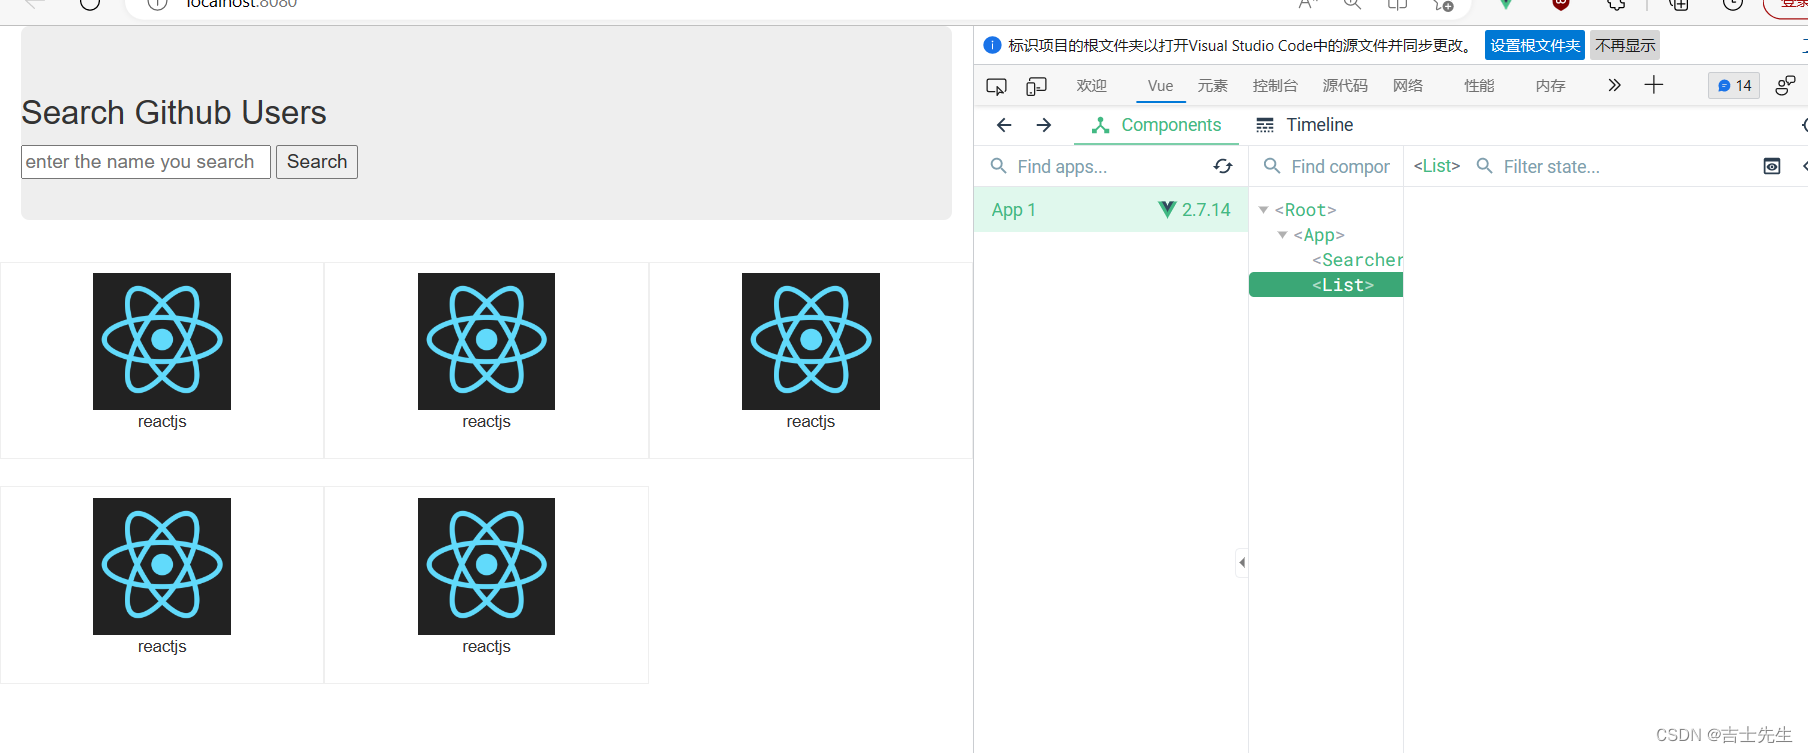
(2).静态资源设置成组件
App.vue
<template>
  <div>
    <div class="container">
      <Searcher/>
      <List/>
  </div>
  </div>
</template>

<script>
import  Searcher  from './components/Searcher.vue'
import  List  from './components/List.vue'
export default {
  name:'App',
  components:{
    Searcher,
    List
  }
}
</script>

<style>
</style>
Searcher.vue
<template>
<div>
<section class="jumbotron">
<h3 class="jumbotron-heading">Search Github Users</h3>
<div>
<input type="text" placeholder="enter the name you search"/> <button>Search</button>
</div>
</section>
</div>
</template>
<script>
export default {
name:'Searcher'
}
</script>
<style>
</style>
List.vue
<template>
  <div>
        <div class="row">
      <div class="card">
        <a href="https://github.com/reactjs" target="_blank">
          <img src="https://avatars.githubusercontent.com/u/6412038?v=3" style='width: 100px'/>
        </a>
        <p class="card-text">reactjs</p>
      </div>
      <div class="card">
        <a href="https://github.com/reactjs" target="_blank">
          <img src="https://avatars.githubusercontent.com/u/6412038?v=3" style='width: 100px'/>
        </a>
        <p class="card-text">reactjs</p>
      </div>
      <div class="card">
        <a href="https://github.com/reactjs" target="_blank">
          <img src="https://avatars.githubusercontent.com/u/6412038?v=3" style='width: 100px'/>
        </a>
        <p class="card-text">reactjs</p>
      </div>
      <div class="card">
        <a href="https://github.com/reactjs" target="_blank">
          <img src="https://avatars.githubusercontent.com/u/6412038?v=3" style='width: 100px'/>
        </a>
        <p class="card-text">reactjs</p>
      </div>
      <div class="card">
        <a href="https://github.com/reactjs" target="_blank">
          <img src="https://avatars.githubusercontent.com/u/6412038?v=3" style='width: 100px'/>
        </a>
        <p class="card-text">reactjs</p>
      </div>
    </div>
  </div>
</template>

<script scoped>
export default {
    name:'List'
}
</script>

<style>
.album {
  min-height: 50rem; /* Can be removed; just added for demo purposes */
  padding-top: 3rem;
  padding-bottom: 3rem;
  background-color: #f7f7f7;
}

.card {
    /* 从哪里开始排序 */
  float: left;
  /* 这个目的是一行放三个 */
  width: 33.333%;
  padding: .75rem;
  /* 这个意思是每个div的行距是2分米 */
  margin-bottom: 2rem;

  border: 1px solid #efefef;
  text-align: center;
}

.card > img {
  margin-bottom: .75rem;
  /* 控制图片的范围 */
  border-radius: 100px;
}

.card-text {
  font-size: 95%;
}
</style>
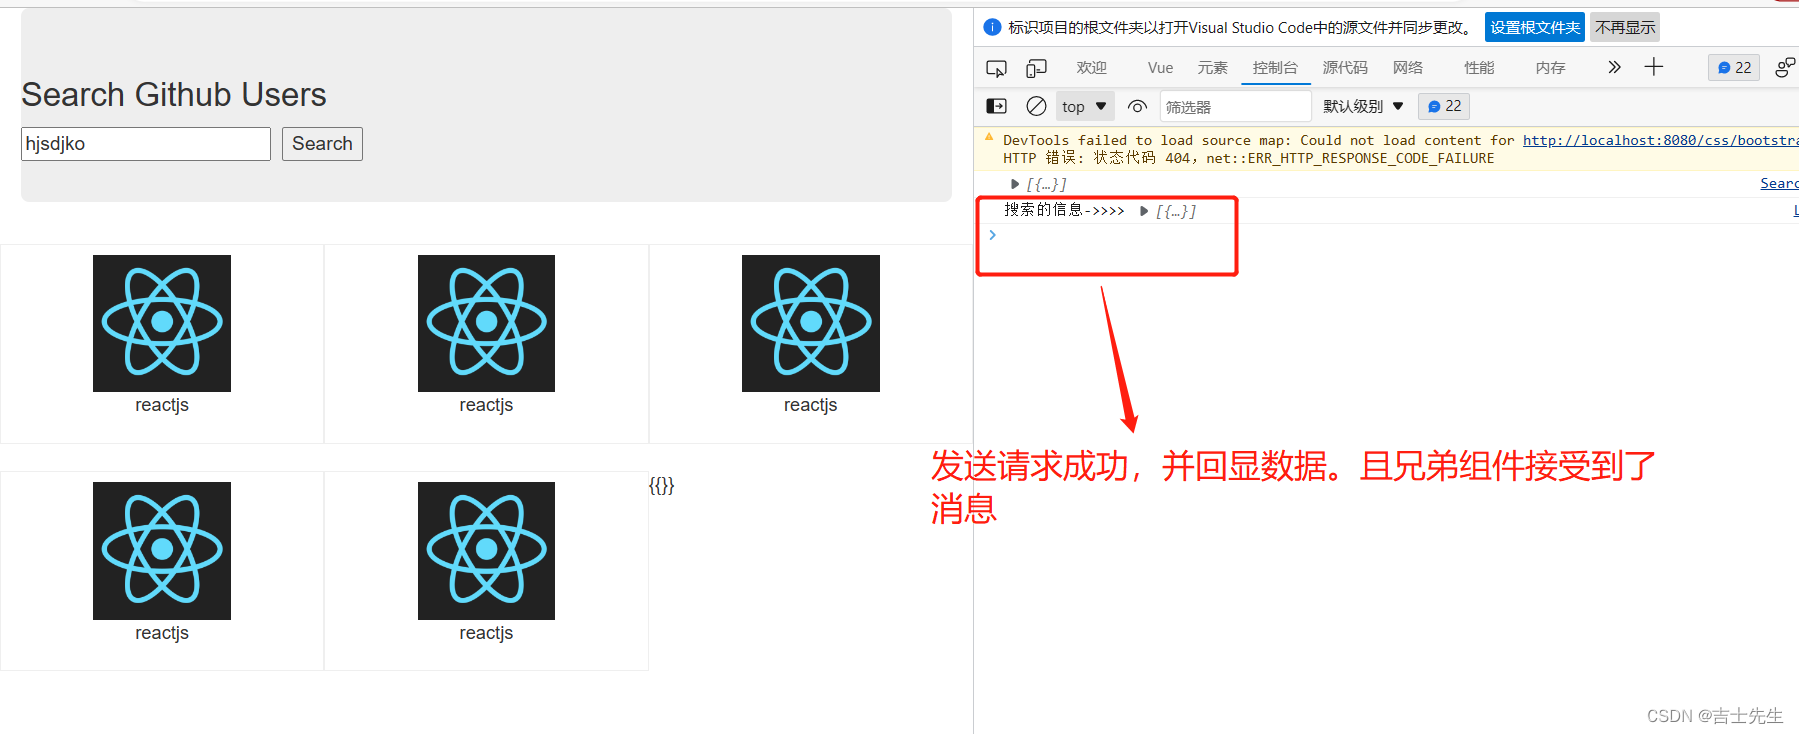
(3).github搜索案列_发送请求
下载axios的插件。在控制台我们添加 axios
npm add axios

接口地址: https://api.github.com/search/users?q=xxx
注册全局事件总线
import  Vue  from 'vue'  // 引入阉割版本的vue
import  App  from './App.vue' // 引入App.vue组件

Vue.config.productionTip = false;

new Vue({
    // 1.安装全局事件总线
    beforeCreate(){
        Vue.prototype.$bus=this;
    },
    render:h=>h(App)

}).$mount('#app');
App.vue
<template>
  <div>
    <div class="container">
      <Searcher/>
      <List/>
  </div>
  </div>
</template>

<script>
import  Searcher  from './components/Searcher.vue'
import  List  from './components/List.vue'
export default {
  name:'App',
  components:{
    Searcher,
    List
  }
}
</script>

<style>
</style>
List.vue
1.接受兄弟List传递过来的数据
    methods: {
      accept_message(x){
        console.log('搜索的信息->>>>',x)
      }
    },
    mounted() {
      this.$bus.$on('list_A',this.accept_message)
    },
<template>
  <div>
        <div class="row">
      <div class="card">
        <a href="https://github.com/reactjs" target="_blank">
          <img src="https://avatars.githubusercontent.com/u/6412038?v=3" style='width: 100px'/>
        </a>
        <p class="card-text">reactjs</p>
      </div>
      <div class="card">
        <a href="https://github.com/reactjs" target="_blank">
          <img src="https://avatars.githubusercontent.com/u/6412038?v=3" style='width: 100px'/>
        </a>
        <p class="card-text">reactjs</p>
      </div>
      <div class="card">
        <a href="https://github.com/reactjs" target="_blank">
          <img src="https://avatars.githubusercontent.com/u/6412038?v=3" style='width: 100px'/>
        </a>
        <p class="card-text">reactjs</p>
      </div>
      <div class="card">
        <a href="https://github.com/reactjs" target="_blank">
          <img src="https://avatars.githubusercontent.com/u/6412038?v=3" style='width: 100px'/>
        </a>
        <p class="card-text">reactjs</p>
      </div>
      <div class="card">
        <a href="https://github.com/reactjs" target="_blank">
          <img src="https://avatars.githubusercontent.com/u/6412038?v=3" style='width: 100px'/>
        </a>
        <p class="card-text">reactjs</p>
      </div>
    </div>
  </div>
</template>

<script scoped>
export default {
    name:'List',
    data() {
      return {
        lists:[],
      }
    },
    methods: {
      accept_message(x){
        // this.lists=x;
        console.log('搜索的信息->>>>',x)
      }
    },
    mounted() {
      this.$bus.$on('list_A',this.accept_message)
    },
}
</script>

<style>
.album {
  min-height: 50rem; /* Can be removed; just added for demo purposes */
  padding-top: 3rem;
  padding-bottom: 3rem;
  background-color: #f7f7f7;
}

.card {
    /* 从哪里开始排序 */
  float: left;
  /* 这个目的是一行放三个 */
  width: 33.333%;
  padding: .75rem;
  /* 这个意思是每个div的行距是2分米 */
  margin-bottom: 2rem;

  border: 1px solid #efefef;
  text-align: center;
}

.card > img {
  margin-bottom: .75rem;
  /* 控制图片的范围 */
  border-radius: 100px;
}

.card-text {
  font-size: 95%;
}
</style>
Searcher.vue
在搜索的组件中: 我们需要在方法上添加 async 标注着这个方法是异步方法。然后通过axios.get进行获取某一个接口,
第一个参数是异步请求的网址,第二个是请求网址的参数。response.data是获取回调的信息。然后需要向兄弟组件中传递我们回调成功的数据。

methods: {
      async Searcher(){
        // TODO:  拼接参数: 左边的是网址右边是拼接参数。 里面的对象名一定要是params。
        // ! https://api.github.com/search/users?q=xxx
        try {
          const response= await axios.get('https://api.github.com/search/users',{params:{q:this.key_words}})
          const {items}=response.data;  // 假如信息调用成功我们就回显
          console.log(items)  // 展示我们查询到的信息
          this.$bus.$emit('list_A',items)
        } catch (error) {
          console.log('信息调用失败了!!')
        }
      }
    },
<template>
<div>
<section class="jumbotron">
<h3 class="jumbotron-heading">Search Github Users</h3>
<div>
<input type="text" placeholder="enter the name you search" v-model="key_words"/>
<button @click="Searcher">Search</button>
</div>
</section>
</div>
</template>
<script>
// TODO: 引入我们添加得axios
import axios from 'axios'
export default {
name:'Searcher',
data() {
return {
key_words:''
}
},
methods: {
async Searcher(){
// TODO: 拼接参数: 左边的是网址右边是拼接参数。 里面的对象名一定要是params。
// ! https://api.github.com/search/users?q=xxx
try {
const response= await axios.get('https://api.github.com/search/users',{params:{q:this.key_words}})
const {items}=response.data; // 假如信息调用成功我们就回显
console.log(items) // 展示我们查询到的信息
this.$bus.$emit('list_A',items)
} catch (error) {
console.log('信息调用失败了!!')
}
}
},
}
</script>
<style>
</style>
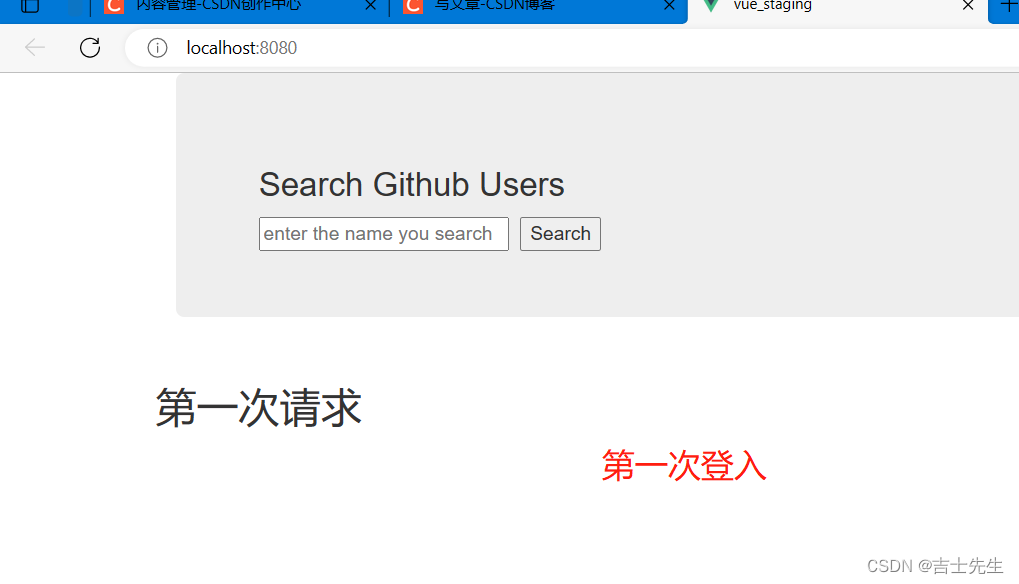
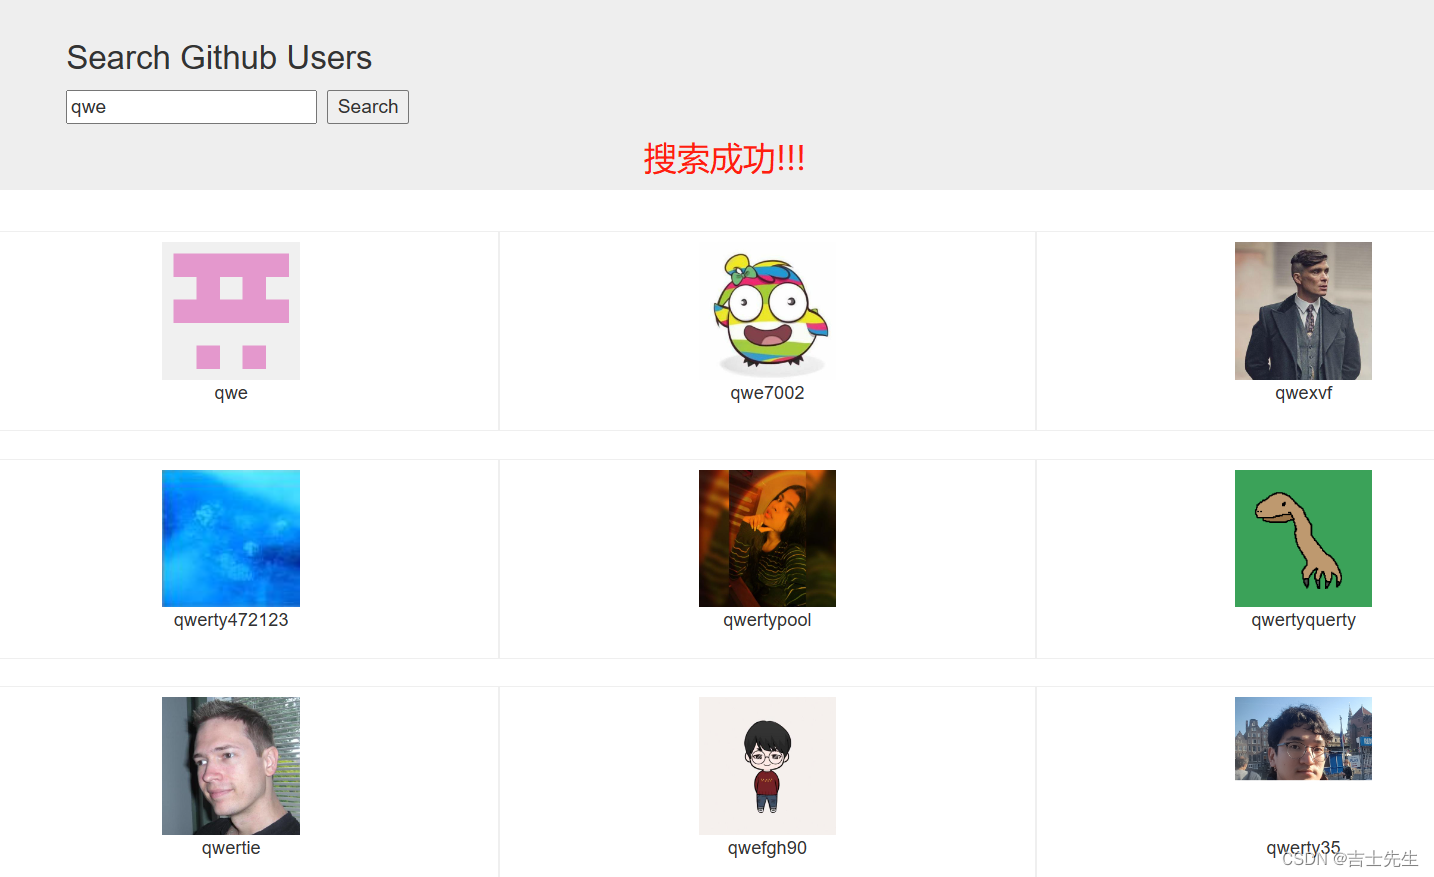
(4).github搜索案列完成
这里我们新增了是否是第一次访问、是否正在加载中、和加载后数据的处理
App.vue
<template>
  <div>
    <div class="container">
      <Searcher/>
      <List/>
  </div>
  </div>
</template>

<script>
import  Searcher  from './components/Searcher.vue'
import  List  from './components/List.vue'
export default {
  name:'App',
  components:{
    Searcher,
    List
  }
}
</script>

<style>
</style>
Searcher.vue
这里的参数我们传递的是: 对象。对象里面的对象名要和接受这个数据组件里面的data对象名要一致。
分别触发三次: 分别是-> 请求之前、请求成功之后、请求失败之后
    methods: {
      async Searcher(){
        // 请求之前通知List更新它的data
        this.$bus.$emit('list_A',{isFirst:false,isLoading:true})
        // TODO:  拼接参数: 左边的是网址右边是拼接参数。 里面的对象名一定要是params。
        // ! https://api.github.com/search/users?q=xxx
        try {
          const response= await axios.get('https://api.github.com/search/users',{params:{q:this.key_words}})
          const {items}=response.data;  // 假如信息调用成功我们就回显
          console.log(items)  // 展示我们查询到的信息
          // 请求成功之后,通知List组件更新它的data
          this.$bus.$emit('list_A',{isLoading:false,lists:items})
        } catch (error) {
          // 请求失败周会
          this.$bus.$emit('list_A',{isLoading:false,lists:[],errMsg:error.message})
          console.log('信息调用失败了!!')
        }
      }
    },
<template>
<div>
<section class="jumbotron">
<h3 class="jumbotron-heading">Search Github Users</h3>
<div>
<input type="text" placeholder="enter the name you search" v-model="key_words"/>
<button @click="Searcher">Search</button>
</div>
</section>
</div>
</template>
<script>
// TODO: 引入我们添加得axios
import axios from 'axios'
export default {
name:'Searcher',
data() {
return {
key_words:''
}
},
methods: {
async Searcher(){
// 请求之前通知list_A更新它的data
this.$bus.$emit('list_A',{isFirst:false,isLoading:true})
// TODO: 拼接参数: 左边的是网址右边是拼接参数。 里面的对象名一定要是params。
// ! https://api.github.com/search/users?q=xxx
try {
const response= await axios.get('https://api.github.com/search/users',{params:{q:this.key_words}})
const {items}=response.data; // 假如信息调用成功我们就回显
console.log(items) // 展示我们查询到的信息
// 请求成功之后,通知List组件更新它的data
this.$bus.$emit('list_A',{isLoading:false,lists:items})
} catch (error) {
// 请求失败周会
this.$bus.$emit('list_A',{isLoading:false,lists:[],errMsg:error.message})
console.log('信息调用失败了!!')
}
}
},
}
</script>
<style>
</style>
Lists.vue
接受数据的时候:
1. {...this.listInfo,...x} 就是把第一个的key-value替换成第二个key-value。只替换不一样的。
2. 三个点对象 代表展开成key-value形式。
3. {...对象名,属性名:值}  就是将第一个对象的属性名替换成右边的假如不同的情况下。
methods: {
      // 我们接受的是一个对象
      accept_message(x){
        console.log('搜索的信息->>>>',x);
        this.listInfo={...this.listInfo,...x} // 假如左边的key-value与右边的key-value不一样,就替换成右边的
      }
    },
    mounted() {
      this.$bus.$on('list_A',this.accept_message)
    },
}
<template>
  <div>
      <div class="row">
        <h2 v-show="listInfo.isFirst">第一次请求</h2>
        <h2 v-show="listInfo.isLoading">正在加载....</h2>
      <div class="card" v-for="list_obj in listInfo.lists" :key="list_obj.id">
        <a :href="list_obj.html_url" target="_blank">
          <img :src="list_obj.avatar_url" style='width: 100px'/>
        </a>
        <p class="card-text">{{list_obj.login}}</p>
      </div>

    </div>
  </div>
</template>

<script scoped>
export default {
    name:'List',
    data() {
      return {
        listInfo:{
        lists:[],
        // 是否是第一次请求
        isFirst:true,
        // 是否正在加载
        isLoading:false,
        errMsg:''
        }

      }
    },
    methods: {
      // 我们接受的是一个对象
      accept_message(x){
        console.log('搜索的信息->>>>',x);
        this.listInfo={...this.listInfo,...x} // 假如左边的key-value与右边的key-value不一样,就替换成右边的
      }
    },
    mounted() {
      this.$bus.$on('list_A',this.accept_message)
    },
}
</script>

<style>
.card {
    /* 从哪里开始排序 */
  float: left;
  /* 这个目的是一行放三个 */
  width: 33.333%;
  padding: .75rem;
  /* 这个意思是每个div的行距是2分米 */
  margin-bottom: 2rem;
  /* 边框 */
  border: 1px solid #efefef;
  text-align: center;
}
  /* 图片的大小 */
.card > img {
  margin-bottom: .75rem;
  /* 控制图片的范围 */
  border-radius: 100px;
}
/* 文本大小 */
.card-text {
  font-size: 95%;
}
</style>
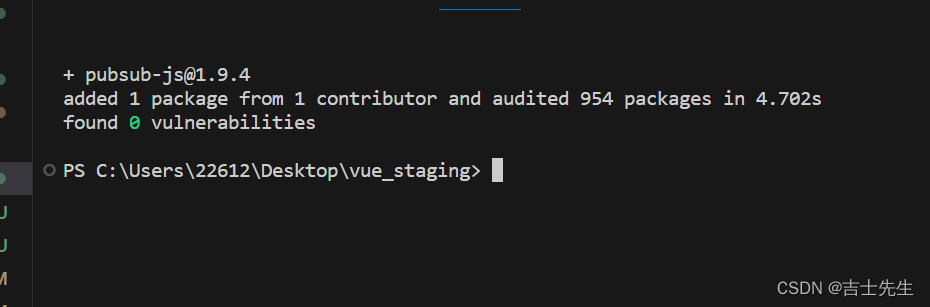
4.Github搜索案列_订阅与发布_axios
安装订阅与发布的插件
npm add pubsub-js
引入订阅与发布
// 引入订阅与发布的插件
import PubSub from 'pubsub-js'
App.vue
<template>
  <div>
    <div class="container">
      <Searcher/>
      <List/>
  </div>
  </div>
</template>

<script>
import  Searcher  from './components/Searcher.vue'
import  List  from './components/List.vue'
export default {
  name:'App',
  components:{
    Searcher,
    List
  }
}
</script>

<style>
</style>
Searcher.vue 发送者
// TODO: 引入我们添加得axios
import axios from 'axios'
// 引入订阅与发布的插件
import PubSub from 'pubsub-js'
发送信息
// this.$bus.$emit('list_A',{isFirst:false,isLoading:true})
PubSub.publish('list_A',{isFirst:false,isLoading:true})
<template>
<div>
<section class="jumbotron">
<h3 class="jumbotron-heading">Search Github Users</h3>
<div>
<input type="text" placeholder="enter the name you search" v-model="key_words"/>
<button @click="Searcher">Search</button>
</div>
</section>
</div>
</template>
<script>
// TODO: 引入我们添加得axios
import axios from 'axios'
// 引入订阅与发布的插件
import PubSub from 'pubsub-js'
export default {
name:'Searcher',
data() {
return {
key_words:''
}
},
methods: {
async Searcher(){
// 请求之前通知List更新它的data
// this.$bus.$emit('list_A',{isFirst:false,isLoading:true})
PubSub.publish('list_A',{isFirst:false,isLoading:true})
// TODO: 拼接参数: 左边的是网址右边是拼接参数。 里面的对象名一定要是params。
// ! https://api.github.com/search/users?q=xxx
try {
const response= await axios.get('https://api.github.com/search/users',{params:{q:this.key_words}})
const {items}=response.data; // 假如信息调用成功我们就回显
console.log(items) // 展示我们查询到的信息
// 请求成功之后,通知List组件更新它的data
// this.$bus.$emit('list_A',{isLoading:false,lists:items})
PubSub.publish('list_A',{isLoading:false,lists:items})
} catch (error) {
// 请求失败周会
// this.$bus.$emit('list_A',{isLoading:false,lists:[],errMsg:error.message})
PubSub.publish('list_A',{isLoading:false,lists:[],errMsg:error.message})
console.log('信息调用失败了!!')
}
}
},
}
</script>
<style>
</style>
List.vue 订阅者
// 引入订阅与发布的插件
import PubSub from 'pubsub-js'
// 订阅
mounted() {
     this.token=PubSub.subscribe('list_A',this.accept_message)
    },
// 取消订阅
    beforeDestroy(){
      PubSub.unsubscribe(this.token);
    }
<template>
  <div>
      <div class="row">
        <h2 v-show="listInfo.isFirst">第一次请求</h2>
        <h2 v-show="listInfo.isLoading">正在加载....</h2>
      <div class="card" v-for="list_obj in listInfo.lists" :key="list_obj.id">
        <a :href="list_obj.html_url" target="_blank">
          <img :src="list_obj.avatar_url" style='width: 100px'/>
        </a>
        <p class="card-text">{{list_obj.login}}</p>
      </div>

    </div>
  </div>
</template>

<script scoped>
// 引入订阅与发布的插件
import PubSub from 'pubsub-js'
export default {
    name:'List',
    data() {
      return {
        listInfo:{
        lists:[],
        // 是否是第一次请求
        isFirst:true,
        // 是否正在加载
        isLoading:false,
        errMsg:''
        }

      }
    },
    methods: {
      // 我们接受的是一个对象
      accept_message(msg,x){  // TODO: 发布与订阅模式中,接收信息会收到两个参数,第一个是msg,第二个才是数据。
        console.log('搜索的信息->>>>',x);
        this.listInfo={...this.listInfo,...x} // 假如左边的key-value与右边的key-value不一样,就替换成右边的
      }
    },
    mounted() {
     this.token=PubSub.subscribe('list_A',this.accept_message)
    },
    beforeDestroy(){
      // 取消订阅
      PubSub.unsubscribe(this.token);
    }
}
</script>

<style>
.card {
    /* 从哪里开始排序 */
  float: left;
  /* 这个目的是一行放三个 */
  width: 33.333%;
  padding: .75rem;
  /* 这个意思是每个div的行距是2分米 */
  margin-bottom: 2rem;
  /* 边框 */
  border: 1px solid #efefef;
  text-align: center;
}
  /* 图片的大小 */
.card > img {
  margin-bottom: .75rem;
  /* 控制图片的范围 */
  border-radius: 100px;
}
/* 文本大小 */
.card-text {
  font-size: 95%;
}
</style>

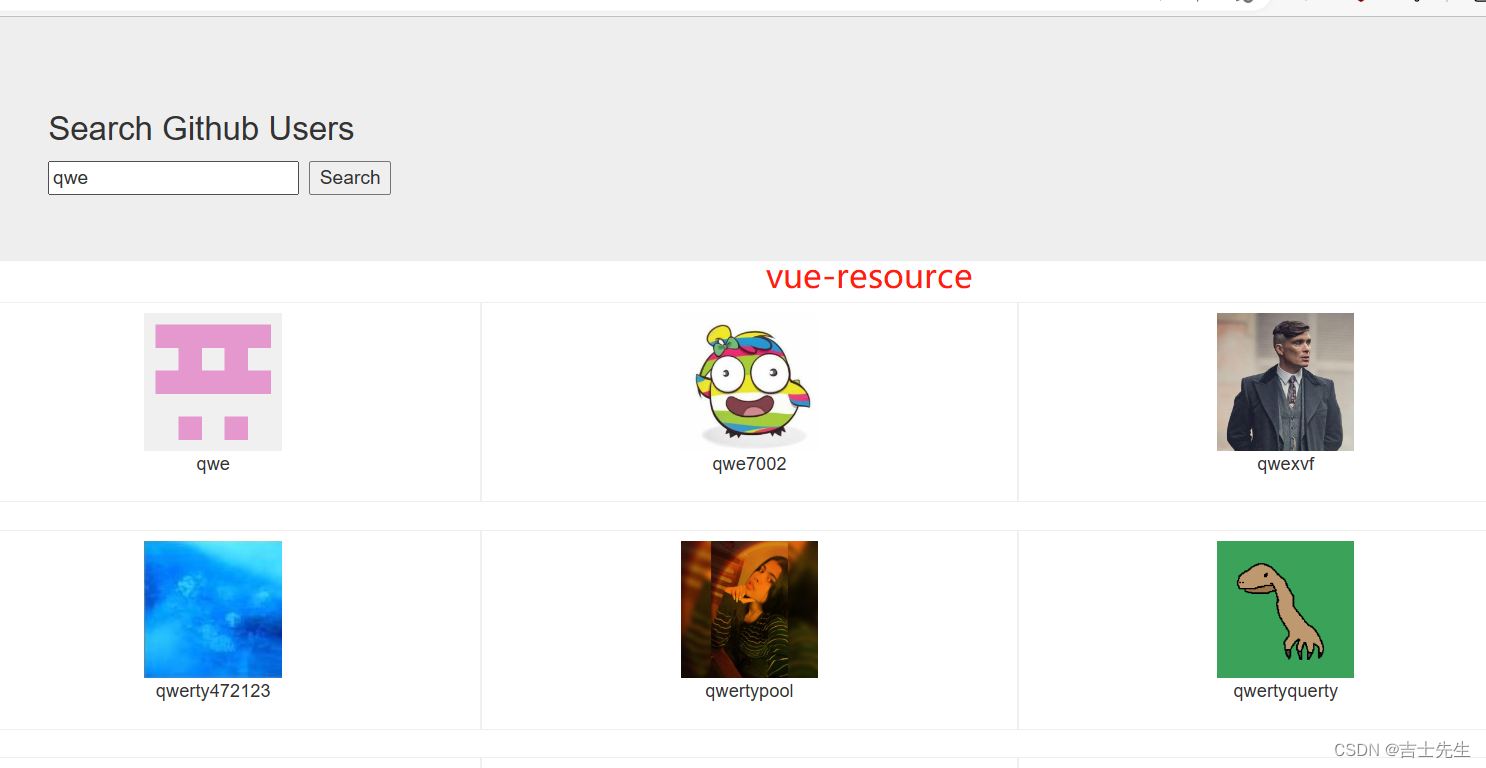
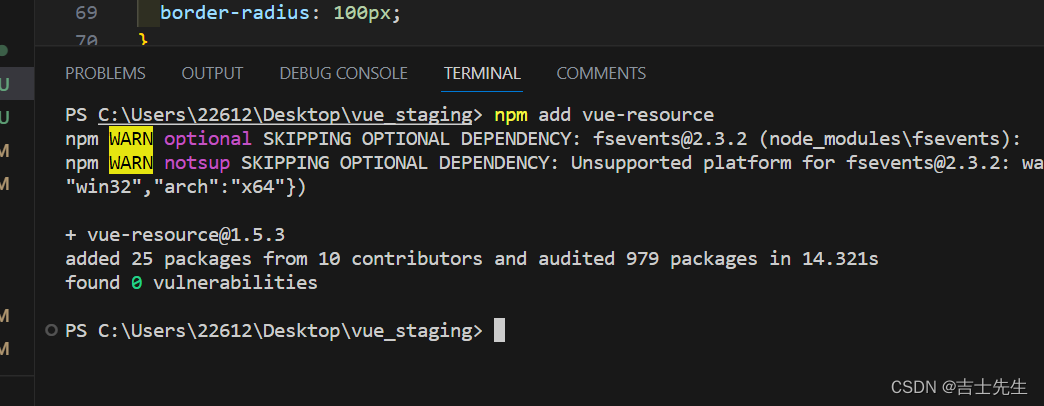
5.Github搜索案列_vue-resource
它是vue的官方插件…
安装vue-resorce
npm add vue-resource
引用Vue-resorce
因为是VUE的官方库、所以我们需要使用到Vue.use
import Vue from "Vue"
import VueResource from 'vue-resource'
Vue.use(VueResource)
引入Vue插件之后: Vue的原型上会新增一个 $http
main.js
import  Vue  from 'vue'  // 引入阉割版本的vue
import  App  from './App.vue' // 引入App.vue组件
import VueResource from 'vue-resource'

Vue.use(VueResource)
Vue.config.productionTip = false;

new Vue({
    // 1.安装全局事件总线
    beforeCreate(){
        Vue.prototype.$bus=this;
    },
    render:h=>h(App)

}).$mount('#app');
App.vue
<template>
  <div>
    <div class="container">
      <Searcher/>
      <List/>
  </div>
  </div>
</template>

<script>
import  Searcher  from './components/Searcher.vue'
import  List  from './components/List.vue'
export default {
  name:'App',
  components:{
    Searcher,
    List
  }
}
</script>

<style>
</style>
Searcher.vue
const response= await this.$http.get('https://api.github.com/search/users',{params:{q:this.key_words}})
<template>
<div>
<section class="jumbotron">
<h3 class="jumbotron-heading">Search Github Users</h3>
<div>
<input type="text" placeholder="enter the name you search" v-model="key_words"/>
<button @click="Searcher">Search</button>
</div>
</section>
</div>
</template>
<script>
// TODO: 引入我们添加得axios
import axios from 'axios'
// 引入订阅与发布的插件
import PubSub from 'pubsub-js'
export default {
name:'Searcher',
data() {
return {
key_words:''
}
},
methods: {
async Searcher(){
// 请求之前通知List更新它的data
// this.$bus.$emit('list_A',{isFirst:false,isLoading:true})
PubSub.publish('list_A',{isFirst:false,isLoading:true})
// TODO: 拼接参数: 左边的是网址右边是拼接参数。 里面的对象名一定要是params。
// ! https://api.github.com/search/users?q=xxx
try {
const response= await this.$http.get('https://api.github.com/search/users',{params:{q:this.key_words}})
const {items}=response.data; // 假如信息调用成功我们就回显
console.log(items) // 展示我们查询到的信息
// 请求成功之后,通知List组件更新它的data
// this.$bus.$emit('list_A',{isLoading:false,lists:items})
PubSub.publish('list_A',{isLoading:false,lists:items})
} catch (error) {
// 请求失败周会
// this.$bus.$emit('list_A',{isLoading:false,lists:[],errMsg:error.message})
PubSub.publish('list_A',{isLoading:false,lists:[],errMsg:error.message})
console.log('信息调用失败了!!')
}
}
},
}
</script>
<style>
</style>
List.vue
<template>
  <div>
      <div class="row">
        <h2 v-show="listInfo.isFirst">第一次请求</h2>
        <h2 v-show="listInfo.isLoading">正在加载....</h2>
      <div class="card" v-for="list_obj in listInfo.lists" :key="list_obj.id">
        <a :href="list_obj.html_url" target="_blank">
          <img :src="list_obj.avatar_url" style='width: 100px'/>
        </a>
        <p class="card-text">{{list_obj.login}}</p>
      </div>

    </div>
  </div>
</template>

<script scoped>
// 引入订阅与发布的插件
import PubSub from 'pubsub-js'
export default {
    name:'List',
    data() {
      return {
        listInfo:{
        lists:[],
        // 是否是第一次请求
        isFirst:true,
        // 是否正在加载
        isLoading:false,
        errMsg:''
        }

      }
    },
    methods: {
      // 我们接受的是一个对象
      accept_message(msg,x){  // TODO: 发布与订阅模式中,接收信息会收到两个参数,第一个是msg,第二个才是数据。
        console.log('搜索的信息->>>>',x);
        this.listInfo={...this.listInfo,...x} // 假如左边的key-value与右边的key-value不一样,就替换成右边的
      }
    },
    mounted() {
     this.token=PubSub.subscribe('list_A',this.accept_message)
    },
    beforeDestroy(){
      // 取消订阅
      PubSub.unsubscribe(this.token);
    }
}
</script>

<style>
.card {
    /* 从哪里开始排序 */
  float: left;
  /* 这个目的是一行放三个 */
  width: 33.333%;
  padding: .75rem;
  /* 这个意思是每个div的行距是2分米 */
  margin-bottom: 2rem;
  /* 边框 */
  border: 1px solid #efefef;
  text-align: center;
}
  /* 图片的大小 */
.card > img {
  margin-bottom: .75rem;
  /* 控制图片的范围 */
  border-radius: 100px;
}
/* 文本大小 */
.card-text {
  font-size: 95%;
}
</style>