Jetpack之Navigation
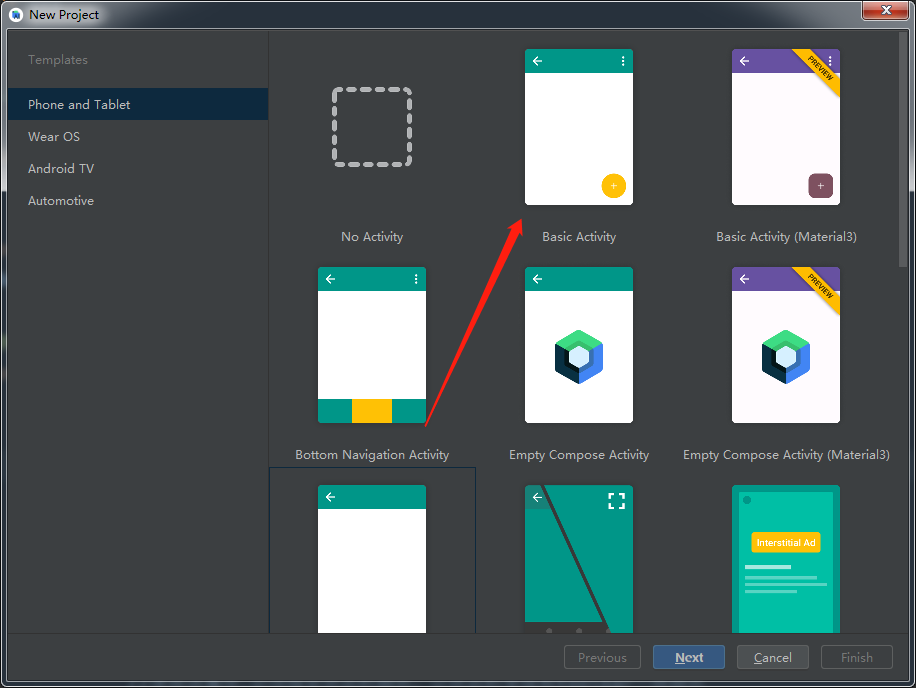
今天新创建一个项目,选的是这个。
首先映入眼帘的是一个这样的界面。
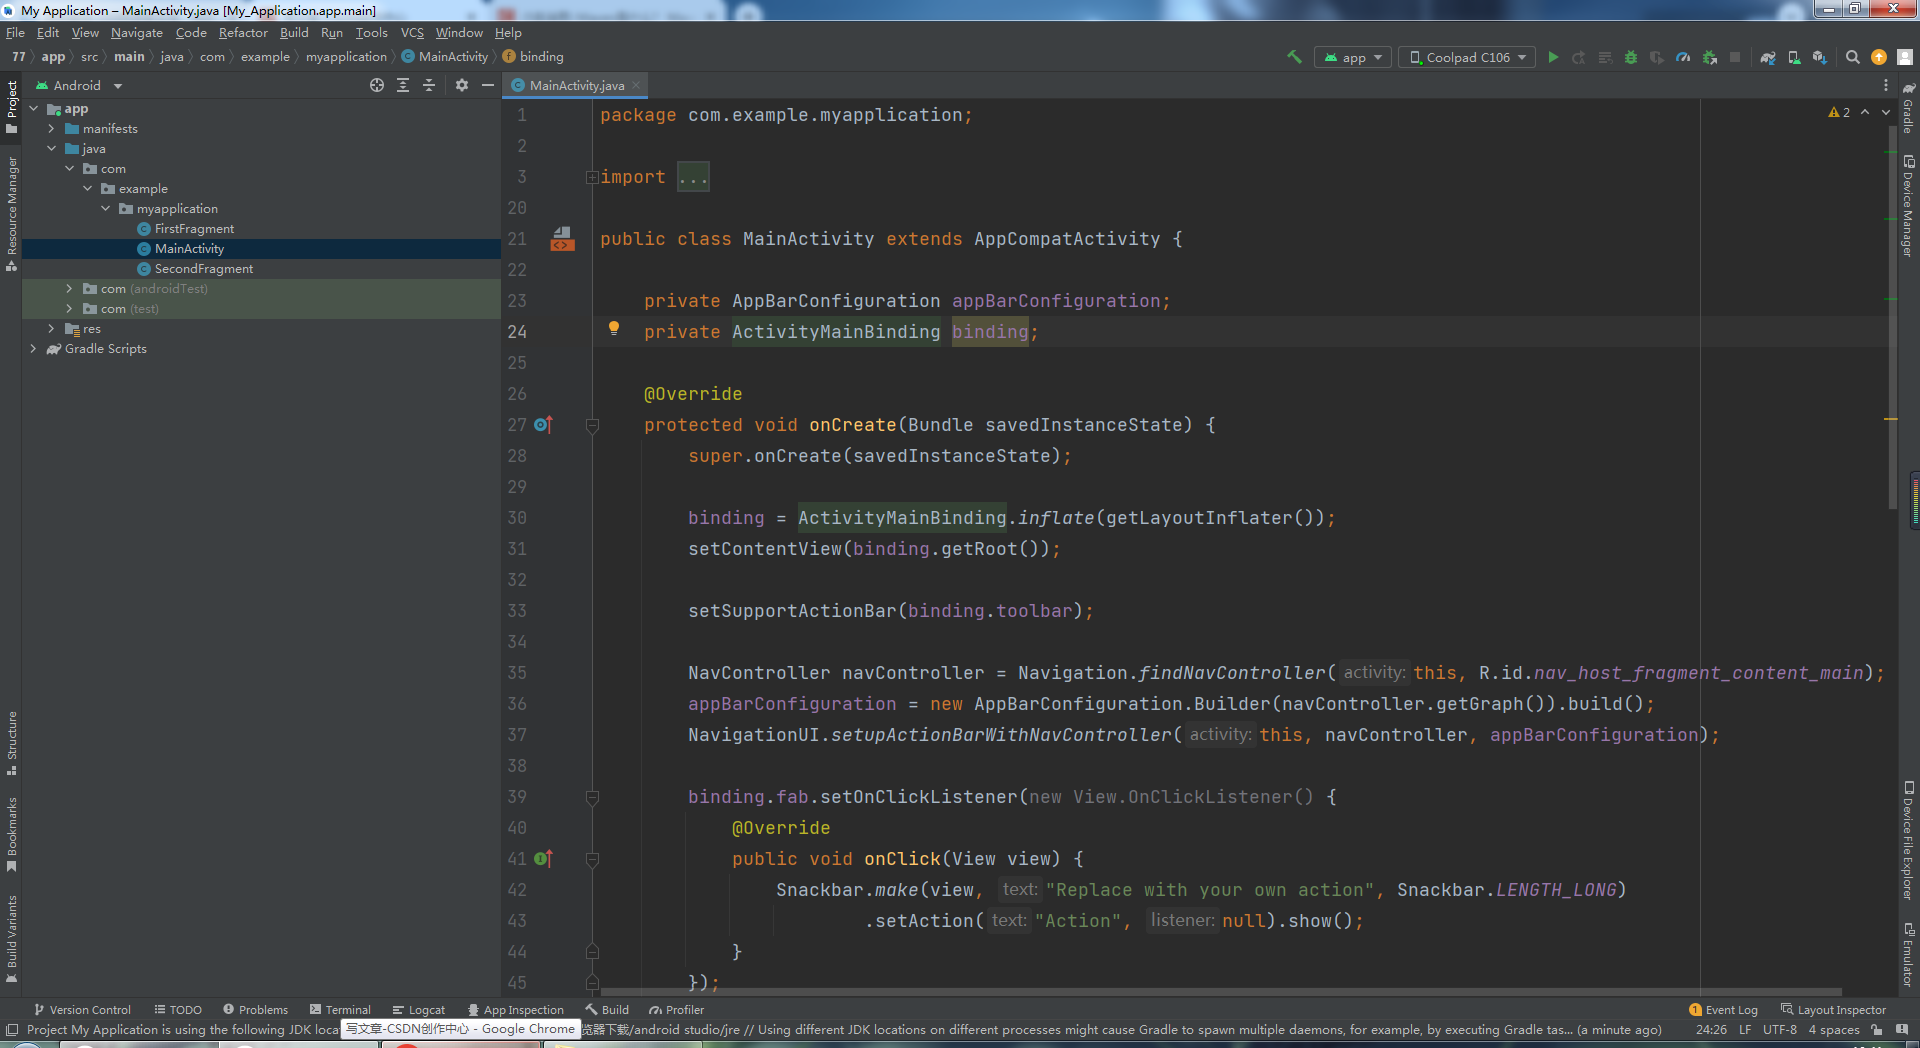
由ViewBinding绑定好XML布局和根布局和标题栏。
这个应该是Navigationg里面的内容
还有个字段
private AppBarConfiguration appBarConfiguration;
@Override
    protected void onCreate(Bundle savedInstanceState) {
        super.onCreate(savedInstanceState);

        binding = ActivityMainBinding.inflate(getLayoutInflater());
        setContentView(binding.getRoot());
        setSupportActionBar(binding.toolbar);

        NavController navController = Navigation.findNavController(this, R.id.nav_host_fragment_content_main);
        appBarConfiguration = new AppBarConfiguration.Builder(navController.getGraph()).build();
        NavigationUI.setupActionBarWithNavController(this, navController, appBarConfiguration);

        binding.fab.setOnClickListener(new View.OnClickListener() {
            @Override
            public void onClick(View view) {
                Snackbar.make(view, "Replace with your own action", Snackbar.LENGTH_LONG)
                        .setAction("Action", null).show();
            }
        });
}这个是右下角的一个FloatingActionButton。点击就会像Toast一样弹出一个东西出来。
binding.fab.setOnClickListener(new View.OnClickListener() {
            @Override
            public void onClick(View view) {
                Snackbar.make(view, "Replace with your own action", Snackbar.LENGTH_LONG)
                        .setAction("Action", null).show();
            }
        });
这两个是绑定选项菜单的。
 @Override
    public boolean onCreateOptionsMenu(Menu menu) {
        // Inflate the menu; this adds items to the action bar if it is present.
        getMenuInflater().inflate(R.menu.menu_main, menu);
        return true;
    }

    @Override
    public boolean onOptionsItemSelected(MenuItem item) {
        // Handle action bar item clicks here. The action bar will
        // automatically handle clicks on the Home/Up button, so long
        // as you specify a parent activity in AndroidManifest.xml.
        int id = item.getItemId();

        //noinspection SimplifiableIfStatement
        if (id == R.id.action_settings) {
            return true;
        }

        return super.onOptionsItemSelected(item);
    }
然后进去FragmentA后发现这是一个主Activity嵌入两个子Fragment的页面,主Activity主要写了一个Toolbar和绑定了菜单和浮动按钮和绑定布局,两个Fragment写了自己的布局。
然后还有一个在res里面的Navigation文件夹,里面写了一个Fragment跳转的文件,居然可以分开,耦合度降低了,但是这个文件需要用一个Fragment来作为容器进行跳转。
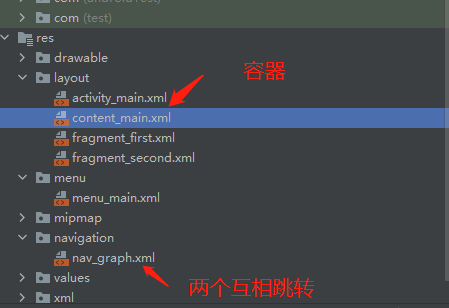
容器通过 app:navGraph="@navigation/nav_graph" 和Navigation相关联。
<?xml version="1.0" encoding="utf-8"?>
<androidx.constraintlayout.widget.ConstraintLayout xmlns:android="http://schemas.android.com/apk/res/android"
    xmlns:app="http://schemas.android.com/apk/res-auto"
    android:layout_width="match_parent"
    android:layout_height="match_parent"
    app:layout_behavior="@string/appbar_scrolling_view_behavior">

    <fragment
        android:id="@+id/nav_host_fragment_content_main"
        android:name="androidx.navigation.fragment.NavHostFragment"
        android:layout_width="0dp"
        android:layout_height="0dp"
        app:defaultNavHost="true"
        app:layout_constraintBottom_toBottomOf="parent"
        app:layout_constraintEnd_toEndOf="parent"
        app:layout_constraintStart_toStartOf="parent"
        app:layout_constraintTop_toTopOf="parent"
        app:navGraph="@navigation/nav_graph" />
</androidx.constraintlayout.widget.ConstraintLayout>
根布局的ID是给XML绑定的,而fragment的id是给UI元素触发点击事件绑定的。
<?xml version="1.0" encoding="utf-8"?>
<navigation xmlns:android="http://schemas.android.com/apk/res/android"
    xmlns:app="http://schemas.android.com/apk/res-auto"
    xmlns:tools="http://schemas.android.com/tools"
    android:id="@+id/nav_graph"
    app:startDestination="@id/FirstFragment">

    <fragment
        android:id="@+id/FirstFragment"
        android:name="com.example.myapplication.FirstFragment"
        android:label="@string/first_fragment_label"
        tools:layout="@layout/fragment_first">

        <action
            android:id="@+id/action_FirstFragment_to_SecondFragment"
            app:destination="@id/SecondFragment" />
    </fragment>
    <fragment
        android:id="@+id/SecondFragment"
        android:name="com.example.myapplication.SecondFragment"
        android:label="@string/second_fragment_label"
        tools:layout="@layout/fragment_second">

        <action
            android:id="@+id/action_SecondFragment_to_FirstFragment"
            app:destination="@id/FirstFragment" />
    </fragment>
</navigation>
然后在Activity中绑定并初始化容器XML即可。
在FragmentA中,怎么通过按钮跳转呢?
public void onViewCreated(@NonNull View view, Bundle savedInstanceState) {
        super.onViewCreated(view, savedInstanceState);

        binding.buttonFirst.setOnClickListener(new View.OnClickListener() {
            @Override
            public void onClick(View view) {
                NavHostFragment.findNavController(FirstFragment.this)
                        .navigate(R.id.action_FirstFragment_to_SecondFragment);
            }
        });
    }
FragmentB也是差不多的。
 public void onViewCreated(@NonNull View view, Bundle savedInstanceState) {
        super.onViewCreated(view, savedInstanceState);

        binding.buttonSecond.setOnClickListener(new View.OnClickListener() {
            @Override
            public void onClick(View view) {
                NavHostFragment.findNavController(SecondFragment.this)
                        .navigate(R.id.action_SecondFragment_to_FirstFragment);
            }
        });
贴上其中一个Fragment的代码
package com.example.myapplication;

import android.os.Bundle;
import android.view.LayoutInflater;
import android.view.View;
import android.view.ViewGroup;

import androidx.annotation.NonNull;
import androidx.fragment.app.Fragment;
import androidx.navigation.fragment.NavHostFragment;

import com.example.myapplication.databinding.FragmentFirstBinding;

public class FirstFragment extends Fragment {

    private FragmentFirstBinding binding;

    @Override
    public View onCreateView(
            LayoutInflater inflater, ViewGroup container,
            Bundle savedInstanceState
    ) {

        binding = FragmentFirstBinding.inflate(inflater, container, false);
        return binding.getRoot();

    }

    public void onViewCreated(@NonNull View view, Bundle savedInstanceState) {
        super.onViewCreated(view, savedInstanceState);

        binding.buttonFirst.setOnClickListener(new View.OnClickListener() {
            @Override
            public void onClick(View view) {
                NavHostFragment.findNavController(FirstFragment.this)
                        .navigate(R.id.action_FirstFragment_to_SecondFragment);
            }
        });
    }

    @Override
    public void onDestroyView() {
        super.onDestroyView();
        binding = null;
    }

}
自定义按钮
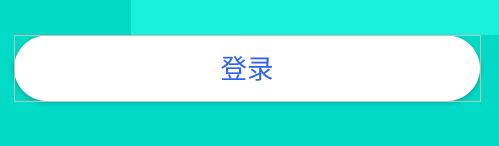
(背景有点歪了)
<Button
    android:id="@+id/button_first"
    android:layout_width="match_parent"
    android:layout_height="50dp"
    android:text="@string/title"
    android:textSize="20dp"
    android:textColor="@color/blue"
    android:background="@drawable/loading_btn"
    android:layout_margin="28dp"
    app:layout_constraintBottom_toBottomOf="parent"
    app:layout_constraintEnd_toEndOf="parent"
    app:layout_constraintStart_toStartOf="parent"
    app:layout_constraintTop_toBottomOf="@id/textview_first" />
对于button的背景重新设定了一下,因为我需要有圆弧的
<?xml version="1.0" encoding="utf-8"?>
<shape xmlns:android="http://schemas.android.com/apk/res/android">

    <solid android:color="@color/white"/>

    <corners android:radius="100dp"/>

</shape>
自定义标题栏
因为我想让标题栏的文字居中,但toolbar好像没有提供这个功能,所以我在toolbar里面嵌入一个文字,直接让文字居中

 <androidx.appcompat.widget.Toolbar
        android:id="@+id/toolbar"
        android:layout_width="match_parent"
        android:layout_height="?attr/actionBarSize"
        android:background="@color/ivory"
        >

    <TextView
        android:layout_width="wrap_content"
        android:layout_height="wrap_content"
        android:text="@string/title"
        android:layout_gravity="center"
        android:textSize="20dp"
        android:textColor="@color/black"/>

</androidx.appcompat.widget.Toolbar>
添加菜单
@Override
public boolean onCreateOptionsMenu(Menu menu) {
// Inflate the menu; this adds items to the action bar if it is present.
getMenuInflater().inflate(R.menu.menu_main, menu);
return true;
}
@Override
public boolean onOptionsItemSelected(MenuItem item) {
int id = item.getItemId();
switch (id) {
case R.id.action_settings://弹出窗
//实例化并去掉背景
dialog = new BottomSheetDialog(this, R.style.BottomSheetDialog);
dialog.setContentView(R.layout.buttom_menu_dialog);
dialog.show();
Toast.makeText(this, "111", Toast.LENGTH_SHORT).show();
return true;
default:
break;
}
return super.onOptionsItemSelected(item);
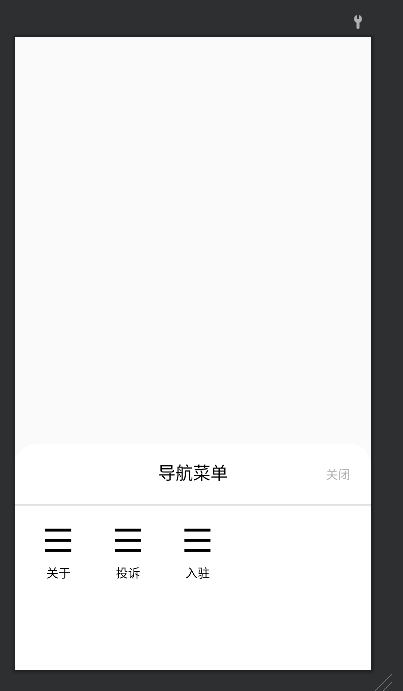
}点击菜单显示弹窗
dialog = new BottomSheetDialog(this, R.style.BottomSheetDialog);
dialog.setContentView(R.layout.buttom_menu_dialog);
dialog.show();
构造参数第二个参数是把背景去掉,为什么要把背景去掉呢?
因为我想要背景有半径。
以下是R.style.BottomSheetDialog,去掉背景的。
<?xml version="1.0" encoding="utf-8"?>
<resources>
    <style name="BottomSheetDialog" parent="Theme.Design.Light.BottomSheetDialog">
        <item name="bottomSheetStyle">@style/bottomSheetStyleWrapper</item>
    </style>
    <style name="bottomSheetStyleWrapper" parent="Widget.Design.BottomSheet.Modal">
        <item name="android:background">@android:color/transparent</item>
    </style>
</resources>
第二句话是设置一个布局。
怎么重新设置一个有半径的背景呢?
在根布局中设置background即可。
shape在res\drawable中创建。背景的格式什么呀都在这里创建。
<?xml version="1.0" encoding="utf-8"?>
<shape xmlns:android="http://schemas.android.com/apk/res/android"
    android:shape="rectangle">
    <!-- rectangle表示为矩形 -->

    <!-- 填充的颜色 -->
    <solid android:color="@color/white" />

    <!-- 边框的颜色和粗细 -->
    <stroke
        android:width="1dp"
        android:color="@color/white" />

    <!-- android:radius 关键点,圆角的半径 -->
    <corners
        android:topLeftRadius="25dp"
        android:topRightRadius="25dp"
        android:bottomRightRadius="0dp"
        android:bottomLeftRadius="0dp" />

</shape>
然后放到最外层的LinearLayout中。
<?xml version="1.0" encoding="utf-8"?>
<LinearLayout xmlns:android="http://schemas.android.com/apk/res/android"
    xmlns:app="http://schemas.android.com/apk/res-auto"
    android:layout_width="match_parent"
    android:layout_height="wrap_content"
    android:layout_gravity="bottom"
    android:background="@drawable/menu_corner_background"
    android:orientation="vertical">
    <!--    背景边缘化半径-->

    <androidx.constraintlayout.widget.ConstraintLayout
        android:layout_width="match_parent"
        android:layout_height="wrap_content"
        android:orientation="horizontal"
        android:gravity="center">

        <TextView
            android:layout_width="wrap_content"
            android:layout_height="30dp"
            android:layout_margin="20dp"
            android:text="导航菜单"
            android:textSize="20dp"
            android:textColor="@color/black"
            app:layout_constraintBottom_toBottomOf="parent"
            app:layout_constraintEnd_toEndOf="parent"
            app:layout_constraintStart_toStartOf="parent"
            app:layout_constraintTop_toTopOf="parent" />

        <TextView
            android:id="@+id/title_close"
            android:layout_width="wrap_content"
            android:layout_height="wrap_content"
            android:layout_marginEnd="24dp"
            android:background="@null"
            android:text="关闭"
            android:textColor="@color/gray"
            app:layout_constraintBottom_toBottomOf="parent"
            app:layout_constraintEnd_toEndOf="parent"
            app:layout_constraintTop_toTopOf="parent"
            app:layout_constraintVertical_bias="0.509" />

    </androidx.constraintlayout.widget.ConstraintLayout>

    <View
        android:layout_width="match_parent"
        android:layout_height="1dp"
        android:background="#C8C2C2" />

    <LinearLayout
        android:layout_width="match_parent"
        android:layout_height="190dp"
        android:orientation="horizontal">

        <androidx.constraintlayout.widget.ConstraintLayout
            android:layout_width="wrap_content"
            android:layout_height="wrap_content"
            android:orientation="vertical"
            android:layout_marginStart="10dp">

            <ImageView
                android:id="@+id/about"
                android:layout_width="40dp"
                android:layout_height="40dp"
                android:layout_margin="20dp"
                android:src="@mipmap/menu"
                app:layout_constraintEnd_toEndOf="parent"
                app:layout_constraintHorizontal_bias="0.533"
                app:layout_constraintStart_toStartOf="parent"
                app:layout_constraintTop_toTopOf="parent" />

            <TextView
                android:layout_width="wrap_content"
                android:layout_height="wrap_content"
                android:layout_marginTop="8dp"
                android:text="关于"
                android:textColor="@color/black"
                app:layout_constraintBottom_toBottomOf="parent"
                app:layout_constraintEnd_toEndOf="parent"
                app:layout_constraintStart_toStartOf="parent"
                app:layout_constraintTop_toBottomOf="@+id/about" />
        </androidx.constraintlayout.widget.ConstraintLayout>


        <androidx.constraintlayout.widget.ConstraintLayout
            android:layout_width="wrap_content"
            android:layout_height="wrap_content"
            android:orientation="vertical">

            <ImageView
                android:id="@+id/report"
                android:layout_width="40dp"
                android:layout_height="40dp"
                android:layout_margin="20dp"
                android:src="@mipmap/menu"
                app:layout_constraintEnd_toEndOf="parent"
                app:layout_constraintHorizontal_bias="0.533"
                app:layout_constraintStart_toStartOf="parent"
                app:layout_constraintTop_toTopOf="parent" />

            <TextView
                android:layout_width="wrap_content"
                android:layout_height="wrap_content"
                android:layout_marginTop="8dp"
                android:text="投诉"
                android:textColor="@color/black"
                app:layout_constraintBottom_toBottomOf="parent"
                app:layout_constraintEnd_toEndOf="parent"
                app:layout_constraintStart_toStartOf="parent"
                app:layout_constraintTop_toBottomOf="@+id/report" />
        </androidx.constraintlayout.widget.ConstraintLayout>

        <androidx.constraintlayout.widget.ConstraintLayout
            android:layout_width="wrap_content"
            android:layout_height="wrap_content"
            android:orientation="vertical">

            <ImageView
                android:id="@+id/Settled"
                android:layout_width="40dp"
                android:layout_height="40dp"
                android:layout_margin="20dp"
                android:src="@mipmap/menu"
                app:layout_constraintEnd_toEndOf="parent"
                app:layout_constraintHorizontal_bias="0.533"
                app:layout_constraintStart_toStartOf="parent"
                app:layout_constraintTop_toTopOf="parent" />

            <TextView
                android:layout_width="wrap_content"
                android:layout_height="wrap_content"
                android:layout_marginTop="8dp"
                android:text="入驻"
                android:textColor="@color/black"
                app:layout_constraintBottom_toBottomOf="parent"
                app:layout_constraintEnd_toEndOf="parent"
                app:layout_constraintStart_toStartOf="parent"
                app:layout_constraintTop_toBottomOf="@+id/Settled" />
        </androidx.constraintlayout.widget.ConstraintLayout>

    </LinearLayout>

</LinearLayout>
沉浸式状态栏
一开始我用的是这个依赖里面的StatusBarUtil类。
implementation 'com.jaeger.statusbarutil:library:1.5.1'但是我发现Sycn完,这个类也没有显示,也没有导包的选项,好TM奇怪啊。
后面发现JCenter远程仓库已经宣布停止维护了,而该事件造成的影响主要表现为: 2022 年 2 月 1 日之后 Android Studio 将无法从 JCenter 仓库拉取任何代码库,统统都会拉取失败,间接导致项目无法编译通过,所以好像就下不了了。。
里面有这个库的看这里更换。
所以怎么办呢?我就去Github找,找了一个收藏最多的的GitHub项目。这个GitHub项目挺不错的。
首先现在app模块添加依赖。
implementation 'com.geyifeng.immersionbar:immersionbar:3.2.2'随后在Java代码中
 //沉浸式状态栏
ImmersionBar.with(this)
        //使用该属性,必须指定状态栏颜色,让状态栏变成和toolbar一样颜色
        .fitsSystemWindows(true).statusBarColor(R.color.ivory)
        //设置状态栏字体颜色为黑色
        .statusBarDarkFont(true, 0.2f).init();
思路:把状态栏全程变成白色,就会自动获取状态栏高度然后设置上去,不然状态栏和标题栏重合。
然后把状态栏的图标变成黑色就可以了。