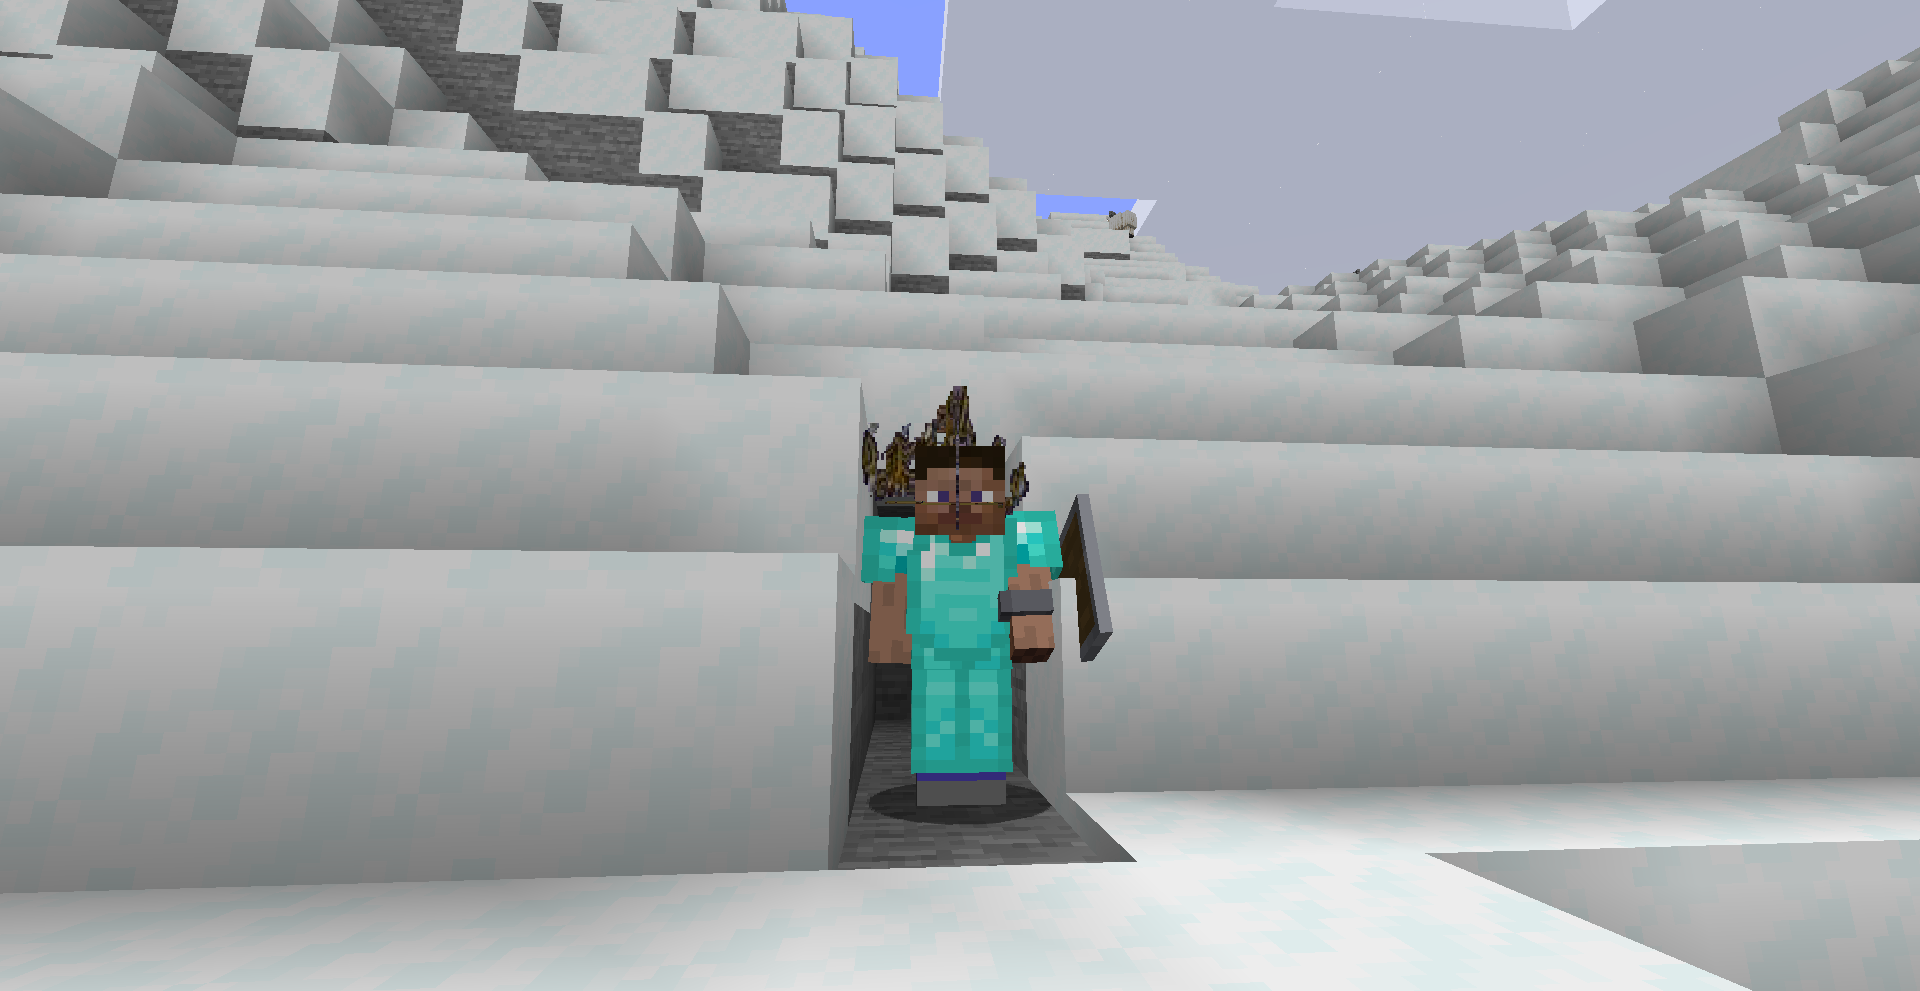
我们本次在Fabric 1.19.2中实现具有动画效果的3D盔甲
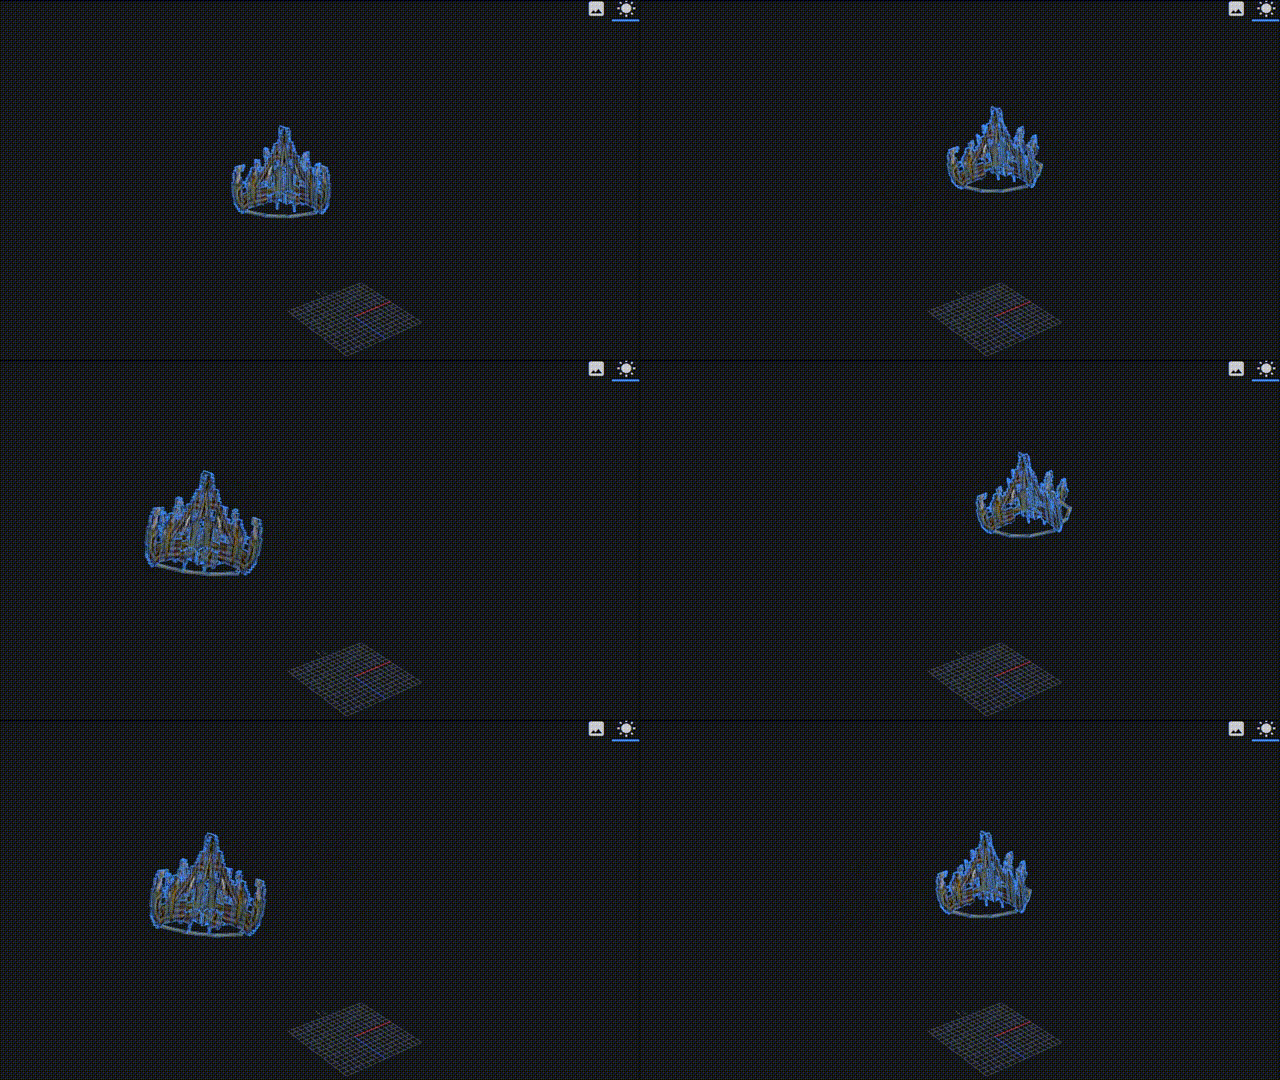
效果演示
效果演示
效果演示
1.首先,为了实现这些效果,我们需要首先使用到一个模组:geckolib(下载地址)
找到项目的build.gradle文件,在repositories和dependencies中添加依赖。
repositories {

    //添加这个
    maven { url 'https://dl.cloudsmith.io/public/geckolib3/geckolib/maven/' }

}
dependencies {
    minecraft 'net.minecraftforge:forge:1.19.2-43.1.1'

    //添加这个
    modImplementation 'software.bernie.geckolib:geckolib-fabric-1.19:3.1.18'

}
之后我们重新构建gradle项目

构建好了项目后在项目主类ModMain类中添加一句geckolib的初始化语句:
ModMain.java
	@Override
	public void onInitialize() {
		ModConfigs.registerConfigs();

		ItemInit.registerModItems();
		BlockInit.registerModBlocks();
		EffectInit.registerEffects();
		SoundInit.registerSounds();
		BlockEntityInit.registerAllBlockEntities();
		//初始化语句
		GeckoLib.initialize();


	}
2.之后,与之前的教程一样,我们需要在blockbench中制作一个模组中的3D盔甲:
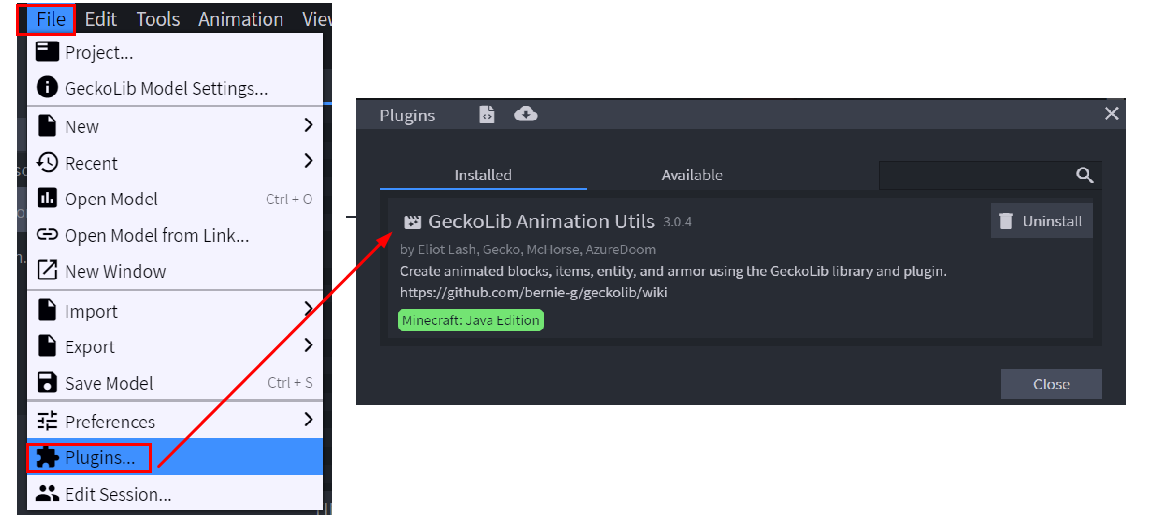
进入软件后我们要找到一个插件按钮,然后再搜索栏中输入GeckoLib Animation Utils,并下载这个插件
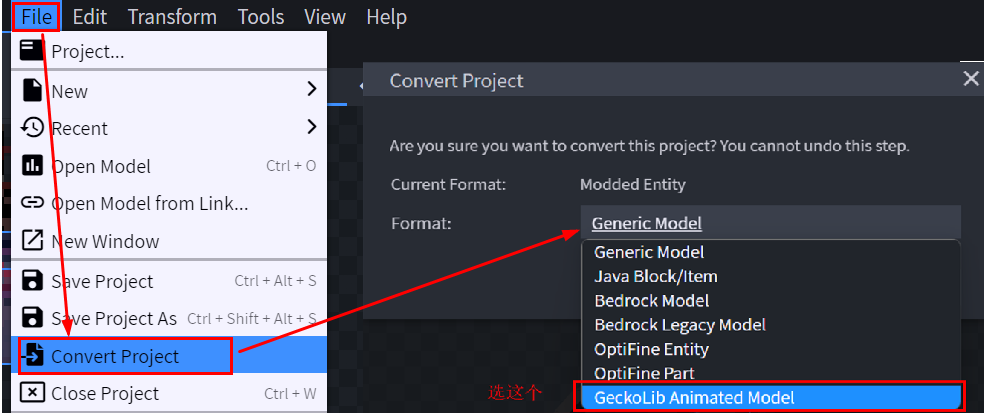
将我们制作好的生物实体进行模型转换工作,找到Convert Project,之后选择Geckolib Animated Model
在这之后,你会发现你的生物实体栏多了一个Animate栏,点击进去:
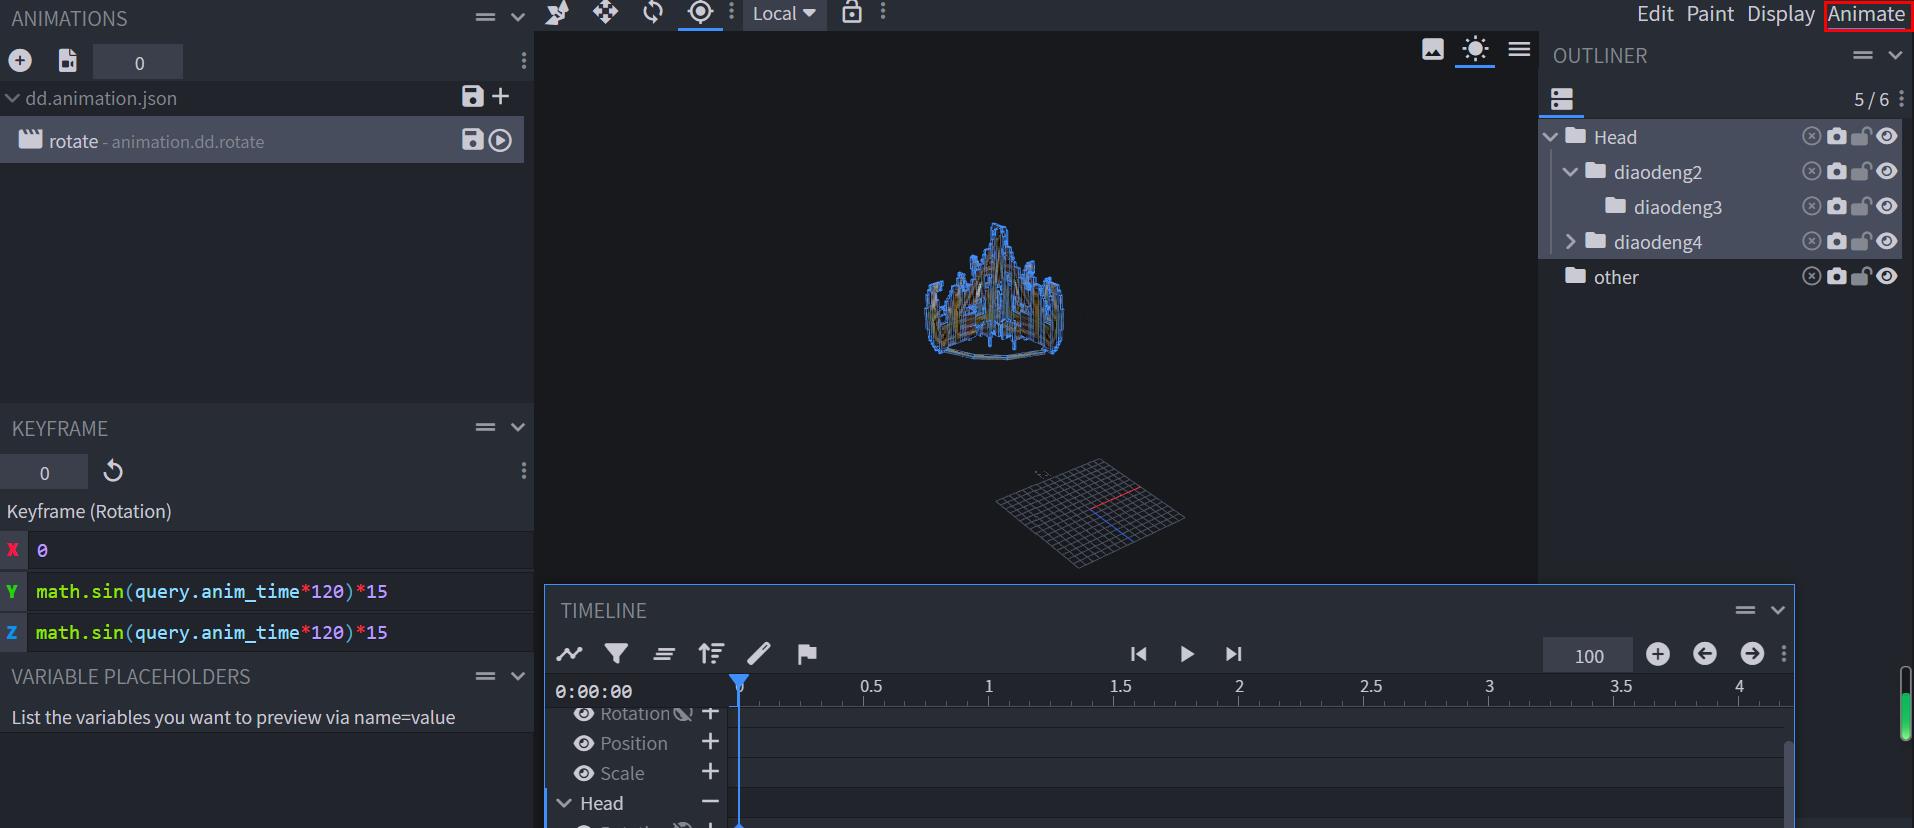
具体动作制作的视频:Blockbench动画制作
在制作好所有的动画后我们导出模型和动画json文件。
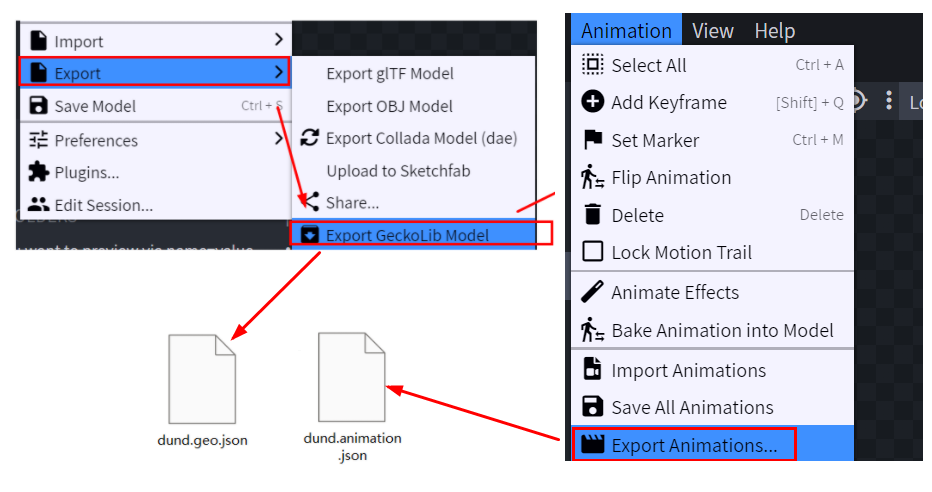
3.模型制作完成,接下来需要制作我们的盔甲类
在items包中新建armor包 -> armor包中新建我们的套装类ChandlierArmorItem
ChandlierArmorItem.java
import net.joy187.joyggd.init.ItemInit;
import net.minecraft.entity.EquipmentSlot;
import net.minecraft.entity.LivingEntity;
import net.minecraft.entity.decoration.ArmorStandEntity;
import net.minecraft.entity.player.PlayerEntity;
import net.minecraft.item.ArmorMaterial;
import net.minecraft.item.Item;
import software.bernie.example.registry.ItemRegistry;
import software.bernie.geckolib3.core.IAnimatable;
import software.bernie.geckolib3.core.PlayState;
import software.bernie.geckolib3.core.builder.AnimationBuilder;
import software.bernie.geckolib3.core.controller.AnimationController;
import software.bernie.geckolib3.core.event.predicate.AnimationEvent;
import software.bernie.geckolib3.core.manager.AnimationData;
import software.bernie.geckolib3.core.manager.AnimationFactory;

import java.util.ArrayList;
import java.util.Arrays;
import java.util.List;

public class ChandlierArmorItem extends ArmorItemBase implements IAnimatable {
    private final AnimationFactory factory = new AnimationFactory(this);

    public ChandlierArmorItem(ArmorMaterial material, EquipmentSlot slot, Settings settings) {
        super(material, slot, settings);
    }

    //盔甲动画状态机
    private <P extends IAnimatable> PlayState predicate(AnimationEvent<P> event) {
        // This is all the extradata this event carries. The livingentity is the entity
        // that's wearing the armor. The itemstack and equipmentslottype are self
        // explanatory.
        LivingEntity livingEntity = event.getExtraDataOfType(LivingEntity.class).get(0);

		//留空的话就默认没有动画
        event.getController().setAnimation(new AnimationBuilder().addAnimation("animation.chandlier.rotate", true));

        // If the living entity is an armorstand just play the animation nonstop
        if (livingEntity instanceof ArmorStandEntity) {
            return PlayState.CONTINUE;
        }

        // The entity is a player, so we want to only play if the player is wearing the
        // full set of armor
        else if (livingEntity instanceof PlayerEntity) {
            PlayerEntity player = (PlayerEntity) livingEntity;

            // Get all the equipment, aka the armor, currently held item, and offhand item
            List<Item> equipmentList = new ArrayList<>();
            player.getItemsEquipped().forEach((x) -> equipmentList.add(x.getItem()));


            //我们的盔甲只包含头盔一个
            List<Item> armorList = equipmentList.subList(5, 6);

            // Make sure the player is wearing all the armor. If they are, continue playing
            // the animation, otherwise stop
			boolean isWearingAll = armorList
					.containsAll(Arrays.asList(ItemInit.CHANDLIER));
            return isWearingAll ? PlayState.CONTINUE : PlayState.STOP;
        }
        return PlayState.STOP;
    }

    //将盔甲动画状态机进行注册
    @Override
    public void registerControllers(AnimationData data) {
        data.addAnimationController(new AnimationController(this,
                "controller", 20, this::predicate));
    }

    @Override
    public AnimationFactory getFactory() {
        return factory;
    }
}
之后我们需要在armor包中新建model包->model包中新建我们的盔甲的模型类ModelChandlier:
ModelChandlier.java
package net.joy187.joyggd.item.armor.model;

import net.joy187.joyggd.ModMain;
import net.joy187.joyggd.items.armor.ChandlierArmorItem;
import net.minecraft.util.Identifier;
import software.bernie.geckolib3.model.AnimatedGeoModel;

public class ModelChandlier extends AnimatedGeoModel<ChandlierArmorItem> {
    //盔甲模型文件地址
    @Override
    public Identifier getModelResource(ChandlierArmorItem object) {
        return new Identifier(ModMain.MOD_ID, "geo/chandlier.geo.json");
    }
    //盔甲材质文件地址
    @Override
    public Identifier getTextureResource(ChandlierArmorItem object) {
        return new Identifier(ModMain.MOD_ID, "textures/models/armor/chandlier_layer_1.png");
    }
    //盔甲动画文件地址
    @Override
    public Identifier getAnimationResource(ChandlierArmorItem animatable) {
        return new Identifier(ModMain.MOD_ID, "animations/chandlier.animation.json");
    }
}
之后我们需要在armor包中新建render包->render包中新建我们的盔甲的渲染类RenderChandlier:
RenderChandlier.java
package net.joy187.joyggd.items.armor.render;

import net.joy187.joyggd.items.armor.ChandlierArmorItem;
import net.joy187.joyggd.items.armor.model.ModelChandlier;
import software.bernie.geckolib3.renderers.geo.GeoArmorRenderer;

public class RenderChandlier extends GeoArmorRenderer<ChandlierArmorItem>{
    //渲染盔甲穿在身上的每一个部位的效果
    public RenderChandlier() {
        super(new ModelChandlier());
        //这里要和第二步你blockbench中建模的名称一一对应
		this.headBone = "Head";
		this.bodyBone = "other";
		this.rightArmBone = "other";
		this.leftArmBone = "other";
		this.rightLegBone = "other";
		this.leftLegBone = "other";
		this.rightBootBone = "other";
		this.leftBootBone = "other";
    }
}
4.在ClientModEventSubscriber类中将我们的盔甲渲染类进行注册:
ClientModEventSubscriber.java
@Mod.EventBusSubscriber(modid = Main.MOD_ID, value = Dist.CLIENT, bus = Mod.EventBusSubscriber.Bus.MOD)
public class ClientModEventSubscriber extends ModEventSubscriber{

    @SubscribeEvent
    public static void registerRenderers(final EntityRenderersEvent.AddLayers event) {
        //渲染类进行注册
        GeoArmorRenderer.registerArmorRenderer(ChandlierArmorItem.class, RenderChandlier::new);
    }
}
5.在items包中新建一个盔甲属性类:
CustomArmorMaterials.java
package net.joy187.joyggd.items;

import net.minecraft.entity.EquipmentSlot;
import net.minecraft.item.ArmorMaterial;
import net.minecraft.item.Items;
import net.minecraft.recipe.Ingredient;
import net.minecraft.sound.SoundEvent;
import net.minecraft.sound.SoundEvents;
import net.minecraft.util.Lazy;

import java.util.function.Supplier;

public enum CustomArmorMaterials implements ArmorMaterial {

	ARMOR_MATERIAL_DROOL("drool", 40, new int[]{6, 10, 12, 8}, 25, SoundEvents.ITEM_ARMOR_EQUIP_CHAIN, 0.0F, 0.0F, () -> {
        return Ingredient.ofItems(Items.DIAMOND);
    }),
    ARMOR_MATERIAL_CHANDLIER("chandlier", 40, new int[]{8, 10, 12, 8}, 15, SoundEvents.ITEM_ARMOR_EQUIP_CHAIN, 2.0F, 0.5F, () -> {
        return Ingredient.ofItems(Items.DIAMOND);
    }),
    ARMOR_MATERIAL_PEACE("peace", 50, new int[]{6, 12, 8, 6}, 12, SoundEvents.ITEM_ARMOR_EQUIP_CHAIN, 4.0F, 0.2F, () -> {
        return Ingredient.ofItems(Items.DIAMOND);
    }),
    ARMOR_MATERIAL_LANTERN("lantern", 50, new int[]{8, 10, 12, 6}, 15, SoundEvents.ITEM_ARMOR_EQUIP_CHAIN, 1.0F, 0.1F, () -> {
        return Ingredient.ofItems(Items.DIAMOND);
    });


    private static final int[] BASE_DURABILITY = new int[]{13, 15, 16, 11};
    private final String name;
    private final int durabilityMultiplier; //耐久
    private final int[] protectionAmounts; //四个部位各有几点防御力
    private final int enchantability; //附魔能力
    private final SoundEvent equipSound;    //穿戴时的声音
    private final float toughness;  //盔甲抗性
    private final float knockbackResistance; //盔甲抗击退能力
    private final Lazy<Ingredient> repairIngredientSupplier; //盔甲用什么物品修

    private CustomArmorMaterials(String name, int durabilityMultiplier, int[] protectionAmounts,
                              int enchantability, SoundEvent equipSound, float toughness,
                              float knockbackResistance, Supplier<Ingredient> repairIngredientSupplier) {
        this.name = name;
        this.durabilityMultiplier = durabilityMultiplier;
        this.protectionAmounts = protectionAmounts;
        this.enchantability = enchantability;
        this.equipSound = equipSound;
        this.toughness = toughness;
        this.knockbackResistance = knockbackResistance;
        this.repairIngredientSupplier = new Lazy(repairIngredientSupplier);
    }

    public int getDurability(EquipmentSlot slot) {
        return BASE_DURABILITY[slot.getEntitySlotId()] * this.durabilityMultiplier;
    }

    public int getProtectionAmount(EquipmentSlot slot) {
        return this.protectionAmounts[slot.getEntitySlotId()];
    }

    public int getEnchantability() {
        return this.enchantability;
    }

    public SoundEvent getEquipSound() {
        return this.equipSound;
    }

    public Ingredient getRepairIngredient() {
        return (Ingredient)this.repairIngredientSupplier.get();
    }

    public String getName() {
        return this.name;
    }

    public float getToughness() {
        return this.toughness;
    }

    public float getKnockbackResistance() {
        return this.knockbackResistance;
    }
}
6.在ItemInit类中将我们的盔甲进行声明,使用我们上一步中所定义的盔甲属性。
ItemInit.java
    //头盔
    public static final Item CHANDLIER = registerItem("chandlier",
            new ChandlierArmorItem(CustomArmorMaterials.ARMOR_MATERIAL_CHANDLIER, EquipmentSlot.HEAD,
                    new FabricItemSettings().group(ModMain.ITEMTAB)));
7.代码部分结束,之后来到材质包制作环节:
在resources\assets\你的modid中的lang包中的en_us.json添加盔甲的英文名称:
"item.joyggd.chandlier":"Chandlier",
在models\item包中添加所有盔甲的模型文件:
chandlier.json
{
  "parent":"minecraft:item/generated",
  "textures":{
    "layer0":"joyggd:item/chandlier"
  }
}
在textures\item中添加盔甲的手持贴图:
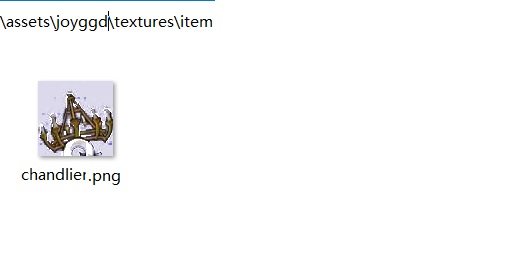
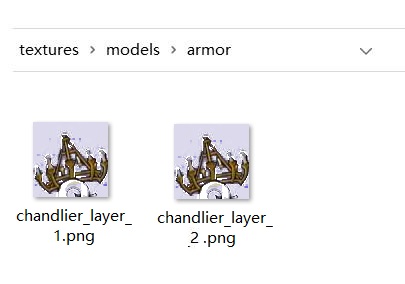
在textures\models\armor中添加盔甲的穿戴后贴图:
新建一个geo包和animation包,把第二步中的模型和动画文件分别放进去
8.保存所有文件 -> 进行测试:
穿上盔甲,如果可以正常显示,就说明我们成功了!
