目录
前言:
整个流程:
一、配置路径
二、打包
三、初始化资源
四、测试打包
前言:
如果使用了GameFrameWork框架的话,你会发现你点击Build And Run按钮打包运行大概是运行不起来的。本篇就讲了怎么打包游戏运行。
我觉得我对于资源加载这块儿理解也不够深,所以本篇主要记录方法流程,不讲原理。想探究原理的可以先去看看官方手册,看看GF官网,然后看看其它GF大佬的B站视频啊,博客啊啥的(多看看,每一篇都有值得吸收的碎片,然后把这些碎片再拼成自己脑中的体系图景)。
废话不多说,开干!
整个流程:
- 配置路径,准备用UGF自带的Editor打包
- 打出AB包
- 把打好的包复制进StreamingAssets文件夹(如果已经build了)
- build工程
一、配置路径
如过没有配置过路径的话,打开GameFramework的资源工具Resource Editor是这样的:

也就是最右边一列的资产列表是空的。
(关于这个打包工具官网有相关介绍可以先看看)
所以这里需要自己手动添加一个配置文件,告诉这个打包器需要打包的资源路径。
在Assets/GameMain/Configs下手动创建文件ResourceEditor.xml:

内容为:
<?xml version="1.0" encoding="UTF-8"?>
<UnityGameFramework>
  <ResourceEditor>
    <Settings>
      <SourceAssetRootPath>Assets/GameMain</SourceAssetRootPath>
      <SourceAssetSearchPaths>
        <SourceAssetSearchPath RelativePath="" />
      </SourceAssetSearchPaths>
      <SourceAssetUnionTypeFilter>t:Scene t:Prefab t:Shader t:Model t:Material t:Texture t:AudioClip t:AnimationClip t:AnimatorController t:Font t:TextAsset t:ScriptableObject</SourceAssetUnionTypeFilter>
      <SourceAssetUnionLabelFilter>l:ResourceInclusive</SourceAssetUnionLabelFilter>
      <SourceAssetExceptTypeFilter>t:Script</SourceAssetExceptTypeFilter>
      <SourceAssetExceptLabelFilter>l:ResourceExclusive</SourceAssetExceptLabelFilter>
      <AssetSorter>Path</AssetSorter>
    </Settings>
  </ResourceEditor>
</UnityGameFramework>
(配置文件的内容看英文就明白个大概了,如果想弄懂的话)
配置文件创建了,然后要告诉框架这个配置文件的路径,需要使用一个叫“ResourceEditorConfigPath”的属性来配置。下面来搞。
在Assets/GameMain/Scripts路径下建立Editor文件夹:

文件夹里面手动创建GameFrameworkConfigs.cs(名字实际上应该无所谓):
里面配置一下刚刚创建的配置文件的路径:
using System.Collections;
using System.Collections.Generic;
using UnityEngine;
using GameFramework;
using UnityGameFramework.Editor.ResourceTools;
using System.IO;
namespace ShadowU
{
    public static class GameFrameworkConfigs
    {
        [ResourceEditorConfigPath]
        public static string ResourceEditorConfig = Utility.Path.GetRegularPath(Path.Combine(Application.dataPath, "GameMain/Configs/ResourceEditor.xml"));
    }
}
如果不懂为啥可以去恶补一下c#的Attribute的相关知识。
保存。
然后再打开打包的资源编辑器:

这样在右边一列就能够看到自己的资源了。
二、打包
然后打包的任务通俗的说就是把右边的资源放到左边。这个界面的操作说明官网有(官网为数不多的教程就有讲这个的。。。)
然后关于打AB包怎么组合比较好可以参考Unity的官方手册:为 AssetBundle 准备资源 - Unity 手册 (unity3d.com)
这里为了演示就不一个包一个包打了直接一把梭:

然后左边就是选择打包的文件:
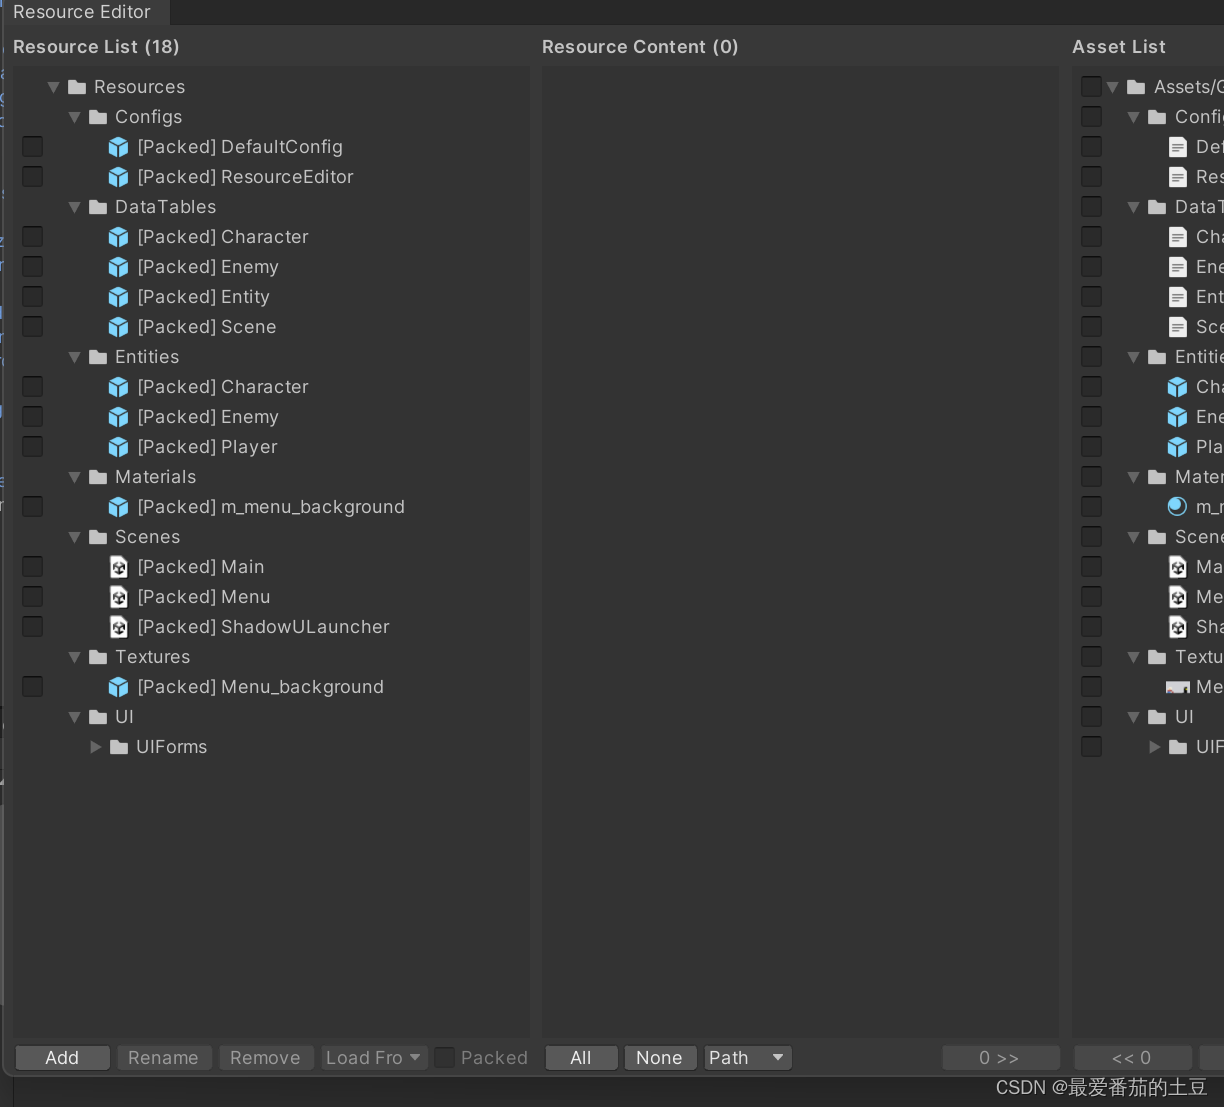
细节不管了,先跑起来再说。
点击右下角save(默认会在Assets/GameFramework/Configs路径下生成ResourceCollection.xml):

然后打开工具的builder:

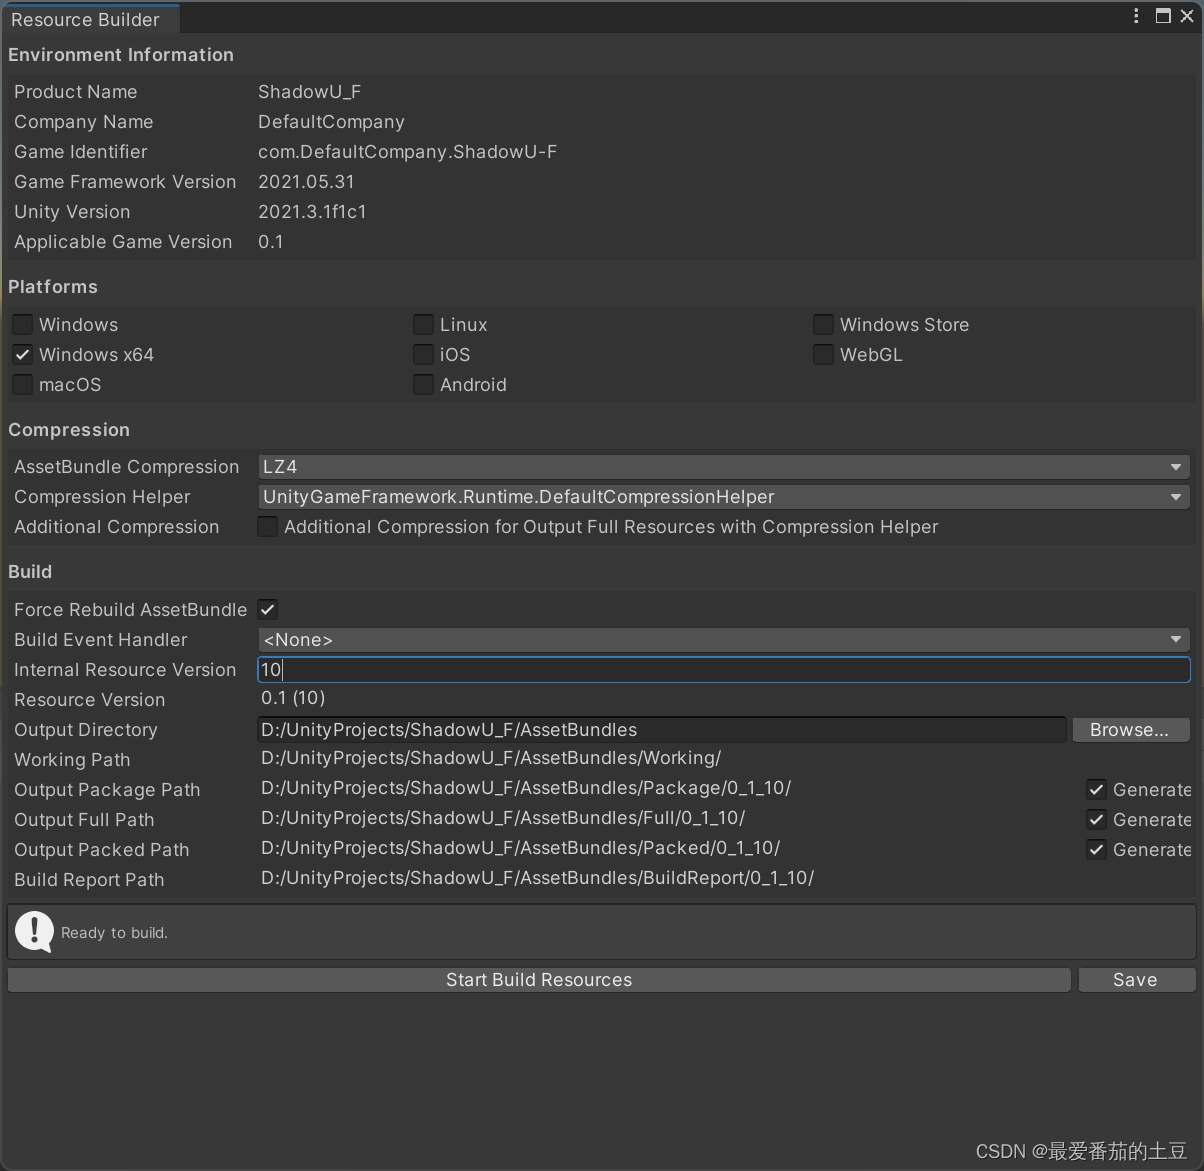
自己设置好你的Output Directory。
(这里的Internal Resource Version每打一次包就会自增,所以我这里是10.。。。)
save是保存这个界面填写的配置(默认会在Assets/GameFramework/Configs路径下生成ResourceBuilder.xml)。
按Start Build Resources开始打包!
打包后,到自己设置的输出文件夹里:

各个文件夹的介绍官网都有写:使用 AssetBundle 构建工具 | Game Framework
然后我们只需要把 Package(单机模式)或 Packed(可更新模式)中对应版本(如 0_1_0_1)、对应平台的内容(如 windows),完整拷贝至 Unity 工程的 Assets/StreamingAssets 中,即可Build了。(StreamingAssets文件夹自己创建):
然后打包之前可以先在编译器运行一下非编译器资源模式。
把这个取消勾选:

然后运行。。。。。
你会发现报错,运行不了。
因为还有一步。
三、初始化资源
虽然已经把游戏所需要的资源打包放好了,但是要让程序使用它们还得通过框架对这些资源进行初始化。
不过初始化很简单,就一个语句:
GameEntry.Resource.InitResources(OnInitResourcesComplete);其中传入的OnInitResourcesComplete是初始化完成的回调函数。
用一个标记来判断是否初始化完成:
m_InitResourcesComplete = false;回调函数就这么写:
        private void OnInitResourcesComplete()
        {
            m_InitResourcesComplete = true;
            Log.Info("Init resources complete.");
}因为我流程写得相对于StarForce的精简了很多,所以我初始化资源、加载资源、启动游戏等逻辑都放在了ProcedureLaunch.cs里面,所以我加了一点处理来保证初始化资源-->初始化完成-->加载资源-->加载资源完成-->启动游戏这些操作按顺序执行。所以代码如下:
(如果觉得乱直接去学习StarForce的代码即可)
 using GameFramework.Fsm;
using GameFramework.Event;
using UnityGameFramework.Runtime;
using System.Collections.Generic;
using UnityEngine;
namespace ShadowU
{
    public class ProcedureLaunch : ProcedureBase
    {
        public override bool UseNativeDialog
        {
            get
            {
                return true;
            }
        }

        private Dictionary<string, bool> m_LoadedFlag = new Dictionary<string, bool>();//用来标记是否已经加载

        private bool m_InitResourcesComplete = false;

        private bool temp = false;

        public static readonly string[] DataTableNames = new string[]
       {
            "Scene",
            "Character",
            "Entity",
            "Enemy"
       };

        protected override void OnEnter(IFsm<GameFramework.Procedure.IProcedureManager> procedureOwner)
        {
            base.OnEnter(procedureOwner);
            Debug.Log("launch!");

            //初始化资源标记
            m_InitResourcesComplete = false;

            temp = false;

            // 注意:使用单机模式并初始化资源前,需要先构建 AssetBundle 并复制到 StreamingAssets 中,否则会产生 HTTP 404 错误
            GameEntry.Resource.InitResources(OnInitResourcesComplete);

            //注册事件
            GameEntry.Event.Subscribe(LoadConfigSuccessEventArgs.EventId, OnLoadConfigSuccess);
            GameEntry.Event.Subscribe(LoadConfigFailureEventArgs.EventId, OnLoadConfigFailure);
            GameEntry.Event.Subscribe(LoadDataTableSuccessEventArgs.EventId, OnLoadDataTableSuccess);
            GameEntry.Event.Subscribe(LoadDataTableFailureEventArgs.EventId, OnLoadDataTableFailure);


        }

        protected override void OnLeave(IFsm<GameFramework.Procedure.IProcedureManager> procedureOwner, bool isShutdown)
        {
            base.OnLeave(procedureOwner, isShutdown);
            //注销事件
            GameEntry.Event.Unsubscribe(LoadConfigSuccessEventArgs.EventId, OnLoadConfigSuccess);
            GameEntry.Event.Unsubscribe(LoadConfigFailureEventArgs.EventId, OnLoadConfigFailure);
            GameEntry.Event.Unsubscribe(LoadDataTableSuccessEventArgs.EventId, OnLoadDataTableSuccess);
            GameEntry.Event.Unsubscribe(LoadDataTableFailureEventArgs.EventId, OnLoadDataTableFailure);

        }

        protected override void OnUpdate(IFsm<GameFramework.Procedure.IProcedureManager> procedureOwner, float elapseSeconds, float realElapseSeconds)
        {
            base.OnUpdate(procedureOwner, elapseSeconds, realElapseSeconds);

            if (!m_InitResourcesComplete)
            {
                // 初始化资源未完成则继续等待
                return;
            }

            if (!temp)//temp用于保证这里的代码只执行一次
            {
                m_LoadedFlag.Clear();
                //预加载配置
                PreloadResources();
                //加载数据表
                foreach (string dataTableName in DataTableNames)
                {
                    LoadDataTable(dataTableName);
                }
                temp = true;
            }

            foreach (KeyValuePair<string,bool> loadedFlag in m_LoadedFlag)
            {
                if (!loadedFlag.Value)
                {
                    return;//说明有资源没有加载成功
                }
            }

            //通过加载的配置表来设置下一个转换场景的ID
            procedureOwner.SetData<VarInt32>("NextSceneId",GameEntry.Config.GetInt("Scene.Menu"));
            //一帧后直接转到菜单流程
            ChangeState<ProcedureChangeScene>(procedureOwner);
        }

        private void PreloadResources()
        {
            LoadConfig("DefaultConfig");
        }

        private void LoadConfig(string configName)
        {
            string configAssetName = AssetUtility.GetConfigAsset(configName, false);
            m_LoadedFlag.Add(configAssetName, false);
            GameEntry.Config.ReadData(configAssetName, this);
        }
        private void LoadDataTable(string dataTableName)
        {
            string dataTableAssetName = AssetUtility.GetDataTableAsset(dataTableName, false);
            m_LoadedFlag.Add(dataTableAssetName, false);
            GameEntry.DataTable.LoadDataTable(dataTableName, dataTableAssetName, this);
        }

        private void OnLoadConfigSuccess(object sender, GameEventArgs e)
        {
            LoadConfigSuccessEventArgs ne = (LoadConfigSuccessEventArgs)e;
            if (ne.UserData != this)
            {
                return;
            }

            m_LoadedFlag[ne.ConfigAssetName] = true;  //资源加载成功了则设置一下标记为true
            Log.Info("Load config '{0}' OK.", ne.ConfigAssetName);
        }

        private void OnLoadConfigFailure(object sender, GameEventArgs e)
        {
            LoadConfigFailureEventArgs ne = (LoadConfigFailureEventArgs)e;
            if (ne.UserData != this)
            {
                return;
            }

            Log.Error("Can not load config '{0}' from '{1}' with error message '{2}'.", ne.ConfigAssetName, ne.ConfigAssetName, ne.ErrorMessage);
        }
        private void OnLoadDataTableSuccess(object sender, GameEventArgs e)
        {
            LoadDataTableSuccessEventArgs ne = (LoadDataTableSuccessEventArgs)e;
            if (ne.UserData != this)
            {
                return;
            }

            m_LoadedFlag[ne.DataTableAssetName] = true;
            Log.Info("Load data table '{0}' OK.", ne.DataTableAssetName);
        }

        private void OnLoadDataTableFailure(object sender, GameEventArgs e)
        {
            LoadDataTableFailureEventArgs ne = (LoadDataTableFailureEventArgs)e;
            if (ne.UserData != this)
            {
                return;
            }

            Log.Error("Can not load data table '{0}' from '{1}' with error message '{2}'.", ne.DataTableAssetName, ne.DataTableAssetName, ne.ErrorMessage);
        }
        private void OnInitResourcesComplete()
        {
            m_InitResourcesComplete = true;
            Log.Info("Init resources complete.");
        }
    }

}
搞定。
四、测试打包
再在编译器运行一下非编译器资源模式:

可以启动,点击开始后也能正常运行。
那下面就可以打包了:

Build And Run,选择好文件夹,打包,运行!
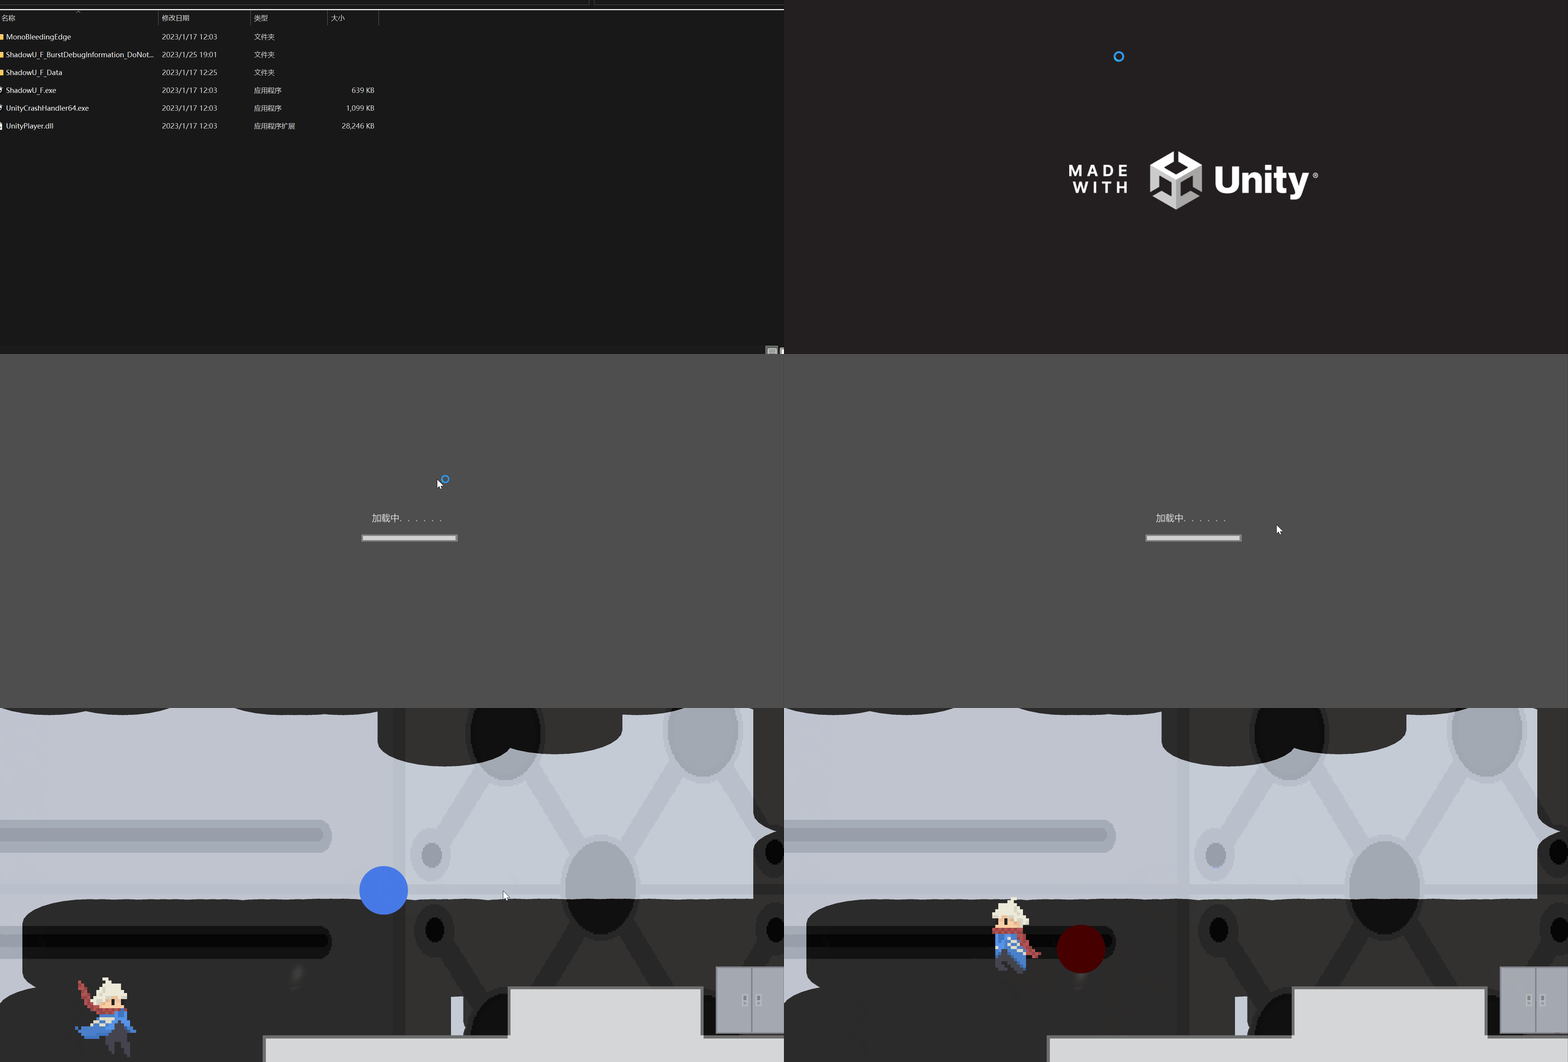
搞定!
同时StreamingAssets文件夹的内容会同时拷贝到打包好的工程的StreamingAssets文件夹:
