注释很详细,直接上代码
上一篇
新增内容:
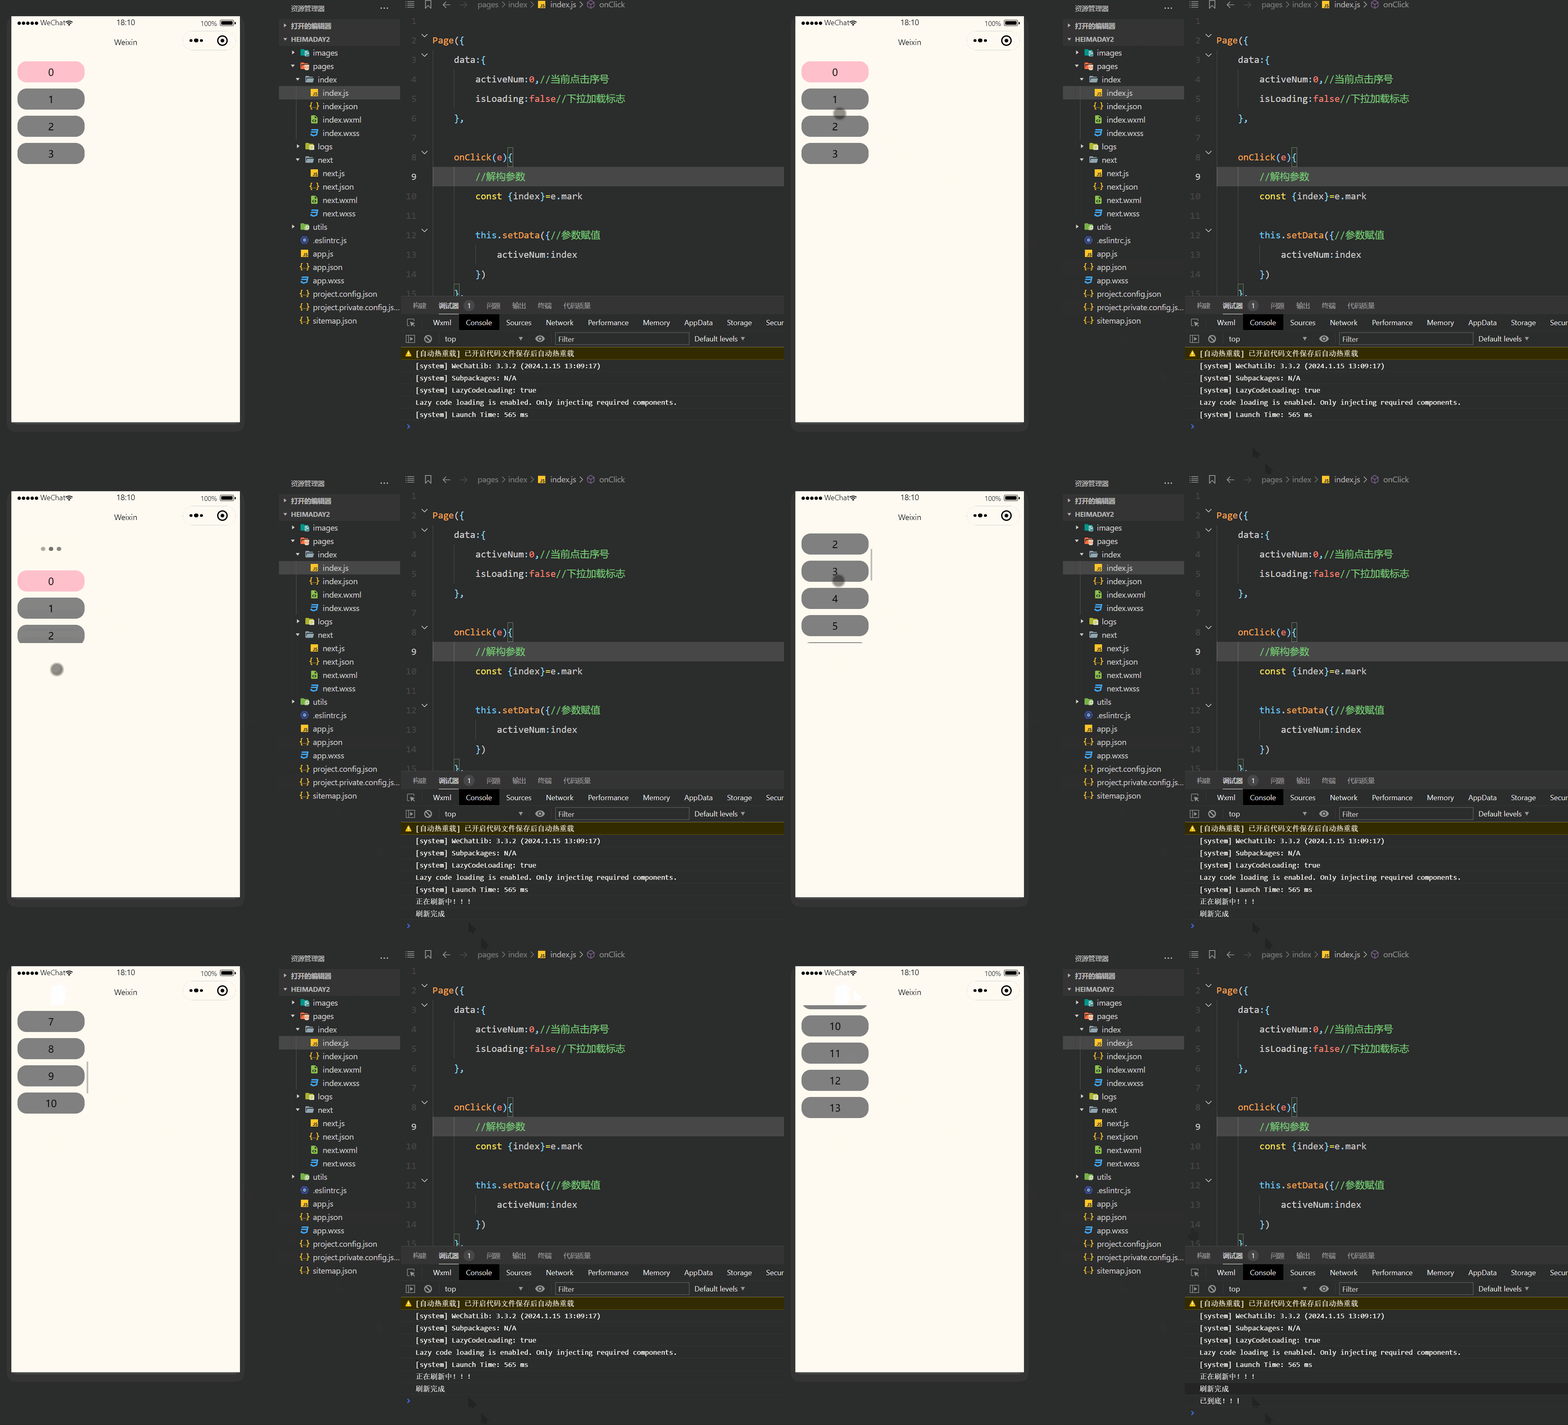
1.滚动触底事件
2.下拉刷新事件
源码:
index.wxml
<view class="Area">
<!--
    scroll-y 垂直滚动
    refresher-enabled  允许刷新
    bindrefresherrefresh 绑定刷新作用函数
    bindscrolltolower 绑定下滑触底作用函数
    refresher-triggered 加载时显示的动态加载效果
    这里演示了最常见的一些,其他的内容感兴趣的读者可以自行研读开发者文档
 -->
    <scroll-view class="areaScroll" scroll-y bindscrolltolower="onScrolltolower" refresher-enabled refresher-triggered="{{isLoading}}" bindrefresherrefresh="onRefresherrefresh">
        <!-- {{activeNum===index?'Active':''}}是选择性添加类名进行渲染 -->
        <view wx:for="{{14}}" wx:key="*this" bind:tap="onClick" mark:index="{{index}}" class="List {{activeNum===index?'Active':''}}">
                {{item}}
        </view>
    </scroll-view>
</view>
index.wxss
page{
    background-color: floralwhite;
}

.Area{
    display: flex;
    justify-content: center;
    flex-direction: column;
    align-items: center;
    width: 260rpx;
}

.List{
    text-align: center;
    margin: 20rpx 20rpx;
    padding: 15rpx ;
    background-color: gray;
    border-radius: 30rpx;
}

.Active{
    background-color: pink;
}

.areaScroll{
    height: 370rpx;
}
index.js
Page({
    data:{
        activeNum:0,//当前点击序号
        isLoading:false//下拉加载标志
    },

    onClick(e){
        //解构参数
        const {index}=e.mark

        this.setData({//参数赋值
            activeNum:index
        })
    },
    //触底事件
    onScrolltolower(){
        console.log("已到底!!!\n")
    },
    //下拉事件
    onRefresherrefresh(){

        console.log("正在刷新中!!!")
        //修改下拉标志位
        this.setData({
            isLoading:true
        })

        //延时函数(模拟一下刷新的流程)
        setTimeout(()=>{//修改下拉标志位
            this.setData({
                isLoading:false
            })
        },1000)
        console.log("刷新完成")
    }
})
效果演示:



![[设计模式Java实现附plantuml源码~行为型]请求的链式处理——职责链模式](https://img-blog.csdnimg.cn/direct/699aac3ed0c446d088772a0ed4c444ed.png)
