【github】https://github.com/DocF/multispectral-object-detection
一.环境
1.1 环境
基本依赖和yolov5基本相同,当然也可以配置在虚拟环境中
git clone https://github.com/DocF/multispectral-object-detection
cd  multispectral-object-detection
pip install -r requirements.txt
1.2 报错解决
1.2.1 找不到sppf
AttributeError: Can't get attribute 'SPPF' on <module 'models.common' from '/hy-tmp/multispectral-object-detection/models/common.py'>
【参考文章】找不到SPPF错误
在models/common.py下找到ssp,将下面这段添加到ssp之前
class SPPF(nn.Module):
    def __init__(self, c1, c2, k=5):
        super().__init__()
        c_ = c1 // 2
        self.cv1 = Conv(c1, c_, 1, 1)
        self.cv2 = Conv(c_ * 4, c2, 1, 1)
        self.m = nn.MaxPool2d(kernel_size=k, stride=1, padding=k // 2)

    def forward(self, x):
        x = self.cv1(x)
        with warnings.catch_warnings():
            warnings.simplefilter('ignore')
            y1 = self.m(x)
            y2 = self.m(y1)
            return self.cv2(torch.cat([x, y1, y2, self.m(y2)], 1))
1.2.2
RuntimeError: result type Float can't be cast to the desired output type __int64
【参考】报错解决方法
将下面这段替换utils/loss.py中build_targets函数,注意保留返回值
        for i in range(self.nl):
            anchors, shape = self.anchors[i], p[i].shape
            gain[2:6] = torch.tensor(shape)[[3, 2, 3, 2]]  # xyxy gain

            # Match targets to anchors
            t = targets * gain  # shape(3,n,7)
            if nt:
                # Matches
                r = t[..., 4:6] / anchors[:, None]  # wh ratio
                j = torch.max(r, 1 / r).max(2)[0] < self.hyp['anchor_t']  # compare
                # j = wh_iou(anchors, t[:, 4:6]) > model.hyp['iou_t']  # iou(3,n)=wh_iou(anchors(3,2), gwh(n,2))
                t = t[j]  # filter

                # Offsets
                gxy = t[:, 2:4]  # grid xy
                gxi = gain[[2, 3]] - gxy  # inverse
                j, k = ((gxy % 1 < g) & (gxy > 1)).T
                l, m = ((gxi % 1 < g) & (gxi > 1)).T
                j = torch.stack((torch.ones_like(j), j, k, l, m))
                t = t.repeat((5, 1, 1))[j]
                offsets = (torch.zeros_like(gxy)[None] + off[:, None])[j]
            else:
                t = targets[0]
                offsets = 0

            # Define
            bc, gxy, gwh, a = t.chunk(4, 1)  # (image, class), grid xy, grid wh, anchors
            a, (b, c) = a.long().view(-1), bc.long().T  # anchors, image, class
            gij = (gxy - offsets).long()
            gi, gj = gij.T  # grid indices

            # Append
            indices.append((b, a, gj.clamp_(0, shape[2] - 1), gi.clamp_(0, shape[3] - 1)))  # image, anchor, grid
            tbox.append(torch.cat((gxy - gij, gwh), 1))  # box
            anch.append(anchors[a])  # anchors
            tcls.append(c)  # class
1.2.3
Exception in thread Thread-9:
Traceback (most recent call last):
  File "/usr/local/miniconda3/envs/PIAFusion/lib/python3.8/threading.py", line 932, in _bootstrap_inner
    self.run()
  File "/usr/local/miniconda3/envs/PIAFusion/lib/python3.8/threading.py", line 870, in run
    self._target(*self._args, **self._kwargs)
  File "/hy-tmp/multispectral-object-detection/utils/plots.py", line 164, in plot_images
    mosaic[block_y:block_y + h, block_x:block_x + w, :] = img
ValueError: could not broadcast input array from shape (519,640,6) into shape (519,640,3)
Exception in thread Thread-10:
Traceback (most recent call last):
  File "/usr/local/miniconda3/envs/PIAFusion/lib/python3.8/threading.py", line 932, in _bootstrap_inner
    self.run()
  File "/usr/local/miniconda3/envs/PIAFusion/lib/python3.8/threading.py", line 870, in run
    self._target(*self._args, **self._kwargs)
  File "/hy-tmp/multispectral-object-detection/utils/plots.py", line 164, in plot_images
    mosaic[block_y:block_y + h, block_x:block_x + w, :] = img
ValueError: could not broadcast input array from shape (519,640,6) into shape (519,640,3)
二. 数据集处理
2.1 数据集下载
【github】https://github.com/DocF/multispectral-object-detection包含了对应的链接
链接:https://pan.baidu.com/s/1zO_1Olognq2atY6m4StZUA?pwd=4i77 提取码:4i77
–来自百度网盘超级会员V1的分享
权重还有数据集全部都打包在这里面了
2.2 数据集放置格式
其实没有严格的规定,我的话是这样:在datasets文件夹下

2.3 数据集预处理成txt
以FLIR(就是那个align)为例
2.3.1 训练集验证集
split_train_val.py
import os
import random
import argparse

parser = argparse.ArgumentParser()
parser.add_argument('--xml_path', type=str, help='input xml label path')
parser.add_argument('--txt_path', type=str, help='output txt label path')
opt = parser.parse_args()

trainval_percent = 1.0
train_percent = 0.9
xmlfilepath = opt.xml_path
txtsavepath = opt.txt_path
total_xml = os.listdir(xmlfilepath)
if not os.path.exists(txtsavepath):
  os.makedirs(txtsavepath)

num=len(total_xml)
list=range(num)

ftrainval = open(txtsavepath + '/trainval.txt', 'w')
ftest = open(txtsavepath + '/test.txt', 'w')
ftrain = open(txtsavepath + '/train.txt', 'w')
fval = open(txtsavepath + '/val.txt', 'w')

for i in list:
    name=total_xml[i][:-4]+'\n'
    ftrainval.write(name)
    if i%7 == 0:
        fval.write(name)
    else:
        ftrain.write(name)

ftrainval.close()
ftrain.close()
fval.close()
ftest.close()
输入命令:
python split_train_val.py --xml_path xml文件路径 --txt_path 输出txt文件路径
(1)xml文件路径:我是先将xml为文件全部放到一个文件夹里面
以我的为例就是:
cp D:\computervision\cross\detection\align\Annotations\*.xml D:\computervision\cross\detection\align\annotation
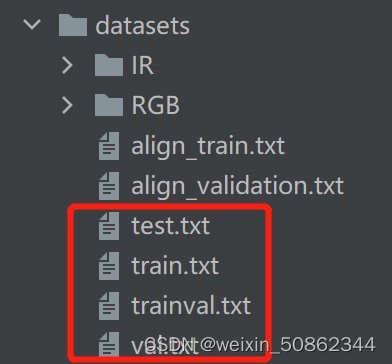
(2)输出txt文件路径:直接输出到前面提到的datasets下
得到下面这四个
2.3.2 格式转换
voc_label.py文件,应该改一下路径就可以用了,就不多说了
import xml.etree.ElementTree as ET
import pickle
import os
from os import listdir, getcwd
from os.path import join

sets=['train', 'val', 'test']
classes = ['person','car','bicycle']

abs_path = os.getcwd()
def convert(size, box):
    dw = 1./(size[0])
    dh = 1./(size[1])
    x = (box[0] + box[1])/2.0 - 1
    y = (box[2] + box[3])/2.0 - 1
    w = box[1] - box[0]
    h = box[3] - box[2]
    x = x*dw
    w = w*dw
    y = y*dh
    h = h*dh
    return (x,y,w,h)
def convert_annotation(image_id ,RGBid ):
    in_file = open(r'D:\computervision\cross\detection\align\annotation\%s.xml'%( image_id))
    irout_file = open('D:\computervision\cross\detection\multispectral-object-detection-main\datasets\IR\labels\%s.txt'%(image_id), 'w')
    rgbout_file= open('D:\computervision\cross\detection\multispectral-object-detection-main\datasets\RGB\labels\%s.txt'%(RGBid), 'w')
    tree=ET.parse(in_file)
    root = tree.getroot()
    size = root.find('size')
    w = int(size.find('width').text)
    h = int(size.find('height').text)
    for obj in root.iter('object'):
        #difficult = obj.find('difficult').text
        cls = obj.find('name').text
        if cls not in classes :
            continue
        cls_id = classes.index(cls)
        xmlbox = obj.find('bndbox')
        b = (float(xmlbox.find('xmin').text), float(xmlbox.find('xmax').text), float(xmlbox.find('ymin').text), float(xmlbox.find('ymax').text))
        bb = convert((w,h), b)
        irout_file.write(str(cls_id) + " " + " ".join([str(a) for a in bb]) + '\n')
        rgbout_file.write(str(cls_id) + " " + " ".join([str(a) for a in bb]) + '\n')

for image_set in sets:
    # if not os.path.exists('D:\computervision\cross\detection\multispectral-object-detection-main\datasets'):
    #     os.makedirs('D:\computervision\cross\detection\multispectral-object-detection-main\datasets')
    #创建两个txt文件
    #(1)先创建rgb文件
    #
    image_ids = open('D:\computervision\cross\detection\multispectral-object-detection-main\datasets\%s.txt'%(image_set)).read().strip().split()
    ir_file = open('D:\computervision\cross\detection\multispectral-object-detection-main\datasets\IR\%s.txt'%(image_set), 'w')
    rgb_file= open('D:\computervision\cross\detection\multispectral-object-detection-main\datasets\RGB\%s.txt'%(image_set), 'w')
    for image_id in image_ids:
        ir_file.write('D:\computervision\cross\detection\multispectral-object-detection-main\datasets\IR\images\%s.jpeg\n'%(image_id))
        id=image_id.split("_")[1]
        RGBid='FLIR_'+id+"_RGB"
        rgb_file.write(
            'D:\computervision\cross\detection\multispectral-object-detection-main\datasets\RGB\images\%s.jpg\n' % (RGBid))

        convert_annotation(image_id,RGBid)
    ir_file.close()
    rgb_file.close()
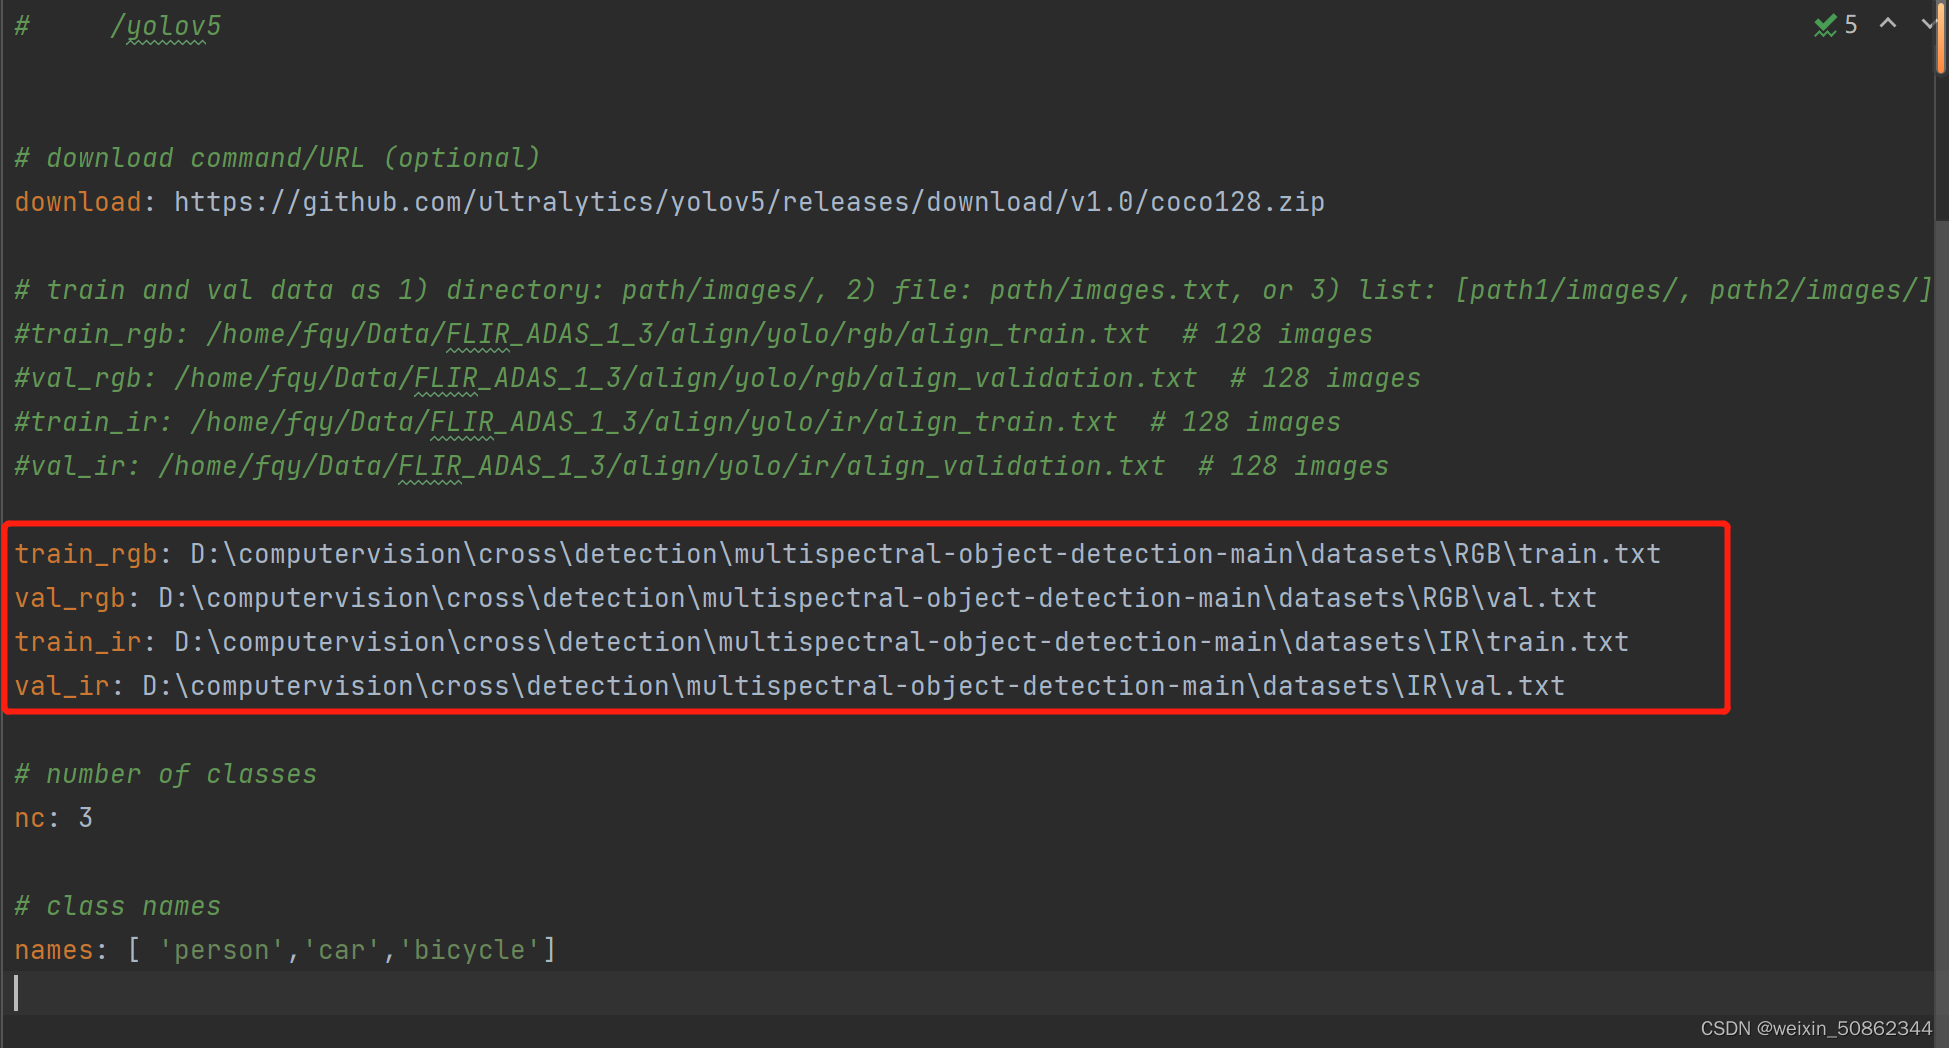
三 .训练
修改data/multispectral/FLIR_aligned.yaml文件夹
直接
python train.py