目录
1. Bean 被修改的案例
2. 作用域定义
2.1 Bean 的 6 种作用域
singleton
prototype
request
session
application(了解)
websocket (了解)
单例作用域(singleton)VS 全局作用域(application)
2.2 设置作用域
3. Spring 的执行流程和 Bean 的生命周期
3.1 Spring 执行流程
3.2 Bean 的生命周期
3.3 实例化和初始化的区别

在之前的文章中,我们学习到 Spring 是用来读取和存储 Bean 的,因此,在 Spring 中 Bean 是最核心的操作资源,所以我们接下来学习 Bean 的作用域和生命周期。
1. Bean 被修改的案例
@Controller
public class ScopeController {
    @Autowired
    private Users user;

    public void sayHi(){
        System.out.println(user);
        user.setName("张三获取的user");
        System.out.println(user);
    }
}
public class App {
public static void main(String[] args) {
// 得到 Spring 上下文
ApplicationContext context = new ClassPathXmlApplicationContext("spring-config.xml");
ScopeController scopeController = context.getBean(ScopeController.class);
scopeController.sayHi();
}
}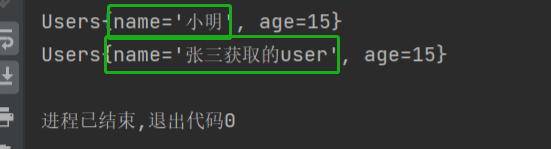
运行后可以看到 name 已经被修改了。
然后我们再次新建一个类,同样去使用这个对象:
@Controller
public class ScopeController2 {
    @Autowired
    private Users user;

    public void sayHi(){
        System.out.println(user);
    }
}
public class App {
    public static void main(String[] args) {
        // 得到 Spring 上下文
        ApplicationContext context = new ClassPathXmlApplicationContext("spring-config.xml");
        ScopeController scopeController = context.getBean(ScopeController.class);
        scopeController.sayHi();

        ScopeController2 scopeController2 = context.getBean(ScopeController2.class);
        scopeController2.sayHi();
    }
}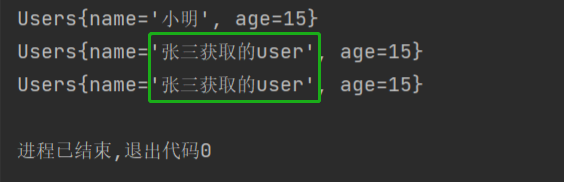
根据运行结果可以看到,当我们再次去获取 Bean 时,拿到的就是修改后的 Bean。那么,这种情况就是单例模式(在一个应用中,一个对象只有一份,无论经过多少线程进行修改,拿到的都是同一份)。Bean 默认情况下是单例状态(singleton),也就是所有人使用的是同一个对象,使用单例模式可以很大程度上提高性能,所以在 Spring 中 Bean 的作用域默认也是 singleton 单例模式。
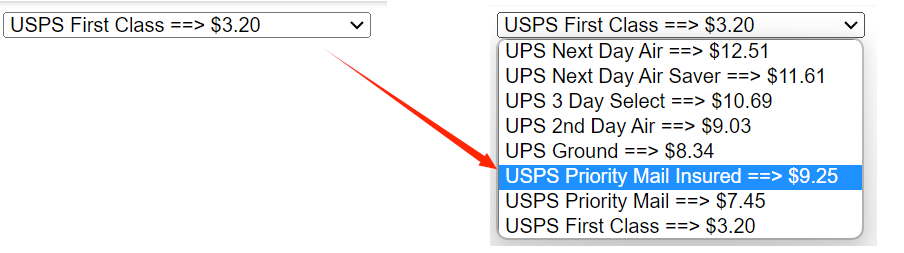
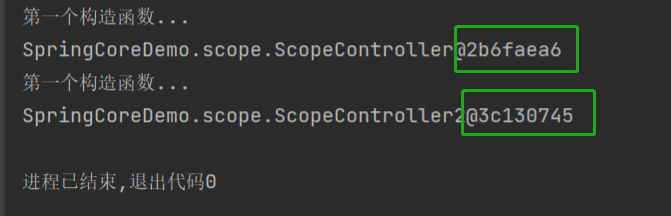
那么当我们在启动类中打开两个 Application (多例)时,结果是不同的:
public class App2 {
    public static void main(String[] args) {
        // 得到 Spring 上下文
        ApplicationContext context = new ClassPathXmlApplicationContext("spring-config.xml");
        ScopeController scopeController = context.getBean(ScopeController.class);
        System.out.println(scopeController);

        ApplicationContext context2 = new ClassPathXmlApplicationContext("spring-config.xml");
        ScopeController2 scopeController2 = context2.getBean(ScopeController2.class);
        System.out.println(scopeController2);
    }
}
2. 作用域定义
限定程序中变量的可用范围叫做作用域,或者说在源代码中定义变量的某个区域就叫做作用域。 而 Bean 的作用域是指 Bean 在 Spring 整个框架中的某种行为模式,比如 singleton 单例作用域,就表示 Bean 在整个 Spring 中只有⼀份,它是全局共享的,那么当其他人修改了这个值之后,那么另⼀ 个人读取到的就是被修改的值。
2.1 Bean 的 6 种作用域
Spring 容器在初始化⼀个 Bean 的实例时,同时会指定该实例的作用域。从官方文档中,我们可以看到 bean 的作用域有 6 种:

Spring有 6 种作用域,最后四种是基于 Spring MVC 生效的:
- singleton:单例作用域
- prototype:原型作用域(多例作用域)
- request:请求作用域
- session:会话作用域
- application:全局作用域
- websocket:HTTP WebSocket 作用域
后四种状态是 Spring MVC 中的至,在普通的 Spring 项目中只有前两种。
singleton
- 官方说明:(Default) Scopes a single bean definition to a single object instance for each Spring IoC container.
- 描述:该作用域下的 Bean 在IoC容器中只存在⼀个实例:获取Bean(即通过 applicationContext.getBean 等方法获取)及装配Bean(即通过 @Autowired 注入)都是同⼀个对象。
- 场景:通常无状态的Bean使用该作用域。无状态表示 Bean 对象的属性状态不需要更新
- 备注:Spring默认选择该作用域
prototype
- 官方说明:Scopes a single bean definition to any number of object instances.
- 描述:每次对该作用域下的 Bean 的请求都会创建新的实例:获取 Bean(即通过 applicationContext.getBean 等方法获取)及装配Bean(即通过@Autowired注入)都是新的对象实例。
- 场景:通常有状态的Bean使⽤该作⽤域
request
- 官方说明:Scopes a single bean definition to the lifecycle of a single HTTP request. That is, each HTTP request has its own instance of a bean created off the back of a single bean definition. Only valid in the context of a web-aware Spring ApplicationContext.
- 描述:每次 http 请求会创建新的 Bean 实例,类似于 prototype
- 场景:⼀次 http 的请求和响应的共享 Bean
- 备注:限定 SpringMVC 中使用
session
- 官方说明:Scopes a single bean definition to the lifecycle of an HTTP Session. Only valid in the context of a web-aware Spring ApplicationContext.
- 描述:在⼀个 http session 中,定义⼀个 Bean 实例
- 场景:用户会话的共享 Bean, 比如:记录⼀个用户的登陆信息
- 备注:限定SpringMVC中使用
application(了解)
- 官方说明:Scopes a single bean definition to the lifecycle of a ServletContext. Only valid in the context of a web-aware Spring ApplicationContext.
- 描述:在⼀个 http servlet Context 中,定义⼀个 Bean 实例
- 场景:Web 应用的上下文信息,比如:记录⼀个应用的共享信息
- 备注:限定 SpringMVC 中使用
websocket (了解)
- 官方说明:Scopes a single bean definition to the lifecycle of a WebSocket. Only valid in the context of a web-aware Spring ApplicationContext.
- 描述:在⼀个 HTTP WebSocket 的生命周期中,定义⼀个 Bean 实例
- 场景:WebSocket 的每次会话中,保存了⼀个Map结构的头信息,将用来包裹客户端消息头。第一次初始化后,直到 WebSocket 结束都是同⼀个 Bean。
- 备注:限定 Spring WebSocket 中使用
单例作用域(singleton)VS 全局作用域(application)
- singleton 是 Spring Core 的作用域;application 是 Spring Web 中的作用域。
- singleton 作用于 IoC 容器;application 作用于 Servlet 容器;
Application scope 就是对于整个 web 容器来说,bean 的作用域是 ServletContext 级别的,这个和 singleton 有点类似,但是区别在于,Applicationscope 是 ServletContext 的单例,singleton 是一个 ApplicationContext 的单例。
一个 web 服务只有一个 ServletContext,可以有多个 ApplicationContext。
2.2 设置作用域
还可以直接设置 Bean 的作用域,此处我们使用 @Scope 标签来声明 bean 的作用域为:prototype:
@Configuration
public class BeanConfig {
    @Bean
    public Integer age(){
        return 15;
    }
  //  @Bean({"aaa","user"})
    @Bean
    public Users user(Integer age){
        Users user = new Users();
        user.setName("小明");
        user.setAge(age);
        return user;
    }
    @Scope("prototype")
    @Bean
    public Users user2(){
        Users user = new Users();
        user.setName("小蓝");
        user.setAge(19);
        return user;
    }
}
@Controller
public class ScopeController2 {
@Autowired
private Users user2;
public void sayHi(){
System.out.println(user2);
}
}public class App {
public static void main(String[] args) {
// 得到 Spring 上下文
ApplicationContext context = new ClassPathXmlApplicationContext("spring-config.xml");
ScopeController scopeController = context.getBean(ScopeController.class);
scopeController.sayHi();
ScopeController2 scopeController2 = context.getBean(ScopeController2.class);
scopeController2.sayHi();
}
}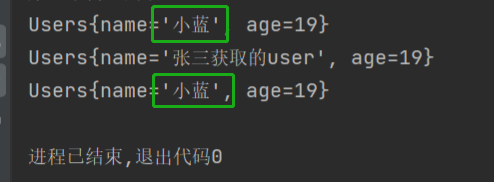
可以看到修改后再次获取时,获取到的仍然是原先的 Bean。
@Scope 标签即可以修饰方法也可以修饰类,@Scope 有两种设置方式:
1. 直接设置值:
@Scope("prototype")2. 使用枚举设置:
@Scope(ConfigurableBeanFactory.SCOPE_PROTOTYPE)3. Spring 的执行流程和 Bean 的生命周期
3.1 Spring 执行流程
- 启动容器
- 解析配置文件的内容,并创建 Bean
- 把对象放在容器中
- Bean 依赖对象的装配
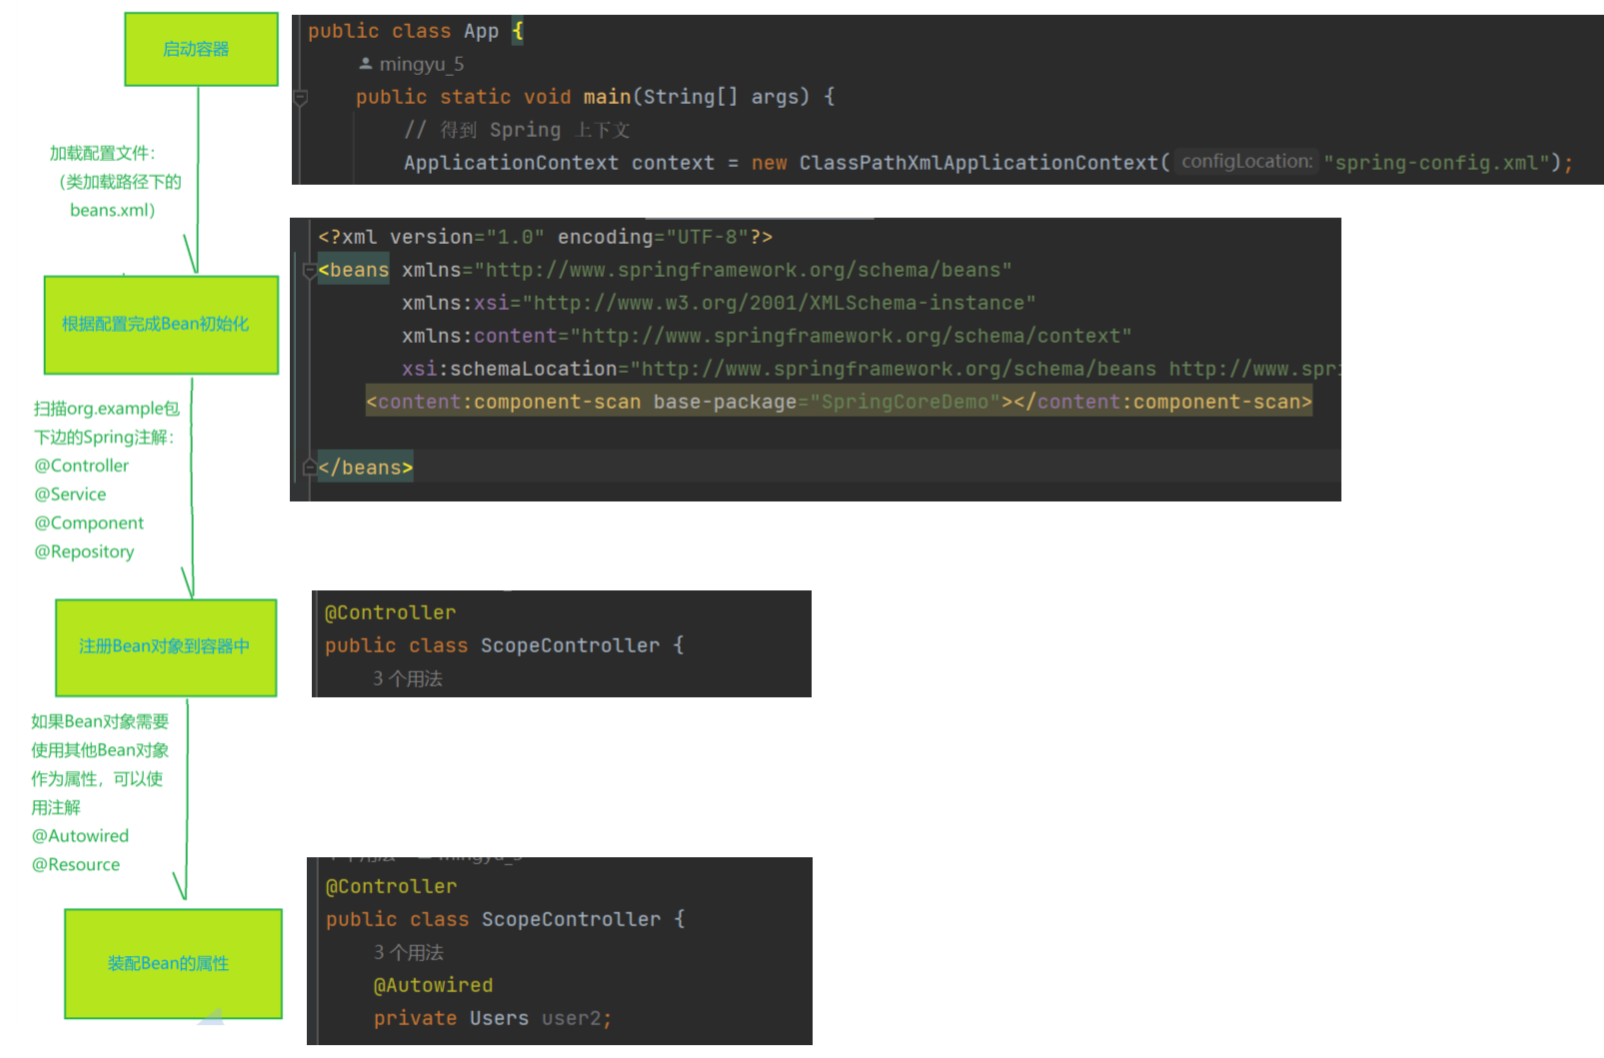
Bean 执行流程(Spring 执行流程):启动 Spring 容器 -> 实例化 Bean(分配内存空间,从无到 有) -> Bean 注册到 Spring 中(存操作) -> 将 Bean 装配到需要的类中(取操作)。
3.2 Bean 的生命周期
所谓的生命周期指的是⼀个对象从诞生到销毁的整个生命过程,我们把这个过程就叫做⼀个对象的生命周期。
Bean 的生命周期分为以下 5 大部分:
1. 实例化 Bean(为 Bean 分配内存空间)
2. 设置属性(Bean 注入和装配,比如 @Autowired)
3. Bean 初始化
- 执行各种通知,如 BeanNameAware、BeanFactoryAware、 ApplicationContextAware 的接口方法;
- 执行初始化前置方法;
- xml 定义 init-method
- 使用注解的方式 @PostConstruct
- 执行 @PostConstruct 初始化方法,依赖注入操作之后被执行;
- 执行 BeanPostProcessor 初始化后置方法。
4. 使用 Bean
5. 销毁 Bean
- 销毁容器的各种方法,如 @PreDestroy、DisposableBean 接口方法、destroy-method。
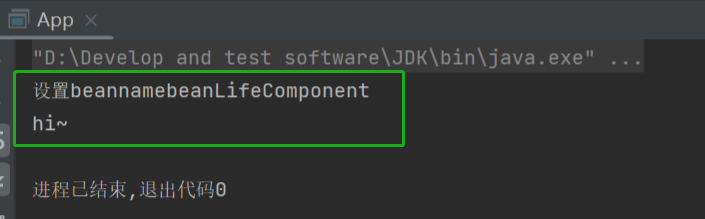
接下来,我们来看一下前置方法 BeanNameAware:
@Component
public class BeanLifeComponent implements BeanNameAware {

    @Override
    public void setBeanName(String s) {
        System.out.println("设置beanname" + s);
    }
    public void hi(){
        System.out.println("hi~");
    }
}
public class App {
public static void main(String[] args) {
ApplicationContext context = new ClassPathXmlApplicationContext("spring-config.xml");
BeanLifeComponent beanLifeComponent = context.getBean(BeanLifeComponent.class);
beanLifeComponent.hi();
}
}
初始化方法 PostConstruct :
@Component
public class BeanLifeComponent implements BeanNameAware {

    @Override
    public void setBeanName(String s) {
        System.out.println("设置beanname" + s);
    }

    @PostConstruct
    public void postConstruct(){
        System.out.println("执行postConstruct方法");
    }
    public void hi(){
        System.out.println("hi~");
    }
}
public class App {
public static void main(String[] args) {
ApplicationContext context = new ClassPathXmlApplicationContext("spring-config.xml");
BeanLifeComponent beanLifeComponent = context.getBean(BeanLifeComponent.class);
beanLifeComponent.hi();
}
}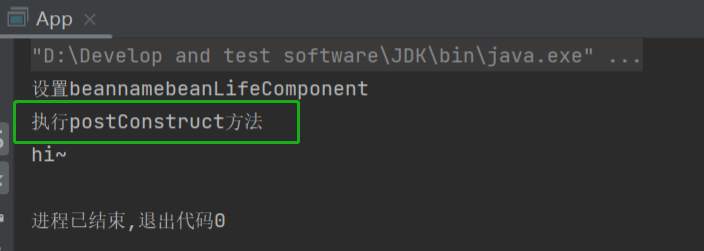
当我们没有调用 hi 方法时,依然会执行以上 PostConstruct 方法。
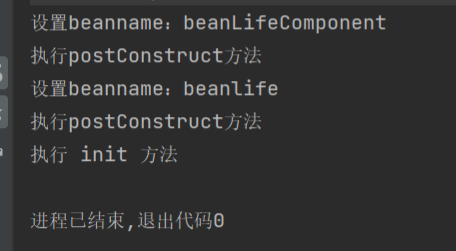
执行 init 方法:
<?xml version="1.0" encoding="UTF-8"?>
<beans xmlns="http://www.springframework.org/schema/beans"
       xmlns:xsi="http://www.w3.org/2001/XMLSchema-instance"
       xmlns:content="http://www.springframework.org/schema/context"
       xsi:schemaLocation="http://www.springframework.org/schema/beans http://www.springframework.org/schema/beans/spring-beans.xsd http://www.springframework.org/schema/context https://www.springframework.org/schema/context/spring-context.xsd">
    <content:component-scan base-package="SpringCoreDemo.component"></content:component-scan>
    <bean id="beanlife" class="SpringCoreDemo.component.BeanLifeComponent" init-method="init"></bean>

</beans>
@Component
public class BeanLifeComponent implements BeanNameAware {
@Override
public void setBeanName(String s) {
System.out.println("设置beanname:" + s);
}
@PostConstruct
public void postConstruct(){
System.out.println("执行postConstruct方法");
}
public void init(){
System.out.println("执行 init 方法");
}
public void hi(){
System.out.println("hi~");
}
}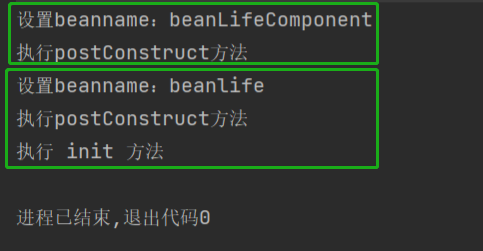
因此,我们可以知道: postConstruct 在对象初始化时,都会执行;init 只对 xml 中定义的 bean 生效;先执行注解,再执行 xml 中配置的 init-method;
我们再来看使用 @Predestroy 完成对象的销毁:
@Component
public class BeanLifeComponent implements BeanNameAware {

    @Override
    public void setBeanName(String s) {
        System.out.println("设置beanname:" + s);
    }

    @PostConstruct
    public void postConstruct(){
        System.out.println("执行postConstruct方法");
    }

    public void init(){
        System.out.println("执行 init 方法");
    }
    @PreDestroy
    public void destroy(){
        System.out.println("执行destroy方法...");
    }
    public void hi(){
        System.out.println("hi~");
    }
}
直接运行以上代码可以看到并没有执行 destroy 方法,因此我们需要先将容器销毁:
public class App {
    public static void main(String[] args) {
        ClassPathXmlApplicationContext context = new ClassPathXmlApplicationContext("spring-config.xml");
        context.destroy();
    }
}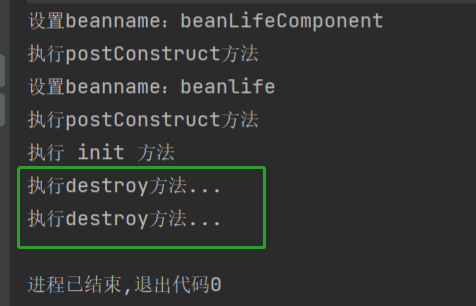
此时可以看到执行了 destroy 方法,同样可以通过 xml 进行:
<?xml version="1.0" encoding="UTF-8"?>
<beans xmlns="http://www.springframework.org/schema/beans"
       xmlns:xsi="http://www.w3.org/2001/XMLSchema-instance"
       xmlns:content="http://www.springframework.org/schema/context"
       xsi:schemaLocation="http://www.springframework.org/schema/beans http://www.springframework.org/schema/beans/spring-beans.xsd http://www.springframework.org/schema/context https://www.springframework.org/schema/context/spring-context.xsd">
<!--    <content:component-scan base-package="SpringCoreDemo.component"></content:component-scan>-->
    <bean id="beanlife" class="SpringCoreDemo.component.BeanLifeComponent" init-method="init" destroy-method="destroyXML"></bean>

</beans>
@Component
public class BeanLifeComponent implements BeanNameAware {
@Override
public void setBeanName(String s) {
System.out.println("设置beanname:" + s);
}
@PostConstruct
public void postConstruct(){
System.out.println("执行postConstruct方法");
}
public void init(){
System.out.println("执行 init 方法");
}
@PreDestroy
public void destroy(){
System.out.println("执行destroy方法...");
}
public void destroyXML() {
System.out.println("执行destroyXML方法...");
}
public void hi(){
System.out.println("hi~");
}
}
public class App {
    public static void main(String[] args) {
        ClassPathXmlApplicationContext context = new ClassPathXmlApplicationContext("spring-config.xml");
        context.destroy();
    }
}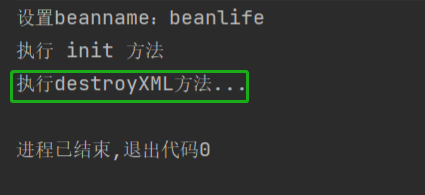
可以看到同样执行成功。
3.3 实例化和初始化的区别
实例化和属性设置是 Java 级别的系统“事件”,其操作过程不可人工干预和修改;而初始化是给开发者提供的,可以在实例化之后。类加载完成之前进行自定义“事件”处理。