这里写目录标题
- 前言
- 一、Stable Diffusion是什么?
- 二、安装stable-diffusion-webui
- 1. python安装
- 2. 下载模型
- 3. 开始安装:
- 4. 汉化:
- 5. 模型使用:
- 6. 下载新模型:
- 7. 基础玩法
- 三、总结
前言
本文将借助stable-diffusion-webui项目来展示AI绘画的乐趣,stable-diffusion-webui项目是一个基于稳定增强扩散技术的Web界面应用,使得普通用户也能够轻松探索AI绘画的乐趣。使用该项目,用户可以上传自己的图像,然后选择特定的风格或主题,AI系统将利用稳定增强扩散技术进行图像生成。生成过程将逐步显示,直观地展示出图像从头到尾的创作过程。用户可以在生成过程中进行实时交互和反馈,调整风格参数或细节,使得艺术作品更符合个人的期望。
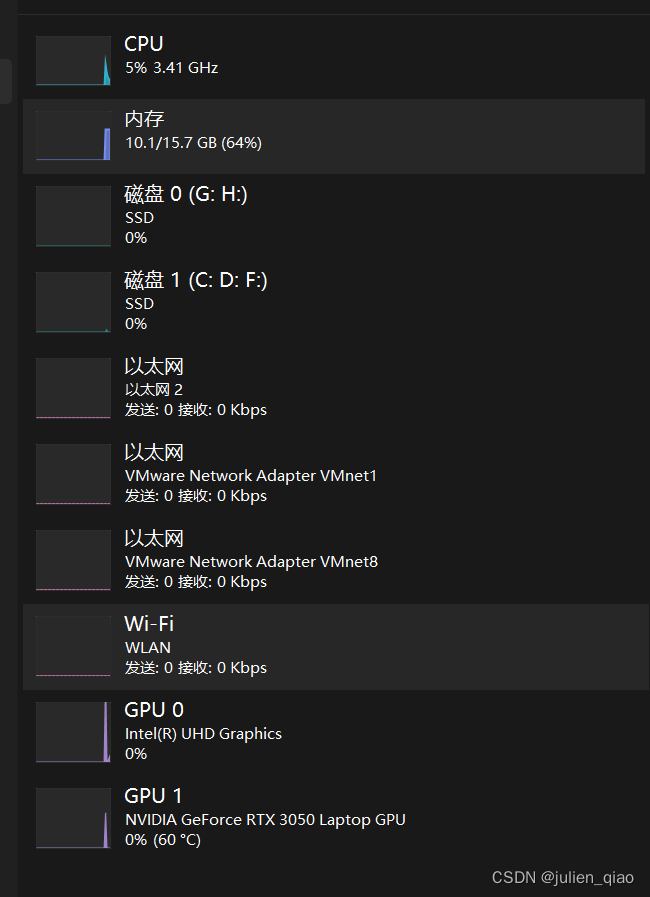
AI绘画需要一定的硬件基础支持,我这里使用I5+16G内存+3050显卡勉强能够生成。
一、Stable Diffusion是什么?
『Stable Diffusion』绘画,这种绘画方法的灵感来源于热传导方程,通过模拟粒子在介质中的扩散过程,展现出独特的、具有稳定性的艺术效果。在绘画中,不同的参数和算法会影响到画面的形态、色彩和纹理等多重因素。通过调整这些参数和算法,画家可以实现各种自然环境的表现,例如云彩、水流、山脉等等。综合来说,『Stable Diffusion』绘画是一种结合了计算机技术和艺术想象力的新型绘画艺术。
二、安装stable-diffusion-webui
项目地址:https://github.com/AUTOMATIC1111/stable-diffusion-webui
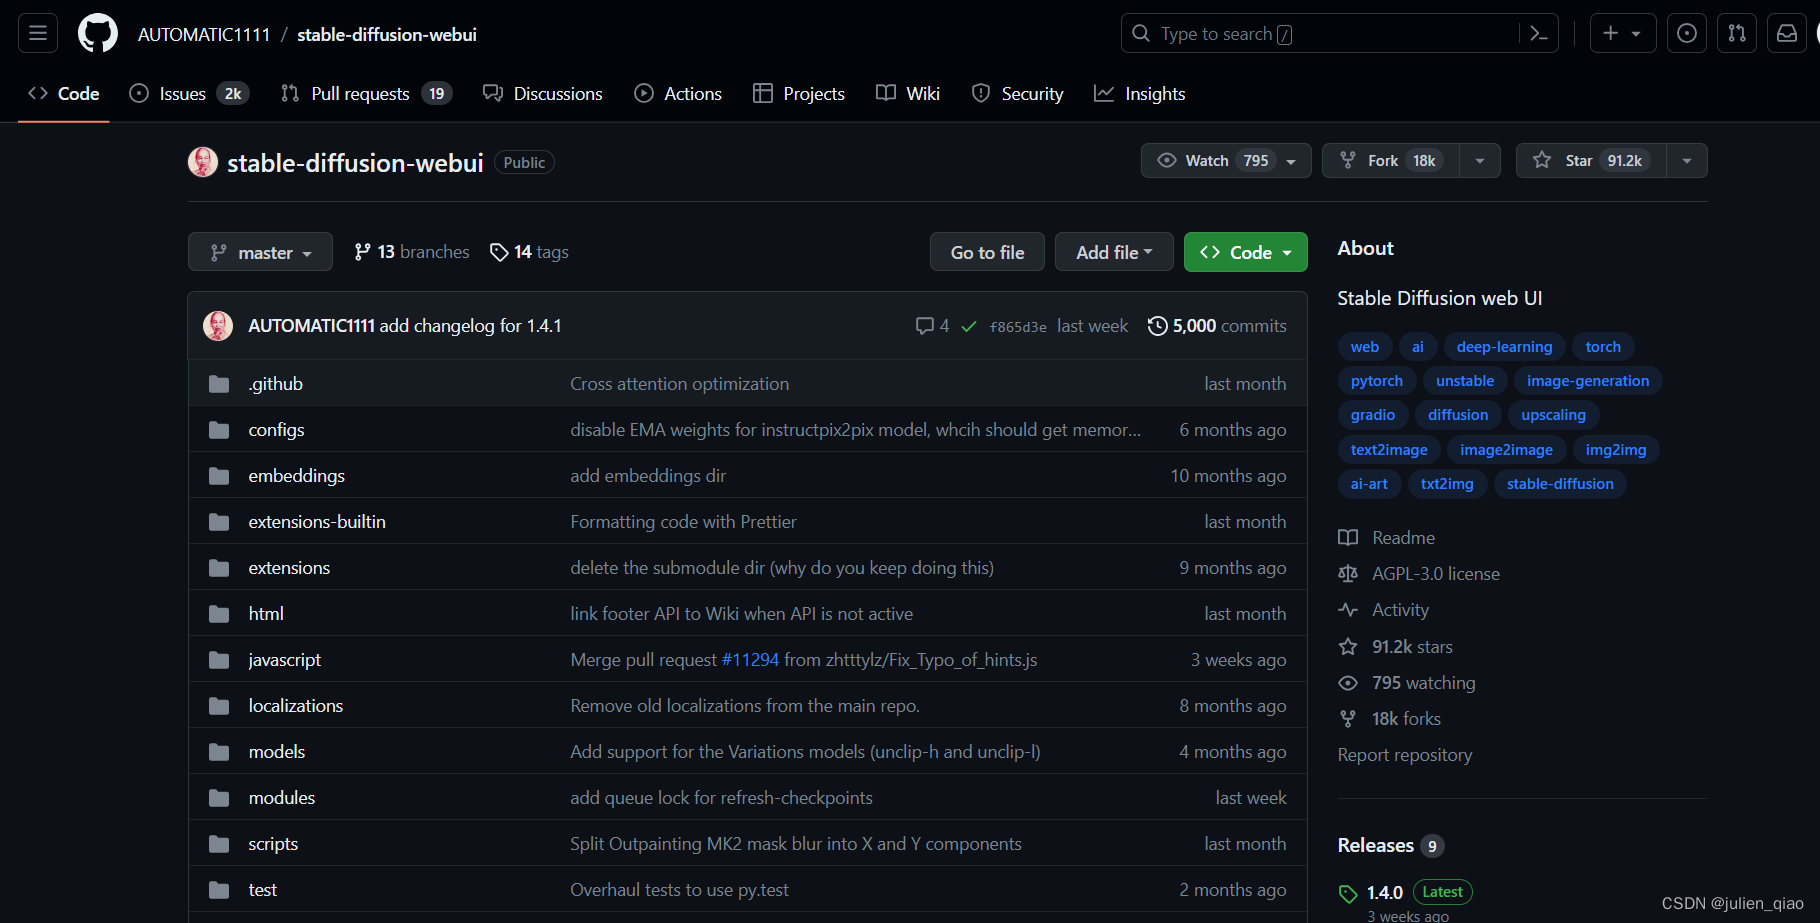
下载到本地:

解压:

1. python安装
stable-diffusion-webui项目依赖python环境
安装python:本地环境要求安装 Python 3.10.6 或以上版本,并且需要写入环境变量中。
python下载:https://www.python.org/downloads/release/python-3114/
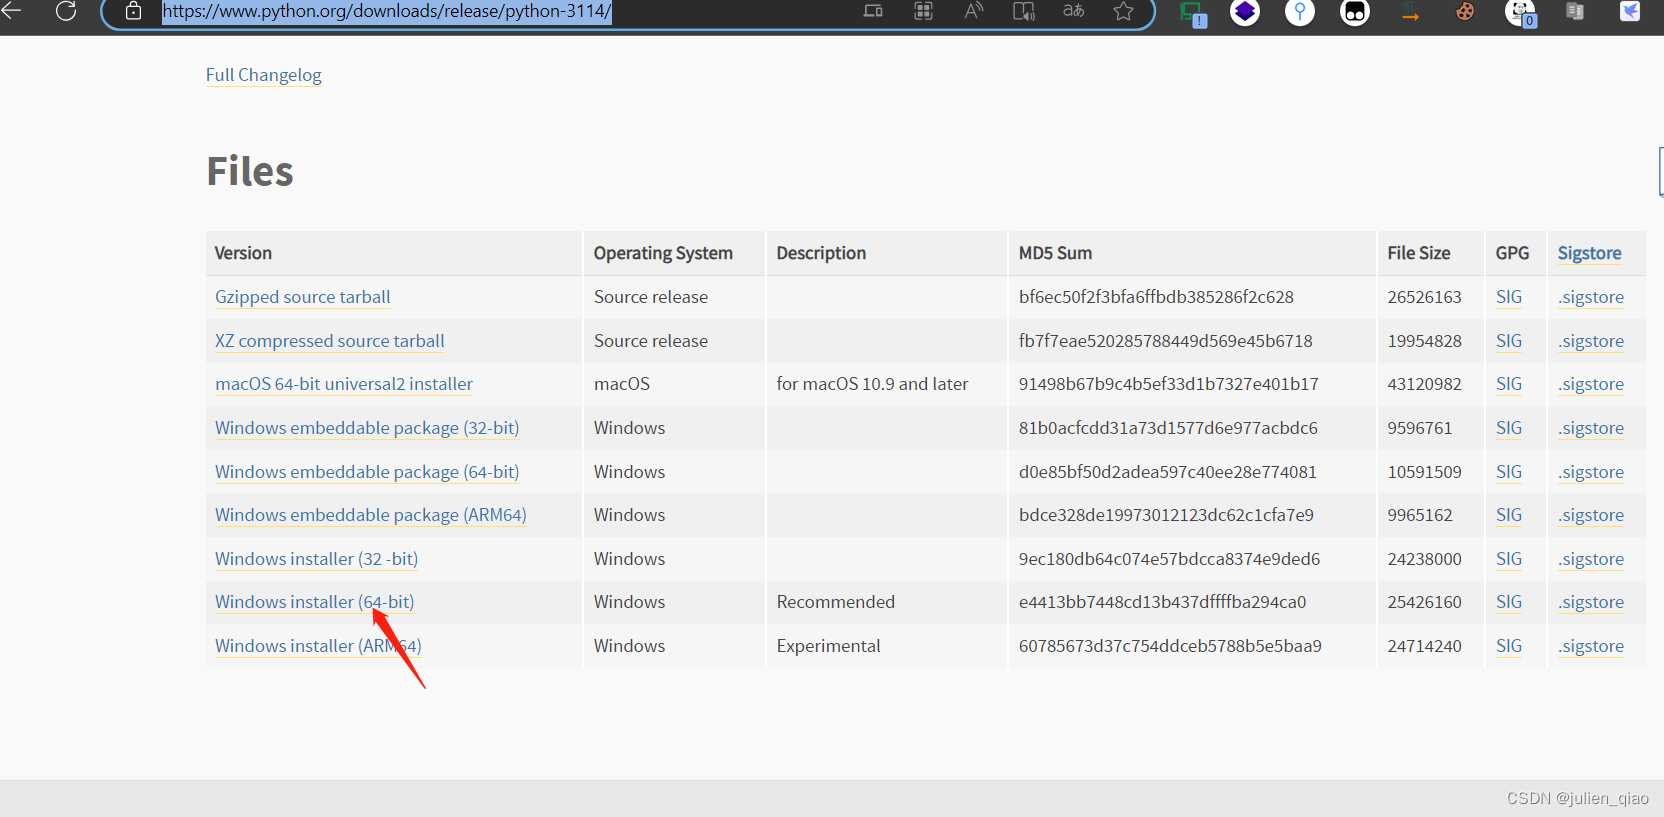
勾选添加环境变量:

命令行进入python:windows+r
输入cmd
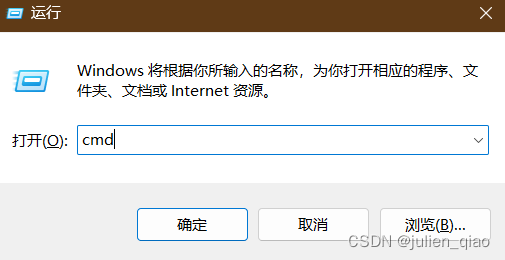
输入python:我这是3.10.9版本

退出python:exit();

这里python安装完成
2. 下载模型
下载地址:https://huggingface.co/CompVis/stable-diffusion-v-1-4-original

将下载好的模型移动到这里:stable-diffusion-webui/models/Stable-diffusion

3. 开始安装:
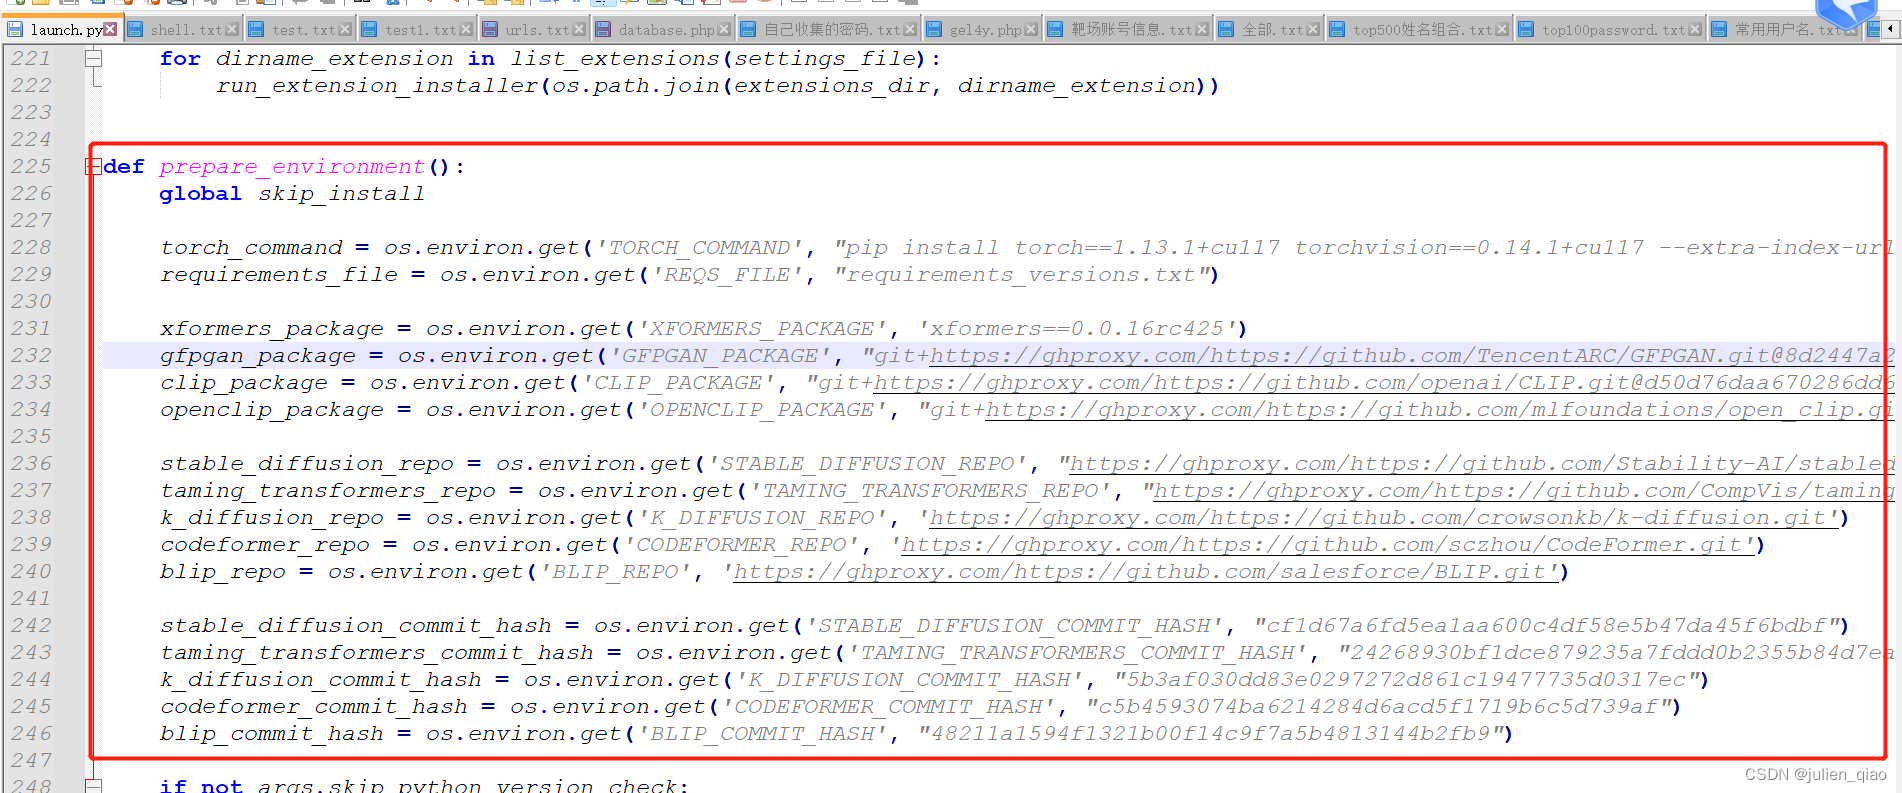
安装时需要国外的一些模块修改代码使用加速的源下载:
修改文件:
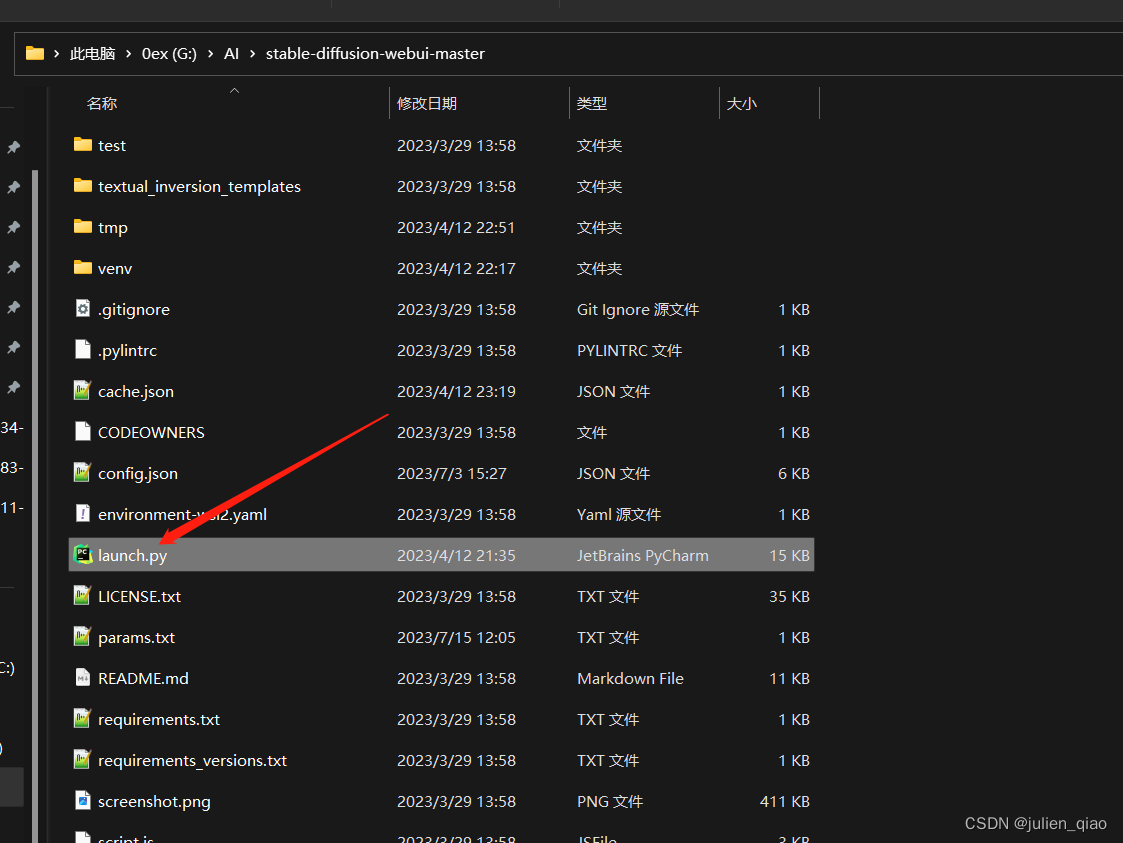
替换代码:(或者科学上网但是可能有问题)
def prepare_environment():
    global skip_install

    torch_command = os.environ.get('TORCH_COMMAND', "pip install torch==1.13.1+cu117 torchvision==0.14.1+cu117 --extra-index-url https://download.pytorch.org/whl/cu117")
    requirements_file = os.environ.get('REQS_FILE', "requirements_versions.txt")

    xformers_package = os.environ.get('XFORMERS_PACKAGE', 'xformers==0.0.16rc425')
    gfpgan_package = os.environ.get('GFPGAN_PACKAGE', "git+https://ghproxy.com/https://github.com/TencentARC/GFPGAN.git@8d2447a2d918f8eba5a4a01463fd48e45126a379")
    clip_package = os.environ.get('CLIP_PACKAGE', "git+https://ghproxy.com/https://github.com/openai/CLIP.git@d50d76daa670286dd6cacf3bcd80b5e4823fc8e1")
    openclip_package = os.environ.get('OPENCLIP_PACKAGE', "git+https://ghproxy.com/https://github.com/mlfoundations/open_clip.git@bb6e834e9c70d9c27d0dc3ecedeebeaeb1ffad6b")

    stable_diffusion_repo = os.environ.get('STABLE_DIFFUSION_REPO', "https://ghproxy.com/https://github.com/Stability-AI/stablediffusion.git")
    taming_transformers_repo = os.environ.get('TAMING_TRANSFORMERS_REPO', "https://ghproxy.com/https://github.com/CompVis/taming-transformers.git")
    k_diffusion_repo = os.environ.get('K_DIFFUSION_REPO', 'https://ghproxy.com/https://github.com/crowsonkb/k-diffusion.git')
    codeformer_repo = os.environ.get('CODEFORMER_REPO', 'https://ghproxy.com/https://github.com/sczhou/CodeFormer.git')
    blip_repo = os.environ.get('BLIP_REPO', 'https://ghproxy.com/https://github.com/salesforce/BLIP.git')

    stable_diffusion_commit_hash = os.environ.get('STABLE_DIFFUSION_COMMIT_HASH', "cf1d67a6fd5ea1aa600c4df58e5b47da45f6bdbf")
    taming_transformers_commit_hash = os.environ.get('TAMING_TRANSFORMERS_COMMIT_HASH', "24268930bf1dce879235a7fddd0b2355b84d7ea6")
    k_diffusion_commit_hash = os.environ.get('K_DIFFUSION_COMMIT_HASH', "5b3af030dd83e0297272d861c19477735d0317ec")
    codeformer_commit_hash = os.environ.get('CODEFORMER_COMMIT_HASH', "c5b4593074ba6214284d6acd5f1719b6c5d739af")
    blip_commit_hash = os.environ.get('BLIP_COMMIT_HASH', "48211a1594f1321b00f14c9f7a5b4813144b2fb9")
替换完成后运行:
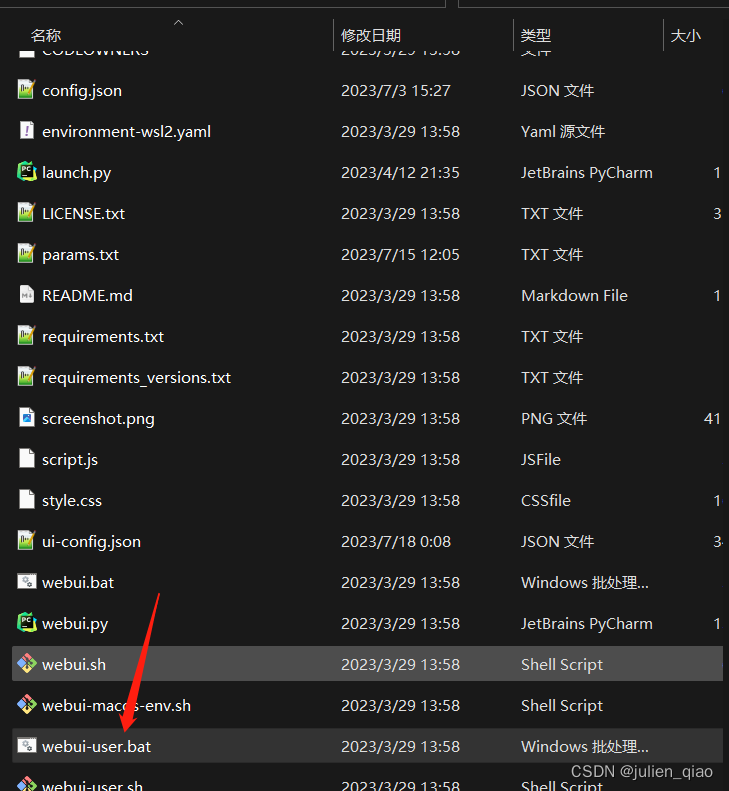
启动后会下载很多依赖:
我这已经下载好了第二次打开会很快:
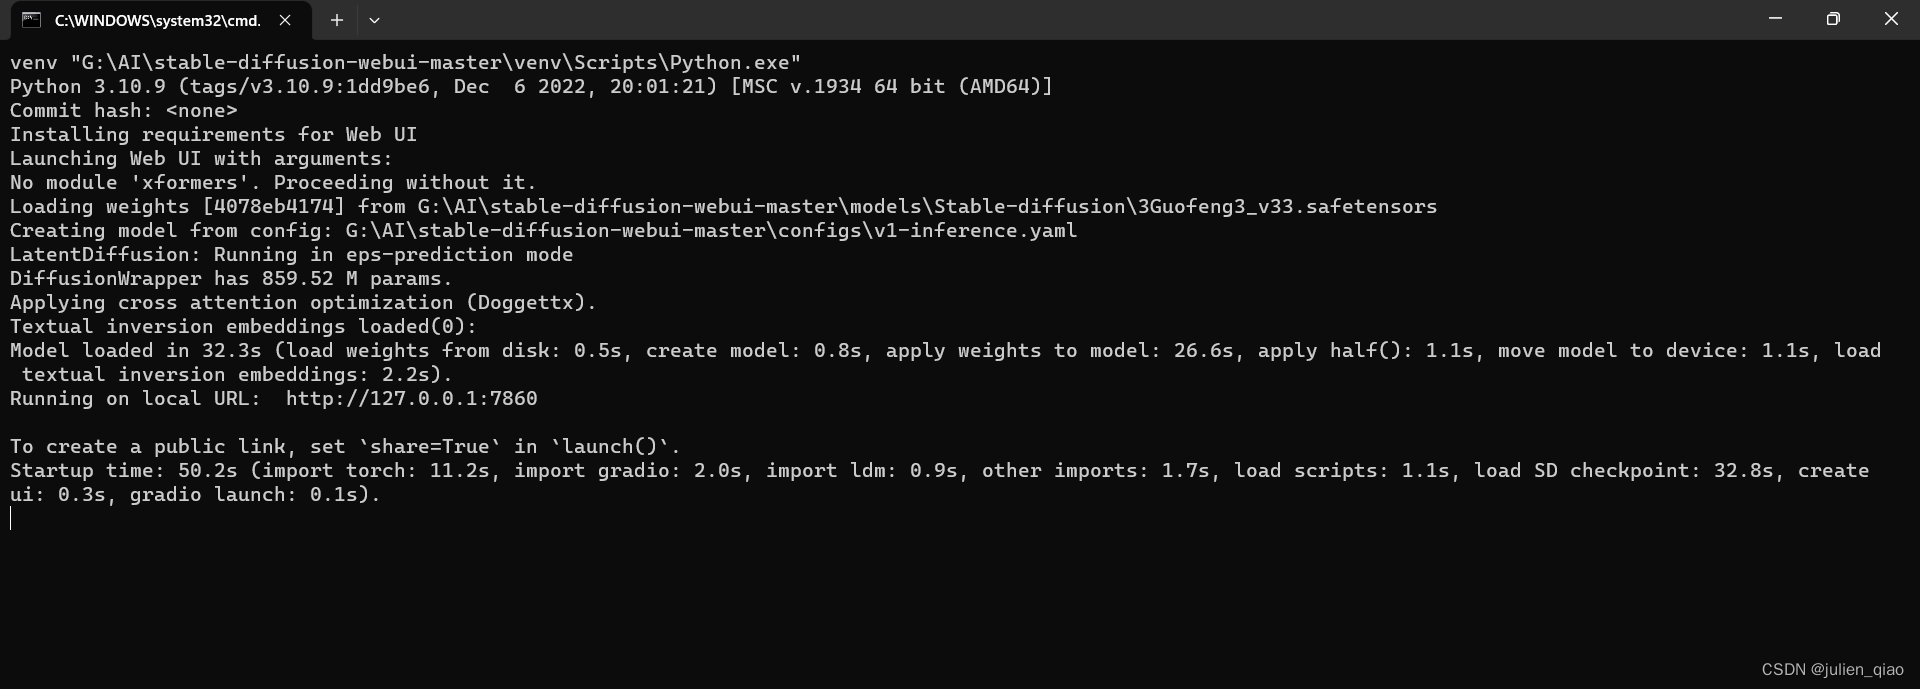

访问web:大家看到这个应该是英文需要汉化

此时需要占用一部分硬件资源了:

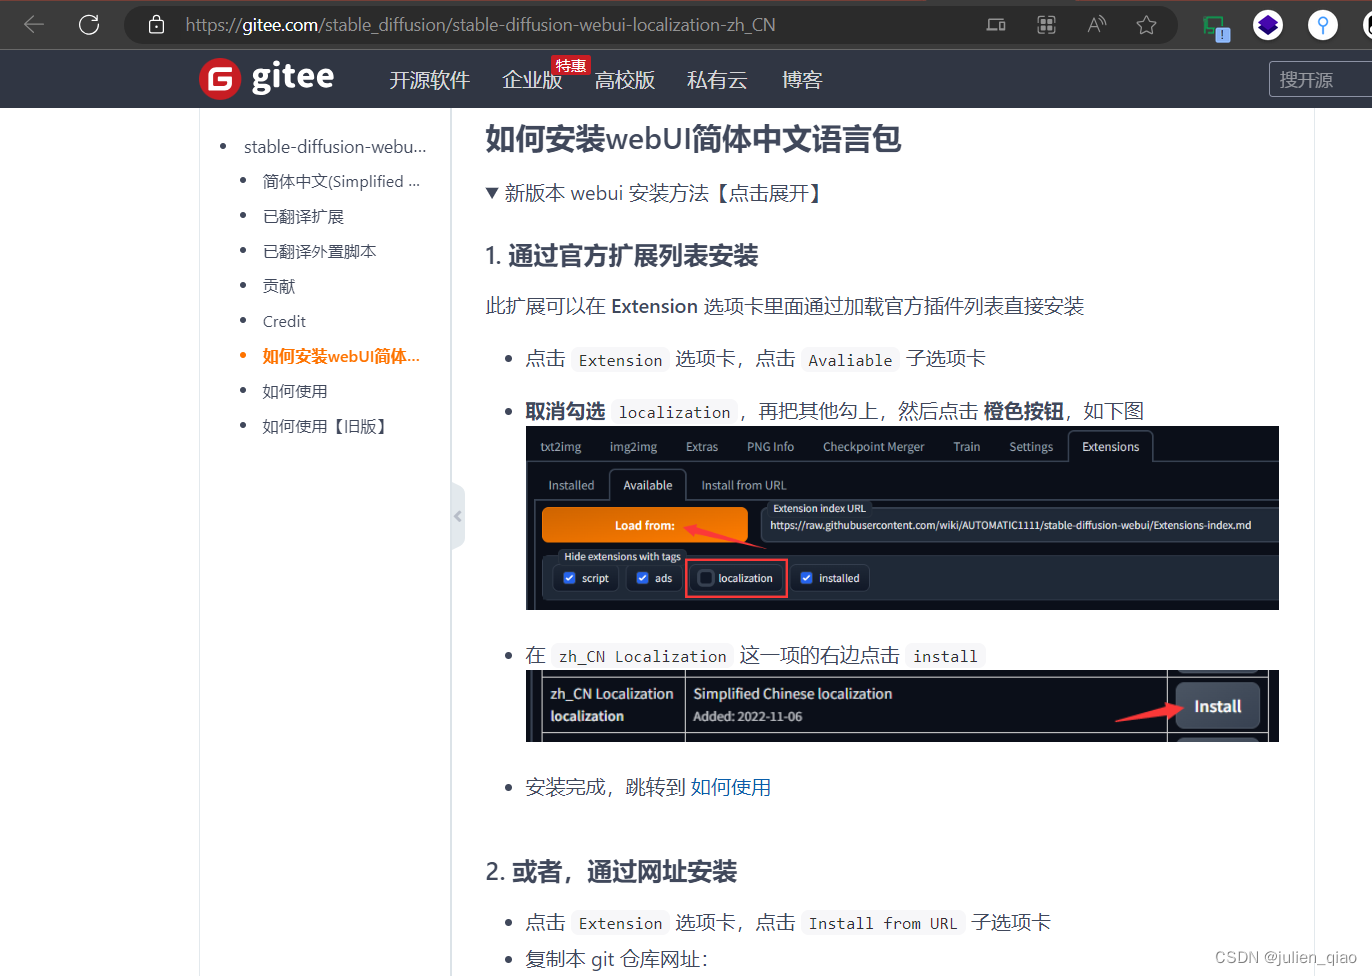
4. 汉化:
https://github.com/dtlnor/stable-diffusion-webui-localization-zh_CN
https://gitee.com/stable_diffusion/stable-diffusion-webui-localization-zh_CN
按照这两个都是可以的

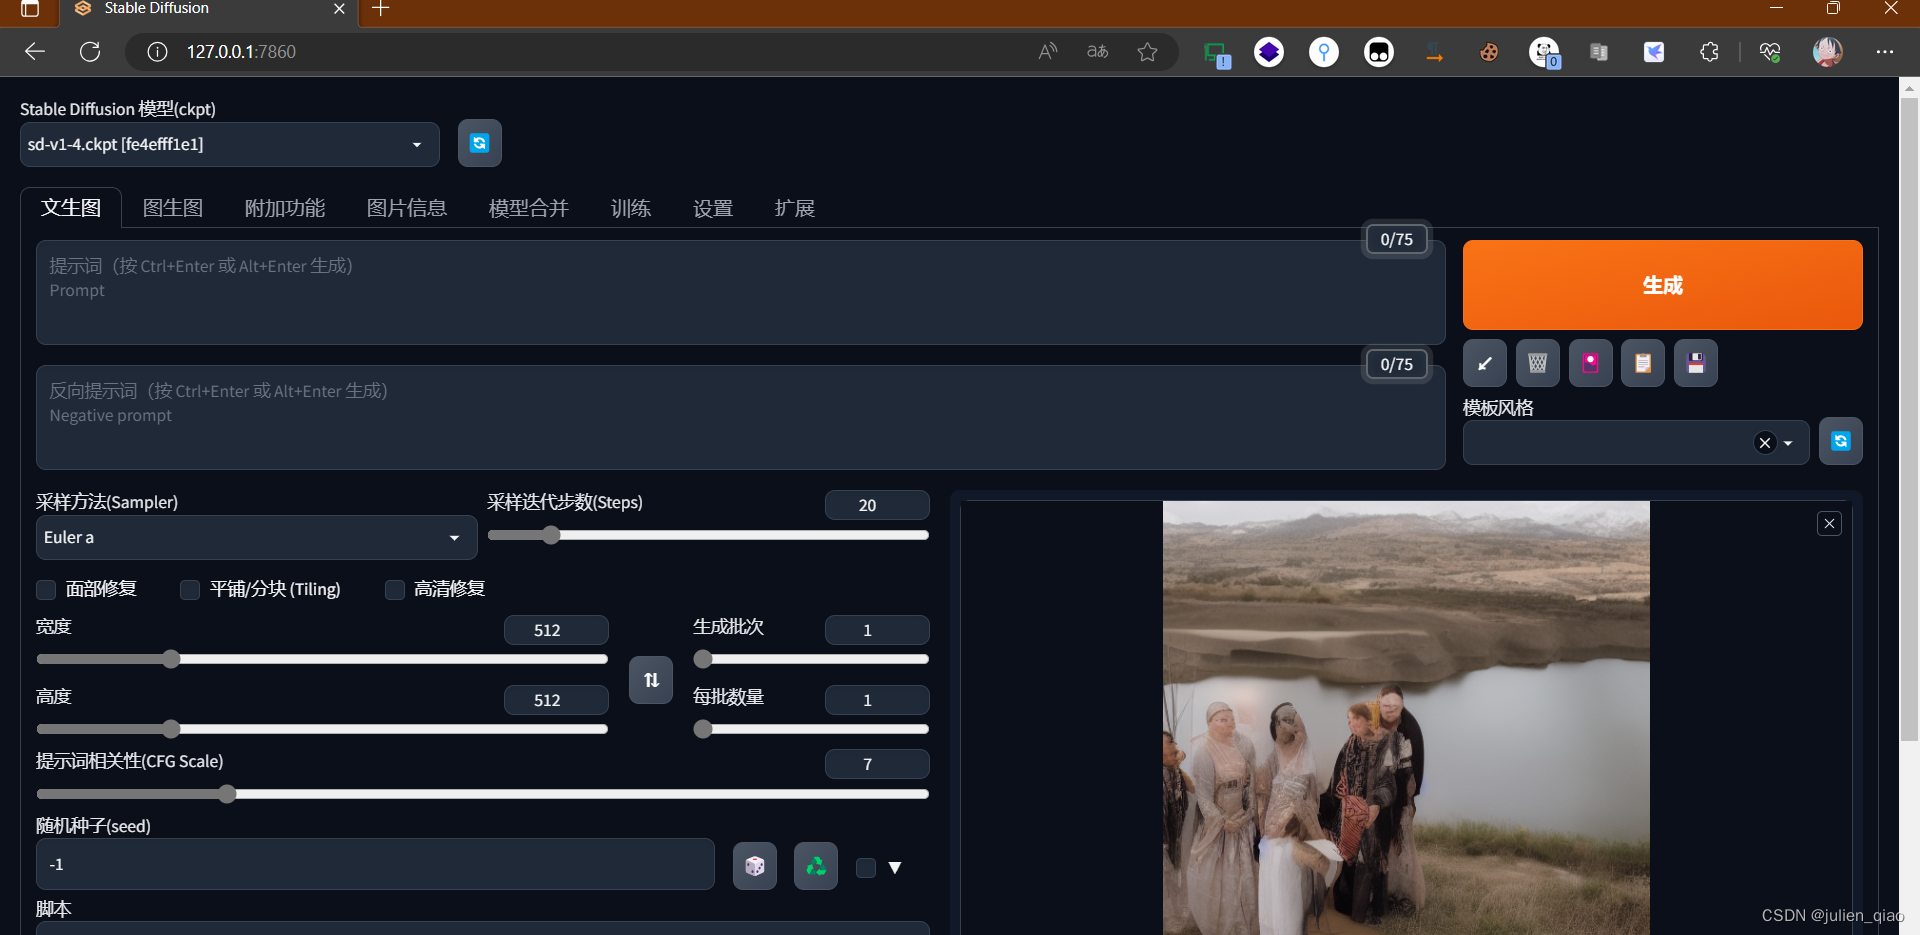
5. 模型使用:
选择模型:直接生成测试一下
注意参数:

6. 下载新模型:
需要出网:https://civitai.com/
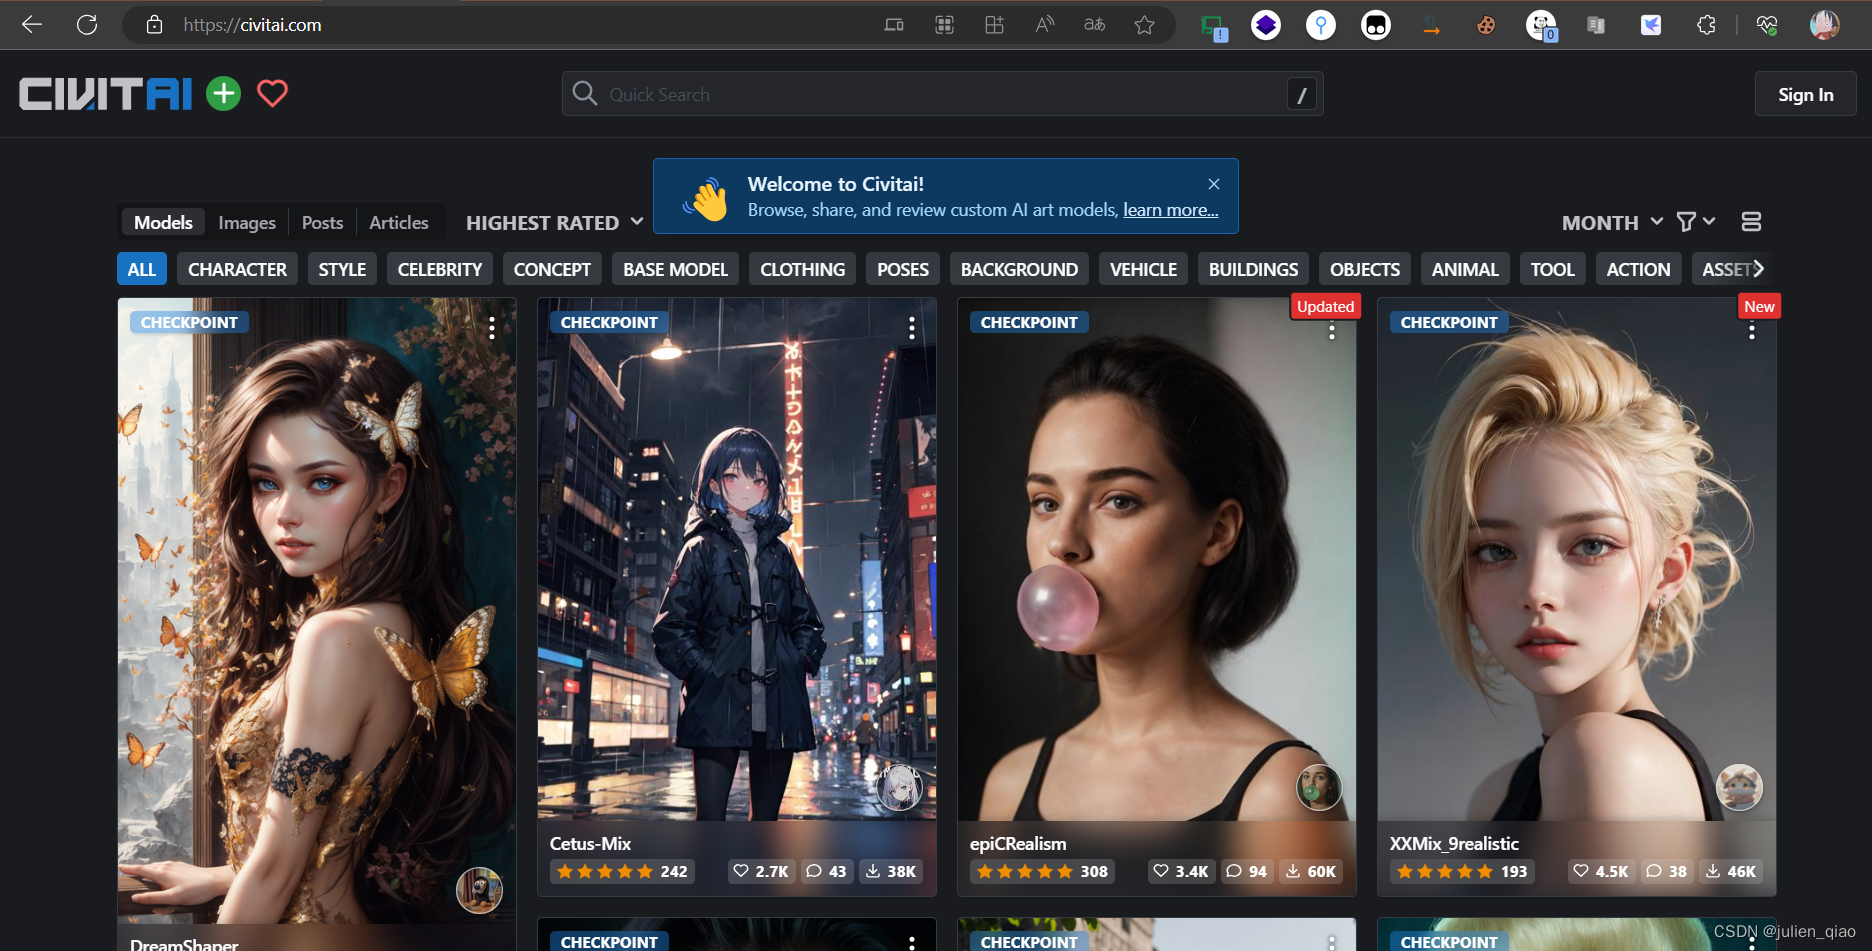
这里下载个国风3的模型:https://civitai.com/models/10415/3-guofeng3?modelVersionId=36644
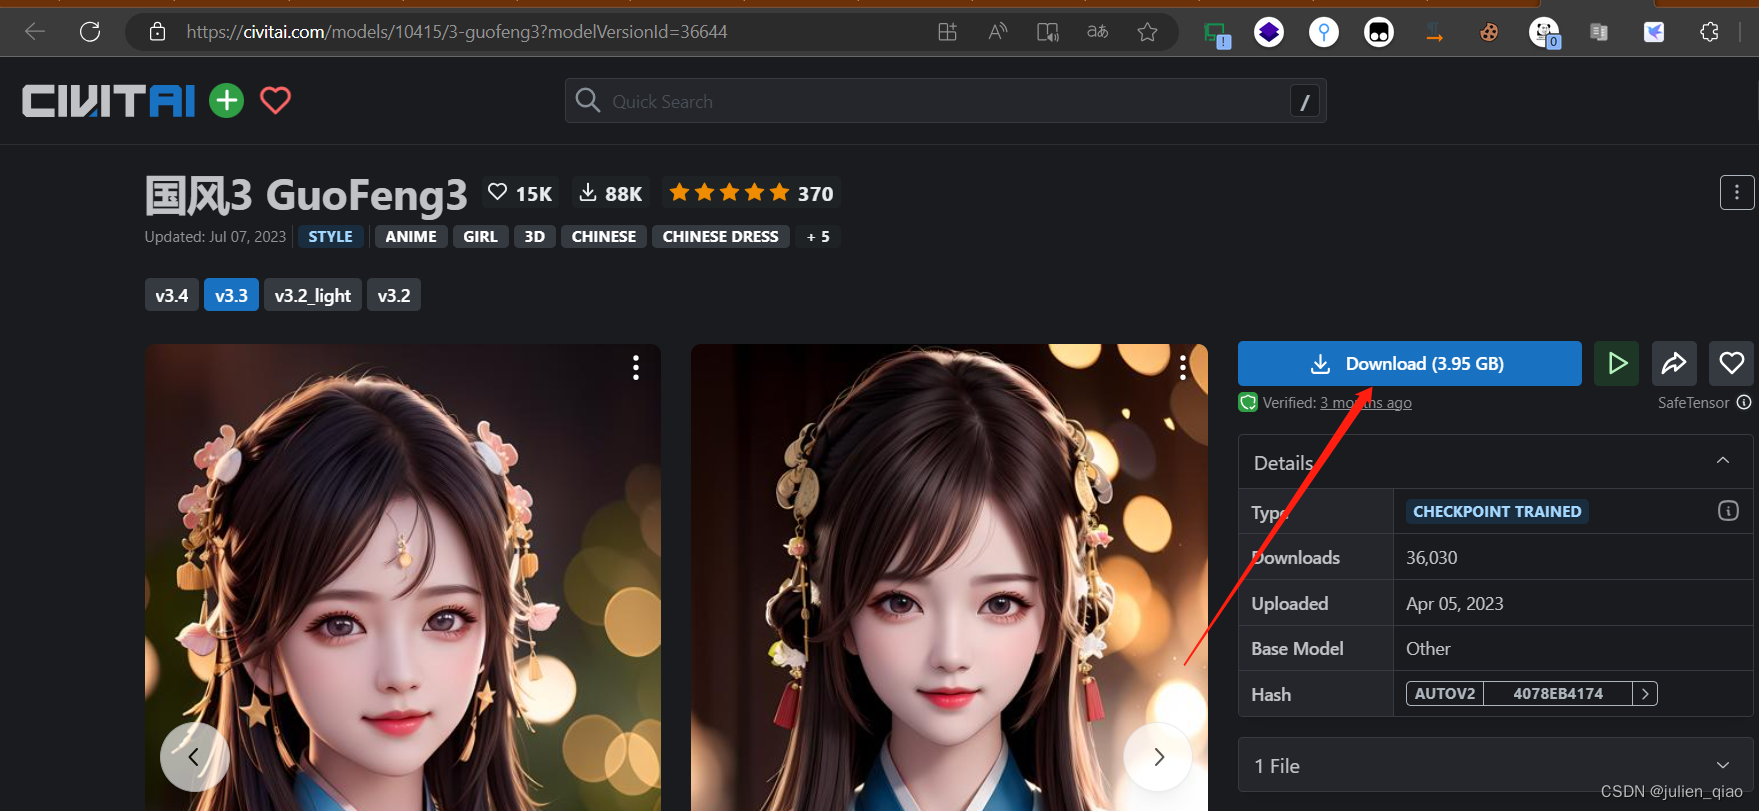
下载完成后放入:stable-diffusion-webui-master\models\Stable-diffusion文件夹下
切换模型:
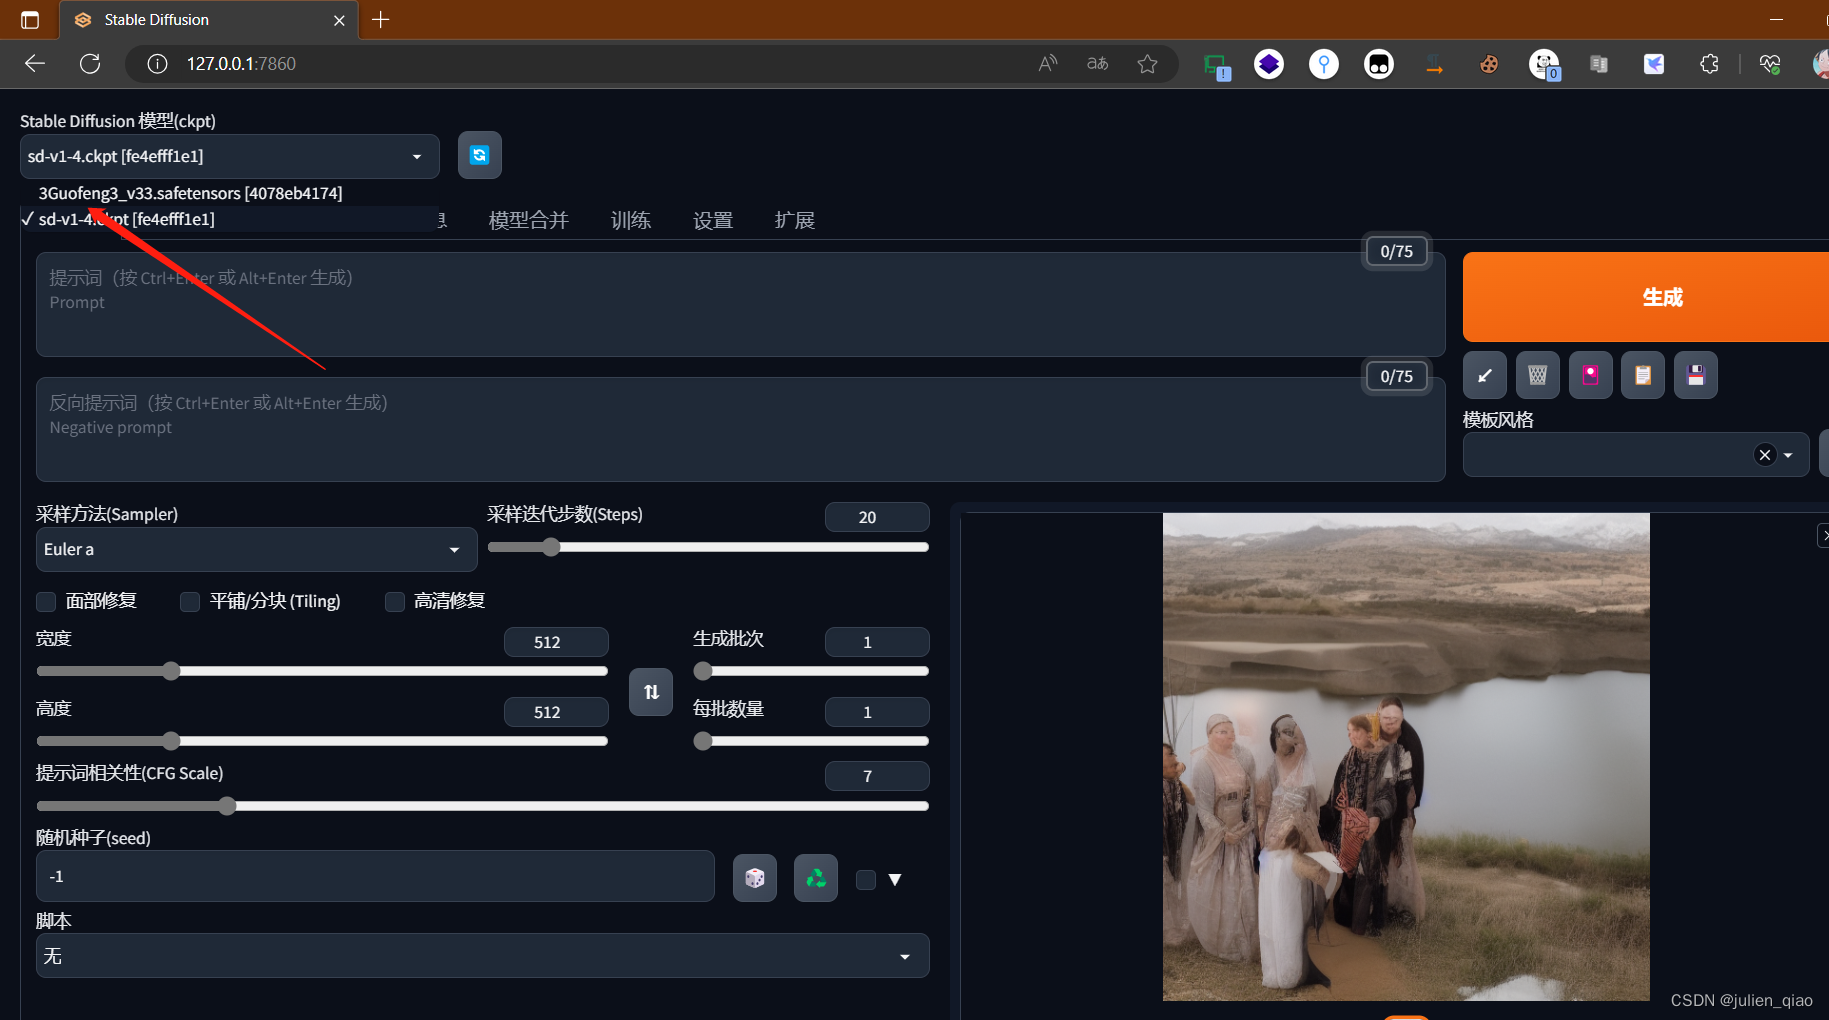
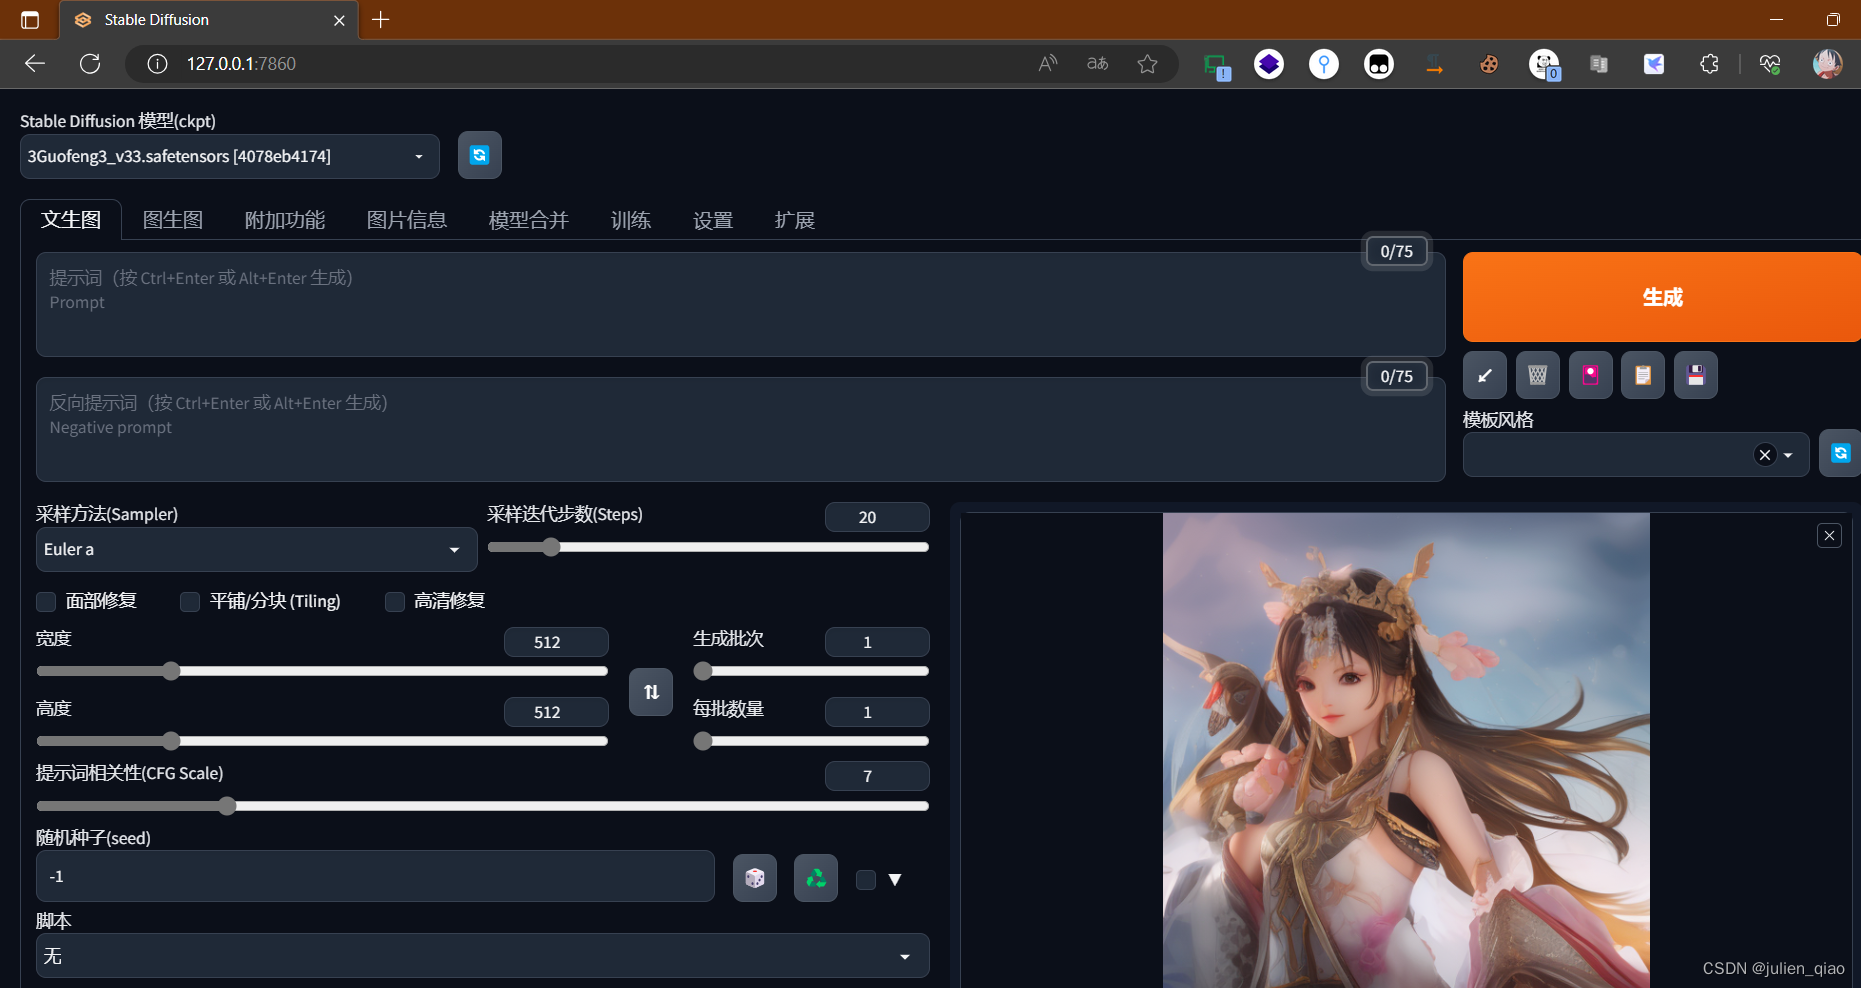
直接生成:
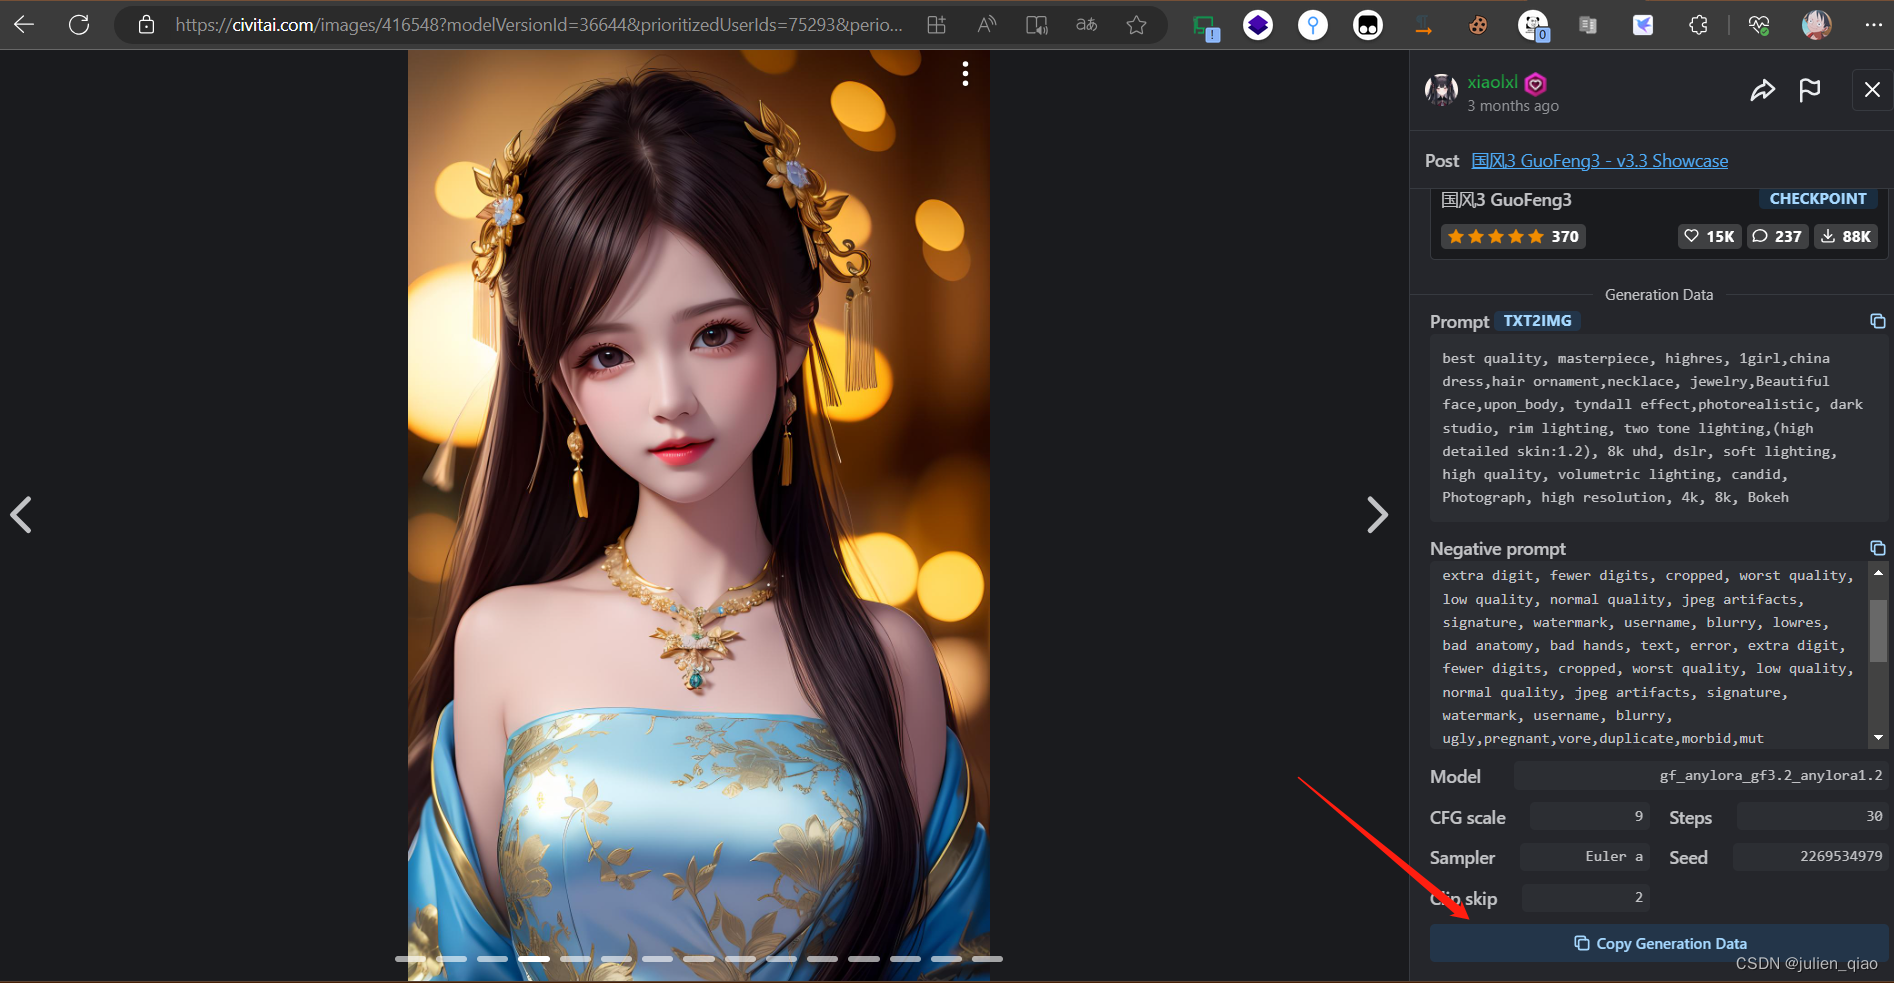
复制参数:
粘贴参数:
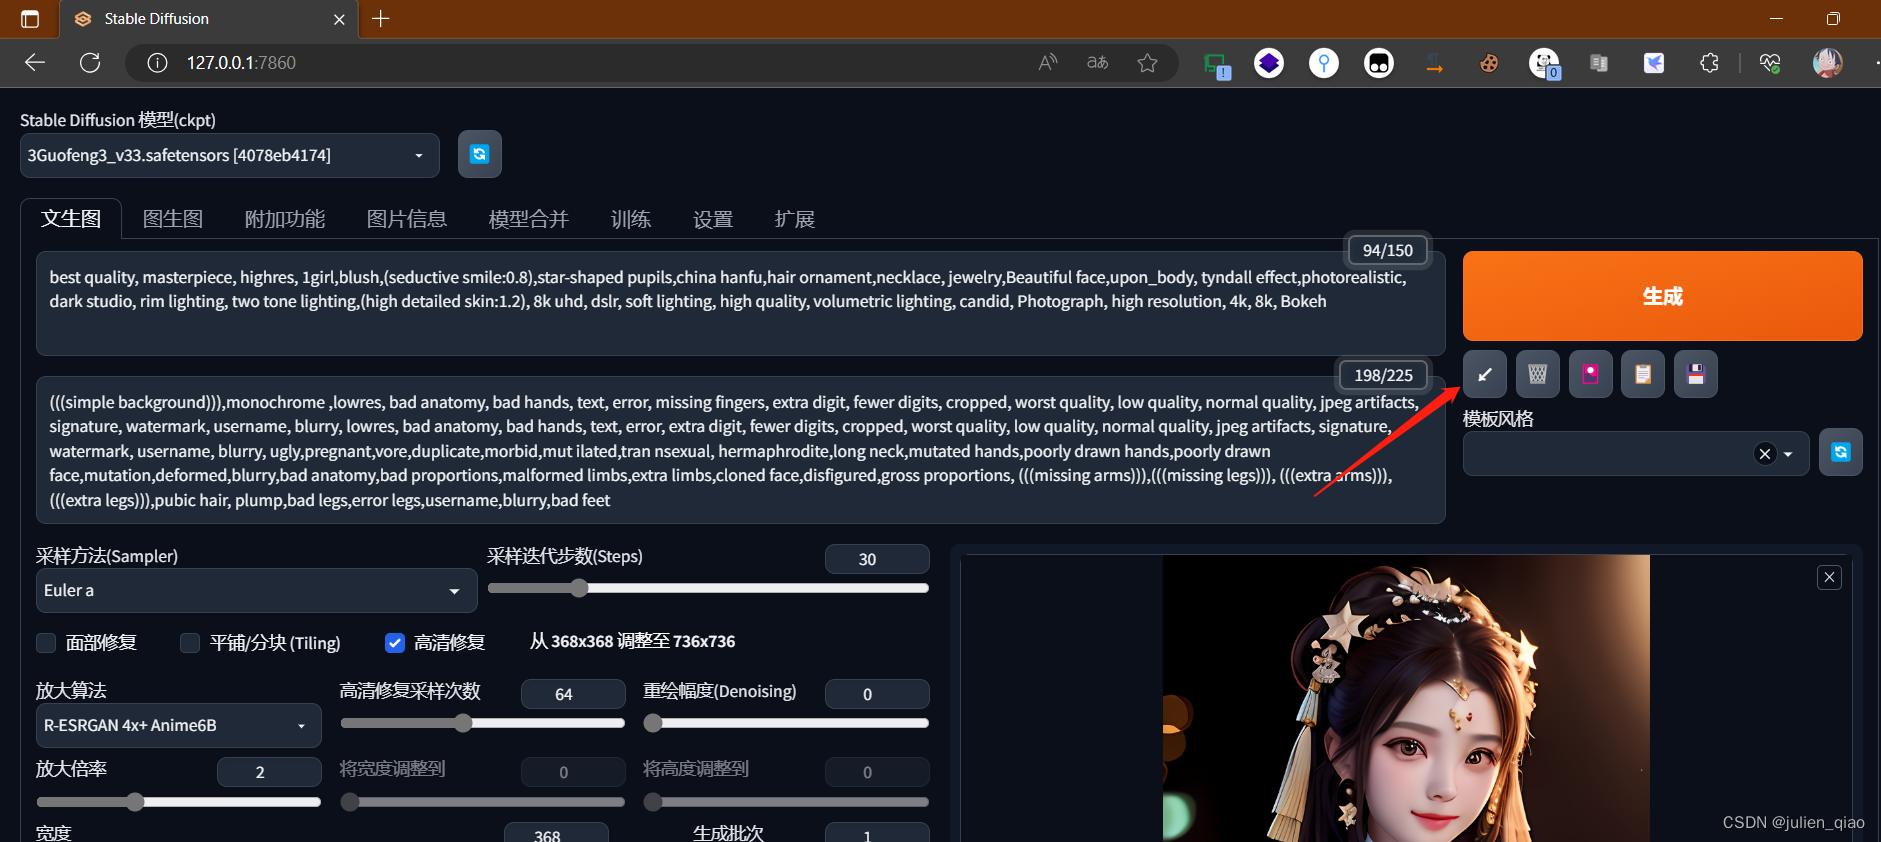
生成:调了一下参数因为GPU内存不够 难受
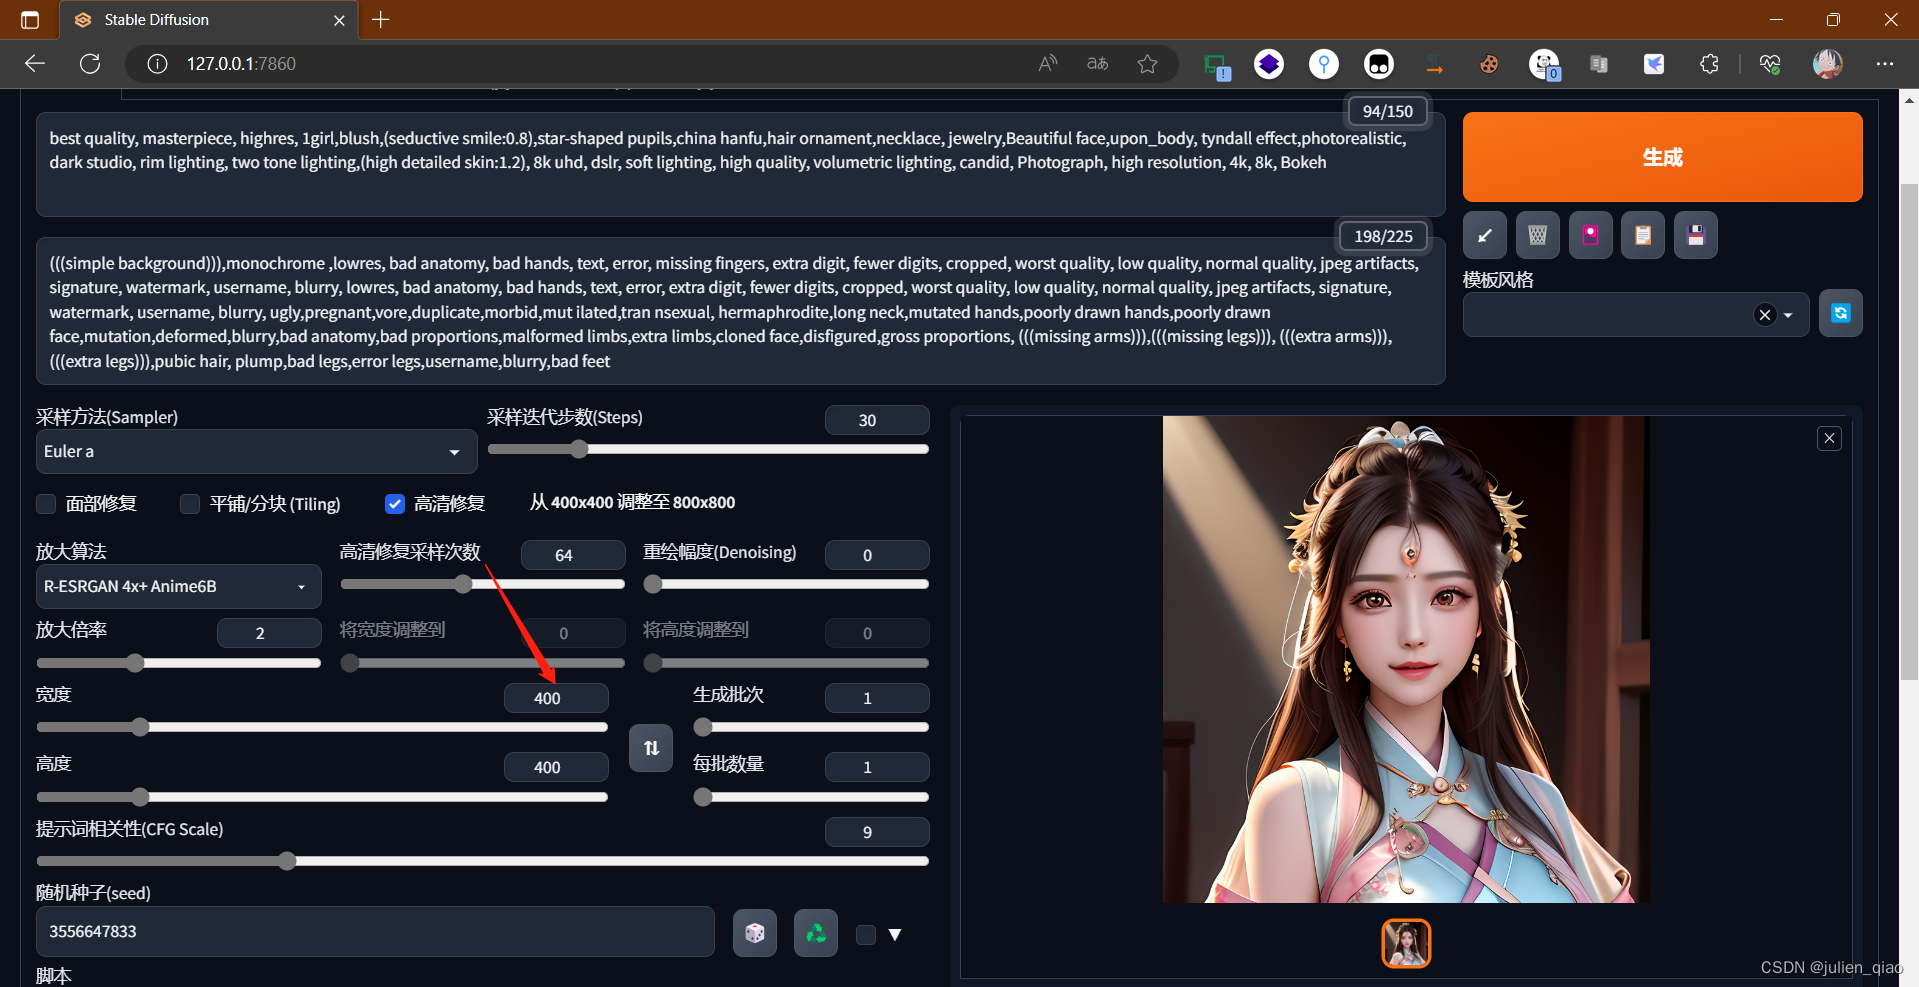
7. 基础玩法
题词:https://tag.redsex.cc/
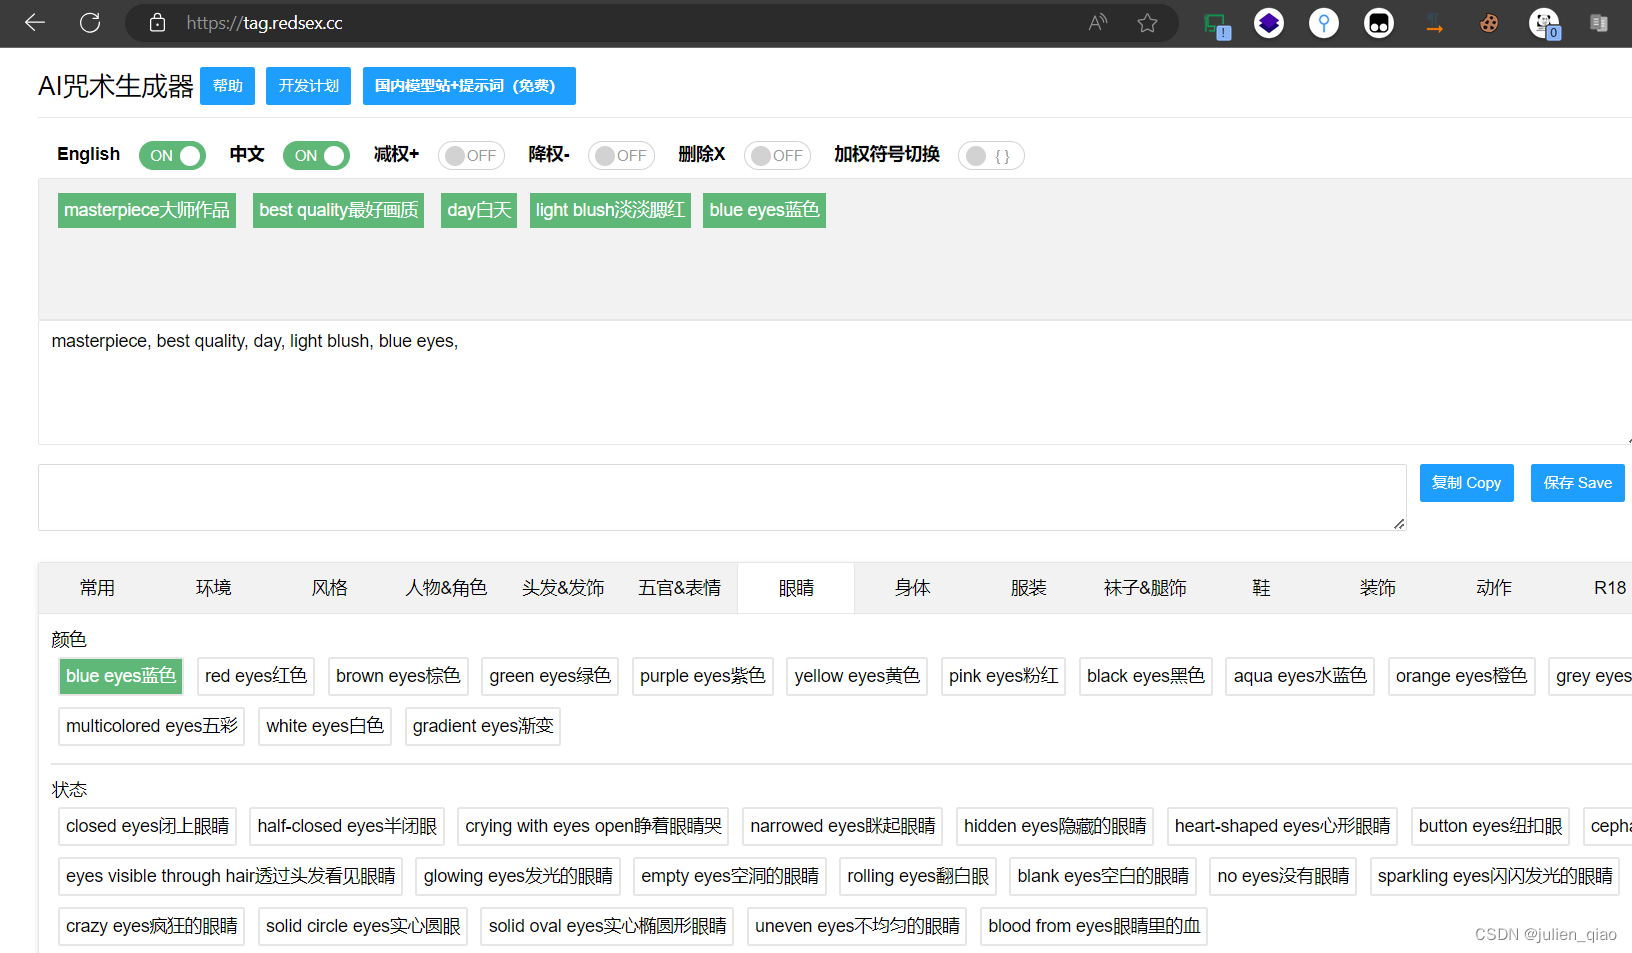


这个可以训练自己的模型,训练的模型可以发布出来大家可以使用的,下一章自己训练一个模型使用。
三、总结
技术无罪,有罪的是使用它的人,网上有很多生成一些x图的我就不想说什么了,这个东西比较简单感兴趣的同学可以试试,过程中有问题可以私信我,如果生成失败可以考虑降低参数生成,因为我的电脑配置较低可能只能做一部分生成,大家电脑配置较高可以生成一些画质比较好的图片。
