机智云获取网络实时时间
机智云代码中其实这么一个函数gizwitsGetNTP( )可以获取网络时间,今天就在STM32F407上教大家如何通过机智云获取NTP网络时间。
简单介绍一下NTP:
网络时间同步现在有2种同步协议NTP和PTP,NTP与PTP不同在于时间戳的产生位置。NTP是通过软件来记录协议相关网络包的发出和到达时刻,同步精度可以达到优于10ms。
NTP 是网络时间协议(Network Time Protocol),他用来同步网络中各个计算机时间的协议。在机智云串口协议中,支持获取 NTP 网络同步时间的功能。
网络时间同步:
网络时间同步是指将计算机或设备的时间与网络上的时间源保持一致。
NTP网络时间同步服务器:
NTP网络时间服务器是为网络设备提供精确、标准、安全、可靠和多功能的时间服务的最佳解决方案,能提供精确的同步时钟信号
我们实现的原理就是通过编程控制Wifi模块连上机智云的网络时间服务器从而获取一个跟网络同步的时间,这个时间可以有很多用途
例如可以作为校准RTC等。
具体方式:
找到API接口函数:
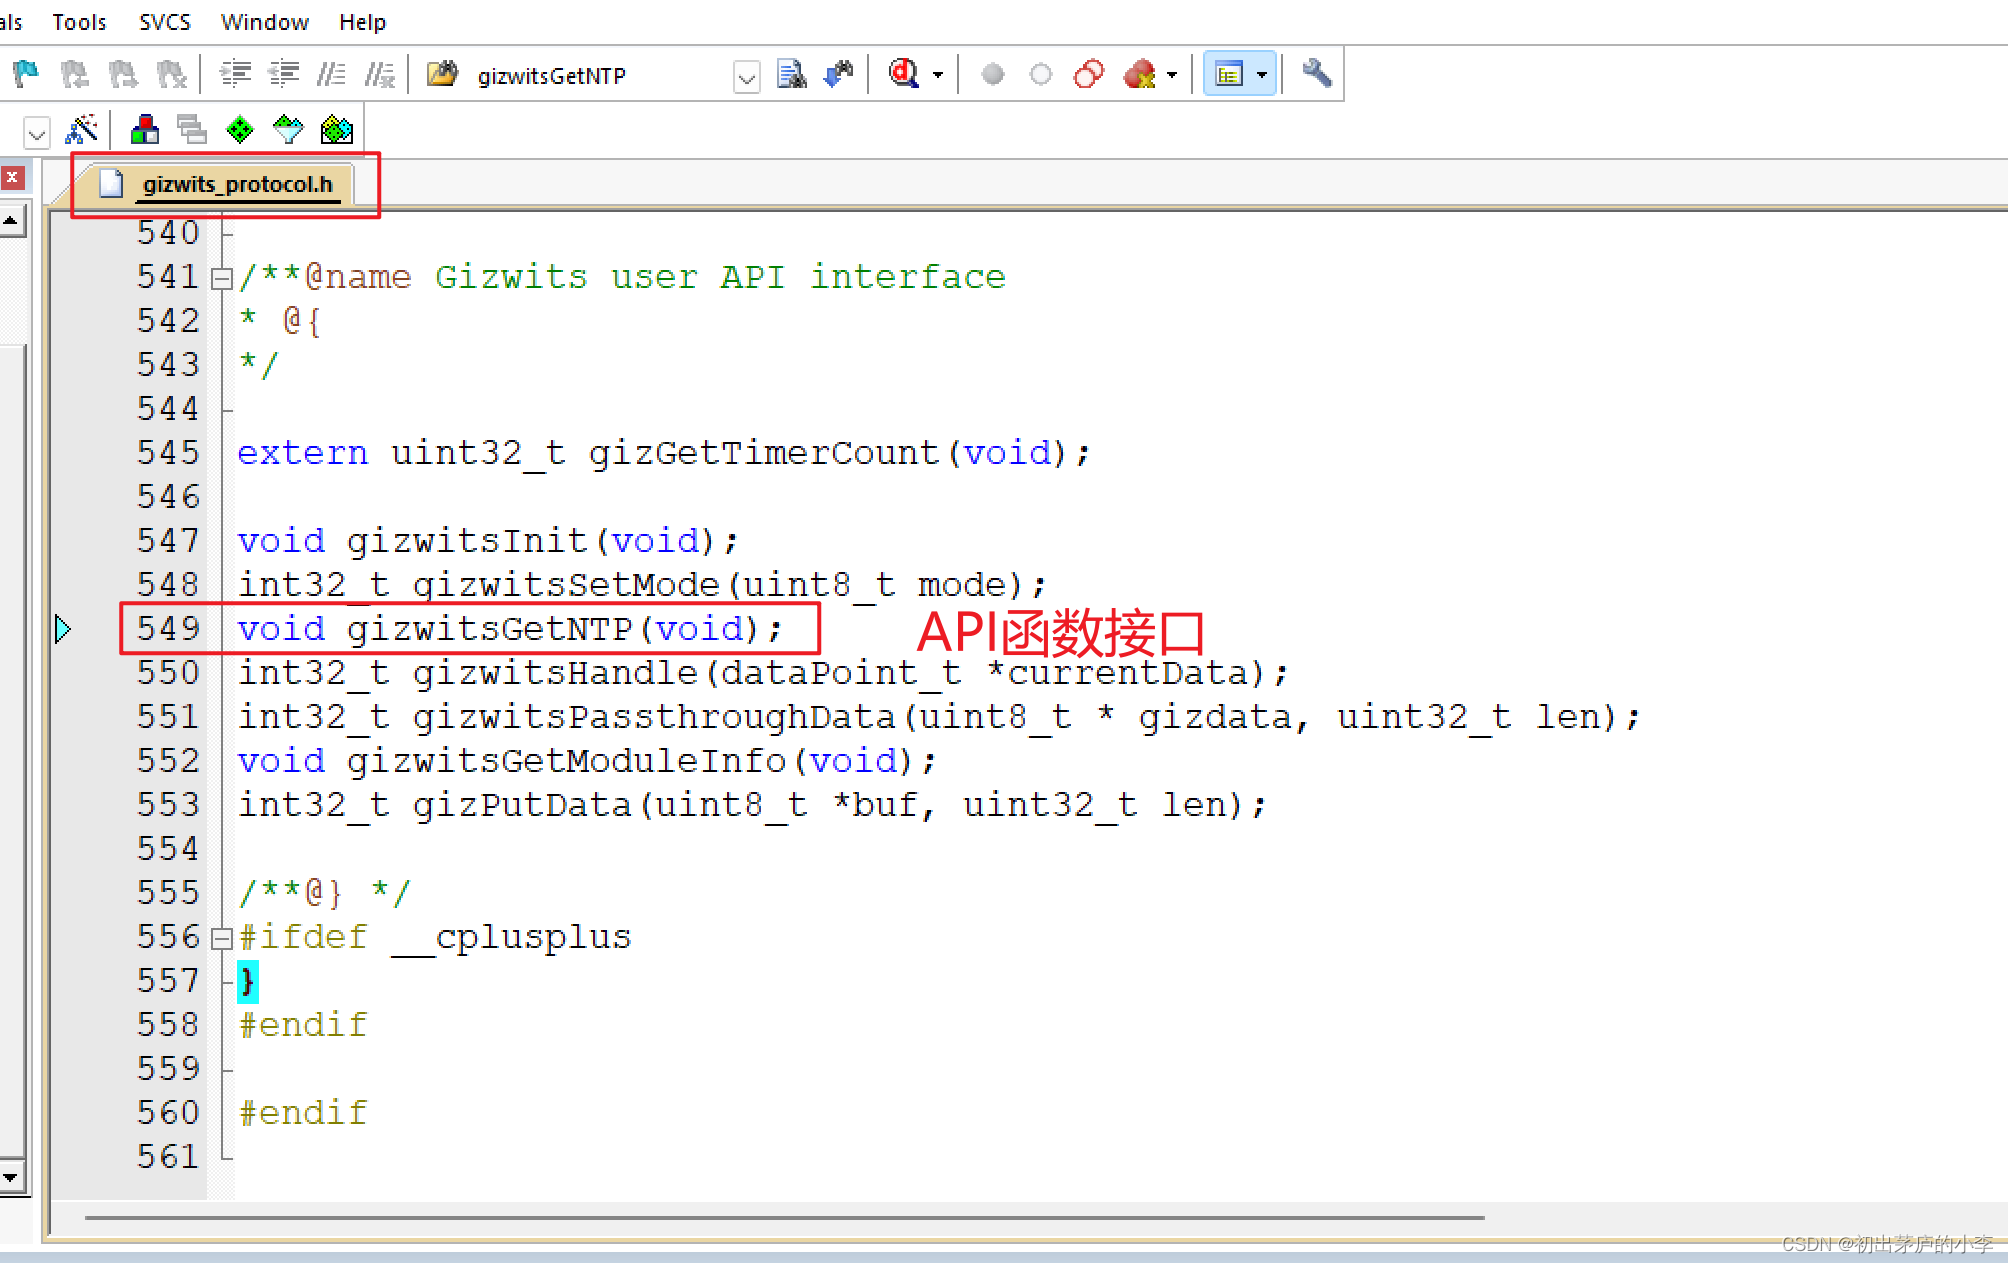
分析API接口函数:
/**
* @brief Get the the network time

* Protocol 4.13:"Device MCU send" of "the MCU requests access to the network time"

* @param[in] none
* @return none
*/
void gizwitsGetNTP(void)
{
    int32_t ret = 0;
    protocolCommon_t getNTP;

    gizProtocolHeadInit((protocolHead_t *)&getNTP);
    getNTP.head.cmd = CMD_GET_NTP;
    getNTP.head.sn = gizwitsProtocol.sn++;
    getNTP.head.len = exchangeBytes(sizeof(protocolCommon_t)-4);
    getNTP.sum = gizProtocolSum((uint8_t *)&getNTP, sizeof(protocolCommon_t));
    ret = uartWrite((uint8_t *)&getNTP, sizeof(protocolCommon_t));
    if(ret < 0)
    {
        GIZWITS_LOG("ERR[NTP]: uart write error %d \n", ret);
    }

    gizProtocolWaitAck((uint8_t *)&getNTP, sizeof(protocolCommon_t));
}
从源码中可以看到:
第一步:定义结构体变量
protocolCommon_t getNTP;//定义了一个结构体变量
构体类型如下:
/** Protocol common data frame(4.2、4.4、4.6、4.9、4.10) protocol structure */
typedef struct
{
    protocolHead_t          head;                   ///< Protocol standard header structure
    uint8_t                 sum;                    ///< checksum
} protocolCommon_t;
这个结构体里面有两个成员:
第1个仍然是一个结构体:
/** Protocol standard header structure */
typedef struct
{
    uint8_t   head[2];       ///< The head is 0xFFFF
    uint16_t  len;  ///< From cmd to the end of the entire packet occupied by the number of bytes
    uint8_t   cmd;                    ///< command
    uint8_t   sn;                     ///<
    uint8_t   flags[2];               ///< flag,default is 0
} protocolHead_t;
第2个则是一个校验结果sum
第二步:填充结构体信息:
填充内容包括:0xFF 0xFF 数据桢头
命令字节: cmd
sn: sn
字节数目:len
校验结果:sum
gizProtocolHeadInit((protocolHead_t *)&getNTP);
getNTP.head.cmd = CMD_GET_NTP;
getNTP.head.sn = gizwitsProtocol.sn++;
getNTP.head.len = exchangeBytes(sizeof(protocolCommon_t)-4);
getNTP.sum = gizProtocolSum((uint8_t *)&getNTP, sizeof(protocolCommon_t));
ret = uartWrite((uint8_t *)&getNTP, sizeof(protocolCommon_t));
校验采用累积和校验:
/*
* @brief Checksum calculation
* @param [in] buf   : data
* @param [in] len   : data len
* @return sum : Checksum
*/
  uint8_t ICACHE_FLASH_ATTR gizProtocolSum(uint8_t *buf, uint32_t len)
  {
    uint8_t     sum = 0;
    uint32_t    i = 0;
    if(buf == NULL || len <= 0)
    {
        return 0;
    }
    for(i=2; i<len-1; i++)
    {
        sum += buf[i];
    }
    return sum;
  }
第三步把组包好的数据发送到Wifi模块
调用接口:
/*
* @brief uartWrite
* Serial write operation, send data to the WiFi module
* @param buf      : Data address
* @param len       : Data length
* @return : Not 0,Serial send success;
*           -1,Input Param Illegal
*/
int32_t uartWrite(uint8_t *buf, uint32_t len)
{
    uint32_t i = 0;
    if(NULL == buf)
    {
        return -1;
    }
    #ifdef PROTOCOL_DEBUG   //如果宏定义了打印的宏 则打印日志  MCU发送到wifi的信息
    GIZWITS_LOG("MCU2WiFi[%4d:%4d]: ", gizGetTimerCount(), len);
    for(i=0; i<len; i++)
    {
        GIZWITS_LOG("%02x ", buf[i]);
    }
    GIZWITS_LOG("\n");
    #endif

    for(i=0; i<len; i++)
    {
           //MCU跟WiFi通信的接口底层仍然是串口通信  这里是串口2
			USART_SendData(USART2, buf[i]);
			while (USART_GetFlagStatus(USART2, USART_FLAG_TXE) == RESET);
            if(i >=2 && buf[i] == 0xFF)//除了帧头部分的0xFF原样发 后面遇到的都要在后面补上0x55 这个是协议规定
            {
                //MCU跟WiFi通信的接口底层仍然是串口通信  这里是串口2
                USART_SendData(USART2,0x55);
                while (USART_GetFlagStatus(USART2, USART_FLAG_TXE) == RESET);
            }
    }
    return len;
}
第四步:根据写入的结果打印日志信息
    ret = uartWrite((uint8_t *)&getNTP, sizeof(protocolCommon_t));
    if(ret < 0)
    {
        GIZWITS_LOG("ERR[NTP]: uart write error %d \n", ret);//返回值是-1则代表出现了错误
    }
第五步:把定义的结构体部分关键信息赋值到WaitAck这个结构体中
gizProtocolWaitAck((uint8_t *)&getNTP, sizeof(protocolCommon_t));

/*
* @brief Protocol ACK check processing function
* @param [in] data            : data adress
* @param [in] len             : data length
* @return 0, suceess; other, failure
*/
  static int8_t gizProtocolWaitAck(uint8_t *gizdata, uint32_t len)
  {
    if(NULL == gizdata)
    {
        GIZWITS_LOG("ERR: data is empty \n");
        return -1;
    }
    memset((uint8_t *)&gizwitsProtocol.waitAck, 0, sizeof(protocolWaitAck_t));//
    memcpy((uint8_t *)gizwitsProtocol.waitAck.buf, gizdata, len);
    gizwitsProtocol.waitAck.dataLen = (uint16_t)len;
    gizwitsProtocol.waitAck.flag = 1;
    gizwitsProtocol.waitAck.sendTime = gizGetTimerCount();
    return 0;
  }
protocolWaitAck_t结构体成员如下
/** resend strategy structure */
typedef struct
{
    uint8_t     num;                    ///< resend times
    uint8_t     flag;                   ///< 1,Indicates that there is a need to wait for the ACK;0,Indicates that there is no need to wait for the ACK
    uint8_t      buf[MAX_PACKAGE_LEN];   ///< resend data buffer
    uint16_t     ataLen;                ///< resend data length
    uint32_t     sendTime;               ///< resend time
} protocolWaitAck_t;
改结构体嵌套在gizwitsProtocol_t中
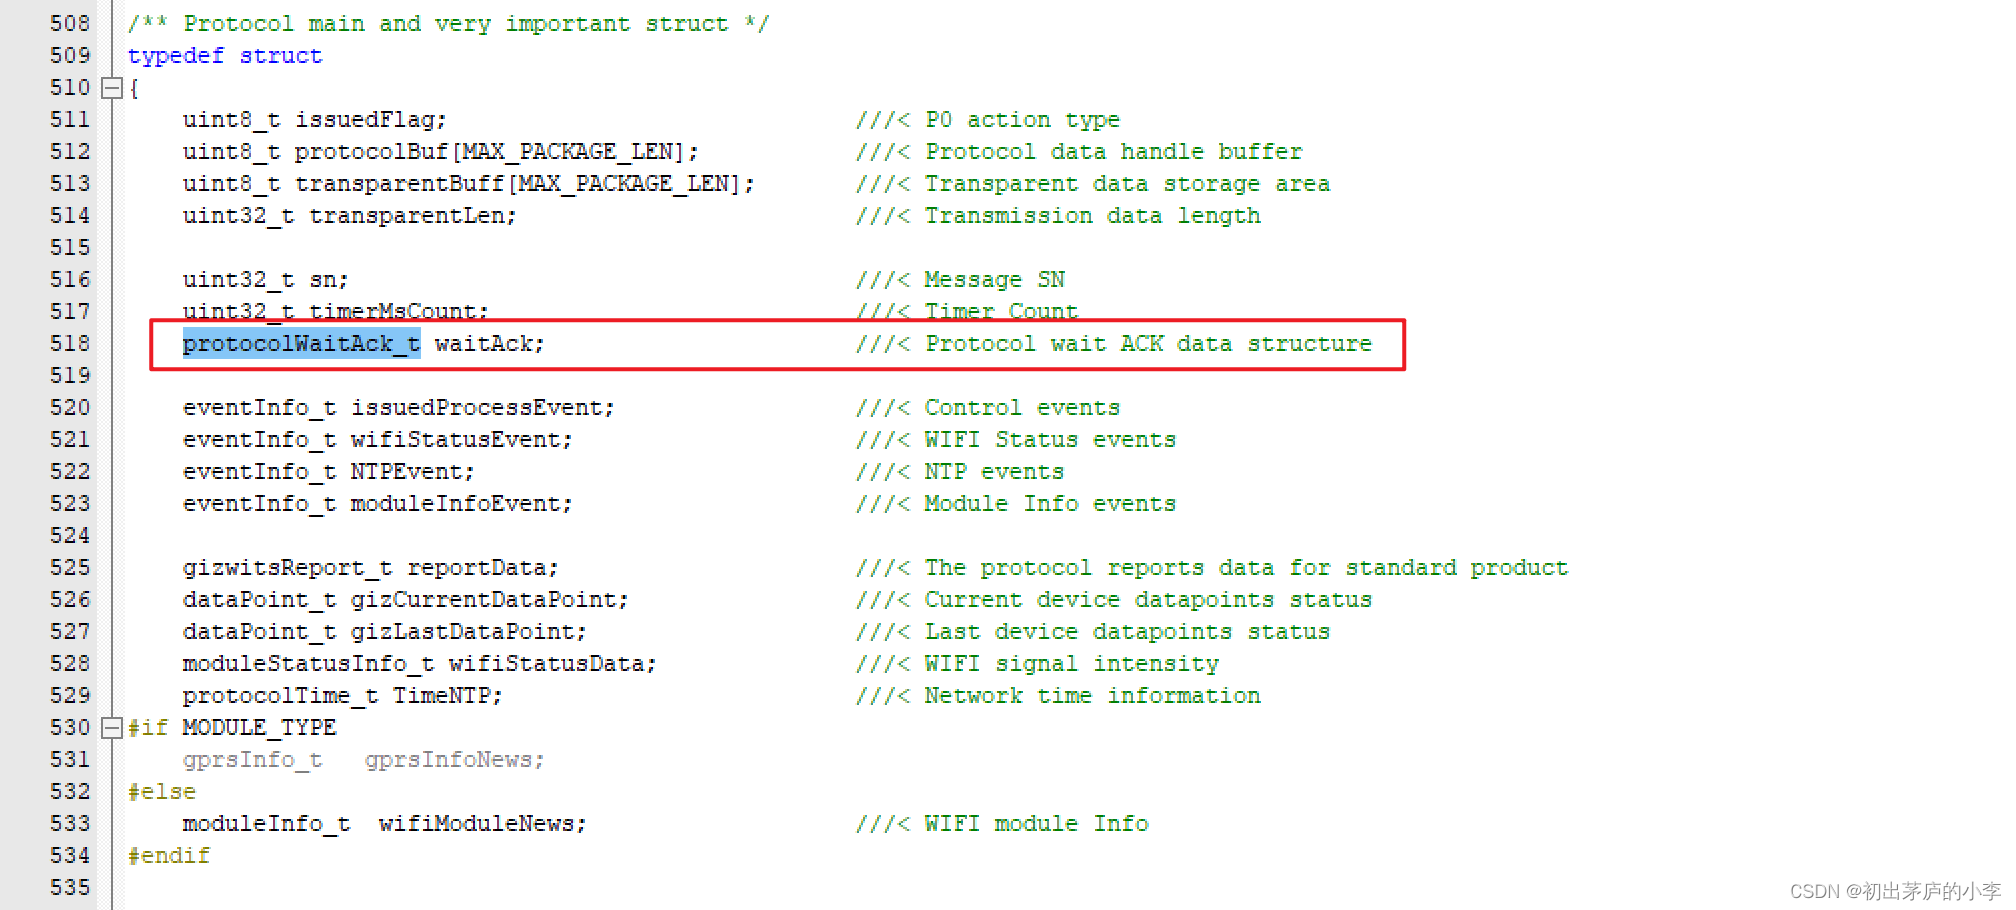
/** Protocol main and very important struct */
typedef struct
{
    uint8_t issuedFlag;                             ///< P0 action type
    uint8_t protocolBuf[MAX_PACKAGE_LEN];           ///< Protocol data handle buffer
    uint8_t transparentBuff[MAX_PACKAGE_LEN];       ///< Transparent data storage area
    uint32_t transparentLen;                        ///< Transmission data length

    uint32_t sn;                                    ///< Message SN
    uint32_t timerMsCount;                          ///< Timer Count

    protocolWaitAck_t waitAck;                      ///< Protocol wait ACK data structure

    eventInfo_t issuedProcessEvent;                 ///< Control events
    eventInfo_t wifiStatusEvent;                    ///< WIFI Status events
    eventInfo_t NTPEvent;                           ///< NTP events
    eventInfo_t moduleInfoEvent;                    ///< Module Info events

	gizwitsReport_t reportData;                     ///< The protocol reports data for standard product
    dataPoint_t gizCurrentDataPoint;                ///< Current device datapoints status
    dataPoint_t gizLastDataPoint;                   ///< Last device datapoints status
    moduleStatusInfo_t wifiStatusData;              ///< WIFI signal intensity
    protocolTime_t TimeNTP;                         ///< Network time information
#if MODULE_TYPE
    gprsInfo_t   gprsInfoNews;
#else
    moduleInfo_t  wifiModuleNews;                   ///< WIFI module Info
#endif

}gizwitsProtocol_t;
至此代码的分析完毕,我们只需要大概的流程即可,里面实现的细节暂且不用深究,接下来我们来写一个代码调用该API并把获取到的网络实时时间通过串口调试工具进行打印查看。
编写应用代码方式:
既然是获取网络时间我们就需要等到入网成功之后才可以获取因为只有这样获取到的时间才是准确的也只有这样我们才能获取到准确的时间。
查找连上WIFI的判断我们定义一个全部变量来表示联网成功!
首先在 main.c文件中,定义一个 wifi_sta 变量,用来记录 wifi 连接状态,当模组连上机智云的服务器时,会返回WIFI_CON_M2M 的事件,断开时返回WIFI_DISCON_M2M,所以我们就在这两个地方添加标志位并且要引入外部变量,否则会报错,如下图所示
![[外链图片转存失败,源站可能有防盗链机制,建议将图片保存下来直接上传(img-3nZo3s2e-1688801965975)(C:\Users\23206\AppData\Roaming\Typora\typora-user-images\image-20230708145640728.png)]](https://img-blog.csdnimg.cn/dacc9f0db0904851b7ee85c2605dc0c0.png)
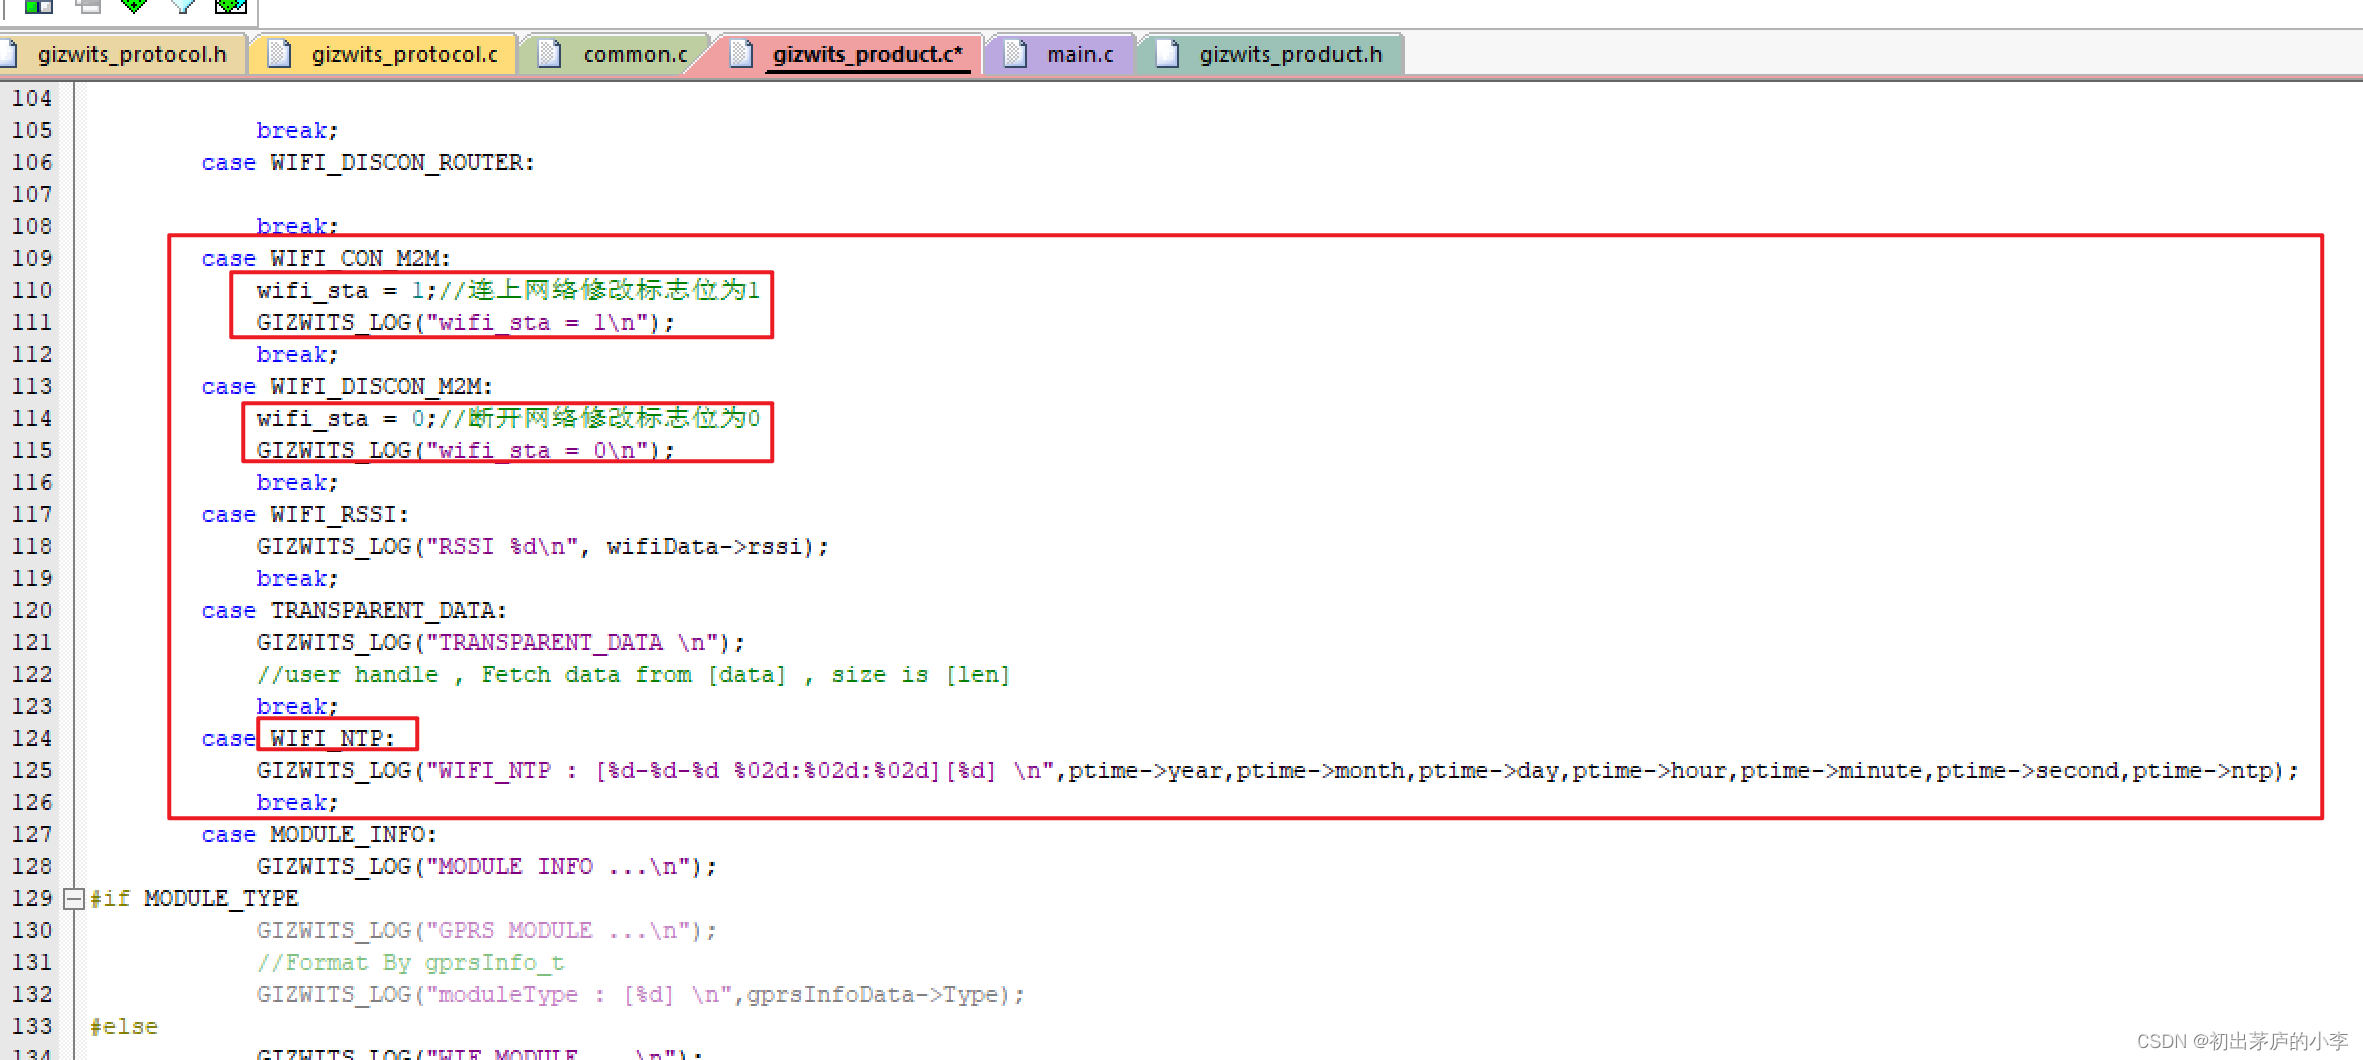
部分代码如下:
    case WIFI_CON_M2M:
            wifi_sta = 1;//连上网络修改标志位为1
            GIZWITS_LOG("wifi_sta = 1\n");
            break;
        case WIFI_DISCON_M2M:
            wifi_sta = 0;//断开网络修改标志位为0
            GIZWITS_LOG("wifi_sta = 0\n");
            break;
        case WIFI_RSSI:
            GIZWITS_LOG("RSSI %d\n", wifiData->rssi);
            break;
        case TRANSPARENT_DATA:
            GIZWITS_LOG("TRANSPARENT_DATA \n");
            //user handle , Fetch data from [data] , size is [len]
            break;
        case WIFI_NTP:
            GIZWITS_LOG("WIFI_NTP : [%d-%d-%d %02d:%02d:%02d][%d] \n",ptime->year,ptime->month,ptime->day,ptime->hour,ptime->minute,ptime->second,ptime->ntp);
            break;
        case MODULE_INFO:
            GIZWITS_LOG("MODULE INFO ...\n");
获取时间的代码实现:
打印代码:

获取代码:
void userHandle(void)
{
	static uint32_t count_time = 0;
	count_time++;
	delay_nms(100);
	if(count_time %10==0)
	{
		if(wifi_sta==1)
		{
				gizwitsGetNTP();//每1秒调用一次网络时间 前提是连上网络之后
		}
		else if(wifi_sta ==0)
		{
			printf("未连接到网络...\r\n");
		}
	}
	currentDataPoint.valuebeep = GPIO_ReadOutputDataBit(GPIOE,GPIO_Pin_0);
	currentDataPoint.valueyzh  = GPIO_ReadOutputDataBit(GPIOC,GPIO_Pin_4);
}
实现结果:
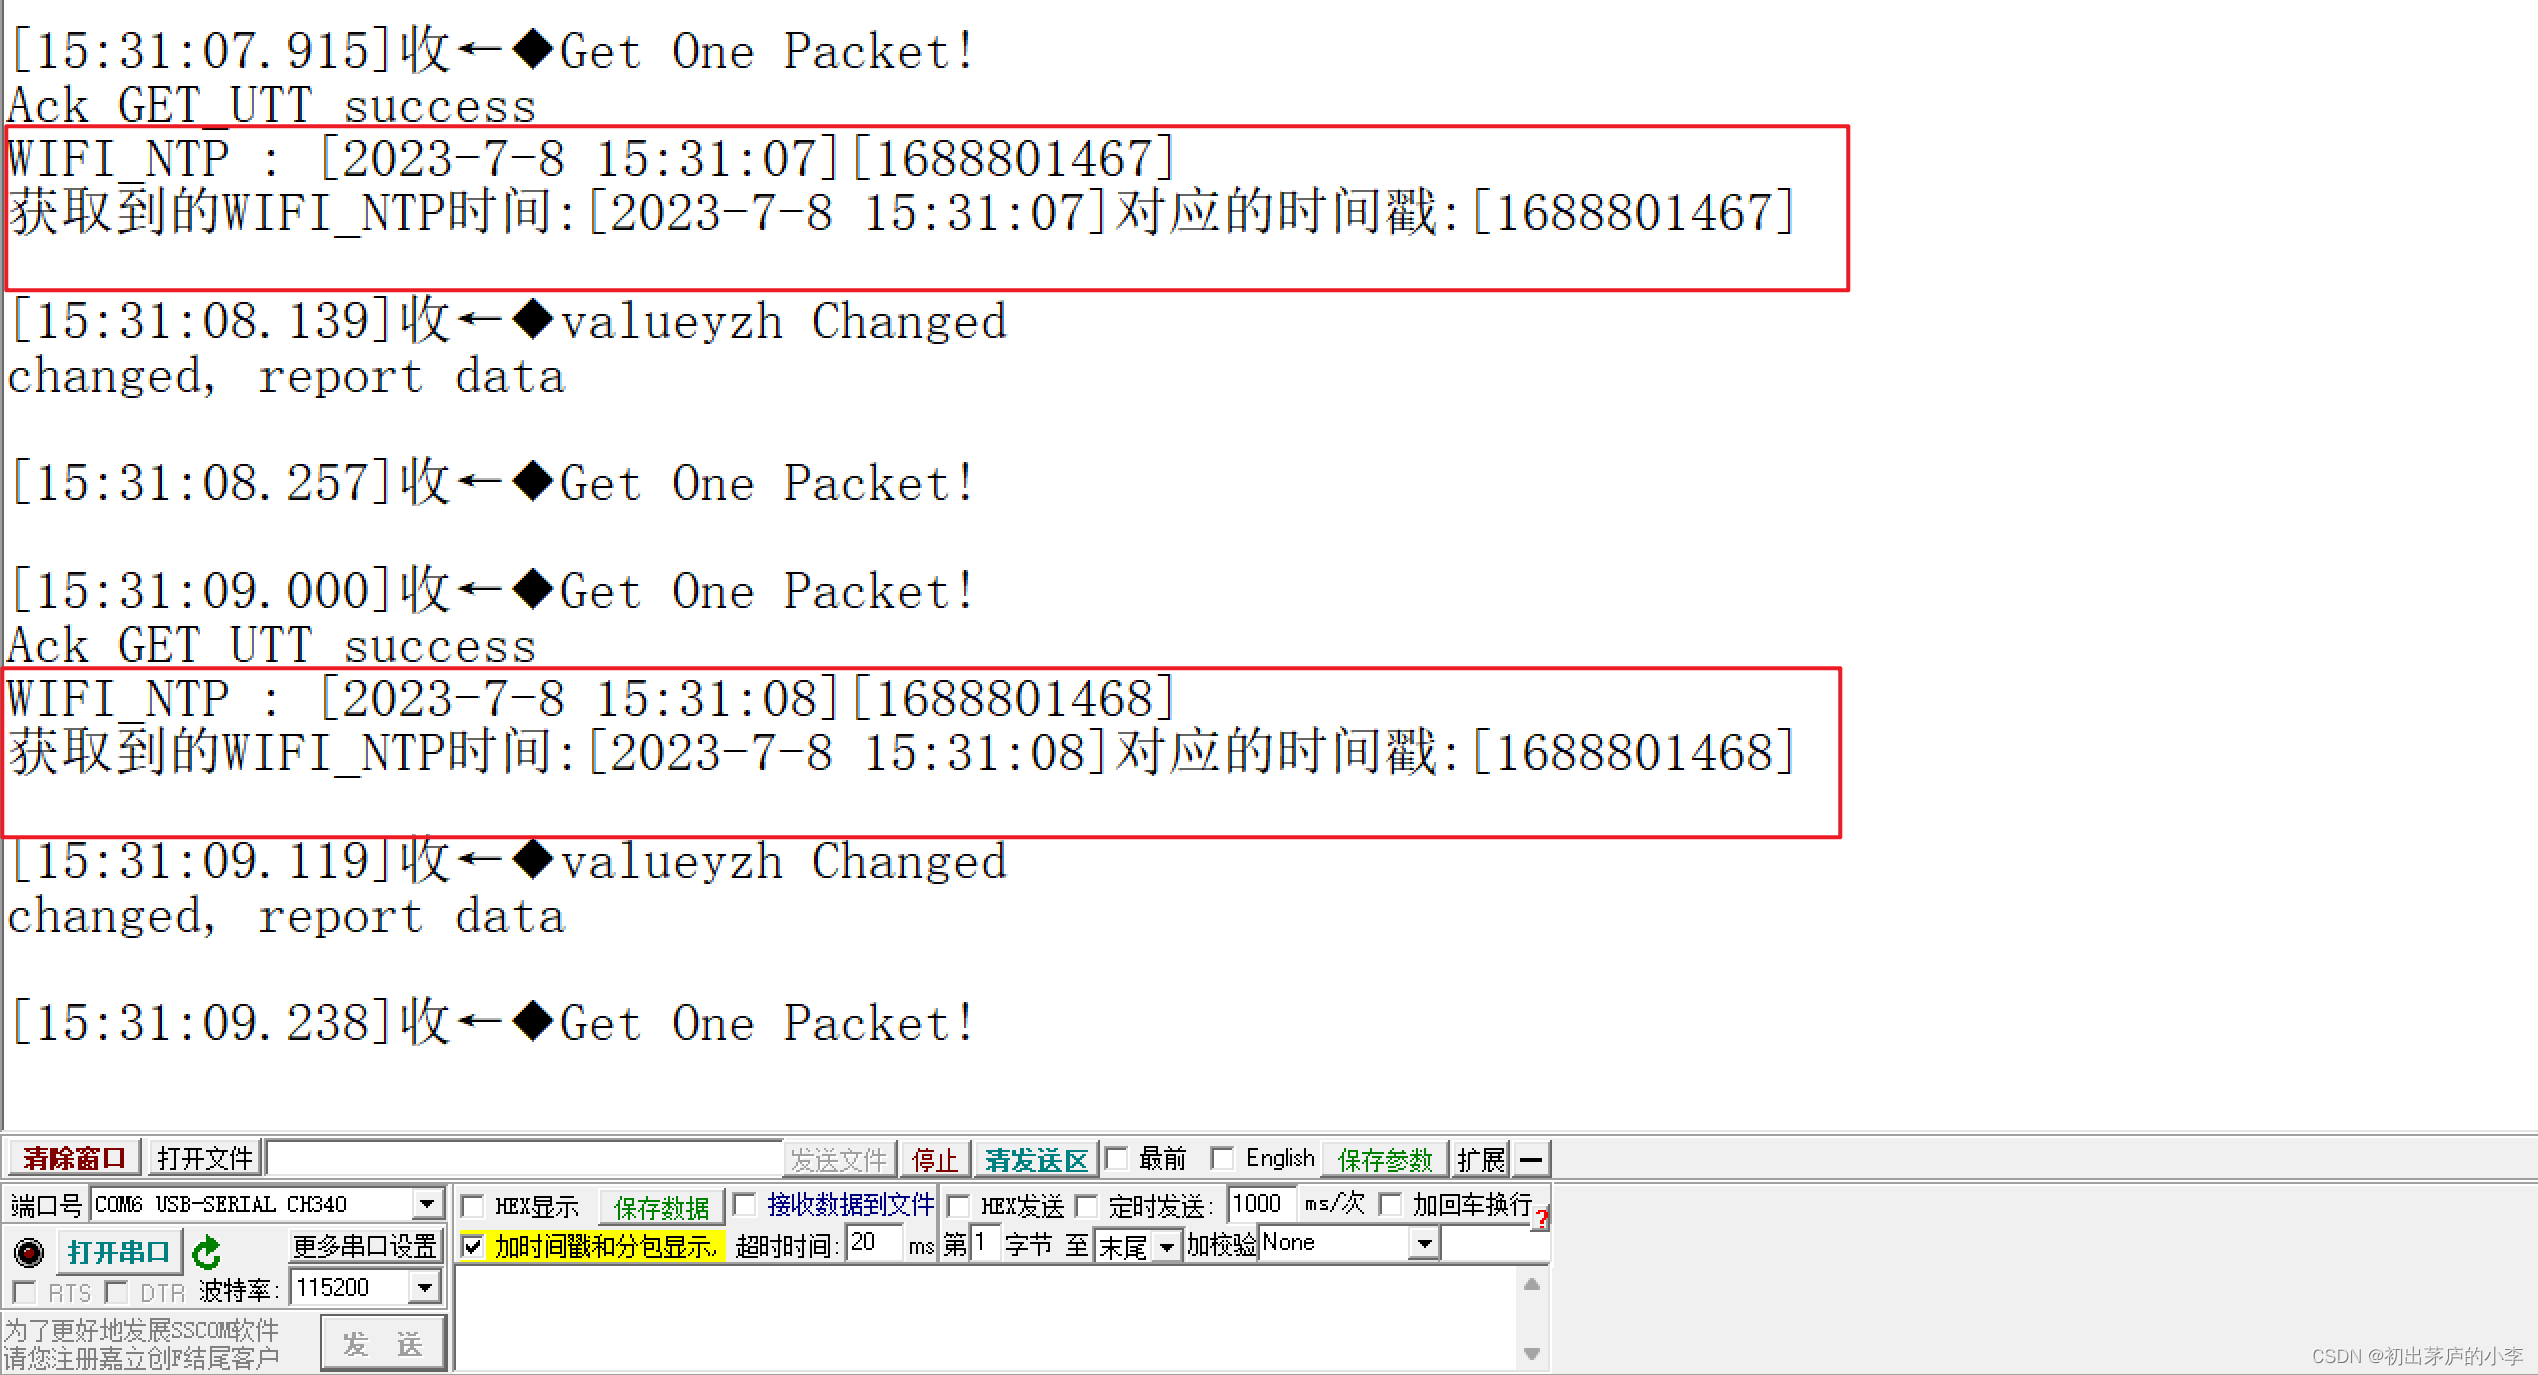
网络时间就是当前时间:2023年7月8日15点31分08秒 这个时间如果用于更新RTC实现并且实现掉电存储就十分准确了
至此:机智云网络获取时间已经完成。


![[C++] 万字 - C++异常处理分析介绍: 异常概念、异常抛出与捕获匹配原则、重新抛出、异常安全、异常体系...](https://img-blog.csdnimg.cn/img_convert/d4987f9daa571c9cdbb2716cce51c015.gif)


