目录
- 环境信息
- 搭建npm仓库
- 创建存储位置
- 创建proxy仓库
- 创建hosted仓库
- 创建group仓库
- 配置域
- 下载及上传
- 登录
- 下载
- 上传
环境信息
- nexus: 3.29.2-02
- node: v14.18.2
- npm: 6.14.15
搭建npm仓库
创建存储位置
这一步不是必须的,可以跟之前创建的复用
依次打开 [设置] -> [ Blob Stores] -> [Create blob store] 填入name并确认 [Create blob store](path默认会自动填充,可根据需要进行修改)

创建proxy仓库
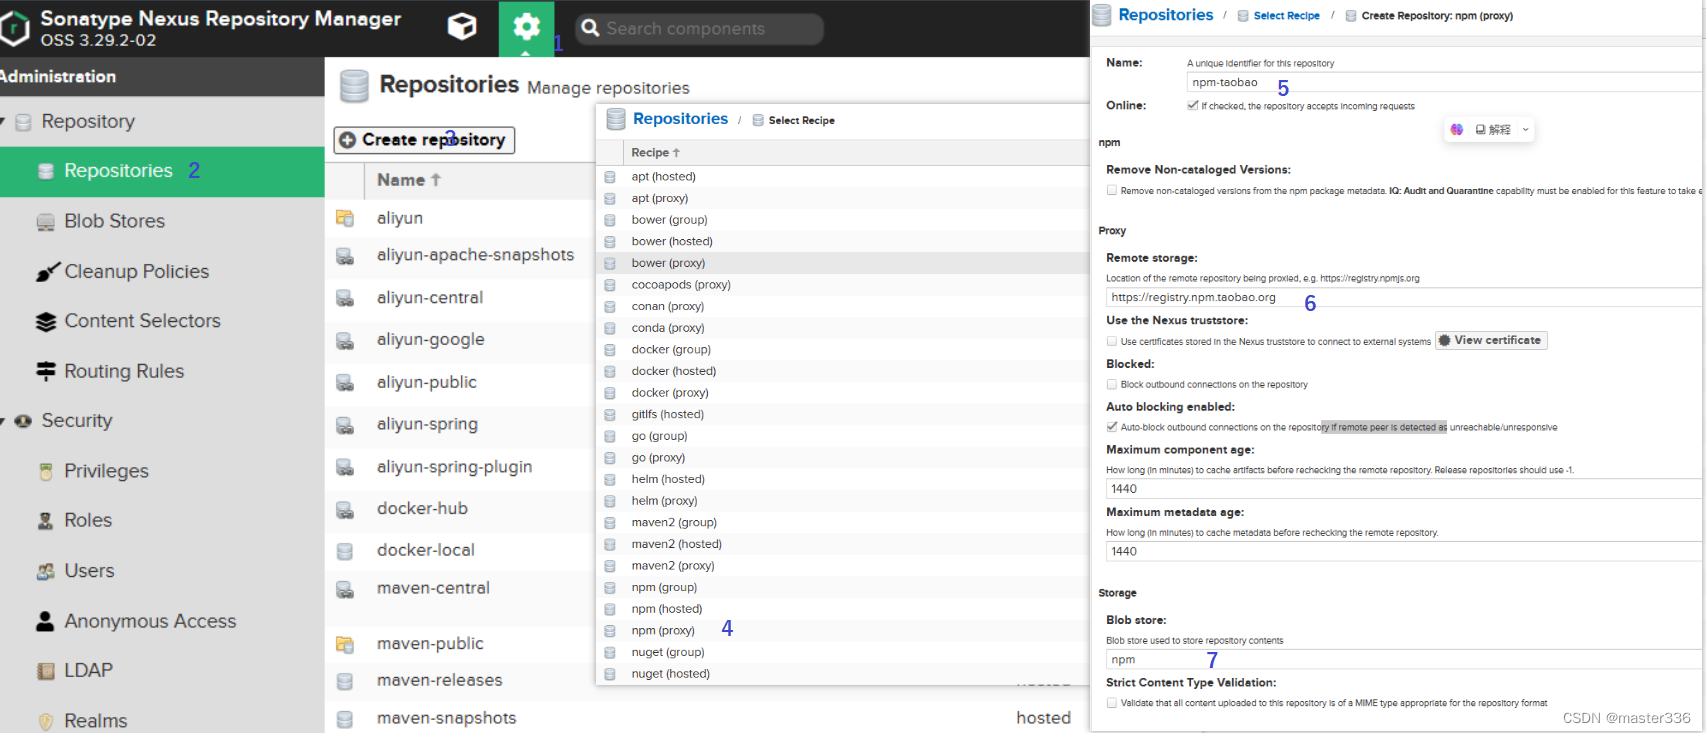
依次打开 [设置] -> [ Repositories] -> [Create repository] -> 选择 [npm(proxy)]类型 打开新增页面, 填入name、url并选择**[blob store](可以选择上一步中创建的) ,点击[Create repository]** 确认即可
创建hosted仓库
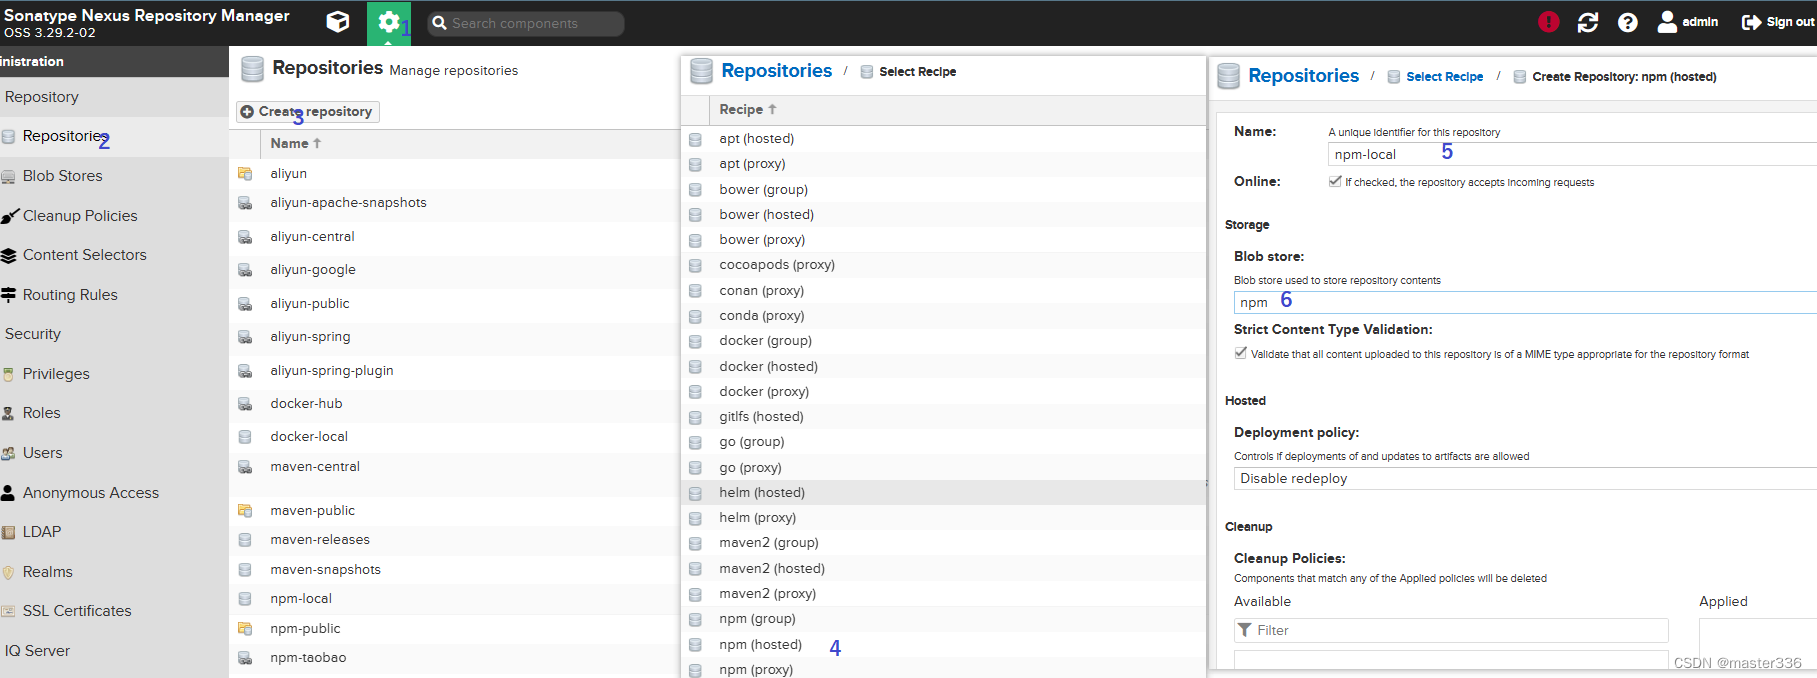
依次打开 [设置] -> [ Repositories] -> [Create repository] -> 选择 [npm(hosted)]类型 打开新增页面, 填入name、选择**[blob store](可以选择上上一步中创建的存储位置) ,点击[Create repository]** 确认即可
创建group仓库
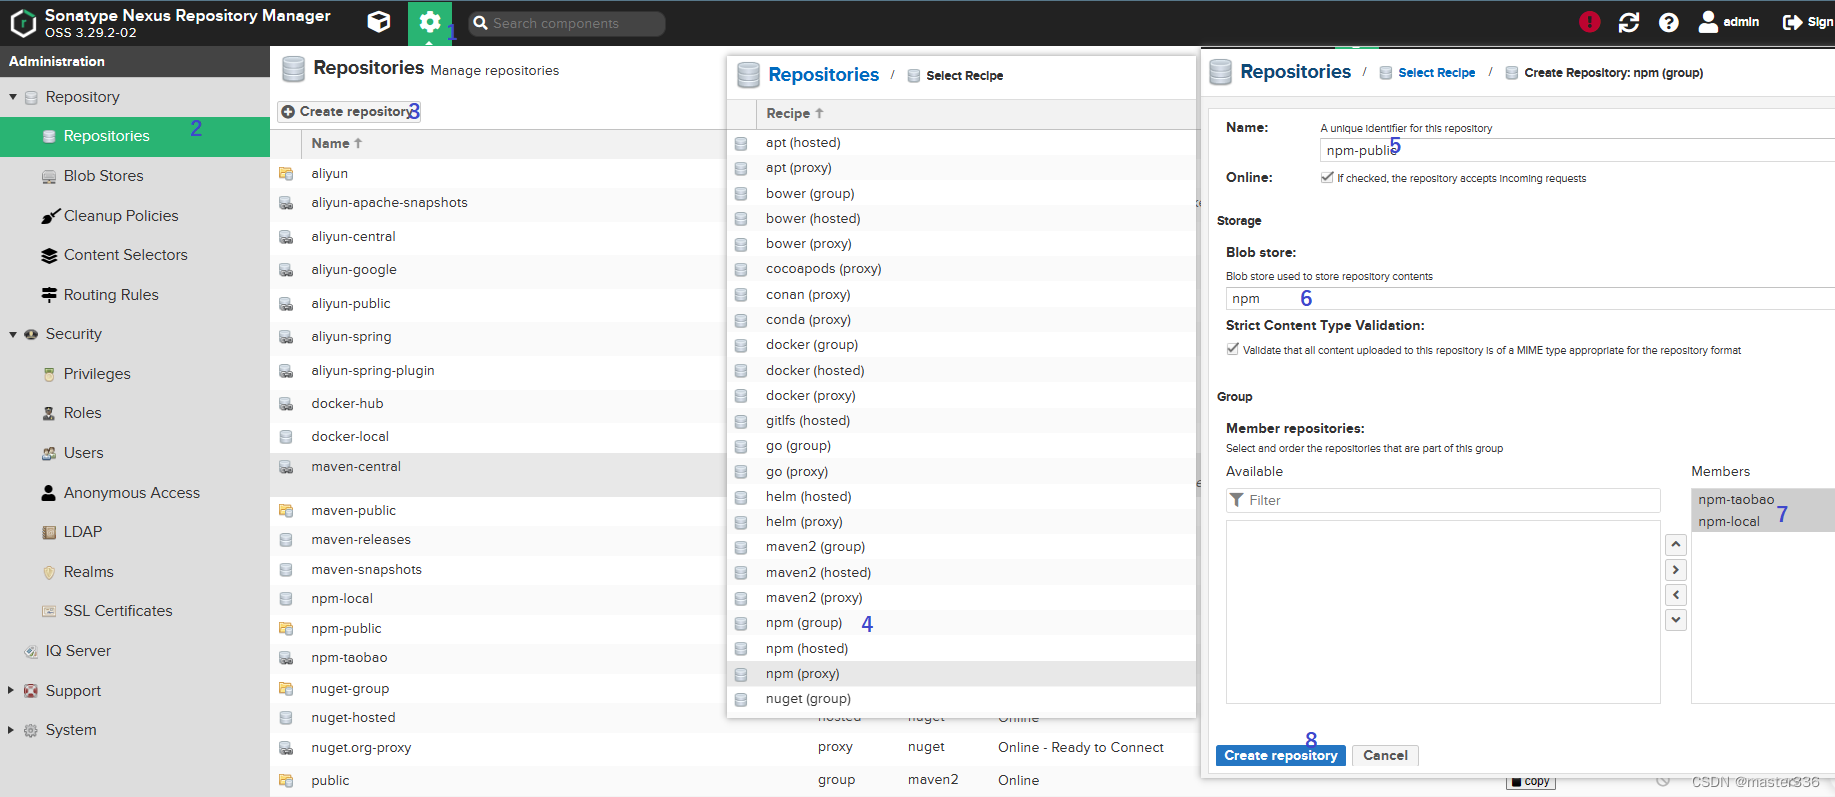
依次打开 [设置] -> [ Repositories] -> [Create repository] -> 选择 [npm(group)]类型 打开新增页面, 填入name、选择 [blob store] (可以选择上上上一步中创建的存储位置) ,从可用列表中选中上一步添加的proxy\hosted类型的仓库,并点击 [>] 添加到右侧,然后点击 [Create repository] 确认即可
配置域
这一步配置主要为了在使用时认证使用,如不配置将报如下错误
npm ERR! code E401
npm ERR! Unable to authenticate, need: BASIC realm="Sonatype Nexus Repository Manager"

npm ERR! A complete log of this run can be found in:
npm ERR!     C:\Users\**\AppData\Roaming\npm-cache\_logs\2023-06-27T14_30_31_628Z-debug.log
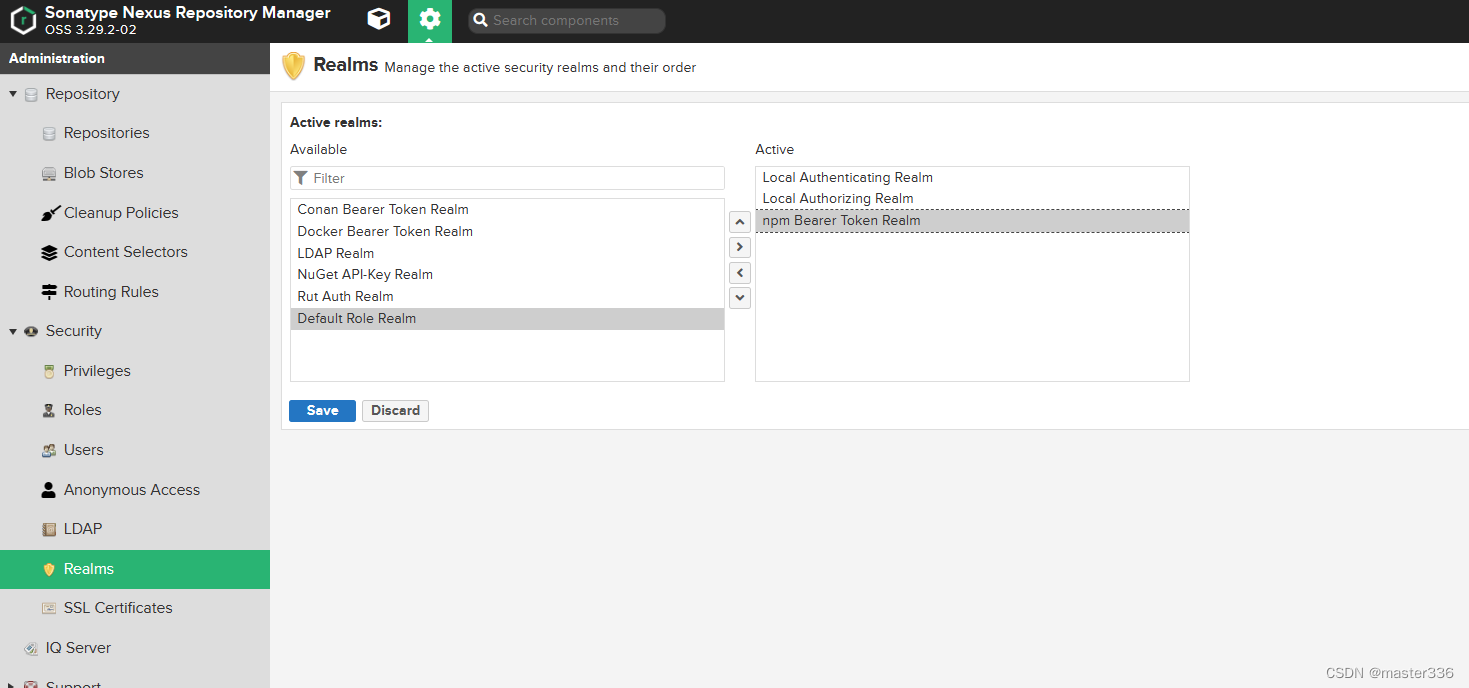
依次打开 [设置] -> [ Security] -> [Realms ],从可用列表中选中 [npm Bearer Token Realm] ,并点击 [>] 添加到右侧,然后点击 [Save] 确认即可
下载及上传
登录
如允许了匿名访问可忽略
使用如下依次设置私服地址及登录
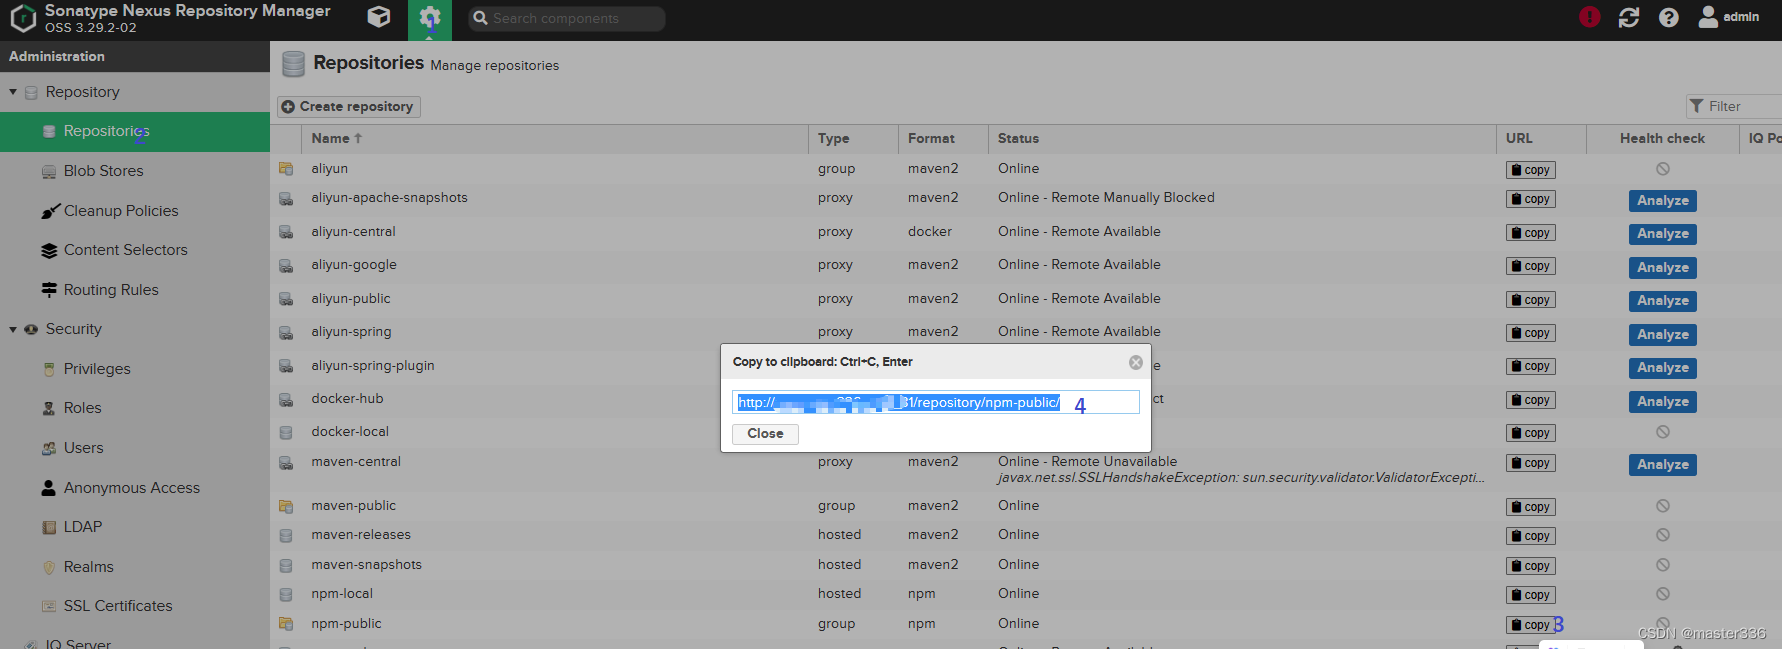
#设置私服地址 (私服地址可从仓库列表中获得)
npm config set registry http://192.168.1.11:8081/repository/npm-public/
#登录私服
npm login --registry http://192.168.1.11:8081/repository/npm-public/
获取私服地址
登录过程

下载
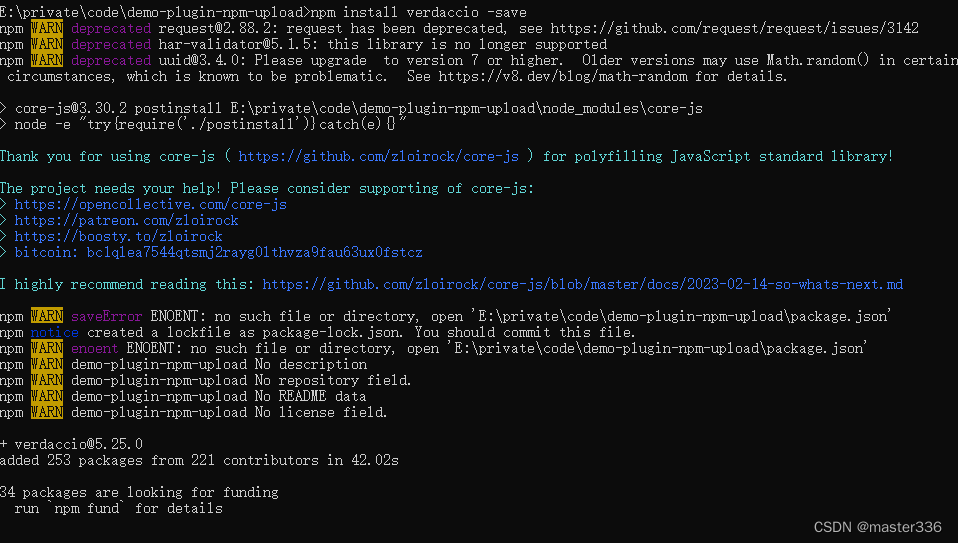
以 安装verdaccio为例
执行如下命令
# 安装插件
npm install verdaccio --save
安装过程
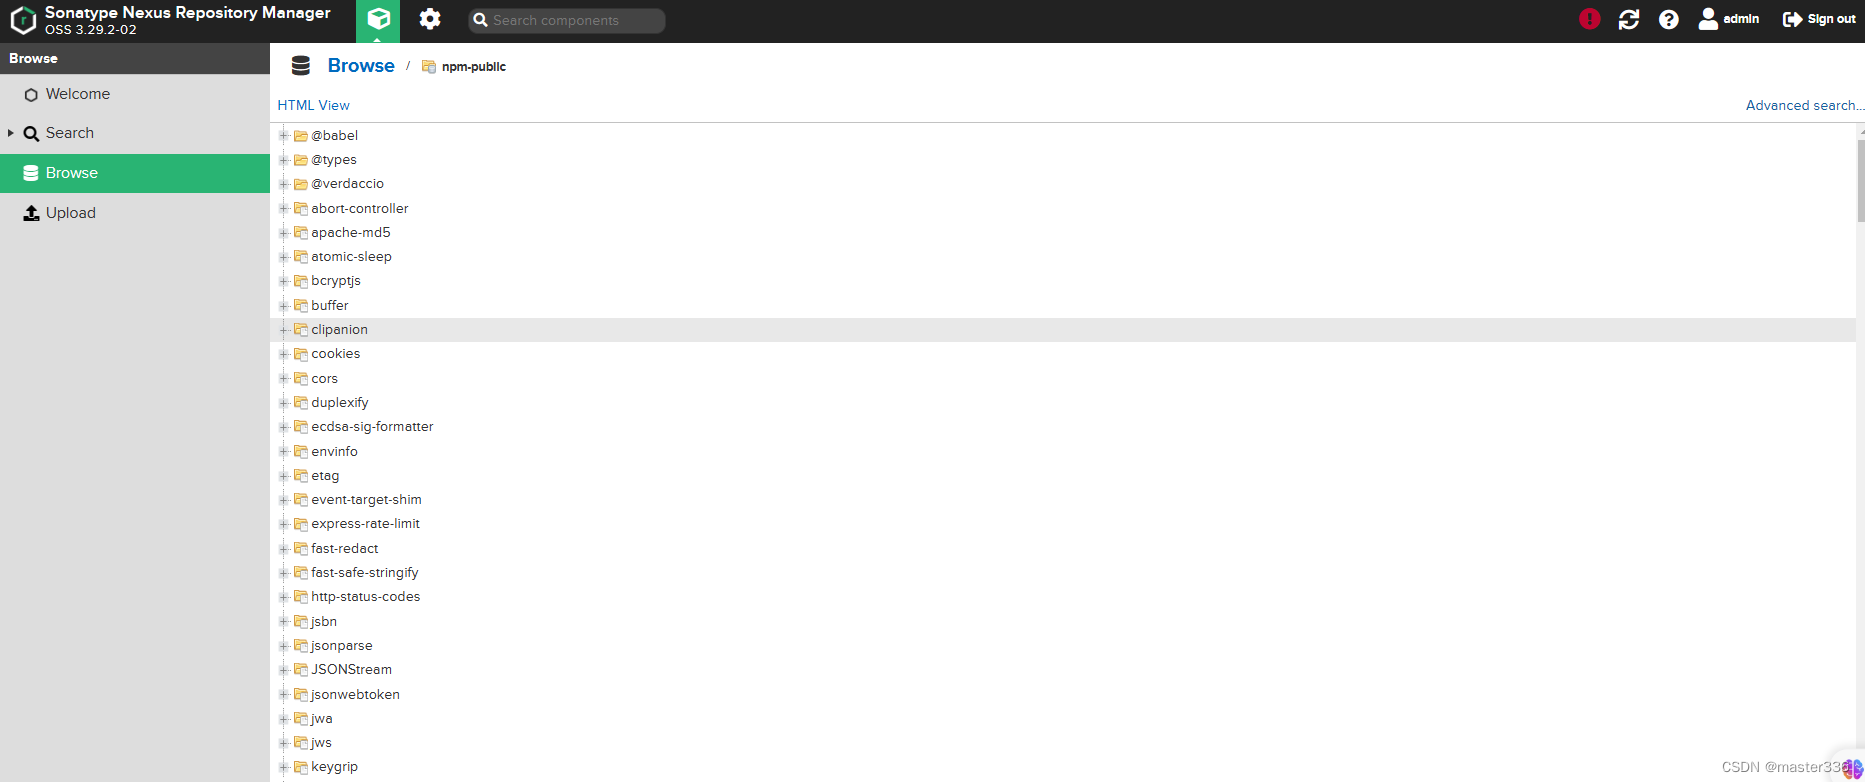
安装完毕后public 仓库内容发生变化
上传
以shellsubstitute插件源码为例
shellsubstitute源码下载地址: https://github.com/featurist/shellsubstitute/archive/refs/heads/master.zip
下载依赖包时使用的group类型的仓库,按其内顺序依次查找,当上传时须上传到hosted类型仓库,虽然两个仓库ip、端口一致,但仍需要进行登录操作
依次执行如下命令
#git拉取代码(直接下载包也行)
git clone  https://gh.api.99988866.xyz/https://github.com/featurist/shellsubstitute.git
#版本迭代
npm version patch
# 登录到hosted类型的仓库
npm login --registry http://192.168.1.11:8081/repository/npm-local/
# 发布到hosted类型的仓库
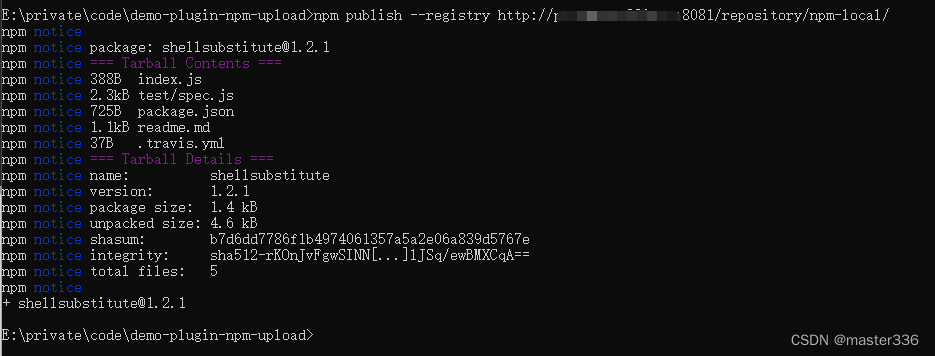
npm publish --registry http://192.168.1.11:8081/repository/npm-local/
#
上传效果
上传后hosted仓库

