前言
在爬虫开发中,我们经常会碰到ip封禁,访问限制的问题,今天主要分享个我在开发中用到过比较好用的ip代理池,希望有需要的小伙伴提供到帮助~
简介
ProxyPool是一个简易高效的代理池,他可以在windows上搭配redis使用,也可以在Docker使用
提供如下功能:
1、定时抓取免费代理网站,简易可扩展。
2、使用 Redis 对代理进行存储并对代理可用性进行排序。
3、定时测试和筛选,剔除不可用代理,留下可用代理。
4、提供代理 API,随机取用测试通过的可用代理。
下载地址:https://github.com/Python3WebSpider/ProxyPool.git
运行方式
1、Docker
如果使用 Docker,则需要安装如下环境:
Docker
Docker-Compose
安装方法自行搜索即可。
官方 Docker Hub 镜像:germey/proxypool
Docker 运行
只需运行 docker-compose up 即可
运行结果类似如下:
redis        | 1:M 19 Feb 2020 17:09:43.940 * DB loaded from disk: 0.000 seconds
redis        | 1:M 19 Feb 2020 17:09:43.940 * Ready to accept connections
proxypool    | 2020-02-19 17:09:44,200 CRIT Supervisor is running as root.  Privileges were not dropped because no user is specified in the config file.  If you intend to run as root, you can set user=root in the config file to avoid this message.
proxypool    | 2020-02-19 17:09:44,203 INFO supervisord started with pid 1
proxypool    | 2020-02-19 17:09:45,209 INFO spawned: 'getter' with pid 10
proxypool    | 2020-02-19 17:09:45,212 INFO spawned: 'server' with pid 11
proxypool    | 2020-02-19 17:09:45,216 INFO spawned: 'tester' with pid 12
proxypool    | 2020-02-19 17:09:46,596 INFO success: getter entered RUNNING state, process has stayed up for > than 1 seconds (startsecs)
proxypool    | 2020-02-19 17:09:46,596 INFO success: server entered RUNNING state, process has stayed up for > than 1 seconds (startsecs)
proxypool    | 2020-02-19 17:09:46,596 INFO success: tester entered RUNNING state, process has stayed up for > than 1 seconds (startsecs)
可以看到 Redis、Getter、Server、Tester 都已经启动成功。
这时候访问 http://localhost:5555/random 即可获取一个随机可用代理。
当然你也可以选择自己 Build,直接运行如下命令即可:
docker-compose -f build.yaml up
如果下载速度特别慢,可以自行修改 Dockerfile,修改:
- RUN pip install -r requirements.txt
+ RUN pip install -r requirements.txt -i https://pypi.douban.com/simple
2、常规方式
常规方式要求有 Python 环境、Redis 环境,具体要求如下:
Python>=3.6
Redis
常规方式运行
本地安装 Redis、Docker 启动 Redis、远程 Redis 都是可以的,只要能正常连接使用即可。
首先可以需要看一下环境变量,代理池会通过环境变量读取这些值。
设置 Redis 的环境变量有两种方式,
一种是分别设置 host、port、password,
另一种是设置连接字符串,设置方法分别如下:
设置 host、port、password,如果 password 为空可以设置为空字符串,示例如下:
export PROXYPOOL_REDIS_HOST='localhost'
export PROXYPOOL_REDIS_PORT=6379
export PROXYPOOL_REDIS_PASSWORD=''
export PROXYPOOL_REDIS_DB=0
1、首先使用 git clone 将源代码拉到你本地, https://github.com/Python3WebSpider/ProxyPool.git
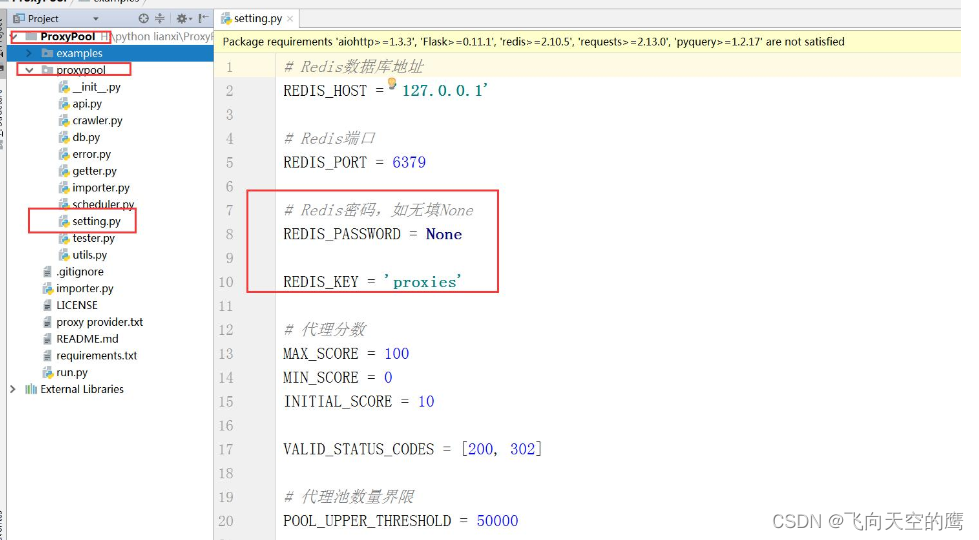
2.进入proxypool目录,修改settings.py文件,PASSWORD为Redis密码,如果为空,则设置为None。(新装的redis一般没有密码。)
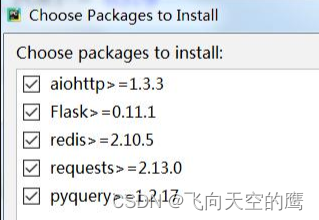
3.接着在你 clone 下来的文件目录中(就是这个ProxyPool存的电脑路径 )安装相关所需的依赖包:
pip install -r requirements.txt
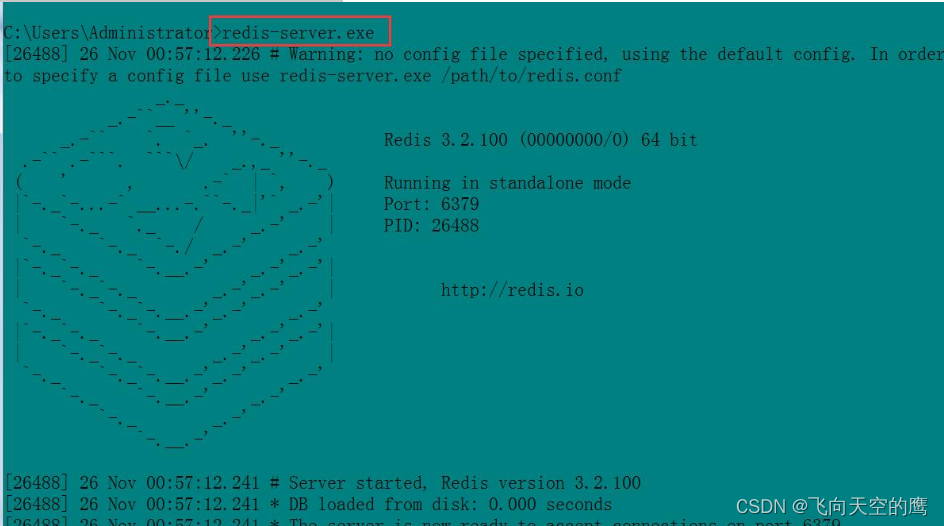
4.接下来开启你的 redis服务,直接cmd 打开dos窗口,运行:redis-server.exe
即可开启redis服务器。redis 的默认端口就是 6379
5.接着就可以运行 run.py 了。
运行之后会启动 Tester、Getter、Server,这时访问 http://localhost:5555/random 即可获取一个随机可用代理。
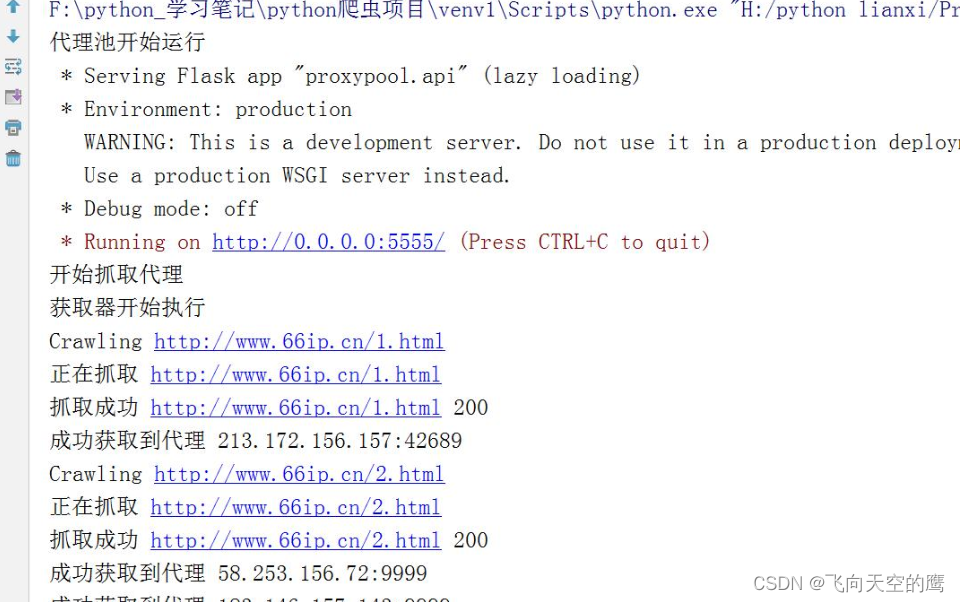
注意此处可以用两种方式运行代理池,一种是 Tester、Getter、Server 全部运行,另一种是按需分别运行。
或者如果你弄清楚了代理池的架构,可以按需分别运行,命令如下:
python3 run.py --processor getter
python3 run.py --processor tester
python3 run.py --processor server
6.运行 run.py 以后,你可以打开你的redis管理工具,或者进入redis里面查看,这时候在你的 redis 中就会存入很多已经爬取到的代理 ip 了
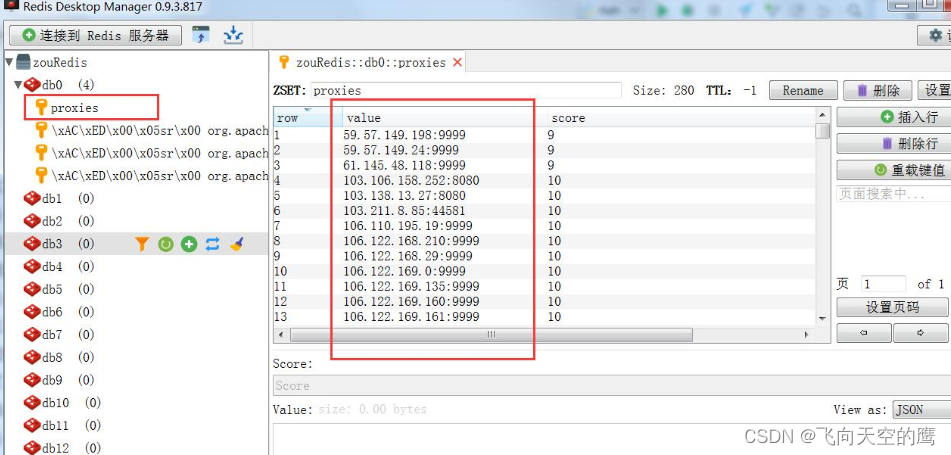
7.项目跑起来之后保持运行,此时redis里面存了ip,就可以访问这个代理池了。
在上面的图中,可以看到有这么一句话 Running on http://0.0.0.0:5555/ (Press CTRL+C to quit)
这就是告诉我们随机访问地址URL是多少了
你可以在浏览器中随机获取一个代理 ip 地址:http://0.0.0.0:5555/random
你就浏览器输入:

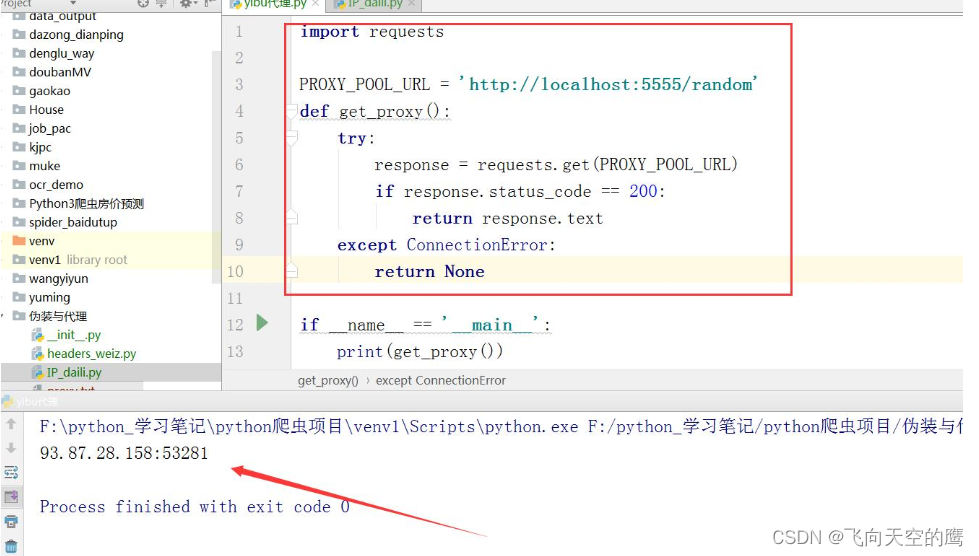
Python获取代码
import requests

PROXY_POOL_URL = "http://localhost:5555/random"
def get_proxy():
	try:
		response = requests.get(PROXY_POOL_URL)
		if response.status_code == 200:
			return response.text
	except ConnectionError:
		return None

if name == ‘main’:
	print(get_proxy())
正常请求如下图:
好了,自此你本地ip代理池就搭建好了,希望可以帮助到大家~

