目录
- 创建一个Lamda函数
- 用Lamda函数控制启停EC2实例
- 创建一台EC2实例
- 创建角色
- 创建lamda函数
- 使用Amazon EventBridge计划启停实例
- 创建EventBridge
- 用户往S3存储桶上传图片文件,触发Lambda函数,将图片压缩并上传至另一个存储桶
- 创建两个存储桶
- 通过Cloudformation堆栈创建IAM角色
- 创建Lambda函数
创建一个Lamda函数
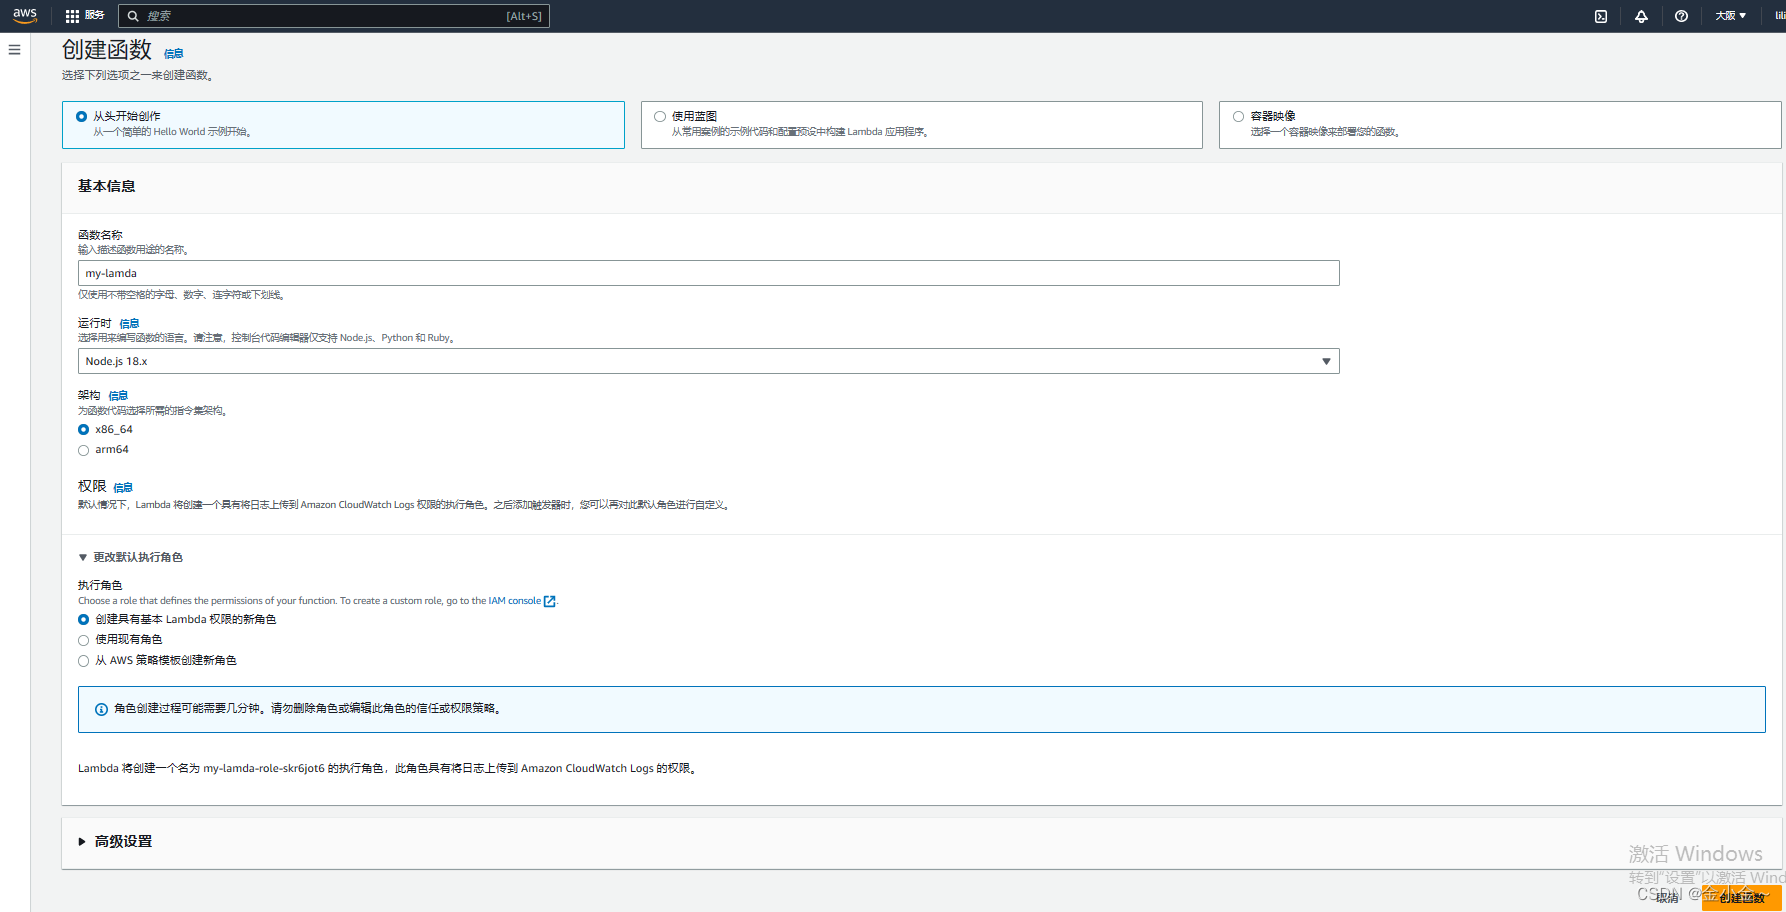
点击【创建函数】按钮

自定义【函数名称】
选择用来编写函数的语言【运行时】,【架构】,【执行角色】后,点击【创建函数】按钮来创建一个Lamda函数
高级设置保持默认即可
函数创建好后显示如下
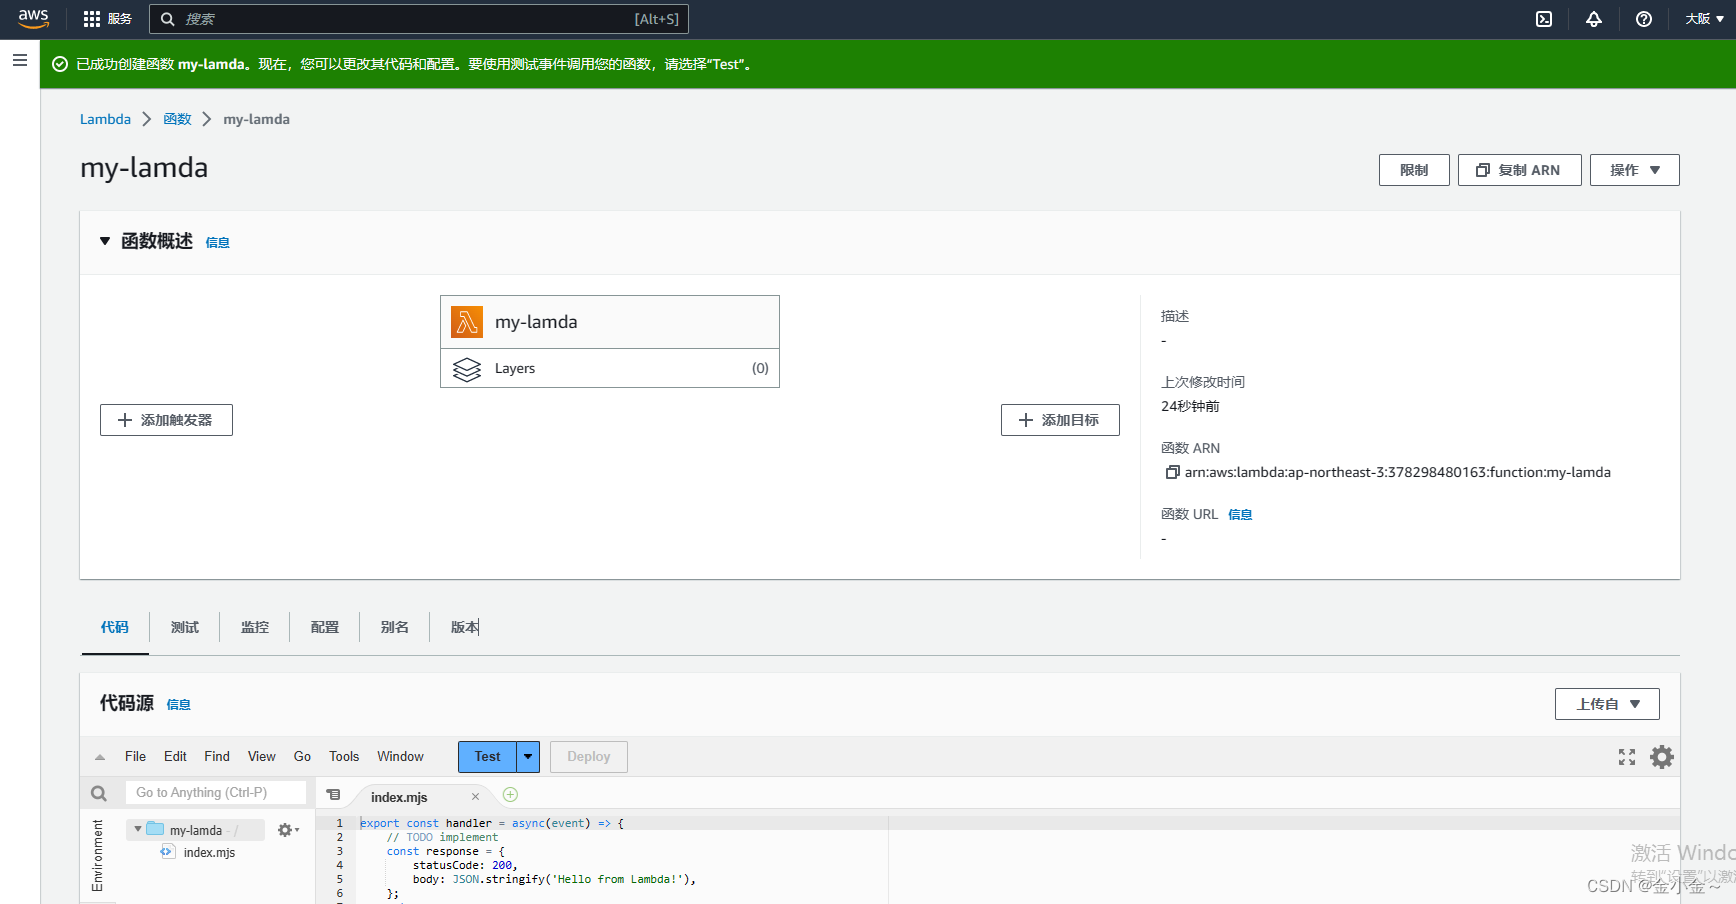
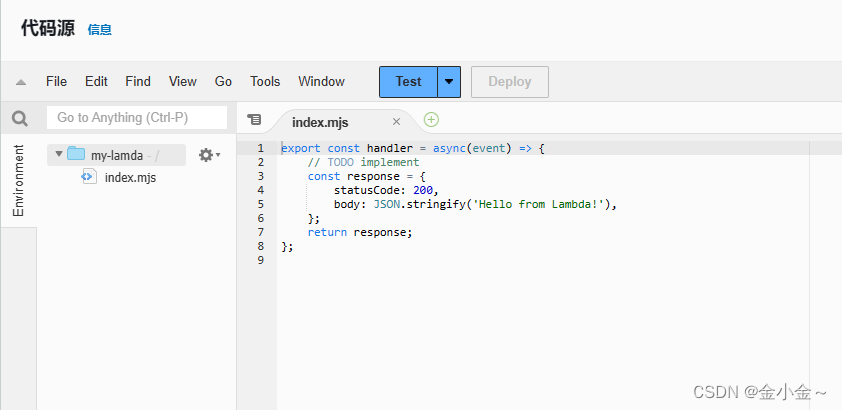
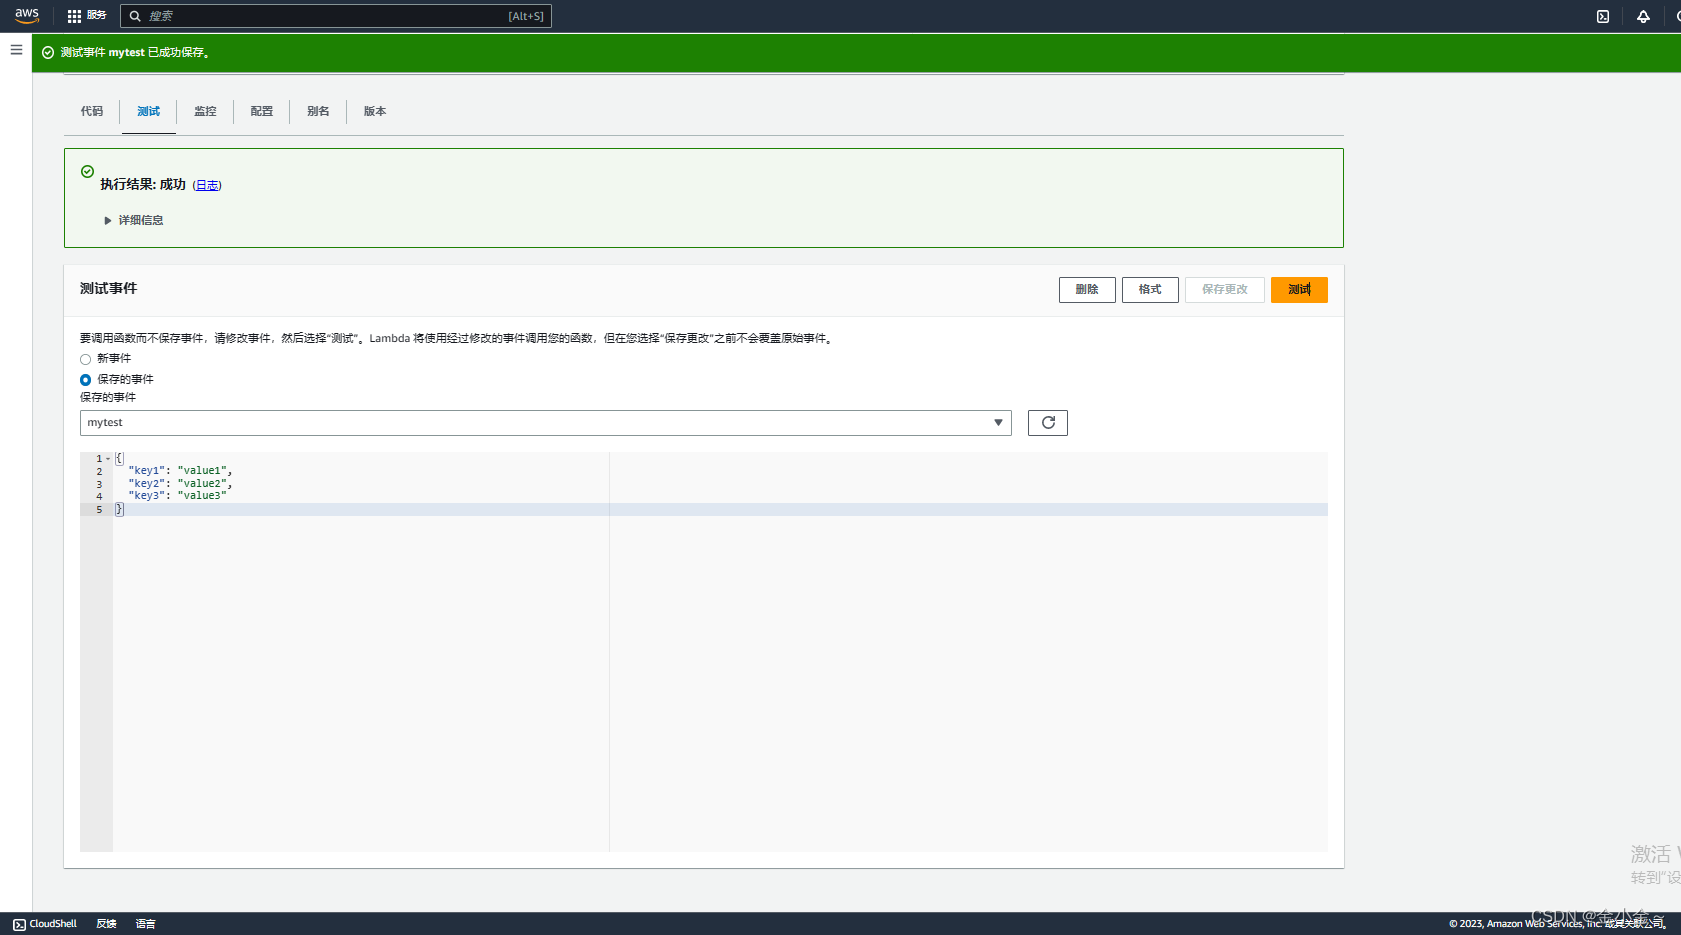
点击【测试】选项卡,选择测试【模板】,填写自定义测试【名称】,点击【保存更改】,【测试】按钮
显示测试成功
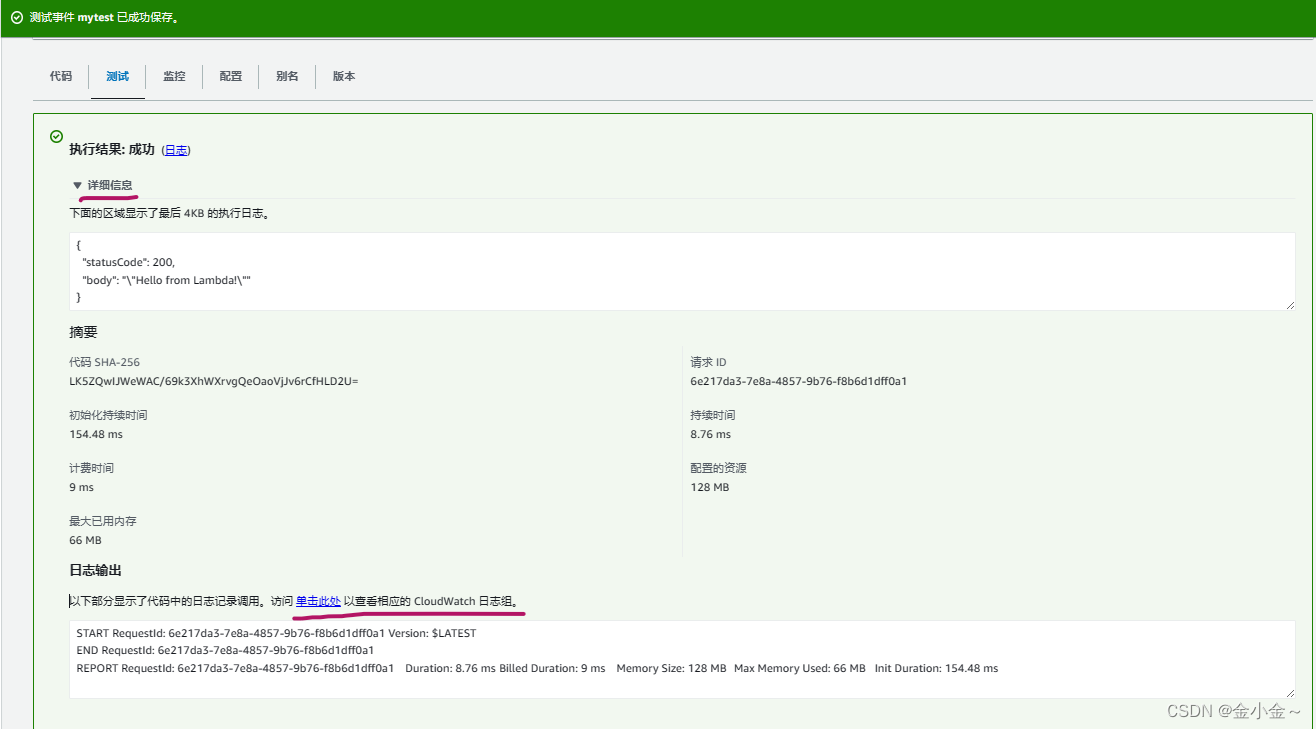
点击详细信息,可以查看运行的详情,点击【单击此处】可以查看日志组

会自动创建一个角色

用Lamda函数控制启停EC2实例
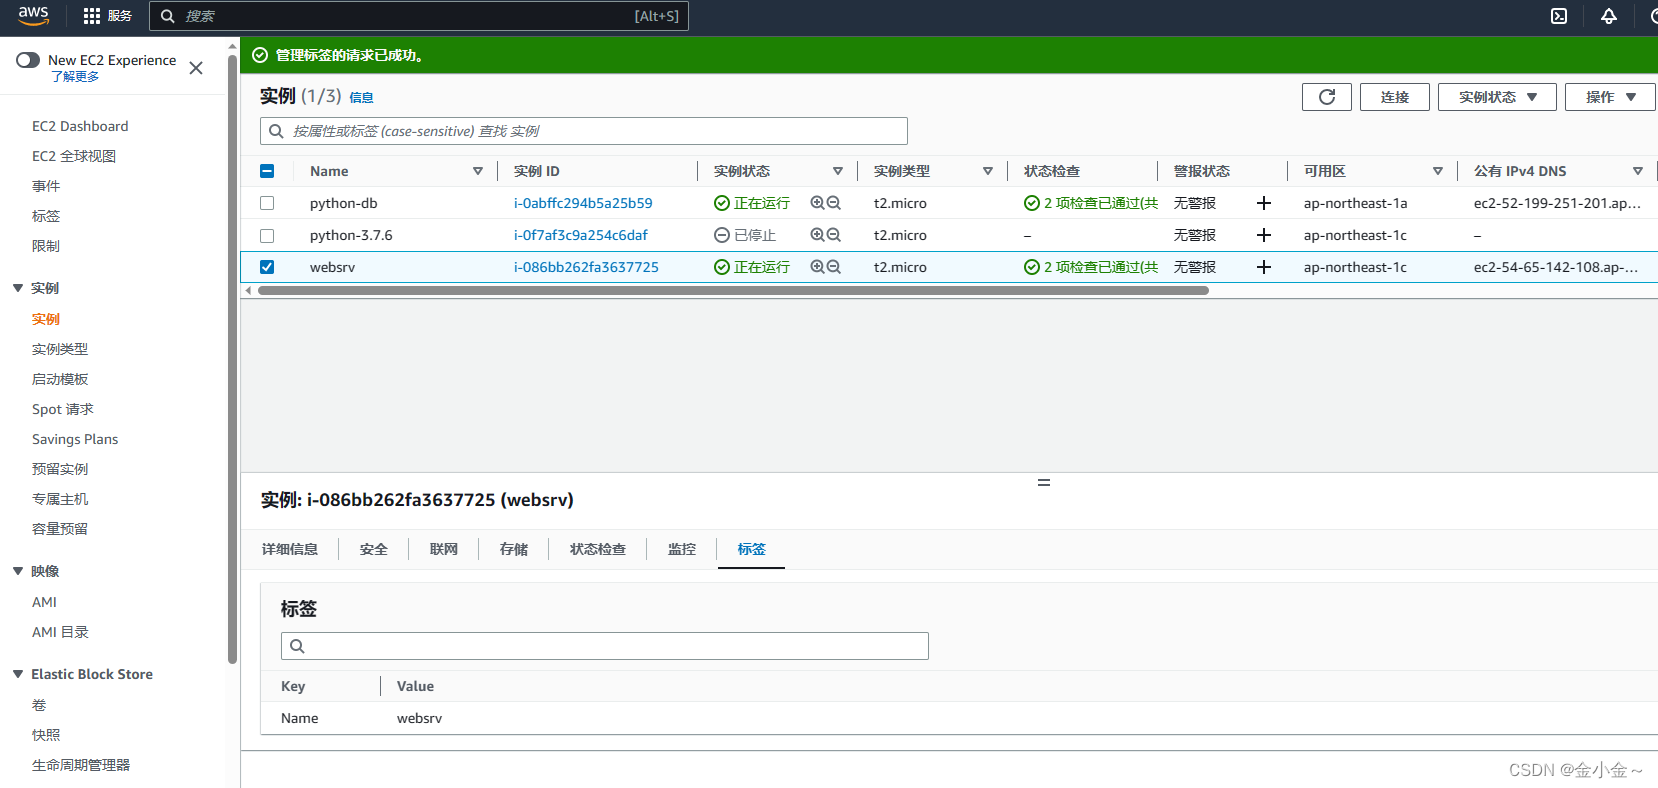
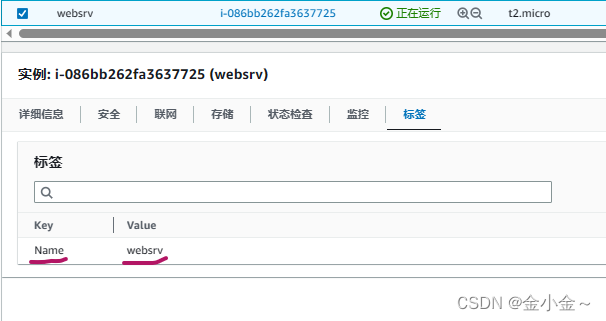
创建一台EC2实例
创建角色
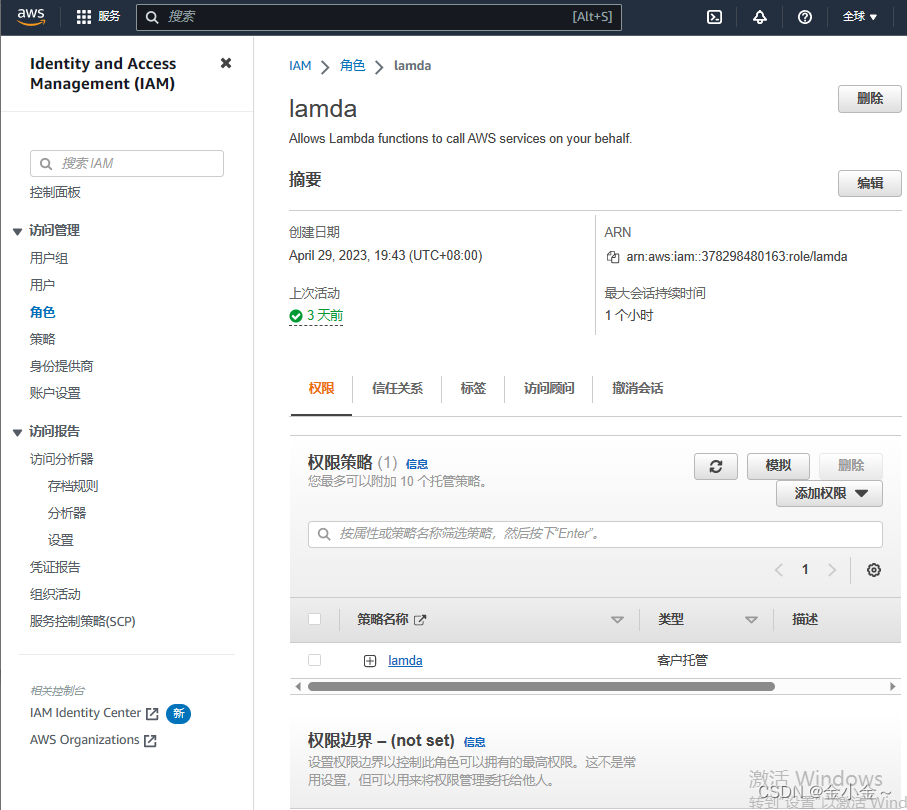
创建一个 Role 服务为 lambda 附加新创建的策略
【角色】名:自定义,此处定义为:lamda
【策略】:参照以下示例
{
 "Version": "2012-10-17",
 "Statement": [
 {
 "Effect": "Allow",
 "Action": [
 "logs:CreateLogGroup",
 "logs:CreateLogStream",
 "logs:PutLogEvents"
 ],
 "Resource": "arn:aws:logs:*:*:*"
 },
 {
 "Effect": "Allow",
 "Action": [
 "ec2:DescribeInstances",
 "ec2:Start*",
 "ec2:Stop*",
 "ec2:DescribeInstanceStatus"
 ],
 "Resource": "*"
 }
 ]
}
创建lamda函数
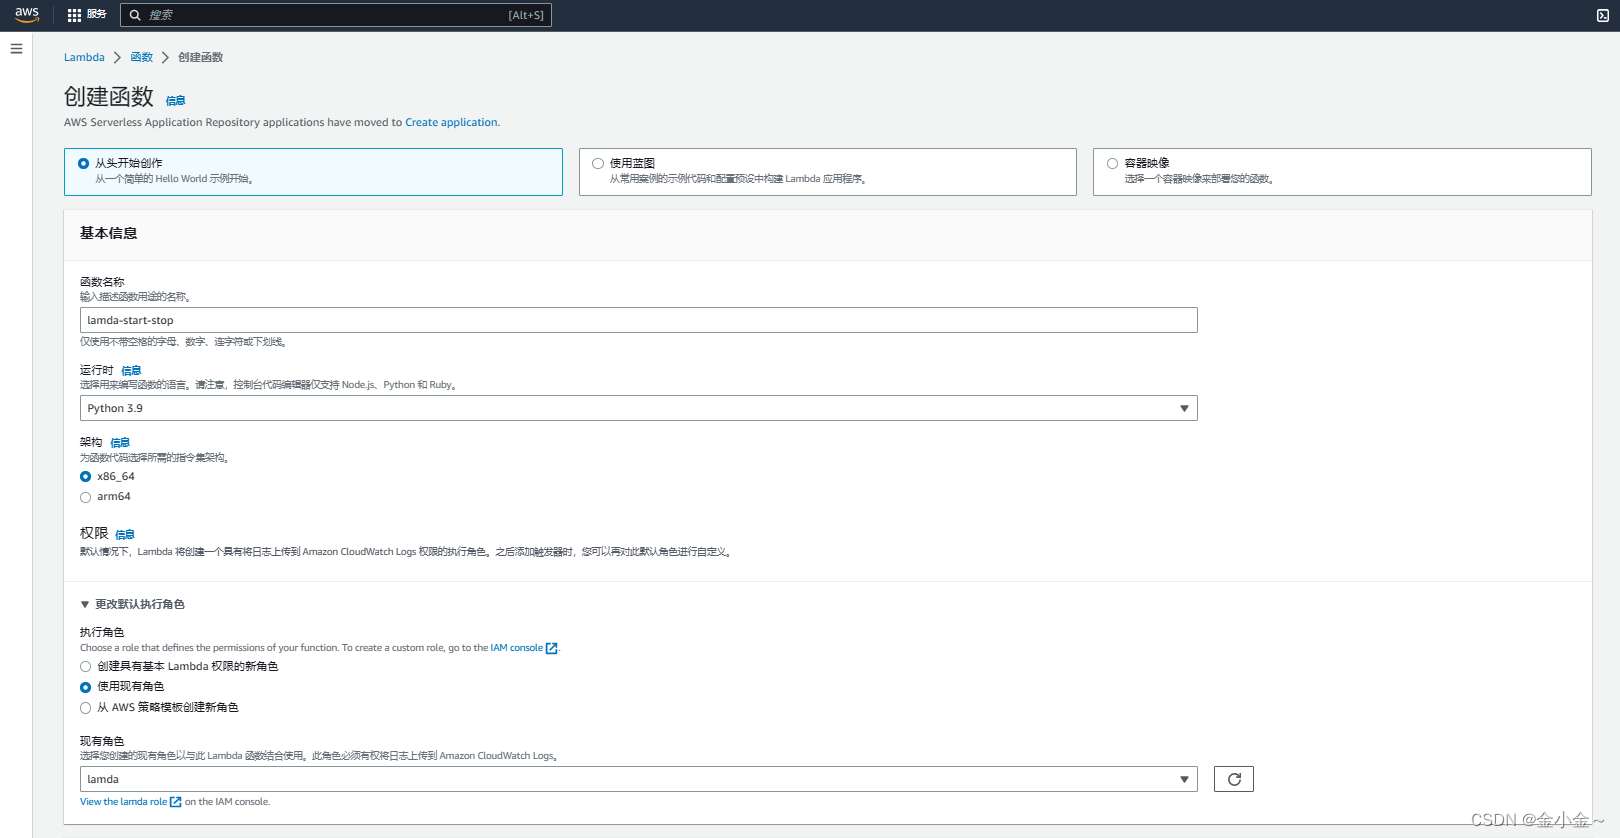
【函数名称】:自定义即可
【运行时】:此处我们选择Python3.9
【执行角色】:选择上一步骤中创建好的角色[lamda]
准备就绪后,点击【创建函数】按钮来创建一个lamda函数
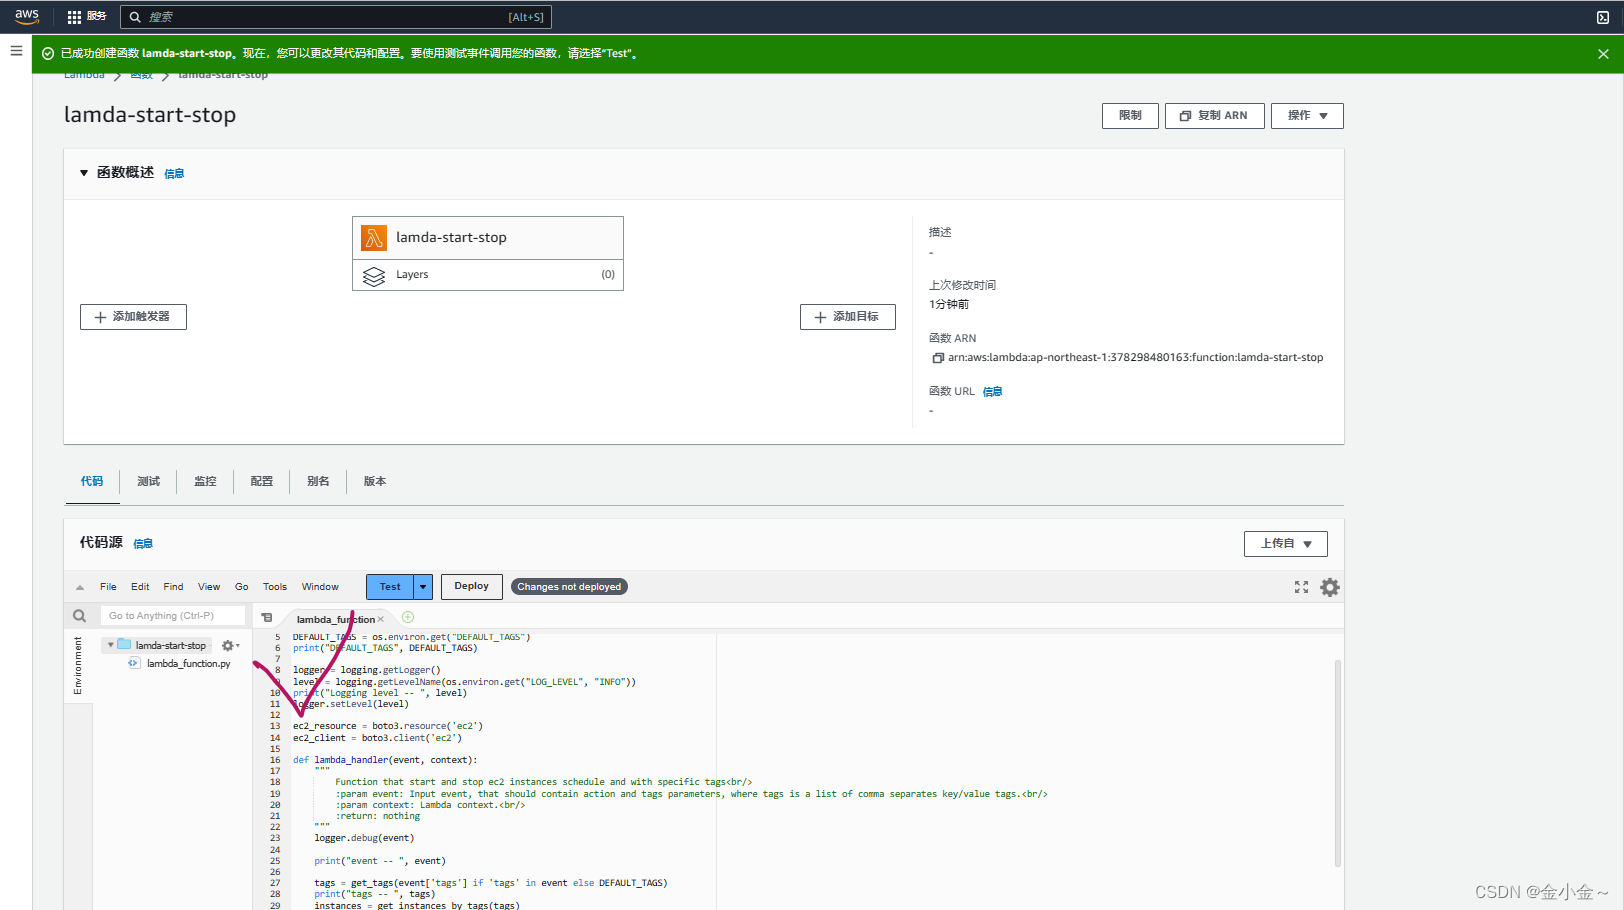
将准备好的python代码拷贝到如下位置后,点击【Deploy】按钮进行更新
import os
import boto3
import logging

DEFAULT_TAGS = os.environ.get("DEFAULT_TAGS")
print("DEFAULT_TAGS", DEFAULT_TAGS)

logger = logging.getLogger()
level = logging.getLevelName(os.environ.get("LOG_LEVEL", "INFO"))
print("Logging level -- ", level)
logger.setLevel(level)

ec2_resource = boto3.resource('ec2')
ec2_client = boto3.client('ec2')

def lambda_handler(event, context):
    """
        Function that start and stop ec2 instances schedule and with specific tags<br/>
        :param event: Input event, that should contain action and tags parameters, where tags is a list of comma separates key/value tags.<br/>
        :param context: Lambda context.<br/>
        :return: nothing
    """
    logger.debug(event)

    print("event -- ", event)

    tags = get_tags(event['tags'] if 'tags' in event else DEFAULT_TAGS)
    print("tags -- ", tags)
    instances = get_instances_by_tags(tags)

    if not instances:
        logger.warning('No instances available with this tags')
    else:
        if event['action'] == 'start':
            ec2_client.start_instances(InstanceIds=instances)
            logger.info('Starting instances.')
        elif event['action'] == 'stop':
            ec2_client.stop_instances(InstanceIds=instances)
            logger.info('Stopping instances.')
        else:
            logger.warning('No instances availables with this tags')


def get_tags(tags):
    """
        Method that split comma separated tags and return a formed tags filter<br/>
        :param tags: Comma separated string with the tags values.<br/>
        :return: tags structure
    """
    final_tags = []
    split_tags = tags.split(",")
    for tag in split_tags:
        values = tag.split('=')
        final_tags.append({
            'Name': values[0],
            'Values': [values[1]]
        })
    return final_tags


def get_instances_by_tags(tags):
    """
        Method that filter all ec2 instances and return only the instances with specific tags<br/>
        :param tags: Filter structure with tag values.<br/>
        :return: list of ec2 instances
    """
    response = ec2_resource.instances.filter(Filters=tags)
    print("Response -- ", response)
    for instance in response:
        print("Instance -- ", instance)
    intance_ids = [instance.id for instance in response]
    print("intance_ids -- ", intance_ids)

    return intance_ids
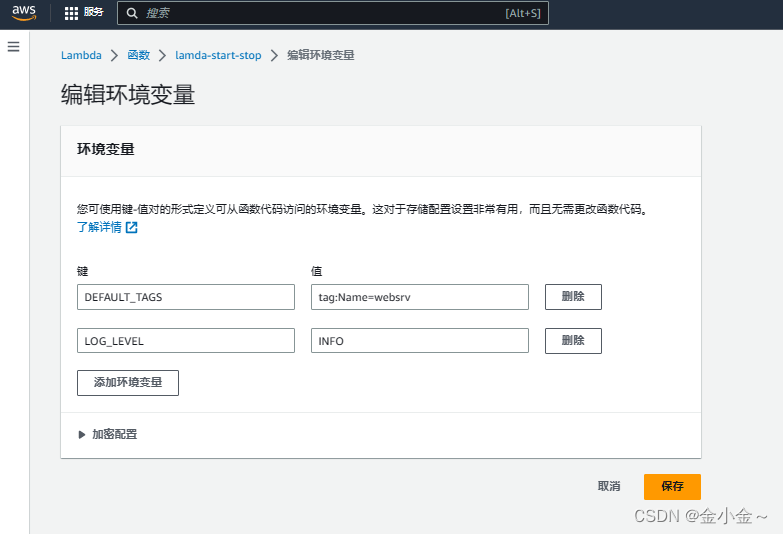
配置>环境变量>添加环境变量,配置环境变量

您可使用键-值对的形式定义可从函数代码访问的环境变量,这对于存储配置设置非常有用,而且无需更改函数代码。
示例:此处的第一对儿【键】,【值】中【键】参照Python代码中的 参数,【键】填EC2实例的标签名
第二对【键】,【值】参照Python代码中的参数
填写完,点击【保存】
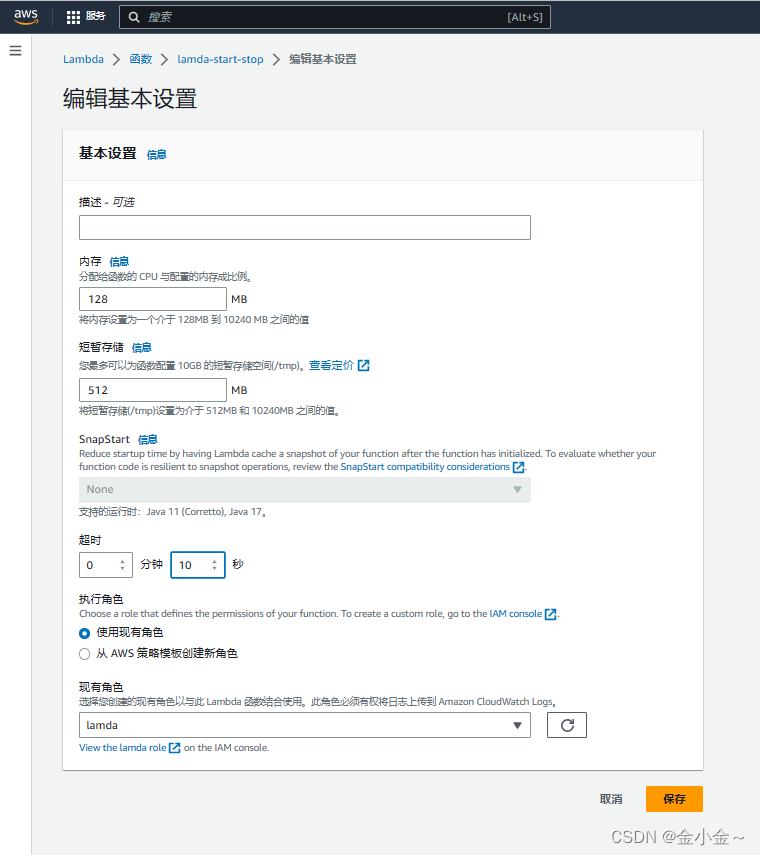
配置>常规配置>编辑
将【超时】时间由[3秒]改为[10秒]
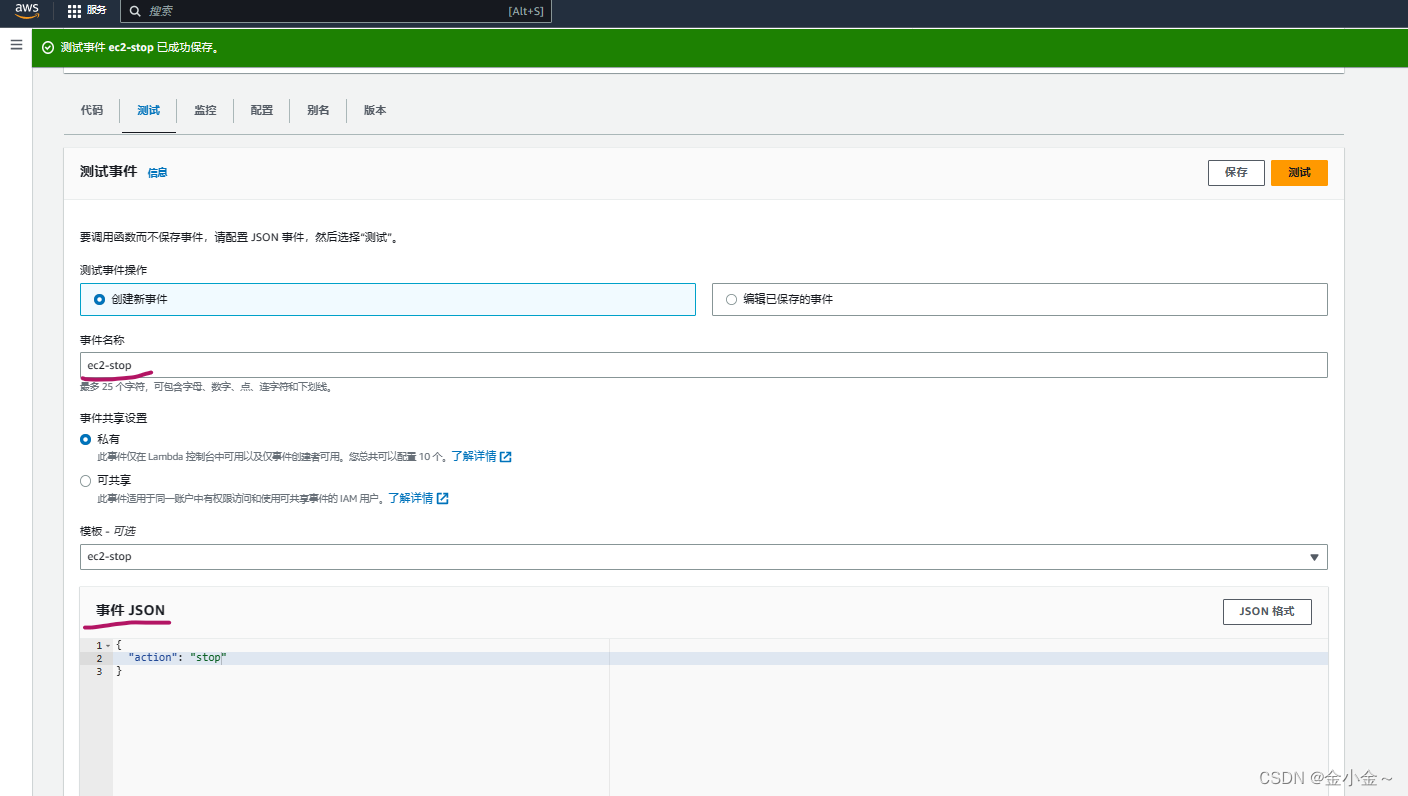
开始进行测试,给事件去一个名字,并添加事件的action为stop,
保存并点击测试选项
【事件名称】:自定义
【时间JSON】:参考下图
{
  "action": "stop"
}
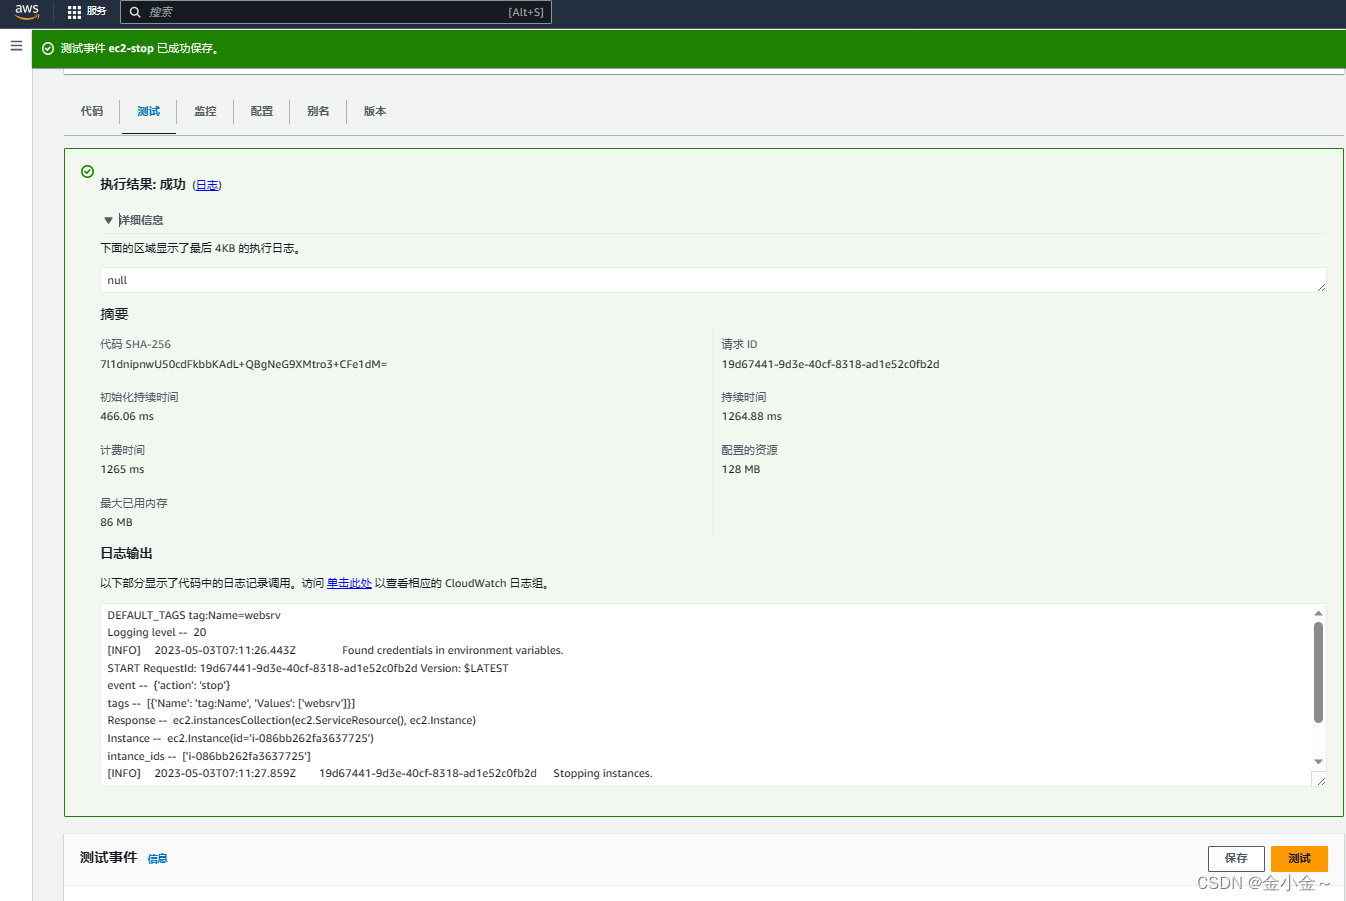
点击【测试】按钮,输入如下详情,并且原本运行中的实例也随机停止

若想开启或者关闭其他实例可以通过编辑时间JSON


使用Amazon EventBridge计划启停实例
创建EventBridge
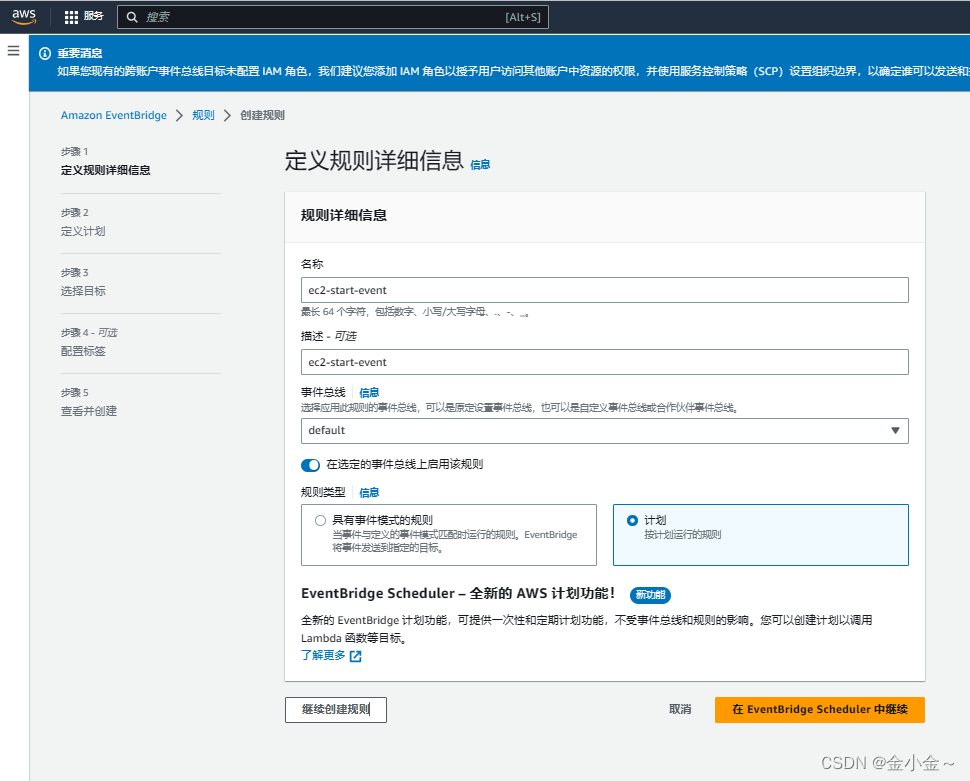
自定义【名称】
自定义【描述】
【规则类型】:计划
点击【在EventBridge Schedular中继续】
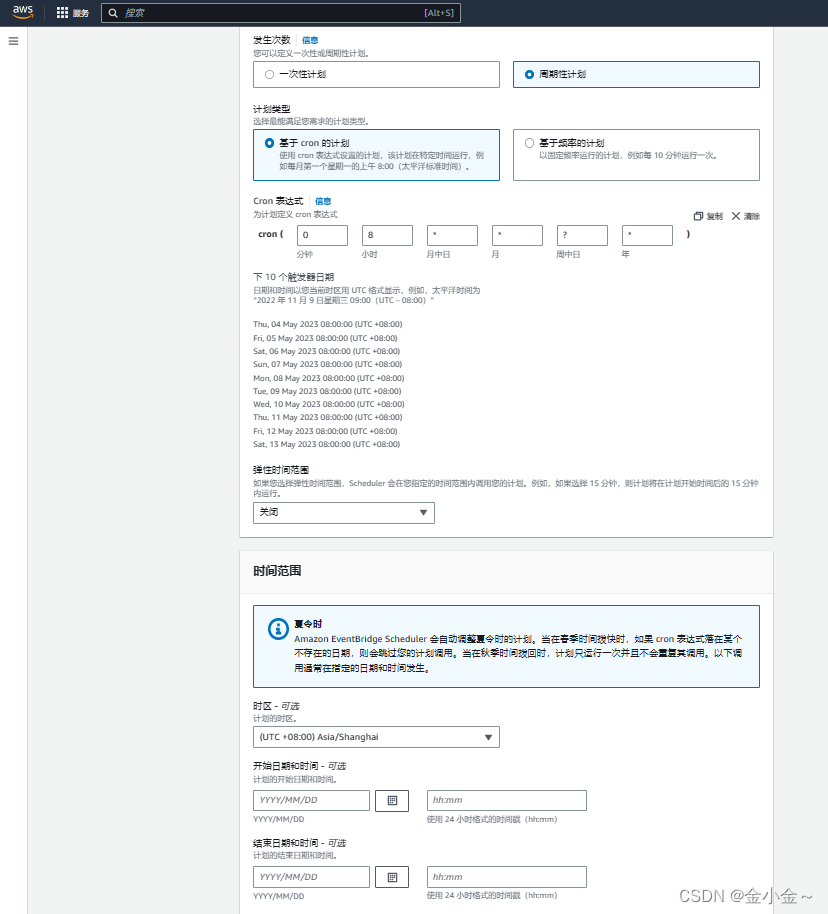
【发生次数】:周期性计划
【计划类型】:基于cron的计划
【cron表达式】:自定义
其他保持默认即可,点击【下一步】
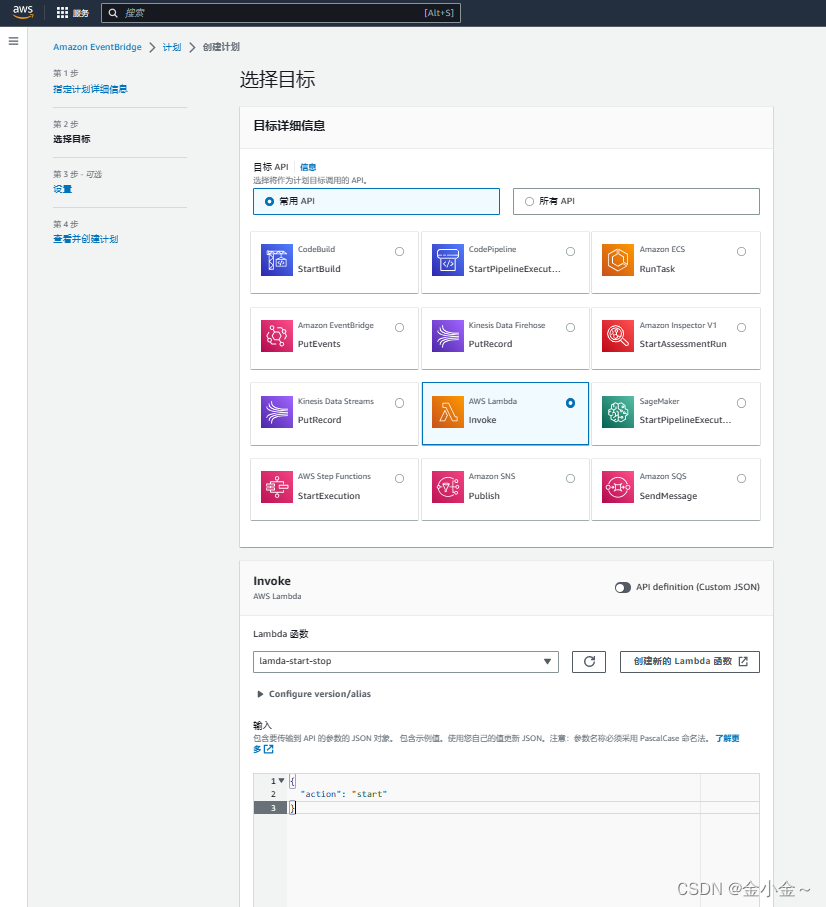
【目标API】:常用API:Lambda
【Lambda函数】:选择一个
【输入】:自定义
其他保持默认即可,点击【下一步】
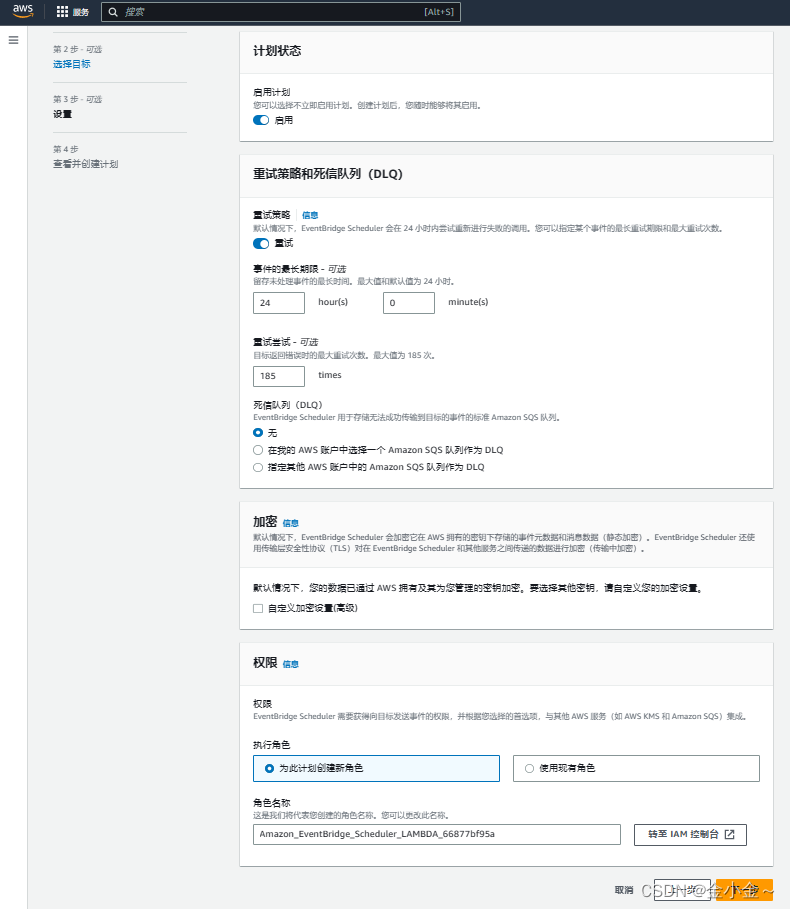
点击【下一步】
点击【创建计划】
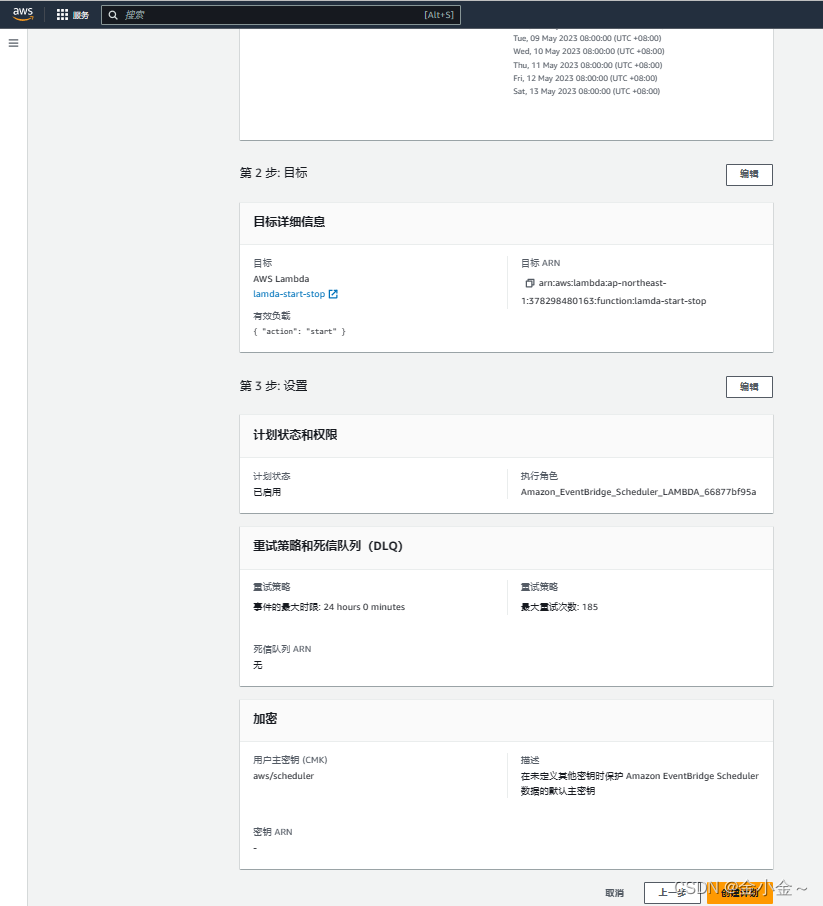
关联的EC2实例将在下一个触发时间进行启用
如果想设置在固定的时间停用,需要再创建一个EventBridge
用户往S3存储桶上传图片文件,触发Lambda函数,将图片压缩并上传至另一个存储桶
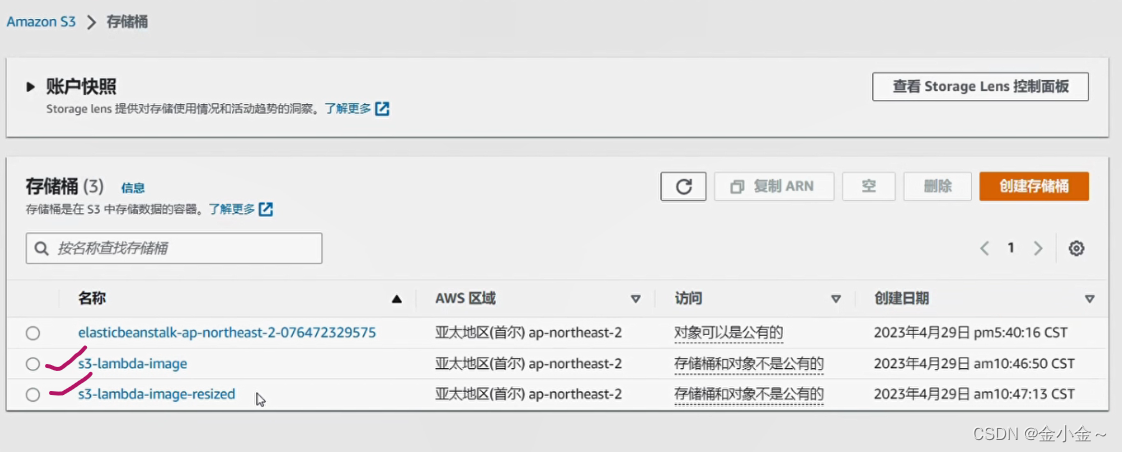
创建两个存储桶
其中XXXresized的存储桶名称涉及到Python函数的调用,命名时需要注意!
通过Cloudformation堆栈创建IAM角色
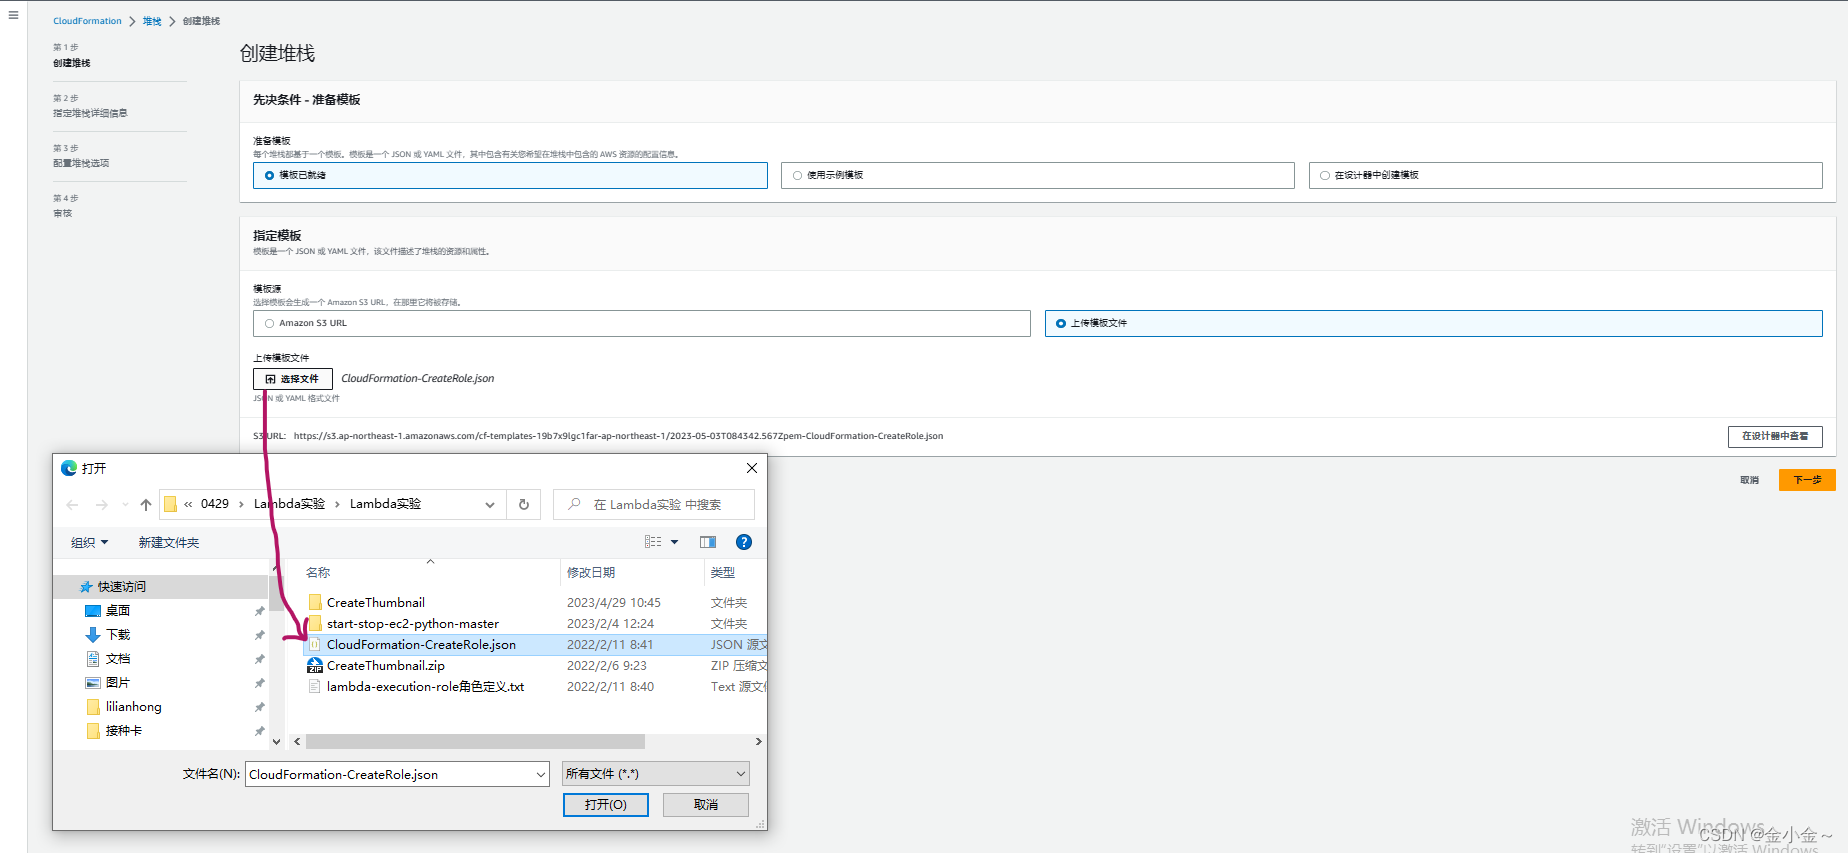
文件详情如下:
AWSTemplateFormatVersion: '2010-09-09'
Resources:
  LambdaRole:
    Type: AWS::IAM::Role
    Properties:
      RoleName: lambda-execution-role
      AssumeRolePolicyDocument:
        Version: '2012-10-17'
        Statement:
          - Effect: Allow
            Principal:
              Service:
                - lambda.amazonaws.com
            Action:
              - sts:AssumeRole
      Path: /
      Policies:
        - PolicyName: lambda-execution-policy
          PolicyDocument:
            Version: '2012-10-17'
            Statement:
              - Effect: Allow
                Action:
                  - logs:*
                Resource: arn:aws:logs:*:*:*
              - Effect: Allow
                Action:
                  - s3:GetObject
                  - s3:PutObject
                Resource: arn:aws:s3:::*
创建的堆栈详情一览
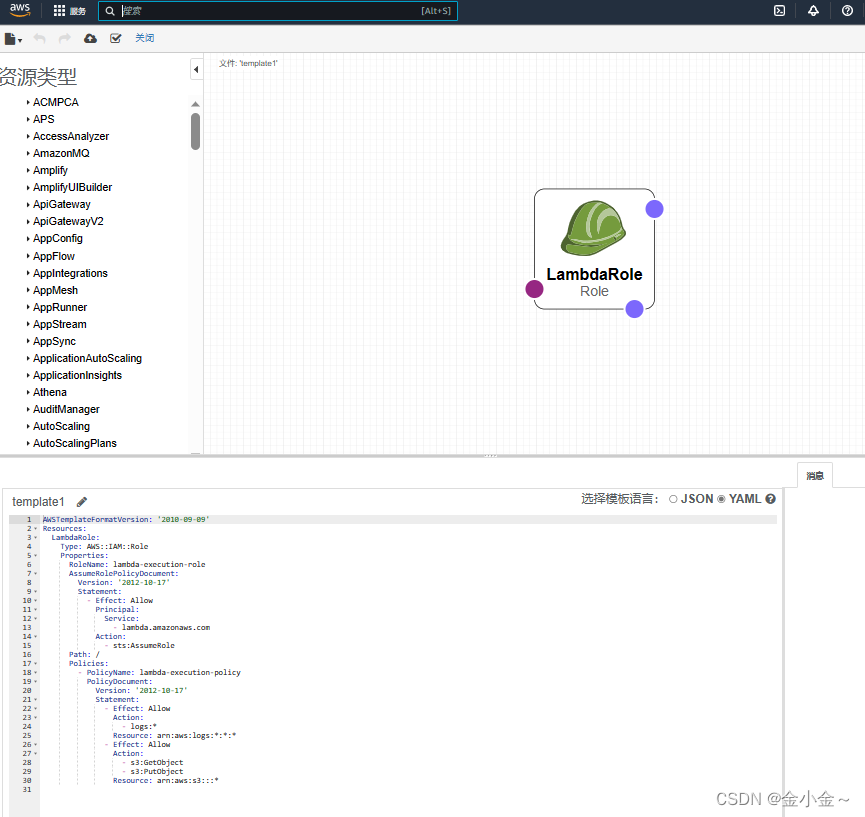
为创建的堆栈起个名字,点击【下一步】
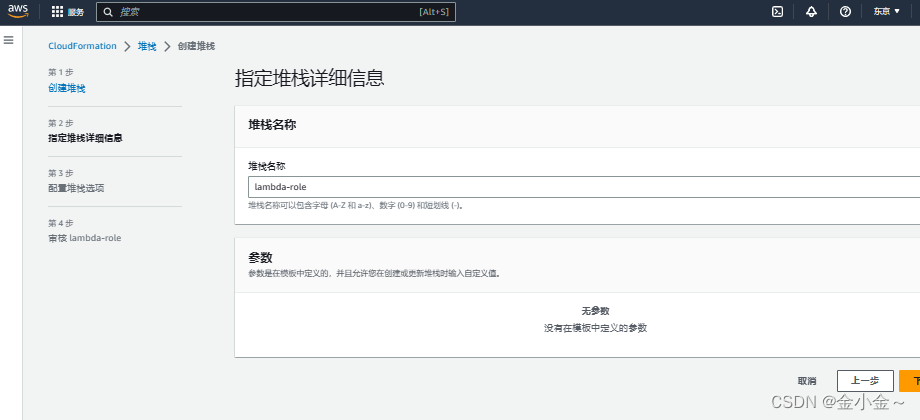
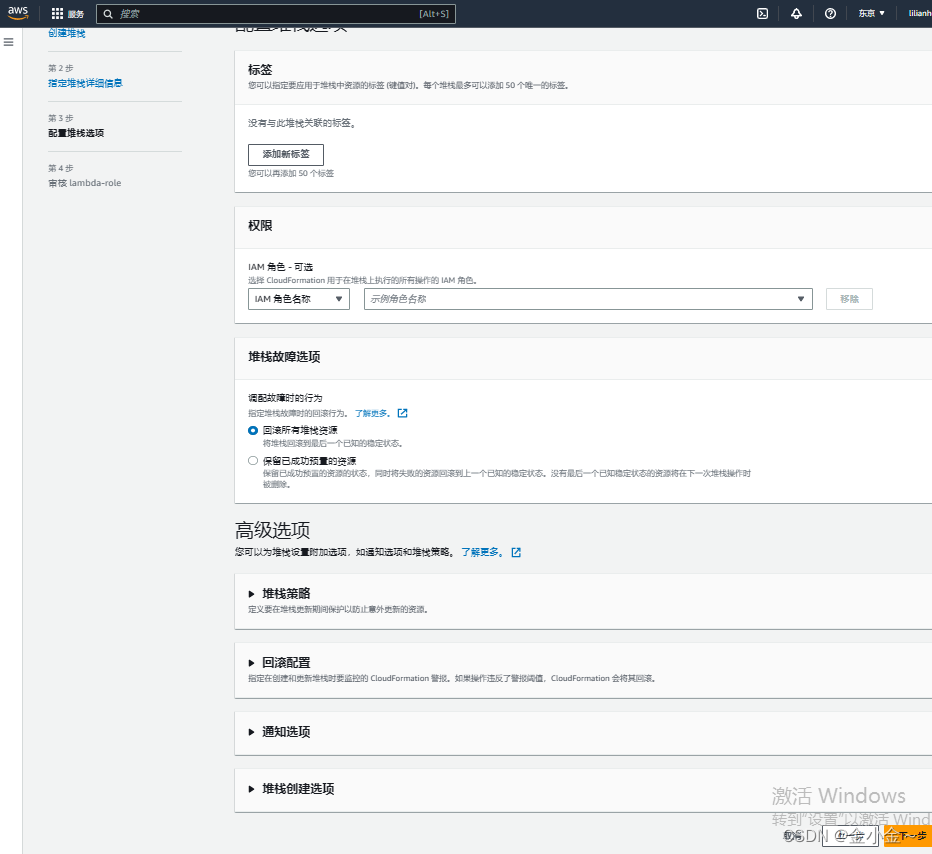
点击【下一步】
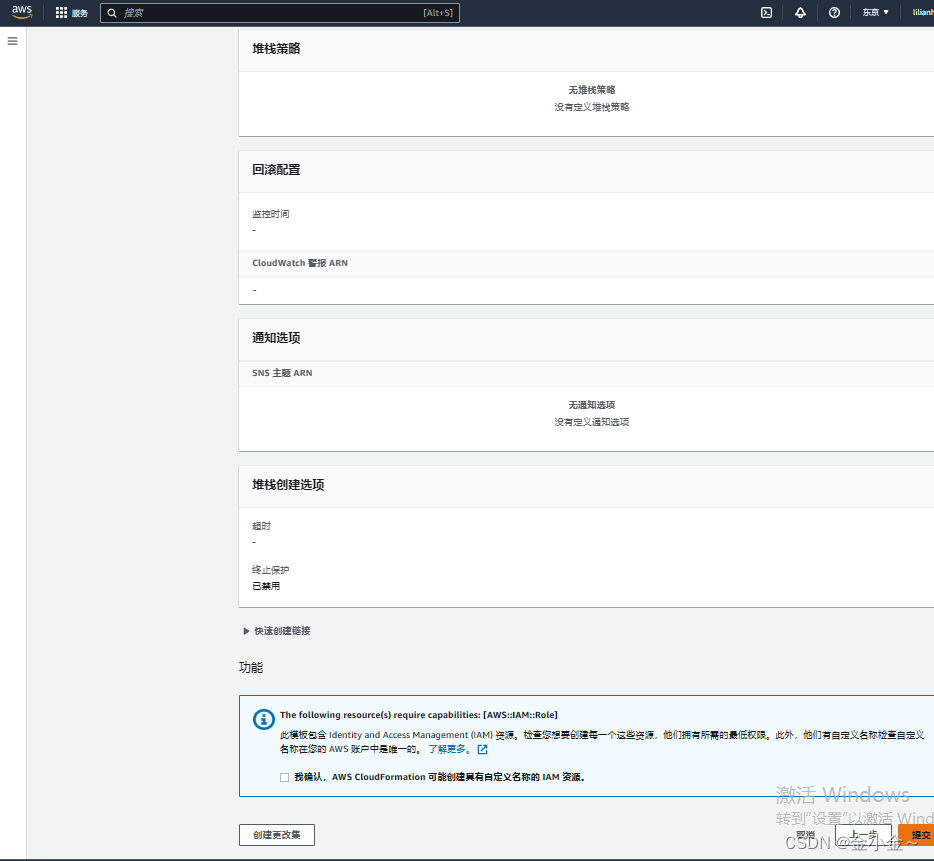
checkbox勾选后点击【提交】
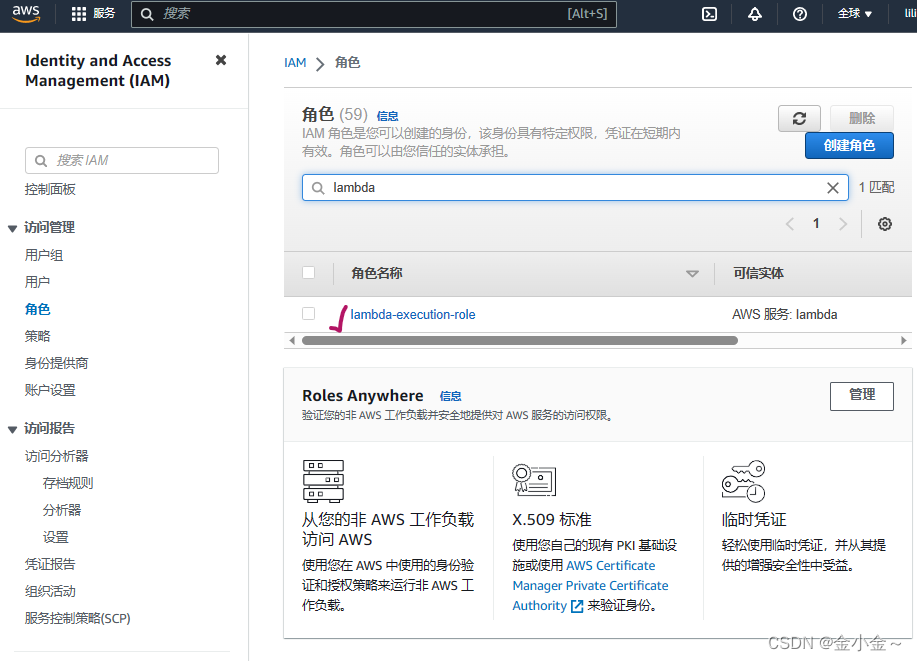
IAM角色创建成功
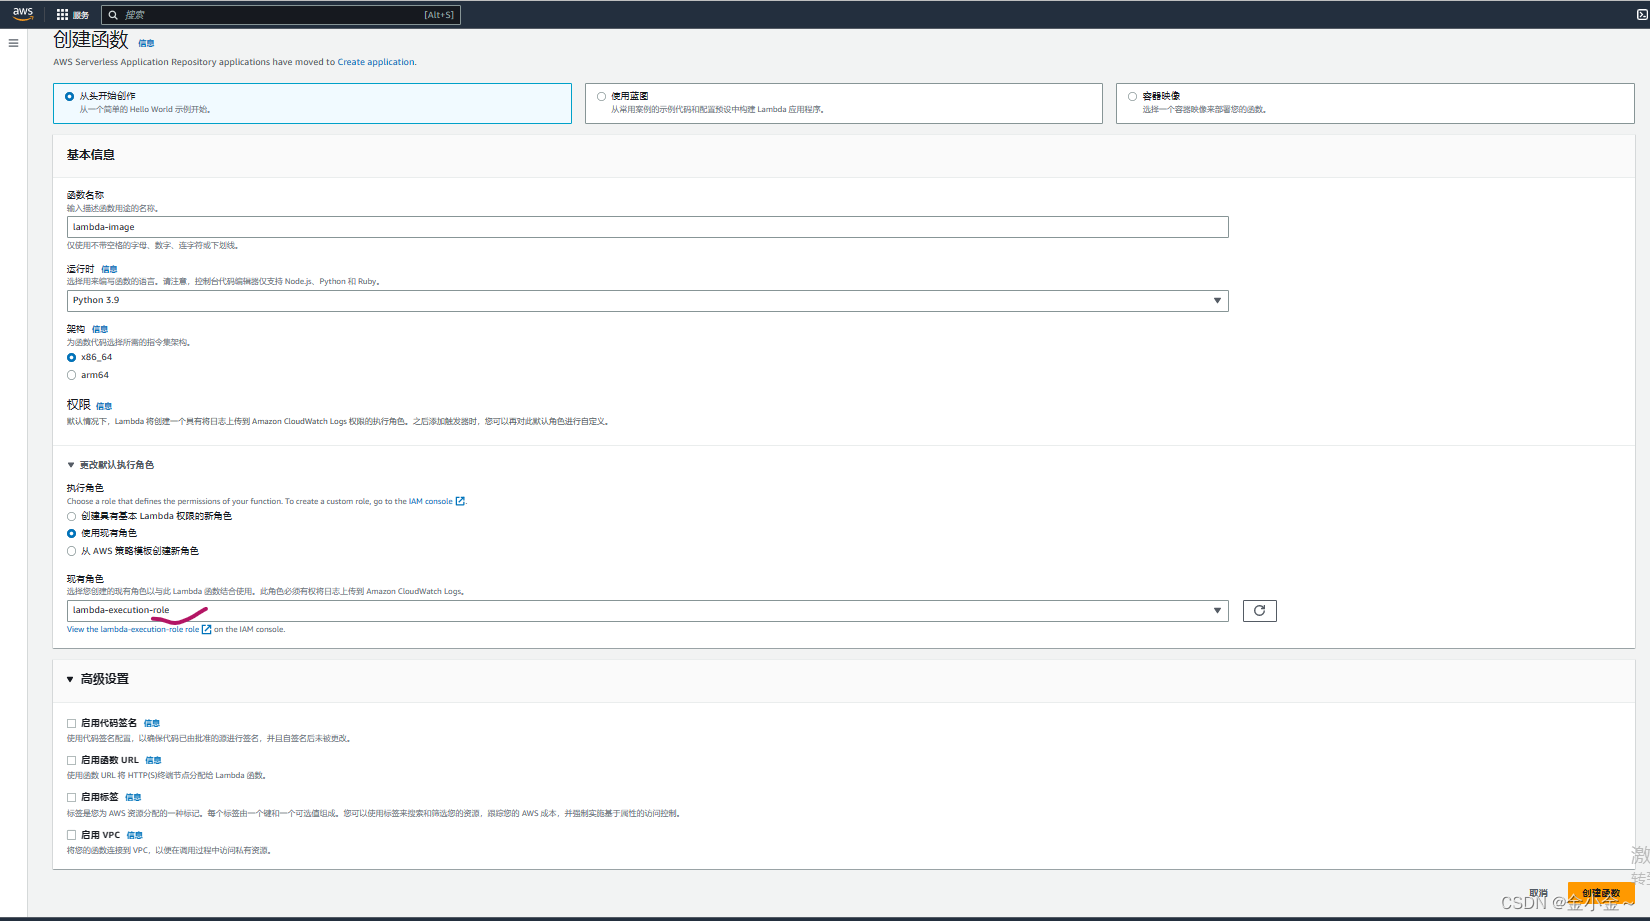
创建Lambda函数
此处注意角色选择上一步骤中创建好的角色
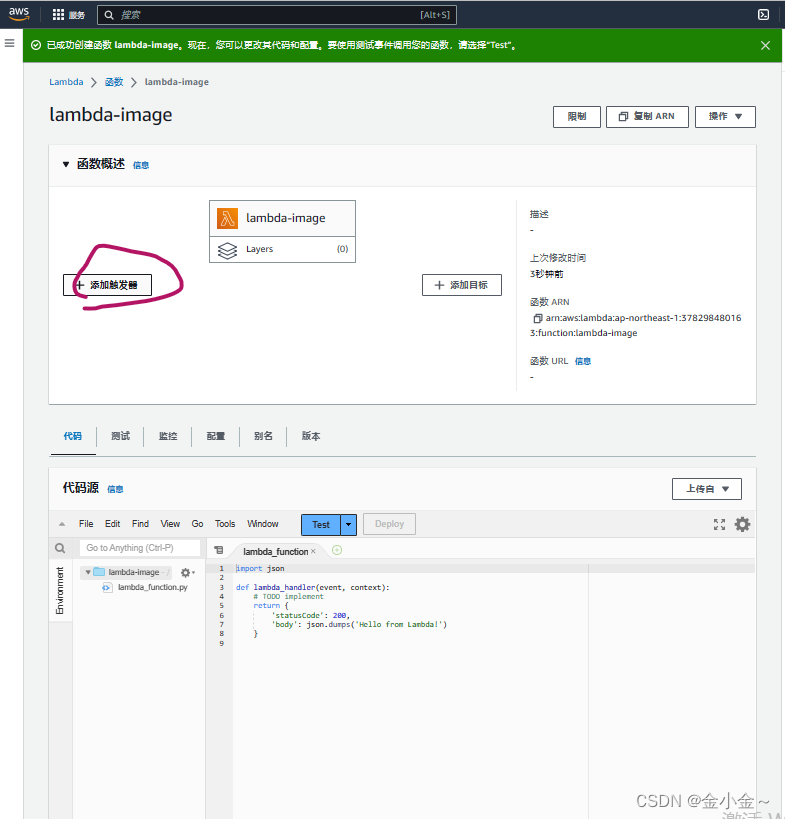
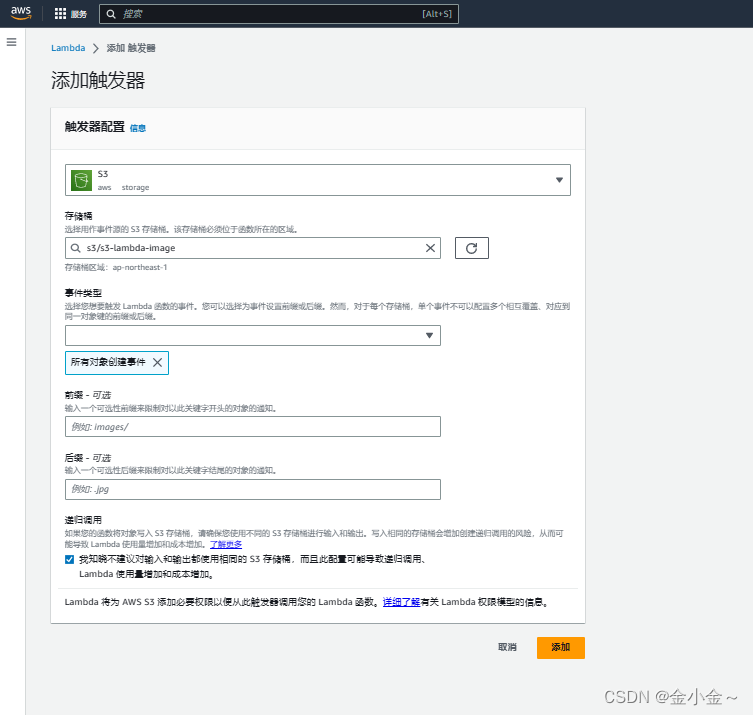
点击【添加触发器】
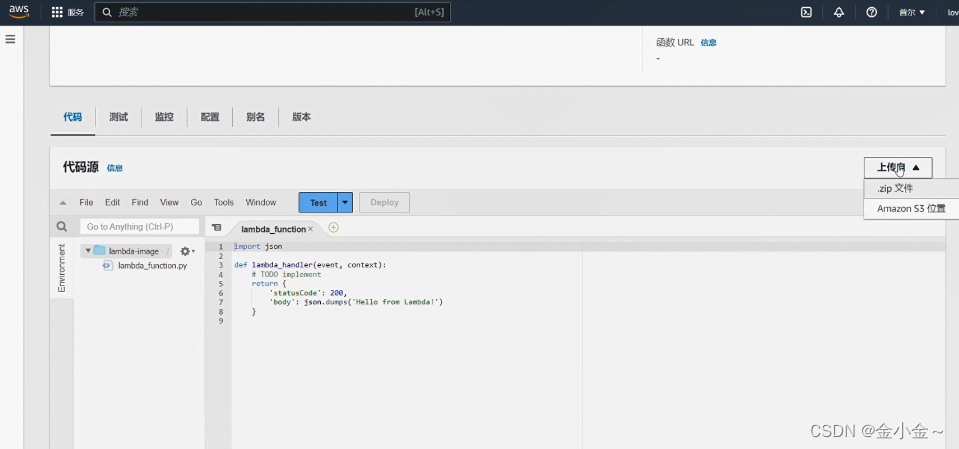
代码> 上传文件
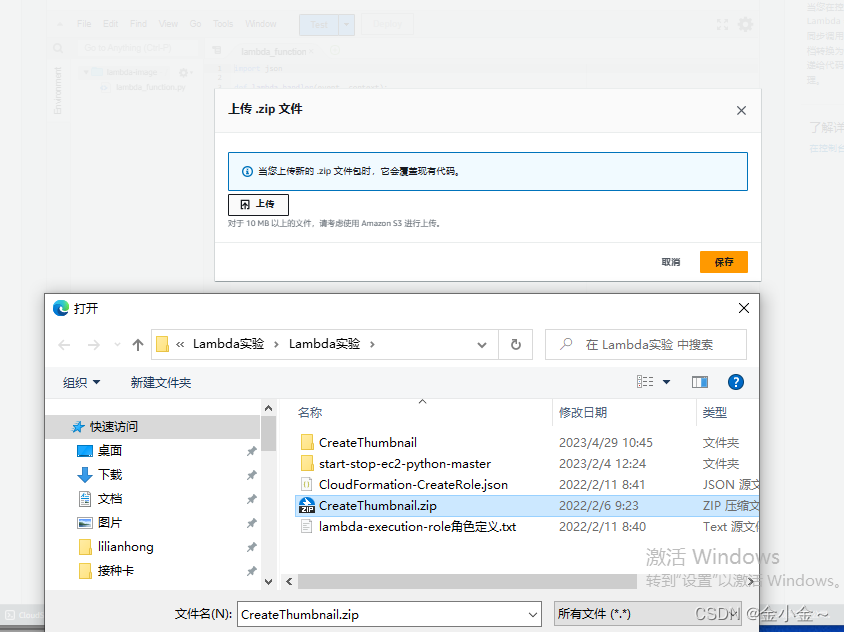
或者手动添加代码也可以:
import boto3
import os
import sys
import uuid
from PIL import Image
import PIL.Image

s3_client = boto3.client('s3')

def resize_image(image_path, resized_path):
    with Image.open(image_path) as image:
        image.thumbnail((128, 128))
        image.save(resized_path)

def handler(event, context):
    for record in event['Records']:
        bucket = record['s3']['bucket']['name']
        key = record['s3']['object']['key']
        download_path = '/tmp/{}{}'.format(uuid.uuid4(), key)
        upload_path = '/tmp/resized-{}'.format(key)

        s3_client.download_file(bucket, key, download_path)
        resize_image(download_path, upload_path)
        s3_client.upload_file(upload_path, '{}-resized'.format(bucket), key)
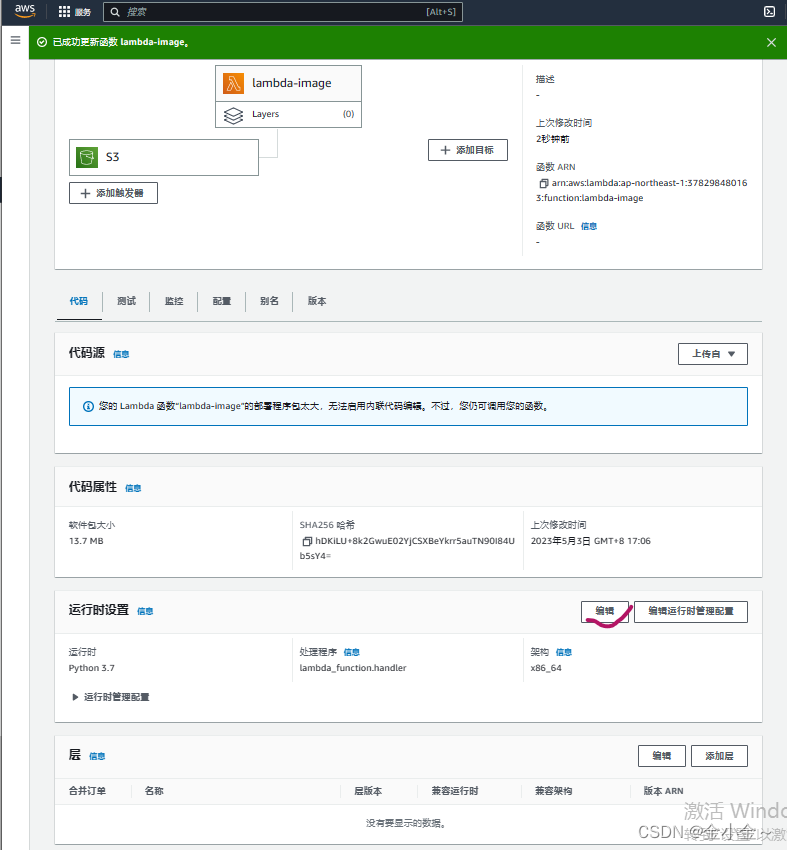
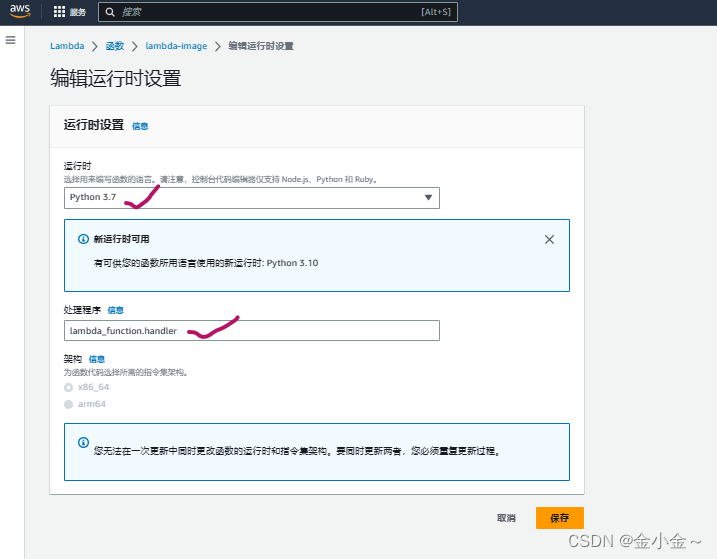
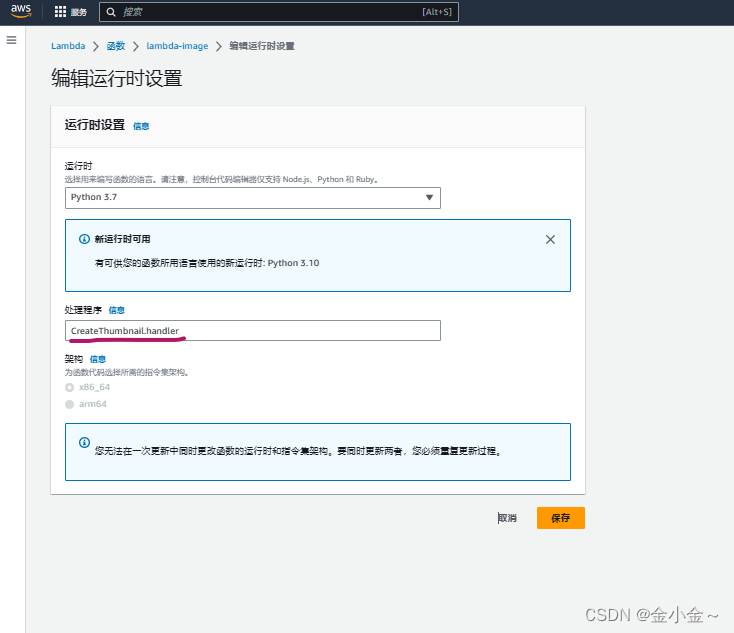
编辑运行时设置【处理程序】,【运行时】
【运行时】:Python3.7
【处理程序】:lambda_function.handler
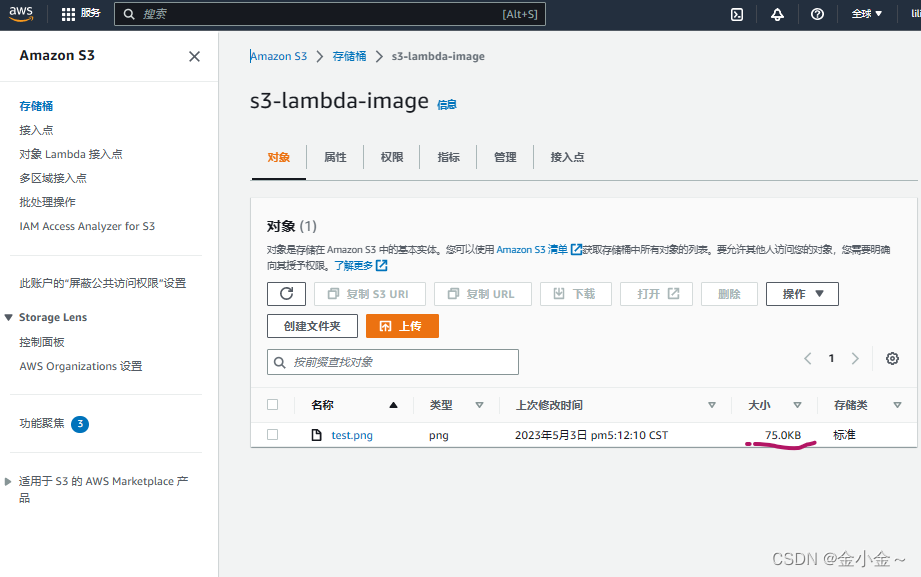
s3存储桶中上传一个图片
进行测试
测试代码中修改几处位置
name:修改为源存储桶名(s3-lambda-image)
arn:attach存储桶名(s3-lambda-image)
key:上传到源存储桶的图片名
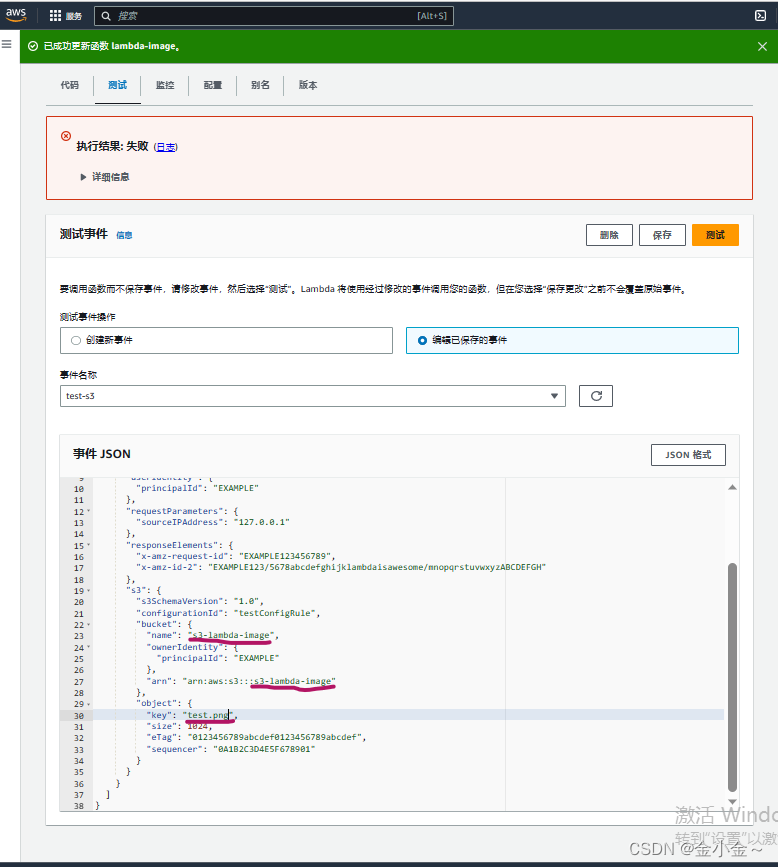
测试报错
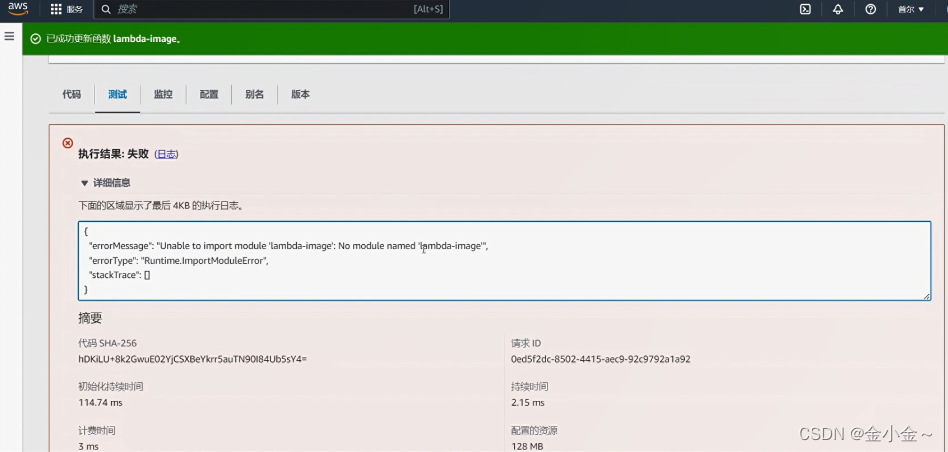
更改代码中适配的【处理程序】名
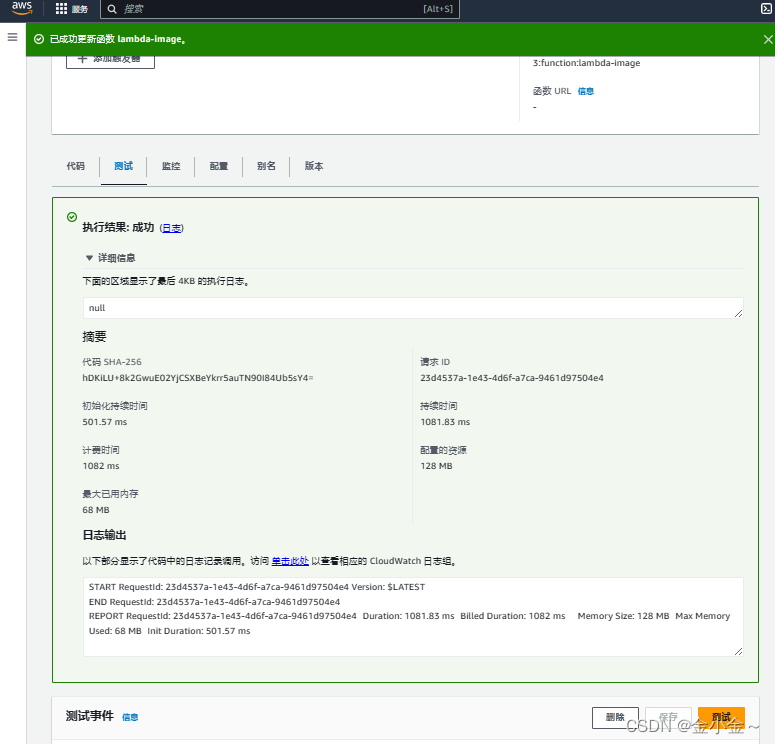
执行成功
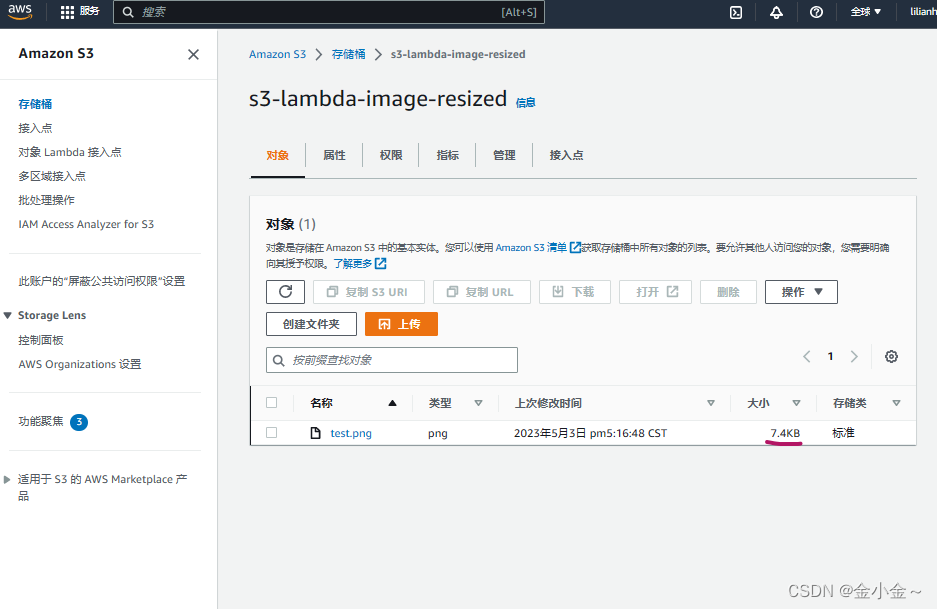
查看目标存储桶,图片被压缩
