基于Rush.js的Monorepo入门实战
概述
Monorepo是一种软件开发模式,它将多个项目或组件存储在同一个代码库中,而不是将它们分散到多个库中。这样做可以方便跨项目的代码重用、版本控制、依赖管理等,被广泛应用于大型软件公司的开发流程中。
Rush.js 是一个用于管理多个包的工具,可以协调和优化它们之间的依赖关系。它提供了命令,例如初始化存储库、添加/删除项目、构建存储库、运行测试等。Rush.js 还支持增量构建、Git 工作流和预安装包等高级功能。它可以提高项目的开发效率和可维护性。
不同于一股脑说各种功能,我会以最简单的demo入手,然后逐步提出新的需求并解决,当然首先你要安装rush。这非常简单,从你的 shell 或命令行窗口输入这个命令:
npm install -g @microsoft/rush
项目模板:rush_monorepo_demo
觉得有用的话,记得点个 start 哦
新建
初始化一个仓库
使用 rush init初始化仓库,自动生成 .gitattributes .github .gitignore common rush.json等几个文件夹。
// 创建工程文件夹
❯ mkdir rush_demo
❯ cd rush_demo/
// 执行初始化命令
❯ rush init

Rush Multi-Project Build Tool 5.93.1 (unmanaged) - https://rushjs.io
Node.js version is 16.19.1 (LTS)

Starting "rush init"
Generating: /home/mfine/my_project/rush_demo/.github/workflows/ci.yml
Generating: /home/mfine/my_project/rush_demo/common/config/rush/.pnpmfile.cjs
Generating: /home/mfine/my_project/rush_demo/common/config/rush/.npmrc
Generating: /home/mfine/my_project/rush_demo/common/config/rush/.npmrc-publish
Generating: /home/mfine/my_project/rush_demo/common/config/rush/artifactory.json
Generating: /home/mfine/my_project/rush_demo/common/config/rush/build-cache.json
Generating: /home/mfine/my_project/rush_demo/common/config/rush/command-line.json
Generating: /home/mfine/my_project/rush_demo/common/config/rush/common-versions.json
Generating: /home/mfine/my_project/rush_demo/common/config/rush/experiments.json
Generating: /home/mfine/my_project/rush_demo/common/config/rush/pnpm-config.json
Generating: /home/mfine/my_project/rush_demo/common/config/rush/rush-plugins.json
Generating: /home/mfine/my_project/rush_demo/common/config/rush/version-policies.json
Generating: /home/mfine/my_project/rush_demo/common/git-hooks/commit-msg.sample
Generating: /home/mfine/my_project/rush_demo/.gitattributes
Generating: /home/mfine/my_project/rush_demo/.gitignore
Generating: /home/mfine/my_project/rush_demo/rush.json
~/my_project/rush_demo
❯ ls -a
.  ..  .gitattributes  .github  .gitignore  common  rush.json
添加一个工具包项目
初始化项目
对于新建项目最开始要做的就是添加项目,我建议每次只添加或验证单个项目。不然小心一小加太多调不通,不好debug。好了让我添加一个叫my-utils的项目,显然它是一些常用的工具方法。
在根目录下创建工具类项目的包
> mkdir tools
> cd tools
> mkdir my-utils
初始化仓库
> pnpm init
然后如下所示,可以看到最主要就是在根目录下的rush.json文件中的projects字段中指明包名和包所在的文件地址。
{
 // .......省略若干
  "projects": [
    {
      "packageName": "my-utils",
      "projectFolder": "tools/my-utils"
    }
  ]
}
配置package.json和rollup.config.js
下面我们开始先配置my-utils,使用的是rollup+ts+sass的方式,配置如下。
记住当package.json 文件发生变化时,请务必运行 rush update。也就是说当你添加了一下新的项目的时候或者从使用拉取新的更新之后,此时package.json 发生了变化就需要执行 rush update。
此外一般情况下安装第三包的时候,我们也不使用 pnpm install等命令了。而会换成
rush add -p example-lib
例如(记得切换到对应的工程目录下执行):
rush_demo/app on dev [!]
❯ cd my-app-vue2
rush_demo/app/my-app-vue2 on dev [!] via v16.19.1
❯ ls
README.md babel.config.js dist jsconfig.json my-app-vue2.build.error.log my-app-vue2.build.log node_modules package.json pnpm-lock.yaml public src vue.config.js
rush_demo/app/my-app-vue2 on dev [!] via v16.19.1
❯ rush add -p lodash
package.json
{
  "name": "my-utils",
  "version": "1.0.0",
  "description": "",
  "main": "./dist/index.js",
  "module": "./dist/index.esm.js",
  "umd": "./dist/index.umd.js",
  "types": "./dist/types/index.d.ts",
  "scripts": {
    "clean:dist": "rimraf dist",
    "build:types": "npm run clean:dist && tsc -b ./tsconfig.types.json",
    "dev": "npm run build:types && rollup --bundleConfigAsCjs -c ",
    "test": "node test/test.js",
    "pretest": "npm run build"
  },
  "keywords": [],
  "author": "",
  "license": "ISC",
  "devDependencies": {
    "@babel/plugin-transform-runtime": "^7.21.0",
    "@babel/preset-env": "^7.20.2",
    "@rollup/plugin-babel": "^6.0.3",
    "@rollup/plugin-commonjs": "^24.0.1",
    "@rollup/plugin-node-resolve": "^15.0.1",
    "rimraf": "^4.3.0",
    "rollup": "^3.18.0",
    "rollup-plugin-terser": "^7.0.2",
    "rollup-plugin-typescript2": "^0.34.1",
    "typescript": "^4.9.5"
  },
  "dependencies": {
    "@babel/core": "~7.21.0"
  }
}
roullup.config.js
import path from 'path'
import resolve from '@rollup/plugin-node-resolve'
import commonjs from '@rollup/plugin-commonjs'
import rollupTypescript from 'rollup-plugin-typescript2'
import babel from '@rollup/plugin-babel'
import { DEFAULT_EXTENSIONS } from '@babel/core'
import { terser } from 'rollup-plugin-terser' // 读取 package.json 配置
import pkg from './package.json' assert { type: "json" }// 当前运行环境,可通过 cross-env 命令行设置
const env = process.env.NODE_ENV // umd 模式的编译结果文件输出的全局变量名称
const name = 'RollupTsTemplate'
const config = {
    // 入口文件,src/index.ts
    input: path.resolve(__dirname, 'src/index.ts'),
    // 输出文件
    output: [
        // commonjs
        {
            // package.json 配置的 main 属性
            file: pkg.main,
            format: 'cjs',
        },
        // es module
        {
            // package.json 配置的 module 属性
            file: pkg.module,
            format: 'es',
        },
        // umd
        {
            // umd 导出文件的全局变量
            name,
            // package.json 配置的 umd 属性
            file: pkg.umd,
            format: 'umd'
        }
    ],
    plugins: [
        // 解析第三方依赖
        resolve(),
        // 识别 commonjs 模式第三方依赖
        commonjs(),
        // rollup 编译 typescript
        rollupTypescript(),
        // babel 配置
        babel({
            // 编译库使用
            babelHelpers: 'runtime',
            // 只转换源代码,不转换外部依赖
            exclude: 'node_modules/**',
            // babel 默认不支持 ts 需要手动添加
            extensions: [
                ...DEFAULT_EXTENSIONS,
                '.ts',
            ],
        }),
    ]
}
// 若打包正式环境,压缩代码
if (env === 'production') {
    config.plugins.push(terser({
        compress: {
            pure_getters: true,
            unsafe: true,
            unsafe_comps: true,
            warnings: false
        }
    }))
}

export default config
添加代码
我们简单的添加几行代码:
tools/my-utils/src/math/index.ts
// add function
export function add(a: number, b: number) {
	return a + b
}

// minus function
export function minus(a: number, b: number) {
	return a - b
}

// multiply function
export function multiply(a: number, b: number) {
	return a * b
}

// divide function
export function divide(a: number, b: number) {
	return a / b
}
构建项目
对于build这里直接使用 rush build命令,但是我们在这里只build my-utils这个项目,因此我们要使用如下命令:
rush_demo/app/my-app-vue2 on dev [!] via v16.19.1
// 开始build
❯ rush build --to my-utils
Found configuration in /home/mfine/my_project/rush_demo/rush.json
Rush Multi-Project Build Tool 5.93.1 - https://rushjs.io
Node.js version is 16.19.1 (LTS)
Found configuration in /home/mfine/my_project/rush_demo/rush.json
Starting "rush build"
Analyzing repo state... DONE (0.08 seconds)
Executing a maximum of 12 simultaneous processes...
==[ my-utils ]=====================================================[ 1 of 1 ]==
/home/mfine/my_project/rush_demo/tools/my-utils/src/index.ts → ./dist/index.js, ./dist/index.esm.js, ./dist/index.umd.js...
created ./dist/index.js, ./dist/index.esm.js, ./dist/index.umd.js in 1s
"my-utils" completed with warnings in 3.73 seconds.
==[ SUCCESS WITH WARNINGS: 1 operation ]=======================================
--[ WARNING: my-utils ]--------------------------------------[ 3.73 seconds ]--
/home/mfine/my_project/rush_demo/tools/my-utils/src/index.ts → ./dist/index.js, ./dist/index.esm.js, ./dist/index.umd.js...
created ./dist/index.js, ./dist/index.esm.js, ./dist/index.umd.js in 1s
Operations succeeded with warnings.
rush build (3.83 seconds)
--to my-utils参数的意思如下:
假设我们刚刚克隆了 monorepo 仓库,现在想在项目 B 中进行开发,则需要构建 B 和 B 依赖的所有项目。
我们可以这样做:
# 构建项目 B 以及 B 依赖的所有项目
$ rush build --to B
上面的命令选择了 A, B 和 E 三个项目:

详细参考:rush build
构建结束之后我们就要在其他项目中引用这个包,因此我们要先创建的应用项目。
添加一个应用项目
这个就和平常创建一个vue2项目差不多,剩余的流程和上述添加一个工具包也差不多。
rush_demo on dev [!]
❯ mkdir app
rush_demo on dev [!]
❯ cd app
rush_demo/app on dev [!]
❯ vue create my-app-vue2
下面我们将在这个vue2项目中引用 my-utils包。
添加同仓库下的包
注意这里使用的 **“workspace:*”**方式其实是一个偷懒的方法,他有一下弊端,具体参考这个文章。但是这里为了演示方便就这样用。添加好了之后别忘了 rush update哦。
{
  "name": "my-app-vue2",
......
  "dependencies": {
    .....
    "my-utils":"workspace:*",
    ......
  },
.......
}
然后我们就可以在项目中使用我们的工具包了:
app/my-app-vue2/src/components/HelloWorld.vue
<template>
  <div class="hello">
    <TestBtn></TestBtn>
  </div>
</template>

<script>
import { TestBtn } from 'vue2-ui';
import { add, divide, minus, multiply } from 'my-utils';
export default {
  name: 'HelloWorld',
  props: {
    msg: String
  },
  components: {
    TestBtn
  },
  mounted() {
    console.log(add(1,1));
    console.log(divide(1,1));
    console.log(minus(1,1));
    console.log(multiply(1,1));
  }
};
</script>

<!-- Add "scoped" attribute to limit CSS to this component only -->
<style scoped></style>
运行查看效果
这里我们可以直接使用pnpm 自带的命令运行就行 npm run serve
自动构建
配置command-line
打开 common/config/rush/command-line.json,添加如下内容或者在原有的build下增加 注释后的内容。
  . . .
  "commands": [
    {
      "name": "build",
      "commandKind": "bulk",
      "summary": "Build projects and watch for changes",
      "description": "For details, see the article \"Using watch mode\" on the Rush website: https://rushjs.io/",

      // 使用增量构建(重要)
      "incremental": true,
      "enableParallelism": true,
      // 启用“监听模式”
      "watchForChanges": true
    },
  . . .
运行(直接引用)
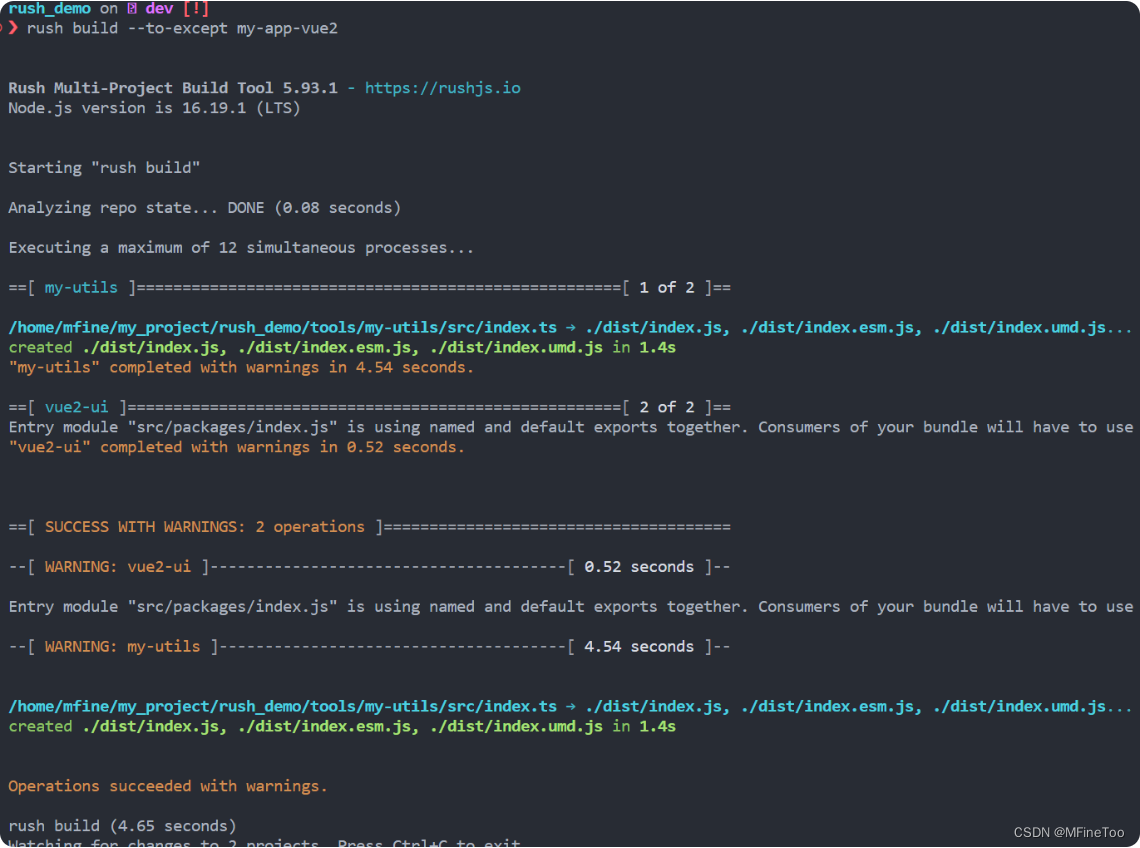
执行 rush build --to-except my-app-vue2 ,构建 my-app-vue2 依赖的所有项目,但不包括项目 my-app-vue2(排除my-app-vue2是因为我们下面单独以dev的方式启动它)。效果如下:
下面我们修改 my-utils下的内容,看看会怎么样。
增加一个平方函数:
// square function
export function square(a: number) {
  return a * a
}
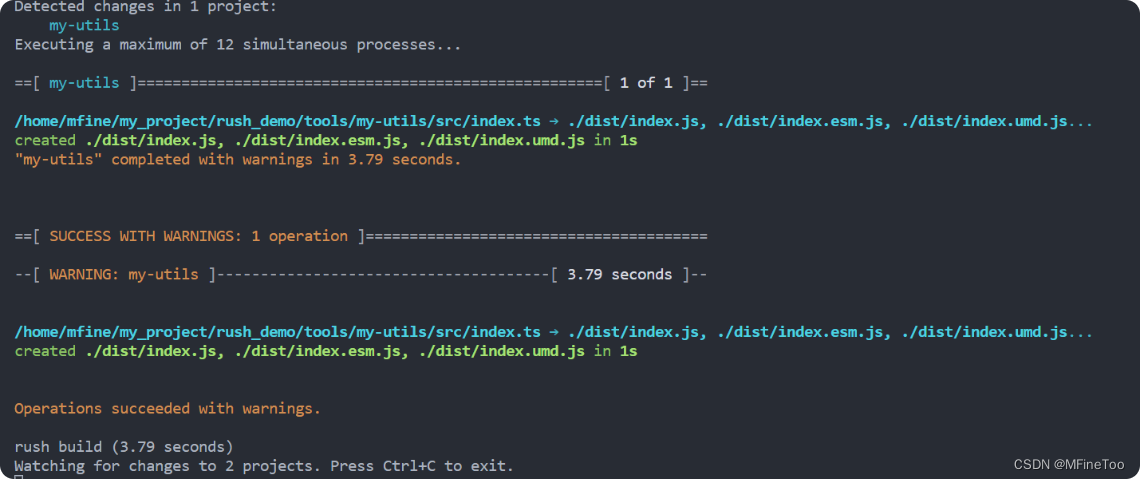
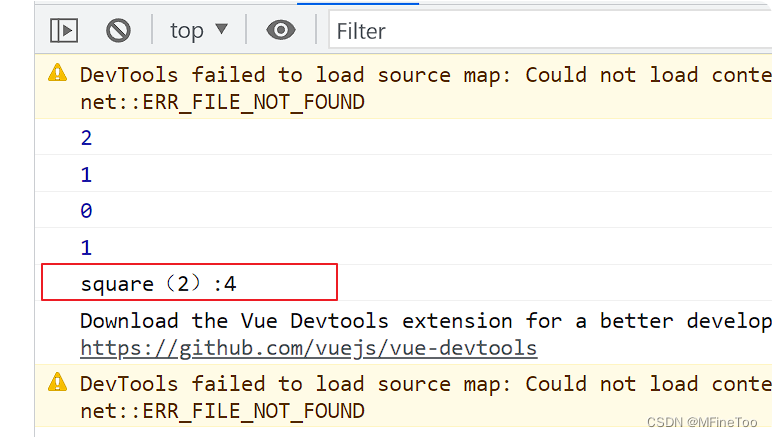
控制台响应如下:
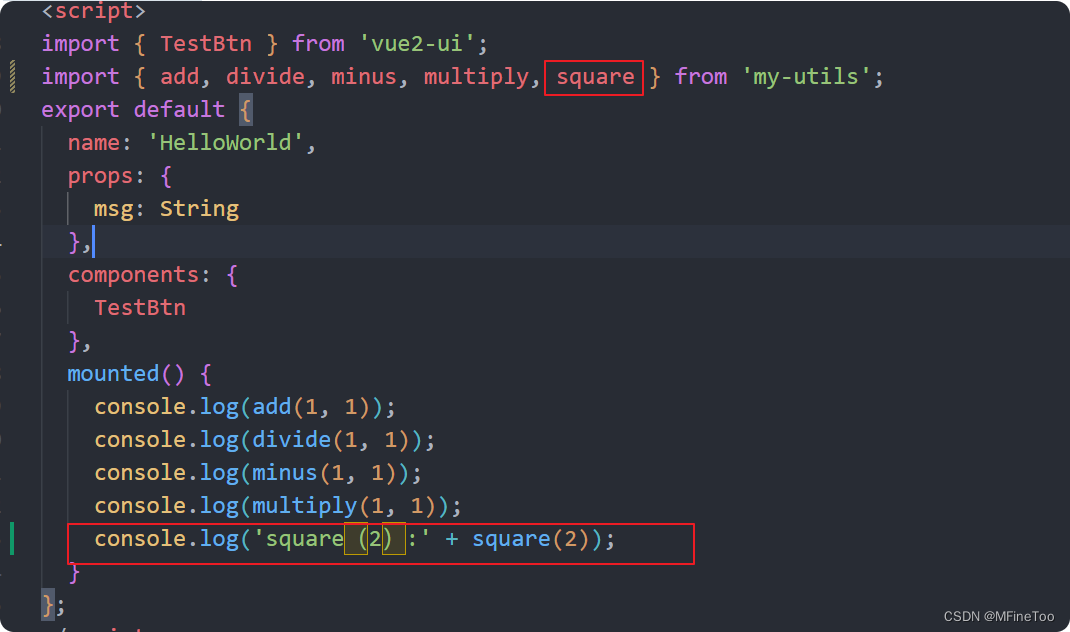
启动 my-app-vue2,已经可以在项目中使用刚刚添加的函数了。
后台如下:
运行(间接引用)
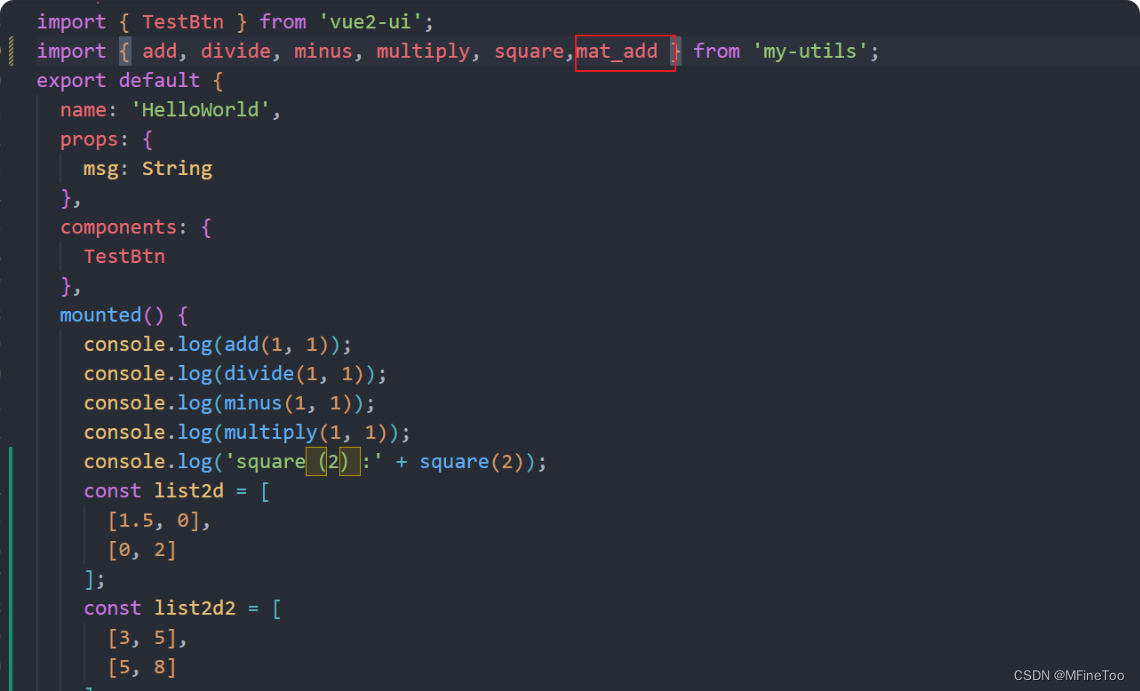
我们再创建一个项目,该项目被 my-utils引用。然后更新这个项目看看效果。可以看到我们创建了一个叫 mat的项目来负责矩阵运算。如下我们在 my-utils项目中使用
import { Matrix } from 'mat';

//......
export function mat_add(mat1: number[][], mat2: number[][]):Matrix|void {
  return new Matrix(mat1).add(new Matrix(mat2));
}
然后我们在 my-app-vue2中使用。
结果:

现在我们改动一个 mat项目,增加如下内容:
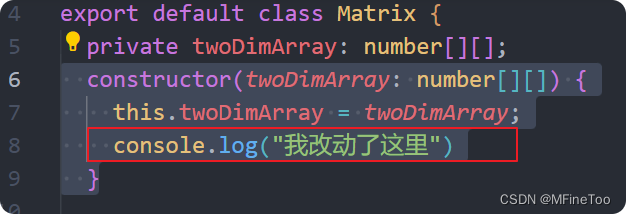
控制台变化如下:

先检测到了 mat项目改动了,然后开始构建mat

然后发现 my-utils引用了 mat所以自动构建 my-utils。最后刷新 my-app-vue2就可以更新mat的改动。

总结
利用rushjs我们可以实现自动构建,不用根据依赖关系一个个手动完成构建过程,并且rushjs是增量构建的,会自动判断那些项目受影响从而自动构建。
发布包
手动多包发布
rush change
在 Rush monorepo 中,rush change 是发包流程的起点,其产物 <branchname>-<timestamp>.json(后文用 changefile.json 代替)会被 rush version 以及 rush publish 消费。
![[外链图片转存失败,源站可能有防盗链机制,建议将图片保存下来直接上传(img-lHK0kxql-1682047472350)(assets/image-20230414162057989.png)]](https://img-blog.csdnimg.cn/144d7d4de9424f79b0ffc2c82cb3e80d.png)
changefile.json 生成流程如下:
![[外链图片转存失败,源站可能有防盗链机制,建议将图片保存下来直接上传(img-obMcJC54-1682047472350)(assets/1460000040989037.png)]](https://img-blog.csdnimg.cn/545e115db9ac4076a2a5da69cd8992e0.png)
- 检测当前分支与目标分支(通常是 master)的差异,筛选出存在变更的项目(基于
git diff命令); - 针对筛选出来的每一个项目通过交互式命令行询问一些信息(如版本更新策略以及更新的内容简要描述);
- 基于上述信息在
common/changes目录下生成对应 package 的 changefile.json。
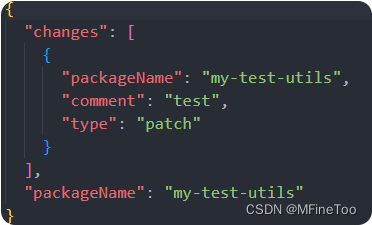
type: none的特性使得我们可以将已开发完毕但不需要跟随下一次发布周期的 package 提前合入 master,直到该 pacakge 出现 type 不为 none 的 changefile.json。
rush version 与 rush publish
rush version 或 rush publish --apply 则会基于生成的 changefile.json 进行版本号的更新。同时注意这两个命令会消费changelfile.json文件。
级联发布
前面有提到在更新版本号时,除了更新当前需要被发布的 package 的版本号,也可能更新其上层 package 的版本号,这取决于上层 package 在 package.json 中如何引用当前 package 的。
如下所示,@modern-js/plugin-tailwindcss(上层 package) 通过 "workspace:^1.0.0" 的形式引入 @modern-js/utils(底层 package)。
package.json(@modern-js/plugin-tailwindcss)
{
  "name": "@modern-js/plugin-tailwindcss",
  "version": "1.0.0",
  "dependencies": {
    "@modern-js/utils": "workspace:^1.0.0"
  }
}
package.json(@modern-js/utils)
{
  "name": "@modern-js/utils",
  "version": "1.0.0"
}
- 若
@modern-js/utils更新至1.0.1,Rush 在更新版本号时不会更新@modern-js/plugin-tailwindcss的版本号。因为^1.0.0兼容1.0.1,从语义的角度出发,@modern-js/plugin-tailwindcss不需要更新版本号,直接安装@modern-js/plugin-tailwindcss@1.0.0是可以获取到@modern-js/utils@1.0.1的 - 若
@modern-js/utils更新至2.0.0,Rush 在更新版本号时会更新@modern-js/plugin-tailwindcss的版本号至1.0.1。因为^1.0.0不兼容2.0.0,更新@modern-js/plugin-tailwindcss版本至1.0.1才可引用到最新的@modern-js/utils@2.0.0,此时@modern-js/plugin-tailwindcss的 package.json 内容如下:
{
  "name": "@modern-js/plugin-tailwindcss",
  "version": "1.0.1",
  "dependencies": {
   // 引用版本号也发生了变化
    "@modern-js/utils": "workspace:^2.0.0"
  }
}
更新了版本号,还需要发布至 npm。此时需要 rush publish 增加 --include-all 参数,配置该参数后 rush publish 检查到仓库中存在 shouldPublish: true 的 package 的版本新于 npm 版本时,会将该 package 发布。
发布到npm仓库
工作流如下:
- git add [files] (提交更改到暂存区)
- rush change
- rush publish --apply --publish --registry registryUrl
此处注意如果不注意消费了 changefile 或者项目的 package.json配置了 publishConfig 字段,那么后面配置的仓库地址就会失效。
同意注意–apply会消费 changefile文件
发布到私有仓库
和发布到npm仓库相同,只不过地址改为私有地址或者 package.json配置 publishConfig 字段
生成 change file

推送到私有仓库
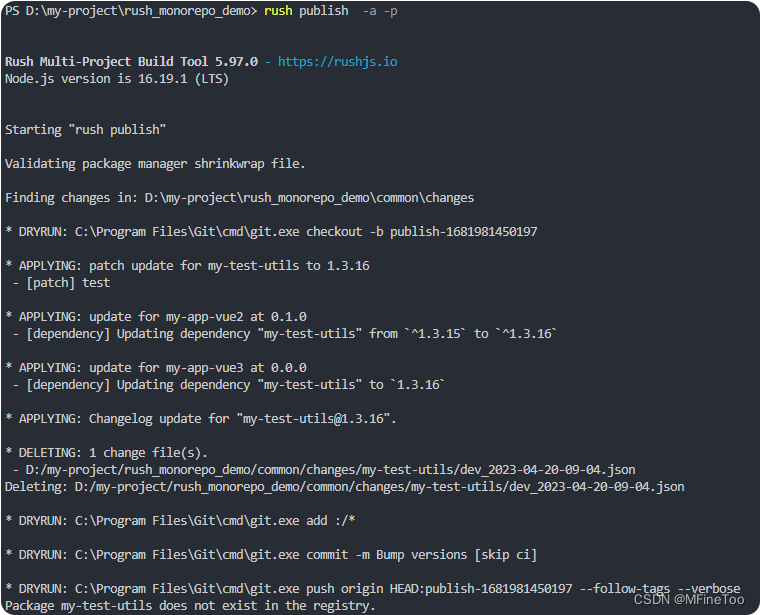
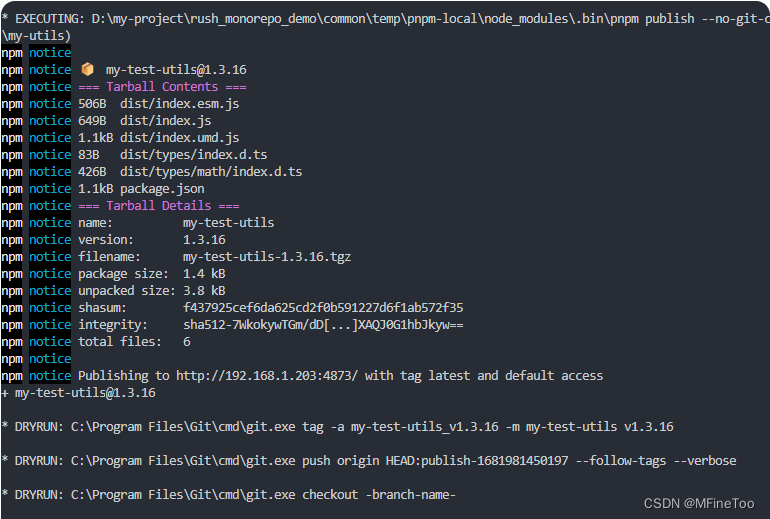
规范化
commit前自动格式化代码
主要是通过 git hooks实现,同样的husky也可以实现相同效果。这里使用rush自带功能。
pre-commit 配置
你可以按照如下方式使用它。
- 在 common/git-hooks 目录下添加该文件,并在 Git 上提交。
- 当开发者执行
rush install时,Rush 将会拷贝该文件到 .git/hooks/commit-msg 目录下。 - 当你执行
git commit时,Git 讲找到该脚本并调用它。 - 如果 commit 消息过短,脚本会返回非零状态码,Git 显示
Invalid commit message提示并且拒绝操作。
使用 Rush 来安装这个钩子脚本需要避免使用 Husky 等独立解决方案。注意 Husky 预期你的仓库在根目录上有一个 package.json 和 node_modules 目录,并且 Husky 将会执行每个 Git 操作的 shell 命令(即使未使用的钩子);使用 Rush 来安装钩子可以避免这些限制。
**注意:**如果你需要卸载钩子,可以删除你的 .git/hooks/ 目录下的文件。
common/git-hooks/pre-commit

至于如何开启 prettier 功能 参考这个连接即可:启用 Prettier
配置rush prettier命令
common/config/rush/command-line.json
  . . .
  "commands": [
    {
      "name": "prettier",
      "commandKind": "global",
      "summary": "Used by the pre-commit Git hook. This command invokes Prettier to reformat staged changes.",
      "safeForSimultaneousRushProcesses": true,

      "autoinstallerName": "rush-prettier",

      // 它将会唤起 common/autoinstallers/rush-prettier/node_modules/.bin/pretty-quick
      "shellCommand": "pretty-quick --staged"
    }
    . . .
配置perttier配置文件
rush_monorepo_demo/.prettierignore
#-------------------------------------------------------------------------------------------------------------------
# 保持与 .gitignore 同步
#-------------------------------------------------------------------------------------------------------------------

👋 (此处将你的 .gitignore 文件内容复制粘贴过来) 👋

#-------------------------------------------------------------------------------------------------------------------
# Prettier 通用配置
#-------------------------------------------------------------------------------------------------------------------

# Rush 文件
common/changes/
common/scripts/
common/config/
CHANGELOG.*

# 包管理文件
pnpm-lock.yaml
yarn.lock
package-lock.json
shrinkwrap.json

# 构建产物
dist
lib

# 在 Markdown 中,Prettier 将会对代码块进行格式化,这会影响输出
*.md
rush_monorepo_demo/.prettierrc.js
// 配置可参考 https://prettier.io/en/configuration.html
module.exports = {
  // 使用较大的打印宽度,因为 Prettier 的换行设置似乎是针对没有注释的 JavaScript.
  printWidth: 110,

  // 使用 .gitattributes 来管理换行
  endOfLine: 'auto',

  // 单引号代替双引号
  singleQuote: true,

  // 对于 ES5 而言, 尾逗号不能用于函数参数,因此使用它们只能用于数组
  trailingComma: 'none'
};
规范提交
还是利用 git hooks实现
添加 pre-push hook

- node common/scripts/install-run-rush.js change -v 的意思是检查有没有提供 change file文件( change file 由rush change命令产生)
- node common/scripts/install-run-rush.js publish -a 的意思是检查通过之后直接模拟发布(会消费change file 以及提升版本号)。
总结
此章节主要是利用 githooks 进行一下自动化操作以达到规范代码和提交功能。但不建议做更深的自动化,比如自动publish ,发版操作应该实在项目进入测试阶段之后开始发版,一开始开发阶段完全没有发版的必要,大家依靠git 进行同步代码即可。
ps:添加或者修改hook后记得 rush update!!!
自定义指令
如果你的工具链有特殊的模式或功能,你可以将它们作为自定义指令或 Rush 工具的参数来暴露出来。或者你就是单纯的不想敲那么多字想利用简单的命令替代一个长命令,就可以用这个实现。
比如我每次启动项目都要 run build --to-eccept my-app-vue2我觉得太烦了,想直接 rush te你就可以这样配置。
common/config/rush/command-line.json
  "commands": [
        {
          "name": "te",
          "commandKind": "global",
          "summary": "build my-app-vue2 project's dependencies and do not build my-app-vue2",
          "safeForSimultaneousRushProcesses": true,
          "shellCommand": "rush build:watch --to-except my-app-vue2"
        },
    ]
或者你在每个项目的 package.json 定义了一个新的 script 命令,你想运行rush 命令直接自动调用每个项目中的命令,这样就不用去每个项目下手动调用,那你就可以这样配置。
  "commands": [
    {
      "commandKind": "bulk",
      "name": "build:watch",
      "summary": "used by build when file changes",
      "description": "watch file changes and build",
       // 是否并行化构建
       "enableParallelism": true,
       // 一下表示自动检测变化 进行增量构建 非必须
      "incremental": true,
      "watchForChanges": true
    }
  ],
同时你看可以自定义参数类型来进行个性化构建,比如生成不通语言版本,这里就不项目阐述了,具体参考这里:
自定义指令和参数
自动安装器(Autoinstallers)
它的作用如下:
-
如果你有一些包需要在执行rush install之前运行,那么你就要可以使用 Autoinstallers 将包直接安装好,后续不需要 rush install 也可以直接使用。
-
当你启动插件功能的时候,你也必须要配置Autoinstallers。
-
如果你配置的自定义命令需要一个 npm包的依赖
使用方法:
-
创建一个文件 自动安装器的文件夹
rush init-autoinstaller --name my-autoinstaller
-
编辑启动的 package.json文件添加依赖
-
更新 shrinkwrap file
创建或更新 common/autoinstallers/my-autoinstaller/pnpm-lock.yaml*
这个文件应该被提交并被git追踪
rush update-autoinstaller --name my-autoinstaller
-
提交更新文件到git
git add common/autoinstallers/my-autoinstaller/
git commit -m “Updated autoinstaller”
具体详细使用案例可以参考 :启用 Prettier
详细文档参考:Autoinstallers
总结
总的来说 rushjs的核心功能就是增量思想,每次构建只构建改变的部分。此外rushjs 可以做到快速迭代,在npm包还没有稳定的情况下。直接把包放到仓库中有任何修改都可以及时更新到使用的项目中,节约之前反复publish和拉取的过程。
项目模板:rush_monorepo_demo
觉得有用的话,记得点个 start 哦
参考
从0到1搭建 Rollup + TypeScript 模板工程
rushjs官方文档
[基于 Rush 的 Monorepo 多包发布实践](https://segmentfault.com/a/1190000040988970)


