Android学习笔记
- 了解Android 的结构
- Activity
- Android中的布局
- 了解安卓的结构
- Activity
- Android中的布局
- 代码展示(登录界面的实现):
- 实现效果:
- 代码展示(注册界面的实现)
- 实现效果
- 一些之前学习的笔记
- end
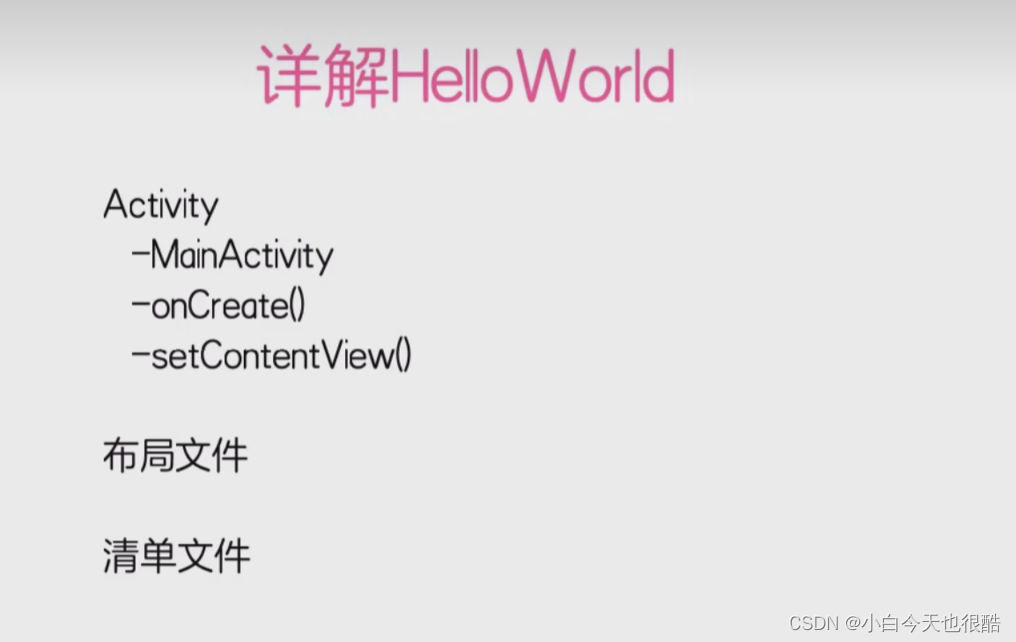
了解Android 的结构
Activity
Android中的布局
了解安卓的结构
minSdkVersion:最小APIlevel
兼容设备的API不指定的话默认是1兼容所有设备,我们的设备低于API就不可以安装我们的APP
compieSdkVersion:编译的SDK版本
指定SDK去编译我们的版本,一般使用最新的去编译
targetSdkVersion:目标版本
匹配使用消除差异
dependencies:
依赖配置,依赖的库,定义其他的库
Activity
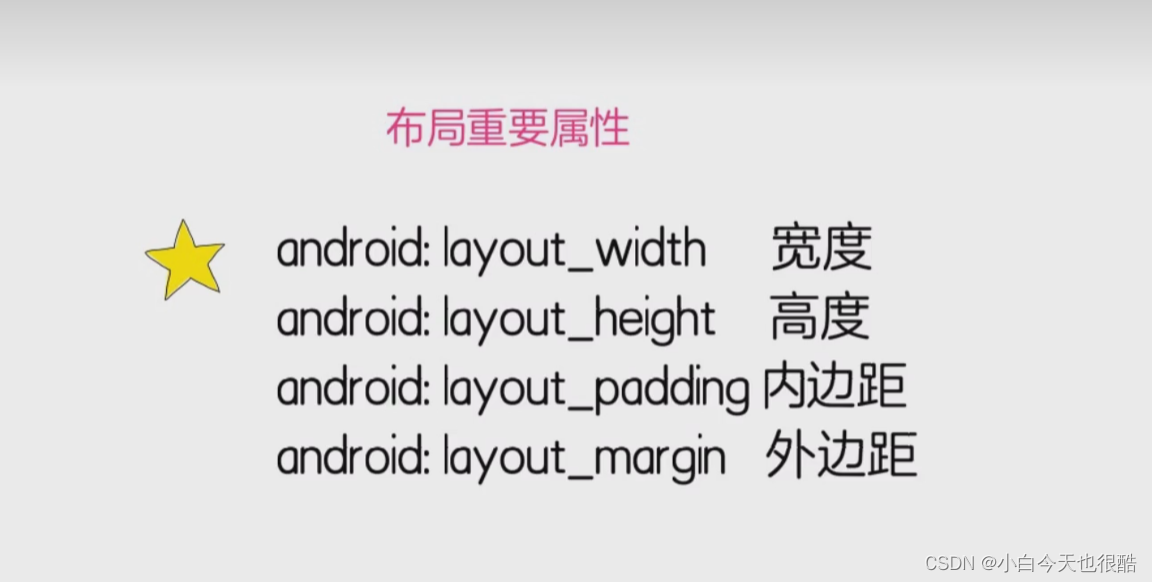
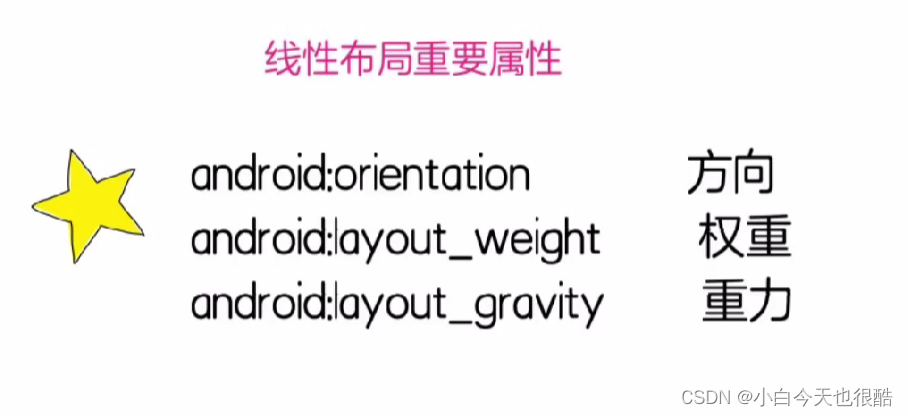
Android中的布局
相关的参数如下图:
代码展示(登录界面的实现):
<?xml version="1.0" encoding="utf-8"?>
<androidx.constraintlayout.widget.ConstraintLayout xmlns:android="http://schemas.android.com/apk/res/android"
    xmlns:app="http://schemas.android.com/apk/res-auto"
    xmlns:tools="http://schemas.android.com/tools"
    android:layout_width="match_parent"
    android:layout_height="match_parent"
    tools:context=".MainActivity">
    <!-- 头部背景 -->
    <ImageView
        android:id="@+id/hander"
        android:layout_width="match_parent"
        android:layout_height="280dp"
        android:contentDescription="@string/app_name"
        android:scaleType="centerCrop"
        android:src="@drawable/bg"
        app:layout_constraintTop_toTopOf="parent" />
<!--    <View-->
<!--        android:layout_width="0dp"-->
<!--        android:layout_height="0dp"-->
<!--        android:background="@drawable/hander_layer"-->
<!--        app:layout_constraintBottom_toBottomOf="@id/hander"-->
<!--        app:layout_constraintEnd_toEndOf="parent"-->
<!--        app:layout_constraintStart_toStartOf="parent"-->
<!--        app:layout_constraintTop_toTopOf="parent"/>-->

<View
    android:layout_width="1dp"
    android:layout_height="1dp"
    android:id="@+id/v1"
    android:layout_marginBottom="30dp"
    app:layout_constraintStart_toStartOf="parent"
    app:layout_constraintBottom_toBottomOf="@id/hander" />


    <androidx.constraintlayout.widget.ConstraintLayout
        android:layout_width="match_parent"
        android:layout_height="0dp"
        android:background="@drawable/login_baground"
        android:paddingStart="30dp"
        android:paddingEnd="30dp"
        app:layout_constraintBottom_toBottomOf="parent"
        app:layout_constraintTop_toBottomOf="@+id/v1"
        app:layout_constraintVertical_bias="0.0"
        tools:layout_editor_absoluteX="1dp">

        <TextView
            android:id="@+id/welcome"
            android:layout_width="match_parent"
            android:layout_height="wrap_content"
            android:layout_marginStart="10dp"
            android:layout_marginTop="25dp"
            android:layout_marginEnd="10dp"
            android:gravity="center"
            android:text="Welcome"
            android:textColor="@color/black"
            android:textSize="20sp"
            android:textStyle="bold"
            app:layout_constraintTop_toTopOf="parent" />

        <EditText
            android:id="@+id/inputEmail"
            android:layout_width="match_parent"
            android:layout_height="wrap_content"
            android:layout_marginStart="10dp"
            android:layout_marginTop="40dp"
            android:layout_marginEnd="10dp"
            android:background="@null"
            android:hint="账户"
            android:imeOptions="actionNext"
            android:inputType="textEmailAddress"
            android:paddingStart="60dp"
            android:paddingEnd="10dp"
            android:textColor="@color/black"
            android:textSize="15sp"
            app:layout_constraintTop_toBottomOf="@+id/welcome"
            tools:ignore="Autofill" />

        <View
            android:id="@+id/view"
            android:layout_width="match_parent"
            android:layout_height="1dp"
            android:layout_marginStart="10dp"
            android:layout_marginTop="10dp"
            android:background="@color/black"
            app:layout_constraintTop_toBottomOf="@id/inputEmail" />

        <ImageView
            android:layout_width="20dp"
            android:layout_height="20sp"
            android:layout_marginStart="10dp"
            android:contentDescription="@string/app_name"
            android:src="@drawable/ic_email"
            app:layout_constraintBottom_toBottomOf="@id/inputEmail"
            app:layout_constraintStart_toStartOf="@id/inputEmail"
            app:tint="@color/cardview_shadow_start_color" />

        <EditText
            android:id="@+id/inputPassword"
            android:layout_width="match_parent"
            android:layout_height="wrap_content"
            android:layout_marginStart="10dp"
            android:layout_marginTop="40dp"
            android:layout_marginEnd="10dp"
            android:background="@null"
            android:hint="密码"
            android:imeOptions="actionDone"
            android:inputType="textPassword"
            android:paddingStart="60dp"
            android:paddingEnd="10dp"
            android:textColor="@color/black"
            android:textSize="15sp"
            app:layout_constraintTop_toBottomOf="@id/view"
            tools:ignore="Autofill" />

        <View

            android:id="@+id/v2"
            android:layout_width="match_parent"
            android:layout_height="1dp"
            android:layout_marginStart="10dp"
            android:layout_marginTop="10dp"
            android:background="@color/black"
            app:layout_constraintTop_toBottomOf="@id/inputPassword" />

        <ImageView
            android:layout_width="20dp"
            android:layout_height="20dp"
            android:layout_marginStart="10dp"
            android:contentDescription="@string/app_name"
            android:src="@drawable/ic_lock"
            app:layout_constraintBottom_toBottomOf="@id/inputPassword"
            app:layout_constraintStart_toStartOf="@id/inputPassword"
            app:tint="@color/cardview_shadow_start_color" />

        <Button
            android:id="@+id/btn1"
            android:layout_width="match_parent"
            android:layout_height="wrap_content"
            android:layout_marginStart="10dp"
            android:layout_marginTop="50dp"
            android:layout_marginEnd="10dp"
            android:background="@drawable/primary_button"
            android:text="@string/login"
            android:textAllCaps="false"
            android:textColor="@color/white"
            android:textSize="13sp"
            android:textStyle="bold"
            app:layout_constraintTop_toBottomOf="@id/v2" />

        <Button
            android:id="@+id/btn2"
            android:layout_width="match_parent"
            android:layout_height="wrap_content"
            android:layout_marginStart="10dp"
            android:layout_marginTop="30dp"
            android:layout_marginEnd="10dp"
            android:background="@drawable/primary_button"
            android:text="@string/Singup"
            android:textAllCaps="false"
            android:textColor="@color/white"
            android:textSize="13sp"
            android:textStyle="bold"
            app:layout_constraintTop_toBottomOf="@id/btn1" />


    </androidx.constraintlayout.widget.ConstraintLayout>

</androidx.constraintlayout.widget.ConstraintLayout>
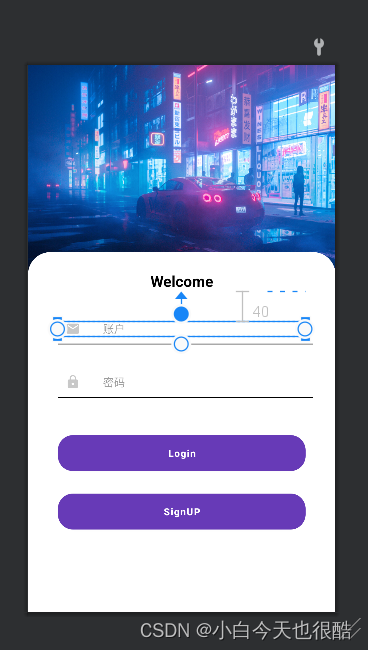
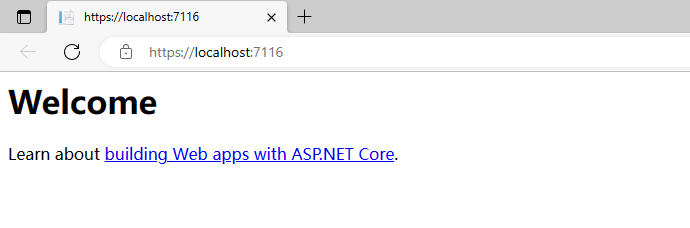
实现效果:
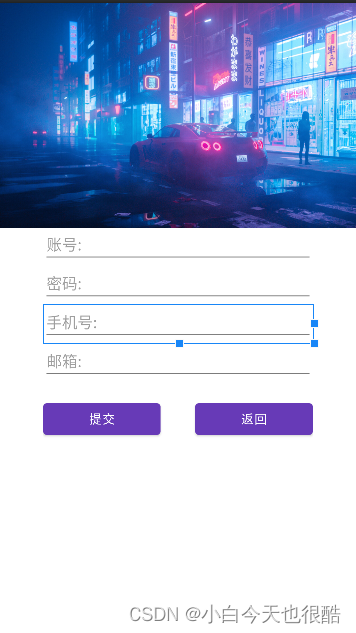
代码展示(注册界面的实现)
<?xml version="1.0" encoding="utf-8"?>
<androidx.constraintlayout.widget.ConstraintLayout xmlns:android="http://schemas.android.com/apk/res/android"
    xmlns:app="http://schemas.android.com/apk/res-auto"
    xmlns:tools="http://schemas.android.com/tools"
    android:layout_width="match_parent"
    android:layout_height="match_parent"
    tools:context=".MainActivity2">
    <LinearLayout
        android:layout_width="match_parent"
        android:layout_height="match_parent">
        <ImageView
            android:layout_width="match_parent"
            android:layout_height="260dp"
            android:scaleType="centerCrop"
            android:src="@drawable/bg"/>
    </LinearLayout>

    <LinearLayout
        android:layout_marginTop="30dp"
        android:layout_width="match_parent"
        android:gravity="center"
        android:padding="50dp"
        android:layout_height="match_parent"
        android:orientation="vertical">

        <EditText
            android:id="@+id/name1"
            android:layout_width="match_parent"
            android:layout_height="wrap_content"
            android:hint="账号:"/>
        <EditText
            android:id="@+id/pasw1"
            android:layout_width="match_parent"
            android:layout_height="wrap_content"
            android:hint="密码:"/>
        <EditText
            android:id="@+id/nunber"
            android:layout_width="match_parent"
            android:layout_height="wrap_content"
            android:hint="手机号:"/>
        <EditText
            android:id="@+id/emmail"
            android:layout_width="match_parent"
            android:layout_height="wrap_content"
            android:hint="邮箱:"/>
        <LinearLayout
            android:layout_width="match_parent"
            android:layout_height="wrap_content"
            android:orientation="horizontal">
            <Button
                android:id="@+id/sumbit"
                android:layout_width="wrap_content"
                android:layout_weight="1"
                android:layout_marginTop="20dp"
                android:layout_marginRight="40dp"
                android:layout_height="wrap_content"
                android:text="提交"/>
            <Button
                android:id="@+id/back"
                android:layout_width="wrap_content"
                android:layout_marginTop="20dp"
                android:layout_weight="1"
                android:layout_height="wrap_content"
                android:text="返回"/>

        </LinearLayout>

    </LinearLayout>
</androidx.constraintlayout.widget.ConstraintLayout>
实现效果
一些之前学习的笔记
控件:
按钮
图片按钮
文本框
编辑框
照片框
图片
浏览器框
地图框
选择开关
图片开关
wrap_content 自适应
match_parent 充父控件
LinearLayout:线性布局
再设置id的时候id要保证唯一性
android:text=“确定”
android:orientation=“vertical” 设置布局方向 vertical 代表垂直
android:orientation=“horizontal” 设置布局方向 horizontal 代表 横向
android:gravity=“center” 设置布局方向 center 代表居中
android:layout_gravity=“center” 带layout是针对自己的方式
android:background=“@color/design_default_color_primary” 改变背景颜色
控件id是Java中文件与xml文件通讯的介质类似于控件的号码 必须唯一
按钮 实现单击事件
要实现控件是就必须与按钮的id进行绑定 且id必须唯一
java里面的函数
btn_1.setOnClickListener(new View.OnClickListener() {
@Override
public void onClick(View view) {
       }
   });
安卓开发要多调式 多刷程序 (因为不知道程序什么时候会崩掉)
Toast.makeText(MainActivity.this,“你好”,Toast.LENGTH_SHORT).show();
这个程序的意思是单击之后会有一个弹窗提示 ————————>你好。
—————
控件的联动
——————
————————————————————————————————————————————————————————————————————————
EditText 这是一个编辑框
android:hint=“请输入名称” 文本框输入东西
LinearLayout 带LInear Layout就是针对自己的控件
android:layout_marginLeft=“140dp” 代表本身向左移动的空格
android:layout_marginTop=“20dp” 代表距离顶部的间距
要实现app之间的控件间距同理
android:layout_weight=“1” 控件实现均分
——————————————————————布局是嵌套进行的 一层套一层—————————————————————————----
************************************************************************
*                                                                       *
*        后期需要用到的东西按钮单击之后用来发送命令控制硬件   例如  open_door      *
*        文本框更新数据    用来接受硬件上报的传感器的值    例如 温度:36.5°C       *
*                                                                       *
*************************************************************************

举一反三很重要
需要网络权限  和授权

网络连接成功
订阅主题
MQTT是连接物联网的关键技术,因此这个协议很重要
UI之间反馈信息都靠这个
- */


![[计算机图形学]光线追踪前瞻:阴影图(前瞻预习/复习回顾)](https://img-blog.csdnimg.cn/1d59f7f832c74c6c996e4b6b4dfbd5fa.png)