Nacos客户端实例注册源码分析-篇一
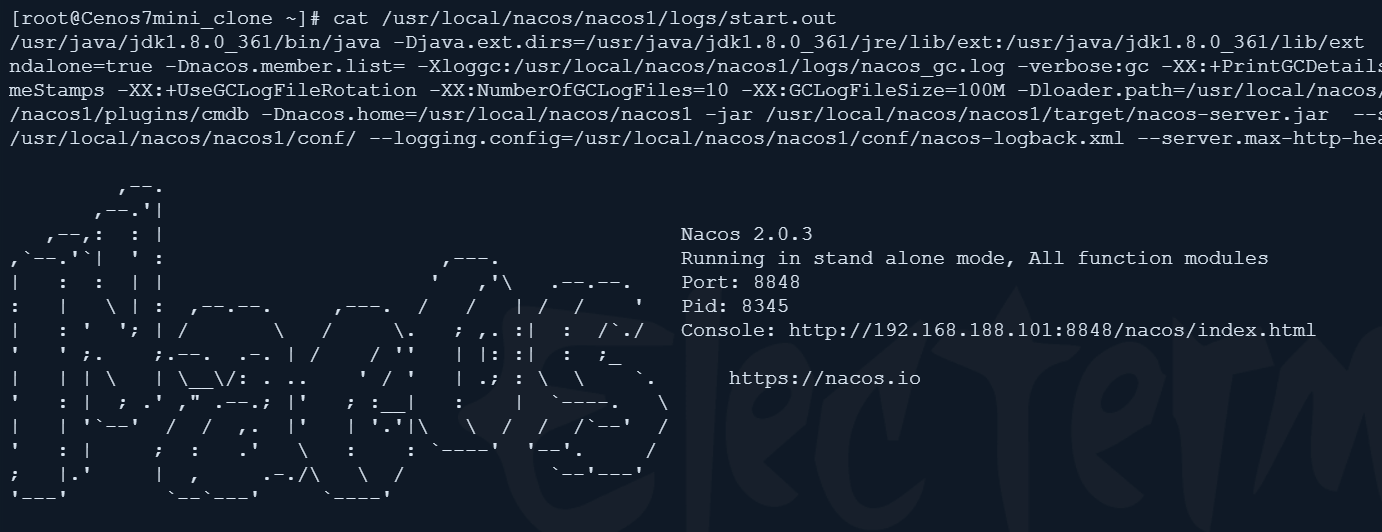
版本 nacos 服务器端 nacos 2.0.3
实例客户端注册入口
注册案例
回到之前搭建的服务提供者项目 9002 ,在真实的生产环境下,如果需要让某一个服务注册到 Nacos 的服务当中,我们引入对应的 nacos 发现依赖,配置对应的 yaml 文件即可。
启动服务器端的 nacos 服务(当然线上环境 nacos 服务是一直在线的)
在后端项目当中导入对应的服务依赖
<dependency>
    <groupId>com.alibaba.cloud</groupId>
    <artifactId>spring-cloud-starter-alibaba-nacos-discovery</artifactId>
</dependency>
配置相应的 yaml 文件
server:
  port: 9002
spring:
  application:
    name: nacos-provider //服务名
  cloud:
    nacos:
      discovery:
        server-addr: 192.168.188.101:8848 //nacos的服务地址
在启动类添加启动发现客户端注解 @EnableDiscoveryClient
@SpringBootApplication
@EnableDiscoveryClient
public class CloudanlibabaNacos9002Application {

    public static void main(String[] args) {
        SpringApplication.run(CloudanlibabaNacos9002Application.class, args);
    }

}
Nacos 客户端就可以看到相应的服务


那么这个注册的过程是怎么实现的呢?Nacos 到底是怎么从我们配置的 yaml 文件中扫描到相应的注册信息的呢?那我们接着往下看。。。
源码探究
还记得 SpringBoot 项目在通过 Maven 导入依赖后,是怎么实现自动装配的吗?对了,核心就是 spring.factories 文件,那我们就从注册发现的包导入入手。
在普通的 SpringBoot 项目的 pom.xml 当中引入相应的依赖,导入 discovery 的 jar 包
<dependency>
    <groupId>com.alibaba.cloud</groupId>
    <artifactId>spring-cloud-starter-alibaba-nacos-discovery</artifactId>
</dependency>
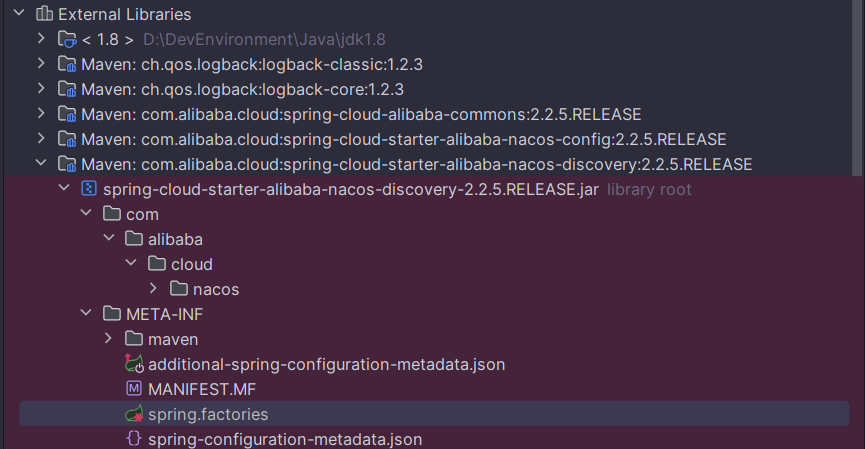

- NacosDiscoveryAutoConfiguration Nacos 发现自动配置
- RibbonNacosAutoConfiguration Ribbon Nacos 自动配置
- NacosDiscoveryEndpointAutoConfiguration Nacos 发现端点自动配置
- NacosServiceRegistryAutoConfiguration Nacos 服务注册自动配置
- NacosConfigServerAutoConfiguration Nacos 配置的自动配置
可以看到的是 SpringBoot 通过 EnableAutoConfiguration 实现类的扫描自动加载,那么如何知道我们的服务在注册的时候使用的是那个类呢?
其实我们只要找到有 Auto(自动) 修饰的类即可,可以看到的是在 factories 文件当中有 Auto 修饰的类有多个。
因为我们需要了解的客户端的服务注册 ,那么我们只需要找服务注册 **NacosServiceRegistryAutoConfiguration **即可
//
// Source code recreated from a .class file by IntelliJ IDEA
// (powered by FernFlower decompiler)
//

package com.alibaba.cloud.nacos.registry;

import com.alibaba.cloud.nacos.ConditionalOnNacosDiscoveryEnabled;
import com.alibaba.cloud.nacos.NacosDiscoveryProperties;
import com.alibaba.cloud.nacos.discovery.NacosDiscoveryAutoConfiguration;
import java.util.List;
import org.springframework.beans.factory.ObjectProvider;
import org.springframework.boot.autoconfigure.AutoConfigureAfter;
import org.springframework.boot.autoconfigure.condition.ConditionalOnBean;
import org.springframework.boot.autoconfigure.condition.ConditionalOnProperty;
import org.springframework.boot.context.properties.EnableConfigurationProperties;
import org.springframework.cloud.client.serviceregistry.AutoServiceRegistrationAutoConfiguration;
import org.springframework.cloud.client.serviceregistry.AutoServiceRegistrationConfiguration;
import org.springframework.cloud.client.serviceregistry.AutoServiceRegistrationProperties;
import org.springframework.context.ApplicationContext;
import org.springframework.context.annotation.Bean;
import org.springframework.context.annotation.Configuration;

@Configuration(
    proxyBeanMethods = false
)
@EnableConfigurationProperties
@ConditionalOnNacosDiscoveryEnabled
@ConditionalOnProperty(
    value = {"spring.cloud.service-registry.auto-registration.enabled"},
    matchIfMissing = true
)
@AutoConfigureAfter({AutoServiceRegistrationConfiguration.class, AutoServiceRegistrationAutoConfiguration.class, NacosDiscoveryAutoConfiguration.class})
public class NacosServiceRegistryAutoConfiguration {
    public NacosServiceRegistryAutoConfiguration() {
    }

    @Bean
    public NacosServiceRegistry nacosServiceRegistry(NacosDiscoveryProperties nacosDiscoveryProperties) {
        return new NacosServiceRegistry(nacosDiscoveryProperties);
    }

    @Bean
    @ConditionalOnBean({AutoServiceRegistrationProperties.class})
    public NacosRegistration nacosRegistration(ObjectProvider<List<NacosRegistrationCustomizer>> registrationCustomizers, NacosDiscoveryProperties nacosDiscoveryProperties, ApplicationContext context) {
        return new NacosRegistration((List)registrationCustomizers.getIfAvailable(), nacosDiscoveryProperties, context);
    }

    @Bean
    @ConditionalOnBean({AutoServiceRegistrationProperties.class})
    public NacosAutoServiceRegistration nacosAutoServiceRegistration(NacosServiceRegistry registry, AutoServiceRegistrationProperties autoServiceRegistrationProperties, NacosRegistration registration) {
        return new NacosAutoServiceRegistration(registry, autoServiceRegistrationProperties, registration);
    }
}
可以看到服务注册类当中初始化了许多的 Bean 容器组件,这些组件都是 Spring 在初始化的时候注入到其中的,但以上 Bean 当中最核心的就是 NacosAutoServiceRegistration ,下面我们就 NacosAutoServiceRegistration 该类展开研究
注册的核心 NacosAutoServiceRegistration 类
先进入该类中大致的看一眼,该类的整体结构

可以看到的是该类的构造方法调用的是父类的构造,传入了两个重要的参数,服务注册表 **serviceRegistry **与服务自动注册属性 autoServiceRegistrationProperties

而父类将这两个注册的参数传递给当前的对象,这里的当前对象也就是在后端 yaml 中配置的相应信息,那么这些信息具体都是干什么都有什么作用呢?这就得去研究研究 NacosAutoSericeRegistration 这个类了,接着往下看。
NacosAutoSericeRegistration 的基础关系图
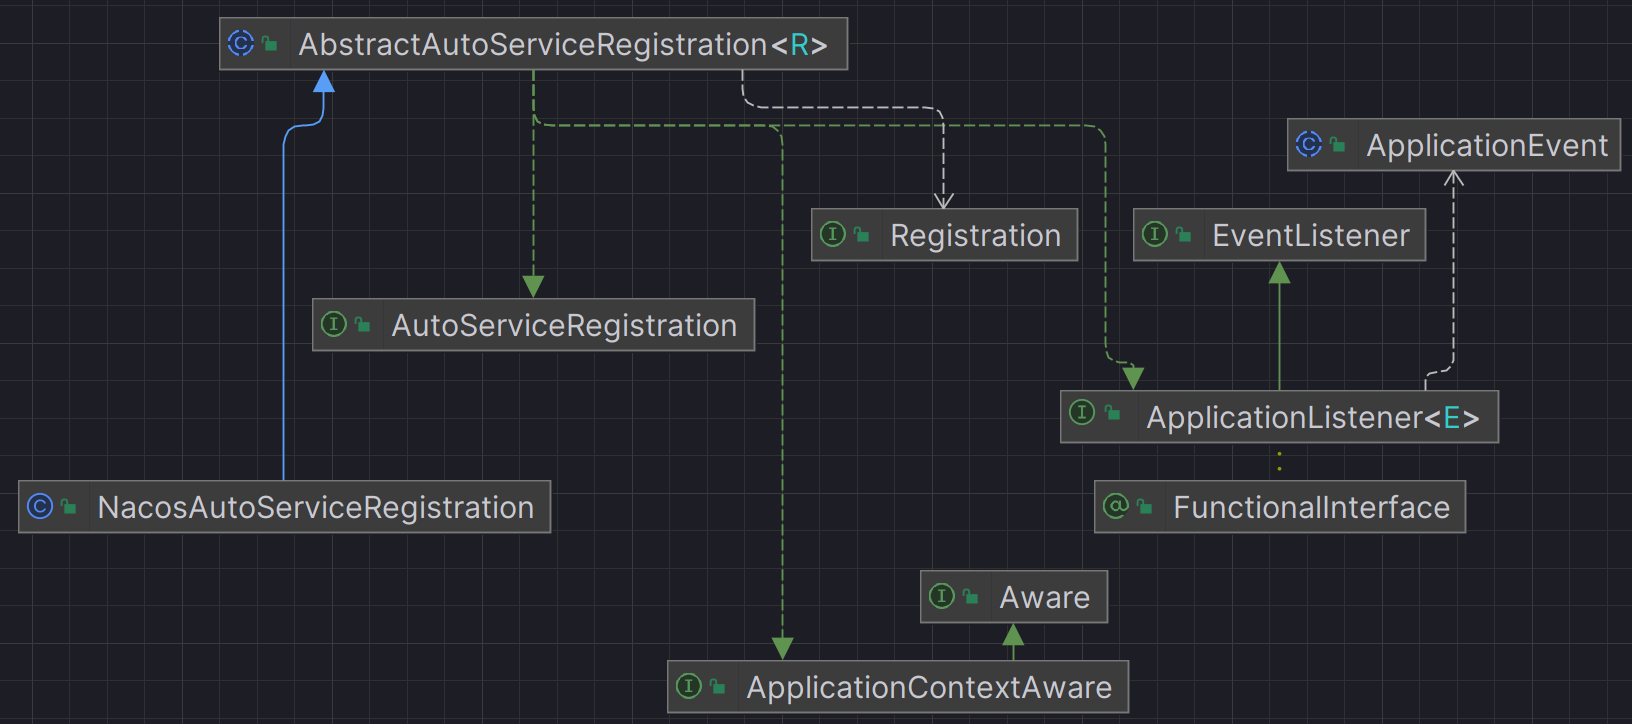
从上面的图中可以 NacosAutoSericeRegistration 基础了抽象类 AbstractAutoServiceRegistrantion 同时该抽象类由实现了 ApplicationListener 这个接口,想必大家都知道 listener监听器是干什么的咯。同样的,这里的 ApplicationListener 也是同样的作用。
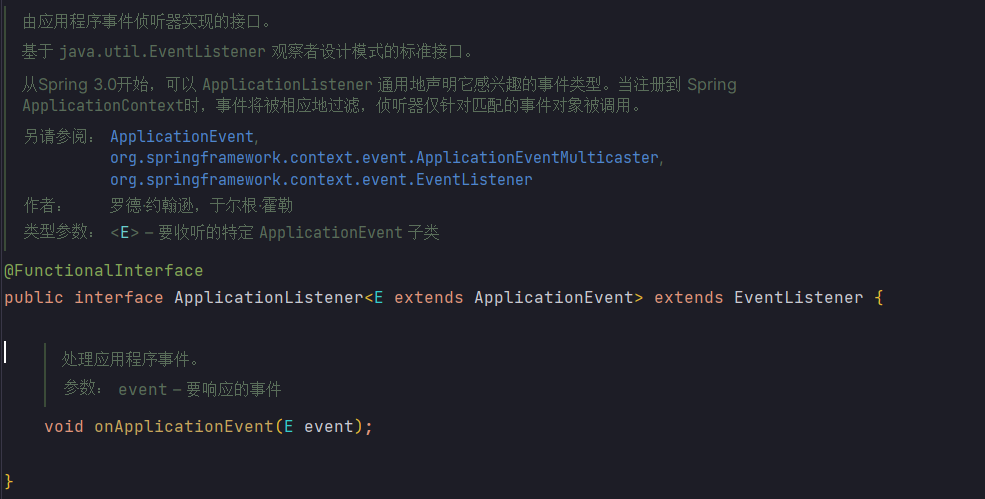
@FunctionalInterface
public interface ApplicationListener<E extends ApplicationEvent> extends EventListener {

	/**
	 * Handle an application event.
	 * @param event the event to respond to
	 */
	void onApplicationEvent(E event);

}
在监听接口当中有一个需要实现的方法 onApplicationEvent(E event) ,该方法是在项目启动时候会被触发的。
所以我们就返回其 AbstractAutoServiceRegistrantion 抽象类当中去看看该方法具体做了什么事呢?
@Override
@SuppressWarnings("deprecation")
public void onApplicationEvent(WebServerInitializedEvent event) {
	bind(event);
}
@Deprecated
public void bind(WebServerInitializedEvent event) {
	ApplicationContext context = event.getApplicationContext();
	if (context instanceof ConfigurableWebServerApplicationContext) {
		if ("management".equals(((ConfigurableWebServerApplicationContext) context)
				.getServerNamespace())) {
			return;
		}
	}
	this.port.compareAndSet(0, event.getWebServer().getPort());
	this.start();
}
public void start() {
	if (!isEnabled()) {
		if (logger.isDebugEnabled()) {
			logger.debug("Discovery Lifecycle disabled. Not starting");
		}
		return;
	}
	// only initialize if nonSecurePort is greater than 0 and it isn't already running
	// because of containerPortInitializer below
	if (!this.running.get()) {
		this.context.publishEvent(
				new InstancePreRegisteredEvent(this, getRegistration()));
        //注册
		register();
		if (shouldRegisterManagement()) {
			registerManagement();
		}
		this.context.publishEvent(
				new InstanceRegisteredEvent<>(this, getConfiguration()));
		this.running.compareAndSet(false, true);
	}
}
通过上面的代码可以看到在启动的瞬间先完成 WebServerInitializedEvent 服务器的一些初始化,然后其调用 start 方法中 完成随后的 register 完成注册。

其实这里的 AbstractAutoServiceRegistranion 类下 register 调用最终是指向 AutoServiceRegistranion的 register 方法
@Override
public void register(Registration registration) {
	if (StringUtils.isEmpty(registration.getServiceId())) {
		log.warn("No service to register for nacos client...");
		return;
	}
	NamingService namingService = namingService();
	String serviceId = registration.getServiceId();
	String group = nacosDiscoveryProperties.getGroup();
    //构建instance实例
	Instance instance = getNacosInstanceFromRegistration(registration);
	try {
        //向服务端注册此服务
		namingService.registerInstance(serviceId, group, instance);
		log.info("nacos registry, {} {} {}:{} register finished", group, serviceId,
				instance.getIp(), instance.getPort());
	}
	catch (Exception e) {
		log.error("nacos registry, {} register failed...{},", serviceId,
				registration.toString(), e);
		// rethrow a RuntimeException if the registration is failed.
		// issue : https://github.com/alibaba/spring-cloud-alibaba/issues/1132
		rethrowRuntimeException(e);
	}
}
SpringBoot 项目-实例构建
private Instance getNacosInstanceFromRegistration(Registration registration) {
	Instance instance = new Instance();
	instance.setIp(registration.getHost());
	instance.setPort(registration.getPort());
	instance.setWeight(nacosDiscoveryProperties.getWeight());
	instance.setClusterName(nacosDiscoveryProperties.getClusterName());
	instance.setEnabled(nacosDiscoveryProperties.isInstanceEnabled());
	instance.setMetadata(registration.getMetadata());
	instance.setEphemeral(nacosDiscoveryProperties.isEphemeral());
	return instance;
}
Nacos源码提供的Dome - 实例构建
Instance instance = new Instance();
instance.setIp("1.1.1.1");
instance.setPort(800);
instance.setWeight(2);
Map<String, String> map = new HashMap<String, String>();
map.put("netType", "external");
map.put("version", "2.0");
instance.setMetadata(map);


哈哈~~~ 看到 AutoServiceRegistranion 类下的 register 方法大家有没有似曾相识的感觉呢?
没错这个和我之前在 Nacos 源码中的 registration 调用是一样的。
所以赖,通过上面的流程,对于 SpringBoot 项目中客户端实例的注册就立马明朗清晰了,下面要做什么呢?当然就是 Debug 验证我们的猜想咯。
补充 接口调用
**启动之前的项目测试类 9002 **
- 可以看到项目在启动的瞬间先进行自动装载调用 NacosAutoServiceRegistration 方法,创建 NacosAutoServiceRegistration 对象

- 进入后调用父类的构造方法,然后给你属性赋值

- 随后会启用监听调用 bind 方法
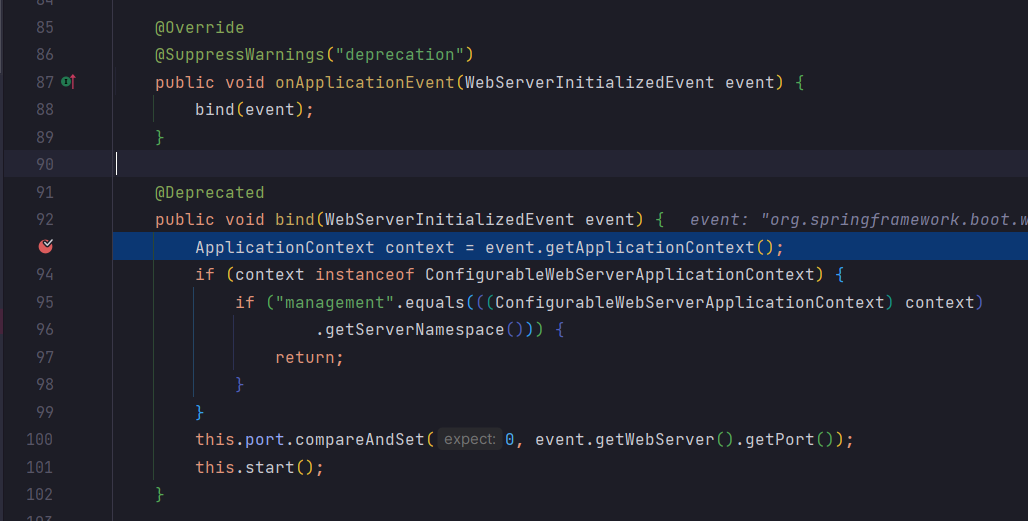
-
调用其 start 方法
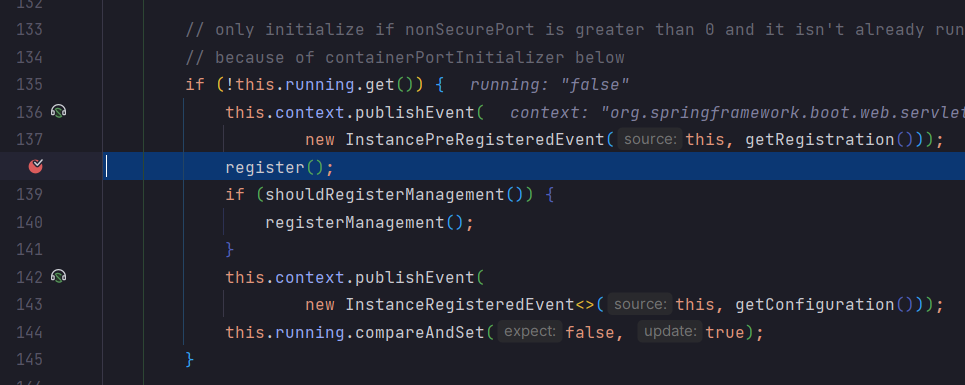
-
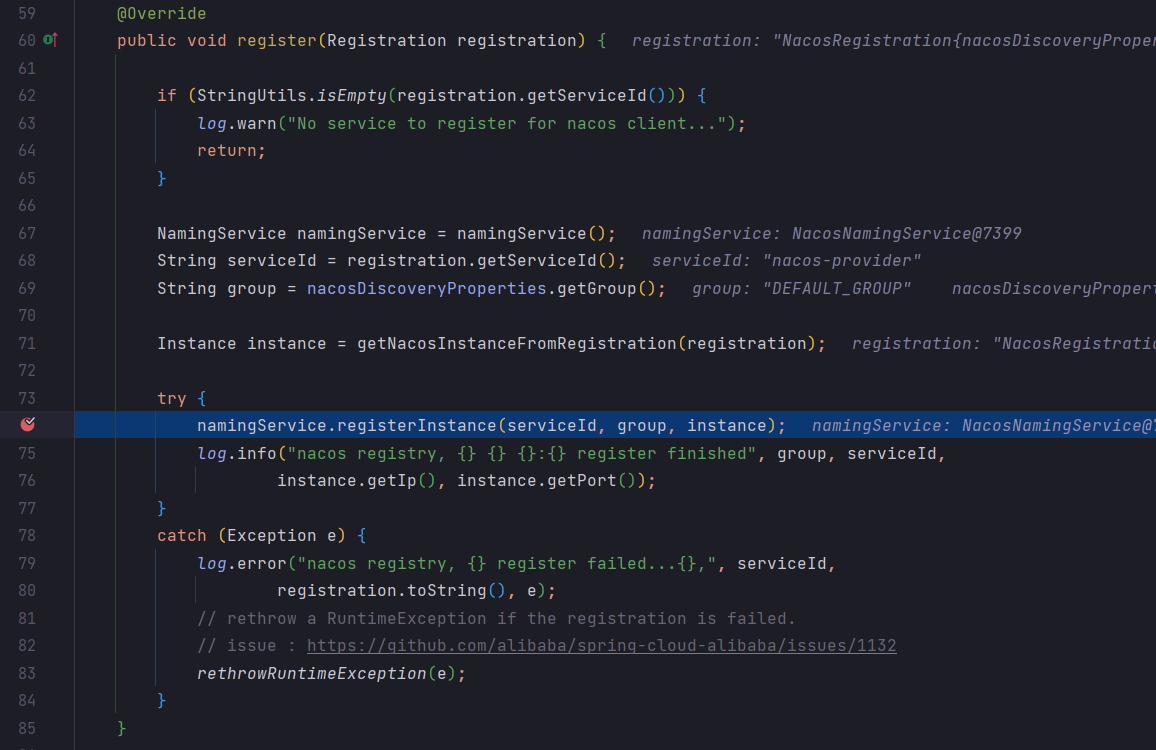
通过 register 抽象方法交于我们的子类 实现


-
这里就将我们的 SpringBoot 启动配置文件中的所有的信息,置入到了 instance 实例对象当中
[外链图片转存失败,源站可能有防盗链机制,建议将图片保存下来直接上传(img-HB0PNcQj-1681367588116)(null)]
-
前面看到 namingService 中调用了 registerInstance 方法进行注册,我们可以看看内部是怎么处理的

-
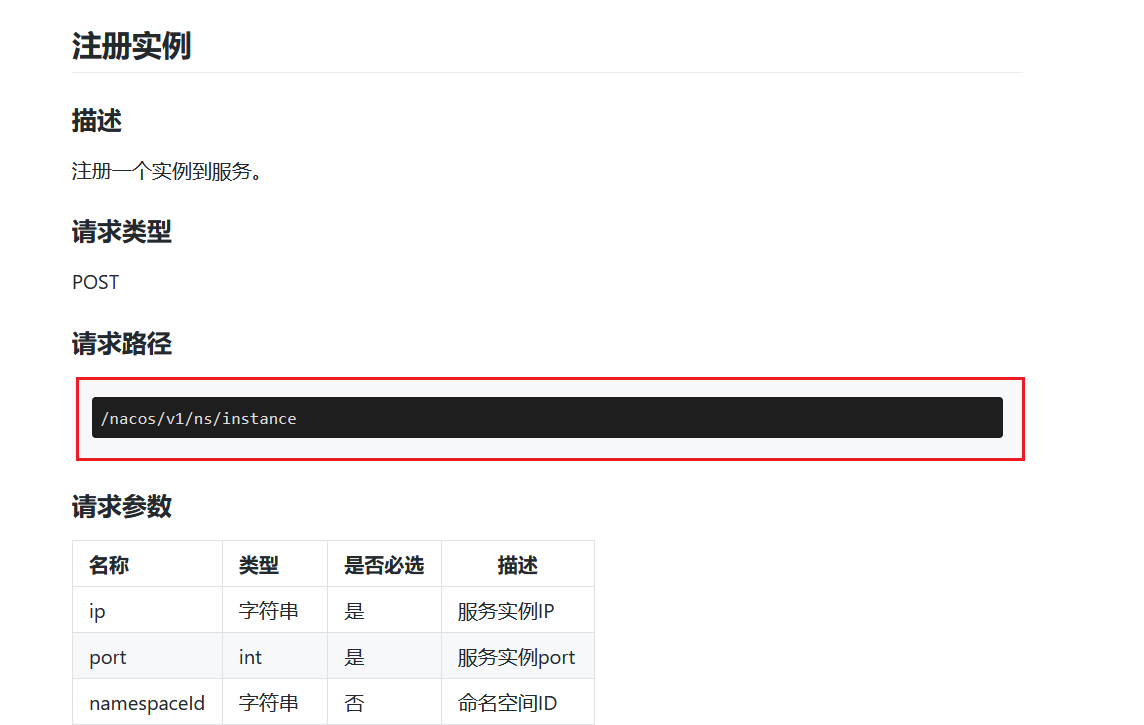
其实这里内部也是通过代理的形式进行调用的,同时调用远端的一个 api 接口 /nacos/v1/ns/instance 进行注册,该接口也就是官方在官网中的文档中提到的 注册接口
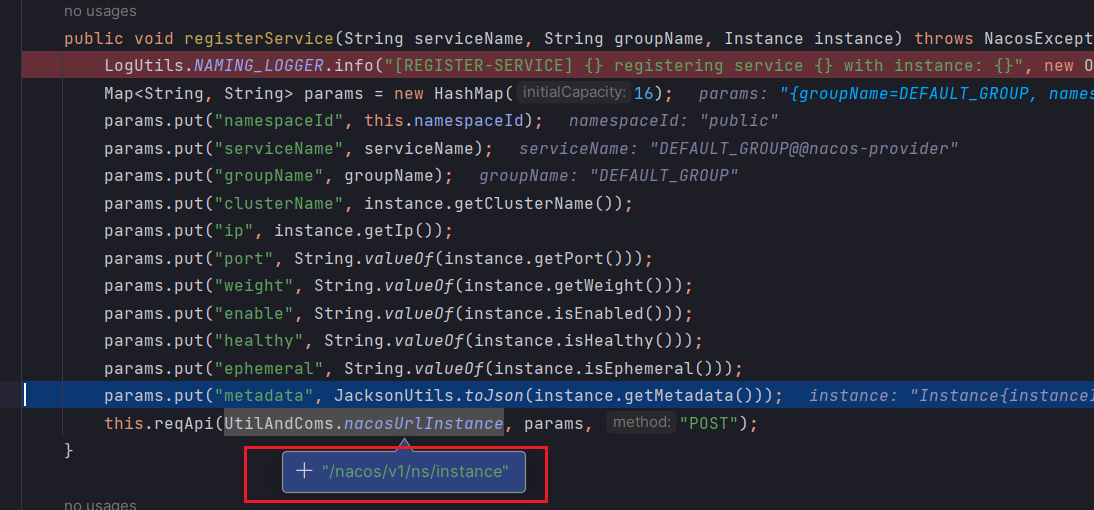
注册的本身是调用了 Nacos 的接口的,我们可以在官网上访问到的 Nacos
-
