【JSON2WEB】01 WEB管理信息系统架构设计
【JSON2WEB】02 JSON2WEB初步UI设计
【JSON2WEB】03 go的模板包html/template的使用
【JSON2WEB】04 amis低代码前端框架介绍
【JSON2WEB】05 前端开发三件套 HTML CSS JavaScript 速成
【JSON2WEB】06 JSON2WEB前端框架搭建
【JSON2WEB】07 Amis可视化设计器CRUD增删改查
【JSON2WEB】08 Amis的事件和校验
【JSON2WEB】09 Amis-editor的代码移植到json2web
基于 Amis 做个登录页面 login.html ,用于验证用户名和密码的,验证成功后返回token,并保存token在 localStorage中。
参考视频教程,https://www.bilibili.com/video/BV1wu411Q7y3/?spm_id_from=333.788 ,Amis官方也没有视频教程,没有一点基础学起来很费劲啊。
1 创建登录页面 Login.html
1 新建登录页面
从官方文档 https://aisuda.bce.baidu.com/amis/zh-CN/docs/start/getting-started 拷贝hello.html,并修改后代码如下:
<!DOCTYPE html>
<html lang="zh">

<head>
  <meta charset="UTF-8" />
  <title>amis demo</title>
  <meta http-equiv="Content-Type" content="text/html; charset=utf-8" />
  <meta name="viewport" content="width=device-width, initial-scale=1, maximum-scale=1" />
  <meta http-equiv="X-UA-Compatible" content="IE=Edge" />
  <link rel="stylesheet" href="/sdk/sdk.css" />
  <link rel="stylesheet" href="/sdk/helper.css" />
  <link rel="stylesheet" href="/sdk/iconfont.css" />
  <!-- 这是默认主题所需的,如果是其他主题则不需要 -->
  <!-- 从 1.1.0 开始 sdk.css 将不支持 IE 11,如果要支持 IE11 请引用这个 css,并把前面那个删了 -->
  <!-- <link rel="stylesheet" href="sdk-ie11.css" /> -->
  <!-- 不过 amis 开发团队几乎没测试过 IE 11 下的效果,所以可能有细节功能用不了,如果发现请报 issue -->
  <style>
    html,
    body,
    .app-wrapper {
      position: relative;
      width: 100%;
      height: 100%;
      margin: 0;
      padding: 0;
    }
  </style>
</head>

<body>
  <div id="root" class="app-wrapper"></div>
  <script src="/sdk/sdk.js"></script>
  <script type="text/javascript">
    (function () {
      let amis = amisRequire('amis/embed');
      // 通过替换下面这个配置来生成不同页面
      let amisJSON = {
        type: 'page',
        title: '登录JSON2WEB',
        body: {
          type: 'form',
          title: '',
          mode: 'horizontal',
          api: {
            url: 'http://127.0.0.1:5217/token/generate-token?userid=$userId&passwd=$passWd',
            method: 'post',
            adaptor: function (payload) {
              console.log(payload);
              if (payload.status === 0) {
                localStorage.setItem('token', payload.data.token);
                // localStorage.clear(); location.href = '/login.html';
                return payload;
              }
            }
          },
          redirect: '/index.html',
          body: [
            {
              label: '用户名:',
              type: 'input-text',
              name: 'userId'
            },
            {
              label: '密码:',
              type: 'input-password',
              name: 'passWd'
            }
          ]
        }
      };
      let amisScoped = amis.embed('#root', amisJSON);
    })();
  </script>
</body>

</html>
1.2 核心就是 API的配置
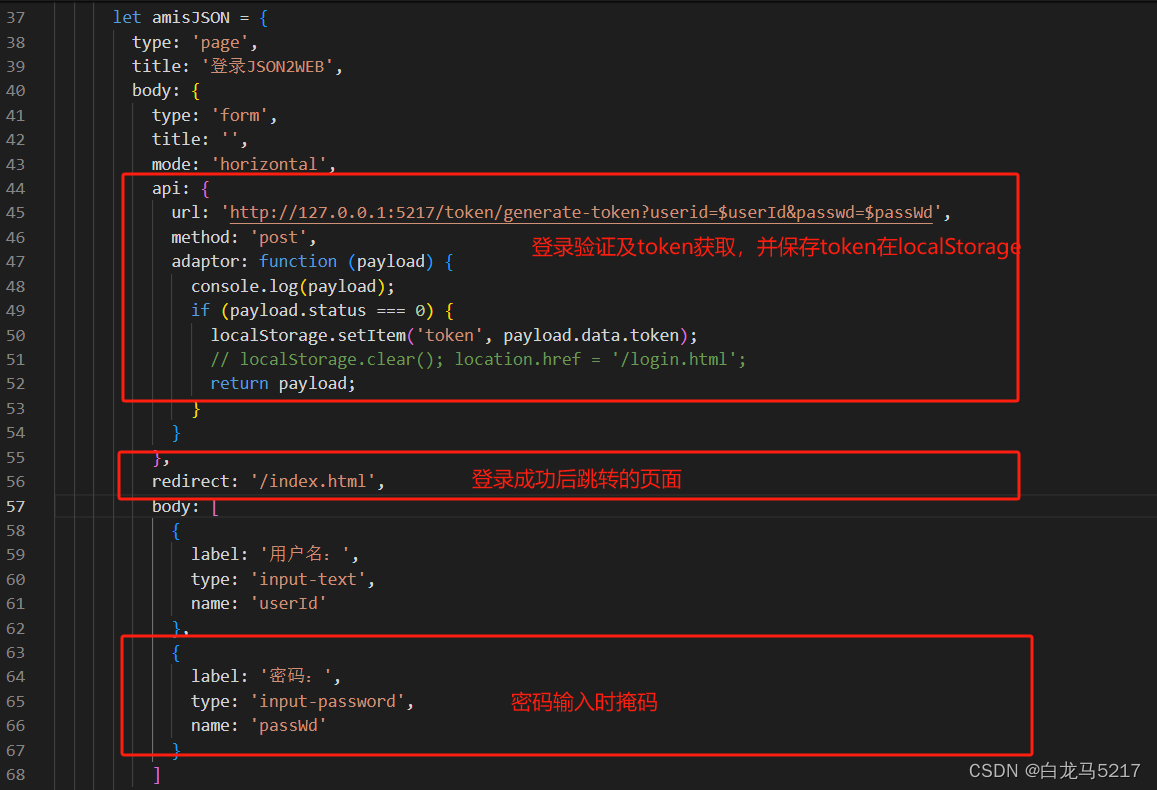
1.3 页面预览

2 主页 index.html的代码
2.1 所有的API请求都带上token
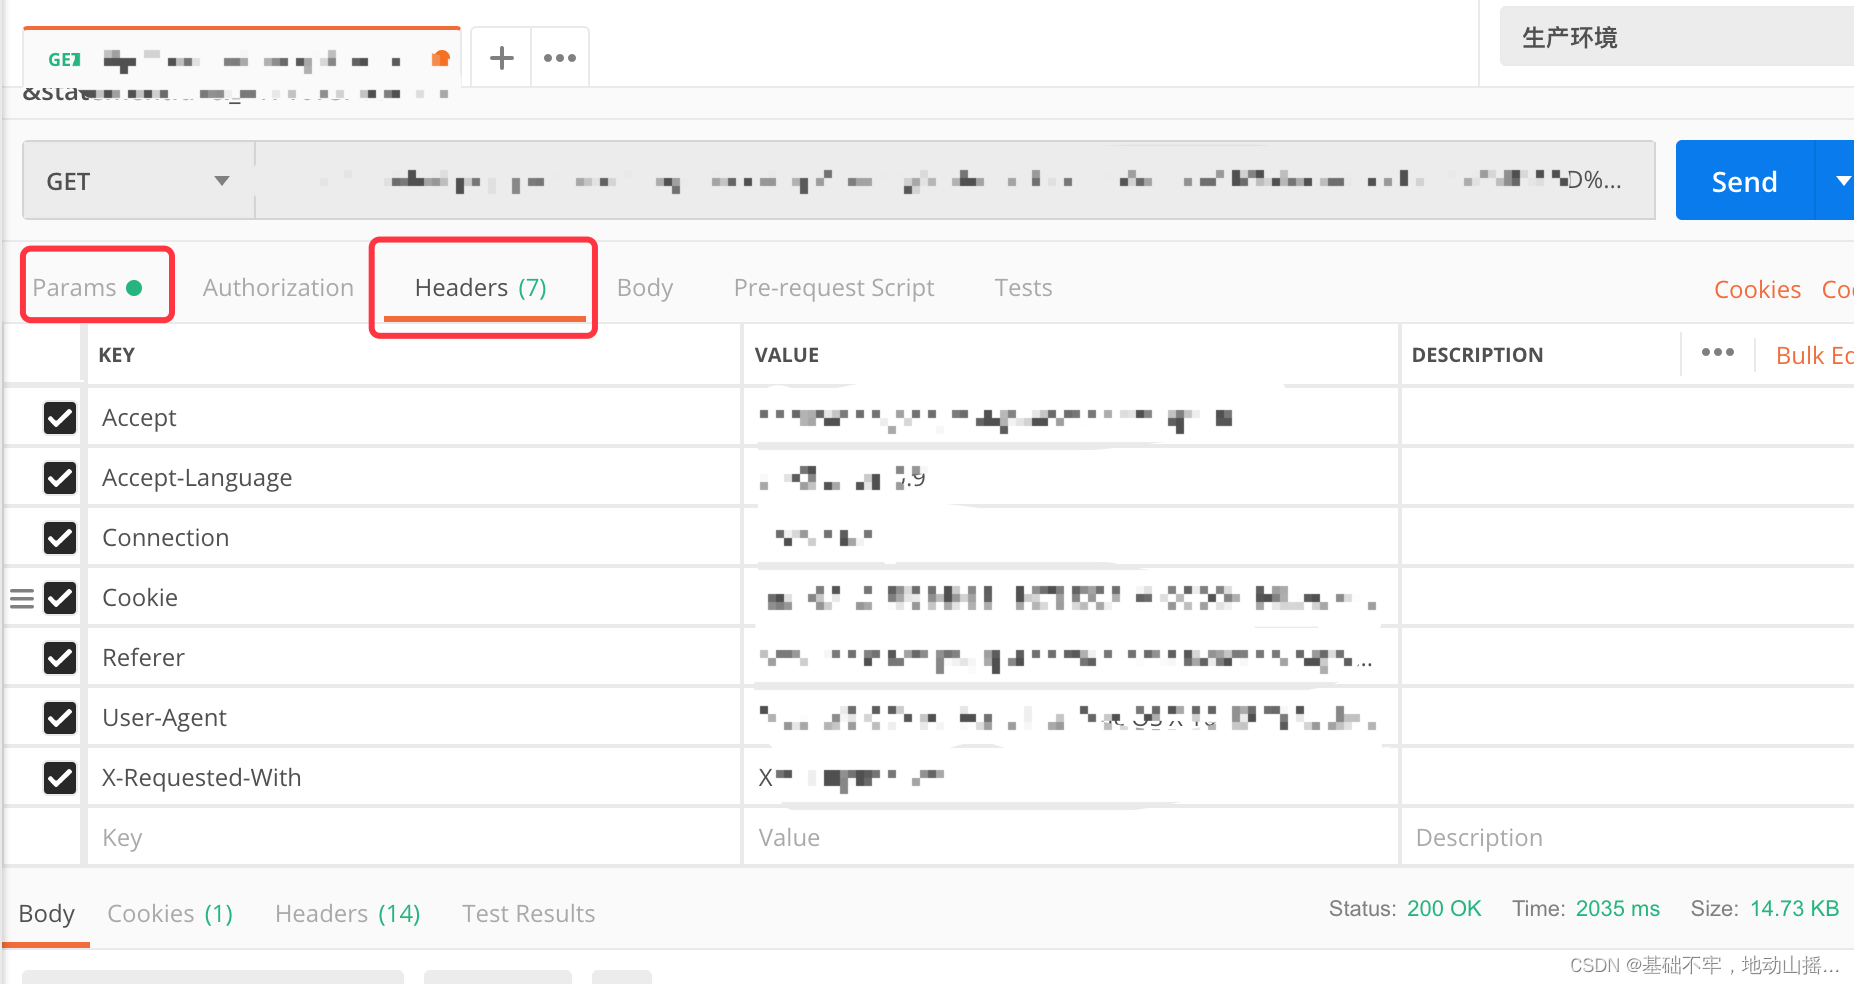
token放在请求头里的Authorization,请求适配器代码如下:
requestAdaptor(api) {
            // Api前缀
            // if (api.url.indexOf("pages") == -1){
            //   api.url = "http://127.0.0.1:5217" + api.url;
            // }
            //api.url = "http://127.0.0.1:5217" + api.url;
            // token 认证
            // api.headers['Authorization'] = "Bearer " + localStorage.getItem('token');
            api.headers['Authorization'] = localStorage.getItem('token');
            console.log("全局请求适配器", api);
            return api;
          },
2.2 所有的响应适配器
也就是没有token或过期等都请求不到后台的数据,代码如下:
// 全局 api 适配器。
          // 另外在 amis 配置项中的 api 也可以配置适配器,针对某个特定接口单独处理。
          responseAdaptor(payload, response) {
            console.log("全局响应适配器", response);
            if (response.state == 401) {
              localStorage.clear();
              location.href = '/';
            }
            return payload, response;
          },
2.3 退出代码
退出时清空token并跳转到登录页,用内嵌js代码实现如下?
 header: {
          type: 'tpl',
          inline: false,
          className: 'w-full',
          tpl: `<div class="flex justify-between"><div>顶部区域左侧</div><div><a href="#" οnclick="localStorage.clear(); location.href = '/';">退出</a></div></div>`
        },
2.4 首页全部代码
<!DOCTYPE html>
<html>

<head>
  <meta charset="UTF-8" />
  <title>amis admin</title>
  <meta http-equiv="Content-Type" content="text/html; charset=utf-8" />
  <meta name="viewport" content="width=device-width, initial-scale=1, maximum-scale=1" />
  <meta http-equiv="X-UA-Compatible" content="IE=Edge" />
  <!--
  <link rel="stylesheet" title="default" href="https://cdn.jsdelivr.net/npm/amis@beta/sdk/sdk.css" />
  <link rel="stylesheet" href="https://cdn.jsdelivr.net/npm/amis@beta/sdk/helper.css" />
  <script src="https://cdn.jsdelivr.net/npm/amis@beta/sdk/sdk.js"></script>
 -->

  <link rel="stylesheet" title="default" href="/sdk/sdk.css" />
  <link rel="stylesheet" title="default" href="/sdk/antd.css" />
  <!-- <link rel="stylesheet" title="default" href="/sdk/cxd.css" /> -->
  <link rel="stylesheet" href="/sdk/helper.css" />
  <script src="/sdk/sdk.js"></script>

  <!-- <script src="https://cdn.jsdelivr.net/npm/vue@2"></script> -->
  <!-- <script src="https://cdn.jsdelivr.net/npm/history/umd/history.js"></script> -->
  <script src="/sdk/history.js"></script>
  <style>
    html,
    body,
    .app-wrapper {
      position: relative;
      width: 100%;
      height: 100%;
      margin: 0;
      padding: 0;
    }
  </style>
</head>

<body>
  <div id="root" class="app-wrapper"></div>
  <script>
    (function () {
      let amis = amisRequire('amis/embed');
      const match = amisRequire('path-to-regexp').match;

      // 如果想用 browserHistory 请切换下这处代码, 其他不用变
      //const history = History.createBrowserHistory();
      const history = History.createHashHistory();

      const app = {
        type: 'app',
        brandName: 'JSON2WEB',
        //logo: '/public/logo.png',
        logo: '/public/5217.jpg',
        header: {
          type: 'tpl',
          inline: false,
          className: 'w-full',
          tpl: `<div class="flex justify-between"><div>顶部区域左侧</div><div><a href="#" οnclick="localStorage.clear(); location.href = '/';">退出</a></div></div>`
        },
        // 如果想用 browserHistory 请切换下这处代码, 他不用变">退出登录</a></div></div>`
        footer: '<div class="p-2 text-center bg-light">版权没有,翻版不究!底部区域</div>',
        asideBefore: '<div class="p-2 text-center">菜单前面区域</div>',
        asideAfter: '<div class="p-2 text-center">菜单后面区域</div>',
        api: '/pages/site.json'
      };

      function normalizeLink(to, location = history.location) {
        to = to || '';

        if (to && to[0] === '#') {
          to = location.pathname + location.search + to;
        } else if (to && to[0] === '?') {
          to = location.pathname + to;
        }

        const idx = to.indexOf('?');
        const idx2 = to.indexOf('#');
        let pathname = ~idx
          ? to.substring(0, idx)
          : ~idx2
            ? to.substring(0, idx2)
            : to;
        let search = ~idx ? to.substring(idx, ~idx2 ? idx2 : undefined) : '';
        let hash = ~idx2 ? to.substring(idx2) : location.hash;

        if (!pathname) {
          pathname = location.pathname;
        } else if (pathname[0] != '/' && !/^https?\:\/\//.test(pathname)) {
          let relativeBase = location.pathname;
          const paths = relativeBase.split('/');
          paths.pop();
          let m;
          while ((m = /^\.\.?\//.exec(pathname))) {
            if (m[0] === '../') {
              paths.pop();
            }
            pathname = pathname.substring(m[0].length);
          }
          pathname = paths.concat(pathname).join('/');
        }

        return pathname + search + hash;
      }

      function isCurrentUrl(to, ctx) {
        if (!to) {
          return false;
        }
        const pathname = history.location.pathname;
        const link = normalizeLink(to, {
          ...location,
          pathname,
          hash: ''
        });

        if (!~link.indexOf('http') && ~link.indexOf(':')) {
          let strict = ctx && ctx.strict;
          return match(link, {
            decode: decodeURIComponent,
            strict: typeof strict !== 'undefined' ? strict : true
          })(pathname);
        }

        return decodeURI(pathname) === link;
      }

      let amisInstance = amis.embed(
        '#root',
        app,
        {
          location: history.location
        },
        {
          // watchRouteChange: fn => {
          //   return history.listen(fn);
          // },
          requestAdaptor(api) {
            // Api前缀
            // if (api.url.indexOf("pages") == -1){
            //   api.url = "http://127.0.0.1:5217" + api.url;
            // }
            //api.url = "http://127.0.0.1:5217" + api.url;
            // token 认证
            // api.headers['Authorization'] = "Bearer " + localStorage.getItem('token');
            api.headers['Authorization'] = localStorage.getItem('token');
            console.log("全局请求适配器", api);
            return api;
          },
          // 全局 api 适配器。
          // 另外在 amis 配置项中的 api 也可以配置适配器,针对某个特定接口单独处理。
          responseAdaptor(payload, response) {
            console.log("全局响应适配器", response);
            if (response.state == 401) {
              localStorage.clear();
              location.href = '/';
            }
            return payload, response;
          },
          updateLocation: (location, replace) => {
            location = normalizeLink(location);
            if (location === 'goBack') {
              return history.goBack();
            } else if (
              (!/^https?\:\/\//.test(location) &&
                location ===
                history.location.pathname + history.location.search) ||
              location === history.location.href
            ) {
              // 目标地址和当前地址一样,不处理,免得重复刷新
              return;
            } else if (/^https?\:\/\//.test(location) || !history) {
              return (window.location.href = location);
            }

            history[replace ? 'replace' : 'push'](location);
          },
          jumpTo: (to, action) => {
            if (to === 'goBack') {
              return history.goBack();
            }

            to = normalizeLink(to);

            if (isCurrentUrl(to)) {
              return;
            }

            if (action && action.actionType === 'url') {
              action.blank === false
                ? (window.location.href = to)
                : window.open(to, '_blank');
              return;
            } else if (action && action.blank) {
              window.open(to, '_blank');
              return;
            }

            if (/^https?:\/\//.test(to)) {
              window.location.href = to;
            } else if (
              (!/^https?\:\/\//.test(to) &&
                to === history.pathname + history.location.search) ||
              to === history.location.href
            ) {
              // do nothing
            } else {
              history.push(to);
            }
          },
          isCurrentUrl: isCurrentUrl,
          // theme: 'cxd'
          theme: 'cxd'
        }
      );

      history.listen(state => {
        amisInstance.updateProps({
          location: state.location || state
        });
      });
    })();
  </script>
</body>

</html>
3 后端REST2SQL修改
3.1 所有REST请求都要验证token
token从请求头Authorization获取。
switch req["RESTorSQL"] {
	case "REST":
		// token有效性验证
		tokenString := req["Authorization"].(string)
		if vToken(w, tokenString) != 200 {
			return
		}
token验证函数:
// token 验证函数
func vToken(w http.ResponseWriter, tokenString string) int {
	tokenmap := make(map[string]interface{})
	tokenmap = token.ValidateTokenHandler(w, tokenString)
	if tokenmap["status"] != http.StatusOK {
		// 抛出错误信息
		httpResWriter(w,tokenmap)
		return 401
	}
	return 200
}
主要内容就是抛出token错误信息,并设置返回代码为 401
4 nodejs路由配置
// 定义路由以加载不同的页面
app.get('/', (req, res) => {
  res.sendFile(path.resolve(__dirname, 'login.html'));
});

app.get('/index.html', function (req, res) {
  res.sendFile(path.join(__dirname, 'index.html'));
});
http://localhost:3000/ 请求的就是登录页面 login.html
http://localhost:3000/index.html请求的是 index.html
5 实操演练
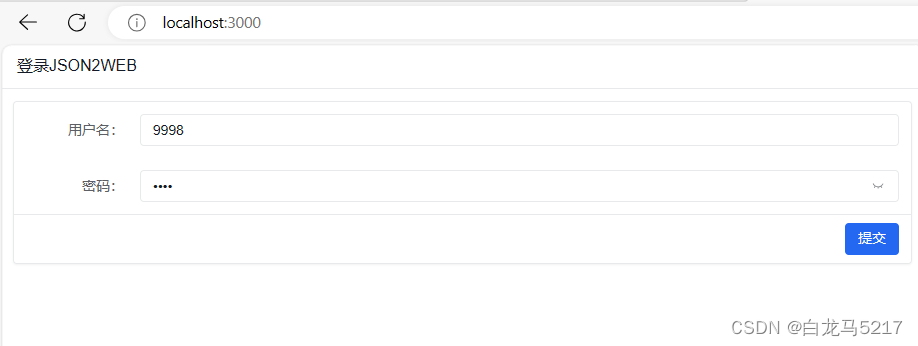
Step1 登录
http://localhost:3000/
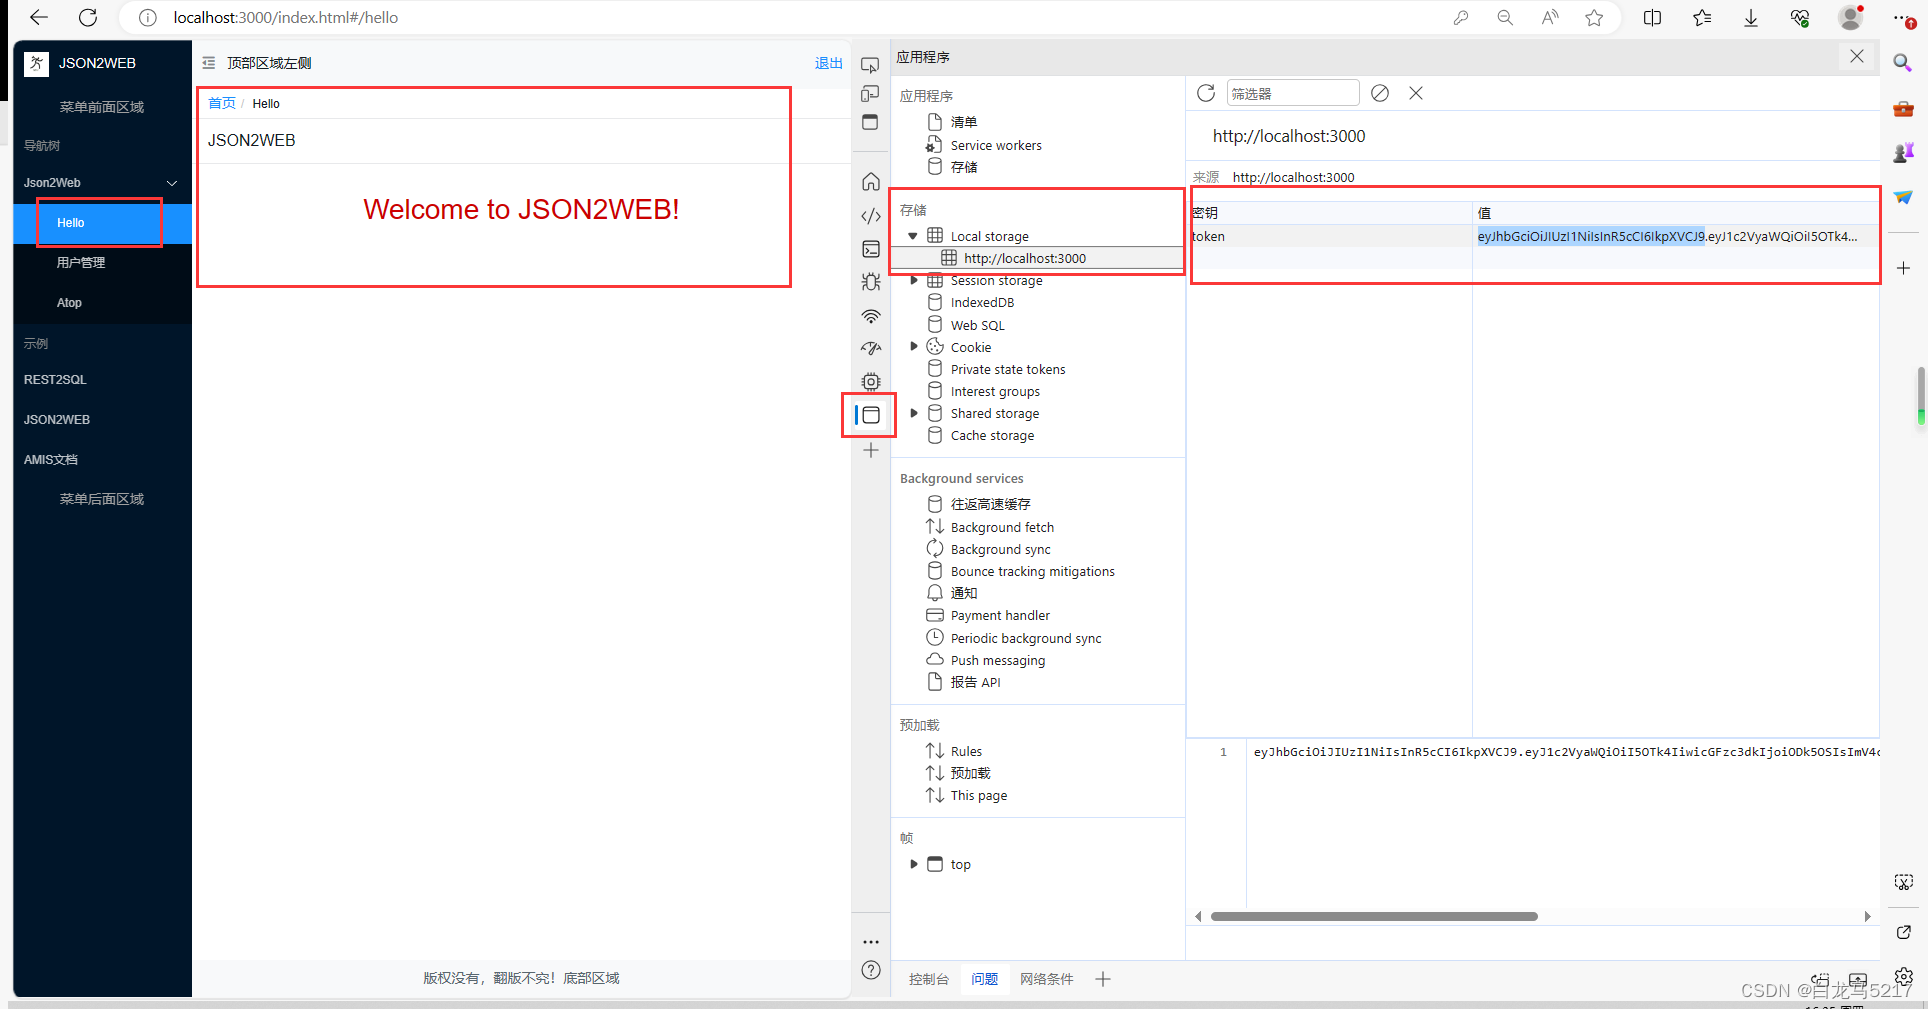
Step 2 提交跳转
点【提交】按钮,登录成功跳转到主页index.html,可以查看token
Step 3 用户管理
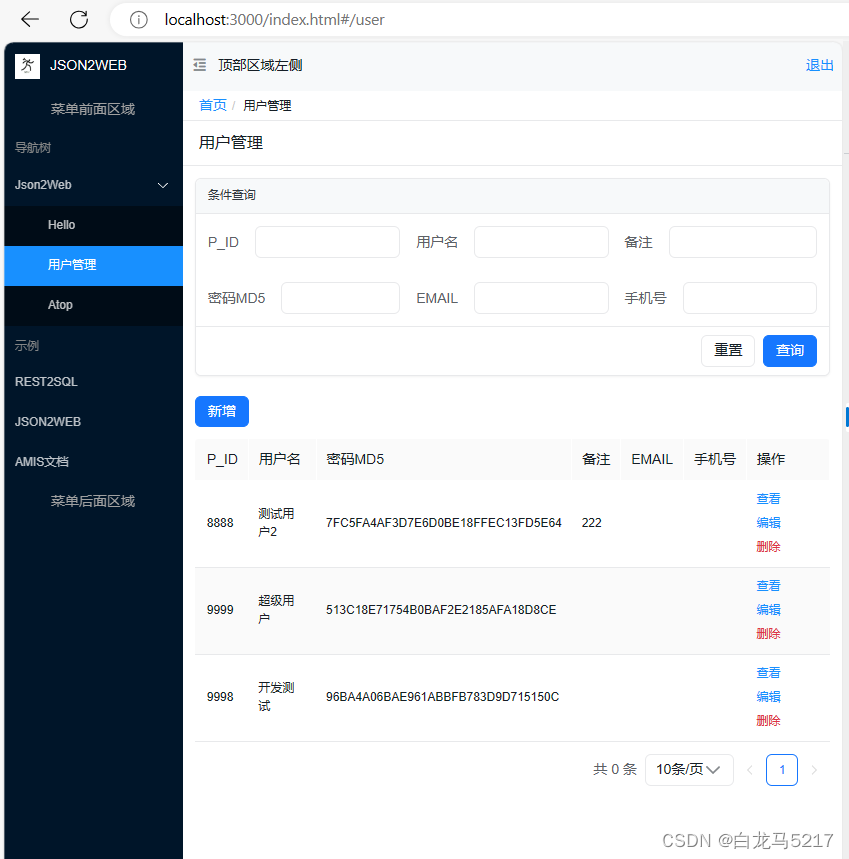
可查询到信息,并可以crud操作。
Setp 4 退出
点主页右上角的【退出】按钮,可退出主页,并跳转到登录页,并清除了token

Step 5 直接在访问index.html
页面可以打开请求不到api的数据。
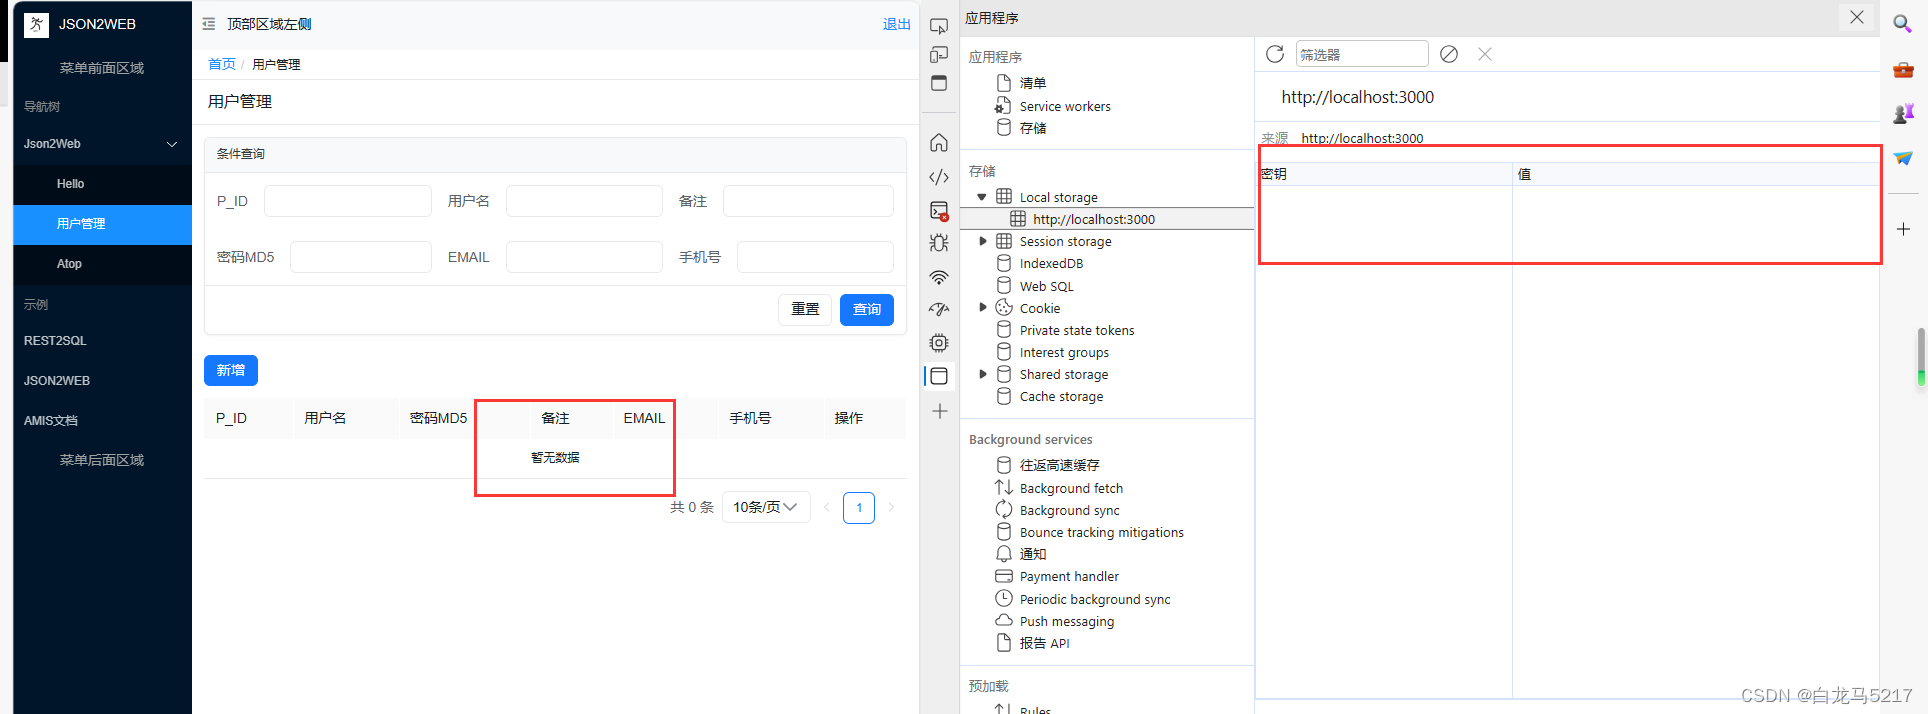
没有token或token过期都请求不到数据
脑子不好用,搞一点都记录一下,方便自己查询,好记性不如烂笔头。
本文完。



![[Java、Android面试]_11_线程的启动方式和区别](https://img-blog.csdnimg.cn/direct/5bb2af74cbd64984872b07983a4d8e84.png)


![[ C++ ] STL---stack与queue](https://img-blog.csdnimg.cn/direct/7ce025ded1c14aa98e7f28d8dc41c42c.gif)
