Gitee官方配置参考网址:
https://help.gitee.com/base/account/SSH%E5%85%AC%E9%92%A5%E8%AE%BE%E7%BD%AE。![]() https://help.gitee.com/base/account/SSH%E5%85%AC%E9%92%A5%E8%AE%BE%E7%BD%AE。
https://help.gitee.com/base/account/SSH%E5%85%AC%E9%92%A5%E8%AE%BE%E7%BD%AE。
A.生成 SSH 公钥
Windows 用户建议使用 Windows PowerShell 或者 Git Bash,在命令提示符下无 cat 和 ls 命令。
1、通过命令 ssh-keygen 生成 SSH Key:
ssh-keygen -t ed25519 -C "Gitee SSH Key"
- -t key 类型
- -C 注释
中间通过三次回车键确定
输出,如:

图1:生成SSH公钥与秘钥
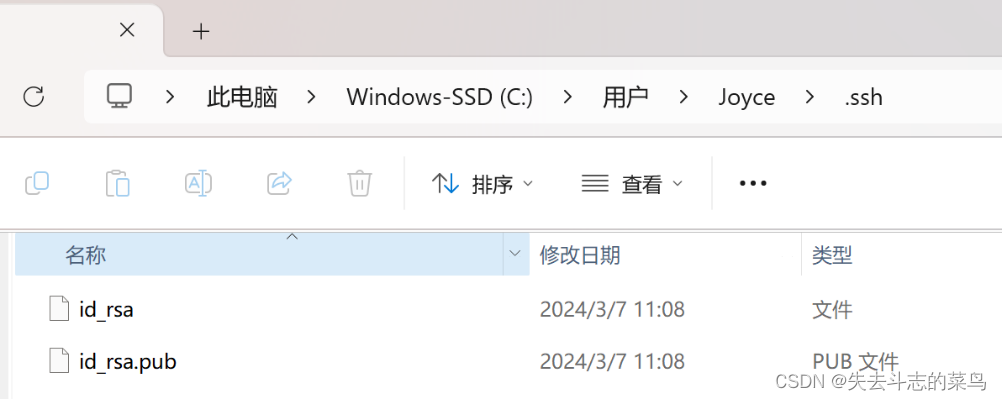
2、查看生成的 SSH 公钥和私钥:
图2:查看文件
id_ed25519 id_ed25519.pub
私钥文件 id_ed25519
公钥文件 id_ed25519.pub
3、读取公钥文件
id_ed25519.pub:
ssh-ed25519 AAAA***5B Gitee SSH Key
B.设置账户 SSH 公钥
复制终端输出的公钥。
用户可以通过主页右上角 「个人设置」->「安全设置」->「SSH 公钥」->「添加公钥」 ,添加生成的 public key 添加到当前账户中。

图3:添加账户公钥
需要注意: 添加公钥需要验证用户密码
添加账户 SSH 公钥
通过 ssh -T 测试,输出 SSH Key 绑定的用户名:
$ ssh -T git@gitee.com
Hi USERNAME! You've successfully authenticated, but GITEE.COM does not provide shell access.
在添加完公钥后,用户可以在 「个人设置」->「安全设置」->「SSH 公钥」 浏览查看当前账户已经添加的 SSH 公钥,并对公钥进行管理/删除操作。
C.设置仓库 SSH 公钥
复制终端输出的公钥。通过仓库主页 「管理」->「部署公钥管理」->「添加部署公钥」 ,将生成的公钥添加到仓库中。

图4:添加仓库公钥
通过 ssh -T 测试时,输出 Anonymous:
$ ssh -T git@gitee.com
Hi Anonymous! You've successfully authenticated, but GITEE.COM does not provide shell access.
添加成功后,就可以使用 SSH 协议对仓库进行拉取。
D.拉取代码
在本地PC的GitBash拉取代码:
git clone git@gitee.com:仓库地址.git

图5:拉取代码
E.仓库的 SSH Key 和账户 SSH Key 的区别?
账户的 SSH Key 和账户绑定,当账户具有推送/拉取权限时可通过 SSH 方式 推送/拉取 的仓库。
通过 ssh -T 测试时,输出 SSH Key 绑定的用户名:
$ ssh -T git@gitee.com
Hi USERNAME! You've successfully authenticated, but GITEE.COM does not provide shell access.
仓库的 SSH key 只针对仓库,且我们仅对仓库提供了部署公钥,即仓库下的公钥仅能拉取仓库,这通常用于生产服务器拉取仓库的代码。
通过 ssh -T 测试时,输出 Anonymous:
ssh -T git@gitee.com
Hi Anonymous! You've successfully authenticated, but GITEE.COM does not provide shell access.
F.生成SSH Key后验证出现问题
The authenticity of host can’t be established ECDSA key fingerprint is SHA256
这个原因可能是本地主机的key发生了变化,因此每次SSH链接都会有提示,只需要在交互下输入yes即可。
当然如果长久的想解决问题,可以采用以下方法:
1、使用ssh连接远程主机时加上“-o StrictHostKeyChecking=no”的选项,去掉对主机的验证检查。
ssh -o StrictHostKeyChecking=no 192.168.xxx.xxx
注:192.168.xxx.xxx 为本地ip地址:windows ipconfig查看,linux ifconfig查看
2、当然你也可以直接改配置文件信息,这样彻底去掉验证。
修改/etc/ssh/ssh_config文件(或$HOME/.ssh/config)中的配置,添加如下两行配置:
StrictHostKeyChecking no
UserKnownHostsFile /dev/null
注:不过采用第二种方法,容易造成潜在的危险。








![[MYSQL数据库]--表的增删查改和字段类型](https://img-blog.csdnimg.cn/direct/fa52ac85a8f8464db0768496d77c5877.png)
![[力扣 Hot100]Day48 路径总和 III](https://img-blog.csdnimg.cn/direct/be2278fcc40b4f53b52f232651de210c.png)