简单来写一下Teleport
src/components/TeleportLearn.vue
<script setup>

</script>

<template>
  <div>
    <Teleport to="body">
        <div>你好</div>
    </Teleport>
  </div>
</template>

<style scoped>

</style>
src/App.vue
<script setup>
import TeleportLearn from './components/TeleportLearn.vue'
</script>

<template>
  <div>
    <TeleportLearn></TeleportLearn>
  </div>
</template>

<style scoped>

</style>
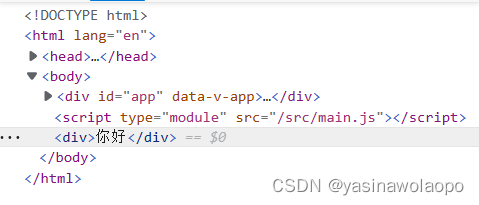
元素在
body上
我们在App.vue中写入hello,你会发现这个传送门在id="app"元素的下面
<script setup>
import TeleportLearn from './components/TeleportLearn.vue'
</script>

<template>
  <div>
    <TeleportLearn></TeleportLearn>
    <span>hello</span>
  </div>
</template>

<style scoped>

</style>
这时你肯定相当与html中的某一个DOM API很像原生JS DOM中的insertAdjacentElementAPI,更确切的说是createElementAPI
insertAdjacentElementAPI
<!DOCTYPE html>
<html lang="en">
<head>
    <meta charset="UTF-8">
    <meta http-equiv="X-UA-Compatible" content="IE=edge">
    <meta name="viewport" content="width=device-width, initial-scale=1.0">
    <title>move</title>
    <link rel="stylesheet" href="style.css">
</head>
<body>
    <div id="app">
    </div>
</body>
<script type="text/javascript">
    const app = document.getElementById('app')
    const element = document.createElement('div')
    element.innerText = '你好啊'
    app.insertAdjacentElement('afterend',element)

</script>
</html>
createElementAPI
<!DOCTYPE html>
<html lang="en">
<head>
    <meta charset="UTF-8">
    <meta http-equiv="X-UA-Compatible" content="IE=edge">
    <meta name="viewport" content="width=device-width, initial-scale=1.0">
    <title>move</title>
    <link rel="stylesheet" href="style.css">
</head>
<body>
    <div id="app">

    </div>
</body>
<script type="text/javascript">
    const body = document.querySelector('body')
    const app = document.getElementById('app')
    const element = document.createElement('div')
    element.innerText = '你好啊'
    body.appendChild(element)

</script>
</html>
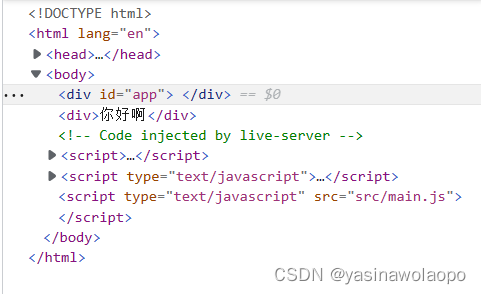
关于原生html,js,css写出覆盖的样式详情可以看这篇
稍微升级一下
我们给这个Teleport来一个if判断
src/components/TeleportLearn.vue
<script setup>

defineProps({
    a:{
        type: Boolean
    }
})
</script>

<template>
  <div>
    <Teleport to="body" v-if="a">
        <div>你好</div>
    </Teleport>
  </div>
</template>

<style scoped>

</style>
src/App.vue
<script setup>
import TeleportLearn from './components/TeleportLearn.vue'
import {ref,reactive} from "vue"
let a = ref(false)
function isTrue(){
  if(a.value === true){
    a.value = false
  }else{
    a.value = true
  }
}
</script>

<template>
  <div>
    <button @click="isTrue">展开</button>
    <TeleportLearn :a="a"></TeleportLearn>
    <span>hello</span>
  </div>
</template>

<style scoped>

</style>
这样就做到了显示与不显示的区别了
其实你会发现这样在
Teleport上写class一点用处也没有,因为Teleport把元素传到body了后Teleport就不在了,所以根本就没有class样式,所以我们得这么写
<script setup>

defineProps({
    a:{
        type: Boolean
    }
})
</script>

<template>
  <div>
    <Teleport to="body" v-if="a">
        <div class="hello">你好</div>
    </Teleport>
  </div>
</template>

<style scoped>

.hello{
    position: absolute;/*要写absolute(绝对定位) */
    left: 0px;
    top: 0px;
    width: 100vw;
    height: 100vh;
    background: rgba(200, 200, 200, 0.3);
}
</style>

你就会发现,很乱(…)这是取决与你的样式的
.hello{
    position: absolute;/*要写absolute(绝对定位) */
    left: 0px;
    top: 20px;
    width: 100px;
    height: 100px;
    /* background: rgba(200, 200, 200, 0.3); */
    background: rgba(255, 255, 255, 1);
}
你就会发现hello字样被覆盖掉了,假如我们放一张图片代替hello
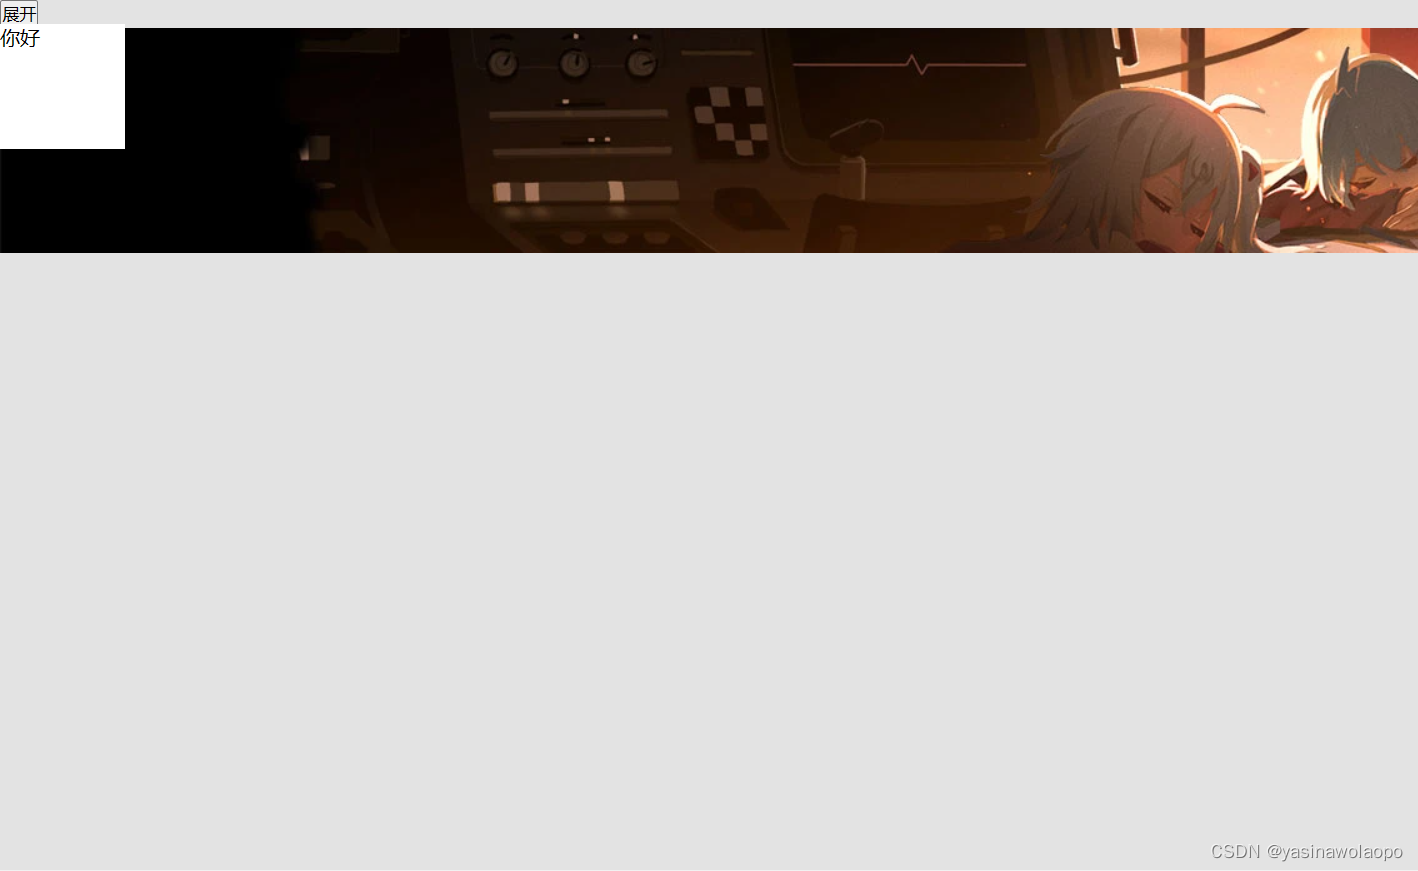
这里分享一下bilibili的2023/1/8还在的春节封面和封面上的logo(不在了,说明bilibili把资源释放(删除)了)
App.vue
<script setup>
import TeleportLearn from './components/TeleportLearn.vue'
import {ref,reactive} from "vue"
let a = ref(false)
function isTrue(){
  if(a.value === true){
    a.value = false
  }else{
    a.value = true
  }
}
</script>

<template>
  <div class="AppAll">
    <button @click="isTrue">展开</button>
    <TeleportLearn :a="a"></TeleportLearn>
    <img src="../public/image/bilibili.jpg" alt="">
  </div>
</template>

<style scoped>
.AppAll{
  width: 100vw;
  height: 100vh;
  background: rgba(200, 200, 200, 0.5);
}
</style>
vue的@mousemove事件
src/components/mouseLearn.vue
<script setup>
function mousemoveFunc(){
    console.log('@')
}
</script>

<template>
  <div>
    <div @mousemove="mousemoveFunc()">@mousemove</div>
  </div>
</template>

<style scoped>


</style>
现象: 鼠标一移入则触发(在元素上移动一直触发)直到移出
<script setup>
function mouseleaveFunc(){
    console.log('+')
}
</script>

<template>
  <div>
    <div @mouseleave="mouseleaveFunc">@mouseleave</div>
  </div>
</template>

<style scoped>


</style>
现象: 移入元素后移出元素触发
升级一下Teleport(让他靠近bilibili样式)
<script setup>
import TeleportLearn from './components/TeleportLearn.vue'
import MouseLearn from './components/MouseLearn.vue'
import {ref,reactive} from "vue"
let a = ref(false)
function mousemoveFunc(){
  a.value = true
}
function mouseleaveFunc(){
  a.value = false
}
</script>

<template>
  <div class="AppAll">
    <button @mouseover="mousemoveFunc()" @mouseleave="mouseleaveFunc()">展开</button>
    <TeleportLearn :a="a"></TeleportLearn>
    <!-- <MouseLearn /> -->
    <img src="../public/image/bilibili.jpg" alt="">
  </div>
</template>

<style scoped>
.AppAll{
  width: 100vw;
  height: 100vh;
  background: rgba(200, 200, 200, 0.5);
}
</style>
我们仔细看bilibili的导航栏会发现它有四种状态
改变前
改变中
改变后
我们就想到了式vue3的过渡
vue3过渡
v-enter-from:定义进入过渡的开始状态。在元素被插入之前生效,在元素被插入之后的下一帧移除。v-enter-active:定义进入过渡生效时的状态。在整个进入过渡的阶段中应用,在元素被插入之前生效,在过渡/动画完成之后移除。这个类可以被用来定义进入过渡的过程时间,延迟和曲线函数。v-enter-to:定义进入过渡的结束状态。在元素被插入之后下一帧生效 (与此同时 v-enter-from 被移除),在过渡/动画完成之后移除。v-leave-from:定义离开过渡的开始状态。在离开过渡被触发时立刻生效,下一帧被移除。v-leave-active:定义离开过渡生效时的状态。在整个离开过渡的阶段中应用,在离开过渡被触发时立刻生效,在过渡/动画完成之后移除。这个类可以被用来定义离开过渡的过程时间,延迟和曲线函数。v-leave-to:离开过渡的结束状态。在离开过渡被触发之后下一帧生效 (与此同时 v-leave-from 被删除),在过渡/动画完成之后移除。
我这里给出的代码是
src/components/GuoDu.vue
<script setup>
import {ref,reactive} from "vue"
let b = ref(false)
function show(){
    if(b.value === true){
        b.value = false
    }else{
        b.value = true
    }
}
</script>

<template>
  <div>
    <button @click="show()">显示/隐藏</button><!--一定要有样式的改变-->
    <transition name="wo">
        <p v-if="b">hello</p>
    </transition>
  </div>
</template>

<style scoped>
.wo-enter-from{
    transition: all 0.5s;
    color: red;
}
.wo-enter-active{
    transition: all 0.5s;
    color: yellowgreen
}
.wo-enter-to{
    transition: all 0.5s;
    color: skyblue;
}
.wo-leave-from{
    transition: all 0.5s;
    color: orange;
}
.wo-leave-active{
    transition: all 0.5s;
    color: green;
}
.wo-leave-to{
    transition: all 0.5s;
    color: pink;
}
</style>
出现的效果先是
黄绿>天蓝>黑>粉
也就是v-enter-active>v-enter-to>v-leave-to


