CentOS7.x下部署oracle19c环境
文章目录
- CentOS7.x下部署oracle19c环境
- 前言
- 一、环境准备工作
- 1.1、虚拟机搭建及关闭防火墙和selinux
- 1.2、RPM包预安装
- 1.3、检查安装情况用户组已创建完成
- 1.4、创建目录
- 1.5、修改/etc/hosts 文件
- 1.6、设置oracle口令
- 1.7、设置环境变量
- 1.8、将oracle软件包(LINUX.X64_193000_db_home.zip)上传到oracle家目录
- 1.9、调图形化页面
- 二、数据库软件安装
- 2.1图形界面安装
- 2.2离线所依赖的rpm包下载地址
- 三、安装数据库
- 3.1使用dbca安装数据库
- 3.2使用netca配置监听
前言
记录一次部署oracle19c的部署过程
一、环境准备工作
1.1、虚拟机搭建及关闭防火墙和selinux
systemctl stop firewalld
systemctl disable firewalld
vim /etc/selinux/config
selinux改为下面的配置
SELINUX=disabled
最后重启
reboot
1.2、RPM包预安装
使用预安装包可以需要另外创建用户、不需要另外建用户组
内核参数不用配置、软限制硬限制不需要做
安装rpm包时候提示需要依赖如下的包,我的虚拟机是最小化系统安装,按照提示缺什么就安装什么依赖包。
[root@node01 install]# rpm -ivh oracle-database-preinstall-19c-1.0-2.el7.x86_64.rpm
warning: oracle-database-preinstall-19c-1.0-2.el7.x86_64.rpm: Header V3 RSA/SHA256 Signature, key ID ec551f03: NOKEY
error: Failed dependencies:
	bind-utils is needed by oracle-database-preinstall-19c-1.0-2.el7.x86_64
	compat-libcap1 is needed by oracle-database-preinstall-19c-1.0-2.el7.x86_64
	glibc-devel is needed by oracle-database-preinstall-19c-1.0-2.el7.x86_64
	ksh is needed by oracle-database-preinstall-19c-1.0-2.el7.x86_64
	libaio-devel is needed by oracle-database-preinstall-19c-1.0-2.el7.x86_64
	libstdc++-devel is needed by oracle-database-preinstall-19c-1.0-2.el7.x86_64
	net-tools is needed by oracle-database-preinstall-19c-1.0-2.el7.x86_64
	nfs-utils is needed by oracle-database-preinstall-19c-1.0-2.el7.x86_64
	psmisc is needed by oracle-database-preinstall-19c-1.0-2.el7.x86_64
	smartmontools is needed by oracle-database-preinstall-19c-1.0-2.el7.x86_64
	sysstat is needed by oracle-database-preinstall-19c-1.0-2.el7.x86_64
	unzip is needed by oracle-database-preinstall-19c-1.0-2.el7.x86_64
	xorg-x11-utils is needed by oracle-database-preinstall-19c-1.0-2.el7.x86_64
	xorg-x11-xauth is needed by oracle-database-preinstall-19c-1.0-2.el7.x86_64
[root@node01 install]# rpm -ivh oracle-database-preinstall-19c-1.0-2.el7.x86_64.rpm
warning: oracle-database-preinstall-19c-1.0-2.el7.x86_64.rpm: Header V3 RSA/SHA256 Signature, key ID ec551f03: NOKEY
Preparing...                          ################################# [100%]
Updating / installing...
   1:oracle-database-preinstall-19c-1.################################# [100%]
1.3、检查安装情况用户组已创建完成
[root@node01 install]# grep oracle /etc/passwd
oracle:x:54321:54321::/home/oracle:/bin/bash
[root@node01 install]# grep dba /etc/group
dba:x:54322:oracle
backupdba:x:54324:oracle
dgdba:x:54325:oracle
kmdba:x:54326:oracle
racdba:x:54330:oracle
[root@node01 install]# grep oinstall /etc/group
oinstall:x:54321:oracle
1.4、创建目录
mkdir -p /home/u01/app/oracle/product/19.3.0/db_1
将/home/u01路径下的全部文件夹,递归更改所属用户以及用户组
chown -R oracle:oinstall /home/u01
权限更改 775(所属用户和组的权限是rwx,其他用户是x)
chmod -R 775 /home/u01
1.5、修改/etc/hosts 文件
[root@node01 u01]# cat /etc/hosts
127.0.0.1   localhost localhost.localdomain localhost4 localhost4.localdomain4
::1         localhost localhost.localdomain localhost6 localhost6.localdomain6
172.10.10.12 node01
1.6、设置oracle口令
[root@node01 u01]# passwd oracle
Changing password for user oracle.
New password:
BAD PASSWORD: The password is shorter than 8 characters
Retype new password:
passwd: all authentication tokens updated successfully.
1.7、设置环境变量
[root@node01 u01]# su - oracle
[oracle@node01 ~]$ vim .bash_profile
export ORACLE_SID=orcl
export ORACLE_BASE=/home/u01/app/oracle
export ORACLE_HOME=$ORACLE_BASE/product/19.3.0/db_1
export PATH=$PATH:$ORACLE_HOME/bin
export LD_LIBRARY_PATH=$LD_LIBRARY_PATH:$ORACLE_HOME/lib
export CLASSPATH=$ORACLE_HOME/JRE:ORACLE_HOME/jlib:$ORACLE_HOME/rdbms/jlib
[oracle@node01 ~]$ source .bash_profile
[oracle@node01 ~]$ echo $ORACLE_SID
orcl
[oracle@node01 ~]$ echo $ORACLE_HOME
/home/u01/app/oracle/product/19.3.0/db_1
1.8、将oracle软件包(LINUX.X64_193000_db_home.zip)上传到oracle家目录
将oracle软件包(LINUX.X64_193000_db_home.zip)上传到oracle家目录(/home/u01/app/oracle/product/19.3.0/db_1)
将上传好的压缩包的所有者改成oracle,所属组改成oinstall(在root用户下完成)
1.9、调图形化页面
先进行DISPLAY配置
[oracle@node01 db_1]$ export DISPLAY=172.10.10.12:0.0
调出ORACLE-INSTALL的图形化界面(如x-shell无响应,直接去虚拟机内运行,虚拟机内运行无需配置上条DISPLAY命令)
使用MobaXterm工具进行安装,使用oracle用户登录
二、数据库软件安装
2.1图形界面安装
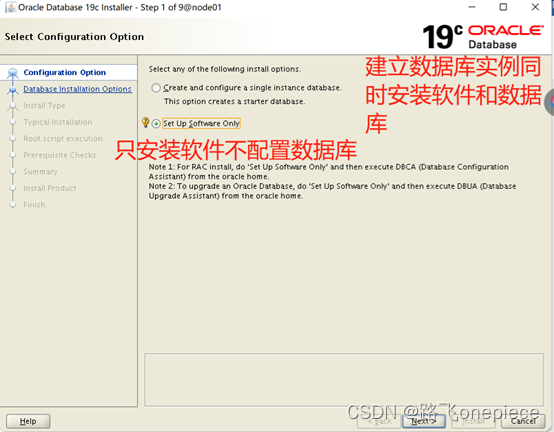
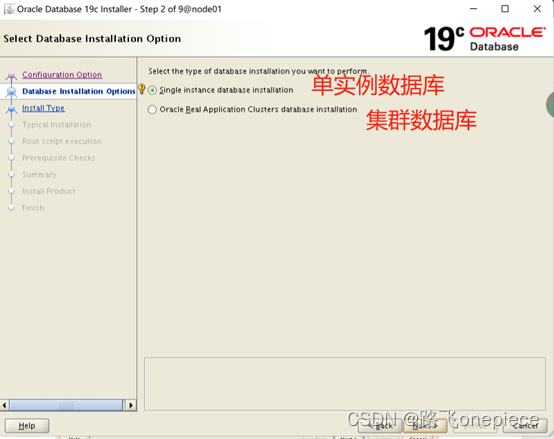
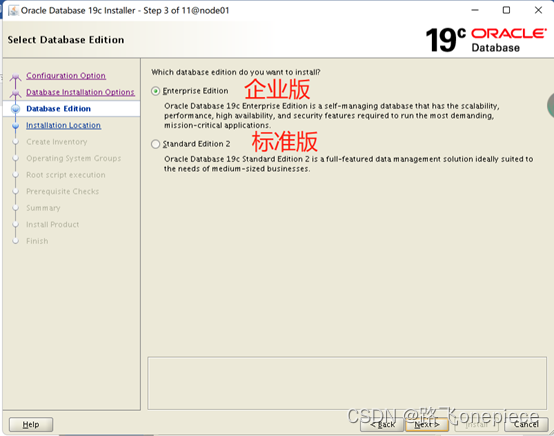
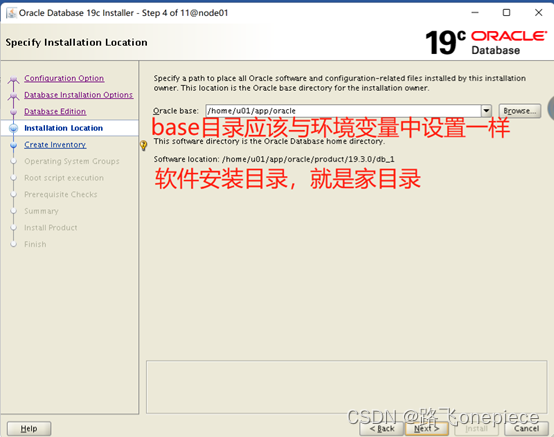
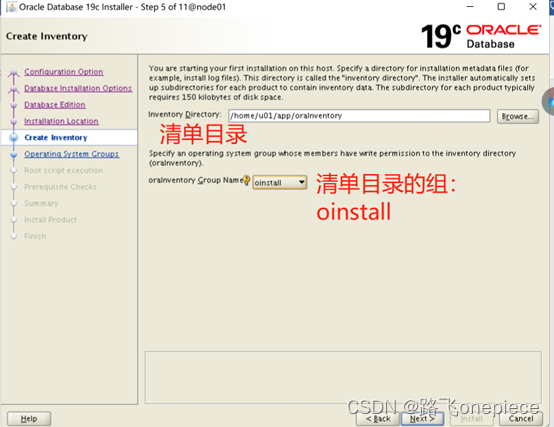
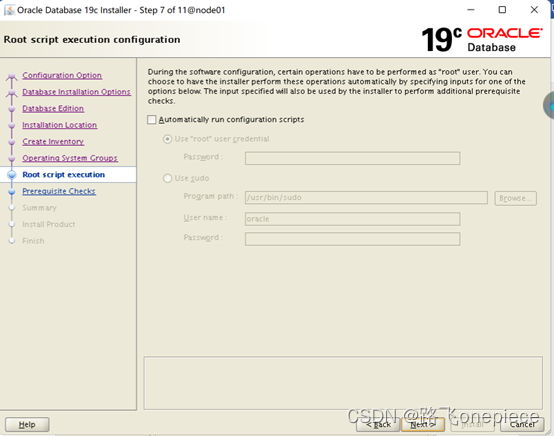
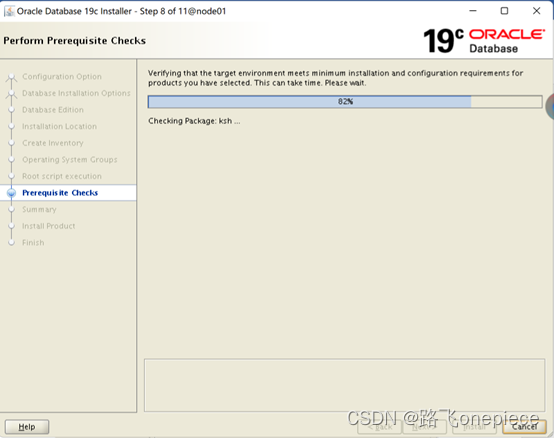
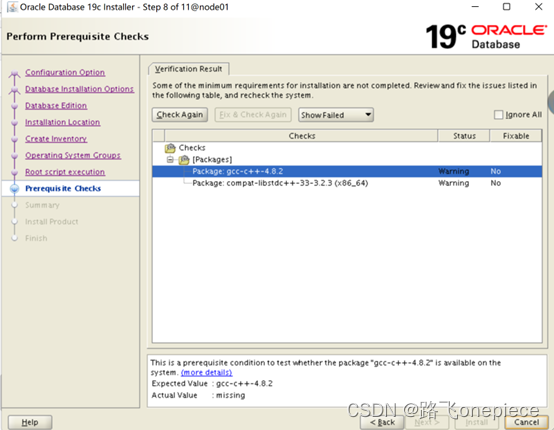
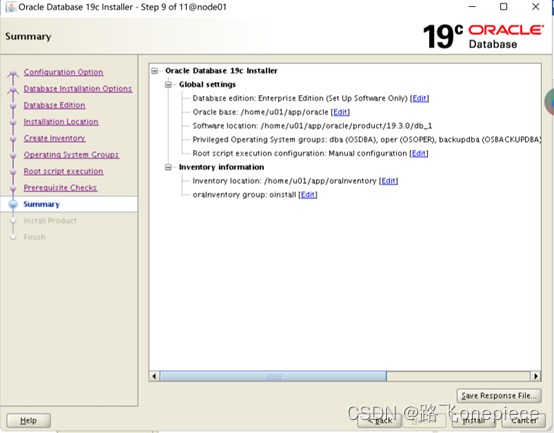
注意通过root账号运行下面路径的脚本
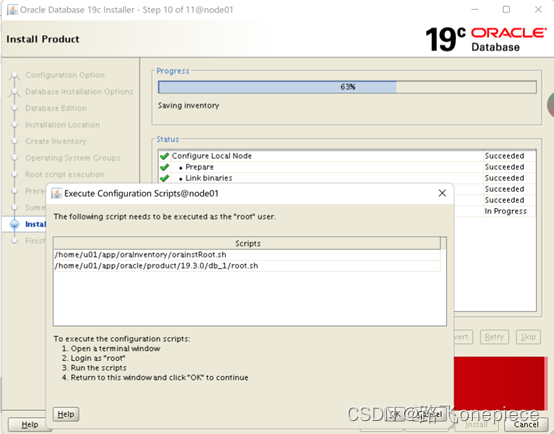
最后安装完毕数据库软件

2.2离线所依赖的rpm包下载地址
所需要的依赖包必须安装(rpm包下载地址)
http://rpmfind.net/linux/rpm2html/search.php?query=vulkan-filesystem&submit=Search+…&system=&arch=
三、安装数据库
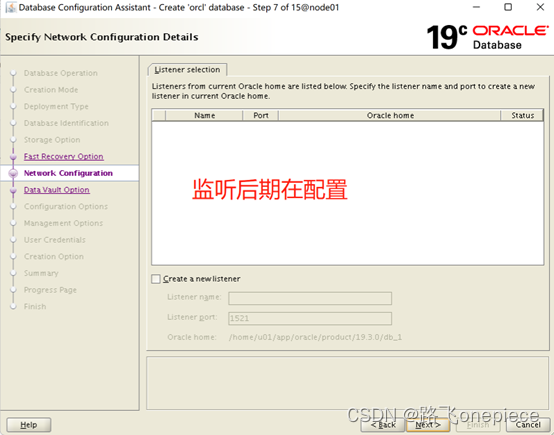
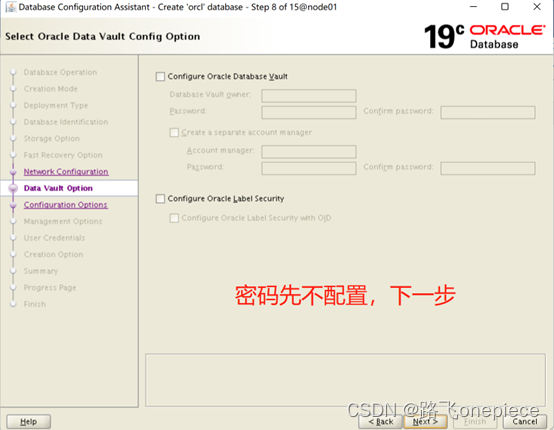
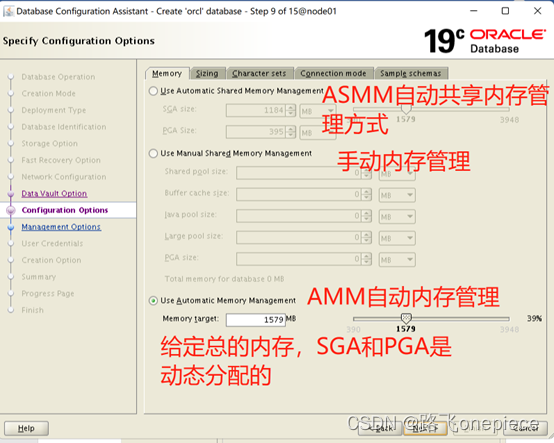
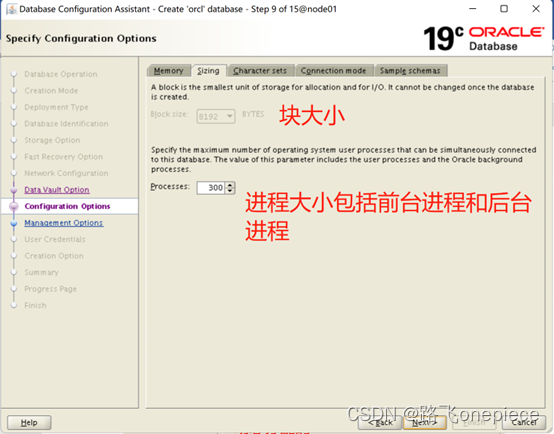
3.1使用dbca安装数据库
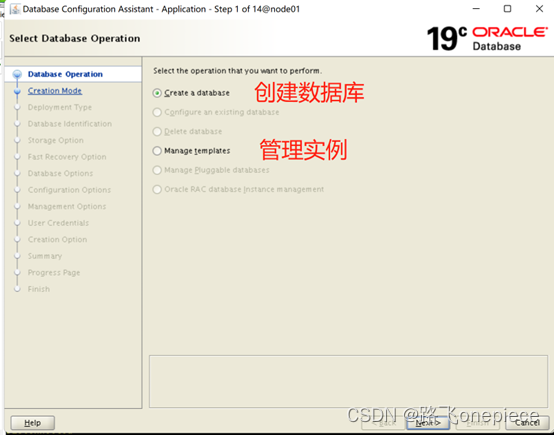
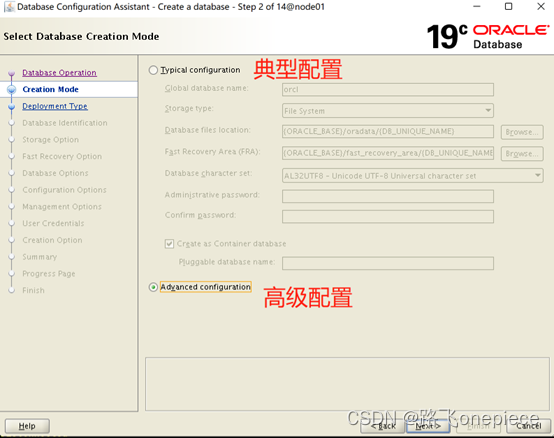
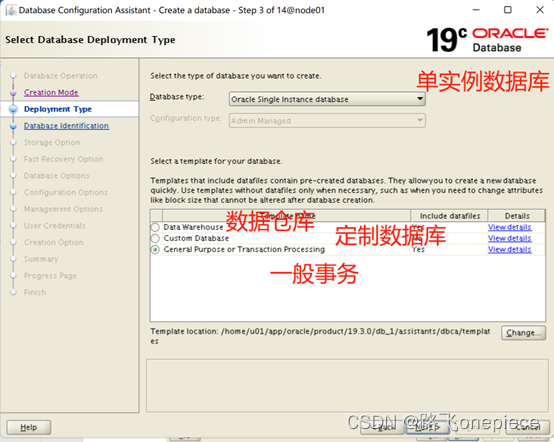
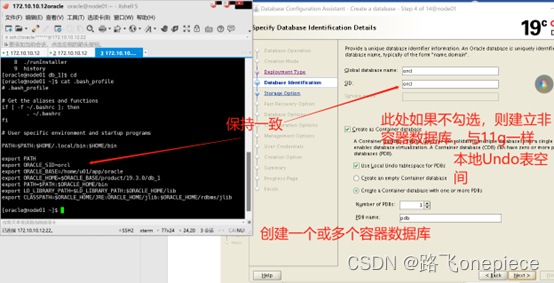
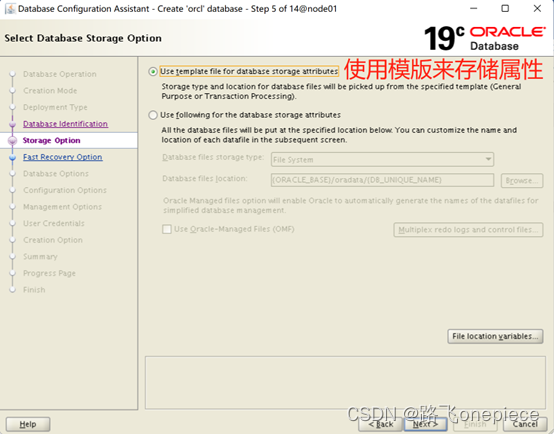
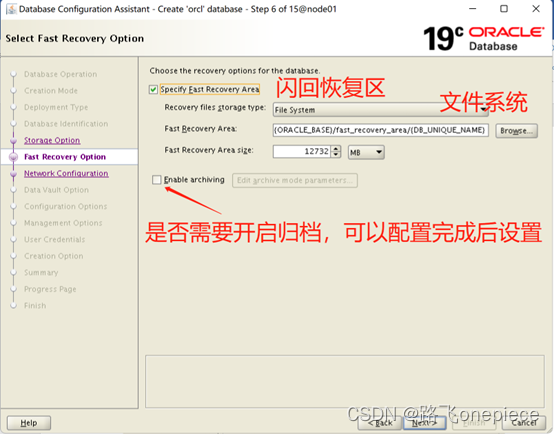
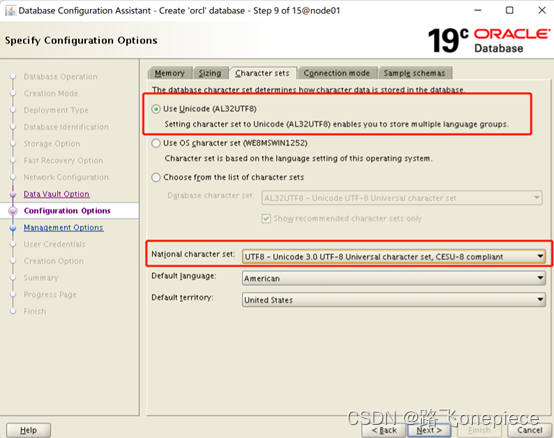
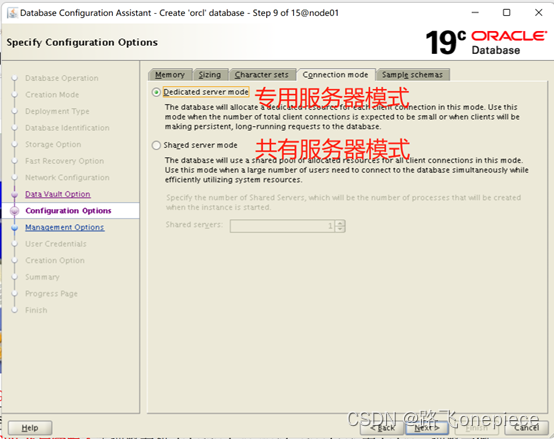
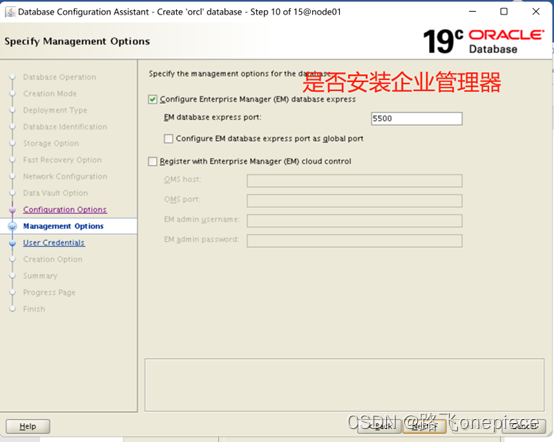
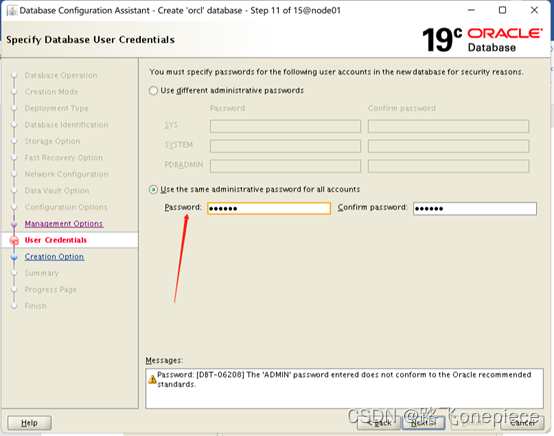
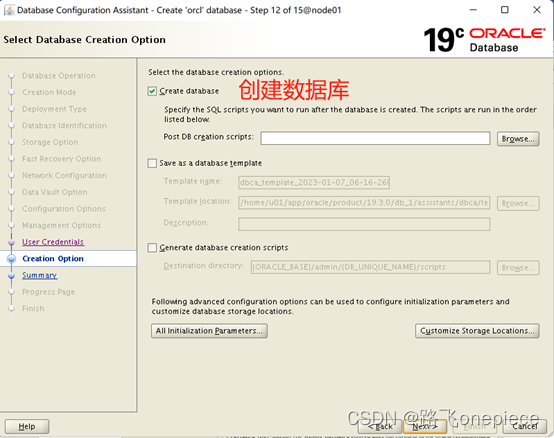
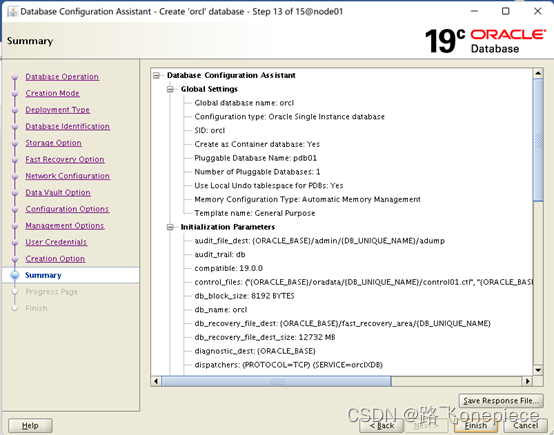
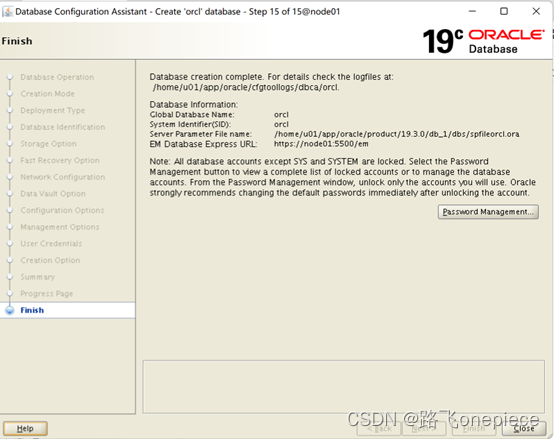
3.2使用netca配置监听
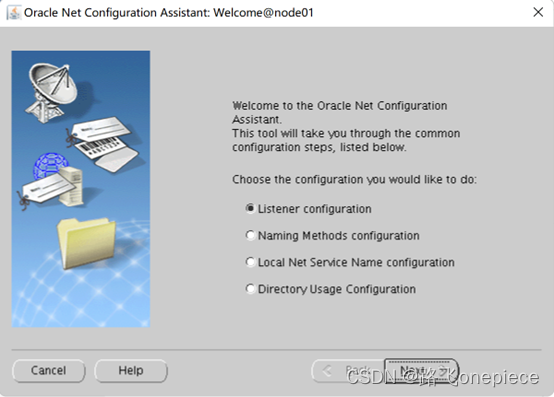
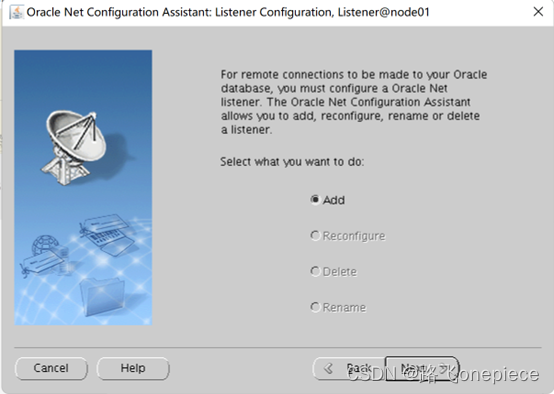
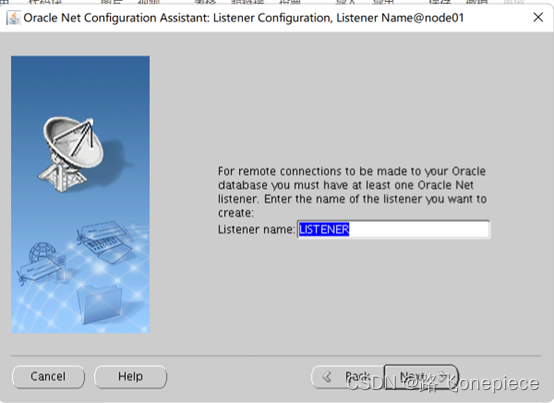
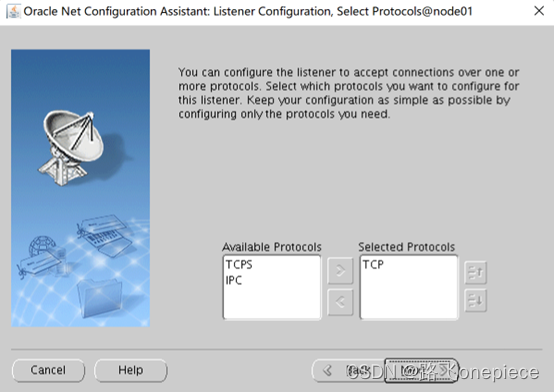
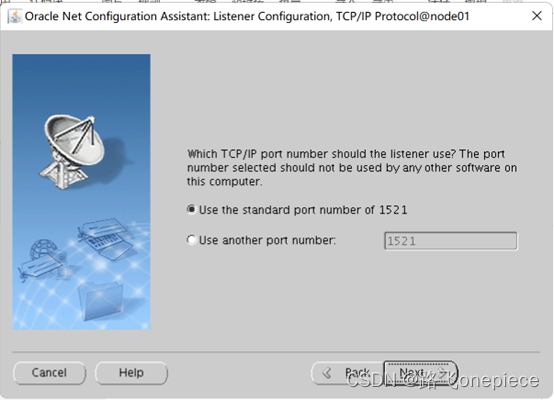

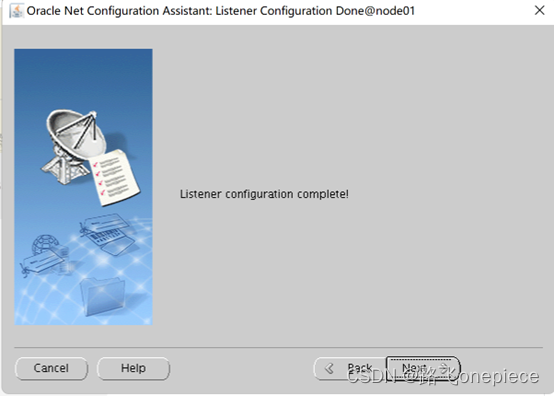
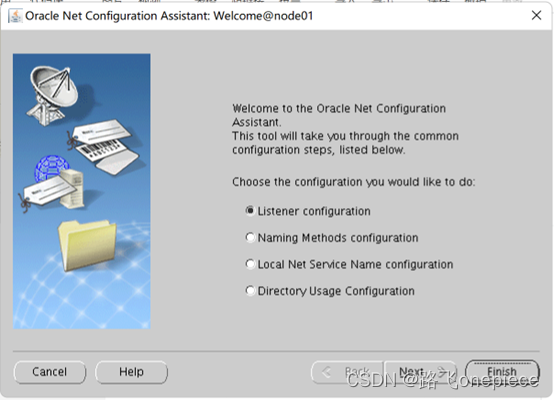
[oracle@node01 ~]$ netca
Oracle Net Services Configuration:
Configuring Listener:LISTENER
Listener configuration complete.
Oracle Net Listener Startup:
Running Listener Control:
/home/u01/app/oracle/product/19.3.0/db_1/bin/lsnrctl start LISTENER
Listener Control complete.
Listener started successfully.
Oracle Net Services configuration successful. The exit code is 0
![[LeetCode周赛复盘] 第 327 场周赛20230108](https://img-blog.csdnimg.cn/0e33b85f61824e64a56a9c70abafac00.png)


![GrapeCity Documents Data Viewer[GcDataViewer] Crack](https://img-blog.csdnimg.cn/f83fcc70f2184da8bb04073776b34621.png)
