文章目录
- 什么是 http 模块
- 创建最基本的 Web 服务器
- request 请求对象
- response 响应对象
- 解决中文乱码问题
- 根据不同的 url 响应不同的 html 内容
- 文件上传实战
什么是 http 模块
http 模块是 Node.js 官方提供的、用来创建 Web 服务器的模块。
node.js提供了http模块,其中封装了一个http服务器和一个建议的http客户端。
http.server是一个基于事件的http服务器,内部由c++实现,接口由JavaScript封装。
http.request则是一个http客户端工具,用户向服务器发送请求。
HTTP 模块提供了 5 个类:
- http.Agent:创建全局实例,以管理 HTTP 客户端连接的持久性和复用,
- http.ClientRequest:当 http.request() 或 http.get() 被调用时,会创建 http.ClientRequest 对象。
- http.Server:当使用 http.createServer() 创建新的服务器时,通常会实例化并返回此类。
- http.ServerResponse
- http.IncomingMessage:http.serverRqueste()
http.serve的事件
http.server 是一个基于事件的http服务器,所有请求都被封装成独立的事件,开发者只有对它的事件编写相应函数,实现http服务器的所有功能。它继承于EventEmitter,提供了以下事件:
- request:当客户端请求到来时,该事件被触发,提供两个参数req和res,分别是http.ServerRequest和http.IncomingMessage(http.ServerResponse)的实例,表示请求和响应信息;就是我们常用的http.createServer([requestListener])模块;
- connection:当TCP连接建立时,该事件被触发,提供一个参数socket,为net.Socket的实例(底层协议底下)
- close:当服务器关闭时,该事件被触发,除此之外还有checkContinue、upgrade、clientError事件
- listen()启动服务器监听
- server.listen(prot,host,backlog,callback) 启动服务器监听
- port:监听的端口号,0表示为服务器随机分配一个端口号。
- host:监听的地址,默认为本机(localhost)
- backlog:指定位于等待队列中的客户端连接的最大数量。超过此数量,则服务器拒绝新的客户端请求。
- callback:开启监听后触发的回调函数。当服务器开启监听后会触发listening事件,可以通过监听listening事件来代替callback回调函数。
创建最基本的 Web 服务器
- 导入 http 模块
如果希望使用 http 模块创建 Web 服务器,则需要先导入它:const http = require('http') - 创建 Web 服务器实例
const server = http.createServer() - 为服务器绑定 request 事件,监听客户端的请求
// 使用服务器实例 .on() 方法,为服务器绑定一个 request 事件 server.on('request',(req,res)=>{ //只要有客户端来请求我们自己的服务器,就会触发 request 事件,从而调用这个事件处理函数 console.log('Someone visit our web server.') }) - 启动服务器
//调用 server.listen(端口号,cb回调)方法,即可启动 Web 服务器
server.listen(80,()=>{
	console.log('http server running at http://127.0.0.1')
})
request 请求对象
在向服务器发送请求时,我们会携带很多信息,比如:
- 本次请求的URL,服务器需要根据不同的URL进行不同的处理;
- 本次请求的请求方式,比如GET、POST请求传入的参数和处理的方式是不同的;
- 本次请求的headers中也会携带一些信息,比如客户端信息、接受数据的格式、支持的编码格式等;
只要服务器接收到了客户端的请求,就会调用通过 server.on() 为服务器绑定的 request 事件处理函数。如果想在事件处理函数中,访问与客户端相关的数据或属性,可以使用如下的方式:
const http = require('http')
const server = http.createServer()
server.on('request',()=>{
	// req.url 是客户端请求的 URL 地址
	const url = req.url
	// req.method 是客户端请求的 method 类型
	const method = req.method
	const str = `Your request url is ${url},and request method is ${method}`
	console.log(str)
})
server.listen(80,()=>{
	console.log('server running at http://127.0.0.1')
})
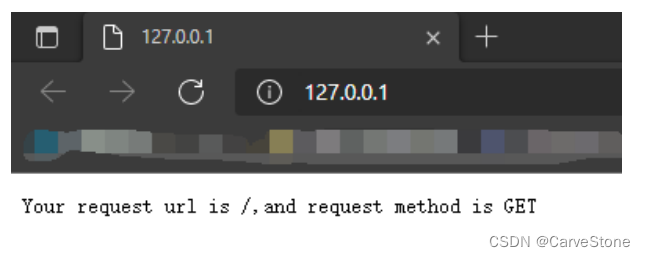
但当打开页面的时候,会发现我们并没有拿到东西,或者说客户端没有响应一些内容,这我们就要用到下面的方法。
response 响应对象
在服务器的 request 事件处理函数中,如果想访问与服务器相关的数据或属性,可以使用如下的方式:
const http = require('http')
const server = http.createServer()
server.on('request',(req,res)=>{
	// req.url 是客户端请求的 URL 地址
	const url = req.url
	// req.method 是客户端请求的 method 类型
	const method = req.method
	const str = `Your request url is ${url},and request method is ${method}`
	console.log(str)
	// 调用 res.end() 方法,向客户端响应一些内容,并结束指定内容
	res.end(str)
})
server.listen(80,()=>{
	console.log('server running at http://127.0.0.1')
})
解决中文乱码问题
const http = require('http')
const server = http.createServer()
	server.on('request',(req,res)=>{
	// 定义一个字符串,包含中文内容
	const str = `您请求的 URL 地址是 ${req.url}, 请求的 method 类型为 ${req.method}`
	// 调用 res.end() 方法来讲内容响应给客户端
	res.end(str)
})
server.listen(80,()=>{
	console.log('server running at http://127.0.0.1')
})

会发现这里面都是乱码,此时我们就要设置响应头来解决乱码问题
const http = require('http')
const server = http.createServer()
server.on('request',(req,res)=>{
	// 定义一个字符串,包含中文内容
	const str = `您请求的 URL 地址是 ${req.url}, 请求的 method 类型为 ${req.method}`
	// 为了解决中文乱码问题,需要设置响应头 Content-Type 的值为 text/html;charset=utf-8
	res.setHeader('Content-Type','text/html;charset=utf-8')
	// 调用 res.end() 方法来讲内容响应给客户端
	res.end(str)
})
server.listen(80,()=>{
	console.log('server running at http://127.0.0.1')
})

根据不同的 url 响应不同的 html 内容
const http = require('http')
const server = http.createServer()
	server.on('request',(req,res)=>{
	//获取请求的 url 地址
	const url = req.url
	//设置默认的内容为 404 Not Found
	let content = '<h1>404 Not Found</h1>'
	//如果用户请求的是首页
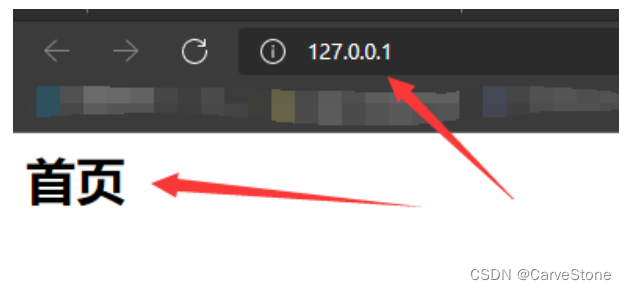
	if (url === '/' || url === '/index.html') {
		content = '<h1>首页</h1>'
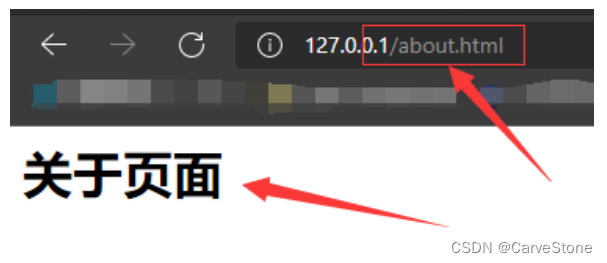
	} else if (url === '/about.html') { //如果用户请求的是关于页面
		content = '<h1>关于页面</h1>'
	}
	res.setHeader('Content-Type','text/html;charset=utf-8')
	res.end(content)
})
server.listen(80,()=>{
	console.log('server running at http://127.0.0.1')
})
这时我们已经可以从服务器内切换不同的页面。
文件上传实战
axios库可以在浏览器中使用,也可以在Node中使用:
- 在浏览器中,axios使用的是封装xhr;
- 在Node中,使用的是http内置模块;
const http = require('http')
const fs = require('fs')
const qs = require('querystring')
const server = http.createServer((req, res) => {
    if (req.url === '/upload') {
        if (req.method === 'POST') {
            req.setEncoding('binary')
            let body = ''
            const boundary = req.headers['content-type'].split(';')[1].replace(' boundary=', '')
            // console.log(boundary)
            req.on('data', (data) => {
                body += data
            })
            // 监听写入结束
            req.on('end', () => {
                // 1.获取image/png的位置
                const payload = qs.parse(body, "\r\n", ": ")
                const type = payload["Content-Type"]
                const typeIndex = body.indexOf(type) // 拿到image/jpeg的索引位置
                const typeLength = type.length // 拿到image/jpeg这个字符串的长度
                let imageData = body.substring(typeIndex + typeLength)
                // 3. 将image/jpeg后面的两个空格去掉
                // imageData = imageData.replace('\r\n\r\n', '')
                imageData = imageData.replace(/^\s\s*/, '')
                // 4. 将最后的boundary去除掉
                imageData = imageData.substring(0, imageData.indexOf(`--${boundary}--`))
                fs.writeFile('./foo.jpg', imageData, {encoding: 'binary'}, (err) => {
                    res.end('文件上传成功~')
                })
                console.log('文件上传成功')
                res.end('文件上传成功')
            })
        }
    }
})
server.listen(8000, '0.0.0.0', () => {
    console.log('文件上传服务器开启成功')
})
