1、jinjia2模板
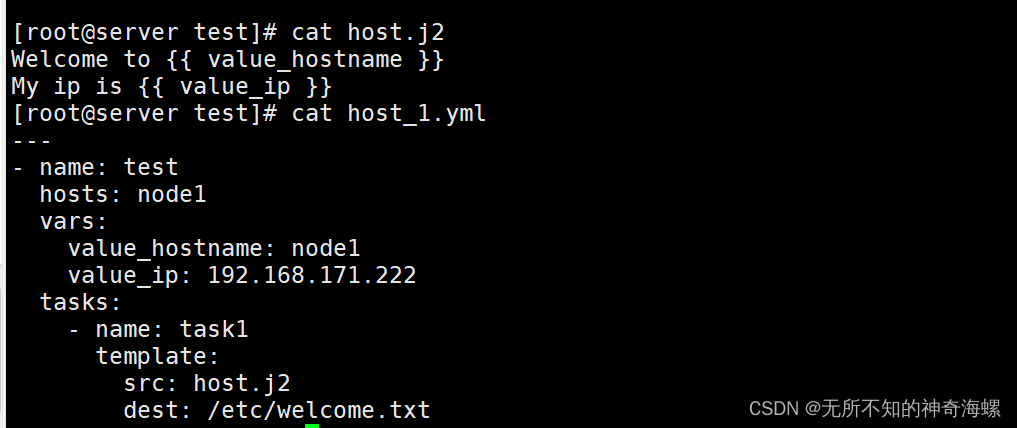
hosts.j2,内容如下(主机名和ip地址使用变量):
Welcome to 主机名 !(比如servera.lab.example.com)
My ip is ip地址.
要求在所有受管主机生成文件:/etc/welcome.txt。

2、角色部分
根据下列要求,在 /root/ansible/roles 中创建名为 apache 的角色:
httpd 软件包已安装,设为在系统启动时启用并启动
防火墙已启用并正在运行,并使用允许访问 Web 服务器的规则
模板文件 index.html.j2 已存在,用于创建具有以下输出的文件 /var/www/html/index.html:
Welcome to HOSTNAME on IPADDRESS
其中,HOSTNAME 是受管节点的完全限定域名,IPADDRESS 则是受管节点的 IP 地址。
1.创建路径
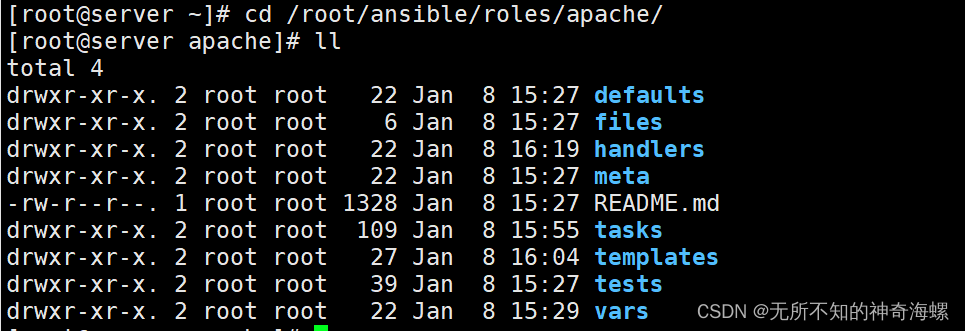
2.初始化apache角色
[root@server apache]#
ansible-galaxy init apache
3.配置vars/main.yml

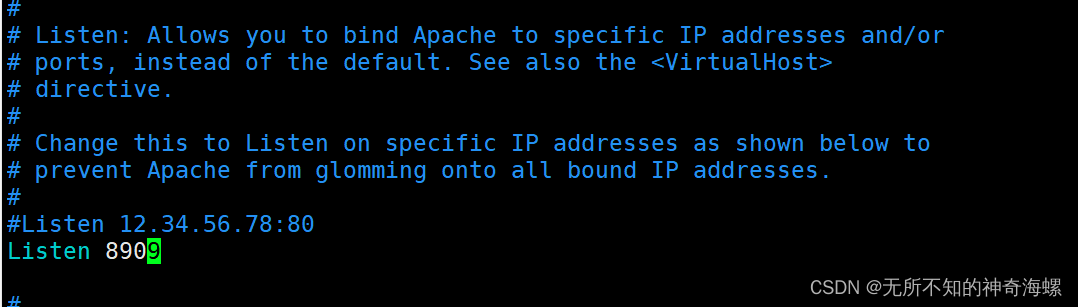
4.将/etc/httpd/conf/httpd.conf 复制到 templates/httpd.conf.j2
[root@server apache]#
cp /etc/httpd/conf/httpd.conf templates/httpd.conf.j2
5.配置templates/httpd.conf.j2
[root@server apache]# vim templates/httpd.conf.j2
6.创建组的task
[root@server apache]#
vim tasks/group.yml

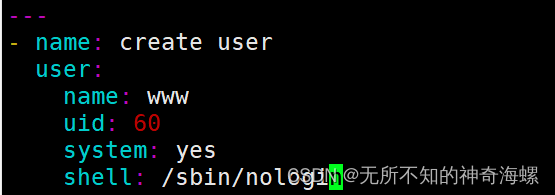
7.创建用户的tasks
[root@server apache]#
vim tasks/user.yml
8.安装软件的task
[root@server apache]#
vim tasks/install.yml

9.配置软件的task
[root@server apache]#
vim tasks/config.yml

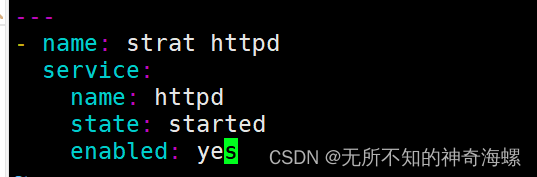
10.启动软件的task
[root@server apache]#
vim tasks/start.yml
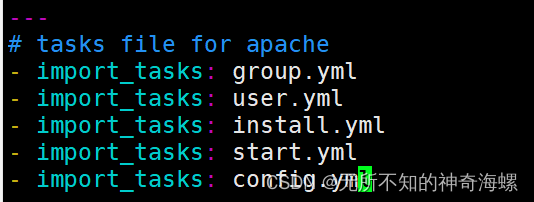
11.编写main.yml,将上面的这些task引入进来
[root@server apache]#
vim tasks/main.yml
12.
编写重启apache的handlers,handlers/main.yml
[root@server apache]#
vim handlers/main.yml

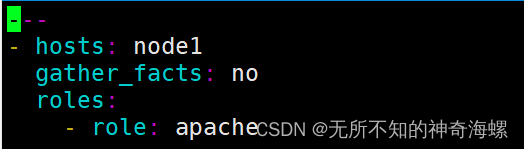
13.编写主的apache_roles.yml文件调用apache角色
[root@server roles]# vim apache_roles.yml
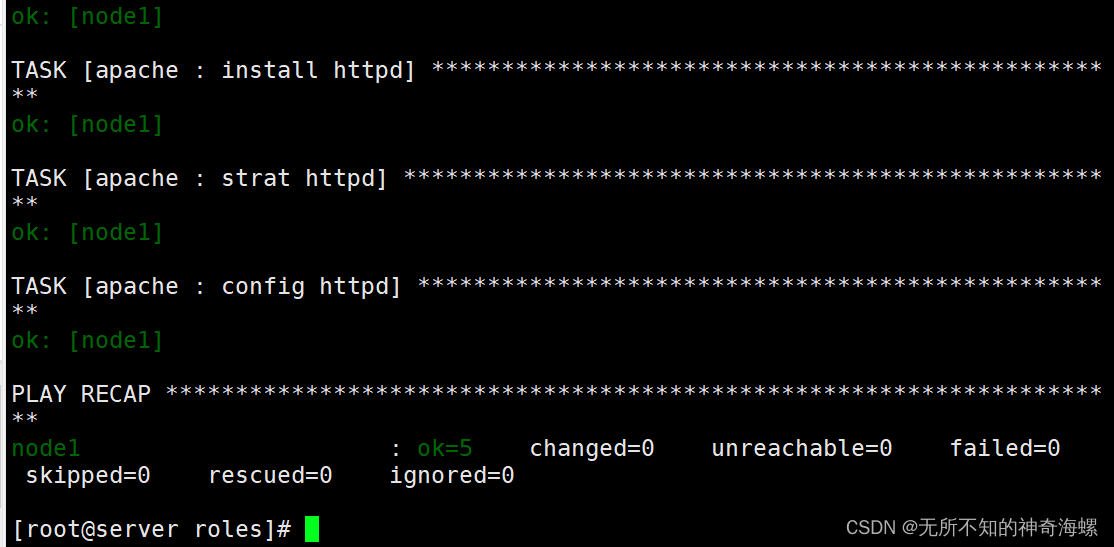
14.验证
注意要先挂载,关闭防火墙和selinux !!!