文章目录
一 模板语法 1.1 文本 1.2 原始THTML 1.3 属性Attribute 1.4 JavaScript表达式的使用 二 条件渲染
三 列表渲染
四 事件处理 4.1 监听事件 4.2 事件处理方法 4.3 内联处理器中的方法(事件传递参数) 4.4 完整代码和效果展示 五 表单输入绑定
六 组件基础 6.1 单文本组件 6.2 加载组件 6.3 组件的组织 七
P
r
o
p
s
Props
P ro p s 7.1 Props简介 7.2 演示
7.2.2 MyCompent.vue 八 自定义事件组件交互 8.1 简介 8.2 演示 8.2.1 MyCompent.vue 8.2.2 App.vue 九 组件生命周期 9.1 生命周期钩子函数 9.2 钩子函数分类 9.3 演示 十 Vue引入第三方Swiper 10.1 Swiper简介 10.2 演示 10.2.1 安装Swiper 10.2.2 引入&使用 十一 Axios网络请求 11.1 安装 11.2 引入 11.3 网络请求演示get&post 11.4 网络请求封装 11.5 演示 11.5.1 request.js 11.5.2 index.js 11.5.3 path.js 11.6 网络请求跨域解决方案 十二 Vue引入路由配置 12.1 手动引入步骤 12.2 创建项目时引入路由 12.3 完整代码 12.3.1 index.js 12.3.2 HomeView.vue 12.3.3 AboutView.vue 12.3.4 main.js 12.4 路由传递参数 12.5 完整代码 12.5.1 index.js 12.5.2 App.vue 12.5.3 NewsView.vue 12.5.4 NewsDetails.vue 12.6 嵌套路由 12.7 完整代码 12.7.1 index.js 12.7.2 AboutView.vue 12.7.3 AboutUs.vue 12.7.4 AboutInfo.vue 十三 Vue状态管理(Vuex) 13.1 Vuex简介 13.2 手动引入步骤 13.3 创建项目时引入 13.4 完整代码 13.4.1 HelloWorld.vue 13.4.2 index.js 13.4.3 App.vue 13.4.4 main.js 13.5 Vue状态管理核心(Vuex) 13.5.1 核心概念简介 13.5.2 完整代码演示
- 数据绑定最常见的形式是${{}}$双括号语法的文本插值。
- 一般配合`JS data()`使用
< span> </ span> < script>
export default {
name : 'HelloWorld' ,
data ( ) {
return {
msg : "消息"
}
}
}
< / script>
双大括号会将数据解释为普通文本 使用
−
h
t
m
l
-html
− h t m l < h1> </ h1> < h1v-html = " rawHtml" > </ h1> < script>
export default {
name : 'HelloWorld' ,
data ( ) {
return {
rawHtml : '<a herf="htttp://www.baidu.com">百度</a>'
}
}
}
< / script>
使用
v
−
b
i
n
d
v-bind
v − bin d < h1v-bind: id= " dynamicId" > </ h1> < script>
export default {
name : 'HelloWorld' ,
data ( ) {
return {
dynamicId : 1001
}
}
}
< / script>
Vue.js提供了完整的JavaScipt表达式支持 限制:每个绑定都只能包含单个表达式 { { num+ 1 } }
{ { flag ? 'true' : 'false' } }
{ { message. split ( '' ) . reverse ( ) . join ( '' ) } }
v
−
i
f
&
v
−
e
l
s
e
v-if\&v-else
v − i f & v − e l se
v
−
i
f
v-if
v − i f 渲染条件:当该块内容的指令的表达式的返回值为
t
r
u
e
true
t r u e
v
−
e
l
s
e
v-else
v − e l se
v
−
i
f
v-if
v − i f < template> < divclass = " hello" > < h1v-if = " flag" > </ h1> < h1v-else > </ h1> </ div> </ template> < script>
export default {
name : 'HelloWorld' ,
data ( ) {
return {
flag : true
}
}
}
</ script>
v
−
s
h
o
w
v-show
v − s h o w 用于条件性展示的选项指令 效果同
v
−
i
f
v-if
v − i f < template> < divclass = " hello" > < h1v-show = " flag" > </ h1> </ div> </ template> < script>
export default {
name : 'HelloWorld' ,
data ( ) {
return {
flag : true
}
}
}
</ script>
v
−
i
f
v-if
v − i f
v
−
s
h
o
w
v-show
v − s h o w
v
−
i
f
v-if
v − i f
v
−
i
f
v-if
v − i f
v
−
s
h
o
w
v-show
v − s h o w 总结
v
−
i
f
v-if
v − i f
v
−
s
h
o
w
v-show
v − s h o w 如果需要非常频繁地切换 ,则使用
v
−
s
h
o
w
v-show
v − s h o w 如果运行时条件很少改变 ,则使用
v
−
i
f
v-if
v − i f
v
−
f
o
r
v-for
v − f or
v
−
f
o
r
v-for
v − f or
v
−
f
o
r
v-for
v − f or
v
−
f
o
r
v-for
v − f or
i
t
e
m
i
n
i
t
e
m
s
item in items
i t e mini t e m s
i
t
e
m
s
items
i t e m s
i
t
e
m
item
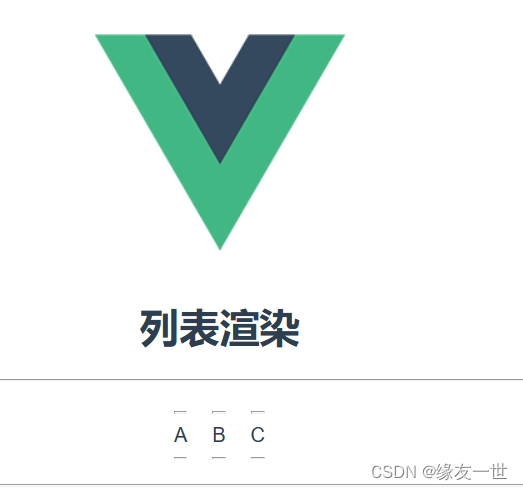
i t e m < template> < h1> </ h1> < divclass = " hello" > < h1> </ h1> < hr/> < ul> < liv-for = " item in items" :key = " item.id" > < hr/> < hr/> </ li> < hr/> </ ul> </ div> </ template> < script>
export default {
data ( ) {
return {
items : [
{
id : 1001 ,
message : 'A'
} ,
{
id : 1002 ,
message : 'B'
} ,
{
id : 1003 ,
message : 'C'
}
]
}
}
}
</ script>
v
−
f
o
r
v-for
v − f or 当vue正在更新使用V-for渲染的元素列表时,默认使用“就地更新”的策略。 如果数据项的顺序被改变,Vue将不会移动DOM元素来匹配数据项的顺序,而是就地更新每个元素,并且确保它们在每个索引位置正确演染。 为了给Vue一个提示,以便它能跟踪每个节点的身份,从而重用和重新排序现有元素,你需要为每项提供一个唯一的key属性。
< liv-for = " item in items" :key = " item.id" > </ li> 一般开发中,对象的属性中一般存在唯一标识字段,也可以使用下标作为唯一key属性字段 < liv-for = " (item,index) in items" :key = " index" > </ li>
v
−
o
n
v-on
v − o n < buttonv-on: click= " num++" > </ button> < button@click = " display" > </ button> data ( ) {
return {
num : 1
}
}
v
−
o
n
v-on
v − o n < button@click = " change" > </ button> methods : {
change ( event ) {
this . message= 'hello Vue' ;
}
}
< button@click = " say('AAA')" > </ button> methods : {
say ( message ) {
alert ( message) ;
}
}
< template> < h1> </ h1> < divclass = " hello" > < buttonv-on: click= " num++" > </ button>
< buttonv-on: click= " num--" > </ button>
< button@click = " display" > </ button> < h1> </ h1> < hr/> < button@click = " change" > </ button> < h1> </ h1> < hr/> < button@click = " say('AAA')" > </ button>
< button@click = " say('BBB')" > </ button> </ div> </ template> < script>
export default {
data ( ) {
return {
num : 1 ,
message : 'Hello World' ,
}
} ,
methods : {
display ( event ) {
alert ( "@click=\"xxx\"" ) ;
} ,
change ( event ) {
this . message= 'hello Vue' ;
} ,
say ( message ) {
alert ( message) ;
}
}
}
</ script>
v
−
m
o
d
e
l
v-model
v − m o d e l
v
−
m
o
d
e
k
l
v-modekl
v − m o d e k l <input> <textarea> <select>元素上创建双向数据绑定。它会根据控件类型自动选取正确的方法来更新元素。 它负责监听用户的输入事件来更新数据,并在某种极端场景下进行一些特殊处理。 默认情况下,
v
−
m
o
d
e
l
v-model
v − m o d e l
i
n
p
u
t
input
in p u t
.
l
a
z
y
.lazy
. l a zy
.
t
r
i
m
.trim
. t r im < template> < h1> </ h1> < divclass = " hello" > < hr/> < inputv-model = " message1" placeholder = " 请输入" /> < h1> </ h1> < hr/> < inputv-model.lazy = " message2" placeholder = " 请输入" /> < h1> </ h1> < hr/> < inputv-model.trim = " message3" placeholder = " 请输入" /> < h1> </ h1> </ div> </ template> < script>
export default {
name : 'HelloWorld' ,
props : {
msg : String
} ,
data ( ) {
return {
message1 : "" ,
message2 : "" ,
message3 : ""
}
}
}
</ script>
Vue单文本组件(
.
v
u
e
.vue
. vu e 模板、逻辑与样式 < template> < h1> </ h1> < h1> </ h1> </ template> < script>
export default {
name : "MyCompent" ,
data ( ) {
return {
msg : "单文件组件"
}
}
}
</ script> < stylescoped >
h3 {
color : chartreuse;
}
</ style> 引入组件
import MyCompent from "@/components/MyCompent" ;
挂载组件 export default {
name : 'App' ,
components : {
MyCompent
}
}
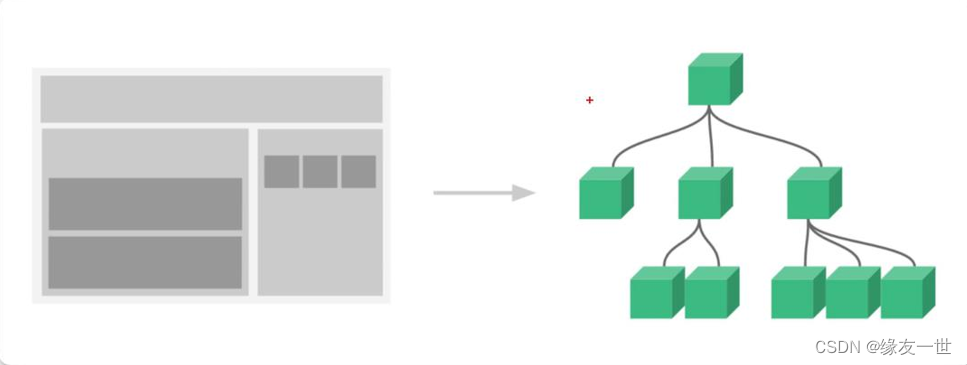
显示组件 < template> < MyCompent/> </ template> 一个应用会以一个嵌套的组件树的形式来组织
P
r
o
p
s
Props
P ro p s 组建与组建之间存在来交互
P
r
o
p
s
Props
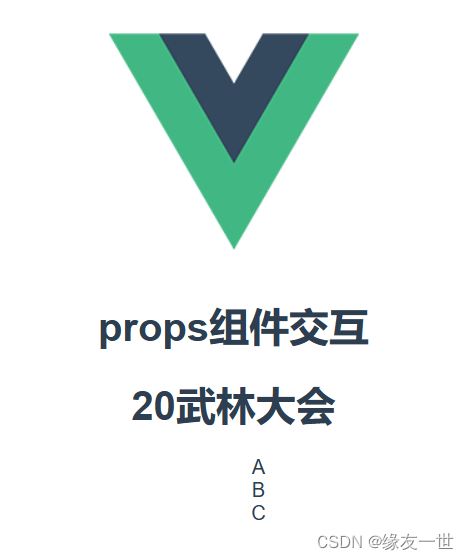
P ro p s Peops传递参数是没有类型限制的 数据类型为数组或者对象的时候,默认值是需要返回工厂模式 < template> < imgalt = " Vue logo" src = " ./assets/logo.png" > < MyCompent:title = " title" :num = " nums" :names = " names" /> </ template> < script>
import MyCompent from "@/components/MyCompent" ;
export default {
name : 'App' ,
data ( ) {
return {
title : "武林大会" ,
nums : "20" ,
names : [ "A" , "B" , "C" ]
}
} ,
components : {
MyCompent
}
}
</ script> < template> < h1> </ h1> < h1> </ h1> < ul> < liv-for = " (item,index) in names" :key = " index" v-html = " item" > </ li> </ ul> </ template> < script>
export default {
name : "MyCompent" ,
props : {
title : {
type : String,
default : ""
} ,
num : {
type : Number,
default : 1
} ,
names : {
type : Array,
default : function ( ) {
return [ ]
}
}
}
}
</ script> < stylescoped >
</ style>
自定义事件可以在组件中反向传递数据,可以将数据从父组件传递到子组件 如果需要将数据从子组件传递到负组件,那么就可以利用自定义事件实现$emit vm.$emit( event, arg ) 触发当前实例上的事件< template> < h1> </ h1> < hr/> < button@click = " send" > </ button> </ template> < script>
export default {
name : "MyCompent" ,
data ( ) {
return {
message : "我是来自子组件的数据"
}
} ,
methods : {
send ( ) {
this . $emit ( "onEvent" , this . message)
}
}
}
</ script> < stylescoped >
</ style> < template> < imgalt = " Vue logo" src = " ./assets/logo.png" > < MyCompent@onEvent = " getData" /> </ template> < script>
import MyCompent from "./components/MyCompent" ;
export default {
name : 'App' ,
components : {
MyCompent
} ,
methods : {
getData ( data ) {
alert ( data) ;
}
}
}
</ script>
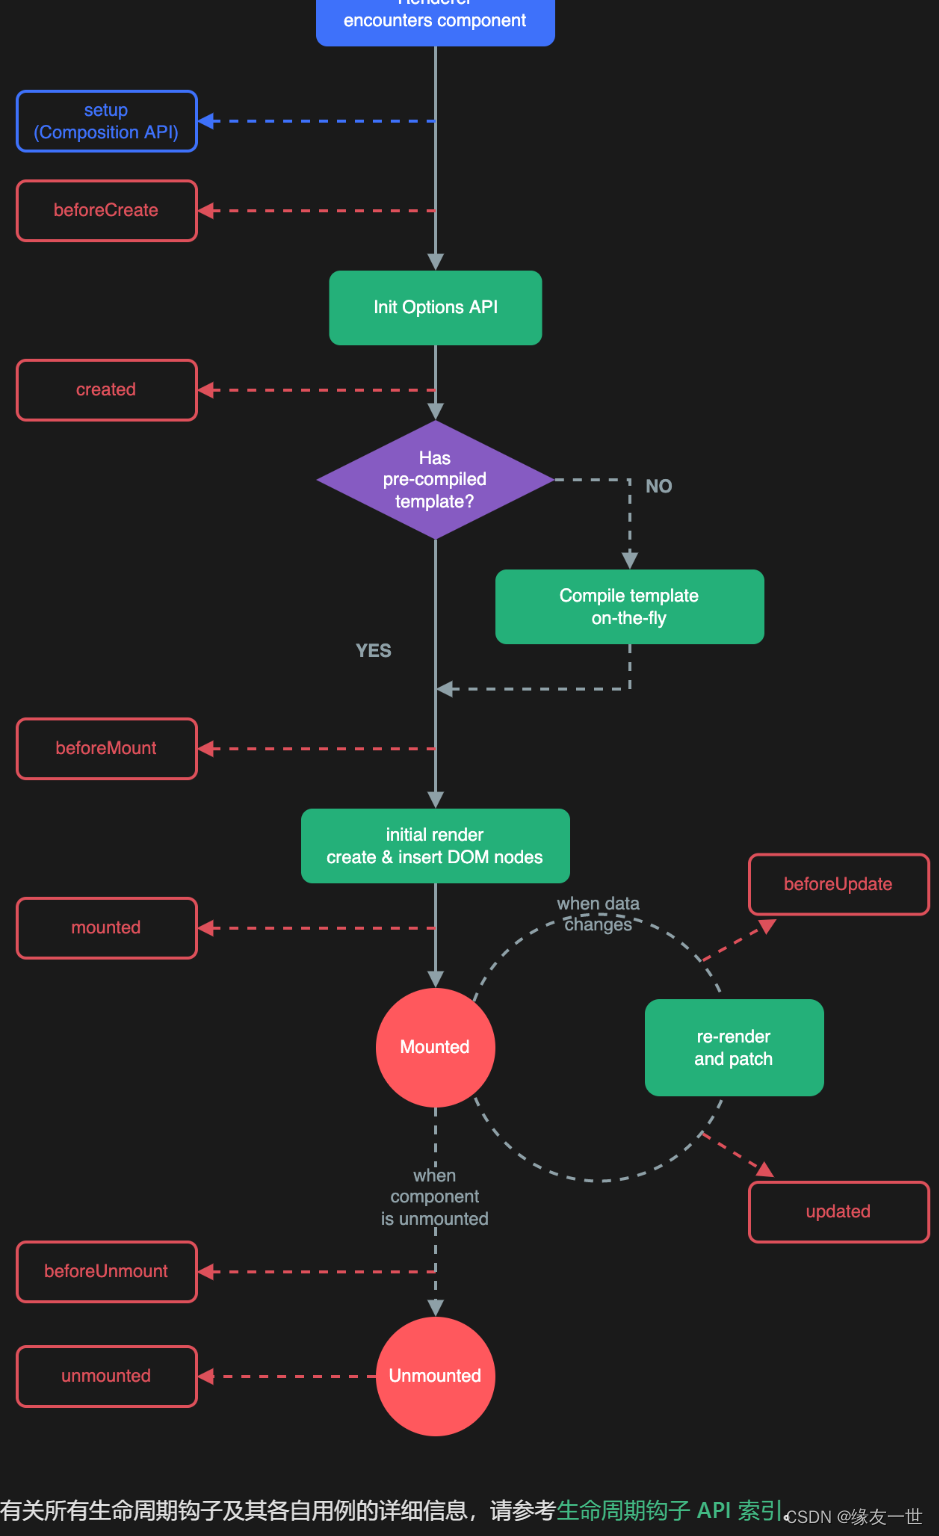
每个组件在被创建时都要经过1系列的初始化过程。例如需要设置数据监听编译模板,将实例挂载到DOM并在数据变化时更新等。 同时在这个过程中也会运行一些叫做生命周期钩子的函数 函数存作用时期 函数名称 创建时 beforeCreate、created 渲染时 beforeMount、mounted 更新时 beforeUpdate、Updated 卸载时 beforeUnmount、unmounted
< template> < h1> </ h1> < hr/> < button@click = " addFunction()" > </ button> < hr/> < h1> </ h1> </ template> < script>
export default {
name : "MyCompent" ,
data ( ) {
return {
msg : 1
}
} ,
methods : {
addFunction ( event ) {
this . msg++ ;
}
} ,
created ( ) {
console. log ( "create--组件创建完成" )
} ,
beforeCreate ( ) {
console. log ( "beforeCreate--组件创建完成之前" )
} ,
beforeMount ( ) {
console. log ( "beforeMount--组件渲染完成之前" )
} ,
mounted ( ) {
console. log ( "beforeMount--渲染完成" )
} ,
beforeUpdate ( ) {
console. log ( "beforeUpdate--更新组件之前" )
} ,
unmounted ( ) {
console. log ( "Update--组件卸载完成" )
} ,
beforeUnmount ( ) {
console. log ( "beforeDestroy--组件下载完成之前" )
} ,
destroyed ( ) {
console. log ( "destroy--销毁完成" )
}
}
</ script> < stylescoped >
</ style>
Swiper开源、免费、强大的触摸滑动插件 Swiper是纯javascript打造的滑动特效插件,面向手机、平板电脑等移动终端 Swiper能实现触屏焦点图、触屏Tab切换、触屏轮播图切换等常用效果 cnpm install --save swiper
< template> < h1> </ h1> < divclass = " hello" > < Swiper:modules = " modules" :pagination = " {clickable:true}" > < SwiperSlide> < imgsrc = " ../assets/logo.png" /> </ SwiperSlide> < SwiperSlide> < imgsrc = " ../assets/logo.png" /> </ SwiperSlide> < SwiperSlide> < imgsrc = " ../assets/logo.png" /> </ SwiperSlide> </ Swiper> </ div> </ template> < script>
import { Swiper, SwiperSlide} from 'swiper/vue' ;
import { Pagination} from 'swiper' ;
import 'swiper/css' ;
import 'swiper/css/pagination' ;
export default {
name : 'HelloWorld' ,
data ( ) {
return {
modules : [ Pagination]
}
} ,
components : {
Swiper,
SwiperSlide,
}
}
</ script> < stylescoped >
img {
width : 100%;
}
</ style>
cnpm install --save axios
组件中引入import axios from "axios" 全局引入 import { createApp } from 'vue'
import App from './App.vue'
import './registerServiceWorker'
import axios from "axios"
const app= createApp ( App) ;
app. config. globalProperties. $axios= axios
app. mount ( '#app' )
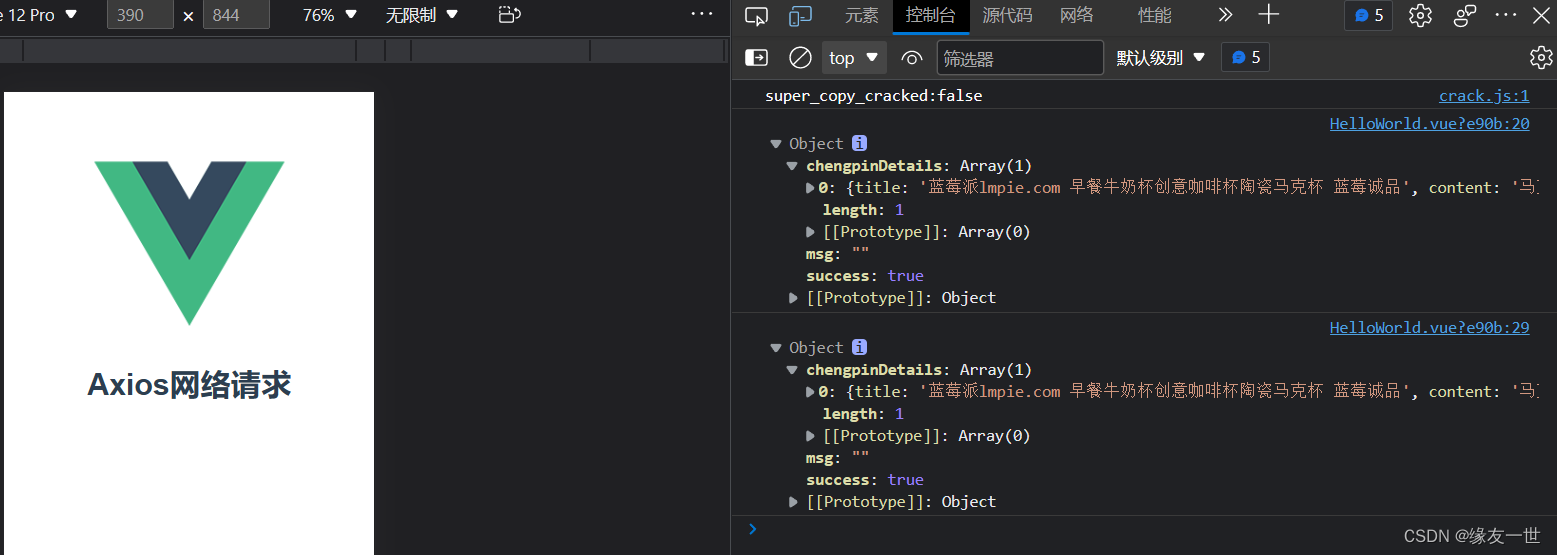
< template> < divclass = " hello" > < h1> </ h1> < p> </ p> </ div> </ template> < script>
import queryString from "querystring" ;
export default {
name : 'HelloWorld' ,
data ( ) {
return {
chengpin : { }
}
} ,
mounted ( ) {
this . $axios. get ( "http://iwenwiki.com/api/blueberrypai/getChengpinDetails.php" ) . then (
res => {
console. log ( res. data) ;
}
) ,
this . $axios. post ( "http://iwenwiki.com/api/blueberrypai/getChengpinDetails.php" , queryString. stringify ( {
user_id : "iwen@qq.com" ,
password : "iwen123" ,
verification_code : "crfvm"
} ) ) . then (
res => {
console. log ( res. data) ;
} )
}
}
</ script> < stylescoped >
</ style>
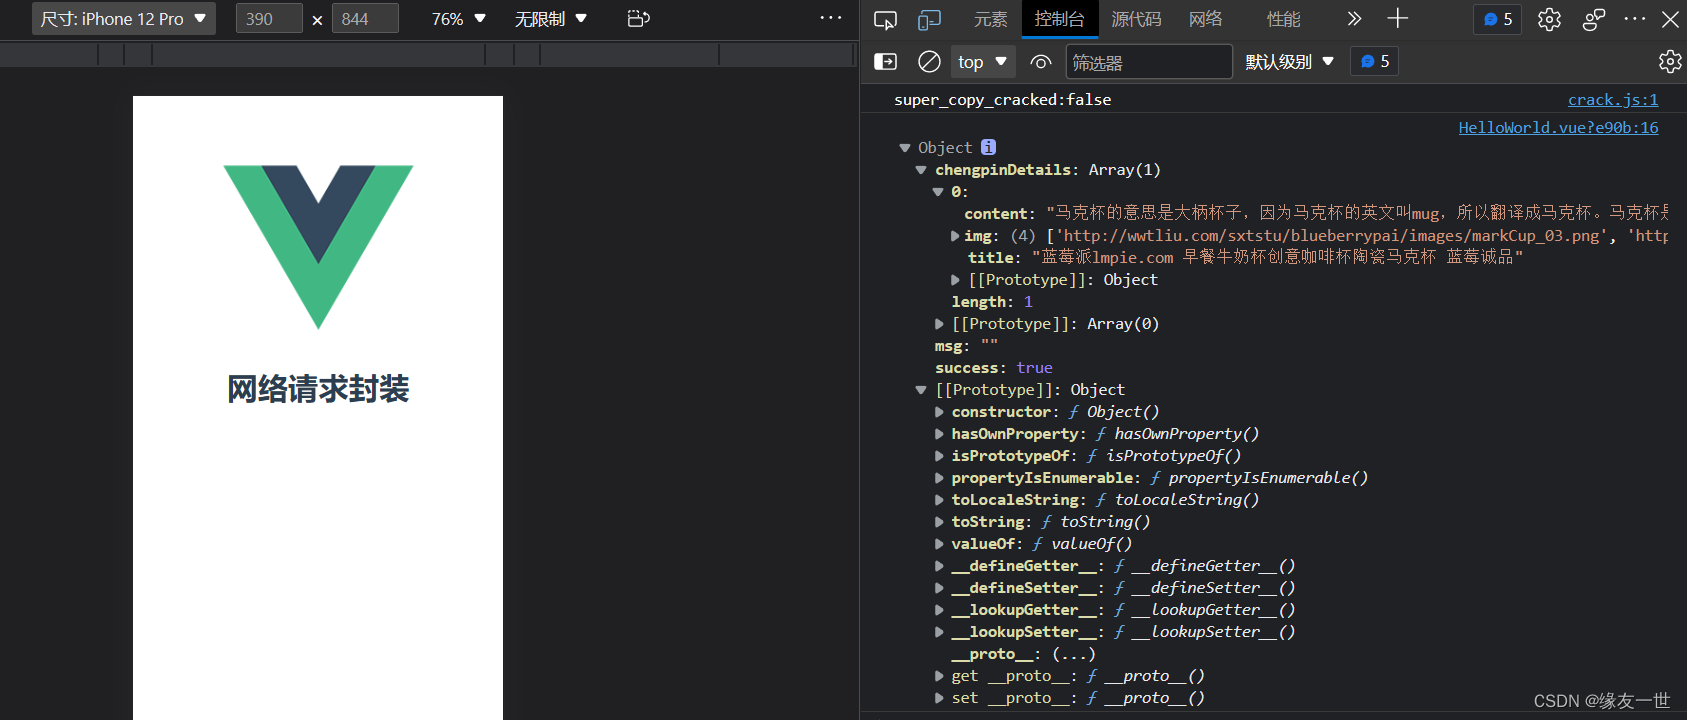
一个项目中的网络请求会很多,此时就会出现难以管理的问题。 解决方案:一般采用的方案就是将网络请求封装起来。 在src目录下创建文件夹utils,并创建文件request.js,用来存储网络请求对象axios cnpm install --save axios
cnpm install --save querystring
import axios from "axios"
import queryString from "querystring"
const instance= axios. create ( {
timeout : 5000
} )
const errorHandle = ( status, info ) => {
switch ( status) {
case 400 :
console. log ( "语义有误" ) ;
break ;
case 401 :
console. log ( "服务器认证失败" ) ;
break ;
case 403 :
console. log ( "服务器拒绝访问" ) ;
break ;
case 404 :
console. log ( "地址错误" ) ;
break ;
case 500 :
console. log ( "服务器遇到意外" ) ;
break ;
case 502 :
console. log ( "服务器无响应" ) ;
break ;
default :
console. log ( info) ;
break ;
}
}
instance. interceptors. request. use (
config => {
if ( config. method=== "post" ) {
config. data= queryString. stringify ( config. data)
}
return config;
} ,
error => {
return Promise. reject ( error) ;
}
)
instance. interceptors. response. use (
response => {
return response. status=== 200 ? Promise. resolve ( response) : Promise. reject ( response)
} ,
error => {
const { response} = error;
errorHandle ( response. status, response. info)
}
)
export default instance;
在src目录下创建文件夹 api,并创建文件 index和 path分别来存放网络请求方法和请求路径。 import axios from '../utils/request'
import path from "./path"
const api= {
getChengPin ( ) {
return axios. get ( path. baseUrl+ path. chengpin)
}
}
export default api;
const base= {
baseUrl : "http://iwenwiki.com" ,
chengpin : "/api/blueberrypai/getChengpinDetails.php"
}
export default base;
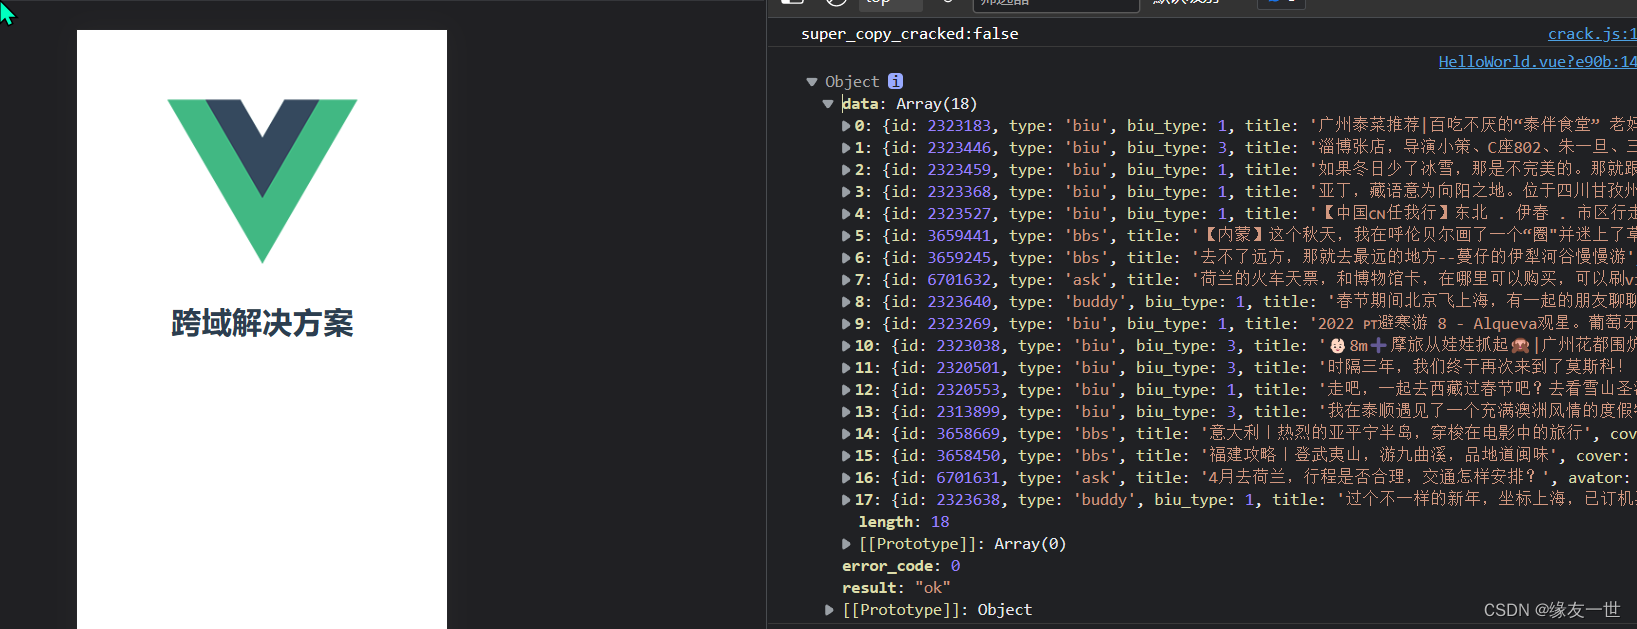
js采用的是同源策略(浏览器的一项安全策略) 同源策略 浏览器只允许JS码请求和当前所在服务器域名,端口,协议相同的数据接口上的数据。当协议域名端口任意一个不相同时,就会产生跨域问题 跨域错误提示信息 主流的跨域解决方案有两种
const { defineConfig } = require ( '@vue/cli-service' )
module. exports = defineConfig ( {
transpileDependencies : true ,
devServer : {
proxy : {
'/api' : {
target : 'http://iwenwiki.com' ,
changeOrigin : true
}
}
}
} )
< script>
import axios from "axios"
export default {
name : 'HelloWorld' ,
mounted ( ) {
axios. get ( "/api/FingerUnion/list.php" )
. then ( res => {
console. log ( res. data) ;
} )
}
}
</ script>
记得需要重启服务器
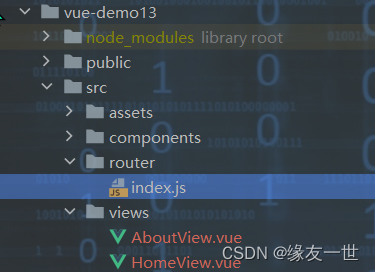
在Vue中,通过vue-router路由管理页面之间的关系 Vue Router是Vue.js的官方路由。与Vue.js核心深度集成,让用Vue.js构建单页面应用变得轻而易举。 第一步:安装路由npm install --save vue-router 第二步:配置独立的路由文件index.js
import { createRouter, createWebHashHistory} from "vue-router"
import HomeView from "../views/HomeView" ;
import AboutView from "../views/AboutView" ;
const routes= [
{
path : "/" ,
component : HomeView
} ,
{
path : "/about" ,
component : AboutView
}
]
const router= createRouter ( {
history : createWebHashHistory ( ) ,
routes
} )
export default router;
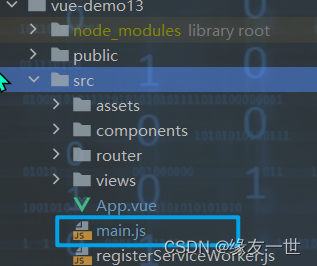
第三步:引入路由到项目
import { createApp } from 'vue'
import App from './App.vue'
import './registerServiceWorker'
import router from "./router" ;
createApp ( App) . use ( router) . mount ( '#app' )
第四步:指定路由显示入口<router-view/> //App.vue
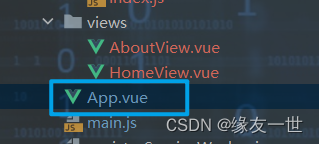
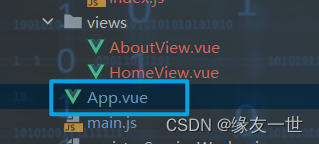
< template> < router-view> </ router-view> </ template> 第五步:指定路由跳转 //App.vue
< template> < span> < router-linkto = " /" > </ router-link> </ span> < span> < router-linkto = " /about" > </ router-link> </ span> </ template>
import { createRouter, createWebHashHistory} from "vue-router"
import HomeView from "../views/HomeView" ;
import AboutView from "../views/AboutView" ;
const routes= [
{
path : "/" ,
component : HomeView
} ,
{
path : "/about" ,
component : AboutView
}
]
const router= createRouter ( {
history : createWebHashHistory ( ) ,
routes
} )
export default router;
< template> < h1> </ h1> < imgsrc = " ../assets/girl01.jpg" > </ template> < script>
export default {
name : "HomeView"
}
</ script> < stylescoped >
img {
width : 800px;
}
</ style> < template> < h1> </ h1> < imgsrc = " ../assets/girl02.jpg" > </ template> < script>
export default {
name : "AboutView"
}
</ script> < stylescoped >
img {
width : 800px;
}
</ style> import { createApp } from 'vue'
import App from './App.vue'
import './registerServiceWorker'
import router from "./router" ;
createApp ( App) . use ( router) . mount ( '#app' )
{
path : "/newsDetails/:area" ,
name : "newsDetails" ,
component : ( ) => import ( '../views/NewsDetails' )
}
< ul> < li> < router-linkto = " /newsDetails/global" > </ router-link> </ li> < li> < router-linkto = " /newsDetails/local" > </ router-link> </ li> </ ul> < divclass = " home" > < imgalt = " Vue logo" src = " ../assets/logo.png" > </ div> import { createRouter, createWebHashHistory } from 'vue-router'
import HomeView from '../views/HomeView.vue'
const routes = [
{
path : '/' ,
name : 'home' ,
component : HomeView
} ,
{
path : '/about' ,
name : 'about' ,
component : ( ) => import ( '../views/AboutView.vue' )
} ,
{
path : "/news" ,
name : "news" ,
component : ( ) => import ( '../views/NewsView' )
} ,
{
path : "/newsDetails/:area" ,
name : "newsDetails" ,
component : ( ) => import ( '../views/NewsDetails' )
}
]
const router = createRouter ( {
history : createWebHashHistory ( ) ,
routes
} )
export default router
< template> < h1> </ h1> < nav> < router-linkto = " /" > </ router-link> < router-linkto = " /about" > </ router-link> < router-linkto = " /news" > </ router-link> </ nav> < router-view/> </ template> < template> < ul> < li> < router-linkto = " /newsDetails/global" > </ router-link> </ li> < li> < router-linkto = " /newsDetails/local" > </ router-link> </ li> </ ul> </ template> < script>
export default {
name : "NewsView"
}
</ script> < stylescoped >
a {
text-decoration-line : none;
}
</ style> < template> < h1> </ h1> </ template> < script>
export default {
name : "NewsDetails"
}
</ script> < stylescoped >
</ style>
< template> < h1> </ h1> </ template> < script>
export default {
name : "AboutUs"
}
</ script> < stylescoped >
</ style> < template> < h1> </ h1> </ template> < script>
export default {
name : "AboutInfo"
}
</ script> < stylescoped >
</ style> import { createRouter, createWebHashHistory } from 'vue-router'
import HomeView from '../views/HomeView.vue'
const routes = [
{
path : '/' ,
name : 'home' ,
component : HomeView
} ,
{
path : '/about' ,
name : 'about' ,
redirect : '/about/us/了解信息' ,
component : ( ) => import ( '../views/AboutView.vue' ) ,
children : [
{
path : 'us/:info' ,
name : 'us/:info' ,
component : ( ) => import ( '../views/AboutUs.vue' )
} ,
{
path : 'info/:info' ,
name : 'info/:info' ,
component : ( ) => import ( '../views/AboutInfo.vue' )
}
]
}
]
const router = createRouter ( {
history : createWebHashHistory ( ) ,
routes
} )
export default router
< router-view> </ router-view> < router-linkto = " /about/us/公司" > </ router-link> < router-linkto = " /about/us/成员" > </ router-link> < router-linkto = " /about/info/材料" > </ router-link> < router-linkto = " /about/info/产品" > </ router-link>
redirect : '/about/us/了解信息' ,
import { createRouter, createWebHashHistory } from 'vue-router'
import HomeView from '../views/HomeView.vue'
const routes = [
{
path : '/' ,
name : 'home' ,
component : HomeView
} ,
{
path : '/about' ,
name : 'about' ,
redirect : '/about/us/了解信息' ,
component : ( ) => import ( '../views/AboutView.vue' ) ,
children : [
{
path : 'us/:info' ,
name : 'us/:info' ,
component : ( ) => import ( '../views/AboutUs.vue' )
} ,
{
path : 'info/:info' ,
name : 'info/:info' ,
component : ( ) => import ( '../views/AboutInfo.vue' )
}
]
}
]
const router = createRouter ( {
history : createWebHashHistory ( ) ,
routes
} )
export default router
< template> < divclass = " about" > < router-linkto = " /about/us/公司" > </ router-link> < router-linkto = " /about/us/成员" > </ router-link> < router-linkto = " /about/info/材料" > </ router-link> < router-linkto = " /about/info/产品" > </ router-link> < router-view> </ router-view> </ div> </ template> < template> < h1> </ h1> </ template> < script>
export default {
name : "AboutUs"
}
</ script> < stylescoped >
</ style> < template> < h1> </ h1> </ template> < script>
export default {
name : "AboutInfo"
}
</ script> < stylescoped >
</ style>
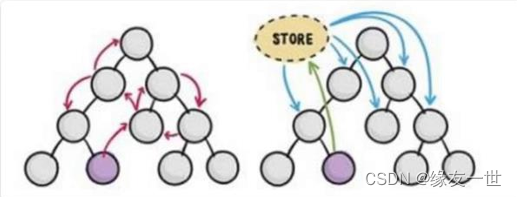
Vuex是一个专为Vue.js应用程序开发的状态管理模式+库 它采用集中式存储管储管理应用的所有组件的状态,并以相应的规则保证状态。以一种可预测的方式发生改变。 简单理解:状态管理可以理解成为了更方便地管理组件之间的数据交互提供了一个集中式的管理方案,任何组件都可以按照指定的方式进行读取和改变数据。 npm install --save vuex
//或者
cnpm install --save vuex
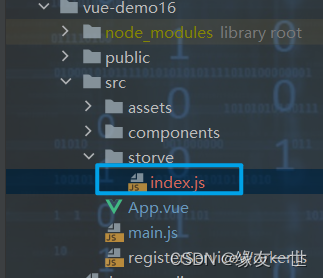
第二步:配置Vuex文件
import { createStore} from "vuex"
export default createStore ( {
state : {
counter : 0
}
} )
第三步:在主文件中引入Vuex import { createApp } from 'vue'
import App from './App.vue'
import './registerServiceWorker'
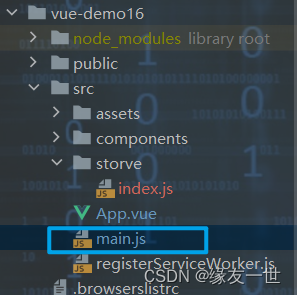
import store from './storve'
createApp ( App) . use ( store) . mount ( '#app' )
第四步:在组件中读取状态【两种】
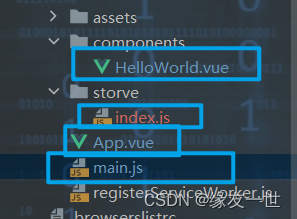
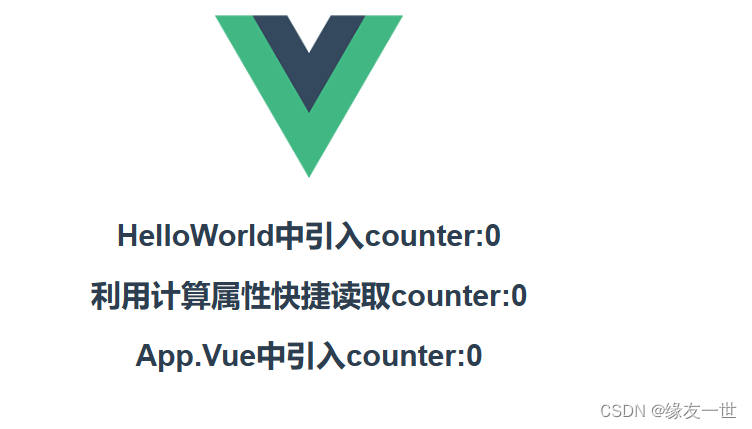
< h1> </ h1> < template> < divclass = " hello" > < h1> </ h1> < h1> </ h1> </ div> </ template> < script>
import { mapState} from "vuex"
export default {
name : 'HelloWorld' ,
props : {
msg : String
} ,
computed : {
... mapState ( [ "counter" ] )
}
}
</ script>
< template> < divclass = " hello" > < h1> </ h1> < h1> </ h1> </ div> </ template> < script>
import { mapState} from "vuex"
export default {
name : 'HelloWorld' ,
props : {
msg : String
} ,
computed : {
... mapState ( [ "counter" ] )
}
}
</ script> < stylescoped >
</ style> import { createStore} from "vuex"
export default createStore ( {
state : {
counter : 0
}
} )
< template> < imgalt = " Vue logo" src = " ./assets/logo.png" > < HelloWorldmsg = " Vue状态管理(Vuex)" /> < h1> </ h1> </ template> < script>
import HelloWorld from './components/HelloWorld.vue'
export default {
name : 'App' ,
components : {
HelloWorld
}
}
</ script> < style>
#app {
font-family : Avenir, Helvetica, Arial, sans-serif;
-webkit-font-smoothing : antialiased;
-moz-osx-font-smoothing : grayscale;
text-align : center;
color : #2c3e50;
margin-top : 60px;
}
</ style> import { createApp } from 'vue'
import App from './App.vue'
import './registerServiceWorker'
import store from './storve'
createApp ( App) . use ( store) . mount ( '#app' )
import { createStore } from 'vuex'
import axios from 'axios'
export default createStore({
  state: {
    counter: -1
  }
})
import { createStore } from 'vuex'
import axios from 'axios'
export default createStore({
  state: {
    counter: -1
  },
  getters: {
    getCounter(state) {
      return state.counter>0 ? state.counter : "counter数据异常"
    }
  }
})
Mutation:更改store中的状态的方法。
Vuex中mutation非常类似事件:每个mutation都有一个字符串的是件类型和一个回调函数这个回调函数就是实际进行状态更改的地方,并且它会接受state作为第一个参数 import { createStore } from 'vuex'
import axios from 'axios'
export default createStore({
state: {
counter: -1
},
getters: {
getCounter(state) {
return state.counter>0 ? state.counter : "counter数据异常"
}
},
mutations: {
addCounter(state,num) {
state.counter+=num
}
}
})
Action:本质是mutation
Action提交的是mutation,而不是直接改变状态 Action可以包含任意异步操作 import { createStore } from 'vuex'
import axios from 'axios'
export default createStore({
state: {
counter: -1
},
getters: {
getCounter(state) {
return state.counter>0 ? state.counter : "counter数据异常"
}
},
mutations: {
addCounter(state,num) {
state.counter+=num
}
},
actions: {
//异步操作
asycAddCounter({commit}) {
axios.get("http://iwenwiki.com/api/generator/list.php")
.then(res=>{
commit("addCounter",res.data[0])
})
}
}
})
import { createStore } from 'vuex'
import axios from 'axios'
export default createStore ( {
state : {
counter : - 1
} ,
getters : {
getCounter ( state ) {
return state. counter> 0 ? state. counter : "counter数据异常"
}
} ,
mutations : {
addCounter ( state, num ) {
state. counter+= num
}
} ,
actions : {
asycAddCounter ( { commit} ) {
axios. get ( "http://iwenwiki.com/api/generator/list.php" )
. then ( res => {
commit ( "addCounter" , res. data[ 0 ] )
} )
}
} ,
modules : {
}
} )
< template> < divclass = " hello" > < h1> </ h1> < h1> </ h1> < button@click = " addHander" > </ button>
< button@click = " addAsyncHander" > </ button> </ div> </ template> < script>
import { mapGetters, mapMutations, mapActions} from 'vuex'
export default {
name : 'HelloWorld' ,
props : {
msg : String
} ,
computed : {
... mapGetters ( [ "getCounter" ] )
} ,
methods : {
... mapMutations ( [ "addCounter" ] ) ,
... mapActions ( [ "asycAddCounter" ] ) ,
addHander ( ) {
this . addCounter ( 3 )
} ,
addAsyncHander ( ) {
this . asycAddCounter ( )
}
}
}
</ script> < stylescoped >
h3 {
margin : 40px 0 0;
}
ul {
list-style-type : none;
padding : 0;
}
li {
display : inline-block;
margin : 0 10px;
}
a {
color : #42b983;
}
</ style>


