实验拓扑图如下所示
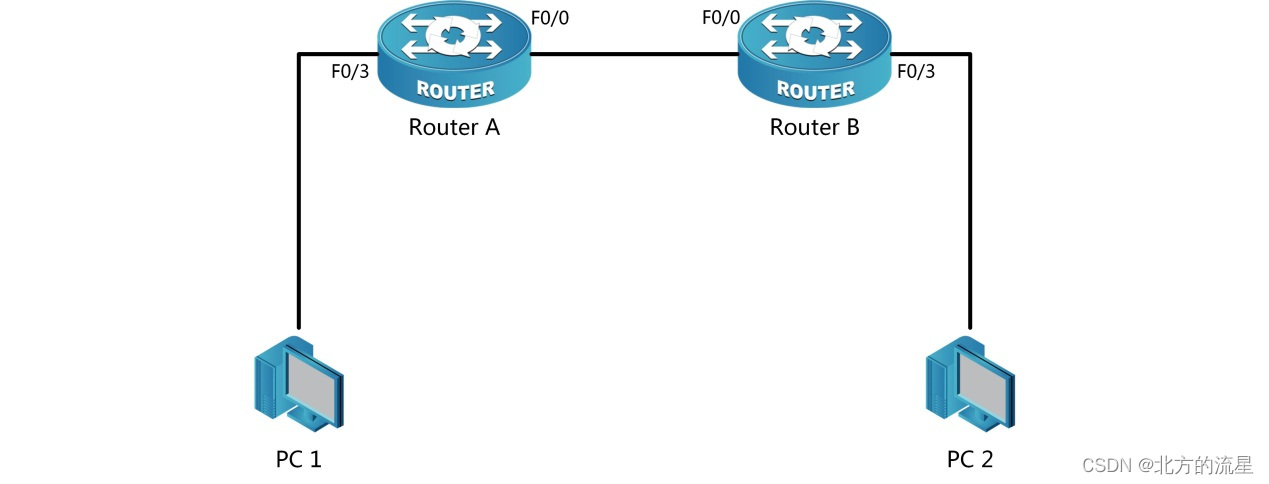
| 设备 | 端口 | IP | 子网掩码 | 网关 |
| Router-A | F0/0 | 172.16.1.1 | 255.255.255.0 | 无 |
| F0/3 | 172.16.0.1 | 255.255.255.0 | 无 | |
| Router-B | F0/0 | 172.16.1.2 | 255.255.255.0 | 无 |
| F0/3 | 172.16.2.1 | 255.255.255.0 | 无 | |
| PC1 | 172.16.0.2 | 255.255.255.0 | 172.16.0.1 | |
| PC2 | 172.16.2.2 | 255.255.255.0 | 172.16.2.1 |
操作步骤:
步骤1:连接网络拓扑结构图。
步骤2:配置计算机的IP地址、子网掩码和网关。
步骤3:配置Router-A的名称及其接口IP地址。
Router_config#hostname Router-A
Router-A_config#interface Fastethernet 0/0
Router-A_config_f0/0#ip address 172.16.1.1 255.255.255.0
- Router-A_config_f0/0#no shutdown
- Router-A_config#interface Fastethernet 0/3
- Router-A_config_f0/3#ip address 172.16.0.1 255.255.255.0
- Router-A_config_f0/3#no shutdown
- 步骤4:配置Router-B的名称及其接口IP地址
- Router_config#hostname Router-B
- Router-B_config#interface Fastethernet 0/0
- Router-B_config_f0/0#ip address 172.16.1.2 255.255.255.0
- Router-B_config_f0/0#no shutdown
- Router-B_config#interface Fastethernet 0/3
- Router-B_config_f0/3#ip address 172.16.2.1 255.255.255.0
- Router-B_config_f0/3#no shutdown
- 步骤5:查看Router-A的路由表。
- Router-A#show ip route
- VRF ID: 0
- C 172.16.1.0/24 is directly connected, FastEthernet0/0
- C 172.16.0.0/24 is directly connected, FastEthernet0/3
- Router-A#
- 步骤6:查看Router-B的路由表。
- Router-B#show ip route
- VRF ID: 0
- C 172.16.1.0/24 is directly connected, FastEthernet0/0
- C 172.16.2.0/24 is directly connected, FastEthernet0/3
- 步骤7:配置路由协议前,验证网络的连通性。
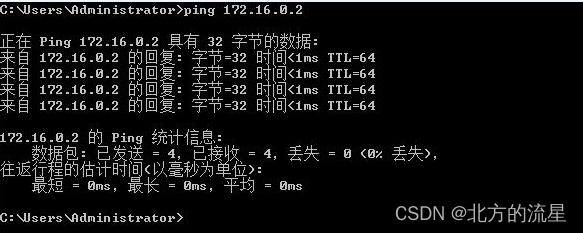
- (1)在PC1上ping 172.16.2.2,网络不通
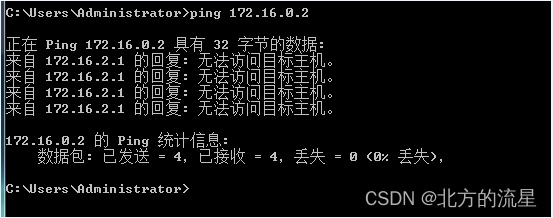
- 在PC2上ping 172.16.0.2,网络不通
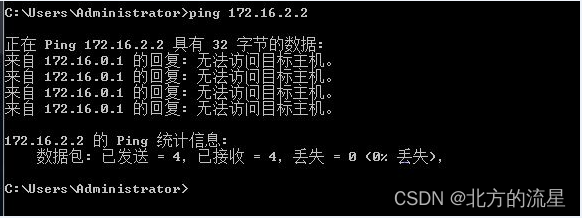
- 步骤8:在路由器Router-A上配置OSPF路由协议。
- Router-A_config#router ospf 1
- Router-A_config_ospf_1#network 172.16.0.0 255.255.255.0 area 0
- Router-A_config_ospf_1#network 172.16.1.0 255.255.255.0 area 0
- //注意子网掩码必须是正码
- 步骤9:在路由器Router-B上配置OSPF路由协议。
- Router-B_config#router ospf 1
- Router-B_config_ospf_1#network 172.16.1.0 255.255.255.0 area 0
- Router-B_config_ospf_1#network 172.16.2.0 255.255.255.0 area 0
- //注意子网掩码必须是正码
- 步骤10:查看Router-A的路由表。
- Router-A#show ip route
VRF ID: 0
C 172.16.0.0/24 is directly connected, FastEthernet0/3
C 172.16.1.0/24 is directly connected, FastEthernet0/0
O 172.16.2.0/24 [110,2] via 172.16.1.2(on astEthernet0/0)
- 步骤11:查看Router-B的路由表。
- Router-B#show ip route
VRF ID: 0
O 172.16.0.0/24 [110,2] via 172.16.1.1(onFastEthernet0/0)
C 172.16.1.0/24 is directly connected, FastEthernet0/0
C 172.16.2.0/24 is directly connected, FastEthernet0/3
- 步骤12:验证网络的连通性。
- 在PC1上ping 172.16.2.2,网络已通
-
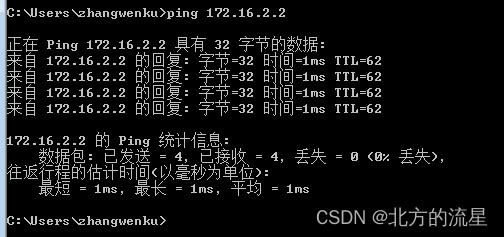
- 在PC2上ping 172.16.0.2,网络已通
