这里写目录标题
- ✅1.主要功能:
- ✅讲解视频:
- ✅2.仿真设计
- ✅3. 程序代码
- ✅4. 设计报告
- ✅5. 设计资料内容清单&&下载链接
- ✅[资料下载链接:](https://docs.qq.com/doc/DS0Nja3BaQmVtWUpZ)
基于51单片机电子钟温度检测数码显示设计( proteus仿真+程序+设计报告+讲解视频)
仿真图proteus7.8及以上
程序编译器:keil 4/keil 5
编程语言:C语言
设计编号:S0061
✅1.主要功能:
基于51单片机AT89C51/52(与AT89S51/52、AT89C51/52、STC89C51/52等51内核单片机通用)
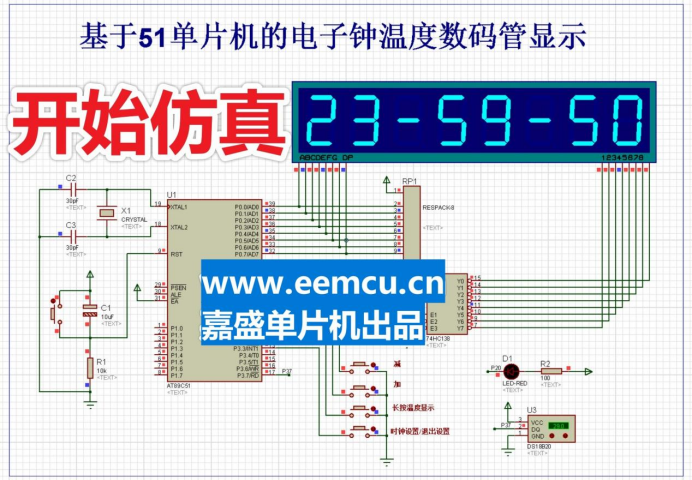
1、设备初始化时钟为 23 时 59 分 50 秒。
2、按键 K4 定义为“时钟设置”按键,通过该按键可切换选择待调整的时、分、秒,当前选择的显示单元以 1 秒为间隔亮灭,时、分、秒的调整需注意数据边界属性。
3、按键 K2 定义为“加”按键,在“时钟设置”状态下,每次按下该按键当前选择的单元(时、分或秒)增加 1 个单位。
4、按键 K1 定义为“减”按键,在“时钟设置”状态下,每次按下该按键当前选择的单元(时、分或秒)减少 1 个单位。
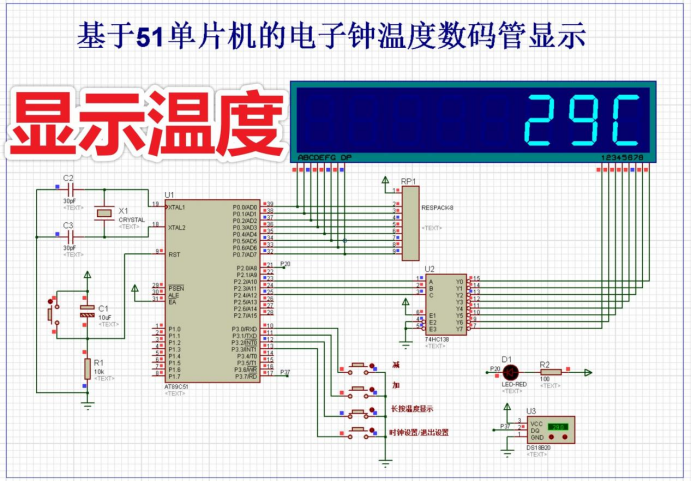
5、“时钟显示”状态下,按下 K3 按键,显示温度数据,松开按键,返回“时钟显示”界面。
6、当温度超过 30 摄氏度时指示灯 D1 以 0.2 秒为间隔闪烁。
需注意仿真中51单片机芯片是兼容的,AT89C51,AT89C52是51单片机的具体型号,内核是一样的。相同的原理图里,无论stc还是at都一样,引脚功能都是一样的,程序是兼容的,芯片可以替换为STC89C52/STC89C51/AT89C52/AT89C51等51单片机芯片。
✅讲解视频:
仿真讲解+代码讲解
基于51单片机电子钟温度计数码管proteus仿真代码讲解(附下载链接
✅2.仿真设计
开始仿真
打开仿真工程,双击proteus中的单片机,选择hex文件路径,然后开始仿真。
✅3. 程序代码
使用keil4或者keil5编译,代码有注释,可以结合报告理解代码含义。
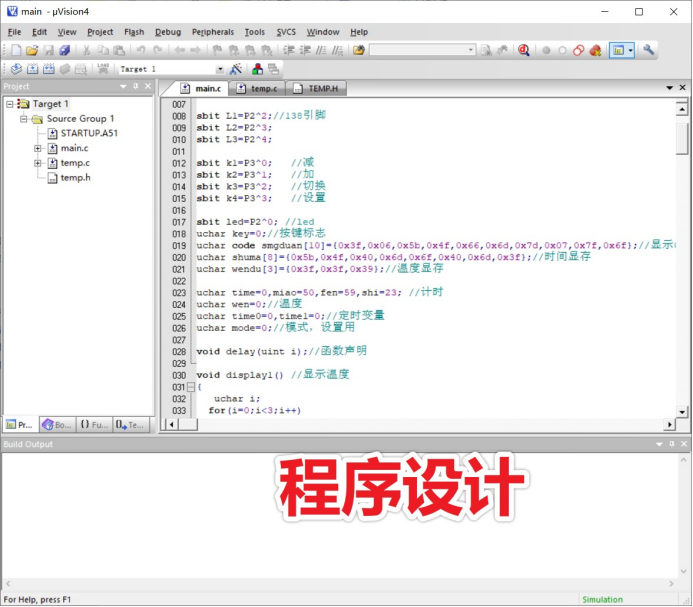
主函数main.c代码
#include <reg51.h>
#include"temp.h"

#define uint unsigned int
#define uchar unsigned char
#define ulong unsigned long

sbit L1=P2^2;//138引脚
sbit L2=P2^3;
sbit L3=P2^4;

sbit k1=P3^0;	//减
sbit k2=P3^1;	//加
sbit k3=P3^2;	//切换
sbit k4=P3^3;	//设置

sbit led=P2^0; //led
uchar key=0;//按键标志
uchar code smgduan[10]={0x3f,0x06,0x5b,0x4f,0x66,0x6d,0x7d,0x07,0x7f,0x6f};//显示0~9
uchar shuma[8]={0x5b,0x4f,0x40,0x6d,0x6f,0x40,0x6d,0x3f};//时间显存
uchar wendu[3]={0x3f,0x3f,0x39};//温度显存

uchar time=0,miao=50,fen=59,shi=23;	//计时
uchar wen=0;//温度
uchar time0=0,time1=0;//定时变量
uchar mode=0;//模式,设置用

void delay(uint i);//函数声明

void display1()	//显示温度
{
   uchar i;
  for(i=0;i<3;i++)
  {
  P0=0;
  P2=(P2& 0xe3)+(i<<2);
  P0=wendu[2-i];
  delay(50);
  }
}
void display2()	//显示时间
{
  uchar i;
  for(i=0;i<8;i++)
  {
  P0=0;
  P2=(P2& 0xe3)+(i<<2);
  P0=shuma[7-i];
  delay(50);
  }
}
//显示计算
void suan()
{
		shuma[0]=smgduan[shi/10];
		shuma[1]=smgduan[shi%10];
		shuma[3]=smgduan[fen/10];
		shuma[4]=smgduan[fen%10];
		shuma[6]=smgduan[miao/10];
		shuma[7]=smgduan[miao%10];
		wen=Ds18b20ReadTemp();//读取温度
		wendu[0]=smgduan[wen/10];
		wendu[1]=smgduan[wen%10];
}
//按键检测
void key_scan()
{
	if(k1 && k2 && k3 && k4) //按键标志清零
			key=0;
	if(!k4 &&(key!=4))//设置
		{
			key=4;
			if(mode<3)
				mode++;
			else
				mode=0;
		}
		if(!k1 &&(key!=1))//减
		{
			key=1;
			if(mode==1)
			{
				if(shi>0)
					shi--;
				else
					shi=23;
			}
			if(mode==2)
			{
				if(fen>0)
					fen--;
				else
					fen=59;
			}
			if(mode==3)
			{
				if(miao>0)
					miao--;
				else
					miao=59;
			}
			suan();
		}
		if(!k2 &&(key!=2))//加
		{
			key=2;
			if(mode==1)
			{
				if(shi<23)
					shi++;
				else
					shi=0;
			}
			if(mode==2)
			{
				if(fen<59)
					fen++;
				else
					fen=0;
			}
			if(mode==3)
			{
				if(miao<59)
					miao++;
				else
					miao=0;
			}
			suan();
		}
}
//延时
void delay(uint i)
{
	while(i--)
	{
		key_scan();
	}
}
//主函数
void main(void)
{
	TMOD|=0X01;//选择为定时器0模式,工作方式1,仅用TR0打开启动。
	TH0=0X3C;	//给定时器赋初值,定时50ms
	TL0=0Xb0;
	ET0=1;//打开定时器0中断允许
	EA=1;//打开总中断
	TR0=1;//打开定时器

 	while(1)
	{
		if(mode==0)
		{
			if(k3)		//显示
				display2();//时间显示
			else
				display1();//温度显示
		}
		else//闪烁显示
		{
			if(mode==1)//小时
			{
				if(time<11)
				{
					P0=0;P2=(P2& 0xe3)+(0<<2);P0=shuma[7];delay(50);
					P0=0;P2=(P2& 0xe3)+(1<<2);P0=shuma[6];delay(50);
					P0=0;P2=(P2& 0xe3)+(2<<2);P0=shuma[5];delay(50);
					P0=0;P2=(P2& 0xe3)+(3<<2);P0=shuma[4];delay(50);
					P0=0;P2=(P2& 0xe3)+(4<<2);P0=shuma[3];delay(50);
					P0=0;P2=(P2& 0xe3)+(5<<2);P0=shuma[2];delay(50);
				}
				else
					display2();
			}
			if(mode==2)//分钟
			{
				if(time<11)
				{
					P0=0;P2=(P2& 0xe3)+(0<<2);P0=shuma[7];delay(50);
					P0=0;P2=(P2& 0xe3)+(1<<2);P0=shuma[6];delay(50);
					P0=0;P2=(P2& 0xe3)+(2<<2);P0=shuma[5];delay(50);
					P0=0;P2=(P2& 0xe3)+(5<<2);P0=shuma[2];delay(50);
					P0=0;P2=(P2& 0xe3)+(6<<2);P0=shuma[1];delay(50);
					P0=0;P2=(P2& 0xe3)+(7<<2);P0=shuma[0];delay(50);
				}
				else
					display2();
			}
			if(mode==3)//秒
			{
				if(time<11)
				{
					P0=0;P2=(P2& 0xe3)+(2<<2);P0=shuma[5];delay(50);
					P0=0;P2=(P2& 0xe3)+(3<<2);P0=shuma[4];delay(50);
					P0=0;P2=(P2& 0xe3)+(4<<2);P0=shuma[3];delay(50);
					P0=0;P2=(P2& 0xe3)+(5<<2);P0=shuma[2];delay(50);
					P0=0;P2=(P2& 0xe3)+(6<<2);P0=shuma[1];delay(50);
					P0=0;P2=(P2& 0xe3)+(7<<2);P0=shuma[0];delay(50);
				}
				else
					display2();
			}
		}

	}
}
//定时器0中断
void Timer0() interrupt 1
{

if((time0<4)&&(wen>30))//led闪烁
  {
  	time0=0;
	led=!led;
  }
else
	led=1;
if(time<20)//计时
	time++;
else
	{
	time=0;
	if(mode==0)	//模式0正常计时
	{
	if(miao<59)
		miao++;
	else
		{
		miao=0;
		if(fen<59)
			fen++;
		else
			{
			fen=0;
			if(shi<23)
				shi++;
			else
			{
				shi=0;
			}
			}
		}
		suan();//显示计算
	}
	}
	TH0=0X3C;	//给定时器赋初值,定时50ms
	TL0=0Xb0;
}
✅4. 设计报告
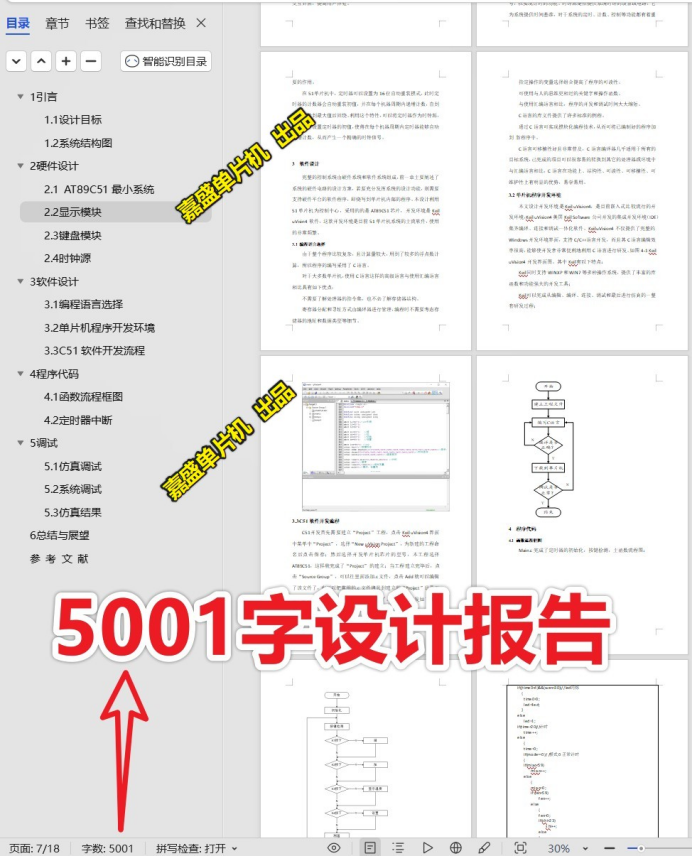
5001字设计报告,内容包括硬件设计、软件设计、软硬件框图、调试、结论等
✅5. 设计资料内容清单&&下载链接
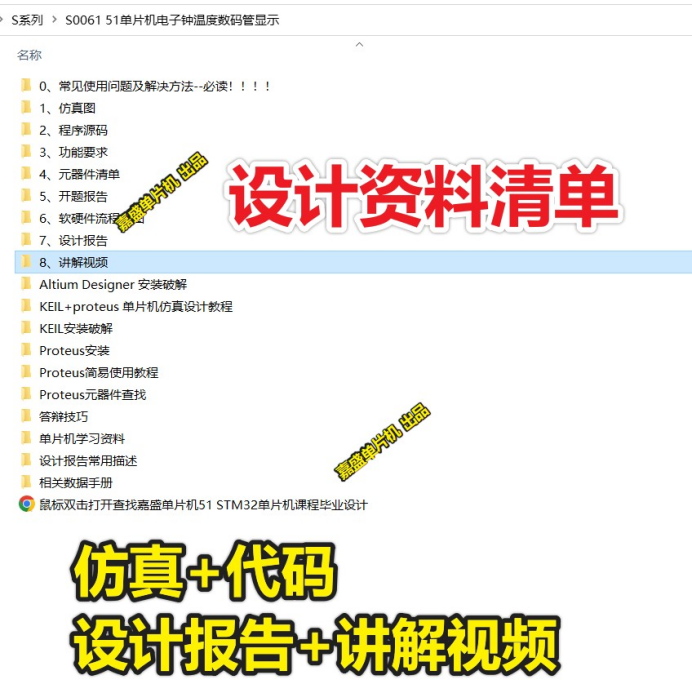
资料设计资料包括仿真,程序代码、讲解视频、功能要求、设计报告、软硬件设计框图等。
0、常见使用问题及解决方法–必读!!!!
1、仿真图
2、程序源码
3、功能要求
4、元器件清单
5、开题报告
6、软硬件流程框图
7、设计报告
8、讲解视频
Altium Designer 安装破解
KEIL+proteus 单片机仿真设计教程
KEIL安装破解
Proteus元器件查找
Proteus安装
Proteus简易使用教程
单片机学习资料
相关数据手册
答辩技巧
设计报告常用描述
鼠标双击打开查找嘉盛单片机51 STM32单片机课程毕业设计.url
