1. 类组件生命周期原理
React 中有两个核心阶段:
1.调和 (render) 阶段遍历 Fiber 树,通过 diff 算法找出变化的部分,如果是组件则会执行其 render 函数进行更新2.commit 阶段根据调和的结果去创建或修改真实 DOM 节点生命周期是贯穿在一个组件的创建、更新、销毁中的,正好是一个组件从出现到消失的整个过程,因此被形象地称为“生命周期”
1.1. 基本流程
先来看看它的基本流程:
packages/react-reconciler/src/ReactFiberBeginWork.js
/** @description workloop React 处理类组件的主要功能方法 */
function updateClassComponent() {// shouldUpdate 标识用来证明 组件是否需要更新let shouldUpdate// stateNode 是 fiber 指向 类组件实例的指针。const instance = workInProgress.stateNode// instance 为组件实例,如果组件实例不存在,证明该类组件没有被挂载过,那么会走初始化流程if (instance === null) {// 组件实例将在这个方法中被 newconstructClassInstance(workInProgress, Component, nextProps)// 初始化挂载组件流程mountClassInstance(workInProgress,Component,nextProps,renderExpirationTime,)shouldUpdate = true} else {// 组件实例已存在 -- 更新组件shouldUpdate = updateClassInstance(current,workInProgress,Component,nextProps,renderExpirationTime,)}if (shouldUpdate) {// 执行render函数 ,得到子节点nextChildren = instance.render()// 继续调和子节点reconcileChildren(current,workInProgress,nextChildren,renderExpirationTime,)}
}
大体上就是检查组件实例是否存在,不存在则走初始化的流程,已存在则走更新的流程
有几个重要的地方需要记住:
1.instance: 类组件实例
2.workInProgress: 当前正在调和的 fiber 树
3.current: 调和结束后会将 workInProgress 赋值给 current
4.Component: 用户编写的 class 组件
5.nextProps: 组件在一次更新中的 props
6.renderExpirationTime: 下一次渲染的过期时间
7.类组件实例与 fiber 对象的关系: 类组件实例通过 _reactInternals 获取对应 fiber 节点,fiber 节点通过 stateNode 获取对应类组件实例
1.2. 组件初始化
1.2.1. constructClassInstace
首先会执行 constructClassInstace 实例化类组件,这个在前面的起源 Component章节有讲到
1.2.2. mountClassInstance
实例化后会执行 mountClassInstance 去挂载组件,如何挂载的呢?看看核心代码:
packages/react-reconciler/src/ReactFiberBeginWork.js
function mountClassInstance( workInProgress,ctor,newProps,renderExpirationTime, ) {const instance = workInProgress.stateNode// ctor 就是我们写的类组件,获取类组件的静态方法const getDerivedStateFromProps = ctor.getDerivedStateFromProps// 这个时候执行 getDerivedStateFromProps 生命周期 ,得到将合并的 stateif (typeof getDerivedStateFromProps === 'function') {// getDerivedStateFromProps 生命周期根据新的 props 和旧的 state 派生出新的 stateconst partialState = getDerivedStateFromProps(nextProps, prevState)// 合并stateconst memoizedState =partialState === null || partialState === undefined? prevState: Object.assign({}, prevState, partialState)workInProgress.memoizedState = memoizedState// 将 state 赋值给我们实例上,instance.state就是我们在组件中 this.state 获取的 stateinstance.state = workInProgress.memoizedState}// 当 getDerivedStateFromProps 和 getSnapshotBeforeUpdate 不存在的时候 ,执行 componentWillMountif (typeof ctor.getDerivedStateFromProps !== 'function' &&typeof instance.getSnapshotBeforeUpdate !== 'function' &&typeof instance.componentWillMount === 'function') {instance.componentWillMount()}
}
1.2.3. componentDidMount 执行时机
componentDidMount声明周期还没有出现,它是在何时被执行的呢?
前面的getDerivedStateFromProps 和 componentWillMount 生命周期都是在 render 阶段执行的
componentDidMount 则是在 commit 阶段才执行的
packages/react-reconciler/src/ReactFiberCommitWork.js
commit 阶段入口
function commitLayoutEffectOnFiber( finishedRoot: FiberRoot,current: Fiber | null,finishedWork: Fiber,committedLanes: Lanes, ): void {// 根据 fiber tag 识别类组件并执行相应生命周期switch (finishedWork.tag) {case ClassComponent: {commitClassLayoutLifecycles(finishedWork, current)}}
}
类组件 commit 阶段生命周期调用
function commitClassLayoutLifecycles( finishedWork: Fiber,current: Fiber | null, ) {// 从 fiber 中获取类组件实例const instance = finishedWork.stateNodeif (current === null) {// 类组件首次调和渲染instance.componentDidMount()} else {// 类组件更新instance.componentDidUpdate(prevProps,prevState,instance.__reactInternalSnapshotBeforeUpdate,)}
}
从源码中可以了解到 componentDidMount 和 componentDidUpdate 的执行时机是一样的
综上,可以了解到一个类组件初始化的时候的生命周期的执行顺序为:
constructor -> getDerivedStateFromProps / componentWillMount -> render -> componentDidMount
1.3. 组件更新
根据基本流程中的代码逻辑,当 current === null 的时候会去更新类组件,来看看 updateClassInstance 相关代码,只看和生命周期钩子调用相关的部分:
packages/react-reconciler/src/ReactFiberClassComponent.js
function updateClassInstance( current: Fiber,workInProgress: Fiber,ctor: any,newProps: any,renderLanes: Lanes, ): boolean {// 获取类组件实例const instance = workInProgress.stateNode// 判断是否有 getDerivedStateFromProps 生命周期const hasNewLifecycles = typeof getDerivedStateFromProps === 'function'if (!hasNewLifecycles &&typeof instance.componentWillReceiveProps === 'function') {// 浅层比较 propsif (oldProps !== newProps || oldContext !== nextContext) {// 执行生命周期 -- componentWillReceivePropsinstance.componentWillReceiveProps(newProps, nextContext)}}let newState = (instance.state = oldState)// 执行生命周期 getDerivedStateFromProps,逻辑和 mounted 类似 ,合并 stateif (typeof getDerivedStateFromProps === 'function') {ctor.getDerivedStateFromProps(nextProps, prevState)newState = workInProgress.memoizedState}let shouldUpdate = true// 执行生命周期 shouldComponentUpdate 返回值决定是否执行 render ,调和子节点if (typeof instance.shouldComponentUpdate === 'function') {shouldUpdate = instance.shouldComponentUpdate(newProps,newState,nextContext,)}if (shouldUpdate) {// 执行生命周期 componentWillUpdateif (typeof instance.componentWillUpdate === 'function') {instance.componentWillUpdate()}}return shouldUpdate
}
根据源码可以得知更新阶段组件生命周期的执行顺序如下:
1.componentWillReceiveProps – 没有 getDerivedStateFromProps 且 props 发生变化时才会执行
2.getDerivedStateFromProps
3.shouldComponentUpdate
4.componentWillUpdate – shouldComponentUpdate 返回 true 时才执行
5.执行 render 函数 – shouldComponentUpdate 返回 true 时才执行
6.调和子节点 – shouldComponentUpdate 返回 true 时才执行
7.getSnapshotBeforeUpdate – 发生在 commit 阶段的 before Mutation 时执行,也就是修改真实 DOM 元素之前
8.componentDidUpdate
图片来自掘金小测《React 进阶实践指南》
1.4. 组件销毁
仅有一个生命周期钩子,在 commit 阶段的 before Mutation 时执行 componentWillUnmount
1.5. 三个阶段总览
图片来自掘金小册《React 进阶实践指南》
2. 各个生命周期中能做的事情
目前我们知道各个生命周期的执行顺序了,但还不知道实际使用的时候该用它们来干嘛,接下来就举一些例子来看看
2.1. constructor
在类组件的构造函数中,我们一般可以做以下事情:
1.初始化组件 state2.对事件处理函数做处理* 绑定 this – 事件处理函数如果是直接传递时,在事件系统中被执行时,是直接调用的,会出现 this 没指向类组件实例的情况,此时可以在构造函数中绑定 this,或者用 onClick={() => this.handleClick()}的方式绑定事件处理函数
3.对类组件进行生命周期劫持、渲染劫持 – 常用于反向继承的 HOC### 2.2. getDerivedStateFromProps
1.用于替代 componentWillReceiveProps 和 componentWillMount
2.组件初始化或更新时将 props 映射到 state
3.返回值与 state 合并后可以作为 shouldComponentUpdate 生命周期钩子的第二个参数 newState
2.3. componentWillMount
适合做一些初始化工作
2.4. componentWillReceiveProps
1.监听父组件是否执行 render (不安全性的体现)
2.在异步回调中改变 state
2.5. componentWillUpdate
获取组件更新之前的状态,比如 DOM 元素的位置
2.6. render
render 函数的主要作用是将 jsx 元素转换成 React element,因此我们可以在 render 函数里做以下事情:
1.createElement
2.cloneElement
3.遍历 children
2.7. getSnapshotBeforeUpdate
配合 componentDidUpdate 一起使用,在更新 DOM 元素之前获取 DOM 元素的快照,将这个快照 return 后会传给 componentDidUpdate 的第三个参数
getSnapshotBeforeUpdate(prevProps,preState){const style = getComputedStyle(this.node)// 传递更新前的元素位置return {cx:style.cx,cy:style.cy}
}
componentDidUpdate(prevProps, prevState, snapshot){// 获取元素绘制之前的位置console.log(snapshot)
}
:::warning
如果没有返回值作为 snapshot 会有控制台警告信息
如果没有 componentDidUpdate 也会有控制台警告信息
:::
2.8. componentDidUpdate
1.获取组件更新后的 DOM 元素
2.消费 getSnapshotBeforeUpdate 返回的 snapshot
:::warning
如果在这里面使用 setState 一定要加以限制,否则会引起无限循环
:::
2.9. componentDidMount
1.做一些关于 DOM 的操作,如基于 DOM 的事件监听器
2.初始化发起异步请求数据,渲染视图
2.10. shouldComponentUpdate
shouldComponentUpdate(newProps,newState,nextContext) {}
常用于性能优化,其返回值决定着组件是否需要更新
:::tip
newState 可以来自于 getDerivedStateFromProps 生命周期的返回值与现有 state 合并后的结果
:::
2.11. componentWillUnmount
做一些收尾工作,如清除定时器,移除 DOM 元素事件监听器
3. UNSAFE 生命周期为什么 UNSAFE
从 React v16.3 开始,componentWillMount 被标识为 UNSAFE,也就是不安全的,主要是以下三个:
- UNSAFE_componentWillMount
- UNSAFE_componentWillReceiveProps
- UNSAFE_componentWillUpdate
接下来我们看看它们为什么不安全
* 3.1. UNSAFE_componentWillMount
它是在 render 之前执行的,对于是否执行 render 可以通过 shouldUpdate 去制约,但是对于 componentWillMount 这个生命周期钩子,在多次触发 updateClassInstance 时,并没有条件限制,因此存在生命周期内的上下文被多次执行的风险
3.2. UNSAFE_componentWillReceiveProps
当新旧 props 变化时会执行 componentWillReceiveProps,但是父组件的 render 函数执行时,即便子组件 props 未改变,也会导致 componentWillReceiveProps 生命周期执行
这是因为对于新旧 props 的比较仅仅是比较内存地址是否发生变化,而父组件 render 函数执行时,子组件 props 重新创建,即便对象的属性没发生变化,但已经是另外一个对象了,从而导致 componentWillReceiveProps 执行
3.3. UNSAFE_componentWillUpdate
推荐使用 getSnapshotBeforeUpdate 生命周期替代
4. 函数组件中的声明周期替代方案
函数组件中不存在类组件的生命周期,但可以通过 hooks 去替代实现,首先看看相关 hooks 的特性方便理解如何替代类组件生命周期
4.1. useEffect & useLayoutEffect
4.1.1. useEffect
useEffect 是异步执行的,不会阻塞浏览器渲染
4.1.2. useLayoutEffect
useLayoutEffect 是同步执行的,在 DOM 更新之后,浏览器渲染绘制之前执行,如果执行的任务比较耗时则有可能阻塞浏览器渲染
4.1.3. 如何选择 useEffect 和 useLayoutEffect
需要修改 DOM,改变页面布局就使用 useLayoutEffect,否则都使用 useEffect
4.1.4. 和 componentDidMount/componentDidUpdate 有啥区别?
componentDidMount/componentDidUpdate 都是同步执行的,和 useLayoutEffect 更加相似
4.2. useInsertionEffect
主要用于 CSS in JS 的场景下,其他场景下官方不推荐使用该 hook,那么为什么它适用于 CSS in JS 场景呢?
首先需要了解以下 CSS in JS 的特性,以 styled-components 为例
样式均通过该库提供的运行时 api 定义,并在执行到相关代码时,会动态生成 style 标签插入到 head 标签中,使样式生效
那么这就有一个问题,如果在 useLayoutEffect 中使用 CSS in JS 的代码的话,此时 DOM 是已经更新了的,布局也确认了,只需要让浏览器绘制即可
然而此时执行了 CSS in JS 的代码,动态往 head 中插入了 style 标签,导致浏览器不得不重绘甚至重排布局
所以最佳的执行 CSS in JS 代码的时机应当是 DOM 变化之前就执行,从而 useInsertionEffect 就诞生了,它的执行时机在 DOM 更新之前,比 useLayoutEffect 要更早
4.3. componentDidMount 替代方案
useEffect(() => {// 异步请求、事件监听、操作 DOM...
}, [])
利用 useEffect 第二个参数 dep 数组为空的特性,当 dep 为空数组时,useEffect 的回调只会执行一次
4.4. componentWillUnmount 替代方案
useEffect(() => {return () => {// 移除事件监听器、移除定时器等}
}, [])
利用 useEffect 回调中返回的函数会在组件销毁前执行的特性模拟 componentWillUnmount
同样,要让 dep 数组为空数组才能让其只执行一次
4.5. componentWillReceiveProps 替代方案
严格来说,说 useEffect 可以替代 componentWillReceiveProps 还是比较牵强的,理由如下:
1.useEffect 发生在 commit 阶段,而 componentWillReceiveProps 则发生在 render 阶段
2.useEffect 会在初始化时执行一次,而 componentWillReceiveProps 并不会
所以不能说严格替代,但是由于 useEffect 的 dep 数组可以起到一个监听的作用,我们可以利用它来监听 props 或 props 中具体某个属性的变化,因而从功能作用上来看确实是可以替代 componentWillReceiveProps,但从底层原理来看并不能算是替代
useEffect(() => {console.log(`props changed: ${props}`)
}, [props])

useEffect(() => {console.log(`props.counter changed: ${props.counter}`)
}, [props.counter])
4.6. componentDidUpdate 替代方案
与替代 componentWillReceiveProps 类似,只能说 useEffect 在功能作用上是可以替代 componentDidUpdate,但是在底层原理上不算是严格替代 componentDidUpdate
因为 componentDidUpdate 是同步执行的,而 useEffect 是异步执行的,但它们的执行时机都是在 commit 阶段
只需要不传递 useEffect 的第二个参数即可在每次函数组件执行时执行 useEffect 里的回调
useEffect(() => {console.log('模拟 componentDidUpdate')
})
4.7. 函数组件生命周期案例
接下来通过一个简单的 demo 模拟组件生命周期的各个阶段
const FunctionComponentLifeCycleDemo: React.FC = () => {// 控制组件是否挂载和卸载const [shouldRender, setShouldRender] = useState(true)// 作为子组件 propsconst [counter, setCounter] = useState(0)return (<div>{shouldRender && <FunctionComponentLifeCycle counter={counter} />}<button onClick={() => setCounter((counter) => counter + 1)}>add counter</button><button onClick={() => setShouldRender(false)}>卸载销毁组件</button></div>)
}

interface FunctionComponentLifeCycleProps {counter: number
}
const FunctionComponentLifeCycle: React.FC<FunctionComponentLifeCycleProps> = ( props, ) => {const [stateCounter, setStateCounter] = useState(0)// 模拟类组件 componentDidMount 和 componentWillUnmount 生命周期useEffect(() => {logger.log('组件挂载完成 -- componentDidMount')return () => {logger.log('组件即将卸载销毁 -- componentWillUnmount')}// 注意要将 deps 设置为空数组}, [])// 模拟类组件 componentWillReceiveProps 生命周期useEffect(() => {logger.log('props 变化 -- componentWillReceiveProps')}, [props])// 模拟类组件 componentDidUpdate 生命周期useEffect(() => {logger.log('组件更新完成 -- componentDidUpdate')})return (<div><p>props.counter: {props.counter}</p><p>stateCounter: {stateCounter}</p><buttononClick={() => setStateCounter((stateCounter) => stateCounter + 1)}>add stateCounter</button></div>)
}
5. 生命周期实战 – ScrollView 组件
ScrollView 是一个滚动列表组件,支持传入数据以及单元项组件,并提供滚动到底部时的回调,使用效果如下:
<ScrollViewlist={list}component={Item}onScrollToBottom={handleScrollToBottom}
/>
实现如下:
class ScrollView extends React.Component<ScrollViewProps, ScrollViewState> {// ================ 属性 ================// 根 DOM 元素结点的引用rootEl: HTMLElement | null = null// ================ 事件处理方法 ================handleScroll(e: Event) {// emit scroll 事件给外界const { onScroll: emitScroll = () => {} } = this.propsemitScroll && emitScroll(e)// 检测滚动条是否触底this.checkScrollToBottom()}// ================ 普通方法 ================/** @description 检测滚动条是否触底 -- 触底则 emit scroll-to-bottom 事件 */checkScrollToBottom() {const { onScrollToBottom: emitScrollToBottom } = this.propsconst { scrollHeight, scrollTop, offsetHeight } = this.rootEl!// 触底条件if (scrollHeight <= scrollTop + offsetHeight) {emitScrollToBottom && emitScrollToBottom()}}// ================ 生命周期 ================constructor(props: ScrollViewProps) {super(props)// 初始化 statethis.state = {list: [],}// handleScroll 方法防抖处理this.handleScroll = this.handleScroll.bind(this)this.handleScroll = debounce(this.handleScroll, 200)}/** @description 根据 props 派生 state */static getDerivedStateFromProps(nextProps: ScrollViewProps): ScrollViewState {return {list: nextProps.list ?? [],}}/** @description 绑定事件监听器 */componentDidMount(): void {this.rootEl!.addEventListener('scroll', this.handleScroll)}/** @description 仅当 props.list 变化才更新渲染组件 */shouldComponentUpdate(_: Readonly<ScrollViewProps>,nextState: Readonly<ScrollViewState>,): boolean {return nextState.list !== this.state.list}/** @description 保存组件更新前的容器高度 */getSnapshotBeforeUpdate() {return this.rootEl!.scrollHeight}/** @description 计算组件更新前后的容器高度变化量 */componentDidUpdate(prevProps: Readonly<ScrollViewProps>,prevState: Readonly<ScrollViewState>,snapshot?: number,): void {if (this.rootEl?.scrollHeight !== undefined && snapshot !== undefined) {console.log(`容器高度变化量: ${this.rootEl.scrollHeight - snapshot}`)}}/** @description 解除事件监听器 */componentWillUnmount(): void {this.rootEl?.removeEventListener('scroll', this.handleScroll)}render(): React.ReactNode {const { list } = this.stateconst { itemComponent, maxHeight = '300px' } = this.props/** * React 将在组件挂载时,会调用 ref 回调函数并传入 DOM 元素,当卸载时调用它并传入 null。 * 在 componentDidMount 或 componentDidUpdate 触发前,React 会保证 refs 一定是最新的。 */return (<divstyle={{ maxHeight, overflowY: 'scroll' }}ref={(el) => (this.rootEl = el)}><div style={{ display: 'flex', flexDirection: 'column', gap: '30px' }}>{list.map((item) =>React.createElement(itemComponent, {key: item.id,data: item.data,}),)}</div></div>)}
}
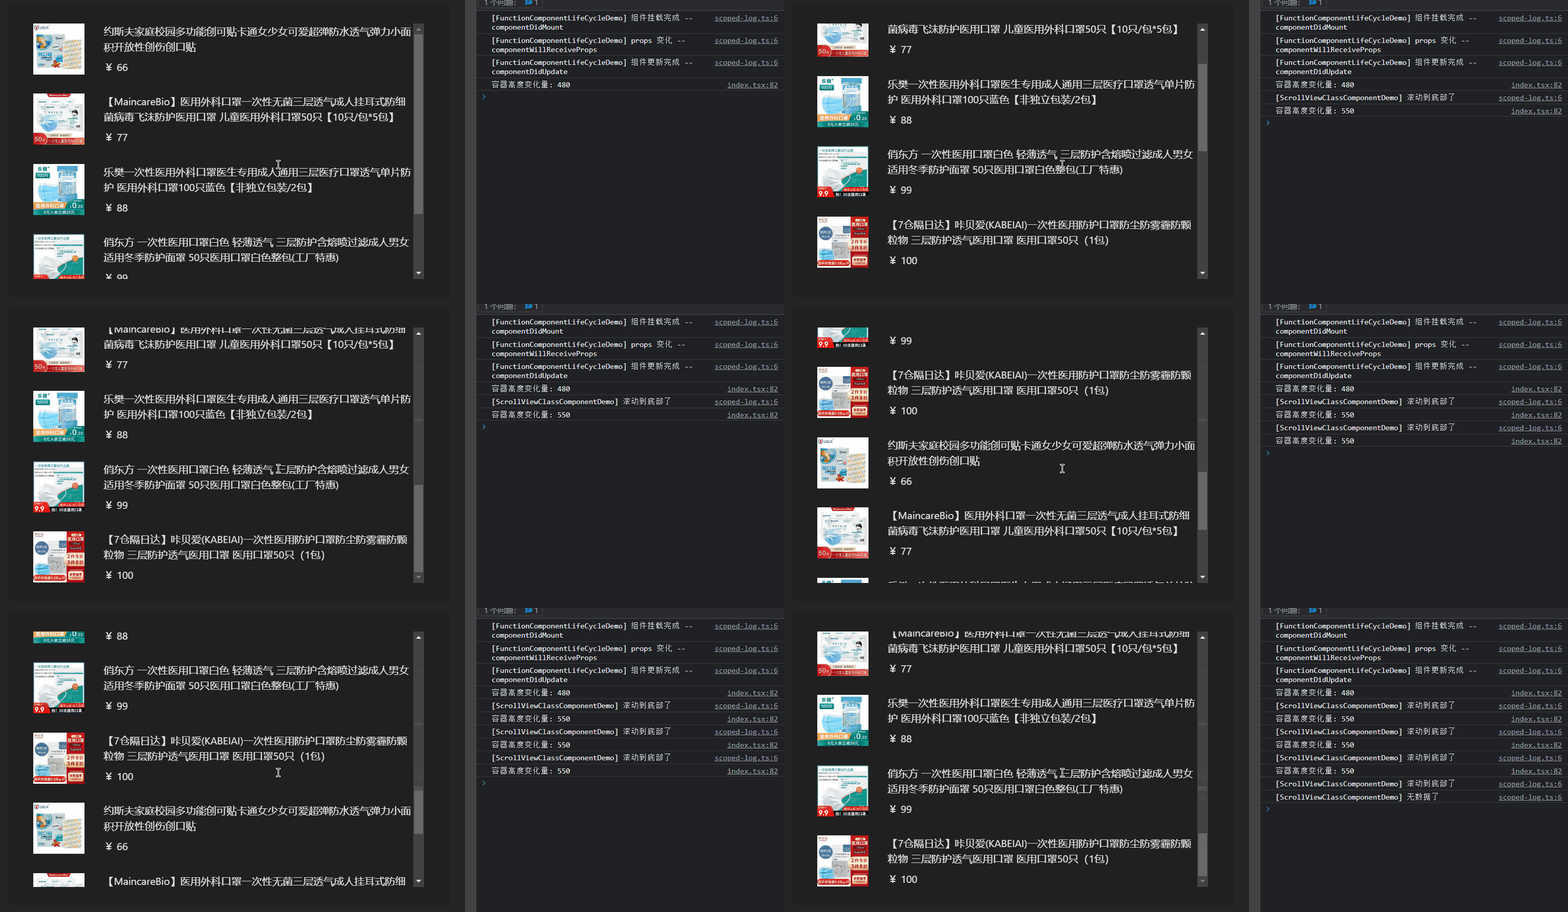
生命周期各个阶段做的事情如下:
- constructor: 初始化 state,绑定 this 到事件处理函数,使用 debounce 处理事件处理函数
- getDerivedStateFromProps: 合并 props.list 到 state 中
- componentDidMount: 绑定监听 scroll 事件
- shouldComponentUpdate: 性能优化 – 仅当 list 变化时才重新渲染
- render: 渲染视图 根据 props.list 调用 itemComponent 渲染对应列表项
- getSnapshotBeforeUpdate: 保存组件更新前的 ScrollView 容器高度
- componentDidUpdate: 根据 ScrollView 更新前后的高度计算高度变化量
- componentWillUnmount: 解除 scroll 事件监听器
总结
通过本篇文章的学习,相信你能够对 React 生命周期执行的流程以及各个生命周期中能做的事情有一个全面的了解了,也希望能够帮助到你在工作或项目中正确运用 React 生命周期
最后还是要十分感谢掘金小册 《React 进阶实践指南》,强烈推荐大家去购买阅读!!!
最后
整理了75个JS高频面试题,并给出了答案和解析,基本上可以保证你能应付面试官关于JS的提问。
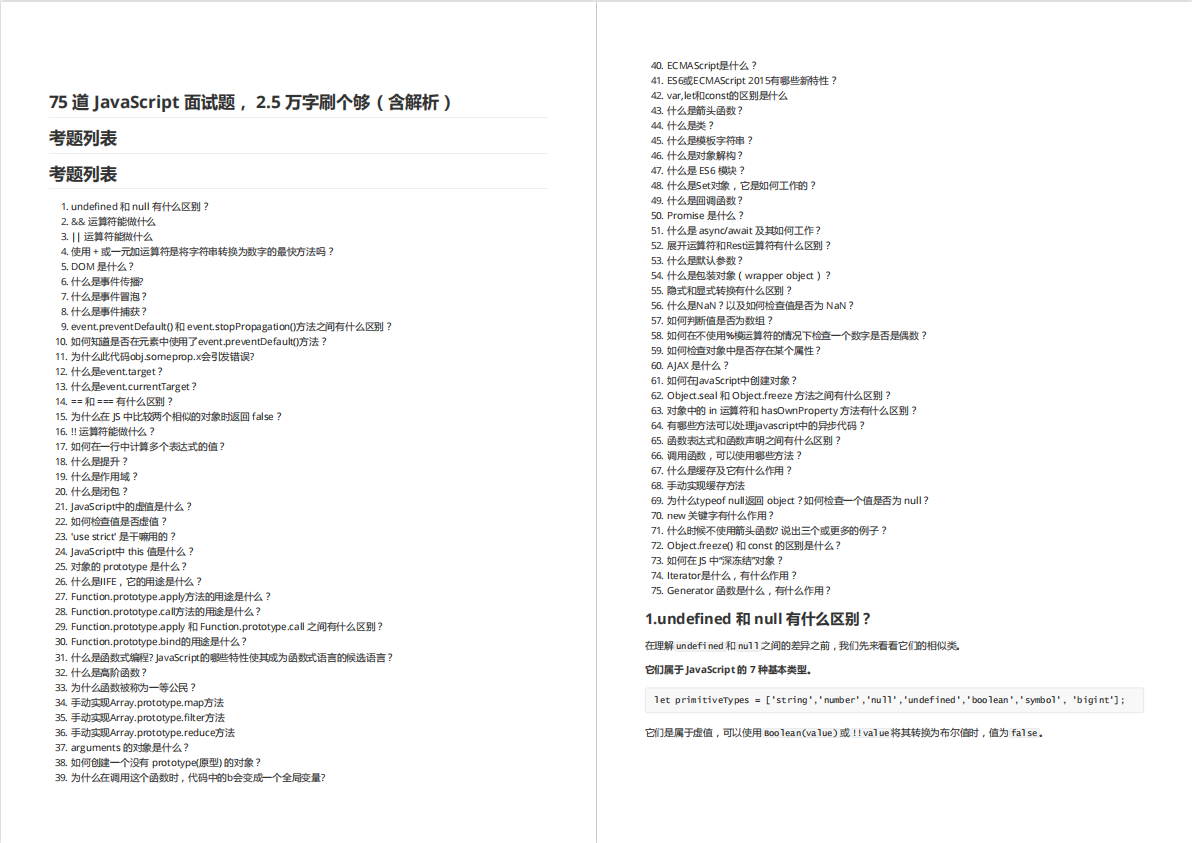

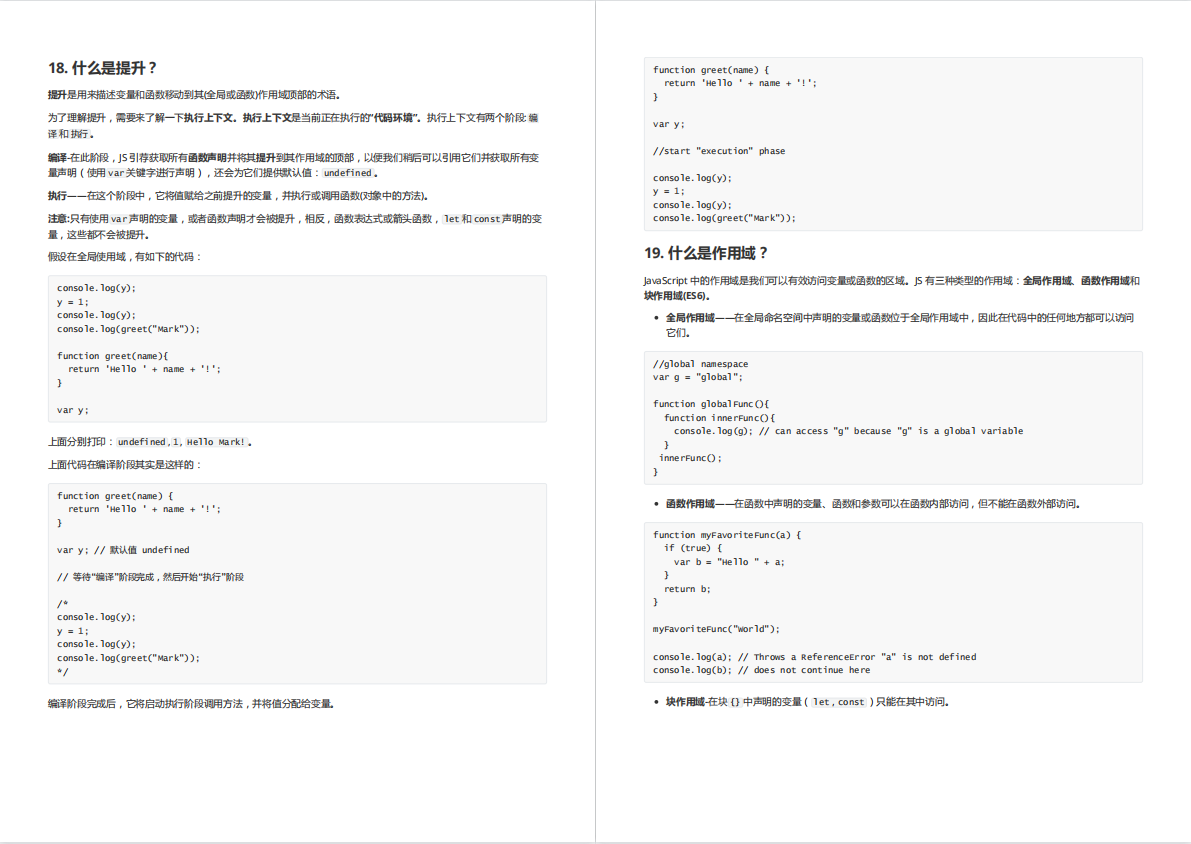
有需要的小伙伴,可以点击下方卡片领取,无偿分享
