一、Blender
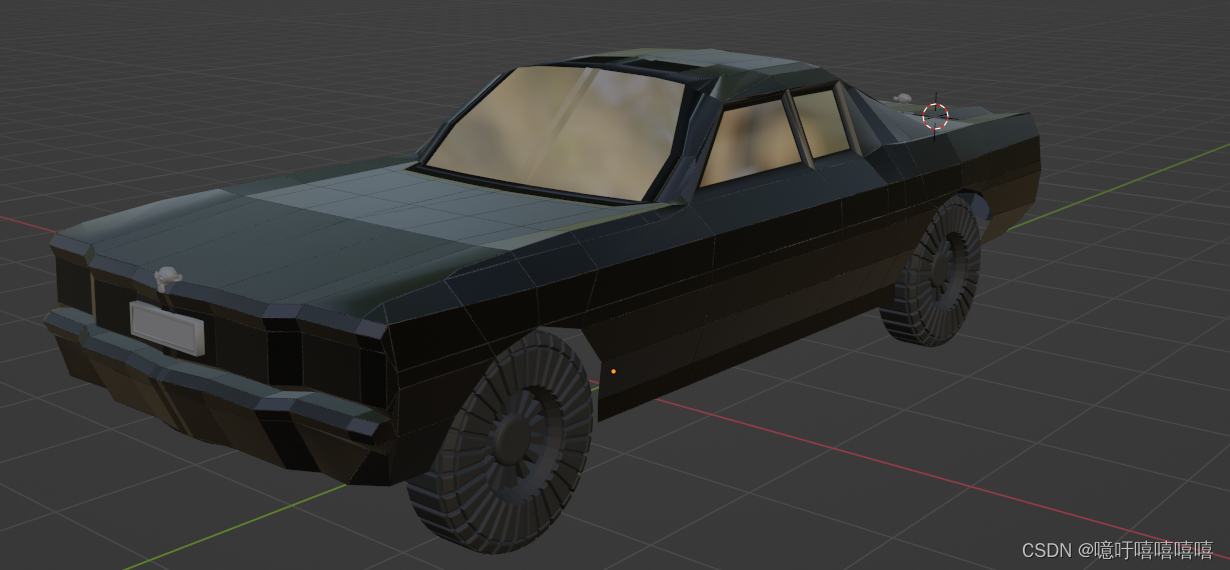
Blender入门:https://www.bilibili.com/video/BV1fb4y1e7PD/
Blender导入骨骼:https://www.bilibili.com/video/BV1hc41157nL
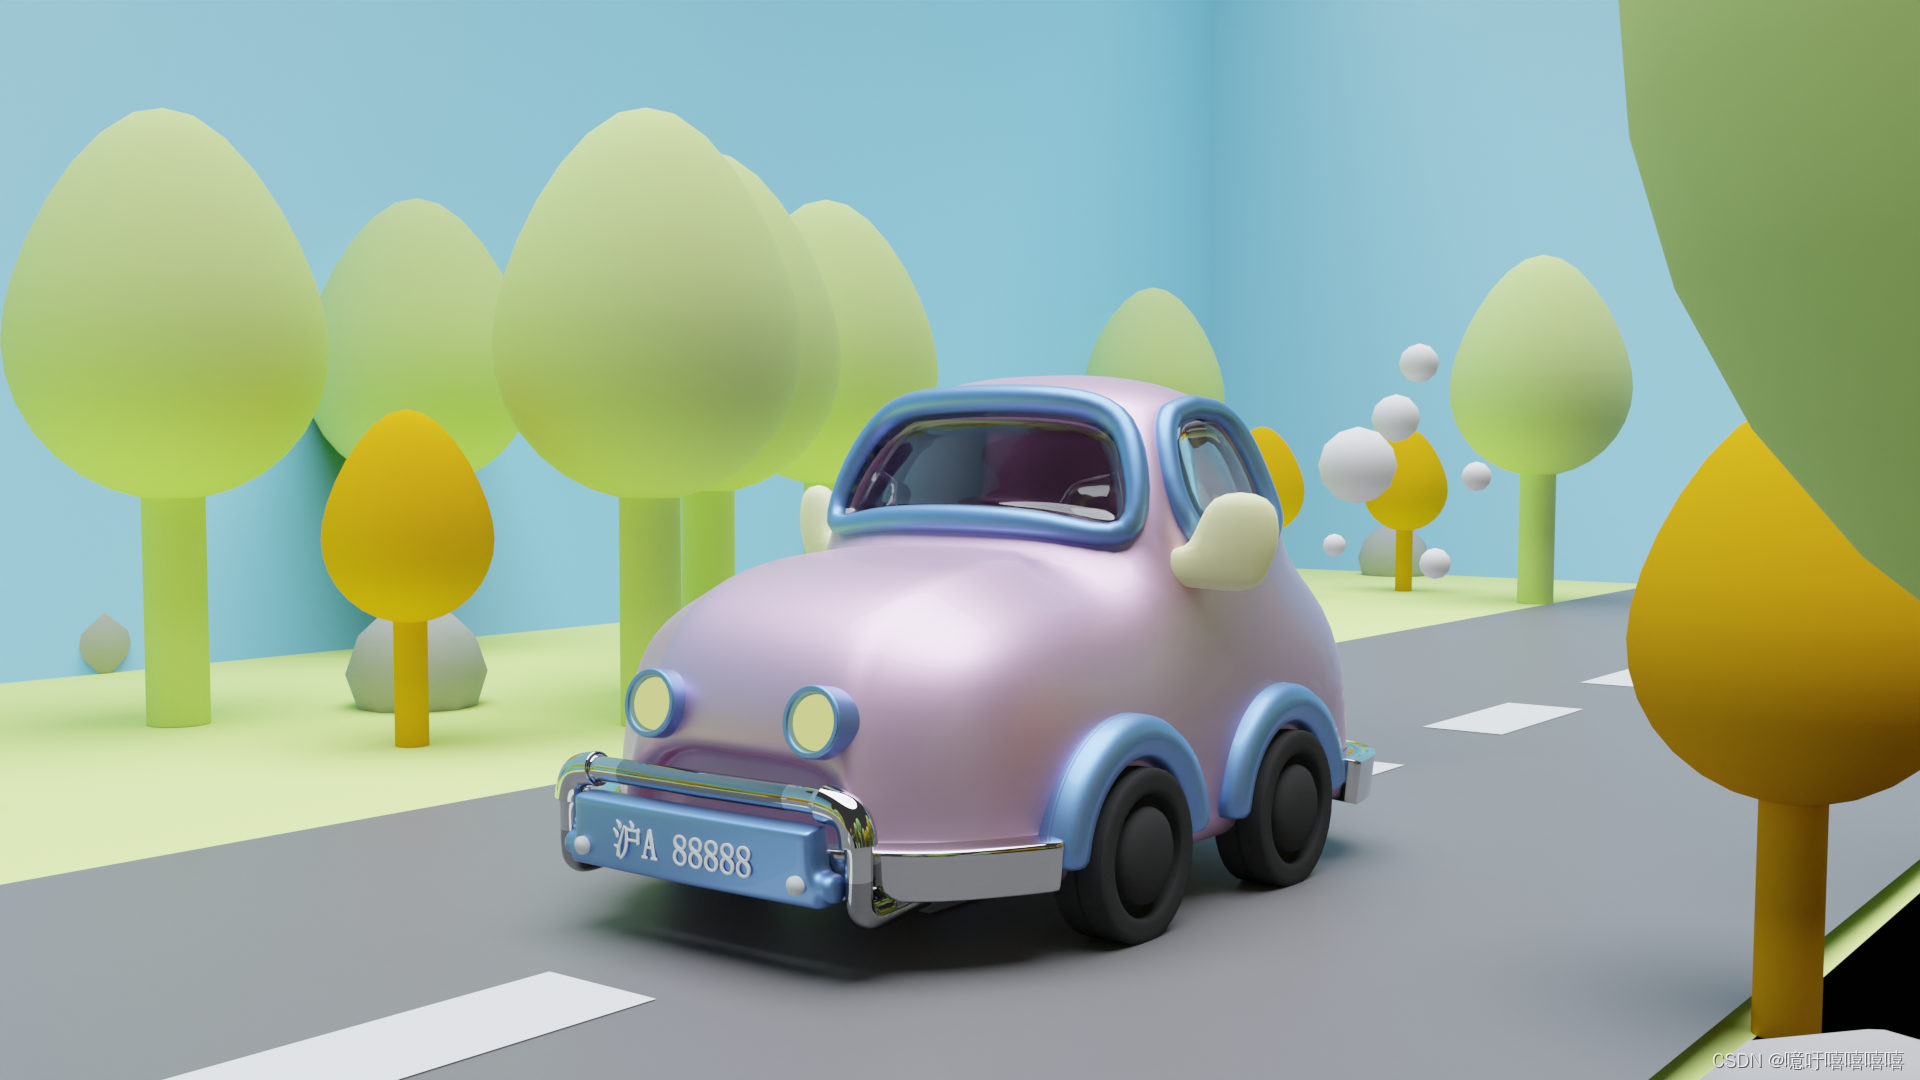
做一个车:https://www.bilibili.com/video/BV1hY411q7w2



二、Roadrunner
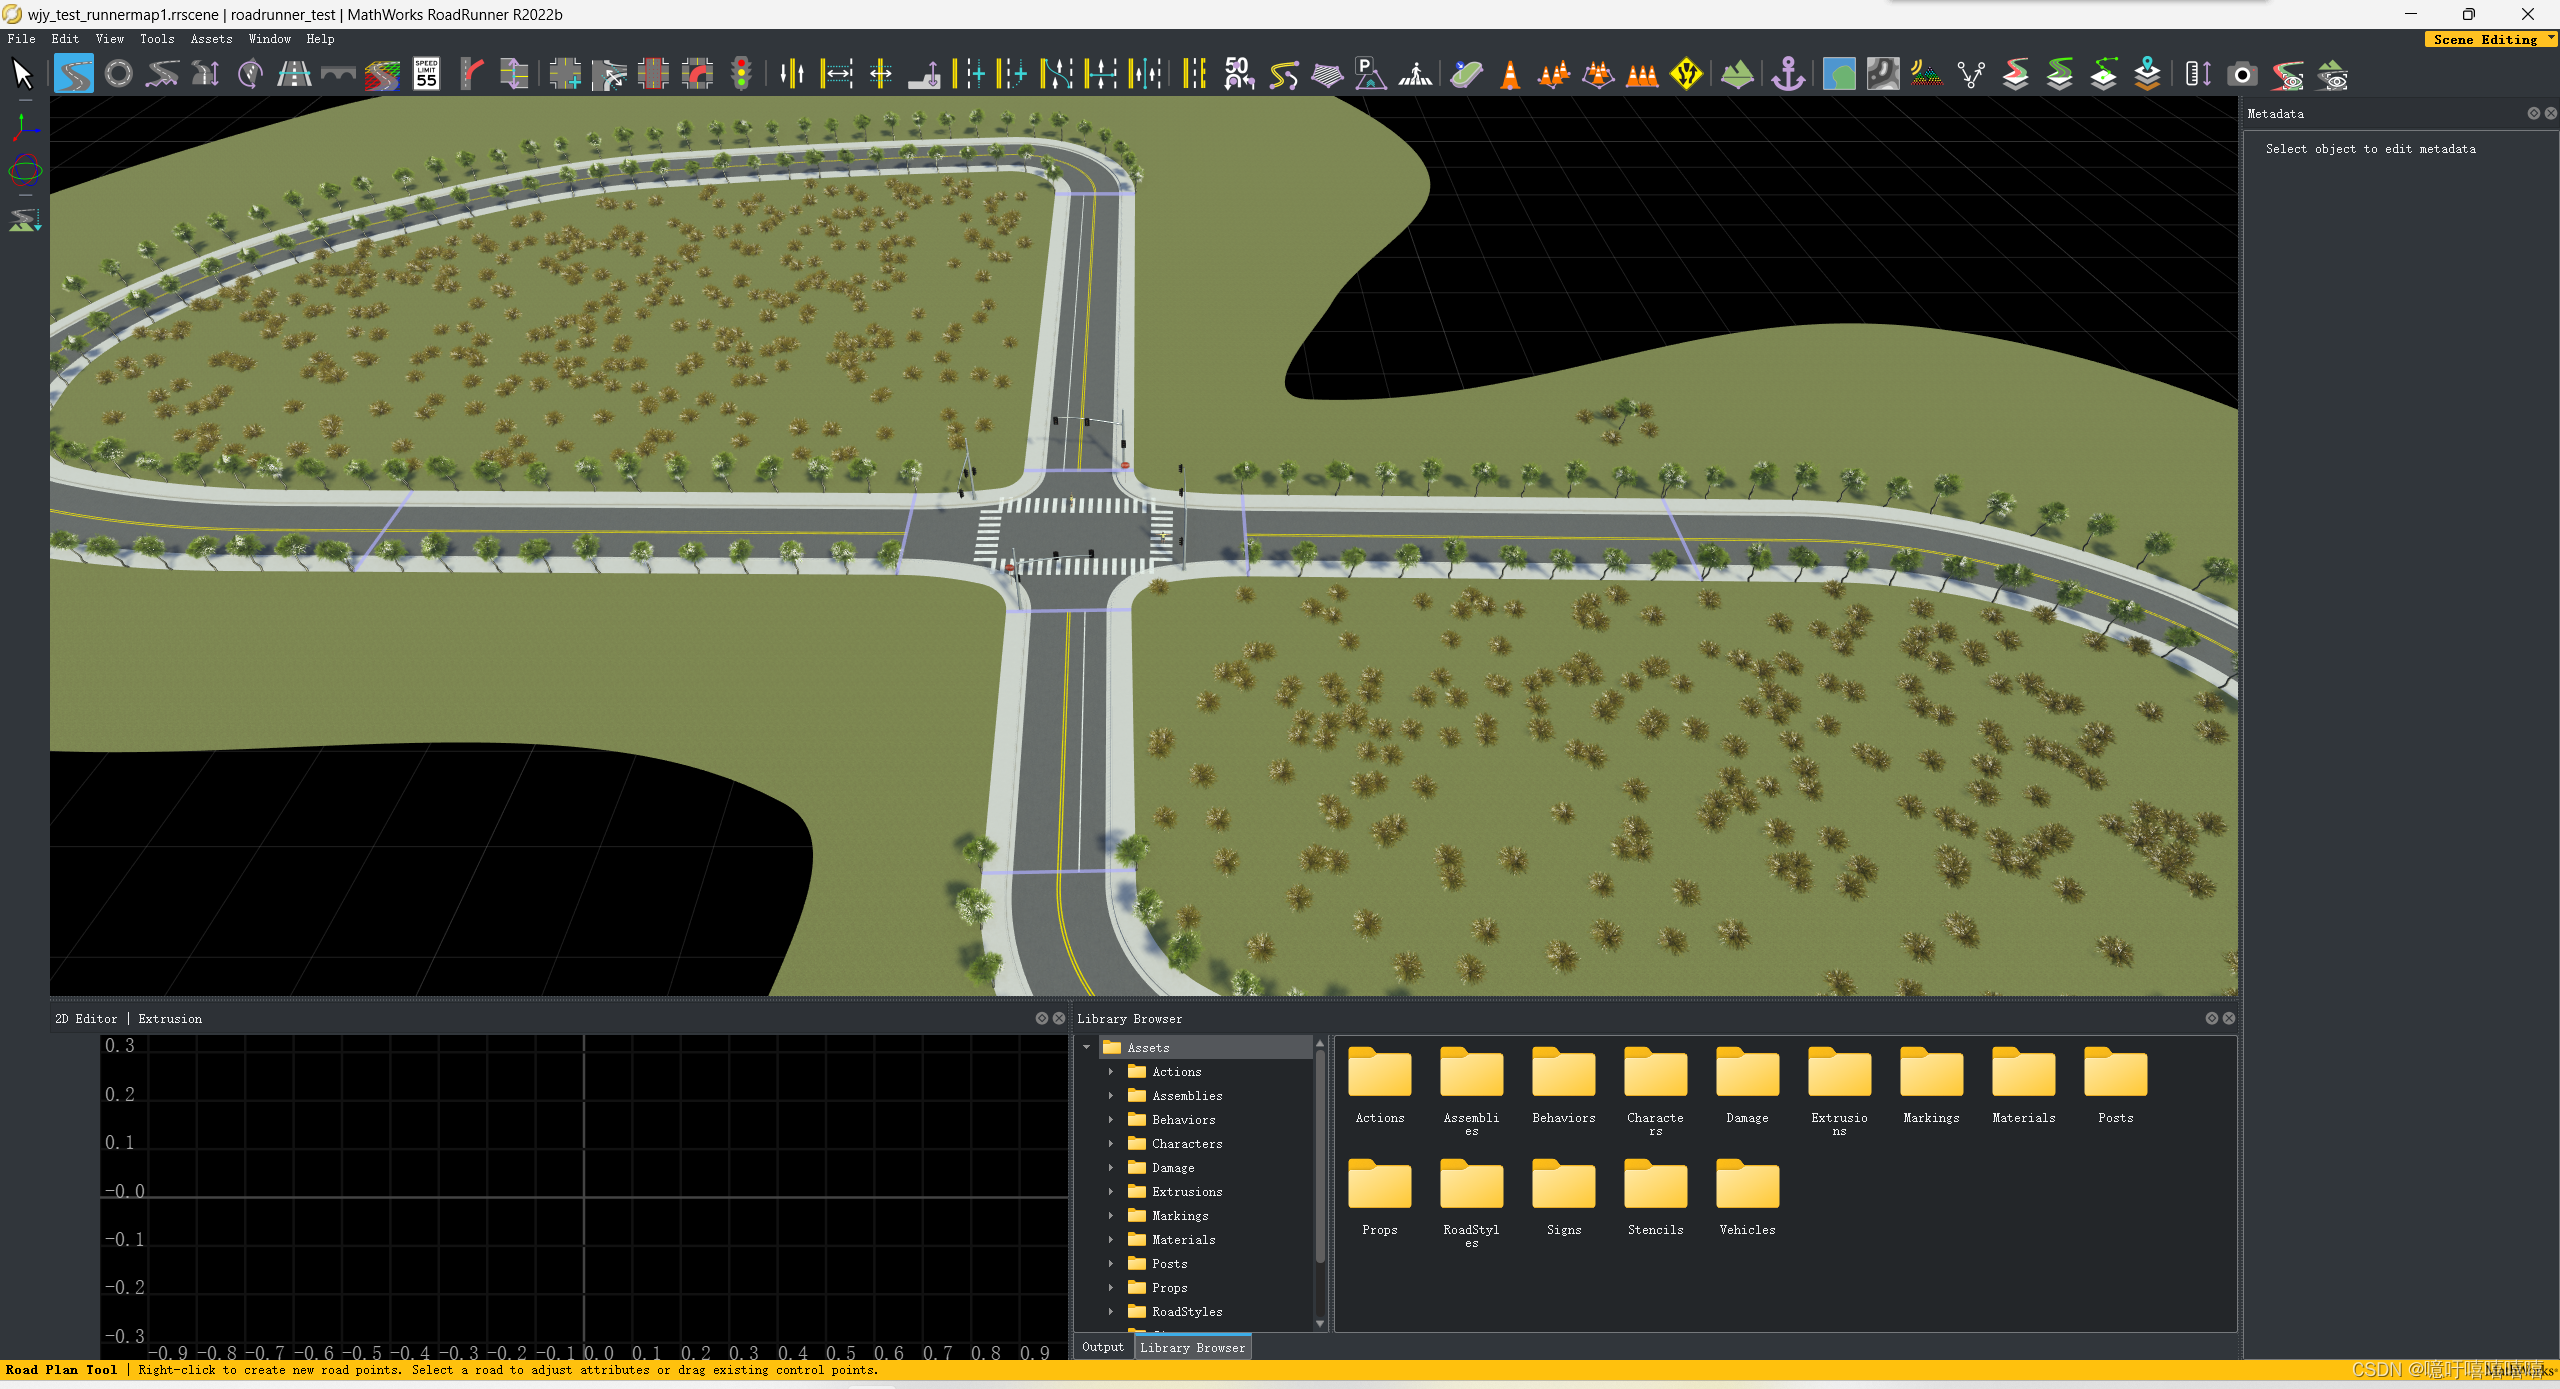
RoadRunner Scenario+CARLA联合仿真
三、Blender中导入汽车骨骼
carla仿真器搭建及特定车辆模型的导入
里面有两个视频,无声的看小车的骨骼构建,有声的看小车导入UE:
How to add a vehicle/truck in carla using Unreal Engine Editor 4 + Blender for beginners
How to rig vehicle in Blender 2.8 for UE4 [No Sound] _ Blender 2.8, Unreal Engine 4
建议先做一个简单的小车学习导入流程,汽车做的太豪华,导入的时候没卡出来
以下过程中,每个步骤有编译的的地方点一下,有保存的地方点一下
-
UE4中导入小车的fbx

-
在物理资产中设置骨骼
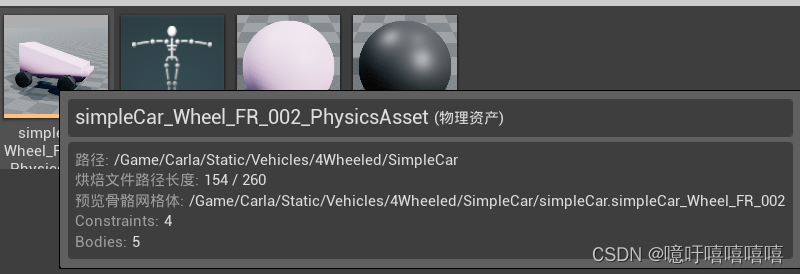
进入编辑:
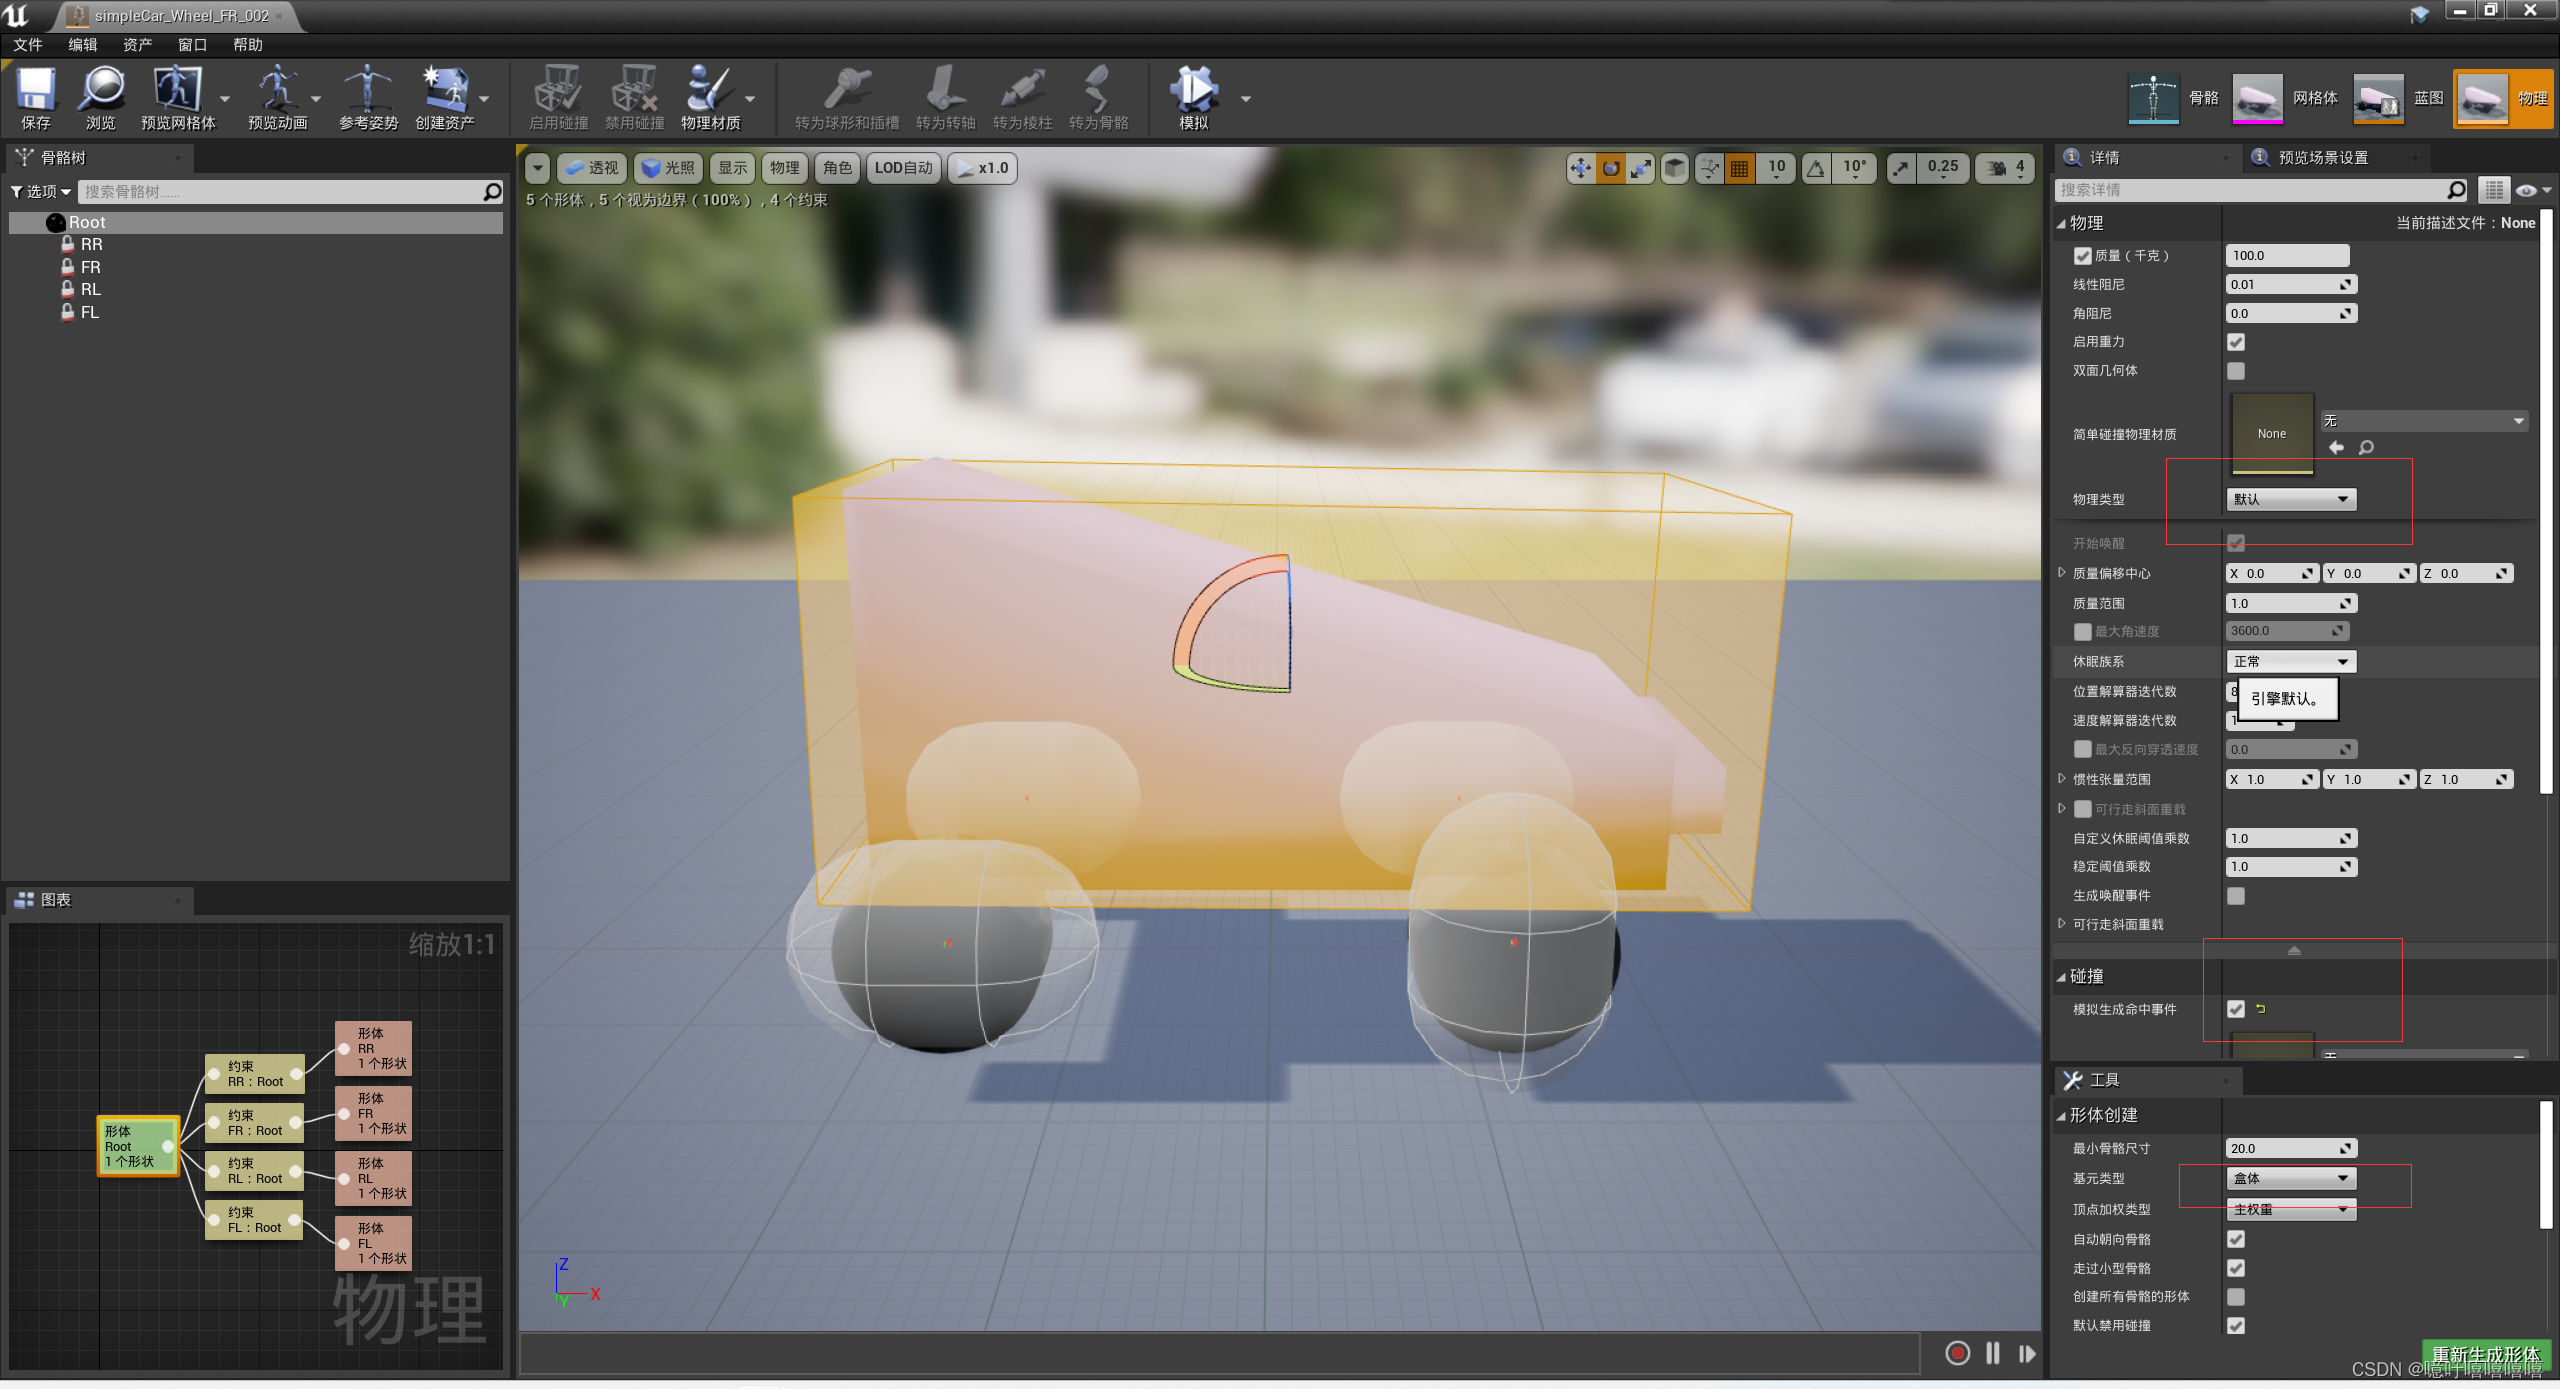
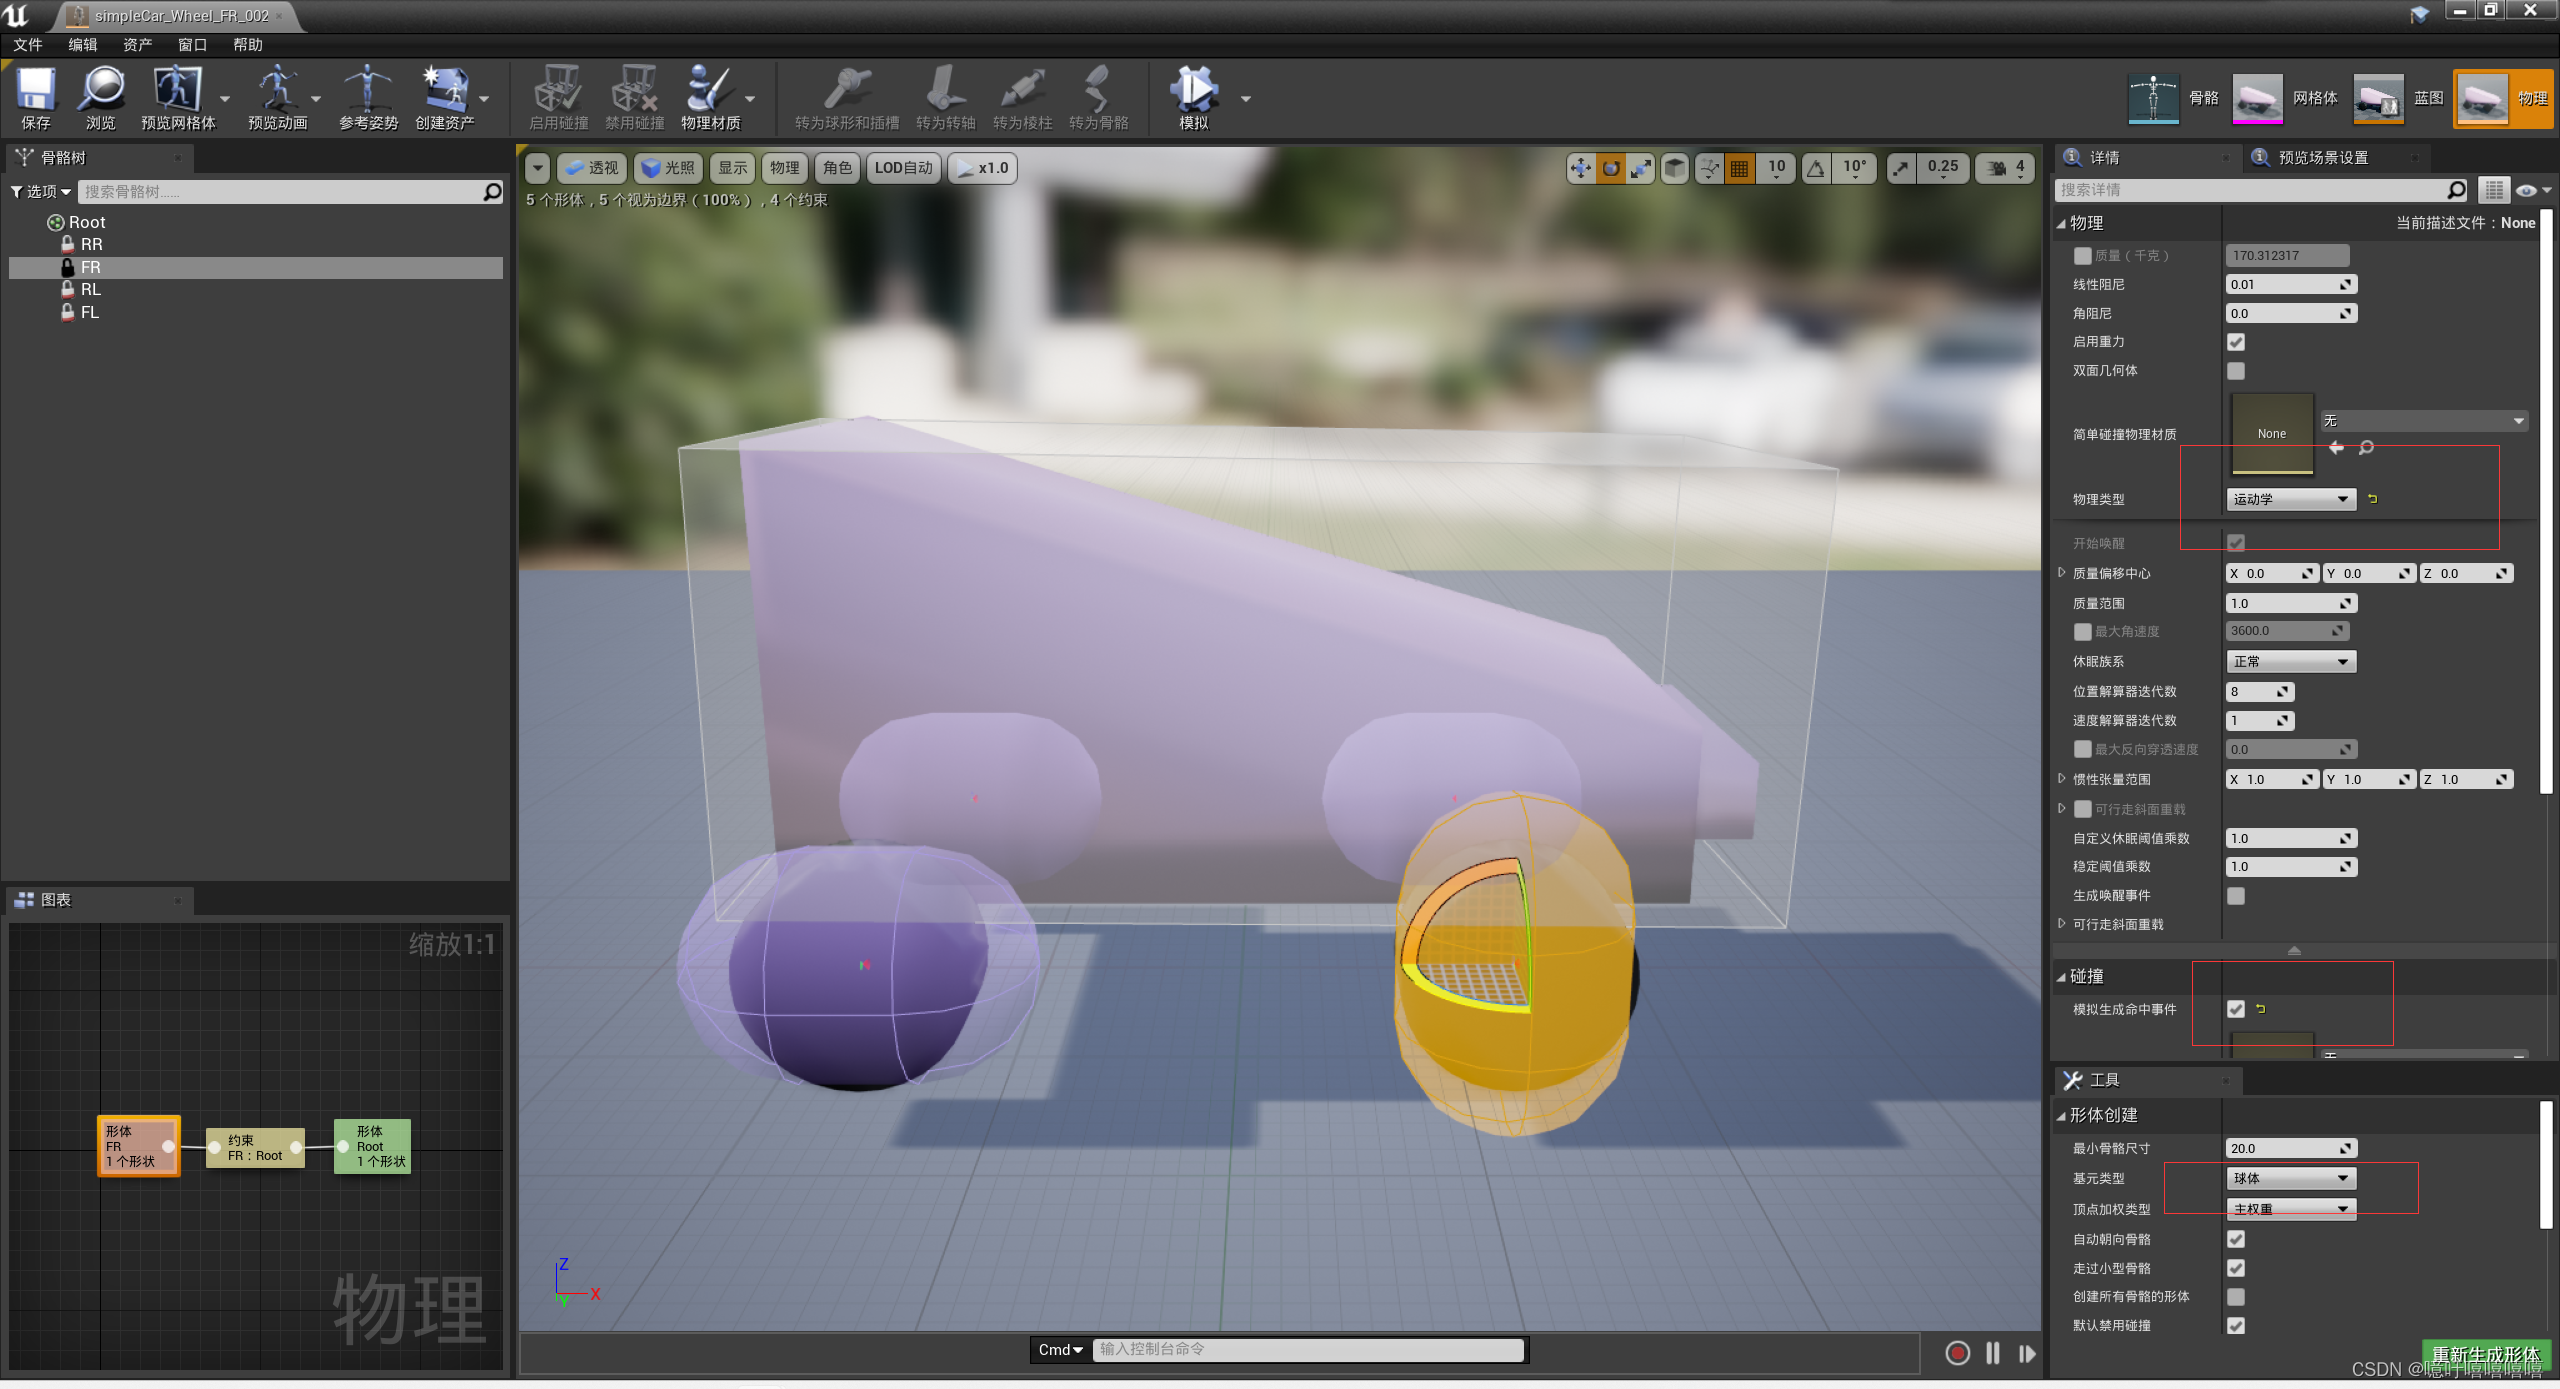
-
添加动画蓝图,直接去现有的车辆动画蓝图复制过来
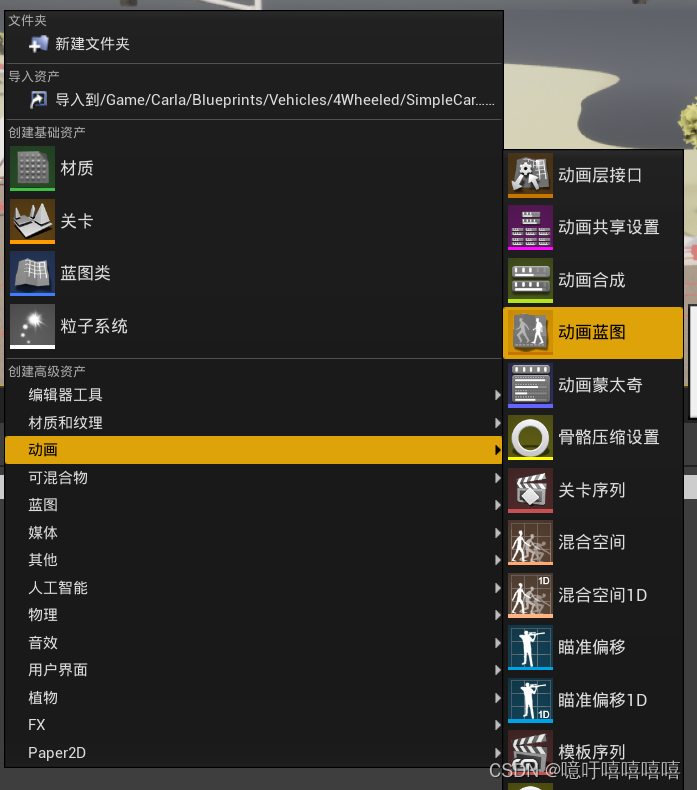
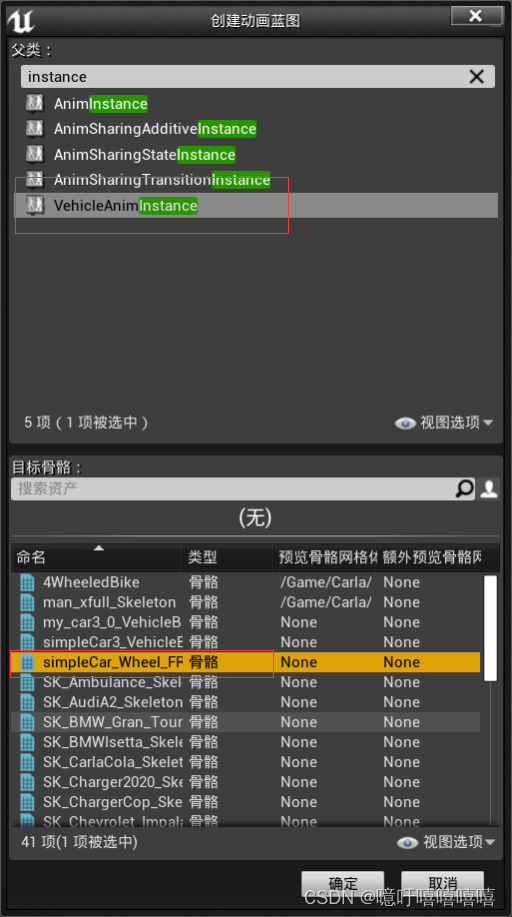
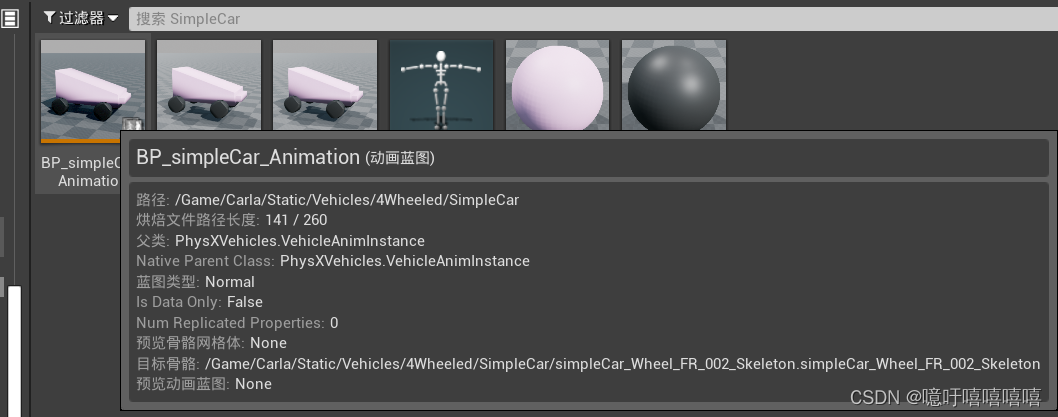
进入编辑: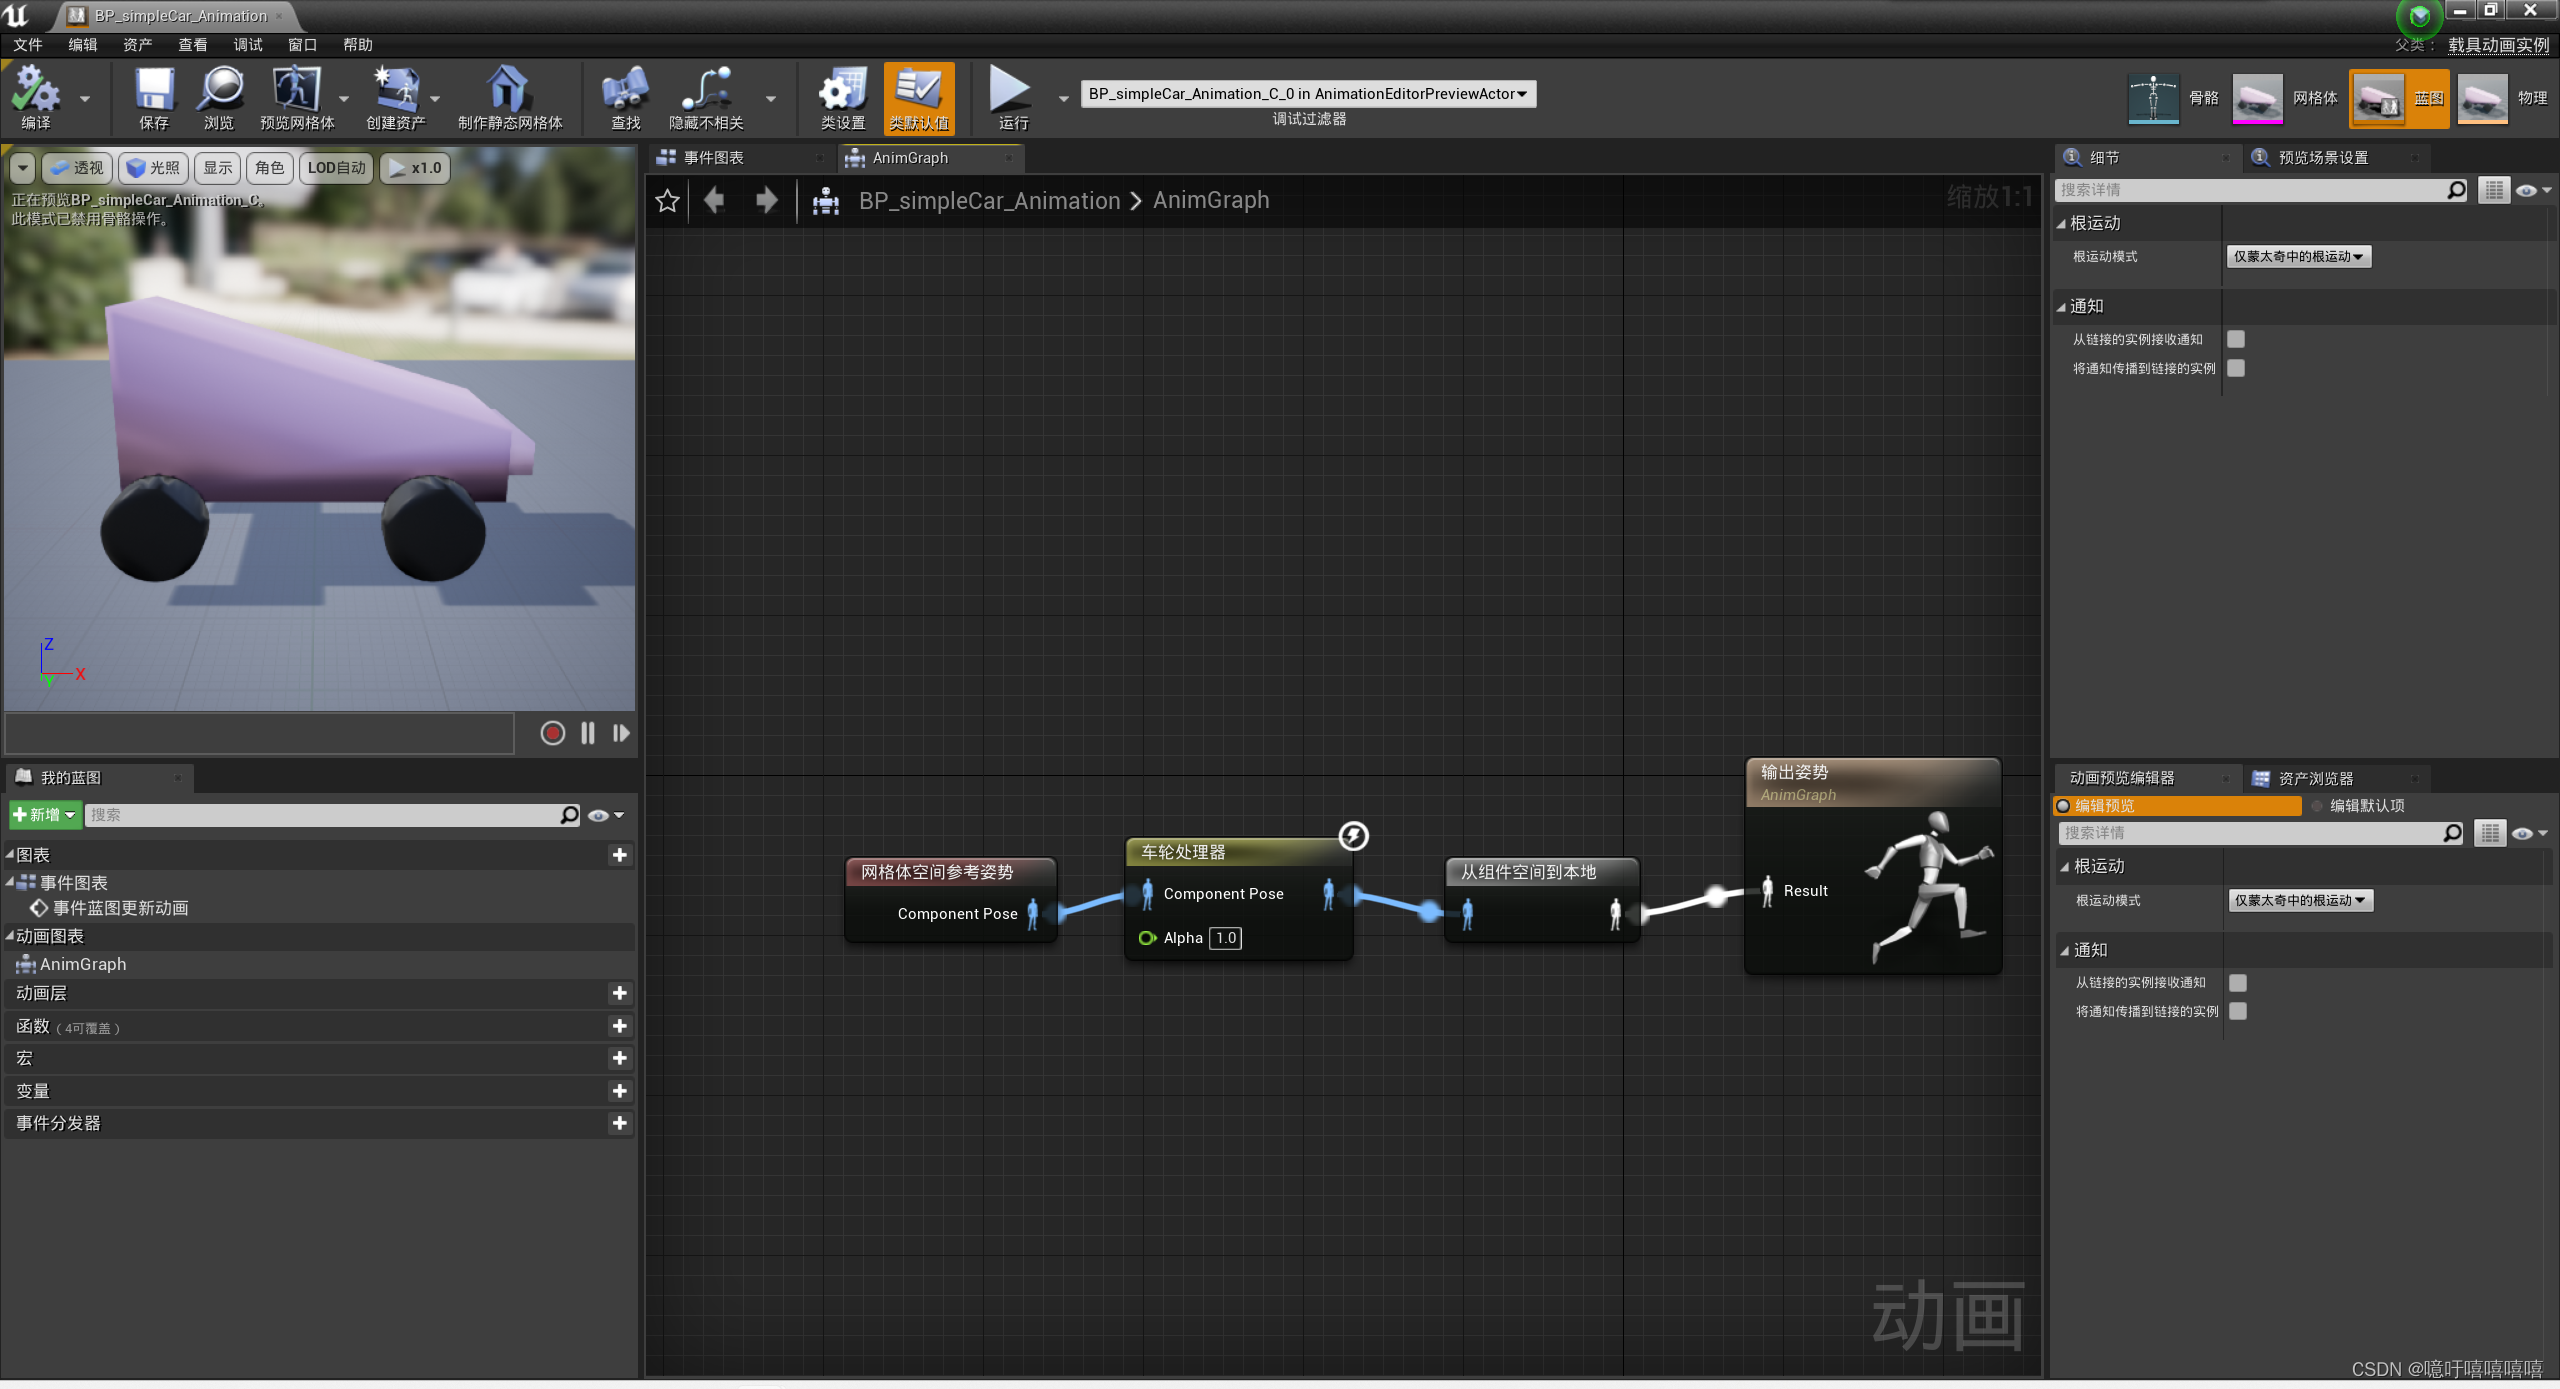
-
添加轮子的蓝图
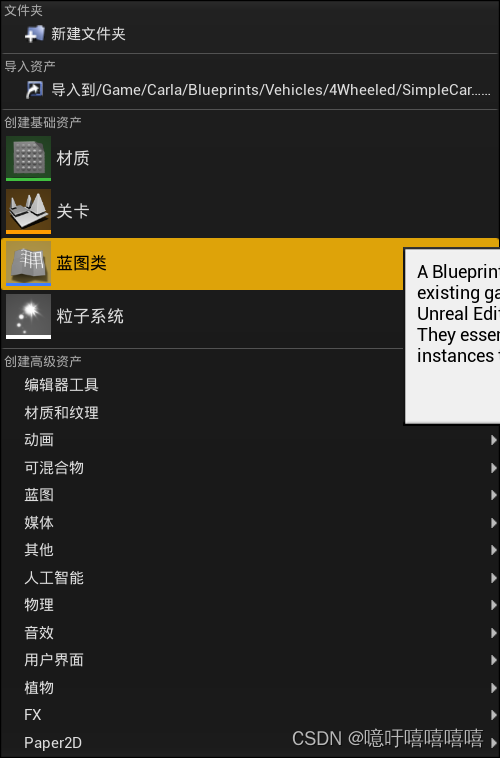
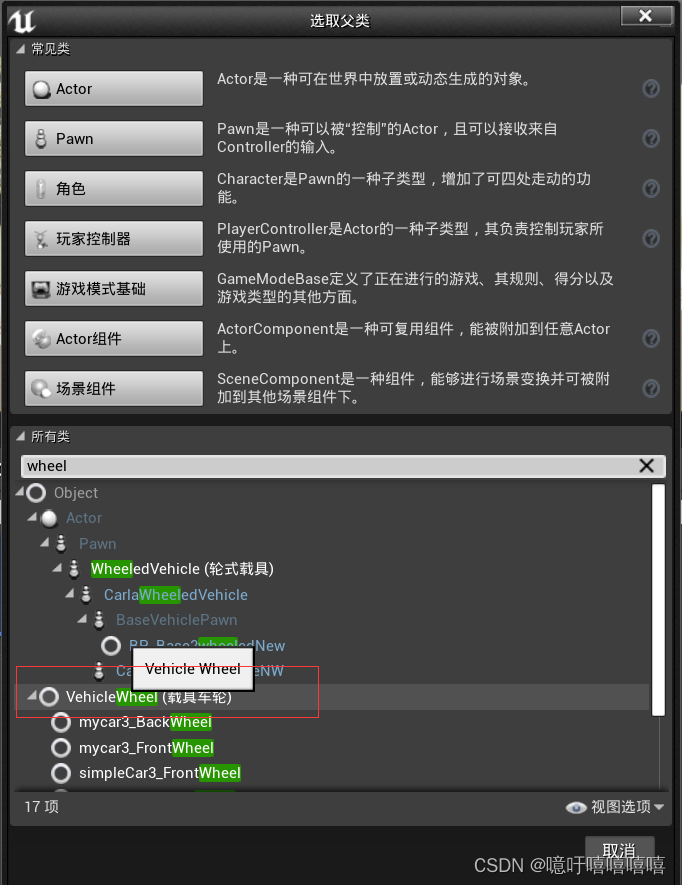
进入编辑:
前轮胎: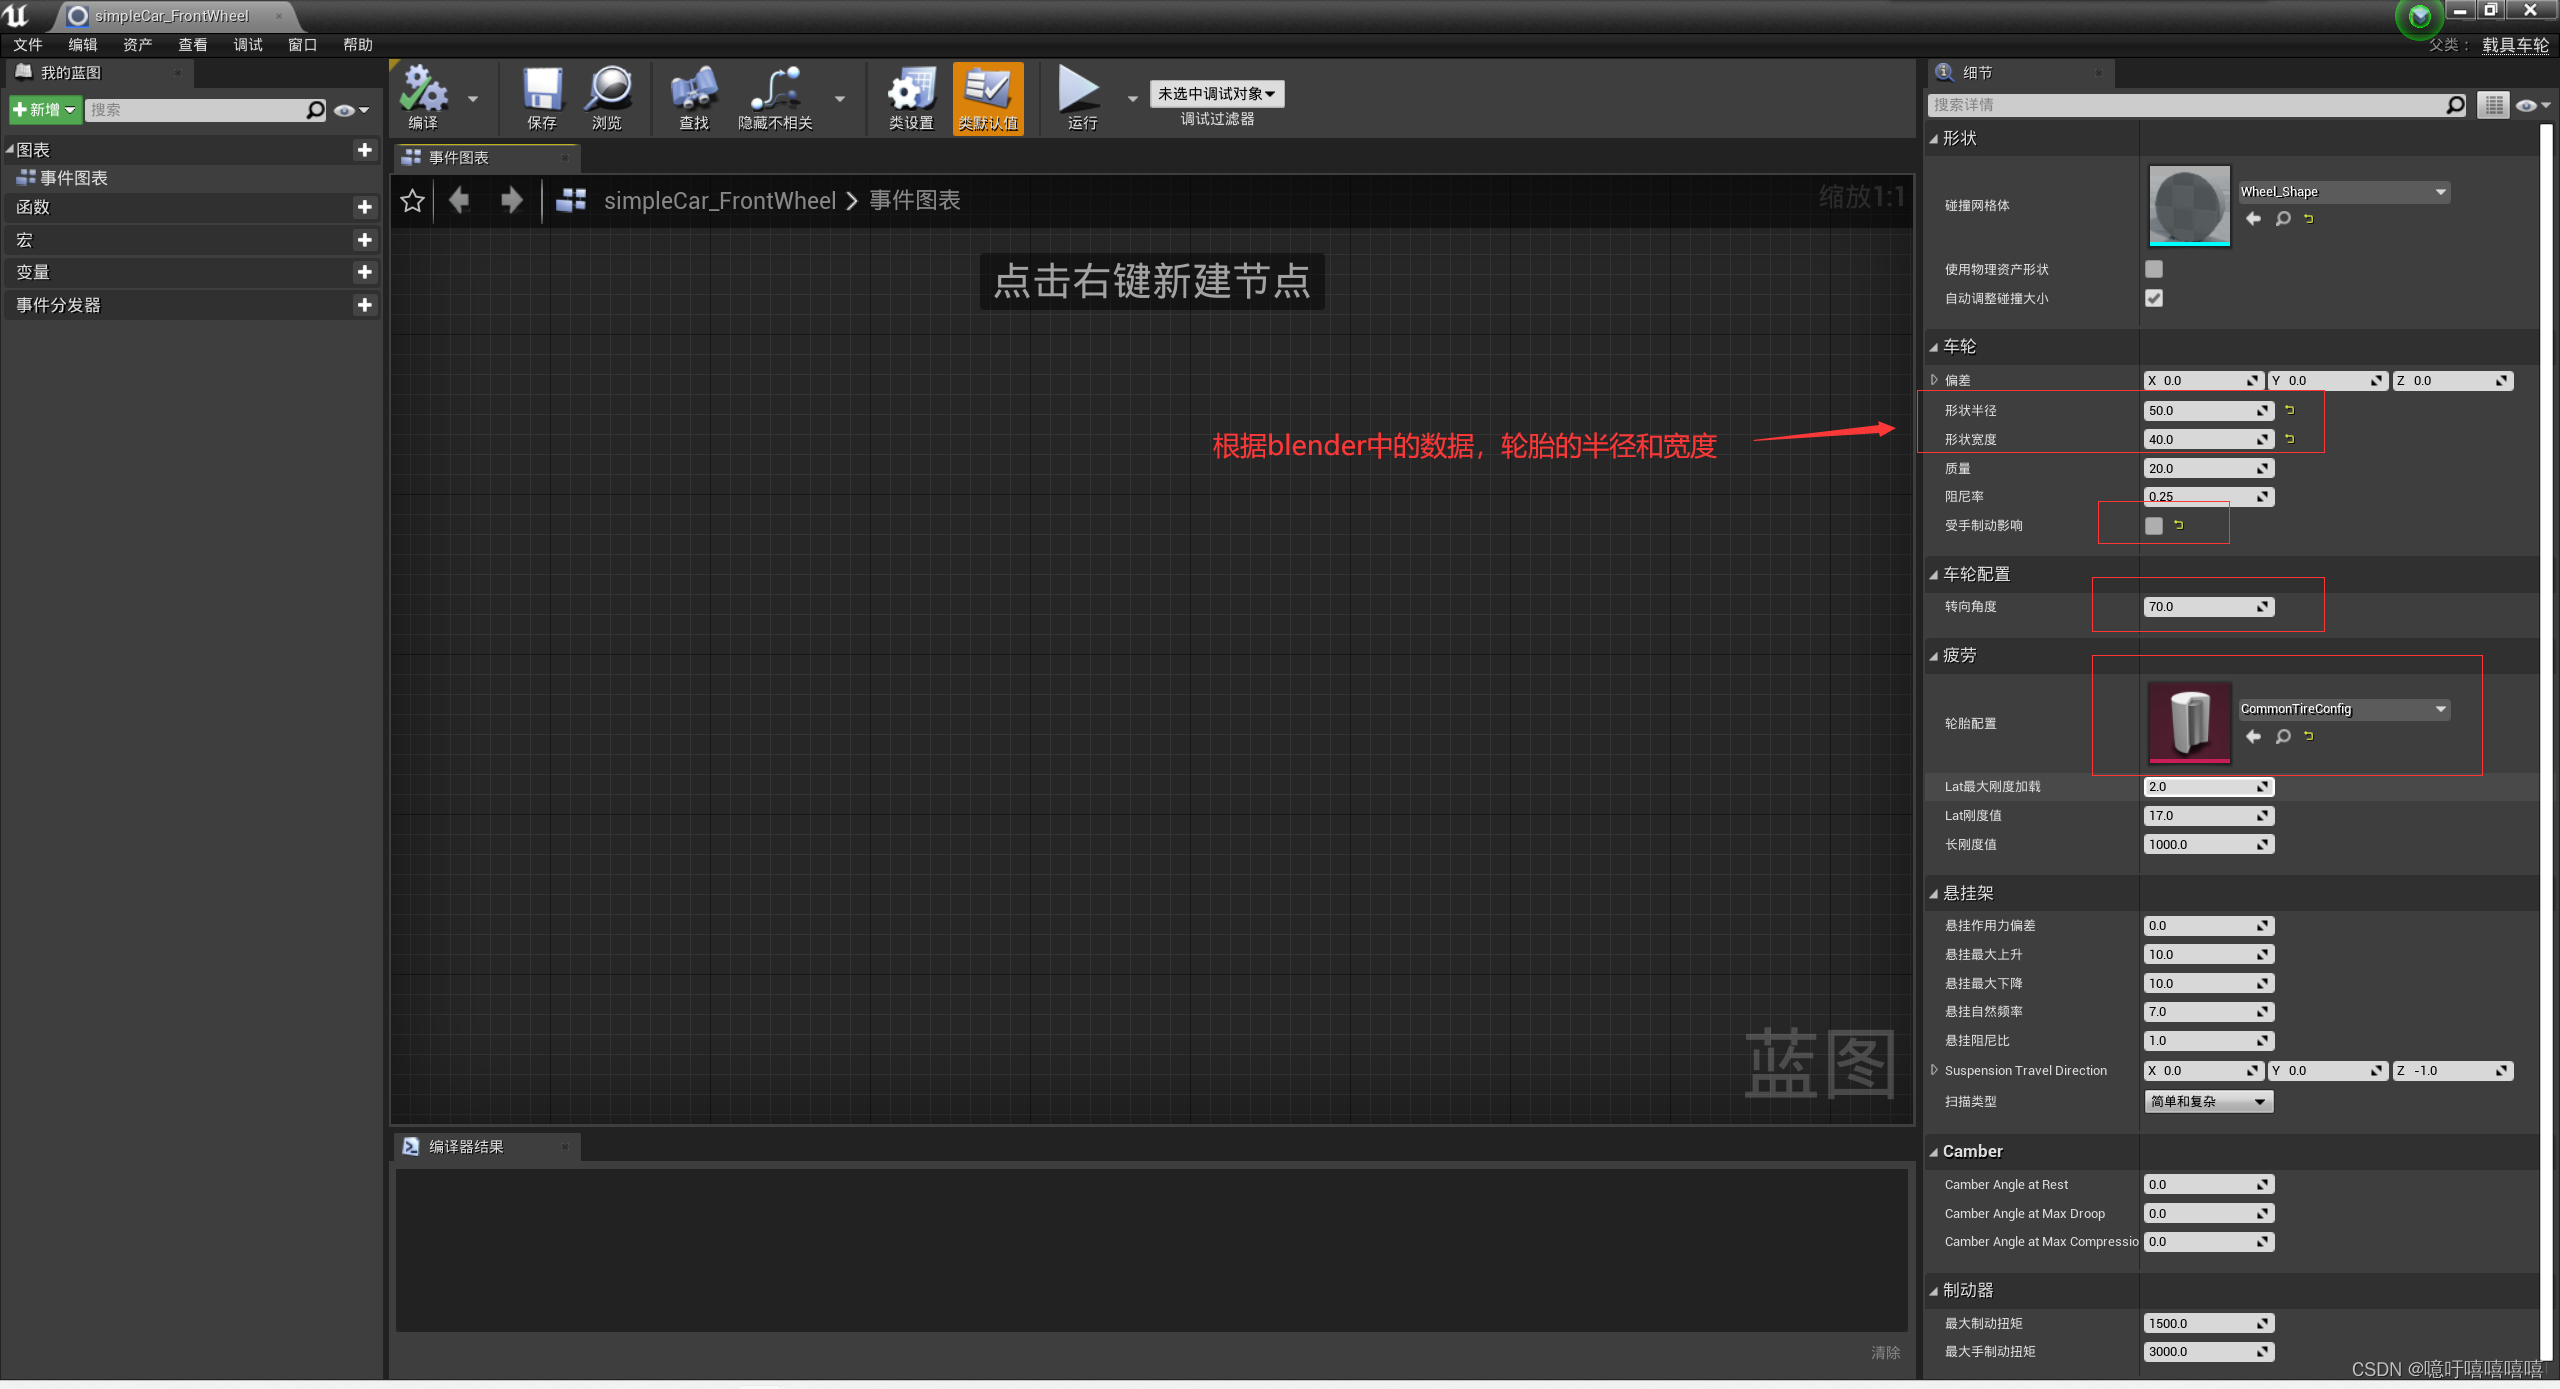
后轮胎: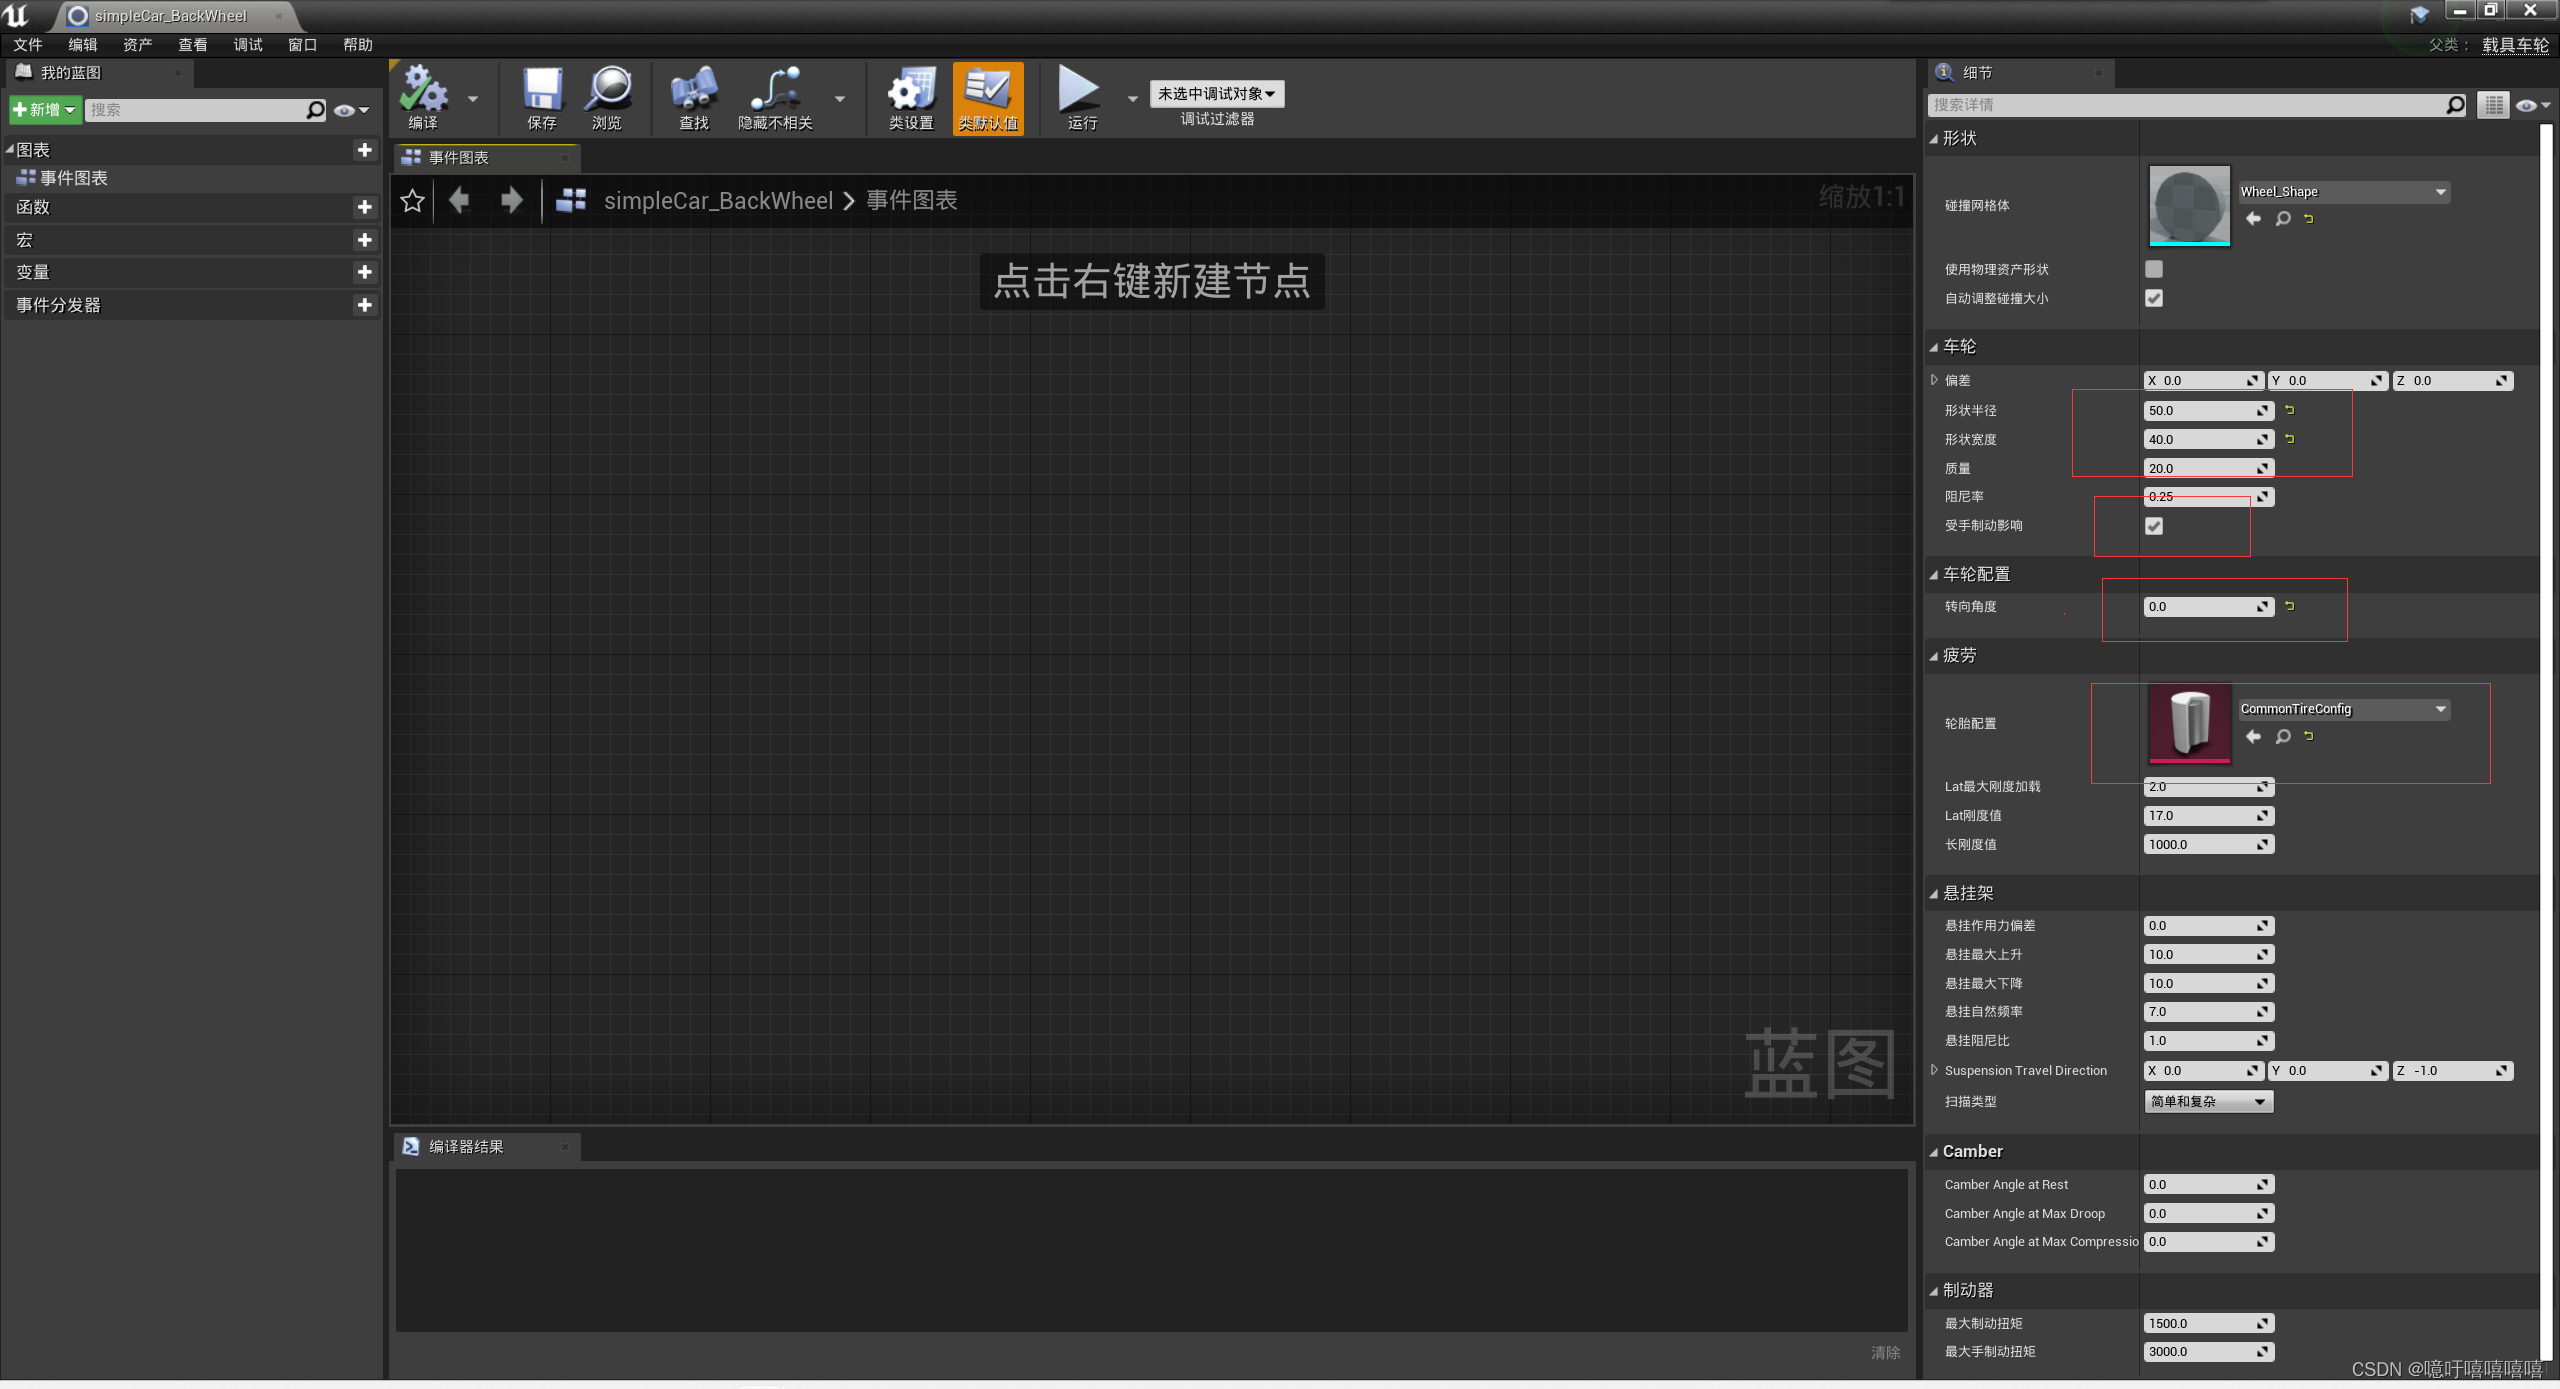
-
新建汽车蓝图类
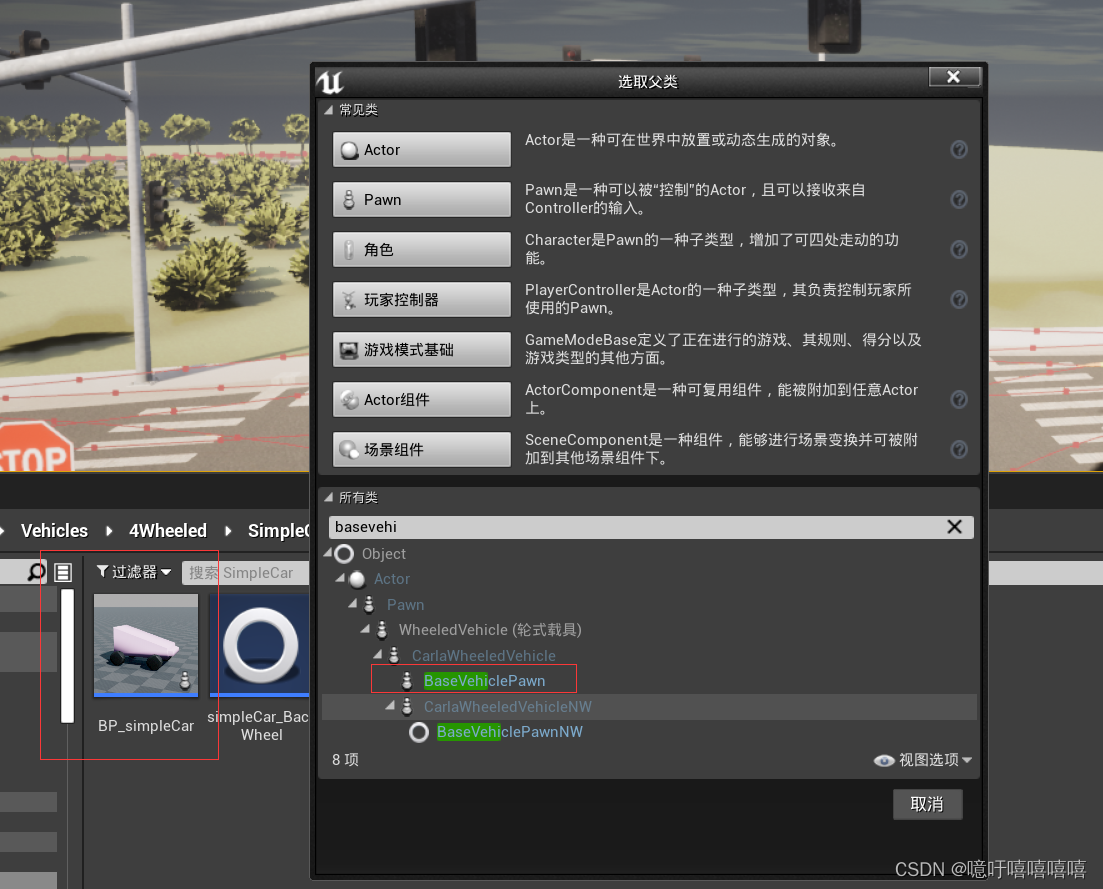
进入编辑:
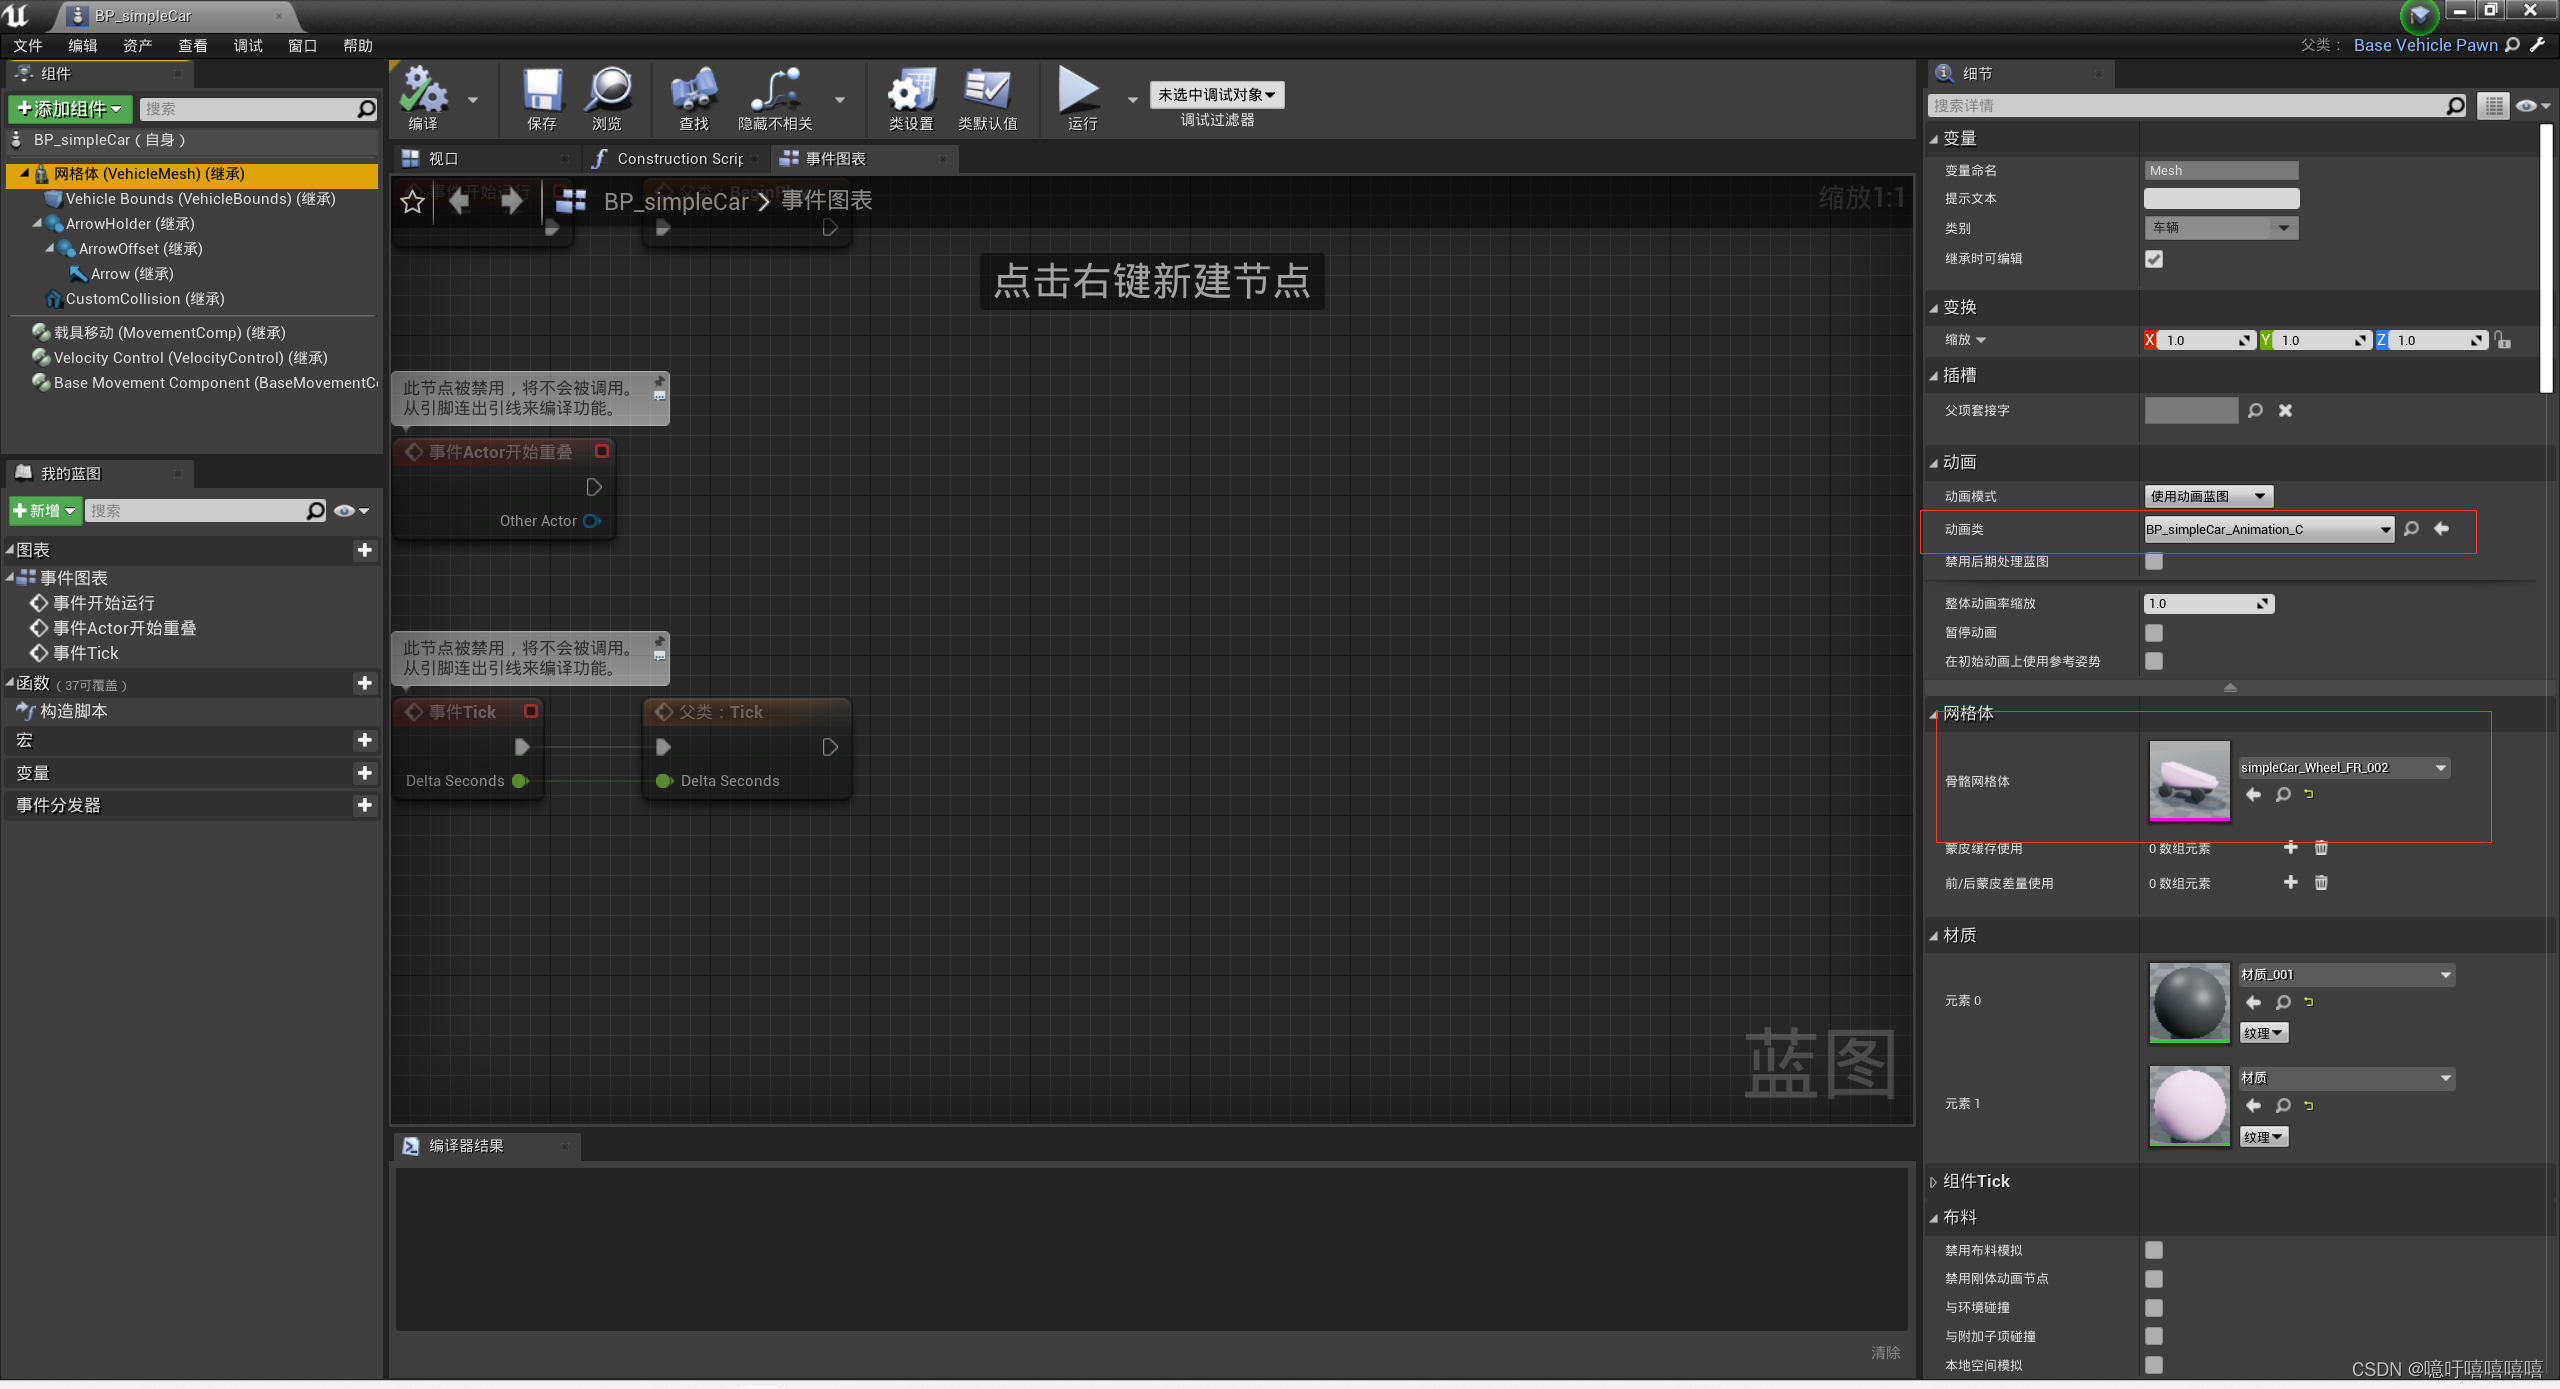
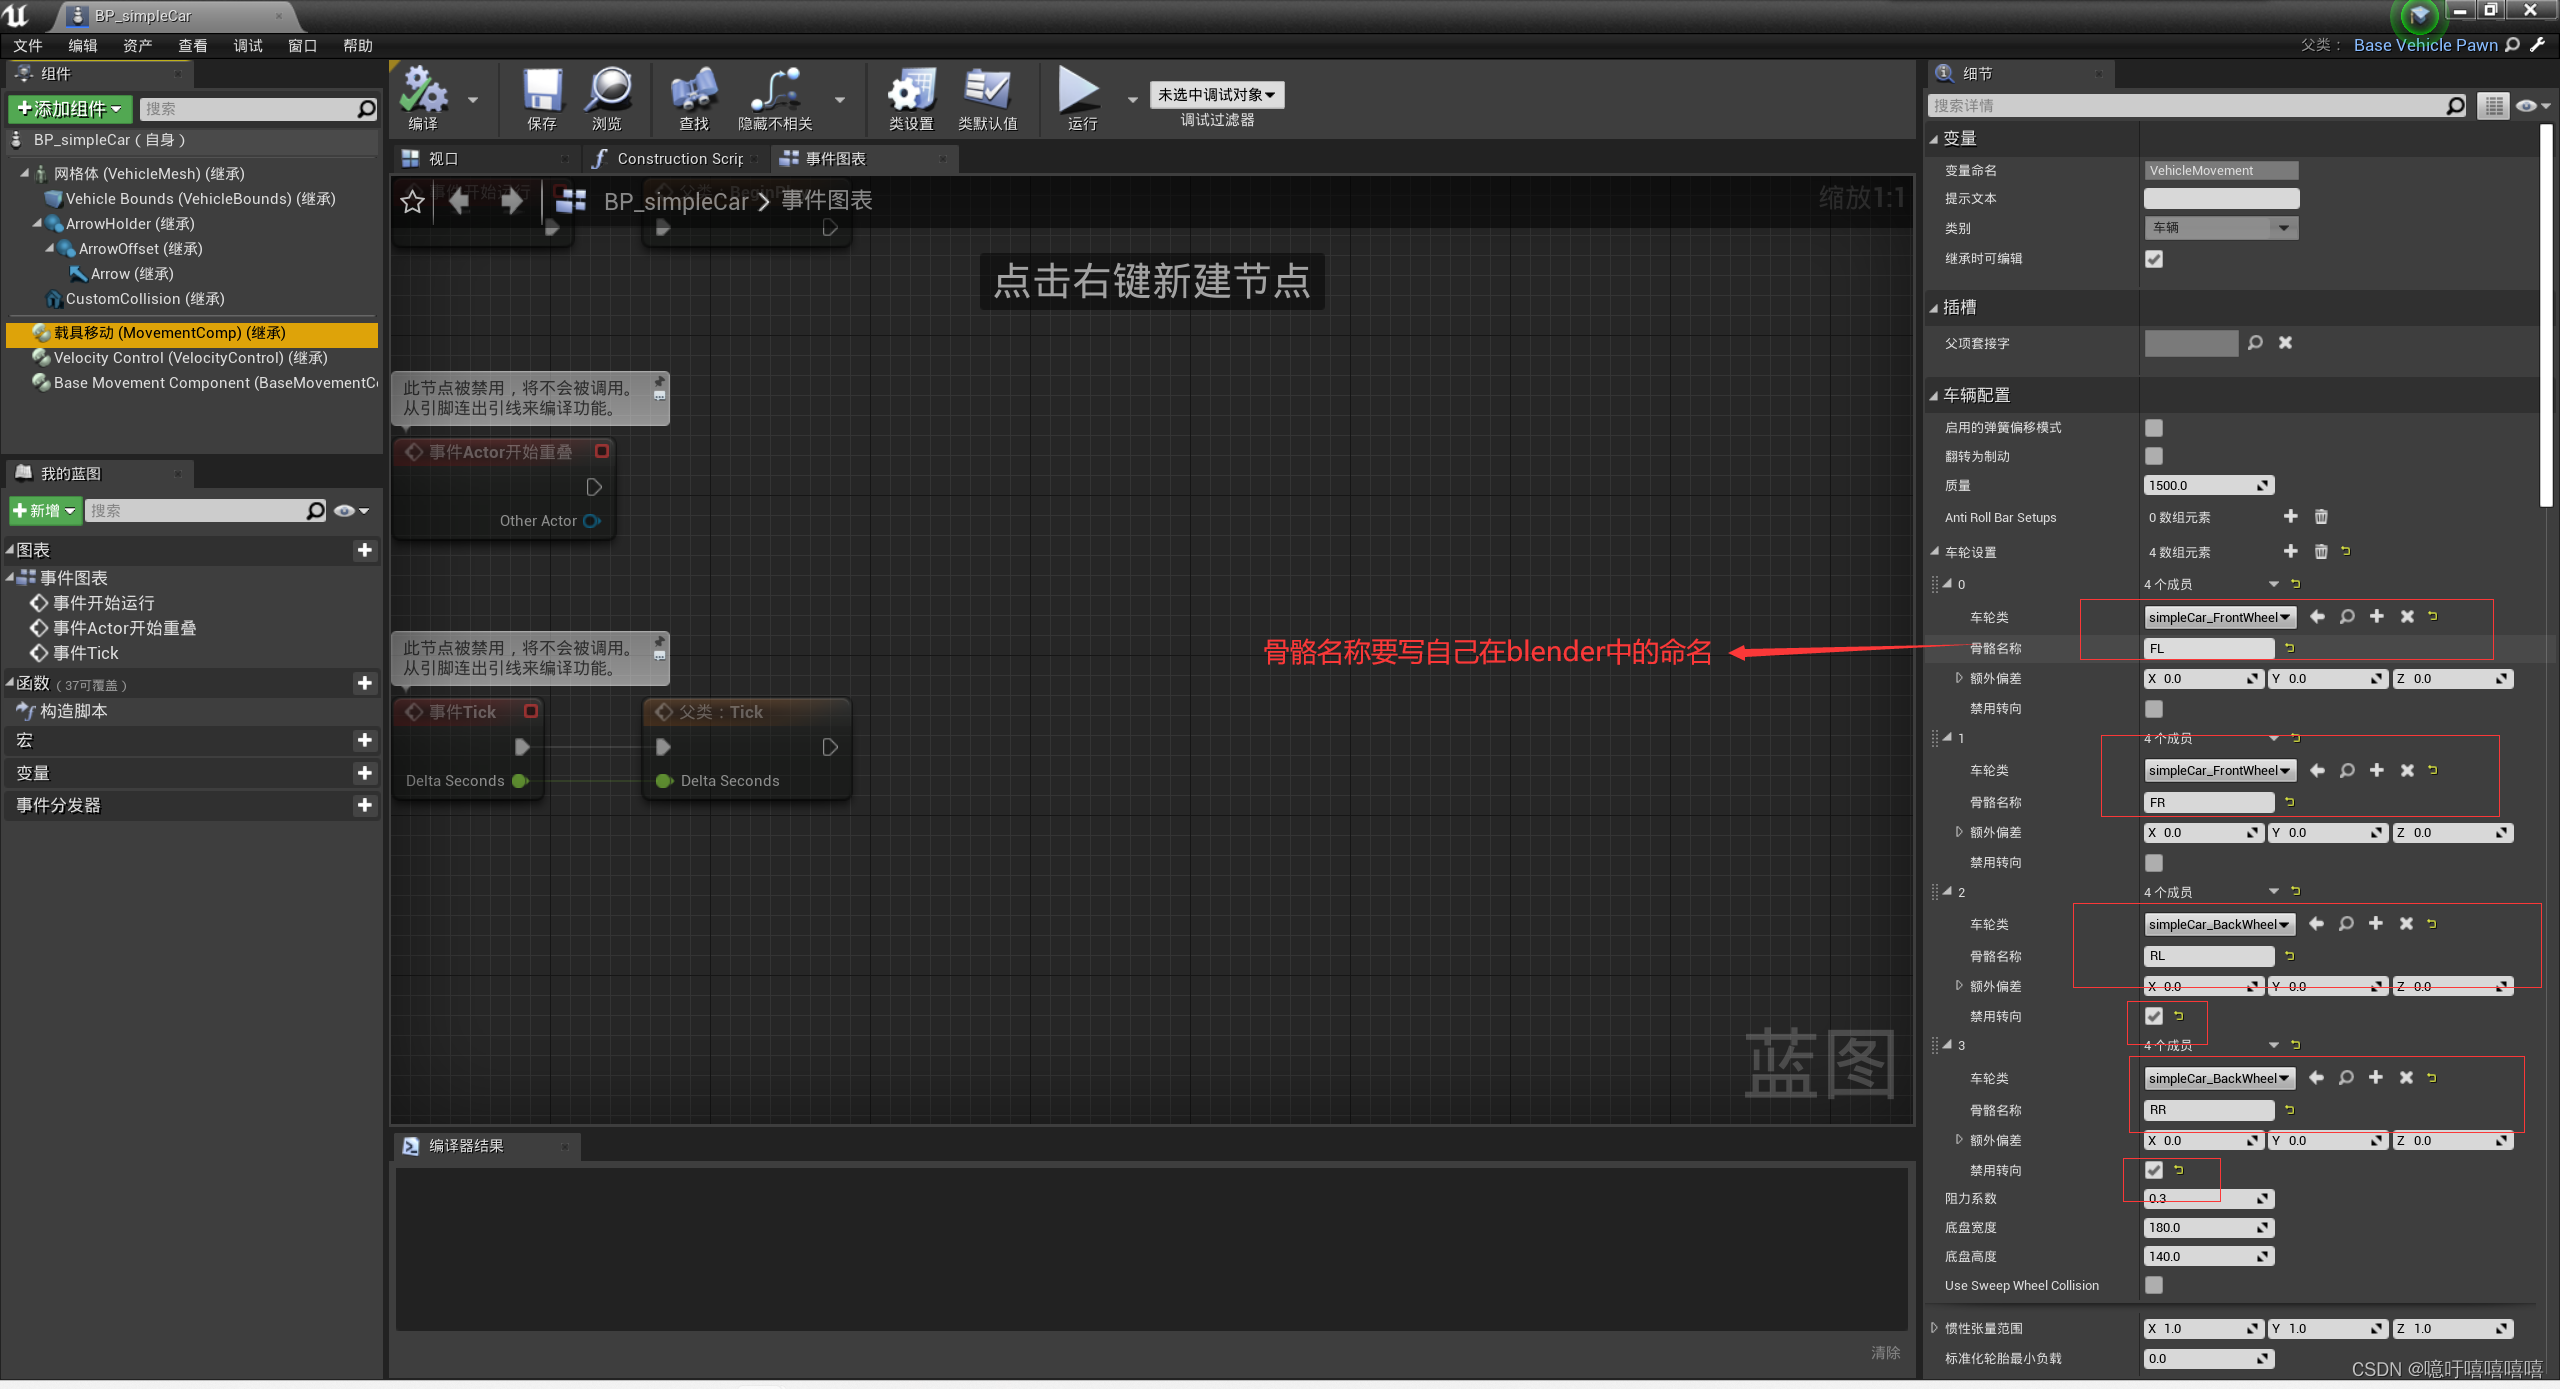
-
编辑汽车资产库
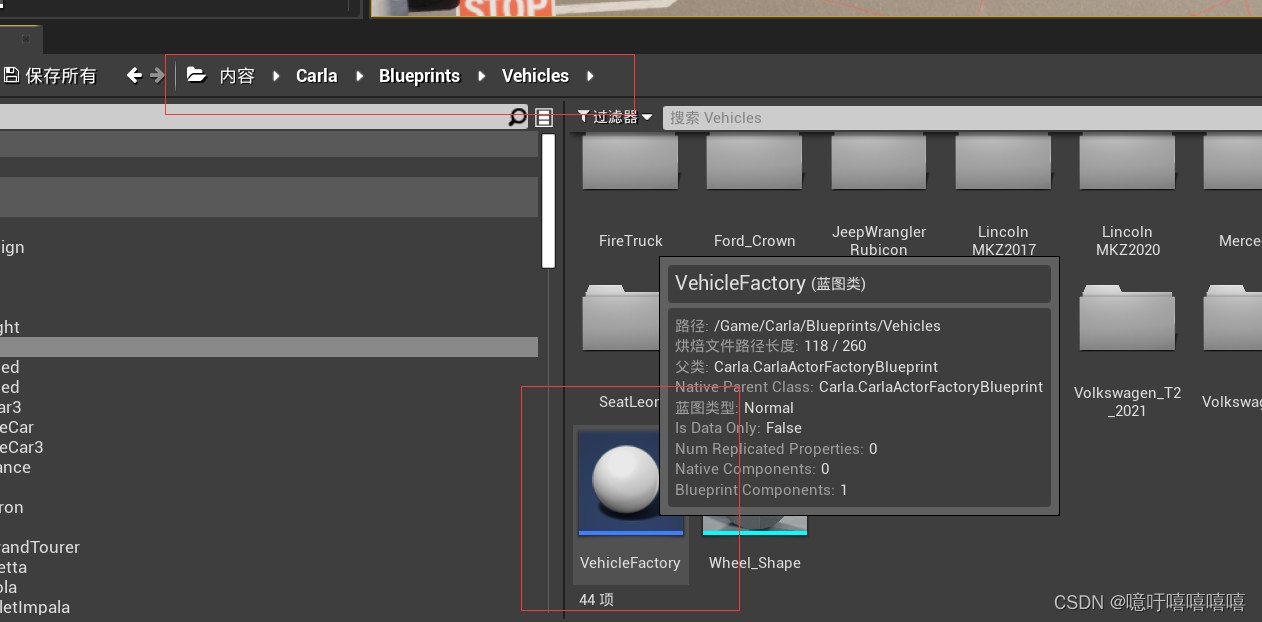
进入编辑:
(这里写错了,是 SimpleCar和SimpleCar01)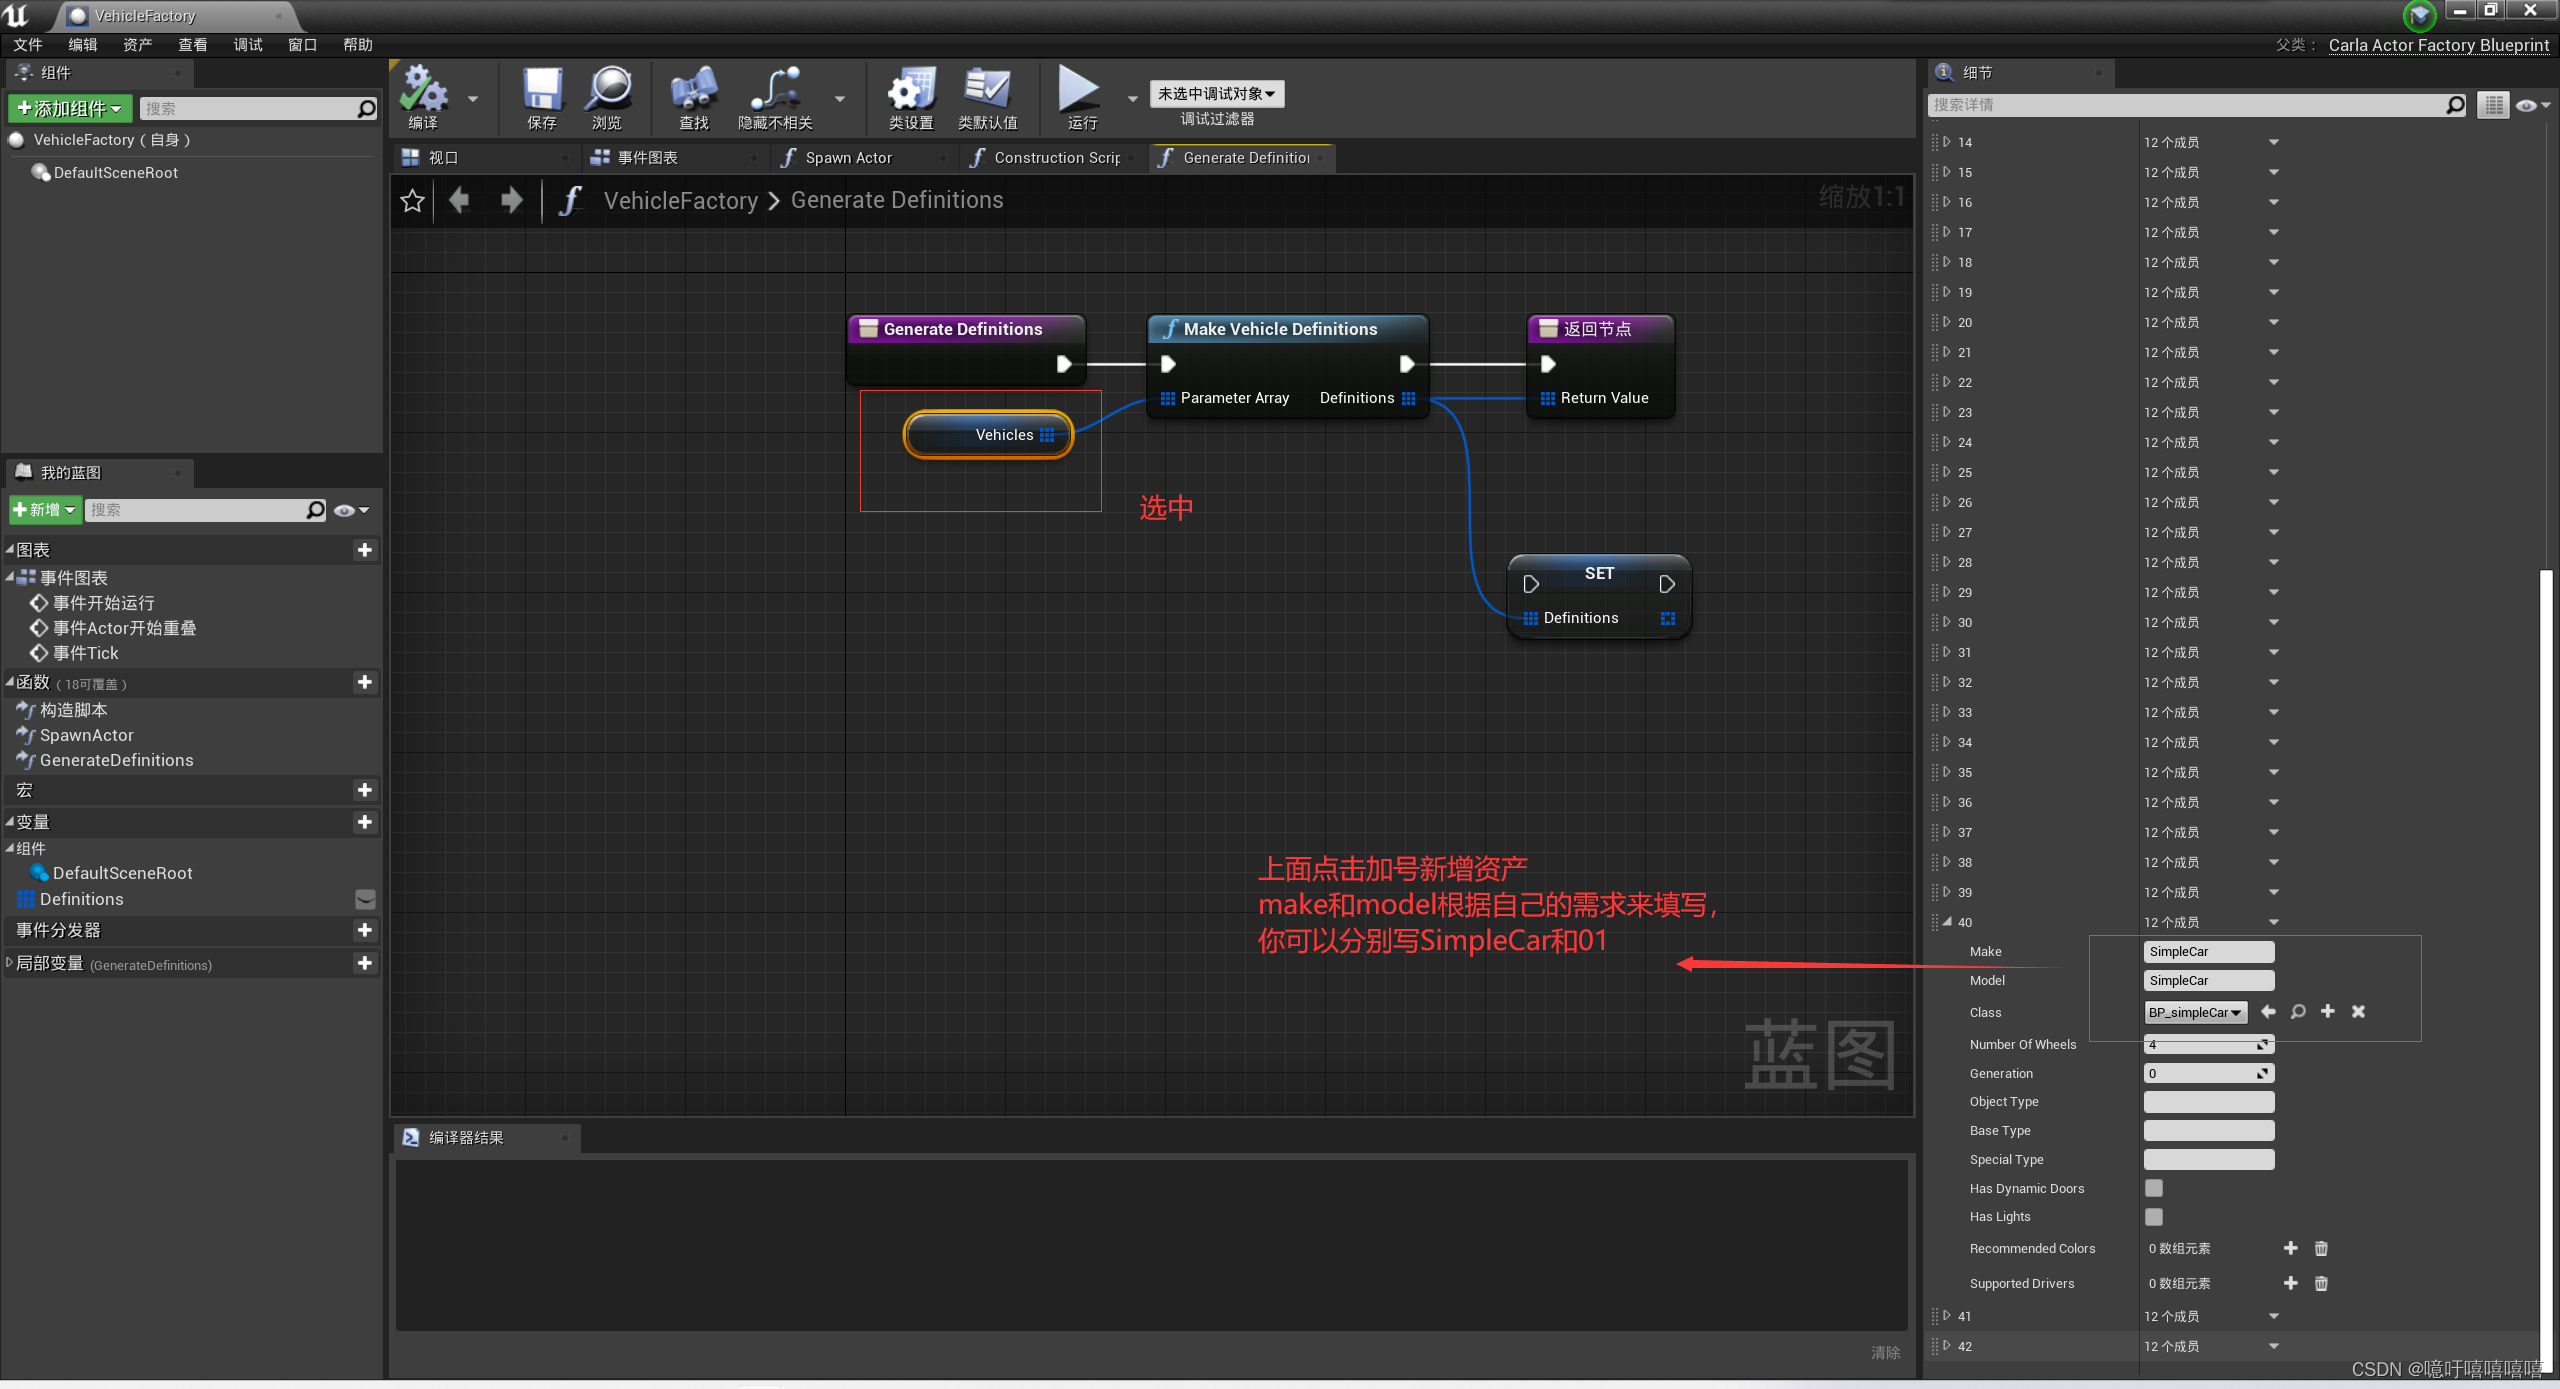 好了,此时就可以运行看看了。
python manual_control.py --filter SimplerCar01
四、小车等待红绿灯code
# ==============================================================================
# -- find carla module ---------------------------------------------------------
# ==============================================================================
import glob
import math
import os
import random
import sys

try:
    sys.path.append(glob.glob('../carla/dist/carla-*%d.%d-%s.egg' % (
        sys.version_info.major,
        sys.version_info.minor,
        'win-amd64' if os.name == 'nt' else 'linux-x86_64'))[0])
except IndexError:
    pass

import carla


def hld(world, vehicle, vehicle_max_speed):
    global vehicle_current_location
    global way_near_point
    global distance_to_intersection
    # if vehicle:
    #     # 获取汽车当前位置
    #     vehicle_current_location = vehicle.get_location()
    #     # 使用Carla的道路地图获取最近的路口(交叉口)Waypoint
    #     waypoint_location = world.get_map().get_waypoint(vehicle_current_location).transform.location
    #     # 使用Waypoint的distance属性获取距离路口的距离
    #     print(vehicle_current_location)
    #     print(waypoint_location)
    #     distance_to_intersection = math.sqrt((vehicle_current_location.x - waypoint_location.x) ** 2 + (
    #                 vehicle_current_location.y - waypoint_location.y) ** 2)
    #     print("The neaerest way point's distance is:", distance_to_intersection, "meters")
    # else:
    #     print("_________________Not found the vehicle !_________________")
    #     return

    # 获取汽车的速度
    vehicle_current_velocity = vehicle.get_velocity()
    vehicle_current_speed = vehicle_current_velocity.length()  # 线速度

    print("vehicle_current_speed______", vehicle_current_speed)

    # 判断汽车当前是否处于红绿灯影响范围
    if vehicle.is_at_traffic_light():
        # 获取红绿灯
        traffic_light = vehicle.get_traffic_light()
        print("traffic_light.get_state()______", traffic_light.get_state())
        # 如果前方是红灯并且距离路口只有0.5m了,制动汽车
        if traffic_light and traffic_light.get_state() == carla.TrafficLightState.Red:
            print("红灯请停车!")
            # target_velocity = max(vehicle_current_speed - 5.0, 0.0)  # 以5m/s的速度减速,
            vehicle.apply_control(carla.VehicleControl(throttle=-0.0, steer=0, brake=1.0))
        # 如果前方是绿灯
        elif traffic_light and traffic_light.get_state() == carla.TrafficLightState.Green:
            # 如果当前是静止的状态,则让汽车启动
            if vehicle_current_speed == 0.0:
                print("绿灯请行驶!")
                vehicle.apply_control(carla.VehicleControl(throttle=1.0, steer=0.0, brake=0.0))
            # 如果当前是行驶状态并且速度大于最大速度限制的一半,则让其保持当前速度行驶
            elif vehicle_current_speed > (vehicle_max_speed / 2.0):
                print("路口请缓行!")
                vehicle.apply_control(carla.VehicleControl(throttle=0.0, steer=0.0, brake=0.0))
            # 其他情况,则保持当前速度行驶
            else :
                print("绿灯请缓行!")
                vehicle.apply_control(carla.VehicleControl(throttle=0.5, steer=0.0, brake=0.0))
        # 如果前方是黄灯,则汽车开始制动
        elif traffic_light and traffic_light.get_state() == carla.TrafficLightState.Yellow:
            print("黄灯请停车!")
            vehicle.apply_control(carla.VehicleControl(throttle=0.0, steer=0.0, brake=1.0))
    else:
        print("直线行驶中~~~")
        # 如果汽车的速度超过了最大速度,则让他保持当前速度行驶
        speed_tolerance = 0.5  # 设置速度容忍范围,可以根据需要调整
        # 计算油门值,使车辆保持在最大速度附近
        if vehicle_current_speed < vehicle_max_speed - speed_tolerance:
            # print("start throttle")
            throttle = 1.0  # 假设油门力度为1.0
        else:
            # print("stop throttle")
            throttle = 0.0  # 达到最大速度时,停止加油门

        vehicle.apply_control(carla.VehicleControl(throttle=throttle, steer=0.0, brake=0.0))


def main():
    actor_list = []
    client = carla.Client('127.0.0.1', 2000)
    client.set_timeout(2.0)
    try:
        # 获取世界
        world = client.get_world()

        # 创建汽车蓝图
        # vehicle_blueprint = random.choice(world.get_blueprint_library().filter('vehicle.*'))
        # 选用自定义小车蓝图
        vehicle_blueprint = world.get_blueprint_library().filter('vehicle.simplecar.simplecar')
        # vehicle_spawn_points = random.choice(world.get_map().get_spawn_points())
        vehicle_spawn_points = carla.Transform(
            carla.Location(x=20.235275, y=13.414804, z=0.600000),  # 设置初始位置的x、y和z坐标
            carla.Rotation(pitch=0.000000, yaw=-179.840790, roll=0.000000)  # 设置初始方向的pitch、yaw和roll角度
        )
        print("vehicle_spawn_points: ",vehicle_spawn_points)

        vehicle = world.spawn_actor(vehicle_blueprint, vehicle_spawn_points)
        # 设置最大车速
        vehicle_max_speed = 7.0

        actor_list.append(vehicle)

        # 创建相机蓝图
        camera_blueprint = world.get_blueprint_library().find('sensor.camera.rgb')
        camera_spawn_points = carla.Transform(carla.Location(x=-5, z=4), carla.Rotation(pitch=-20))
        camera = world.spawn_actor(camera_blueprint, camera_spawn_points, attach_to=vehicle)
        # camera.listen(lambda image: image.save_to_disk(os.path.join('_out', '%06d.png' % image.frame)))

        actor_list.append(camera)

        while True:
            # 设置相机视角
            world.get_spectator().set_transform(camera.get_transform())

            hld(world, vehicle, vehicle_max_speed)

            # 优化循环性能
            world.tick()

    finally:
        client.apply_batch([carla.command.DestroyActor(x) for x in actor_list])
        print("All the actors have already been destroied !")


if __name__ == "__main__":
    main()
五、两个小车跟车code
import carla
import math
import random
import time

# 创建CARLA仿真客户端
client = carla.Client('127.0.0.1', 2000)
client.set_timeout(2.0)
actor_list=[]

try:
    # ======================================获取CARLA世界和地图======================================
    world = client.get_world()
    blueprint_library = world.get_blueprint_library()
    map = world.get_map()

    # ======================================创建两辆车======================================
    # 位置设置
    # spawn_points = map.get_spawn_points()
    spawn_points = carla.Transform(
        carla.Location(x=20.235275, y=13.414804, z=0.600000),  # 设置初始位置的x、y和z坐标
        carla.Rotation(pitch=0.000000, yaw=-179.840790, roll=0.000000)  # 设置初始方向的pitch、yaw和roll角度
    )
    # 主车
    # vehicle_bp1 = blueprint_library.filter('vehicle')[0]
    # vehicle_bp1.set_attribute('color', '255,0,0')
    # 自定义小车
    vehicle_bp1 = blueprint_library.find('vehicle.simplecar.simplecar')
    # vehicle1_spawn_point = random.choice(spawn_points)
    vehicle1_spawn_point = spawn_points
    vehicle1 = world.spawn_actor(vehicle_bp1, vehicle1_spawn_point)
    # 跟车
    # vehicle_bp2 = blueprint_library.filter('vehicle')[0]
    # vehicle_bp2.set_attribute('color', '0,0,255')
    # 自定义小车
    vehicle_bp2 = blueprint_library.find('vehicle.simplecar3.simplecar3')
    vehicle2_spawn_point = carla.Transform(vehicle1_spawn_point.location + carla.Location(x=10.0),carla.Rotation(pitch=0.000000, yaw=-179.840790, roll=0.000000))
    vehicle2 = world.spawn_actor(vehicle_bp2, vehicle2_spawn_point)

    # 设置车辆的初始速度
    vehicle1.apply_control(carla.VehicleControl(throttle=0.5, steer=0, brake=0)) # 车1的初始速度为10 m/s
    vehicle2.apply_control(carla.VehicleControl(throttle=0, steer=0, brake=0))
    actor_list.append(vehicle1)
    actor_list.append(vehicle2)
    # # 给两个车设置自动驾驶
    # vehicle1.set_autopilot(True)
    # vehicle2.set_autopilot(True)


    # ======================================创建相机蓝图======================================
    camera_blueprint = world.get_blueprint_library().find('sensor.camera.rgb')
    camera_transform = carla.Transform(carla.Location(x=-5, z=4), carla.Rotation(pitch=-10))
    camera1 = world.spawn_actor(camera_blueprint, camera_transform, attach_to=vehicle1)
    camera2 = world.spawn_actor(camera_blueprint, camera_transform, attach_to=vehicle2)
    # camera.listen(lambda image: image.save_to_disk(os.path.join('_out', '%06d.png' % image.frame)))
    actor_list.append(camera1)
    actor_list.append(camera2)

    # ======================================定义跟车参数======================================
    desired_distance = 20.0  # 期望的跟车距离
    max_velocity = 1.0  # 最大速度 (m/s)

    while True:
        # 设置相机视角
        world.get_spectator().set_transform(camera2.get_transform())

        # 获取车辆的位置
        location1 = vehicle1.get_location()
        location2 = vehicle2.get_location()

        # 计算车辆之间的距离
        distance = math.sqrt((location1.x - location2.x)**2 + (location1.y - location2.y)**2)

        # 计算车辆2的期望速度,使其保持在期望跟车距离内
        target_speed = 0.0 if desired_distance > distance else max_velocity

        # 设置车辆2的速度
        vehicle2.apply_control(carla.VehicleControl(throttle=target_speed, steer=0, brake=0))

        # 打印信息
        print(f"Distance between vehicles: {distance:.2f} m, Target Speed for Vehicle 2: {vehicle2.get_velocity().length():.2f} m/s")


        world.tick()

finally:
    client.apply_batch([carla.command.DestroyActor(x) for x in actor_list])
    print("All the actors have already been destroied !")
六、前车实现等红绿灯+后车实现跟车code
import glob
import math
import os
import random
import sys

try:
    sys.path.append(glob.glob('../carla/dist/carla-*%d.%d-%s.egg' % (
        sys.version_info.major,
        sys.version_info.minor,
        'win-amd64' if os.name == 'nt' else 'linux-x86_64'))[0])
except IndexError:
    pass

import carla


# ======================================后车执行跟车逻辑======================================

def follow(vehicle1, vehicle2, max_speed, desired_distance,):
    # 获取车辆的位置
    location1 = vehicle1.get_location()
    location2 = vehicle2.get_location()
    # 获取汽车的速度
    vehicle2_current_velocity = vehicle2.get_velocity()
    vehicle2_current_speed = vehicle2_current_velocity.length()  # 线速度

    # 计算车辆之间的距离
    distance = math.sqrt((location1.x - location2.x) ** 2 + (location1.y - location2.y) ** 2)

    # 设置车辆2的速度
    if desired_distance>distance:
        vehicle2.apply_control(carla.VehicleControl(throttle=0.0, steer=0, brake=0))
    else:
        # 如果汽车的速度超过了最大速度,则让他保持当前速度行驶
        speed_tolerance = 0  # 设置速度容忍范围,可以根据需要调整
        # 计算油门值,使车辆保持在最大速度附近
        if vehicle2_current_speed < max_speed - speed_tolerance or desired_distance>distance:
            # print("start throttle")
            throttle = 1.0  # 假设油门力度为1.0
        else:
            # print("stop throttle")
            throttle = 0.1  # 达到最大速度时,停止加油门

        vehicle2.apply_control(carla.VehicleControl(throttle=throttle, steer=0.0, brake=0.0))

    # 打印信息
    print(
        f"Distance between vehicles: {distance:.2f} m, Target Speed for Vehicle 2: {vehicle2.get_velocity().length():.2f} m/s")


# ======================================主车执行红绿灯逻辑======================================
def hld(world, vehicle, vehicle_max_speed):
    global vehicle_current_location
    global way_near_point
    global distance_to_intersection
    # if vehicle:
    #     # 获取汽车当前位置
    #     vehicle_current_location = vehicle.get_location()
    #     # 使用Carla的道路地图获取最近的路口(交叉口)Waypoint
    #     waypoint_location = world.get_map().get_waypoint(vehicle_current_location).transform.location
    #     # 使用Waypoint的distance属性获取距离路口的距离
    #     print(vehicle_current_location)
    #     print(waypoint_location)
    #     distance_to_intersection = math.sqrt((vehicle_current_location.x - waypoint_location.x) ** 2 + (
    #                 vehicle_current_location.y - waypoint_location.y) ** 2)
    #     print("The neaerest way point's distance is:", distance_to_intersection, "meters")
    # else:
    #     print("_________________Not found the vehicle !_________________")
    #     return

    # 获取汽车的速度
    vehicle_current_velocity = vehicle.get_velocity()
    vehicle_current_speed = vehicle_current_velocity.length()  # 线速度

    print("vehicle_current_speed______", vehicle_current_speed)

    # 判断汽车当前是否处于红绿灯影响范围
    if vehicle.is_at_traffic_light():
        # 获取红绿灯
        traffic_light = vehicle.get_traffic_light()
        print("traffic_light.get_state()______", traffic_light.get_state())
        # 如果前方是红灯并且距离路口只有0.5m了,制动汽车
        if traffic_light and traffic_light.get_state() == carla.TrafficLightState.Red:
            print("红灯请停车!")
            # target_velocity = max(vehicle_current_speed - 5.0, 0.0)  # 以5m/s的速度减速,
            vehicle.apply_control(carla.VehicleControl(throttle=-0.0, steer=0, brake=1.0))
        # 如果前方是绿灯
        elif traffic_light and traffic_light.get_state() == carla.TrafficLightState.Green:
            # 如果当前是静止的状态,则让汽车启动
            if vehicle_current_speed == 0.0:
                print("绿灯请行驶!")
                vehicle.apply_control(carla.VehicleControl(throttle=1.0, steer=0.0, brake=0.0))
            # 如果当前是行驶状态并且速度大于最大速度限制的一半,则让其保持当前速度行驶
            elif vehicle_current_speed > (vehicle_max_speed / 2.0):
                print("路口请缓行!")
                vehicle.apply_control(carla.VehicleControl(throttle=0.0, steer=0.0, brake=0.0))
            # 其他情况,则保持当前速度行驶
            else:
                print("绿灯请缓行!")
                vehicle.apply_control(carla.VehicleControl(throttle=0.5, steer=0.0, brake=0.0))
        # 如果前方是黄灯,则汽车开始制动
        elif traffic_light and traffic_light.get_state() == carla.TrafficLightState.Yellow:
            print("黄灯请停车!")
            vehicle.apply_control(carla.VehicleControl(throttle=0.0, steer=0.0, brake=1.0))
    else:
        print("直线行驶中~~~")
        # 如果汽车的速度超过了最大速度,则让他保持当前速度行驶
        speed_tolerance = 0.5  # 设置速度容忍范围,可以根据需要调整
        # 计算油门值,使车辆保持在最大速度附近
        if vehicle_current_speed < vehicle_max_speed - speed_tolerance:
            # print("start throttle")
            throttle = 1.0  # 假设油门力度为1.0
        else:
            # print("stop throttle")
            throttle = 0.0  # 达到最大速度时,停止加油门

        vehicle.apply_control(carla.VehicleControl(throttle=throttle, steer=0.0, brake=0.0))


# 创建CARLA仿真客户端
client = carla.Client('127.0.0.1', 2000)
client.set_timeout(2.0)
actor_list = []

try:
    # ======================================获取CARLA世界和地图======================================
    world = client.get_world()
    blueprint_library = world.get_blueprint_library()
    map = world.get_map()

    # ======================================创建两辆车======================================
    # 位置设置
    # spawn_points = map.get_spawn_points()
    # vehicle1_spawn_point = random.choice(spawn_points)
    # print(vehicle1_spawn_point)

    # 自定义小车位置
    spawn_points = carla.Transform(
        carla.Location(x=400, y=-0.6, z=4.000000), carla.Rotation(pitch=0.000000, yaw=-180, roll=0.000000))
    vehicle1_spawn_point = spawn_points
    print(vehicle1_spawn_point)

    # 主车
    # vehicle_bp1 = blueprint_library.filter('vehicle')[0]
    # vehicle_bp1.set_attribute('color', '255,0,0')
    # 自定义小车
    vehicle_bp1 = blueprint_library.find('vehicle.simplecar.simplecar')
    vehicle1 = world.spawn_actor(vehicle_bp1, vehicle1_spawn_point)
    # 跟车
    # vehicle_bp2 = blueprint_library.filter('vehicle')[0]
    # vehicle_bp2.set_attribute('color', '0,0,255')
    # 自定义小车
    vehicle_bp2 = blueprint_library.find('vehicle.simplecar3.simplecar3')
    vehicle2_spawn_point = carla.Transform(vehicle1_spawn_point.location + carla.Location(x=10.0),
                                           carla.Rotation(pitch=0.000000, yaw=-180, roll=0.000000))
    vehicle2 = world.spawn_actor(vehicle_bp2, vehicle2_spawn_point)

    # 设置车辆的初始速度
    vehicle1.apply_control(carla.VehicleControl(throttle=0.5, steer=0, brake=0))  # 车1的初始速度为10 m/s
    vehicle2.apply_control(carla.VehicleControl(throttle=0, steer=0, brake=0))
    actor_list.append(vehicle1)
    actor_list.append(vehicle2)
    # # 给两个车设置自动驾驶
    # vehicle1.set_autopilot(True)
    # vehicle2.set_autopilot(True)

    # ======================================创建相机蓝图======================================
    camera_blueprint = world.get_blueprint_library().find('sensor.camera.rgb')
    camera_transform = carla.Transform(carla.Location(x=-5, z=4), carla.Rotation(pitch=-10))
    camera1 = world.spawn_actor(camera_blueprint, camera_transform, attach_to=vehicle1)
    camera2 = world.spawn_actor(camera_blueprint, camera_transform, attach_to=vehicle2)
    # camera.listen(lambda image: image.save_to_disk(os.path.join('_out', '%06d.png' % image.frame)))
    actor_list.append(camera1)
    actor_list.append(camera2)

    # ======================================定义跟车参数======================================
    desired_distance = 15.0  # 期望的跟车距离
    max_velocity = 1.0  # 最大速度 (m/s)
    max_speed = 7.0  # 最大速度 (m/s)

    while True:
        # 设置相机视角
        world.get_spectator().set_transform(camera2.get_transform())
        # 主车执行红绿灯
        hld(world, vehicle1, max_speed)
        # 后车执行跟车
        follow(vehicle1, vehicle2, max_speed, desired_distance)

        world.tick()

finally:
    client.apply_batch([carla.command.DestroyActor(x) for x in actor_list])
    print("All the actors have already been destroied !")
七、实现效果
跟车+红绿灯+roadRunner+有红灯停下效果 15m
