1.准备工作
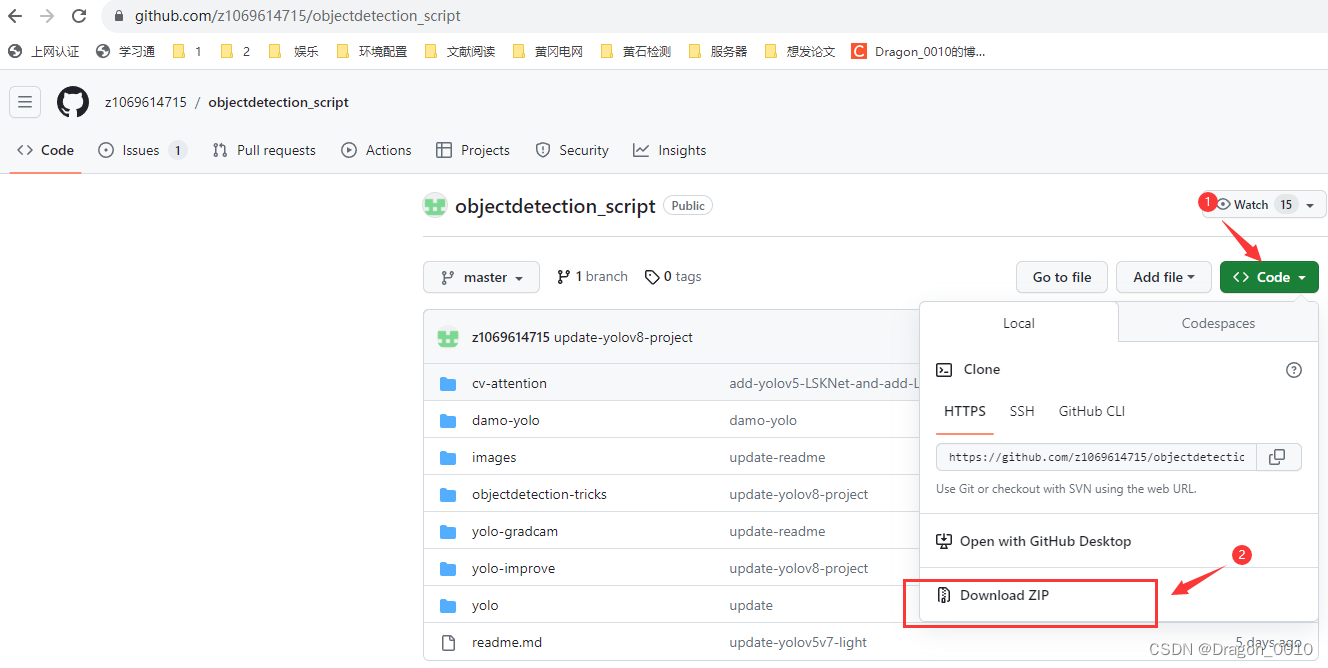
先给出13种注意力机制的下载地址:
https://github.com/z1069614715/objectdetection_script
2.加入注意力机制
1.以添加SimAM注意力机制为例(不需要接收通道数的注意力机制)
1.在models文件下新建py文件,取名叫SimAM.py

将以下代码复制到SimAM.py文件种
import torch
import torch.nn as nn


class SimAM(torch.nn.Module):

    # 不需要接收通道数输入
    def __init__(self, e_lambda=1e-4):
        super(SimAM, self).__init__()

        self.activaton = nn.Sigmoid()
        self.e_lambda = e_lambda

    def __repr__(self):
        s = self.__class__.__name__ + '('
        s += ('lambda=%f)' % self.e_lambda)
        return s

    @staticmethod
    def get_module_name():
        return "simam"

    def forward(self, x):
        b, c, h, w = x.size()

        n = w * h - 1

        x_minus_mu_square = (x - x.mean(dim=[2, 3], keepdim=True)).pow(2)
        y = x_minus_mu_square / (4 * (x_minus_mu_square.sum(dim=[2, 3], keepdim=True) / n + self.e_lambda)) + 0.5

        return x * self.activaton(y)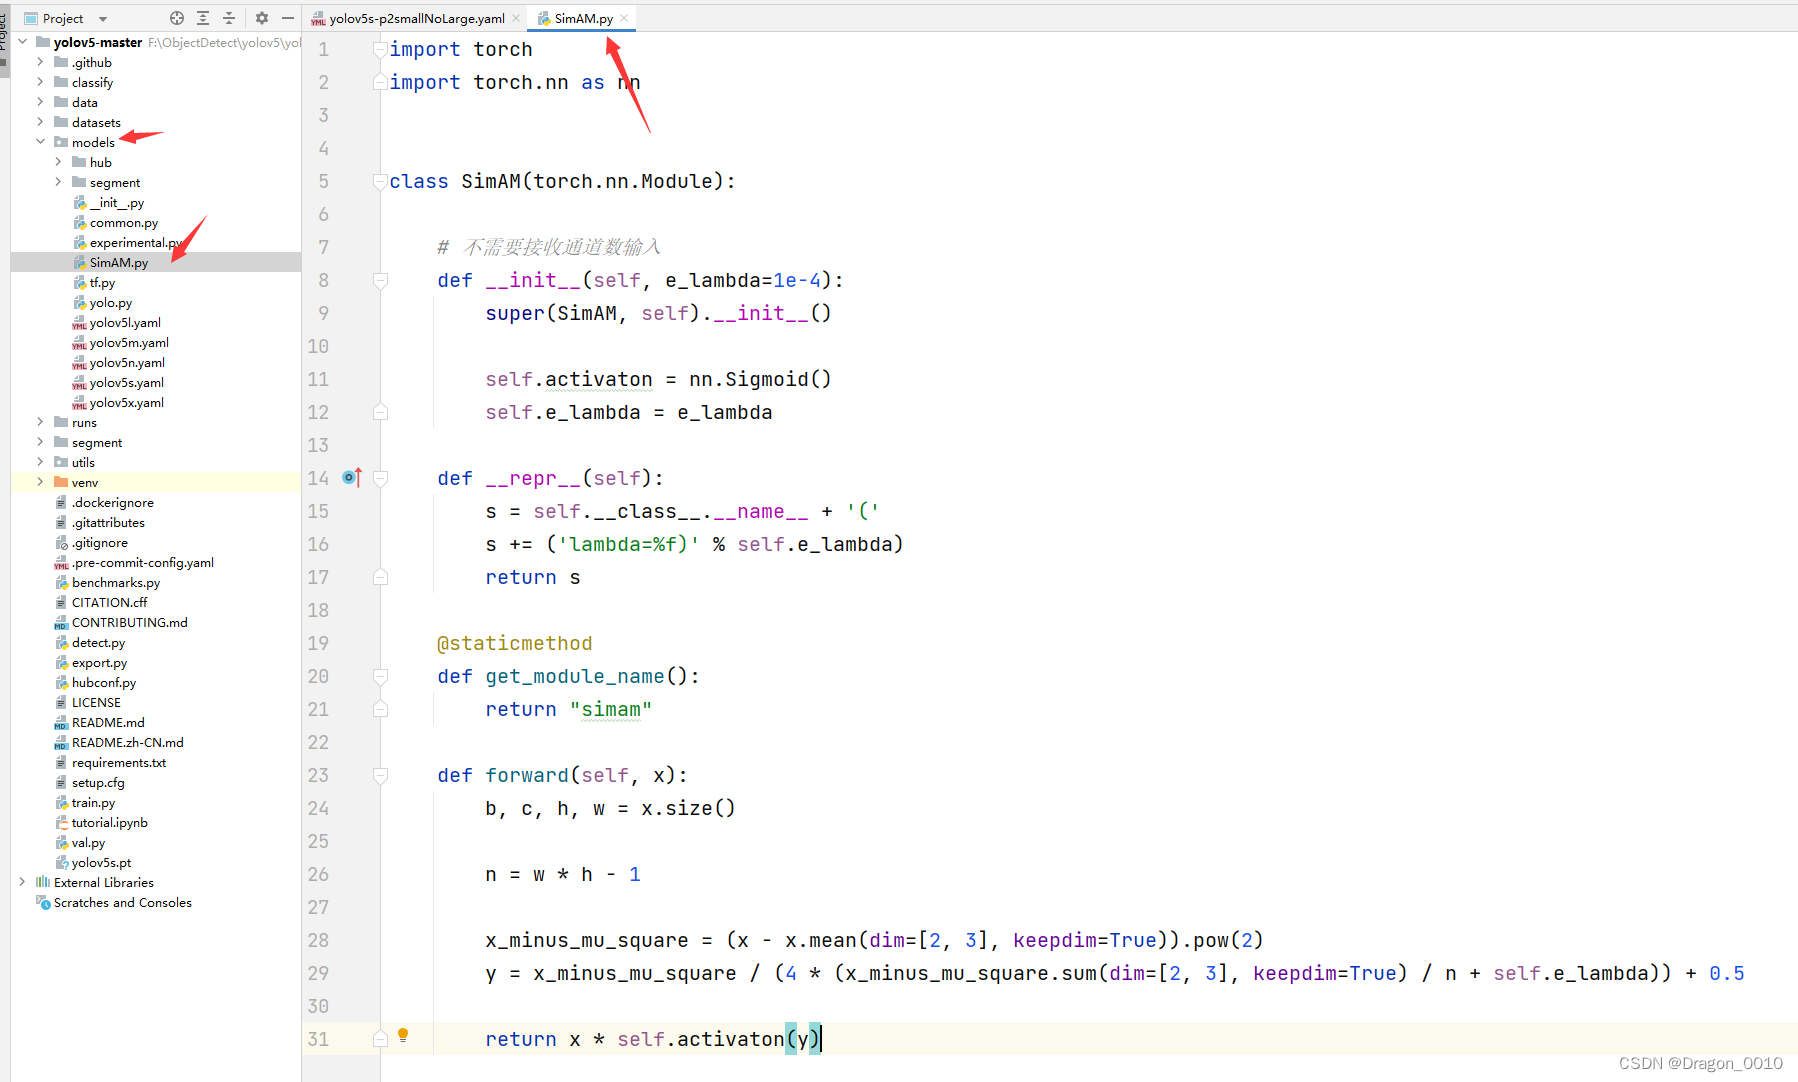
2.在yolo.py头部导入SimAM这个类

3.然后复制yolov5s.yaml到同级目录,取名为yolov5s-SimAM.yaml
在某一层添加注意力机制
[from,number,module,args]
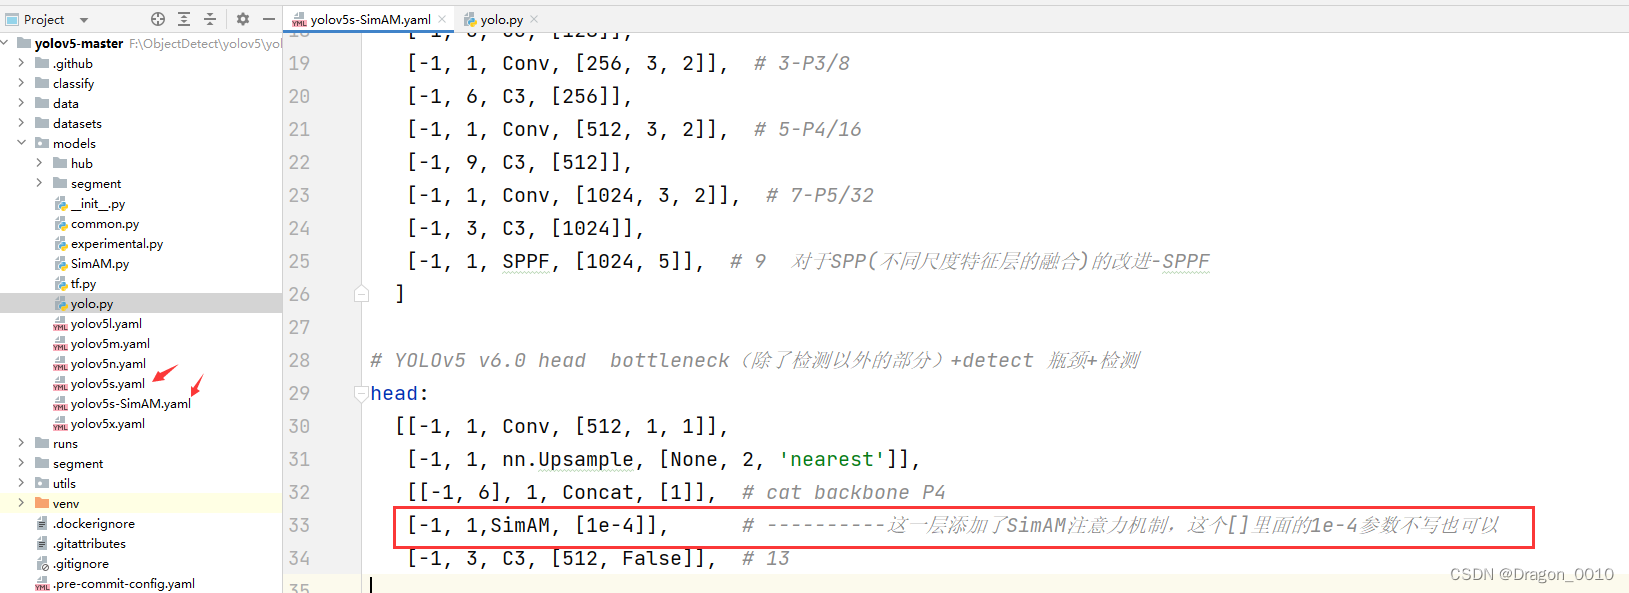
注意:!!!!!!!!!!!!!!!!!!!
添加完一层注意力机制之后,会对后面层数造成影响,记得在检测头那里要改层数

2.添加SE注意力机制(需要接收通道数的注意力机制)
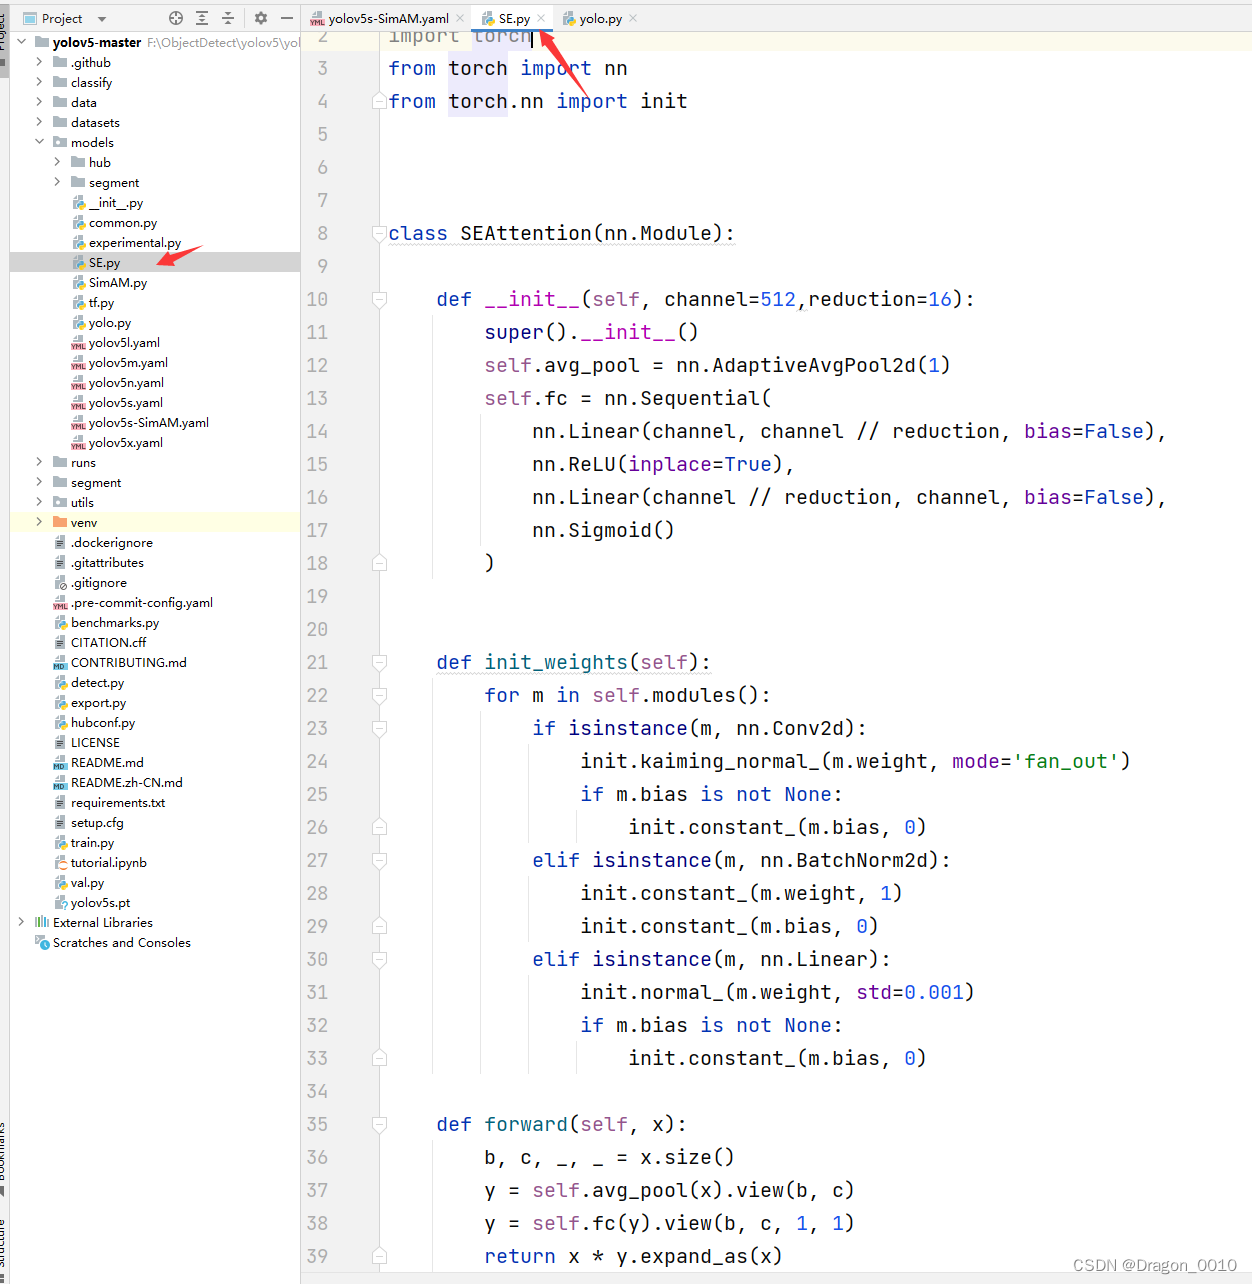
1.新建SE.py
import numpy as np
import torch
from torch import nn
from torch.nn import init


class SEAttention(nn.Module):

    def __init__(self, channel=512,reduction=16):
        super().__init__()
        self.avg_pool = nn.AdaptiveAvgPool2d(1)
        self.fc = nn.Sequential(
            nn.Linear(channel, channel // reduction, bias=False),
            nn.ReLU(inplace=True),
            nn.Linear(channel // reduction, channel, bias=False),
            nn.Sigmoid()
        )


    def init_weights(self):
        for m in self.modules():
            if isinstance(m, nn.Conv2d):
                init.kaiming_normal_(m.weight, mode='fan_out')
                if m.bias is not None:
                    init.constant_(m.bias, 0)
            elif isinstance(m, nn.BatchNorm2d):
                init.constant_(m.weight, 1)
                init.constant_(m.bias, 0)
            elif isinstance(m, nn.Linear):
                init.normal_(m.weight, std=0.001)
                if m.bias is not None:
                    init.constant_(m.bias, 0)

    def forward(self, x):
        b, c, _, _ = x.size()
        y = self.avg_pool(x).view(b, c)
        y = self.fc(y).view(b, c, 1, 1)
        return x * y.expand_as(x)
2.修改yolo.py

添加这两行代码
        elif m is SEAttention:
            args = [ch[f]]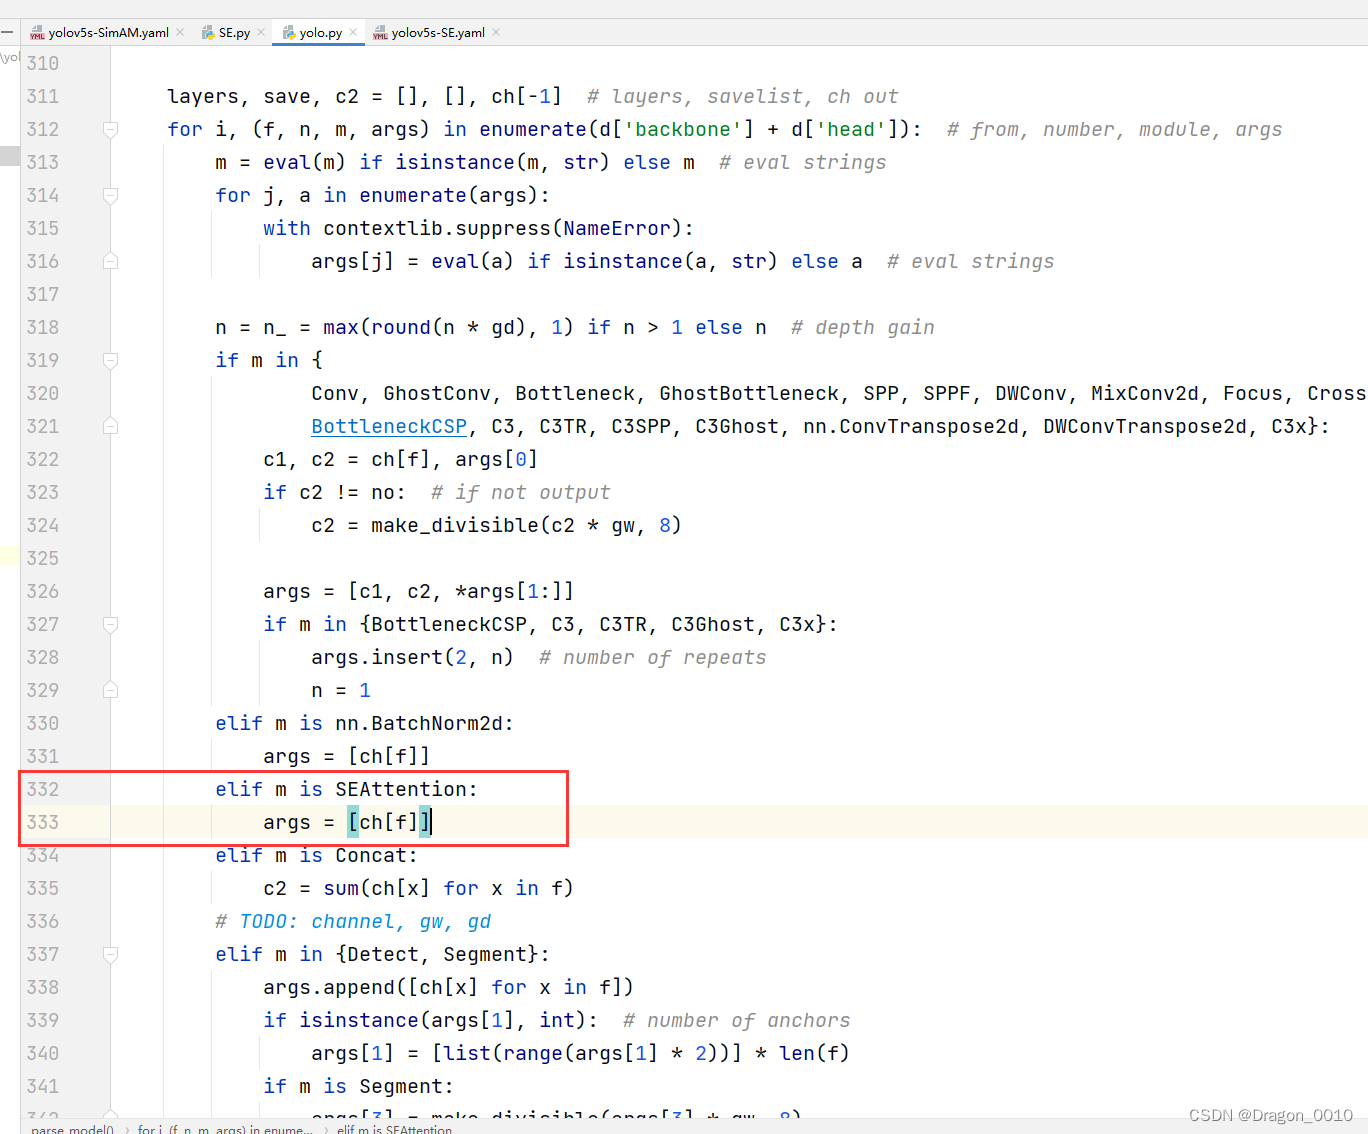
3.models下新建yolov5s-SE.yaml
# YOLOv5 🚀 by Ultralytics, AGPL-3.0 license

# Parameters
nc: 80  # number of classes  coco数据集的种类
depth_multiple: 0.33  # model depth multiple  用来控制模型的大小  与每一层的number相乘再取整
width_multiple: 0.50  # layer channel multiple  与每一层的channel相乘 例如64*0.5、128*0.5
# anchors指的是我们使用的anchor的大小,anchor分为3组,每组3个
anchors:
  - [10,13, 16,30, 33,23]  # P3/8 第一组anchor作用在feature,feature大小是原图的1/8的stride大小。anchor比较小。因为是浅层的特征,感受野比较小。
  - [30,61, 62,45, 59,119]  # P4/16
  - [116,90, 156,198, 373,326]  # P5/32

# YOLOv5 v6.0 backbone
backbone:
  # [from, number, module, args]  args:参数 arg是argument(参数)的缩写,是每一层输出的一个参数
  [[-1, 1, Conv, [64, 6, 2, 2]],  # 0-P1/2  arguments 输出通道数为64(也是卷积核的个数),Conv卷积核的大小为6*6 stride=2 padding=2 此时特征图大小为原图的1/2
   [-1, 1, Conv, [128, 3, 2]],  # 1-P2/4
   [-1, 3, C3, [128]],
   [-1, 1, Conv, [256, 3, 2]],  # 3-P3/8
   [-1, 6, C3, [256]],
   [-1, 1, Conv, [512, 3, 2]],  # 5-P4/16
   [-1, 9, C3, [512]],
   [-1, 1, Conv, [1024, 3, 2]],  # 7-P5/32
   [-1, 3, C3, [1024]],
   [-1, 1, SPPF, [1024, 5]],  # 9  对于SPP(不同尺度特征层的融合)的改进-SPPF
  ]

# YOLOv5 v6.0 head  bottleneck(除了检测以外的部分)+detect 瓶颈+检测
head:
  [[-1, 1, Conv, [512, 1, 1]],
   [-1, 1, nn.Upsample, [None, 2, 'nearest']],
   [[-1, 6], 1, Concat, [1]],  # cat backbone P4
   [-1, 1,SEAttention, [16]],      # ----------这一层添加了SEAttention注意力机制,此注意力的通道数512也不用写在这里,[]里面写除了通道数以外的其他参数:reduction=16
   [-1, 3, C3, [512, False]],  # 14 -------从原来的13层改成14层

   [-1, 1, Conv, [256, 1, 1]],
   [-1, 1, nn.Upsample, [None, 2, 'nearest']],
   [[-1, 4], 1, Concat, [1]],  # cat backbone P3
   [-1, 3, C3, [256, False]],  # 17 (P3/8-small)

   [-1, 1, Conv, [256, 3, 2]],
   [[-1, 15], 1, Concat, [1]],  # cat head P4   ------这里从原来的14改成15
   [-1, 3, C3, [512, False]],  # 20 (P4/16-medium)

   [-1, 1, Conv, [512, 3, 2]],
   [[-1, 10], 1, Concat, [1]],  # cat head P5  ------注意力机制加在10层之后,所以不会对第10层有影响
   [-1, 3, C3, [1024, False]],  # 23 (P5/32-large)

   [[18, 21, 24], 1, Detect, [nc, anchors]],  # Detect(P3, P4, P5) ----从原来的17,20,23改成18,21,24
  ]
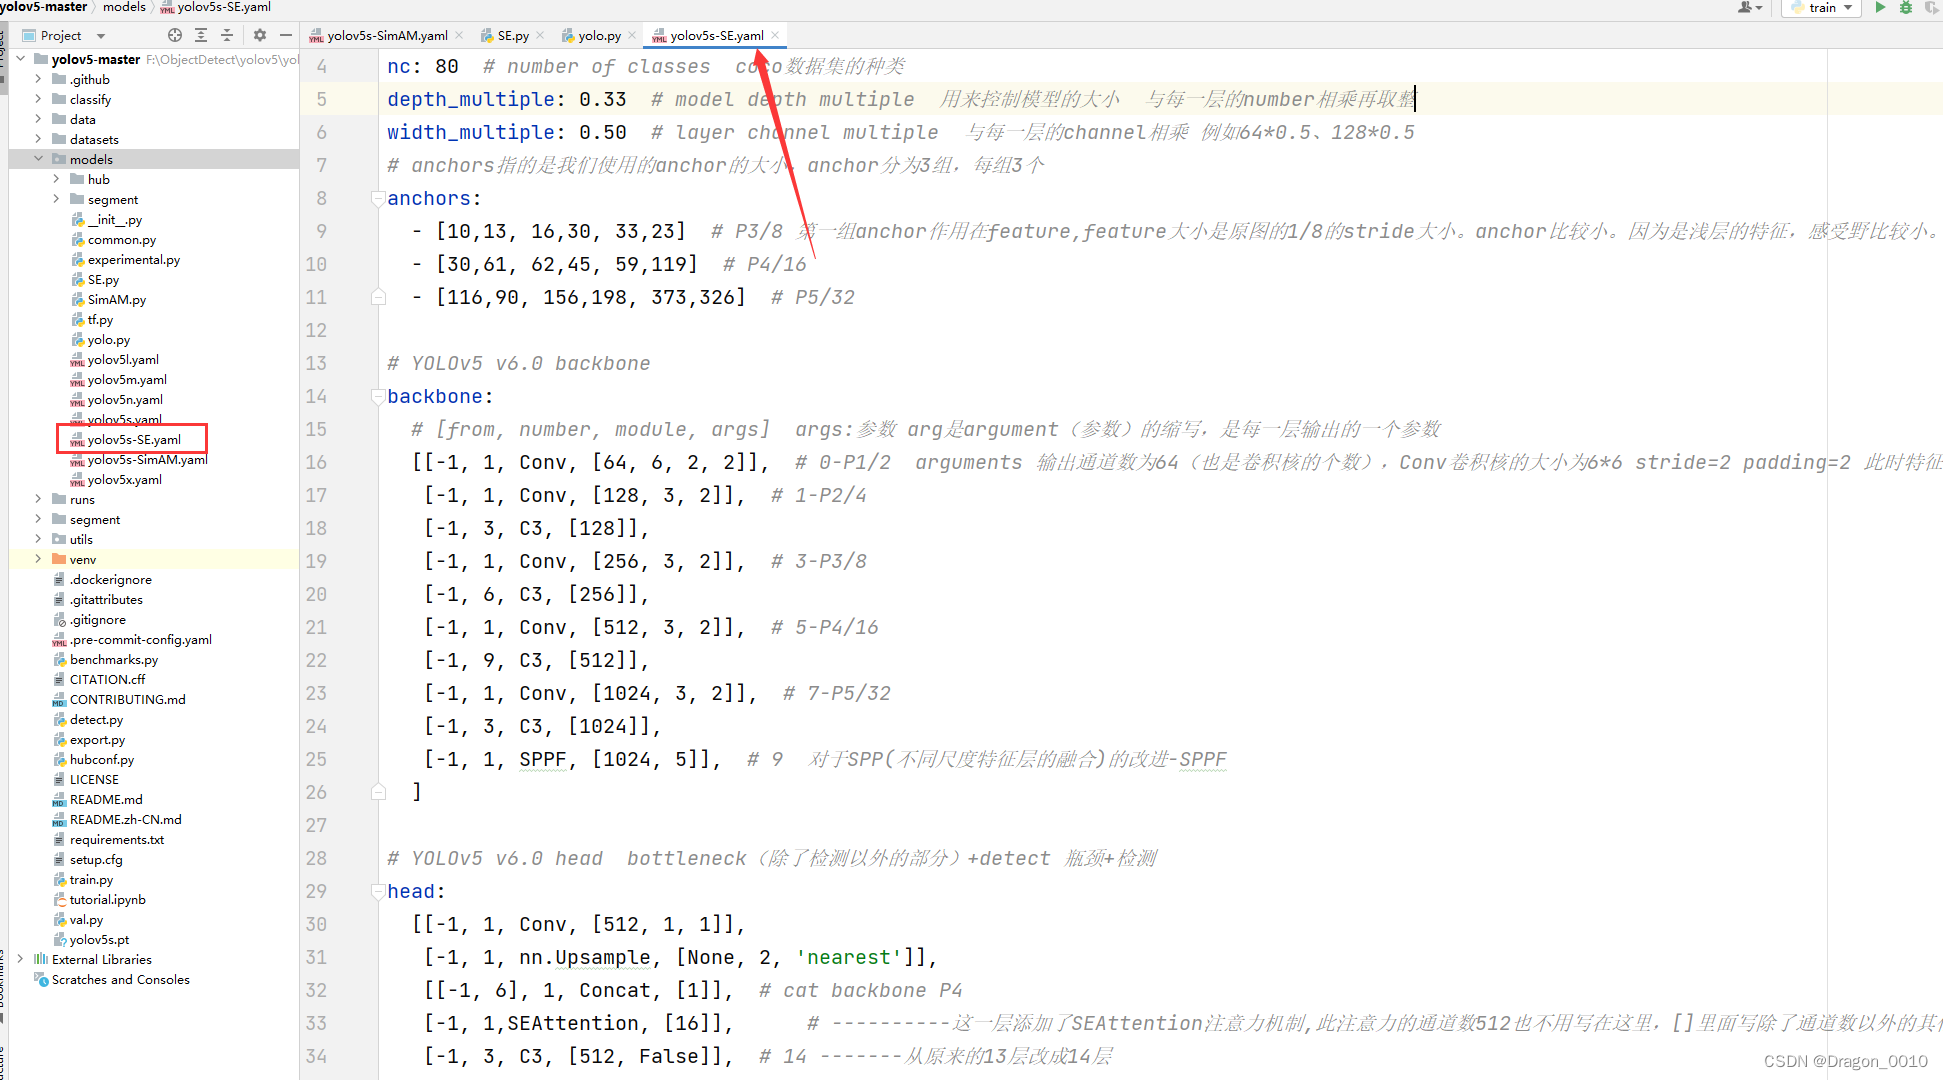
注意:添加了SEAttention注意力机制,此注意力的通道数512也不用写在这里,[]里面写除了通道数以外的其他参数:reduction=16
