FastChat是一个用于训练、提供服务和评估基于大型语言模型的聊天机器人的开放平台。其核心特点包括:
- 最先进模型(例如 Vicuna)的权重、训练代码和评估代码。
- 一个分布式的多模型提供服务系统,配备 Web 用户界面和与 OpenAI 兼容的 RESTful API。
本篇博客介绍如何在aws instance上通过FastChat部署vicuna大模型。首先需要在aws申请带GPU的instance,以及安装CUDA driver,这部分内容,请参考上一篇博客。
配置好CUDA的driver后,就可以按照FastChat官方给出的安装步骤开始部署大模型了。
下载FastChat代码
git clone https://github.com/lm-sys/FastChat.git
cd FastChat
安装相关依赖包
pip3 install -e ".[model_worker,webui]"
下载大模型参数以及启动大模型
python3 -m fastchat.serve.cli --model-path lmsys/vicuna-7b-v1.5
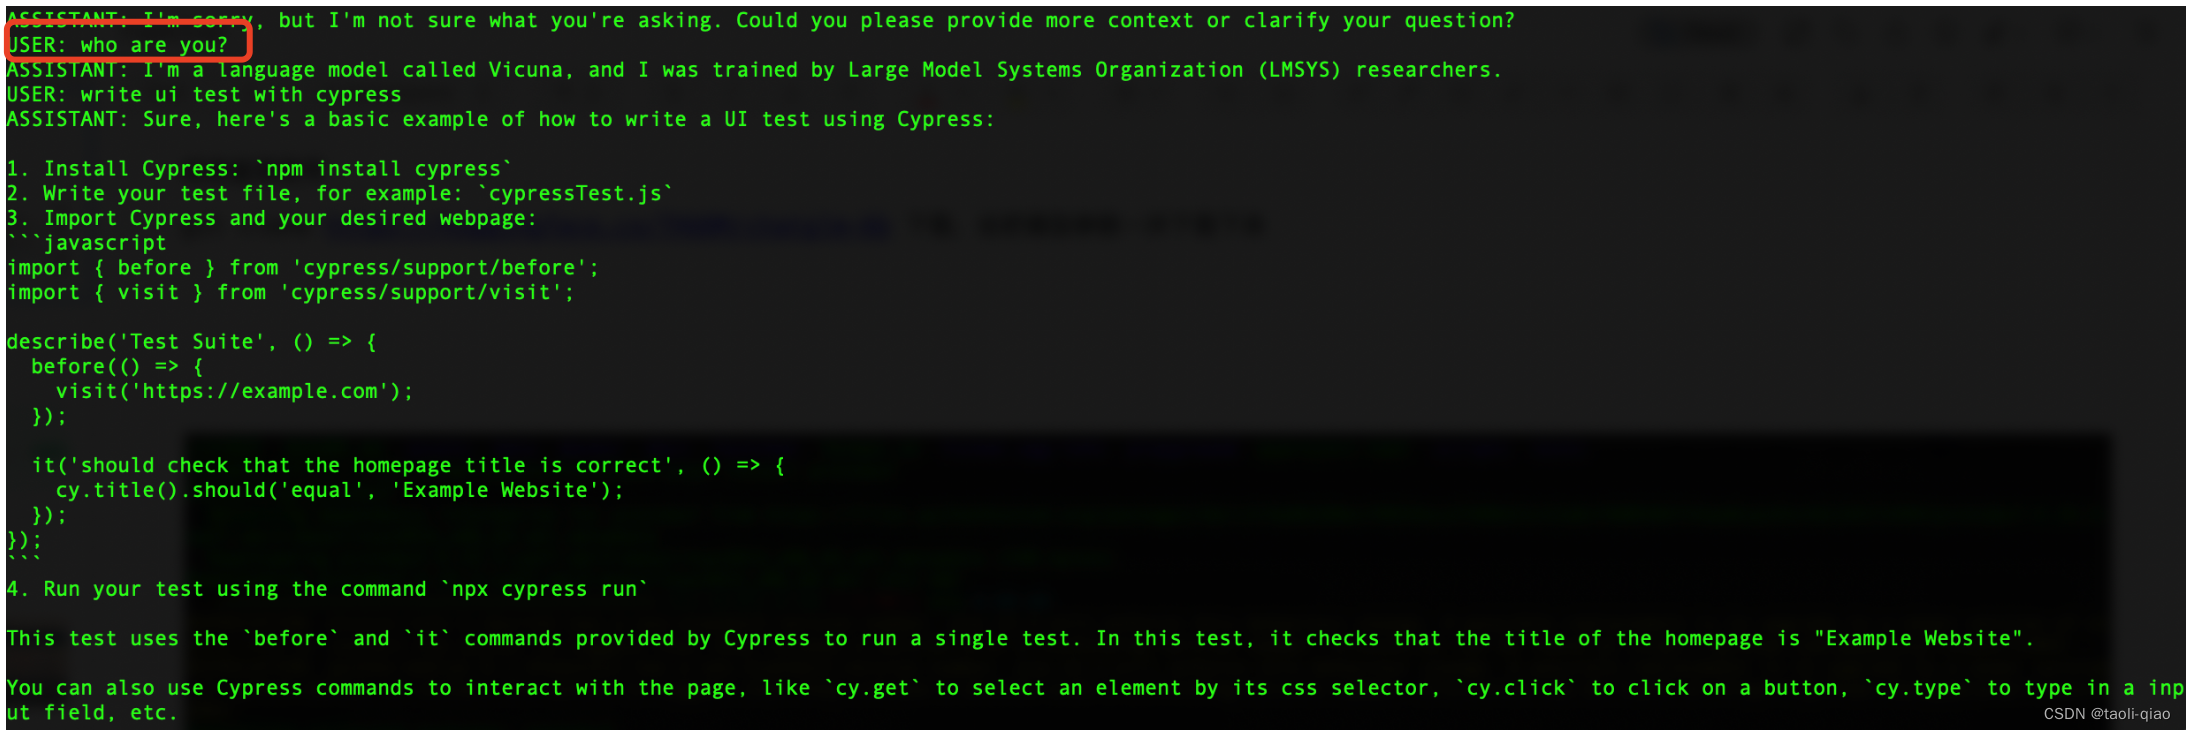
如果在启动过程中,提示缺少protobuf包的错误,那么执行命令安装protobuf。 安装命令:pip install protobuf。如果下载启动模型过程中无问题,会看到下面的截图信息,可以看到执行上面的命令过程中,下载了大模型参数文件,也就是xxx.bin文件,下载完成后,启动了大模型。
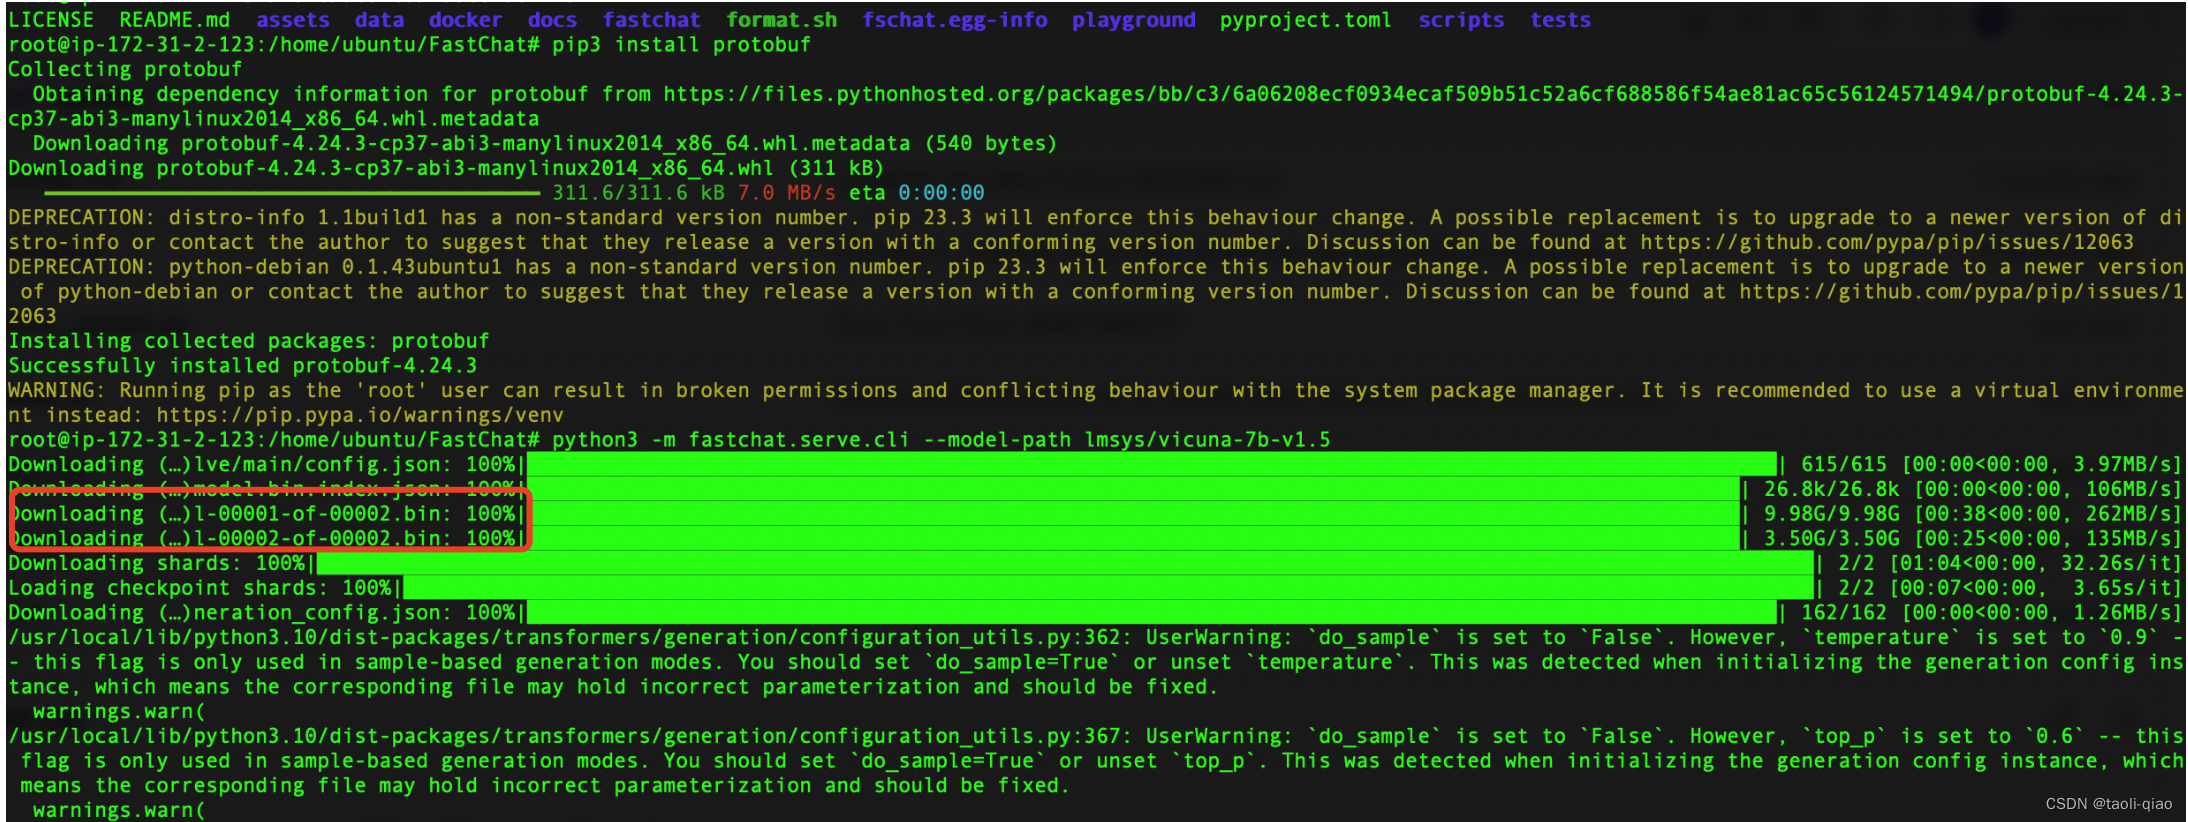
大模型启动成功后,在USER:字段后面输入信息,就会得到大模型返回的内容,具体如下图所示:ASSISTANT字段后面的内容就是大模型返回的内容。
除了直接通过命令行中输入信息与大模型交互外,FastChat还支持提供与OpenAI 兼容的 RESTful API,要启动API只需要执行下面三行命令即可:
#Launch controller
pip3 install -e ".[model_worker,webui]"

#Launch model work
python3 -m fastchat.serve.model_worker --model-path lmsys/vicuna-7b-v1.5

#Launch the RESTful API server
python3 -m fastchat.serve.openai_api_server --host localhost --port 8000
执行完上面的命令,就可以通过API调用的方式与部署的大模型进行交互了。以下图为例,输入curl命令,可以看到返回了内容。且这个API是完全兼容了OpenAI api。
curl http://localhost:8000/v1/chat/completions \
  -H "Content-Type: application/json" \
  -d '{
    "model": "vicuna-7b-v1.5",
    "messages": [{"role": "user", "content": "Hello! What is your name?"}]
  }'
除了通过接口与大模型直接对话,还可以通过接口获取输入信息的向量信息。
curl http://localhost:8000/v1/embeddings \
  -H "Content-Type: application/json" \
  -d '{
    "model": "vicuna-7b-v1.5",
    "input": "Hello world!"
  }'
返回的向量信息如下图所示:

除了通过curl命令调用接口外,还支持通过编程方式调用api。安装openai的包(pip install --upgrade openai),编写调用接口的代码。
import openai
# to get proper authentication, make sure to use a valid key that's listed in
# the --api-keys flag. if no flag value is provided, the `api_key` will be ignored.
openai.api_key = "EMPTY"
openai.api_base = "http://localhost:8000/v1"

model = "vicuna-7b-v1.5"
prompt = "Once upon a time"

# create a completion
completion = openai.Completion.create(model=model, prompt=prompt, max_tokens=64)
# print the completion
print(prompt + completion.choices[0].text)

# create a chat completion
completion = openai.ChatCompletion.create(
  model=model,
  messages=[{"role": "user", "content": "Hello! What is your name?"}]
)
# print the completion
print(completion.choices[0].message.content)
执行上面的python脚本,可以看到打印了大模型返回的信息,结果如下图所示:

上面只介绍了部署vicuna大模型,以及如何启动大模型的api。实际上,FastChat支持部署多个大模型,例如,国内的ChatGLM大模型以及国外的很多开源大模型。具体可见官网信息。在部署过程中只需要修改--model-path=xx即可。例如:如果要通过fastchat部署国内的ChatGLM大模型,部署命令是: “python3 -m fastchat.serve.cli --model-path=THUDM/chatglm-6b”,在调用api的时候,接口参数model的值替换成自己部署的大模型名称即可,例如ChatGLM模型,调用的时候接口参数的mode=chatglm-6b.
以上就是对如果通过FastChat部署开源大模型的过程介绍。
![[JAVA] byte与int的类型转换案例剖析](https://img-blog.csdnimg.cn/308c58e3e0b046bdabfa36fab4f1011e.png)
