文章目录
- 一、代码复现
- 1.1 环境搭建
- 1.2 数据集下载
- 1.3 Evaluate a model
- 1.4 Visualize Predictions
- 1.5 Visualize Input/Output Data
- 1.6 Train a model
- 二、代码理解
- main.py
- explore.py
- data.py
- models.py
- tools.py
- train.py
原论文:https://arxiv.org/pdf/2008.05711v1.pdf
论文解读:论文精读《LSS: Lift, Splat, Shoot: Encoding Images from Arbitrary Camera Rigs by Implicitly Unprojecting》
代码: https://github.com/nv-tlabs/lift-splat-shoot
一、代码复现
1.1 环境搭建
使用ubuntu从零配置环境参考:此文
- 使用anaconda创建虚拟环境
conda create -n lssEnv python=3.8
conda activate lssEnv
- 安装torch
先从官网上下载轮子,然后直接安装
pip install torch-1.9.0+cu102-cp38-cp38-linux_x86_64.whl
pip install torchvision-0.10.0+cu102-cp38-cp38-linux_x86_64.whl
- 安装工具
pip install nuscenes-devkit tensorboardX efficientnet_pytorch==0.7.0
- 安装tensorflow (方便在训练过程中使用TensorBoard)
pip install tensorflow-gpu==2.2.0
1.2 数据集下载
NuSences 数据集解析以及 nuScenes devkit 的使用
- 在官网上下载mini版本的数据集(Nuscenes的官网下载链接 )

- 解压后有四个文件夹:
maps、samples、sweeps、v1.0-mini, 并将根目录下的v1.0-mini改成mini

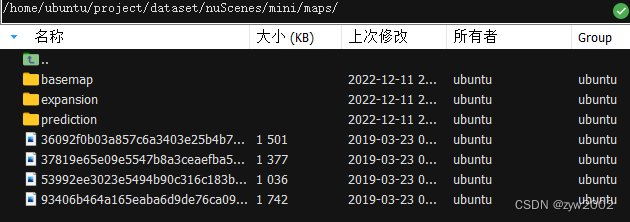
- 下载最新的Map expansion

- 解压到maps文件下
1.3 Evaluate a model
- 下载项目文件
git clone https://github.com/nv-tlabs/lift-splat-shoot.git
- 下载权重文件
wget https://github.com/lukemelas/EfficientNet-PyTorch/releases/download/1.0/efficientnet-b0-355c32eb.pth
- 运行
main.py文件中的eval_model_iou对模型进行评估。
其中,因为我们采用的是mini版本的 nuScenes,所以 采用mini参数。反之,如果我们采用的是Trianval版本的 nuScenes,则采用Trianval参数。
modelf选择刚才下载的权重文件放置的路径
dataroot选择我们下载mini数据集的路径
gpuid如果是默认一块则为0
python main.py eval_model_iou mini --modelf=./efficientnet-b0-355c32eb.pth --dataroot=../dataset/nuScenes --gpuid=0
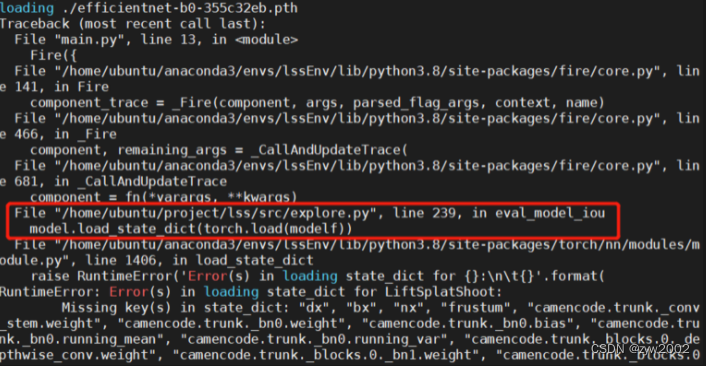
- 这时会报错 :
- 解决方案
把explore.py文件下的第239行中,选择不加载模型状态
model.load_state_dict(torch.load(modelf), False)
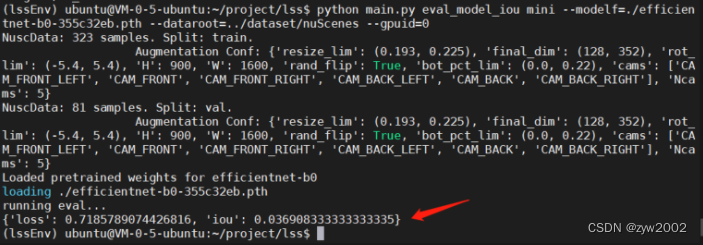
- 然后,运行成功
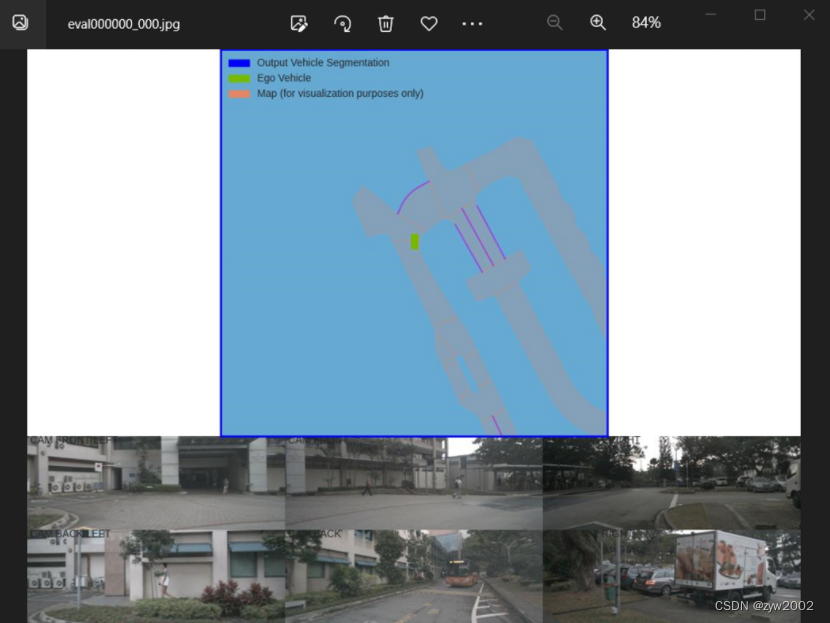
1.4 Visualize Predictions
- 运行
main.py文件中的viz_model_preds对预测结果进行可视化。
python main.py viz_model_preds mini --modelf=./efficientnet-b0-355c32eb.pth --dataroot=../dataset/nuScenes --map_folder=../dataset/nuScenes/mini --gpuid=0
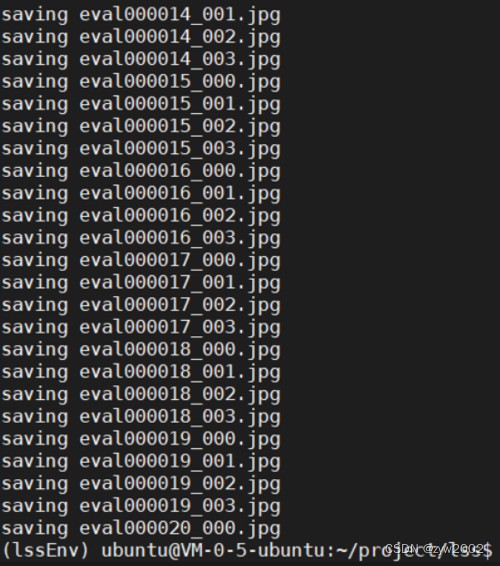
- 可视化结果
1.5 Visualize Input/Output Data
- 运行lidar_check, 检查以确保正确地解析了extrinsics/intrinsics
python main.py lidar_check mini --dataroot=../dataset/nuScenes --viz_train=False
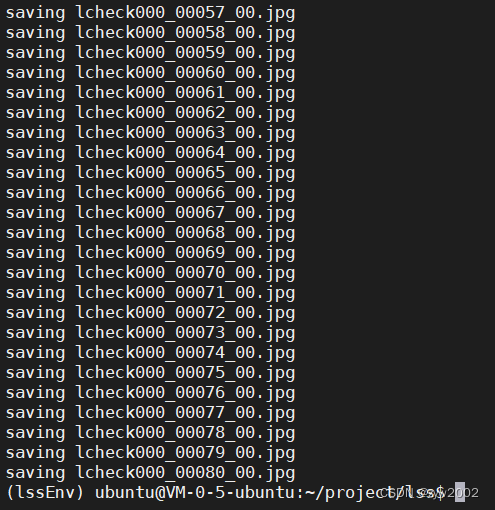
- 可视化结果

1.6 Train a model
-
在项目文件夹下新建一个
runs的目录,用来存放训练时的日志信息。 -
执行下面的命令开始训练
python main.py train mini --dataroot=../dataset/nuScenes --logdir=./runs --gpuid=0
tensorboard --logdir=./runs --bind_all
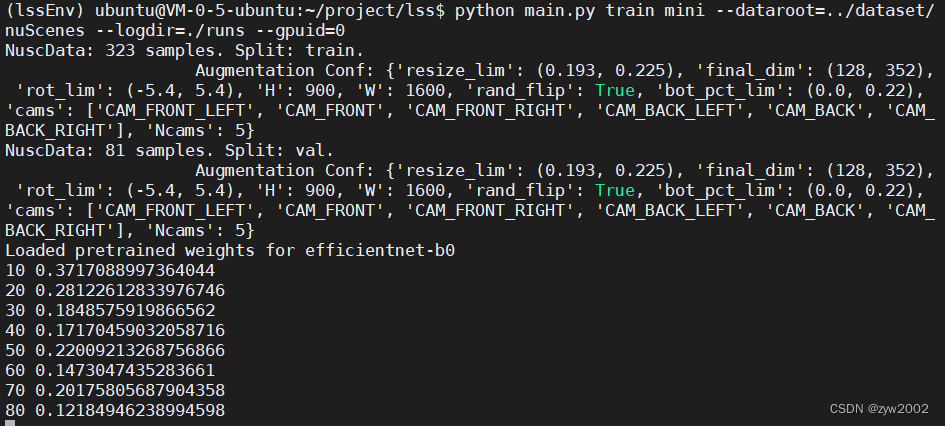
- 在服务器上打开tensorboard。 其中
log_dir是网络训练时自己指定的日志目录, 比如:./runs
tensorboard --logdir=./runs --host=127.0.0.1

-
利用MobaXterm配置隧道

然后新建一个隧道,并进行配置。
1) 选择【本地端口转发】
2)【我的电脑】选择6006端口
3)【ssh服务器】和我们通过SSH连接远程服务器的设置是一样的,分别填写相应的IP地址,用户名,端口号(通常为22)即可
4)【远程服务器】远程服务器 填localhost, 远程端口填6006
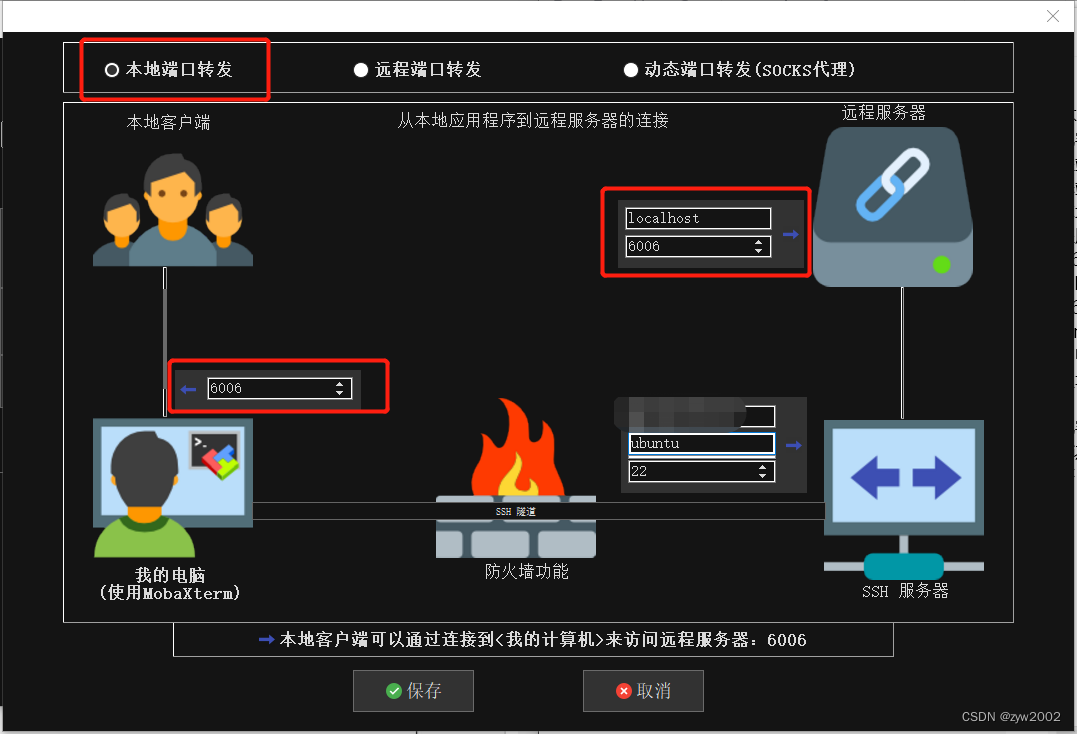
然后启动隧道
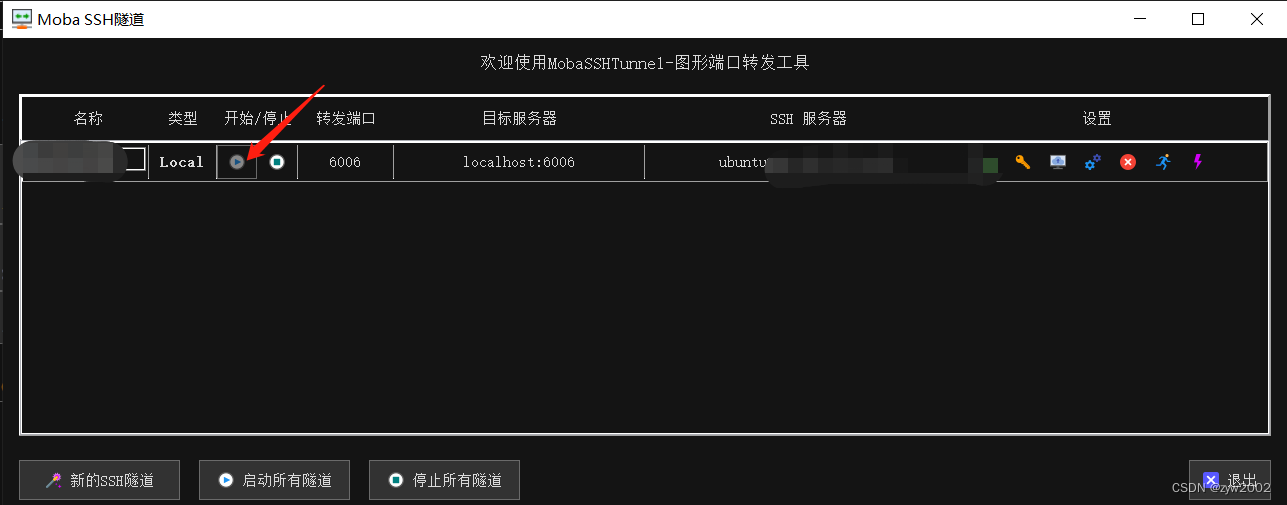
-
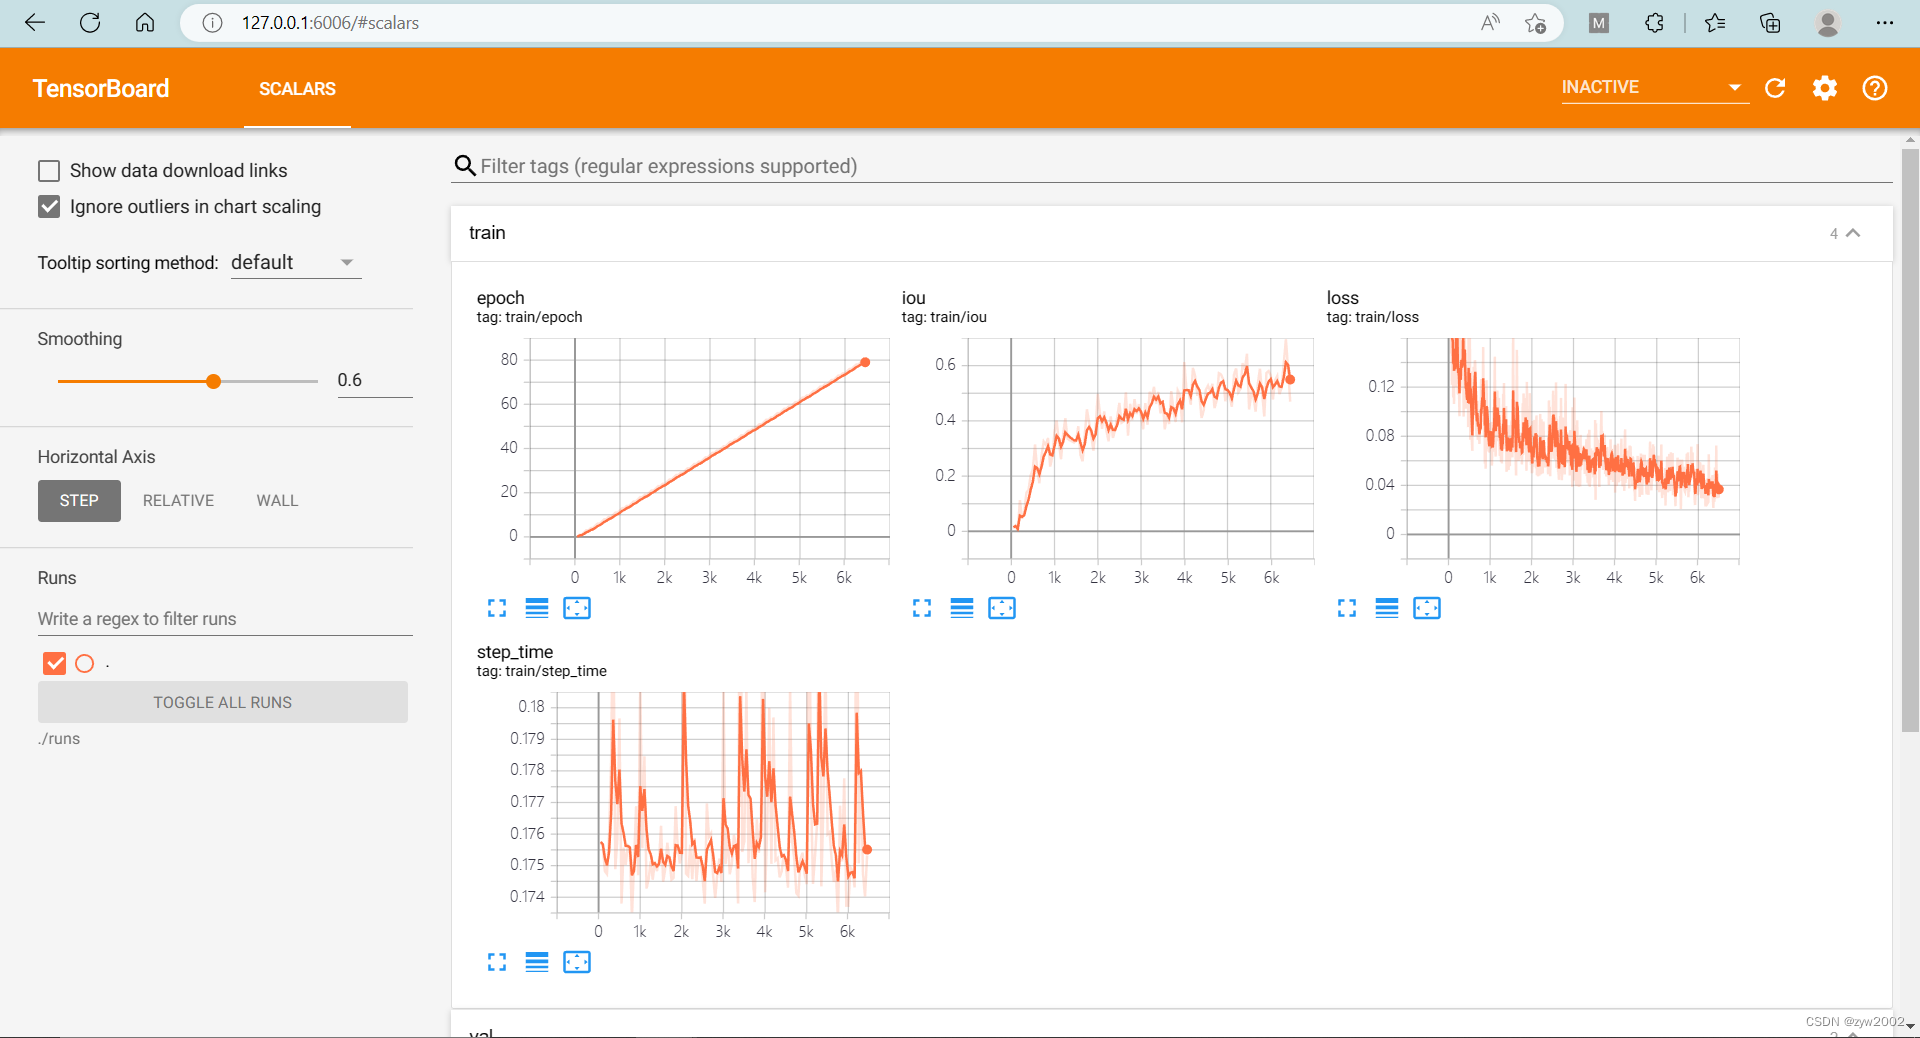
在本地浏览器上输入
127.0.0.1:6006, 可以看到tensorboard面板
二、代码理解
我们按照代码的执行逻辑来拆开理解。
main.py
main.py文件是函数的执行入口。
Fire (python Fire 的使用指南)通过使用字典格式,选择函数暴露给命令行。
当命令行参数传入eval_model_iou ,程序就开始执行src/explore.py文件下的eval_model_iou 函数。
if __name__ == '__main__':
    Fire({
        'lidar_check': src.explore.lidar_check,
        'cumsum_check': src.explore.cumsum_check,

        'train': src.train.train,
        'eval_model_iou': src.explore.eval_model_iou,
        'viz_model_preds': src.explore.viz_model_preds,
    })
explore.py
我们来看看explore.py中的eval_model_iou函数。
函数参数:
先来看看这个函数需要传入哪些参数~
version, # 数据集版本: mini/trival
modelf, # 模型文件路径
dataroot='/data/nuscenes',# 数据集路径
gpuid=1,# gpu的序号

H=900, W=1600, # 图片的宽和高
resize_lim=(0.193, 0.225), # resize 的范围
final_dim=(128, 352), # 数据预处理后最终的图片大小
bot_pct_lim=(0.0, 0.22), # 裁剪图片时,图像底部裁掉部分所占的比例范围
rot_lim=(-5.4, 5.4), # 训练时旋转图片的角度范围
rand_flip=True, # 是否随机翻转
然后定义了两个字典grid_conf 和 data_aug_con
    grid_conf = { # 网格配置
        'xbound': xbound,
        'ybound': ybound,
        'zbound': zbound,
        'dbound': dbound,
    }
    data_aug_conf = { # 数据增强配置
                    'resize_lim': resize_lim,
                    'final_dim': final_dim,
                    'rot_lim': rot_lim,
                    'H': H, 'W': W,
                    'rand_flip': rand_flip,
                    'bot_pct_lim': bot_pct_lim,
                    'cams': ['CAM_FRONT_LEFT', 'CAM_FRONT', 'CAM_FRONT_RIGHT',
                             'CAM_BACK_LEFT', 'CAM_BACK', 'CAM_BACK_RIGHT'],
                    'Ncams': 5, # 读取数据时读取的摄像机的数目-1
                }
数据的加载、训练和评估:
- 调用
data.py文件中的compile_data生成训练集和验证集的数据加载器trainloader和valloader。
trainloader, valloader = compile_data(version, dataroot, data_aug_conf=data_aug_conf,
                                          grid_conf=grid_conf, bsz=bsz, nworkers=nworkers,
                                          parser_name='segmentationdata') # 测试集和验证集集的数据加载器
- 调用
model.py文件中的compile_model构造LSS模型
model = compile_model(grid_conf, data_aug_conf, outC=1) # 获取模型
- 把模型迁移到GPU上
     device = torch.device('cpu') if gpuid < 0 else torch.device(f'cuda:{gpuid}') # 如果不能使用gpu(cuda),则使用cpu
     model.to(device) # 把模型迁移到device设备上
- 使用在
tool.py文件中定义SimpleLoss的计算损失, 然后开启评估模型,最后调用get_val_info对模型进行评估
   loss_fn = SimpleLoss(1.0).cuda(gpuid) # 计算损失
    model.eval() # 开启评估模式
    val_info = get_val_info(model, valloader, loss_fn, device) # 推理并打印输出loss和iou
完整的注释如下:
def eval_model_iou(version, # 数据集版本: mini/trival
                modelf, # 模型文件路径
                dataroot='/data/nuscenes',# 数据集路径
                gpuid=1,# gpu的序号
                H=900, W=1600, # 图片的宽和高
                resize_lim=(0.193, 0.225), # resize 的范围
                final_dim=(128, 352), # 数据预处理后最终的图片大小
                bot_pct_lim=(0.0, 0.22), # 裁剪图片时,图像底部裁掉部分所占的比例范围
                rot_lim=(-5.4, 5.4), # 训练时旋转图片的角度范围
                rand_flip=True, # 是否随机翻转

                # 分别显示x,y,z,d方向的范围并划分网格  [下边界,上边界,网格间距]
                xbound=[-50.0, 50.0, 0.5],
                ybound=[-50.0, 50.0, 0.5],
                zbound=[-10.0, 10.0, 20.0],
                dbound=[4.0, 45.0, 1.0],

                bsz=4,# bachsize的大小
                nworkers=10, # 线程数
                ):
    grid_conf = { # 网格配置
        'xbound': xbound,
        'ybound': ybound,
        'zbound': zbound,
        'dbound': dbound,
    }
    data_aug_conf = { # 数据增强配置
                    'resize_lim': resize_lim,
                    'final_dim': final_dim,
                    'rot_lim': rot_lim,
                    'H': H, 'W': W,
                    'rand_flip': rand_flip,
                    'bot_pct_lim': bot_pct_lim,
                    'cams': ['CAM_FRONT_LEFT', 'CAM_FRONT', 'CAM_FRONT_RIGHT',
                             'CAM_BACK_LEFT', 'CAM_BACK', 'CAM_BACK_RIGHT'],
                    'Ncams': 5, # 读取数据时读取的摄像机的数目-1
                }
    trainloader, valloader = compile_data(version, dataroot, data_aug_conf=data_aug_conf,
                                          grid_conf=grid_conf, bsz=bsz, nworkers=nworkers,
                                          parser_name='segmentationdata') # 测试集和验证集集的数据加载器

    device = torch.device('cpu') if gpuid < 0 else torch.device(f'cuda:{gpuid}') # 如果不能使用gpu(cuda),则使用cpu
    model = compile_model(grid_conf, data_aug_conf, outC=1) # 获取模型
    print('loading', modelf)
    model.load_state_dict(torch.load(modelf),False) # 加载状态字典
    model.to(device) # 把模型迁移到device设备上

    loss_fn = SimpleLoss(1.0).cuda(gpuid) # 计算损失

    model.eval() # 开启评估模式
    val_info = get_val_info(model, valloader, loss_fn, device) # 推理并打印输出loss和iou
    print(val_info)
data.py
explore.py 中调用了compile_data函数。
compile_data 函数
- 首先是调用
nuscenes.nuscenes.NuScenes库构建了一个nusc的数据集 - 然后把
nusc作为参数传入parser()中构建数据解析器traindata和valdata。 - 其中
parser根据输入的参数parser_name有两种选择,一个是VizData,一个是SegmentationData(这两个都是继承自定义的NuscData的Dataset类,我们下面会详细介绍)
然后traindata和valdata再把这两个参数传入torch.utils.data.DataLoader构建了训练集和测试集的数据加载器,并返回。
def compile_data(version, dataroot, data_aug_conf, grid_conf, bsz,
                 nworkers, parser_name):
    nusc = NuScenes(version='v1.0-{}'.format(version),
                    dataroot=os.path.join(dataroot, version),
                    verbose=False) # 加载ncscenes 数据
    parser = {
        'vizdata': VizData,
        'segmentationdata': SegmentationData,
    }[parser_name]   # 根据传入的参数选择数据解析器
    traindata = parser(nusc, is_train=True, data_aug_conf=data_aug_conf,
                         grid_conf=grid_conf) # 训练数据集
    valdata = parser(nusc, is_train=False, data_aug_conf=data_aug_conf,
                       grid_conf=grid_conf) # 验证数据集
    # 训练数据加载器
    trainloader = torch.utils.data.DataLoader(traindata, batch_size=bsz,
                                              shuffle=True,
                                              num_workers=nworkers,
                                              drop_last=True,
                                              worker_init_fn=worker_rnd_init) # 给每个线程设置随机的种子
    # 验证数据加载器
    valloader = torch.utils.data.DataLoader(valdata, batch_size=bsz,
                                            shuffle=False,
                                            num_workers=nworkers)

    return trainloader, valloader
worker_rnd_init获取随机种子(被compile_data中的Dataloader函数调用)
def worker_rnd_init(x):
    np.random.seed(13 + x) # x是线程id,获取随机种子
NuscData 类
- 初始化
    def __init__(self, nusc, is_train, data_aug_conf, grid_conf):
        self.nusc = nusc
        self.is_train = is_train # 是否为训练集
        self.data_aug_conf = data_aug_conf # 数据增强配置
        self.grid_conf = grid_conf # 网格配置

        self.scenes = self.get_scenes()  # 得到scene名字的列表list: [scene-0061, scene-0103,...]
        self.ixes = self.prepro() # 得到属于self.scenes的所有sample
        '''
                xbound=[-50.0, 50.0, 0.5],
                ybound=[-50.0, 50.0, 0.5],
                zbound=[-10.0, 10.0, 20.0],
                dbound=[4.0, 45.0, 1.0],
        '''
        dx, bx, nx = gen_dx_bx(grid_conf['xbound'], grid_conf['ybound'], grid_conf['zbound']) # toos.py文件下定义的函数,用来划分网格
        self.dx, self.bx, self.nx = dx.numpy(), bx.numpy(), nx.numpy() # 转换成numpy

        self.fix_nuscenes_formatting()

        print(self)
fix_nuscenes_formatting()调整ncscenes数据格式 (被类初始化函数调用)
    def fix_nuscenes_formatting(self): # 调整ncscenes数据格式
        """If nuscenes is stored with trainval/1 trainval/2 ... structure, adjust the file paths
        stored in the nuScenes object.
        """
        # check if default file paths work
        rec = self.ixes[0]
        sampimg = self.nusc.get('sample_data', rec['data']['CAM_FRONT'])
        imgname = os.path.join(self.nusc.dataroot, sampimg['filename'])

        def find_name(f):
            d, fi = os.path.split(f)
            d, di = os.path.split(d)
            d, d0 = os.path.split(d)
            d, d1 = os.path.split(d)
            d, d2 = os.path.split(d)
            return di, fi, f'{d2}/{d1}/{d0}/{di}/{fi}'

        # adjust the image paths if needed
        if not os.path.isfile(imgname):
            print('adjusting nuscenes file paths')
            fs = glob(os.path.join(self.nusc.dataroot, 'samples/*/samples/CAM*/*.jpg'))
            fs += glob(os.path.join(self.nusc.dataroot, 'samples/*/samples/LIDAR_TOP/*.pcd.bin'))
            info = {}
            for f in fs:
                di, fi, fname = find_name(f)
                info[f'samples/{di}/{fi}'] = fname
            fs = glob(os.path.join(self.nusc.dataroot, 'sweeps/*/sweeps/LIDAR_TOP/*.pcd.bin'))
            for f in fs:
                di, fi, fname = find_name(f)
                info[f'sweeps/{di}/{fi}'] = fname
            for rec in self.nusc.sample_data:
                if rec['channel'] == 'LIDAR_TOP' or (rec['is_key_frame'] and rec['channel'] in self.data_aug_conf['cams']):
                    rec['filename'] = info[rec['filename']]
get_scenes()根据 self.nusc.version 场景分为训练集和验证集(被类初始化函数调用)
  def get_scenes(self):
        # filter by scene split
        split = {
            'v1.0-trainval': {True: 'train', False: 'val'},
            'v1.0-mini': {True: 'mini_train', False: 'mini_val'},
        }[self.nusc.version][self.is_train]
        scenes = create_splits_scenes()[split]  # 根据 self.nusc.version 场景分为训练集和验证集,得到的是场景名字的list: [scene-0061,scene-0103,...]
        return scenes
prepro()将self.scenes中的所有sample取出并依照 scene_token和timestamp排序 (被类初始化函数调用)
    def prepro(self): # 将self.scenes中的所有sample取出并依照 scene_token和timestamp排序
        samples = [samp for samp in self.nusc.sample]

        # remove samples that aren't in this split
        samples = [samp for samp in samples if
                   self.nusc.get('scene', samp['scene_token'])['name'] in self.scenes]

        # sort by scene, timestamp (only to make chronological viz easier)
        samples.sort(key=lambda x: (x['scene_token'], x['timestamp']))

        return samples
get_image_data得到图像数据以及各种参数信息(被SegmentationData类中的__getitem__函数调用)
    def get_image_data(self, rec, cams): # rec: 取出的sample  cams:选择的相机通道
        imgs = [] # 图像数据
        rots = [] # 相机坐标系到自车坐标系的旋转矩阵
        trans = [] # 相机坐标系到自车坐标系的平移向量
        intrins = [] # 相机内参
        post_rots = [] # 数据增强的像素坐标旋转映射关系
        post_trans = [] #  数据增强的像素坐标平移映射关系
        for cam in cams:
            samp = self.nusc.get('sample_data', rec['data'][cam]) # 根据相机通道选择对应的sample_data
            imgname = os.path.join(self.nusc.dataroot, samp['filename']) # 图片路径
            img = Image.open(imgname) # 读取图像 1600 x 900
            post_rot = torch.eye(2)
            post_tran = torch.zeros(2)

            sens = self.nusc.get('calibrated_sensor', samp['calibrated_sensor_token']) # 相机record
            intrin = torch.Tensor(sens['camera_intrinsic']) # 相机内参
            rot = torch.Tensor(Quaternion(sens['rotation']).rotation_matrix) # 相机坐标系相对于ego坐标系的旋转矩阵
            tran = torch.Tensor(sens['translation']) # 相机坐标系相对于ego坐标系的平移矩阵

            # augmentation (resize, crop, horizontal flip, rotate)
            resize, resize_dims, crop, flip, rotate = self.sample_augmentation() # 获取数据增强的参数
            img, post_rot2, post_tran2 = img_transform(img, post_rot, post_tran,
                                                     resize=resize,
                                                     resize_dims=resize_dims,
                                                     crop=crop,
                                                     flip=flip,
                                                     rotate=rotate,
                                                     ) # 进行数据增强,并得到增强前后的像素点坐标的对应关系
            # 为了方便,写成3维矩阵的格式
            post_tran = torch.zeros(3)
            post_rot = torch.eye(3)
            post_tran[:2] = post_tran2
            post_rot[:2, :2] = post_rot2

            imgs.append(normalize_img(img))  # 标准化: ToTensor, Normalize 3,128,352
            intrins.append(intrin)
            rots.append(rot)
            trans.append(tran)
            post_rots.append(post_rot)
            post_trans.append(post_tran)

        return (torch.stack(imgs), torch.stack(rots), torch.stack(trans),
                torch.stack(intrins), torch.stack(post_rots), torch.stack(post_trans))
get_lidar_data获取雷达数据
    def get_lidar_data(self, rec, nsweeps):
        pts = get_lidar_data(self.nusc, rec,
                       nsweeps=nsweeps, min_distance=2.2)
        return torch.Tensor(pts)[:3]  # x,y,z
sample_augmentation()对图片进行数据增强(被get_image_data()函数调用)
    def sample_augmentation(self): # 数据增强
        H, W = self.data_aug_conf['H'], self.data_aug_conf['W'] # 原始图片大小
        fH, fW = self.data_aug_conf['final_dim'] # 数据增强后图片大小
        if self.is_train: # 训练数据集增强
            # 随机缩放图片大小
            resize = np.random.uniform(*self.data_aug_conf['resize_lim'])
            resize_dims = (int(W*resize), int(H*resize))
            newW, newH = resize_dims
            # 随机裁剪图片
            crop_h = int((1 - np.random.uniform(*self.data_aug_conf['bot_pct_lim']))*newH) - fH
            crop_w = int(np.random.uniform(0, max(0, newW - fW)))
            crop = (crop_w, crop_h, crop_w + fW, crop_h + fH)
            # 随机翻转图片
            flip = False
            if self.data_aug_conf['rand_flip'] and np.random.choice([0, 1]):
                flip = True
            # 随机旋转图片
            rotate = np.random.uniform(*self.data_aug_conf['rot_lim'])
        else: # 测试数据增强
            # 缩小图片
            resize = max(fH/H, fW/W)
            resize_dims = (int(W*resize), int(H*resize))
            newW, newH = resize_dims
            # 裁剪图片
            crop_h = int((1 - np.mean(self.data_aug_conf['bot_pct_lim']))*newH) - fH
            crop_w = int(max(0, newW - fW) / 2)
            crop = (crop_w, crop_h, crop_w + fW, crop_h + fH)
            flip = False # 不翻转
            rotate = 0 # 不旋转
        return resize, resize_dims, crop, flip, rotate
get_binimg得到自车坐标系相对于地图全局坐标系的位置 (被SegmentationData 中的__getitem__调用)
    def get_binimg(self, rec): #  得到自车坐标系相对于地图全局坐标系的位置
        egopose = self.nusc.get('ego_pose',
                                self.nusc.get('sample_data', rec['data']['LIDAR_TOP'])['ego_pose_token']) # 自车的位置
        trans = -np.array(egopose['translation']) # 平移
        rot = Quaternion(egopose['rotation']).inverse # 旋转
        img = np.zeros((self.nx[0], self.nx[1]))
        for tok in rec['anns']: # 遍历该sample的每个annotation token
            inst = self.nusc.get('sample_annotation', tok)  # 找到该annotation
            # add category for lyft
            if not inst['category_name'].split('.')[0] == 'vehicle': # 只关注车辆类别
                continue
            box = Box(inst['translation'], inst['size'], Quaternion(inst['rotation']))
            box.translate(trans)  # 将box的center坐标从全局坐标系转换到自车坐标系下
            box.rotate(rot) # 将box的center坐标从全局坐标系转换到自车坐标系下

            pts = box.bottom_corners()[:2].T  # 三维边界框取底面的四个角的(x,y)值后转置, 4x2
            pts = np.round(
                (pts - self.bx[:2] + self.dx[:2]/2.) / self.dx[:2]
                ).astype(np.int32) #  # 将box的实际坐标对应到网格坐标,同时将坐标范围[-50,50]平移到[0,100]
            pts[:, [1, 0]] = pts[:, [0, 1]] # 把(x,y)的形式换成(y,x)的形式
            cv2.fillPoly(img, [pts], 1.0) # 在网格中画出box

        return torch.Tensor(img).unsqueeze(0) # 转化为Tensor 1x200x200
choose_cams选择相机通道 (被SegmentationData 中的__getitem__调用)
    def choose_cams(self): # 选择相机通道
        if self.is_train and self.data_aug_conf['Ncams'] < len(self.data_aug_conf['cams']):
            cams = np.random.choice(self.data_aug_conf['cams'], self.data_aug_conf['Ncams'],
                                    replace=False) # 随机选择
        else:
            cams = self.data_aug_conf['cams'] # 选择全部的相机通道
        return cams
SegmentationData类
SegmentationData类的定义
class SegmentationData(NuscData): # SegmentationData类继承NuscData
    def __init__(self, *args, **kwargs):
        super(SegmentationData, self).__init__(*args, **kwargs)

    def __getitem__(self, index):
        rec = self.ixes[index] # 按照索引取出sample

        cams = self.choose_cams() # 对于训练集且data_aug_conf中Ncams<6的,随机选择摄像机通道,否则选择全部相机通道
        imgs, rots, trans, intrins, post_rots, post_trans = self.get_image_data(rec, cams) # 读取图像数据、相机参数和数据增强的像素坐标映射关系
        binimg = self.get_binimg(rec)

        return imgs, rots, trans, intrins, post_rots, post_trans, binimg
VizData类
class VizData(NuscData):
    def __init__(self, *args, **kwargs):
        super(VizData, self).__init__(*args, **kwargs)

    def __getitem__(self, index):
        rec = self.ixes[index]

        cams = self.choose_cams()
        imgs, rots, trans, intrins, post_rots, post_trans = self.get_image_data(rec, cams)
        lidar_data = self.get_lidar_data(rec, nsweeps=3)
        binimg = self.get_binimg(rec)

        return imgs, rots, trans, intrins, post_rots, post_trans, lidar_data, binimg
models.py
compile_model函数
explore.py 中调用了compile_model函数。
该函数构造了LiftSplatShoot 模型
def compile_model(grid_conf, data_aug_conf, outC):
    return LiftSplatShoot(grid_conf, data_aug_conf, outC)
Up类
上采样(被CamEncode类和BEVEncode类中的初始化函数调用)
class Up(nn.Module): # 上采样
    def __init__(self, in_channels, out_channels, scale_factor=2):
        super().__init__()

        self.up = nn.Upsample(scale_factor=scale_factor, mode='bilinear',
                              align_corners=True) # 上采样 BxCxHxW->BxCx2Hx2W

        self.conv = nn.Sequential(  # 两个3x3卷积
            nn.Conv2d(in_channels, out_channels, kernel_size=3, padding=1, bias=False),
            nn.BatchNorm2d(out_channels),
            nn.ReLU(inplace=True),
            nn.Conv2d(out_channels, out_channels, kernel_size=3, padding=1, bias=False),
            nn.BatchNorm2d(out_channels),
            nn.ReLU(inplace=True)
        )

    def forward(self, x1, x2):
        x1 = self.up(x1) # 对x1进行上采样
        x1 = torch.cat([x2, x1], dim=1) # 将x1和x2 concat 在一起
        return self.conv(x1)
CamEncode类
CamEncode类继承自nn.Module提取图像特征并编码(被LiftSplatShoot类中的初始化函数调用)
- 初始化
    def __init__(self, D, C, downsample):  # D: 41 C:64  downsample:16
        super(CamEncode, self).__init__()
        self.D = D # 深度上的网格数:41
        self.C = C # 图像特征维度:64
        # 使用 efficientnet 提取特征
        self.trunk = EfficientNet.from_pretrained("efficientnet-b0")
        # 上采样模块,输入输出通道分别为320+112和512
        self.up1 = Up(320+112, 512)
        # 1x1卷积,变换维度
        self.depthnet = nn.Conv2d(512, self.D + self.C, kernel_size=1, padding=0)
forward返回带有深度信息的特征(调用get_depth_feat函数)
    def forward(self, x):
        '''
        depth: B*N x D x fH x fW(24 x 41 x 8 x 22)
        x: B*N x C x D x fH x fW(24 x 64 x 41 x 8 x 22)
        '''
        depth, x = self.get_depth_feat(x)
        return x
get_depth_feat提取带有深度的特征 (调用get_eff_depth提取特征,调用get_depth_dist把深度信息离散化)
    def get_depth_feat(self, x):  # 提取带有深度的特征
        # 使用efficientnet提取特征  x: 24x512x8x22
        x = self.get_eff_depth(x)
        # Depth
        # 1x1卷积变换维度  x: 24x105x8x22 =24x(C+D)xfHxfW
        x = self.depthnet(x)
        '''
        第二个维度的前D个作为深度维(把连续的深度值离散化)
        进行softmax  depth: 24 x 41 x 8 x 22
        '''
        depth = self.get_depth_dist(x[:, :self.D])
        '''
        将特征通道维和通道维利用广播机制相乘
        depth.unsqueeze(1) -> torch.Size([24, 1, 41, 8, 22])
        x[:, self.D:(self.D + self.C)] -> torch.Size([24, 64, 8, 22])
        x.unsqueeze(2)-> torch.Size([24, 64, 1, 8, 22])
        depth*x-> new_x: torch.Size([24, 64, 41, 8, 22])
        '''
        new_x = depth.unsqueeze(1) * x[:, self.D:(self.D + self.C)].unsqueeze(2)
        return depth, new_x
get_depth_dist对深度维进行softmax,得到每个像素不同深度的概率
    def get_depth_dist(self, x, eps=1e-20): # 对深度维进行softmax,得到每个像素不同深度的概率
        return x.softmax(dim=1)
get_eff_depth使用efficientnet提取特征
    def get_eff_depth(self, x): # 使用efficientnet提取特征
        # adapted from https://github.com/lukemelas/EfficientNet-PyTorch/blob/master/efficientnet_pytorch/model.py#L231
        endpoints = dict()
        # Stem
        x = self.trunk._swish(self.trunk._bn0(self.trunk._conv_stem(x))) #  x: 24 x 32 x 64 x 176
        prev_x = x

        # Blocks
        for idx, block in enumerate(self.trunk._blocks):
            drop_connect_rate = self.trunk._global_params.drop_connect_rate
            if drop_connect_rate:
                drop_connect_rate *= float(idx) / len(self.trunk._blocks) # scale drop connect_rate
            x = block(x, drop_connect_rate=drop_connect_rate)
            if prev_x.size(2) > x.size(2):
                endpoints['reduction_{}'.format(len(endpoints)+1)] = prev_x
            prev_x = x

        # Head
        # x: 24 x 320 x 4 x 11
        endpoints['reduction_{}'.format(len(endpoints)+1)] = x
        # 先对endpoints[4]进行上采样,然后将 endpoints[5]和endpoints[4] concat 在一起
        x = self.up1(endpoints['reduction_5'], endpoints['reduction_4'])
        return x
BevEncode 类
CamEncode类继承自nn.Module 对BEV视图的特征进行编码(被LiftSplatShoot类中的初始化函数调用)
    def __init__(self, inC, outC):
        super(BevEncode, self).__init__()
        # 使用resnet的前3个stage作为backbone
        trunk = resnet18(pretrained=False, zero_init_residual=True)
        self.conv1 = nn.Conv2d(inC, 64, kernel_size=7, stride=2, padding=3,
                               bias=False)
        self.bn1 = trunk.bn1
        self.relu = trunk.relu

        self.layer1 = trunk.layer1
        self.layer2 = trunk.layer2
        self.layer3 = trunk.layer3

        self.up1 = Up(64+256, 256, scale_factor=4)
        self.up2 = nn.Sequential( # 2倍上采样->3x3卷积->1x1卷积
            nn.Upsample(scale_factor=2, mode='bilinear',
                              align_corners=True),
            nn.Conv2d(256, 128, kernel_size=3, padding=1, bias=False),
            nn.BatchNorm2d(128),
            nn.ReLU(inplace=True),
            nn.Conv2d(128, outC, kernel_size=1, padding=0),
        )
        return x
forword
    def forward(self, x): # x: 4 x 64 x 200 x 200
        x = self.conv1(x)  # x: 4 x 64 x 100 x 100
        x = self.bn1(x)
        x = self.relu(x)

        x1 = self.layer1(x) # x1: 4 x 64 x 100 x 100
        x = self.layer2(x1)  # x: 4 x 128 x 50 x 50
        x = self.layer3(x) # x: 4 x 256 x 25 x 25

        x = self.up1(x, x1) # 给x进行4倍上采样然后和x1 concat 在一起  x: 4 x 256 x 100 x 100
        x = self.up2(x) # 2倍上采样->3x3卷积->1x1卷积  x: 4 x 1 x 200 x 200

        return x
LiftSplatShoot类
LiftSplatShoot类继承自nn.Module
- 初始化
    def __init__(self, grid_conf, data_aug_conf, outC): # outC=1
        super(LiftSplatShoot, self).__init__()
        self.grid_conf = grid_conf # 网格配置参数
        self.data_aug_conf = data_aug_conf # 数据增强配置参数

        dx, bx, nx = gen_dx_bx(self.grid_conf['xbound'],
                                              self.grid_conf['ybound'],
                                              self.grid_conf['zbound'],
                                              ) # 网格划分
        self.dx = nn.Parameter(dx, requires_grad=False) # dx: x,y,z方向上的网格间距 [0.5,0.5,20]
        self.bx = nn.Parameter(bx, requires_grad=False) # bx: 第一个网格的中心坐标 [-49.5,-49.5,0]
        self.nx = nn.Parameter(nx, requires_grad=False)  # nx: 分别为x, y, z三个方向上格子的数量 [200,200,1]

        self.downsample = 16  # 下采样倍数
        self.camC = 64 # 图像特征维度
        self.frustum = self.create_frustum() # frustum: DxfHxfWx3(41x8x22x3)
        self.D, _, _, _ = self.frustum.shape # D: 41
        self.camencode = CamEncode(self.D, self.camC, self.downsample) # D: 41 C:64 downsample:16
        self.bevencode = BevEncode(inC=self.camC, outC=outC)

        # toggle using QuickCumsum vs. autograd
        self.use_quickcumsum = True
forword调用get_voxels把图像转换到BEV下,然后调用bevencode(初始化函数中定义,是BevEncode类的实例化)提取特征
    def forward(self, x, rots, trans, intrins, post_rots, post_trans):
        # x:[4,6,3,128,352]
        # rots: [4,6,3,3]
        # trans: [4,6,3]
        # intrins: [4,6,3,3]
        # post_rots: [4,6,3,3]
        # post_trans: [4,6,3]

        # 将图像转换到BEV下,x: B x C x 200 x 200 (4 x 64 x 200 x 200)
        x = self.get_voxels(x, rots, trans, intrins, post_rots, post_trans)
        # 用resnet18提取特征  x: 4 x 1 x 200 x 200
        x = self.bevencode(x)
        return x
get_voxels先调用get_geometry把在相机坐标系(ego frame)下的坐标 (x,y,z) 转换成自车坐标系下的点云坐标;然后调用get_cam_feats提取单张图像特征,最后调用voxel_pooling对体素特征进行汇聚。
    def get_voxels(self, x, rots, trans, intrins, post_rots, post_trans):
        # 像素坐标到自车中坐标的映射关系 geom: B x N x D x fH x fW x 3 (4 x 6 x 41 x 8 x 22 x 3)
        geom = self.get_geometry(rots, trans, intrins, post_rots, post_trans)
        # 提取图像特征并预测深度编码 x: B x N x D x fH x fW x C(4 x 6 x 41 x 8 x 22 x 64)
        x = self.get_cam_feats(x)
        # x: 4 x 64 x 200 x 200
        x = self.voxel_pooling(geom, x)
        return x
get_geometry把在相机坐标系(ego frame)下的坐标 (x,y,z) 转换成自车坐标系下的点云坐标 (被get_voxels调用)
    def get_geometry(self, rots, trans, intrins, post_rots, post_trans):
        """ 把在相机坐标系(ego frame)下的坐标 (x,y,z) 转换成自车坐标系下的点云坐标
        返回 B x N x D x H/downsample x W/downsample x 3
        """
        # B:4(batchsize)    N: 6(相机数目)
        B, N, _ = trans.shape

        # undo post-transformation
        # B x N x D x H x W x 3
        # 抵消数据增强及预处理对像素的变化
        points = self.frustum - post_trans.view(B, N, 1, 1, 1, 3)
        points = torch.inverse(post_rots).view(B, N, 1, 1, 1, 3, 3).matmul(points.unsqueeze(-1))

        # 相机坐标系转换成自车坐标系
        points = torch.cat((points[:, :, :, :, :, :2] * points[:, :, :, :, :, 2:3],
                            points[:, :, :, :, :, 2:3]
                            ), 5) # 将像素坐标(u,v,d)变成齐次坐标(du,dv,d)
        # d[u,v,1]^T=intrins*rots^(-1)*([x,y,z]^T-trans)
        combine = rots.matmul(torch.inverse(intrins))
        points = combine.view(B, N, 1, 1, 1, 3, 3).matmul(points).squeeze(-1)
        points += trans.view(B, N, 1, 1, 1, 3) # 将像素坐标d[u,v,1]^T转换到车体坐标系下的[x,y,z]^T

        return points # B x N x D x H x W x 3 (4 x 6 x 41 x 8 x 22 x 3)
get_cam_feats调用camecode提取单张图像的特征 (被get_voxels调用)
    def get_cam_feats(self, x):
        """
        提取单张图像的特征
        返回: B x N x D x H/downsample x W/downsample x C
        """
        # B: 4  N: 6  C: 3  imH: 128  imW: 352
        B, N, C, imH, imW = x.shape
        # B和N两个维度合起来  x: 24 x 3 x 128 x 352
        x = x.view(B*N, C, imH, imW)
        # 进行图像编码  x: B*N x C x D x fH x fW (24 x 64 x 41 x 8 x 22)
        x = self.camencode(x)
        # 将前两维拆开 x: B x N x C x D x fH x fW(4 x 6 x 64 x 41 x 8 x 22)
        x = x.view(B, N, self.camC, self.D, imH//self.downsample, imW//self.downsample)
        # x: B x N x D x fH x fW x C(4 x 6 x 41 x 8 x 22 x 64)
        x = x.permute(0, 1, 3, 4, 5, 2)
        return x
voxel_pooling对voxel进行池化操作,调用了tools.py文件中定义的quicksum(被get_voxels调用)
    def voxel_pooling(self, geom_feats, x): # 对voxel进行池化操作
        # geom_feats: B x N x D x fH x fW x 3 (4 x 6 x 41 x 8 x 22 x 3)
        # x: B x N x D x fH x fW x C(4 x 6 x 41 x 8 x 22 x 64)
        B, N, D, H, W, C = x.shape # B: 4  N: 6  D: 41  H: 8  W: 22  C: 64
        Nprime = B*N*D*H*W # Nprime: 173184

        # flatten x
        x = x.reshape(Nprime, C) # 将图像展平,一共有 B*N*D*H*W 个点

        # flatten indices
        geom_feats = ((geom_feats - (self.bx - self.dx/2.)) / self.dx).long() # 将[-50,50] [-10 10]的范围平移到[0,100] [0,20],计算栅格坐标并取整
        geom_feats = geom_feats.view(Nprime, 3) # 将像素映射关系同样展平  geom_feats: B*N*D*H*W x 3 (173184 x 3)
        batch_ix = torch.cat([torch.full([Nprime//B, 1], ix,
                             device=x.device, dtype=torch.long) for ix in range(B)]) # 每个点对应于哪个batch
        geom_feats = torch.cat((geom_feats, batch_ix), 1) # geom_feats: B*N*D*H*W x 4(173184 x 4), geom_feats[:,3]表示batch_id

        # filter out points that are outside box
        # 过滤掉在边界线之外的点 x:0~199  y: 0~199  z: 0
        kept = (geom_feats[:, 0] >= 0) & (geom_feats[:, 0] < self.nx[0])\
            & (geom_feats[:, 1] >= 0) & (geom_feats[:, 1] < self.nx[1])\
            & (geom_feats[:, 2] >= 0) & (geom_feats[:, 2] < self.nx[2])
        x = x[kept] # x: 168648 x 64
        geom_feats = geom_feats[kept]

        # get tensors from the same voxel next to each other
        ranks = geom_feats[:, 0] * (self.nx[1] * self.nx[2] * B)\
            + geom_feats[:, 1] * (self.nx[2] * B)\
            + geom_feats[:, 2] * B\
            + geom_feats[:, 3] # 给每一个点一个rank值,rank相等的点在同一个batch,并且在在同一个格子里面
        sorts = ranks.argsort() # 按照rank排序,这样rank相近的点就在一起了
        x, geom_feats, ranks = x[sorts], geom_feats[sorts], ranks[sorts]

        # cumsum trick
        if not self.use_quickcumsum:
            x, geom_feats = cumsum_trick(x, geom_feats, ranks)
        else:
            x, geom_feats = QuickCumsum.apply(x, geom_feats, ranks) # 一个batch的一个格子里只留一个点 x: 29072 x 64  geom_feats: 29072 x 4

        # griddify (B x C x Z x X x Y)
        final = torch.zeros((B, C, self.nx[2], self.nx[0], self.nx[1]), device=x.device) # final: 4 x 64 x 1 x 200 x 200
        final[geom_feats[:, 3], :, geom_feats[:, 2], geom_feats[:, 0], geom_feats[:, 1]] = x # 将x按照栅格坐标放到final中

        # collapse Z
        final = torch.cat(final.unbind(dim=2), 1) # 消除掉z维

        return final # final: 4 x 64 x 200 x 200
create_frustum为每一张图片生成一个棱台状(frustum)的点云 (被初始化函数调用)
    def create_frustum(self): # 为每一张图片生成一个棱台状(frustum)的点云
        # make grid in image plane
        # 数据增强后图片大小  ogfH:128  ogfW:352
        ogfH, ogfW = self.data_aug_conf['final_dim']
        # 下采样16倍后图像大小  fH: 128/16=8  fW: 352/16=22
        fH, fW = ogfH // self.downsample, ogfW // self.downsample
        '''
        ds: 在深度方向上划分网格
        dbound: [4.0, 45.0, 1.0]
        arange后-> [4.0,5.0,6.0,...,44.0]
        view后(相当于reshape操作)-> (41x1x1)
        expand后(扩展张量中某维数据的尺寸)->  ds: DxfHxfW(41x8x22)
        '''
        ds = torch.arange(*self.grid_conf['dbound'], dtype=torch.float).view(-1, 1, 1).expand(-1, fH, fW)
        D, _, _ = ds.shape # D: 41 表示深度方向上网格的数量
        '''
        xs: 在宽度方向上划分网格
        linspace 后(在[0,ogfW)区间内,均匀划分fW份)-> [0,16,32..336]  大小=fW(22)
        view后-> 1x1xfW(1x1x22)
        expand后-> xs: DxfHxfW(41x8x22)
        '''
        xs = torch.linspace(0, ogfW - 1, fW, dtype=torch.float).view(1, 1, fW).expand(D, fH, fW)
        '''
        ys: 在高度方向上划分网格
        linspace 后(在[0,ogfH)区间内,均匀划分fH份)-> [0,16,32..112]  大小=fH(8)
        view 后-> 1xfHx1 (1x8x1)
        expand 后-> ys: DxfHxfW (41x8x22)
        '''
        ys = torch.linspace(0, ogfH - 1, fH, dtype=torch.float).view(1, fH, 1).expand(D, fH, fW)
        '''
        frustum: 把xs,ys,ds堆叠到一起
        stack后-> frustum: DxfHxfWx3
        堆积起来形成网格坐标, frustum[d,h,w,0]就是(h,w)位置,深度为d的像素的宽度方向上的栅格坐标
        '''
        frustum = torch.stack((xs, ys, ds), -1)
        return nn.Parameter(frustum, requires_grad=False)
tools.py
img_transform对输入图像进行数据增强(被data.py中的get_image_data调用)
def img_transform(img, post_rot, post_tran,
                  resize, resize_dims, crop,
                  flip, rotate):  # 数据增强
    # adjust image
    img = img.resize(resize_dims)  # 图像缩放
    img = img.crop(crop)  # 图像裁剪
    if flip:
        img = img.transpose(method=Image.FLIP_LEFT_RIGHT)  # 左右翻转
    img = img.rotate(rotate)  # 旋转

    # post-homography transformation

    # 数据增强后的图像上的某一点的坐标需要对应回增强前的坐标
    post_rot *= resize  # [[0.22,0],[0,0.22]]
    post_tran -= torch.Tensor(crop[:2])  # [0,-48]
    if flip:
        A = torch.Tensor([[-1, 0], [0, 1]])
        b = torch.Tensor([crop[2] - crop[0], 0])
        post_rot = A.matmul(post_rot)
        post_tran = A.matmul(post_tran) + b
    A = get_rot(rotate/180*np.pi)  # 得到数据增强时旋转操作的旋转矩阵
    b = torch.Tensor([crop[2] - crop[0], crop[3] - crop[1]]) / 2  # 裁剪保留部分图像的中心坐标 (176, 64)
    b = A.matmul(-b) + b  # 0
    post_rot = A.matmul(post_rot)
    post_tran = A.matmul(post_tran) + b

    return img, post_rot, post_tran
gen_dx_bx划分网格 (被model.py中的LiftSplatShoot类中的初始化函数调用)
# 划分网络
'''
                xbound=[-50.0, 50.0, 0.5],
                ybound=[-50.0, 50.0, 0.5],
                zbound=[-10.0, 10.0, 20.0]
'''
def gen_dx_bx(xbound, ybound, zbound):
    dx = torch.Tensor([row[2] for row in [xbound, ybound, zbound]])  # dx=[0.5,0.5,20] 分别为x, y, z三个方向上的网格间距
    bx = torch.Tensor([row[0] + row[2]/2.0 for row in [xbound, ybound, zbound]]) # bx=[-49.75,-49.75,0]  分别为x, y, z三个方向上第一个格子中心点的坐标
    nx = torch.LongTensor([(row[1] - row[0]) / row[2] for row in [xbound, ybound, zbound]]) #  nx=[200,200,1]  分别为x, y, z三个方向上格子的数量
    return dx, bx, nx
- QuickCumsum类 论文中提到的QuickCumsum 技巧(被
modle.py文件中的voxel_pooling函数调用)

class QuickCumsum(torch.autograd.Function):
    @staticmethod
    def forward(ctx, x, geom_feats, ranks):
        # x: 168648 x 64  geom_feats: 168648 x 4  ranks: 168648 x
        x = x.cumsum(0) # 求前缀和  x: 168648 x 64
        kept = torch.ones(x.shape[0], device=x.device, dtype=torch.bool)  # kept: 168648 x
        kept[:-1] = (ranks[1:] != ranks[:-1])  # 筛选出ranks中前后rank值不相等的位置
        # rank值相等的点只留下最后一个,即一个batch中的一个格子里只留最后一个点 x: 29072  geom_feats: 29072 x 4
        x, geom_feats = x[kept], geom_feats[kept]
        # x后一个减前一个,还原到cumsum之前的x,此时的一个点是之前与其rank相等的点的feature的和,相当于把同一个格子的点特征进行了sum
        x = torch.cat((x[:1], x[1:] - x[:-1]))
        # save kept for backward
        ctx.save_for_backward(kept)
        # no gradient for geom_feats
        ctx.mark_non_differentiable(geom_feats)

        return x, geom_feats

    @staticmethod
    def backward(ctx, gradx, gradgeom):
        kept, = ctx.saved_tensors
        back = torch.cumsum(kept, 0)
        back[kept] -= 1

        val = gradx[back]

        return val, None, None
cumsum_trick(被modle.py文件中的voxel_pooling函数调用)
def cumsum_trick(x, geom_feats, ranks):
    x = x.cumsum(0)
    kept = torch.ones(x.shape[0], device=x.device, dtype=torch.bool)
    kept[:-1] = (ranks[1:] != ranks[:-1])

    x, geom_feats = x[kept], geom_feats[kept]
    x = torch.cat((x[:1], x[1:] - x[:-1]))

    return x, geom_feats
SimpleLoss计算损失(被explore.py中的eval_model_iou调用)
class SimpleLoss(torch.nn.Module):
    def __init__(self, pos_weight):
        super(SimpleLoss, self).__init__()
        # sigmoid+二值交叉熵损失, pos_weight是给正样本乘的权重系数,防止正样本过少,用于平衡precision和recall。
        self.loss_fn = torch.nn.BCEWithLogitsLoss(pos_weight=torch.Tensor([pos_weight]))

    def forward(self, ypred, ytgt):
        loss = self.loss_fn(ypred, ytgt)
        return loss
train.py
train对模型进行训练
def train(version,  # 数据集的版本
          dataroot='/data/nuscenes',  # 数据集路径
          nepochs=10000,  # 训练最大的epoch数
          gpuid=1,  # gpu的序号

          H=900, W=1600,  # 图片大小
          resize_lim=(0.193, 0.225),  # resize的范围
          final_dim=(128, 352),  # 数据预处理之后最终的图片大小
          bot_pct_lim=(0.0, 0.22),  # 裁剪图片时,图像底部裁剪掉部分所占比例范围
          rot_lim=(-5.4, 5.4),  # 训练时旋转图片的角度范围
          rand_flip=True,  # # 是否随机翻转
          ncams=5, # 训练时选择的相机通道数
          max_grad_norm=5.0,
          pos_weight=2.13,  # 损失函数中给正样本项损失乘的权重系数
          logdir='./runs',  # 日志的输出文件

          xbound=[-50.0, 50.0, 0.5],  # 限制x方向的范围并划分网格
          ybound=[-50.0, 50.0, 0.5],  # 限制y方向的范围并划分网格
          zbound=[-10.0, 10.0, 20.0],  # 限制z方向的范围并划分网格
          dbound=[4.0, 45.0, 1.0],  # 限制深度方向的范围并划分网格

          bsz=4,  # batchsize
          nworkers=10,  # 线程数
          lr=1e-3,  # 学习率
          weight_decay=1e-7,  # 权重衰减系数
          ):
    grid_conf = {   # 网格配置
        'xbound': xbound,
        'ybound': ybound,
        'zbound': zbound,
        'dbound': dbound,
    }
    data_aug_conf = {  # 数据增强配置
        'resize_lim': resize_lim,
        'final_dim': final_dim,
        'rot_lim': rot_lim,
        'H': H, 'W': W,
        'rand_flip': rand_flip,
        'bot_pct_lim': bot_pct_lim,
        'cams': ['CAM_FRONT_LEFT', 'CAM_FRONT', 'CAM_FRONT_RIGHT',
                 'CAM_BACK_LEFT', 'CAM_BACK', 'CAM_BACK_RIGHT'],
        'Ncams': ncams,
    }
    trainloader, valloader = compile_data(version, dataroot, data_aug_conf=data_aug_conf,
                                          grid_conf=grid_conf, bsz=bsz, nworkers=nworkers,
                                          parser_name='segmentationdata')  # 获取训练数据和测试数据

    device = torch.device('cpu') if gpuid < 0 else torch.device(f'cuda:{gpuid}')

    model = compile_model(grid_conf, data_aug_conf, outC=1)  # 获取模型
    model.to(device)

    opt = torch.optim.Adam(model.parameters(), lr=lr, weight_decay=weight_decay)  # 使用Adam优化器

    loss_fn = SimpleLoss(pos_weight).cuda(gpuid)  # 损失函数

    writer = SummaryWriter(logdir=logdir)  # 用于记录训练过程
    val_step = 1000 if version == 'mini' else 10000  # 每隔多少个iter验证一次

    model.train()
    counter = 0
    for epoch in range(nepochs):
        np.random.seed()
        for batchi, (imgs, rots, trans, intrins, post_rots, post_trans, binimgs) in enumerate(trainloader):
            # imgs: 4 x 5 x 3 x 128 x 352
            # rots: 4 x 5 x 3 x 3]
            # trans: 4 x 5 x 3
            # intrins: 4 x 5 x 3 x 3
            # post_rots: 4 x 5 x 3 x 3
            # post_trans: 4 x 5 x 3
            # binimgs: 4 x 1 x 200 x 200

            t0 = time()
            opt.zero_grad()
            preds = model(imgs.to(device),
                          rots.to(device),
                          trans.to(device),
                          intrins.to(device),
                          post_rots.to(device),
                          post_trans.to(device),
                          )  # 推理  preds: 4 x 1 x 200 x 200
            binimgs = binimgs.to(device)
            loss = loss_fn(preds, binimgs)  # 计算二值交叉熵损失
            loss.backward()
            torch.nn.utils.clip_grad_norm_(model.parameters(), max_grad_norm)  # 梯度裁剪
            opt.step()
            counter += 1
            t1 = time()

            if counter % 10 == 0:  # 每10个iter打印并记录一次loss
                print(counter, loss.item())
                writer.add_scalar('train/loss', loss, counter)

            if counter % 50 == 0:  # 每50个iter打印并记录一次iou和一次优化的时间
                _, _, iou = get_batch_iou(preds, binimgs)
                writer.add_scalar('train/iou', iou, counter)
                writer.add_scalar('train/epoch', epoch, counter)
                writer.add_scalar('train/step_time', t1 - t0, counter)

            if counter % val_step == 0:  # 验证一次,记录loss和iou
                val_info = get_val_info(model, valloader, loss_fn, device)
                print('VAL', val_info)
                writer.add_scalar('val/loss', val_info['loss'], counter)
                writer.add_scalar('val/iou', val_info['iou'], counter)

            if counter % val_step == 0:  # 记录checkpoint
                model.eval()
                mname = os.path.join(logdir, "model{}.pt".format(counter))
                print('saving', mname)
                torch.save(model.state_dict(), mname)
                model.train()

![[附源码]Python计算机毕业设计高校教室管理系统Django(程序+LW)](https://img-blog.csdnimg.cn/3537950430794cab93861fab584b075d.png)


![[附源码]Python计算机毕业设计高校教室申请管理系统Django(程序+LW)](https://img-blog.csdnimg.cn/0dee9c79e121432aa9fcdf435116c587.png)



![[附源码]Python计算机毕业设计SSM基于Java的租房系统(程序+LW)](https://img-blog.csdnimg.cn/6a17cba39e4740ababaa04c96c8ace60.png)

