进程与线程
-
进程 : 进程是操作系统进行资源分配的最小单位,每执行一个程序、一条命令操作系统都会启动一个进程,进程是一个程序的执行过程,当程序启动时,操作系统会把进程的代码加载到内存中,并为新进程分配一个唯一的PID、内存资源、设备等。
-
线程:一个进程最少有一个线程去执行代码,一个进程启动后会创建一个主线程,CPU最小的调度单位是线程,每个线程会有自己独立的栈空间,但是会共享进程的内存空间。线程也有自己的TID。线程的创建也需要在进程内部进行。通常是通过编程语言提供的API(如Java的Thread类、C++的std::thread等)来创建线程。创建线程时,操作系统会在当前进程内部创建一个新的线程,并分配给该线程一定的资源。
简单来说进程是一个大单位,好比上学时的班级,而线程是这个班级的每个学生,每个学生都属于这个班级(线程属于某个进程),而每个学生可以独立的学习(学习进度不一样,学习成绩不一样) 好比每个线程执行获取到的CPU的时间片不一样,执行进度也不一样。每个学生有独立的座位,就好比每个线程都独立的栈空间。
- 线程是由操作系统创建并调度的资源。
- 线程之间的切换是CPU完成的,切换线程需要消耗大量CPU资源。
- 一个操作系统通常能调度的线程是有限的,可结合线程池使用。
Java多线程编程
一个java命令就会启动一个进程,例如 java -jar 、 java xxx ,而启动一个进程以后,JVM就会创建一个main线程,由这个main线程开始执行main方法的代码。
- Java实现多线程的方式
- 继承Thread或者实现Runable接口
public class ThreadTest01 {

    public static void main(String[] args) {

        Thread thread = new MyThread();
        thread.start(); //调用start方法开启多线程

        Thread thread1 = new Thread(new MyThread2());
        thread1.start();

    }

}


class MyThread extends Thread{

    @Override
    public void run() {
        System.out.println(Thread.currentThread().getName());
    }
}

class MyThread2 implements Runnable{

    @Override
    public void run() {
        System.out.println(Thread.currentThread().getName());
    }
}
实现Runable的方式是在创建Thread类时当作参数传递进去的,在调用了run方法时,其实还是调用了Runable接口的run方法。

在启动线程时,不要直接调用run方法,直接调用run 方法不会开启新的线程,而是相当于仅仅是调用了一个普通方法,而start方法的签名如下:
    public synchronized void start() {
        /**
         * This method is not invoked for the main method thread or "system"
         * group threads created/set up by the VM. Any new functionality added
         * to this method in the future may have to also be added to the VM.
         *
         * A zero status value corresponds to state "NEW".
         */
        if (threadStatus != 0)
            throw new IllegalThreadStateException();

        /* Notify the group that this thread is about to be started
         * so that it can be added to the group's list of threads
         * and the group's unstarted count can be decremented. */
        group.add(this);

        boolean started = false;
        try {
            start0();
            started = true;
        } finally {
            try {
                if (!started) {
                    group.threadStartFailed(this);
                }
            } catch (Throwable ignore) {
                /* do nothing. If start0 threw a Throwable then
                  it will be passed up the call stack */
            }
        }
    }

    private native void start0();
而调用了start方法之后,方法内部又调用了start0方法,而start0方法是个native方法,表示此方法是JVM中的C++代码实现的,Java本身无法实现,这就是开启多线程的关键。 JVM需要等所有线程都运行完成以后才会退出。
- 线程实例与线程类的方法
- interrupt :中断线程的方法
- join : 优先执行线程调用者的run方法
- setName :设置线程名称
- setDaemon : 设置为守护线程
- setPriority : 设置线程优先级
- Thread.sleep : 让线程休眠,进入TIMED_WAITING状态。
最常用的方法有上述几个,用一个程序来演示一下
public class ThreadTest01 {

    @Test
    public void test1() throws Exception {
        Thread thread = new MyThread();
        thread.setName("t1");
        thread.setPriority(6); //设置线程的优先级
        thread.start(); //调用start方法开启多线程
        for (int i = 0; i < 100; i++) {
            System.out.println(Thread.currentThread().getName() + " ===> " + i);
            Thread.sleep(100);
            if (i >= 60){
//                thread.join();//优先让t1线程执行完成
                thread.interrupt();//中断t1线程的执行、注意、只能是中断t1线程,而无法中断其他已经运行的线程

            }
        }

    }

}


class MyThread extends Thread {

    @SneakyThrows
    @Override
    public void run() {
        for (int i = 0; i < 100; i++) {
            System.out.println(Thread.currentThread().getName() + " ===> " + i);
            Thread.sleep(100);
        }
    }
}
setDaemon方法:设置线程为守护线程,当所有非守护线程执行完成后,守护线程自动中断,典型的守护线程应用有 JVM 中的 GC垃圾回收线程。
- 线程安全问题
线程安全问题的本质就是多线程在对同一份数据进行读写时,与期望的逻辑不相符,由于CPU在执行多线程时,是来回切换执行的,这种操作极有可能导致线程安全问题。
这里的同一份数据是表示能够通过变量名或者类名引用到的某个基本数据类型或者应用数据类型,例如静态变量,多个线程共享一个引用变量等。也就是说,只要多个线程能到某个引用或者基本数据类型,就可能会产生线程安全问题。
public class ThreadTest02 {

    public static void main(String[] args) throws InterruptedException {

        T1 t1 = new T1();
        t1.start();
        T2 t2 = new T2();
        t2.start();

        //先阻塞main线程
        t1.join();
        t2.join();

        System.out.println(Counter.count);

    }

}

class Counter{

    public static int count = 0;

}

class T1 extends Thread{

    @Override
    public void run() {
        for (int i = 0; i < 1000; i++) {
            Counter.count++;
        }
    }
}

class T2 extends Thread{

    @Override
    public void run() {
        for (int i = 0; i < 1000; i++) {
            Counter.count--;
        }
    }
}
在上述这个案例中 ,T1线程 + 1000次,而 t2 线程 - 1000 次,最后的结果理应还是0 .

但是多运行几次,就会发现结果大概率不是0,这就是线程安全问题。
如何解决线程安全问题? — 加锁
- 加锁实现线程安全
加锁的意义就是保证同一时刻的方法或者代码块,只会有一个线程执行。将上述代码进行如下改造
public class ThreadTest02 {

    public static void main(String[] args) throws InterruptedException {

        T1 t1 = new T1();
        t1.start();
        T2 t2 = new T2();
        t2.start();

        //先阻塞main线程
        t1.join();
        t2.join();

        System.out.println(Counter.count);

    }

}

class Counter{

    public static int count = 0;

    public static synchronized void add(){
        count++;
    }

    public static synchronized void dec(){
        count--;
    }

}

class T1 extends Thread{

    @Override
    public void run() {
        for (int i = 0; i < 1000; i++) {
            Counter.add();
        }
    }
}

class T2 extends Thread{

    @Override
    public void run() {
        for (int i = 0; i < 1000; i++) {
            Counter.dec();
        }
    }
}
在Counter类上的两个方法签名上分别加了synchronized 关键字,表示这个方法是一个同步方法,任意时刻只会有一个线程进入此方法去执行。加上了synchronized 关键字以后,保证了add和dec方法各自都可以原子性的执行1000次,所以 无论运行多少次,最终结果都会是0.
synchronized 关键字如果是写在了静态方法上,锁的是当前类的class对象,如果写在了实例方法上,则锁的是当前实例对象,如果线程安全是以对象为单位的,则不同可以用对象锁,如果线程安全是以类为单位的,则可以用类锁。
    public static  void add(){
        synchronized (new Object()){
            count++;
        }
    }
上述的 synchronized 锁的对象是有严重的线程安全问题的,因为每次锁的都是一个新创建出来的新对象,这个对象是刚创建出来的,对象头中的锁信息没有,则每次来一个线程都可以进入方法执行。
同时,synchronized 是一个可重入锁,看下面这个代码块,add方法是一个同步方法,在add方法内部又调用了dec方法,但是dec方法也是需要加锁的,此时只有进入了add方法线程可以进入dec方法,因为都是用的一把锁,这就是可重入锁,像是进入了add方法,但不能进入dec方法的就是不可重入锁。
    public static synchronized void add(){
            count++;
            dec();
    }

    public static synchronized void dec(){
        count--;
    }
- 线程之间的通信
线程间的通信主要是有3个:
- wait : 让执行了wait方法的线程进入等待状态,同时释放已经获取的锁,进入了wait状态的线程不参与锁的竞争。
- notify :唤醒一个当前锁对象调用了wait方法的线程。
- notifyAll : 唤醒所有当前锁对象调用了wait方法的线程。
上述三个方法有以下共同点:
- 必须是在同步方法内调用,也就是synchronized 方法或者synchronized 代码块中调用
- 调用的对象必须的同步的锁对象 也就是 synchronized 锁的对象。
假设有有一个存取队列的场景,有A、B两个线程,一个线程去队列中存数据,另一个线程取队列中的数据,但是取数据的线程不知道存的线程什么时候放,如果使用while去一直监听的话,这样会造成系统资源的浪费,更好的一种做法就是取线程如果获取不到数据,则进入等待状态,待存线程存入数据后 再通过取线程去获取。
public class ThreadTest03 {

    public static void main(String[] args) {

        MyQueue myQueue = new MyQueue();

        Thread thread = new Thread(() -> {

            while (true){
                //存数据
                myQueue.addTask();
                try {
                    Thread.sleep(20);
                } catch (InterruptedException e) {
                    e.printStackTrace();
                }

            }
        });

     new Thread(() -> {
            while (true) {
                myQueue.getTask();
            }
        }).start();

        new Thread(() -> {
            while (true) {
                myQueue.getTask();
            }
        }).start();

        new Thread(() -> {
            while (true) {
                myQueue.getTask();
            }
        }).start();

        new Thread(() -> {
            while (true) {
                myQueue.getTask();
            }
        }).start();

        new Thread(() -> {
            while (true) {
                myQueue.getTask();
            }
        }).start();

        thread.start();

    }

}

class MyQueue{

    private Queue<String> queue = new ArrayDeque<>();

    private Object lock = new Object();

    public void addTask(){
        synchronized (lock){
            String s = UUID.randomUUID().toString();
            queue.add(s);
            //唤醒所有处于wait状态的线程,线程被唤醒之后,参与锁的竞争
            lock.notifyAll();
        }
    }

    public  void getTask(){
        synchronized (lock){
            while (queue.isEmpty()){
                try {
                    System.out.println(Thread.currentThread().getName() + "进入等待状态");
                    lock.wait();//这里必须使用lock对象去调用wait
                } catch (InterruptedException e) {
                    e.printStackTrace();
                }
            }
            String poll = queue.poll();
            System.out.println(Thread.currentThread().getName() + " 获取到的数据是 ===> " + poll);
        }
    }

}
这里要值得注意的是,当调用了notifyAll方法后唤醒了等待状态的线程以后,这些线程需要再次获得锁,才能够去执行剩余的代码。
- 谈一谈死锁
现在有 t1、t2两个线程 同时有 A B 两把锁,t1线程的代码执行顺序是先获取A锁 再获取B锁,而t2 线程的代码执行顺序是先获取B锁 再获取A锁,如下代码:
public class ThreadTest04 {

    public static void main(String[] args) {

        Object lock1 = new Object();
        Object lock2 = new Object();

        new Thread(() -> {

            synchronized (lock1){
                System.out.println("A线程 获取到了lock1");
                try {
                    Thread.sleep(10);
                } catch (InterruptedException e) {
                    e.printStackTrace();
                }
                synchronized (lock2){
                    System.out.println("A线程 获取到了lock2");
                }
            }

        }).start();

        new Thread(() -> {

            synchronized (lock2){
                System.out.println("B线程 获取到了lock2");
                synchronized (lock1){
                    System.out.println("B线程 获取到了lock1");
                }
            }

        }).start();

    }

}
此时程序的控制台输出如下:

死锁一旦发生,除非通过借助外力的方式终止,否则程序本身是无法停止的。
并发编程
- ReentrantLock
ReentrantLock 相比于 synchronized关键字实现同步,提供了更灵活阻塞等待的控制,synchronized 在其他线程获取不到锁时,是一直处于阻塞的状态的,而ReentrantLock 提供了获取不到锁的超时机制。
class Counter01 {

    private int nums = 0;

    private ReentrantLock lock = new ReentrantLock();

    public void add() throws InterruptedException {
        if ( lock.tryLock(3, TimeUnit.SECONDS)){
            try {
                System.out.println(Thread.currentThread().getName() + " 获取到了锁");
            }finally {
                lock.unlock();
            }
        }else {
            //没有获取到锁
            System.out.println(Thread.currentThread().getName() + " 没有获取到锁,放弃执行");
        }
    }

    public void  dec(){
        try {
            lock.lock();
            System.out.println(Thread.currentThread().getName() + " 获取到了锁");
        }finally {
            lock.unlock();
        }


    }

}
ReentrantLock 锁 不同于synchronized,后者是Java语言层面提供的支持,当代码执行完成或者出现异常后,JVM会自动释放锁,而ReentrantLock 不行,必须使用try + finally 最后手动释放锁。
- ReentrantLock 支持的 wait 与 notify
如果使用了ReentrantLock 锁,如何实现 synchronized锁的 wait 、notify 、notifyAll ?
    private ReentrantLock lock = new ReentrantLock();

    private Condition condition = lock.newCondition();

    public void condition() throws InterruptedException {

        condition.await();//相当于wait
        condition.signal(); //相当于 notify
        condition.signalAll(); //相当于 notiflAll
    }
使用ReentrantLock提供的newCondition API 来分别代替 wait notify notiflAll 。
- 读写锁
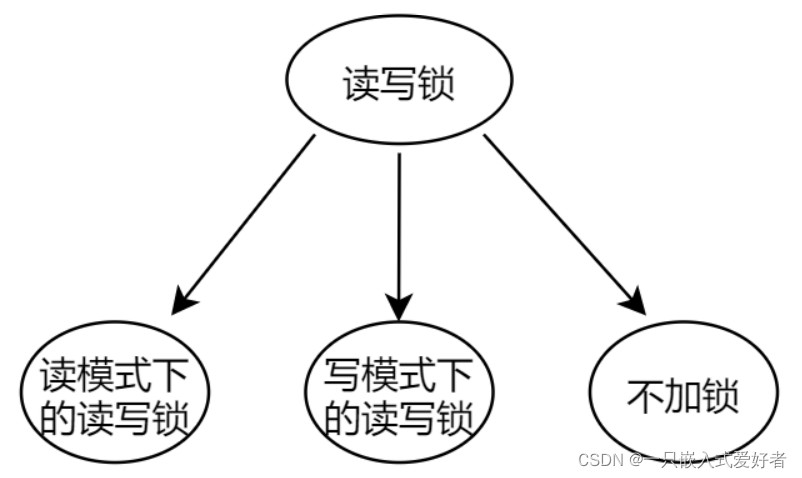
在之前的队列存储案例中,多个线程可以分别取和存,但是存取方法使用了同一把锁,这就导致,两个方法在任意时刻只能执行其中的某一个方法,而如果有一种场景是读可以多线程,但写的时候不能进行读,同时也只会有一个线程允许写,其他写线程和读线程必须等待,这种适用于读多写少的场景就是读写锁。
public class ThreadTest06 {

    public static void main(String[] args) {

        Article article = new Article();

        new Thread(() -> {
            while (true){
                article.update();
                try {
                    Thread.sleep(3000);
                } catch (InterruptedException e) {
                    e.printStackTrace();
                }
            }
        }).start();

        for (int i = 0; i < 3; i++) {
            new Thread(() -> {
               while (true){
                   article.getArticle();
                   try {
                       Thread.sleep(500);
                   } catch (InterruptedException e) {
                       e.printStackTrace();
                   }
               }
            }).start();
        }

    }

}

class Article{

    private ReadWriteLock readWriteLock = new ReentrantReadWriteLock();

    private Lock readLock = readWriteLock.readLock();

    private Lock writeLock = readWriteLock.writeLock();

    private String content = "";

    public void update(){
        try {
            writeLock.lock();
            System.out.println(Thread.currentThread().getName() + "正在更新数据............");
            Thread.sleep(5000);
            content = UUID.randomUUID().toString();
            System.out.println(Thread.currentThread().getName() + "数据更新完成 !!!");
        } catch (Exception e) {
            e.printStackTrace();
        } finally {
            writeLock.unlock();
        }
    }

    public void getArticle(){
        try {
            readLock.lock();
            System.out.println(Thread.currentThread().getName() + "获取到的数据是:" + content );
        } catch (Exception e) {
            e.printStackTrace();
        } finally {
            readLock.unlock();

        }

    }

}
上述代码示例可以比较好的说明读写锁的问题。要注意的一个地方就是如果把 Thread.sleep写在了方法内部,则 Thread.sleep在执行的时候是不会释放锁的,如果写线程不释放锁,则读线程也进不去,此时如果写线程一直while true的话就会造成大量的写请求。
 while (true){
                article.update();
             }
而如果在while true的外部加一个Thread.sleep 此时就会让线程休眠,而且休眠的时间也不会占用锁,那么读线程就可以获取到锁。
- 信号量 Semaphore
信号量的作用是允许可以灵活的控制某个方法在任意时刻最多有多少个线程可以访问。
public class ThreadTest07 {

    public static void main(String[] args) {

        MySemaphore mySemaphore = new MySemaphore();
        for (int i = 0; i < 50; i++) {
            new Thread(() -> {
                try {
                    mySemaphore.test();
                } catch (InterruptedException e) {
                    e.printStackTrace();
                }
            }).start();
        }

    }

}


class MySemaphore {

    private Semaphore semaphore = new Semaphore(5);

    public void test() throws InterruptedException {
        try {
            semaphore.acquire();
            System.out.println(Thread.currentThread().getName() + " 进入执行 !");
            Thread.sleep(2000);
        } finally {
            semaphore.release();
        }

    }

}
使用JDK提供的 Semaphore 类可以很好的实现信号量线程控制。
- JDK线程池
在实际项目开发中,很少会直接创建线程,因为频繁的创建线程以及销毁线程会造成系统资源的浪费,一般都会结合池化思想,使用线程池来处理多任务。类似池化思想的还有 数据库连接池、Http请求池、Socket IO池等等。
线程池的总体设计思想就是 当接收到任务时,判断是否还有空余线程,如果有空余线程,则直接执行、如果没有,则判断队列满没满,如果满了,则执行拒绝策略,如果没满,则加入队列。
public class ThreadTest08 {

    public static void main(String[] args) throws InterruptedException {

        //创建固定数量的线程池
        ExecutorService executorService = Executors.newFixedThreadPool(5);
        for (int i = 0; i < 50; i++) {
            executorService.submit(() -> {
                System.out.println(Thread.currentThread().getName());
            });
        }

        //
        ExecutorService executorService1 = Executors.newCachedThreadPool();
        for (int i = 0; i < 50; i++) {
            executorService1.submit(() -> {
                System.out.println(Thread.currentThread().getName());
            });
        }

        ExecutorService executorService2 = Executors.newSingleThreadExecutor();
        for (int i = 0; i < 50; i++) {
            executorService2.submit(() -> {
                System.out.println(Thread.currentThread().getName());
            });
        }

        ScheduledExecutorService executorService3 = Executors.newScheduledThreadPool(10);
        for (int i = 0; i < 50; i++) {

            executorService3.scheduleAtFixedRate(() -> {
                System.out.println(Thread.currentThread().getName());
            },3, 3,TimeUnit.SECONDS);

            executorService3.scheduleWithFixedDelay(() -> {
                System.out.println(Thread.currentThread().getName());
            },3, 3,TimeUnit.SECONDS);

        }

        Thread.sleep(200);

    }

}
线程池的类型主要有以下几种
- Executors.newFixedThreadPool 创建固定数量的线程池
- Executors.newCachedThreadPool 创建动态数量的线程池
- Executors.newSingleThreadExecutor 创建单个任务的线程池,同一时刻只能执行一个任务
- Executors.newScheduledThreadPool 创建定时任务类型的线程池,定时任务主要有两种类型FixedRate、FixedDelay,例如同样是每隔3s执行一次,FixedRate 不包含任务的执行时间在内,而 FixedDelay 是包含任务的执行时间在内的。
- Future、Callable
使用Future以及Callale实现有返回值的多线程
public class TheadTest09 {

    public static void main(String[] args) throws ExecutionException, InterruptedException {

        ExecutorService executorService = Executors.newFixedThreadPool(5);

        Future<String> future = executorService.submit(() -> UUID.randomUUID().toString());

        String s = future.get();//可能会阻塞

        System.out.println("线程返回值是:" + s);

        executorService.shutdown();

    }

}
- CompletableFuture 异步编排
CompletableFuture 是 JDK1.8 新增的一个异步任务编排解决方案,可以结合线程池实现多任务并发等。
CompletableFuture API的命名特点:
runxxx:处理无返回值的异步任务
supplyxxx:处理有返回值的异步任务
thenAccept:处理正常结果
exceptional:处理异常结果
thenApplyAsync:用于串行化另一个CompletableFuture
anyOf()和allOf:用于并行化多个CompletableFuture
简而言之,一个CompletableFuture 对象就表示一个异步任务或者是具有异步任务处理的能力。
public class ThreadTest10 {

    public static void sleep(int mills) {
        try {
            Thread.sleep(mills);
        } catch (InterruptedException e) {
            e.printStackTrace();
        }
    }

    @Test
    public void test01() throws Exception {
        CompletableFuture<String> future = CompletableFuture.supplyAsync(() -> {
            return UUID.randomUUID().toString();
        });

        sleep(3000);

        future.thenAccept((val) -> {
            System.out.println("异步任务的返回值是:" + val);
        });

        future.exceptionally((ex) -> {
            System.out.println("异步任务的异常信息:" + ex);
            return null;
        });

        sleep(10000);
    }

    @Test
    public void test2() throws Exception {
        CompletableFuture<String> f1 = CompletableFuture.supplyAsync(() -> {
            sleep(3000);
            return UUID.randomUUID().toString();
        });

        CompletableFuture<String> f2 = CompletableFuture.supplyAsync(() -> {
            sleep(1000);
            return UUID.randomUUID().toString();
        });

        //组合API,监听任意一个任务成功即可
        CompletableFuture<Object> data = CompletableFuture.anyOf(f1, f2);
        data.thenAccept((val) -> {
            System.out.println("返回结果:" + val);
        });

        Thread.sleep(10000);

    }

    public static void main(String[] args) throws InterruptedException {
        CompletableFuture<String> f1 = CompletableFuture.supplyAsync(() -> {
            sleep(3000);
            return UUID.randomUUID().toString();
        });

        CompletableFuture<String> f2 = CompletableFuture.supplyAsync(() -> {
            sleep(1000);
            return UUID.randomUUID().toString();
        });

        //组合API,监听任意一个任务成功即可
        CompletableFuture<Void> f3 = CompletableFuture.allOf(f1, f2);

        f3.thenAccept((val) -> {
            System.out.println("返回结果:" + val);
        });

        Thread.sleep(10000);

    }

}
- ForkJoin
Java 7开始引入了一种新的Fork/Join线程池,它可以执行一种特殊的任务:把一个大任务拆成多个小任务并行执行。每个小任务开启线程独立计算,然后计算结合向上递归,最终计算出整个大任务的结果。
案例:使用ForkJoin 对数组进行分段求和。
public class ForkJoinTest {

    public static void main(String[] args) {
        int size = 1000000;
        Random random = new Random();
        int[] nums = new int[size];
        for (int i = 0; i < size; i++) {
            nums[i] = random.nextInt(100);
        }

        long l = System.currentTimeMillis();

        int expected = 0;
        for (int i = 0; i < nums.length; i++) {
            expected = expected + nums[i];
        }
        long end = System.currentTimeMillis();
        System.out.println("ms " +  (end - l) + " result " + expected);

        //采用分治思想 将size大小的数组拆分为 1000 一组
        SumTaskArr sumTaskArr = new SumTaskArr(nums, 0, size);
        Long invoke = ForkJoinPool.commonPool().invoke(sumTaskArr);
        System.out.println(invoke);
    }

}

/**
 * 相同思想的实现还有
 */
class SumTaskArr extends RecursiveTask<Long>{

    private int[] arr;

    //开始下标
    private int start;

    //结束下标
    private int end;

    private int threashold = 1000;

    public SumTaskArr(int[] arr,int start,int end){
        this.arr = arr;
        this.start = start;
        this.end = end;
    }

    /**
     * 每个任务的返回结果,这里只需要处理每个任务即可,返回后Root任务自动累加
     * @return
     */
    @Override
    protected Long compute() {
        if ((end - start) > threashold){
            try {
                Thread.sleep(100);
            } catch (InterruptedException e) {
                e.printStackTrace();
            }
            int middle = (start + end) / 2; //继续拆分
            SumTaskArr childtask1 = new SumTaskArr(arr, start, middle);
            SumTaskArr childtask2 = new SumTaskArr(arr, middle, end);
            invokeAll(childtask1,childtask2);
            Long join = childtask1.join();
            Long join1 = childtask2.join();
            System.out.println(Thread.currentThread() + "  ==> " + (join + join1));
            return join + join1;
        }else {
            //如果不大于阈值,则直接计算
            long ex = 0;
            for (int i = start; i < end; i++) {
                ex = ex + arr[i];
            }
            return ex;
        }
    }
}
ForkJoin 采用的思想叫分治思想,当处理一个大任务比较困难的时候 把任务拆分成多个小任务做,此类思想的算法实现还有归并排序以及快速排序。这个案例最关键的是这三行代码
 			invokeAll(childtask1,childtask2);
            Long join = childtask1.join();
            Long join1 = childtask2.join();
invokeAll 表示 继续开启新线程执行childtask1、childtask2 的compute代码,但是注意 childtask1.join(); 的作用就是优先执行完 childtask1的代码,但是不影响 childtask1、childtask2 并发执行,每个新的线程都会阻塞在开启的子线程上,知道最后的线程完成计算任务并返回。

