1.SpringBoot整合Druid
1)引入jar包
   <dependency>
       <groupId>com.alibaba</groupId>
       <artifactId>druid-spring-boot-starter</artifactId>
       <version>1.2.3</version>
   </dependency>
2)在application.yml中
# 数据源
spring:
  datasource:
    username: root
    password: 123456
    url: jdbc:mysql://localhost:3306/springboot_mybatis?characterEncoding=utf8&useSSL=false&serverTimezone=UTC&
    driver-class-name: com.mysql.cj.jdbc.Driver
    type: com.alibaba.druid.pool.DruidDataSource

    #   数据源其他配置
    initialSize: 5
    minIdle: 5
    maxActive: 20
    maxWait: 60000
    timeBetweenEvictionRunsMillis: 60000
    minEvictableIdleTimeMillis: 300000
    validationQuery: SELECT 1 FROM DUAL
    testWhileIdle: true
    testOnBorrow: false
    testOnReturn: false
    poolPreparedStatements: true
    #   配置监控统计拦截的filters,去掉后监控界面sql无法统计,'wall'用于防火墙
    filters: stat,wall
    maxPoolPreparedStatementPerConnectionSize: 20
    useGlobalDataSourceStat: true
    connectionProperties: druid.stat.mergeSql=true;druid.stat.slowSqlMillis=500
    #初始化时运行sql脚本
    schema: classpath:sql/schema.sql
    initialization-mode: always

    druid:
      #开启druid 监控台servlet
      stat-view-servlet:
        enabled: true
        login-username: admin
        loginPassword: 123456
      #开启druid 监控filter
      web-stat-filter:
        enabled: true
注意: initialization-mode: always 第一次用过之后注释掉,或者将其改成never
3).启动项目,访问:http://127.0.0.1:8080/druid/
用户名:admin/密码:123456(在配置文件中有)
2.SpringBoot整合Mybatis
ps:还记得mybatis中的sqlSessionFactory要传入一个dataSource吗?所以我们先学习了druid。
1)关于逆向工程:我们更多的使用插件plugin的方式
(注意:mybatis的逆向工程生成的是mapper接口和mapper.xml文件
AutoGenerator 是 MyBatis-Plus 的代码生成器,通过 AutoGenerator 可以快速生成 Entity、Mapper、Mapper XML、Service、Controller 等各个模块的代码,极大的提升了开发效率。)
Mybatis逆向工程_飞鸟的心情的博客-CSDN博客
2)集成mybatis
第一步:jar包引入:
   <!--mybatis -->
        <dependency>
            <groupId>org.mybatis.spring.boot</groupId>
            <artifactId>mybatis-spring-boot-starter</artifactId>
            <version>2.1.4</version>
        </dependency>
第二步:
在application.yml中:
#设置mybatis
mybatis:
  mapper-locations: classpath:com/tulingxueyuan/mapper/*Mapper.xml
  typeAliasesPackage: com.tulingxueyuan.pojo
  configuration:
mapUnderscoreToCamelCase: true- typeAliasesPackage 的作用就是指定一个包名,在该包中的所有类都会被自动注册为 MyBatis 的别名,无需显式在 XML 配置文件中指定别名。这可以减少在 XML 配置文件中的重复工作,同时使得配置更加简洁。
- mapUnderscoreToCamelCase: true的作用是:(参考如下代码)其中的查询结果就算没有resultMap映射,那么也可以将dept_name字段映射成deptName
<select id="selectByPrimaryKey" parameterType="java.lang.Integer" resultMap="BaseResultMap">
  select id, dept_name
  from dept
  where id = #{id,jdbcType=INTEGER}
</select>
第三步:
在启动类中加入:@MapperScan("com.tulingxueyuan.mapper")
@SpringBootApplication
@MapperScan("com.tulingxueyuan.mapper")
public class Application {

    public static void main(String[] args) {
        SpringApplication.run(Application.class, args);
    }

}
ok,集成好了。
3.SpringBoot整合MybatisPlus
Idea先安装插件MybatisX
官网:MyBatis-Plus
1.引入jar包:
这里使用的是3.4.2的版本,还有其他版本在mvn repository中查找
  <!-- mybatis-plus   不需要再额外引入mybatis了-->
        <dependency>
            <groupId>com.baomidou</groupId>
            <artifactId>mybatis-plus-boot-starter</artifactId>
            <version>${mybatisplus.version}</version>
        </dependency>
2.集成配置:
application.yml中:
# 数据源
spring:
  datasource:
    username: root
    password: root
    url: jdbc:mysql://localhost:3306/mybatisplus?characterEncoding=utf8&useSSL=false&serverTimezone=UTC&
    driver-class-name: com.mysql.cj.jdbc.Driver
    type: com.alibaba.druid.pool.DruidDataSource
    #初始化时运行sql脚本
    schema: classpath:sql/schema.sql
    initialization-mode : never
logging:
  level:
    root: info
    com.tulingxueyuan: debug  #设置日志级别 mp的mapper日志级别
mybatis-plus:
  configuration:
    map-underscore-to-camel-case: false  #下划线命名转化为驼峰命名
sql文件的内容:
-- 创建表
CREATE TABLE tbl_employee(
   id INT(11) PRIMARY KEY AUTO_INCREMENT,
   last_name VARCHAR(50),
   email VARCHAR(50),
   gender CHAR(1),
   age INT
);
INSERT INTO tbl_employee(last_name,email,gender,age) VALUES('Tom','tom@atguigu.com',1,22);
INSERT INTO tbl_employee(last_name,email,gender,age) VALUES('Jerry','jerry@atguigu.com',0,25);
INSERT INTO tbl_employee(last_name,email,gender,age) VALUES('Black','black@atguigu.com',1,30);
INSERT INTO tbl_employee(last_name,email,gender,age) VALUES('White','white@atguigu.com',0,35);
启动类中:
@SpringBootApplication
@MapperScan("com.tulingxueyuan.mbp.mapper")
public class QuickStartApplication {

    public static void main(String[] args) {
        SpringApplication.run(QuickStartApplication.class, args);
    }

}
3.编写mapper接口和servcie接口
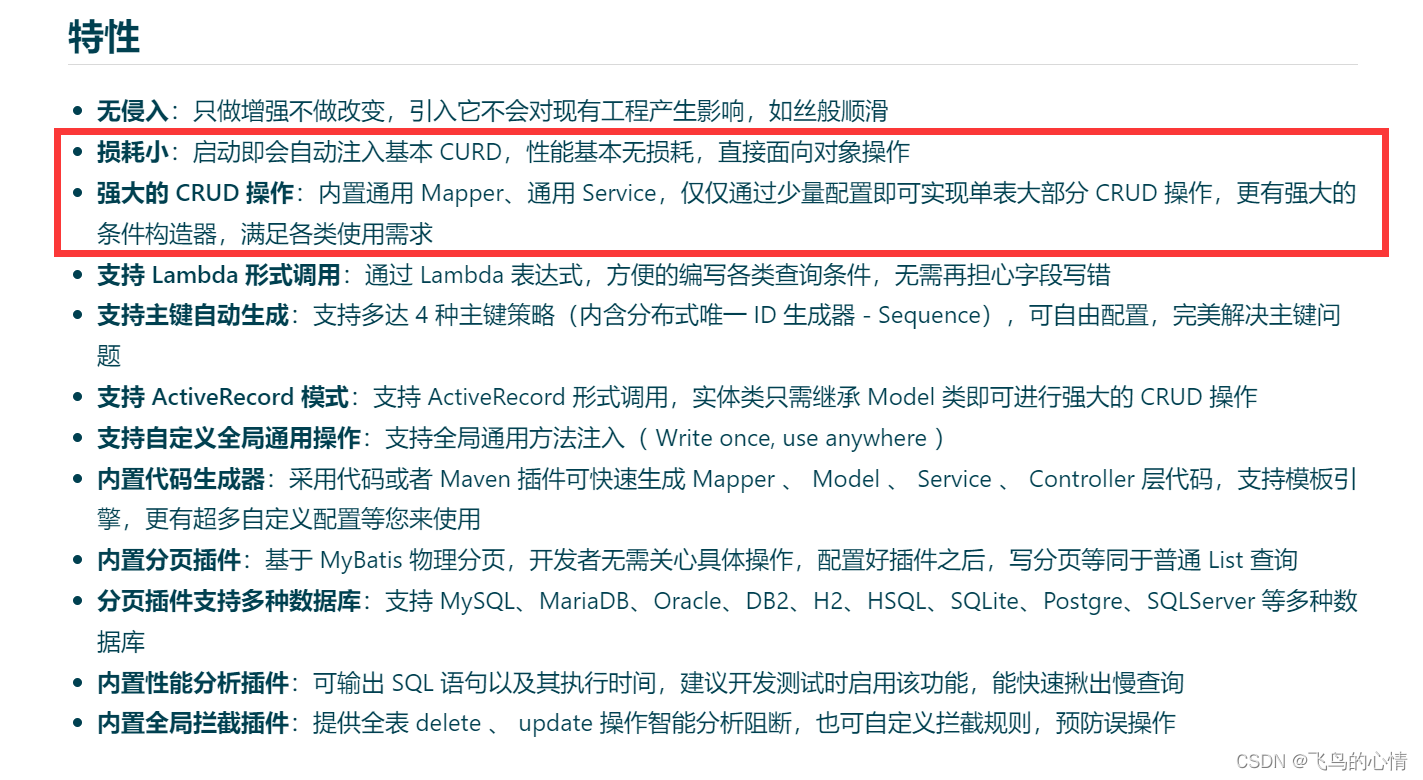
看下图的重点:编写的接口都要继承通用的Mapper和Servcie接口:BaseMapper和IService
mapper中:
package com.tulingxueyuan.mbp.mapper;

import com.baomidou.mybatisplus.core.mapper.BaseMapper;
import com.tulingxueyuan.mbp.pojo.Employee;

public interface EmployeeMapper extends BaseMapper<Employee> {
}
service中:
package com.tulingxueyuan.mbp.service;

import com.baomidou.mybatisplus.extension.service.IService;
import com.tulingxueyuan.mbp.pojo.Employee;

public interface EmployeeService extends IService<Employee> {
}
serviceImpl中:
package com.tulingxueyuan.mbp.service.impl;

import com.baomidou.mybatisplus.extension.service.impl.ServiceImpl;
import com.tulingxueyuan.mbp.mapper.EmployeeMapper;
import com.tulingxueyuan.mbp.pojo.Employee;
import com.tulingxueyuan.mbp.service.EmployeeService;
import org.springframework.stereotype.Service;

/***
 *
 *  service实现类   继承mp提供通用的service基类
 *  ServiceImpl<EmployeeMapper, Employee>
 *      2个泛型 1.EmployeeMapper  Mapper接口
 *              2.Employee  对应Pojo
 */
@Service
public class EmployeeImplService extends
ServiceImpl<EmployeeMapper, Employee> implements EmployeeService {


}
4.创建实体类pojo
package com.tulingxueyuan.mbp.pojo;

import com.baomidou.mybatisplus.annotation.IdType;
import com.baomidou.mybatisplus.annotation.TableField;
import com.baomidou.mybatisplus.annotation.TableId;
import com.baomidou.mybatisplus.annotation.TableName;


//  mp 会默认将pojo类名当表名,如果类名和表名不一致可以使用注解
@TableName("tbl_employee")
public class Employee {
    // mp 会自动识别pojo类中名为id的属性,如果名字叫id就会当做是主键
    // 如果你的注解没有赋值那它会帮你使用ID_WORKER的生成策略, 主要是为了防止你忘记给主键赋值
    // 如果字段是自动增长需要手动改一下生成策略
    @TableId(value = "id", type = IdType.AUTO)
    private Integer id;
    @TableField("last_name")
    private String lastName;
    private String email;
    private Integer gender;
    private Integer age;
    @TableField(exist = false)
    private String genderName; // 这个字段在表中是没有的

    public String getGenderName() {
         if(gender==0){
             return "女";
         }
         else
         {
             return "男";
         }
    }


    public Employee() {
        super();
        // TODO Auto-generated constructor stub
    }
    public Employee(Integer id, String lastName, String email, Integer gender, Integer age) {
        super();
        this.id = id;
        this.lastName = lastName;
        this.email = email;
        this.gender = gender;
        this.age = age;
    }

    //getter和setter省略...

    @Override
    public String toString() {
        return "Employee [id=" + id + ", lastName=" + lastName + ", email=" + email + ", gender=" + gender + getGenderName()+", age="
                + age + "]";
    }


}
ok,以上就是springboot集成MybatisPlus的过程。





![[NOIP2008 提高组] 传纸条——DP+优化](https://img-blog.csdnimg.cn/b478b31f2bbc4c64a089c6bfd88fb4fd.png)
