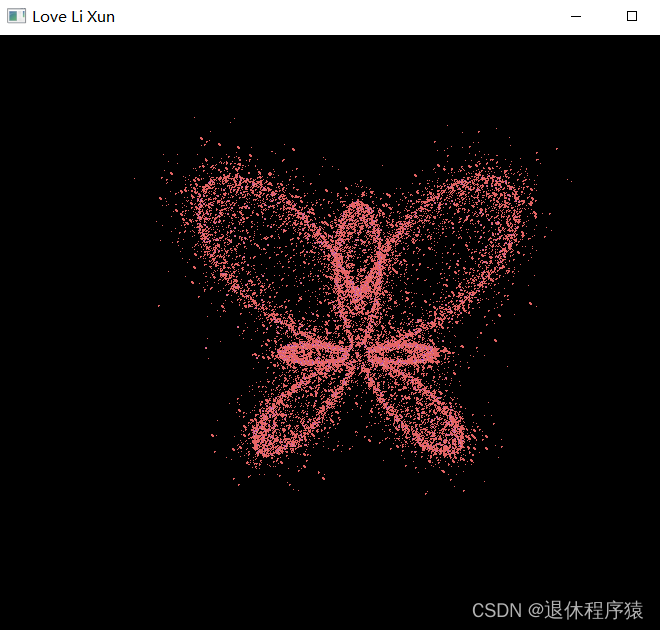
python程序代码:heart.py
from math import cos, pi
import numpy as np
import cv2
import os, glob


class HeartSignal:
    def __init__(self, curve="heart", title="Love U", frame_num=20, seed_points_num=2000, seed_num=None, highlight_rate=0.3,
                 background_img_dir="", set_bg_imgs=False, bg_img_scale=0.2, bg_weight=0.3, curve_weight=0.7, frame_width=1080, frame_height=960, scale=10.1,
                 base_color=None, highlight_points_color_1=None, highlight_points_color_2=None, wait=100, n_star=5, m_star=2):
        super().__init__()
        self.curve = curve
        self.title = title
        self.highlight_points_color_2 = highlight_points_color_2
        self.highlight_points_color_1 = highlight_points_color_1
        self.highlight_rate = highlight_rate
        self.base_color = base_color
        self.n_star = n_star
        self.m_star = m_star
        self.curve_weight = curve_weight
        img_paths = glob.glob(background_img_dir + "/*")
        self.bg_imgs = []
        self.set_bg_imgs = set_bg_imgs
        self.bg_weight = bg_weight
        if os.path.exists(background_img_dir) and len(img_paths) > 0 and set_bg_imgs:
            for img_path in img_paths:
                img = cv2.imread(img_path)
                self.bg_imgs.append(img)
            first_bg = self.bg_imgs[0]
            width = int(first_bg.shape[1] * bg_img_scale)
            height = int(first_bg.shape[0] * bg_img_scale)
            first_bg = cv2.resize(first_bg, (width, height), interpolation=cv2.INTER_AREA)

            # 对齐图片,自动裁切中间
            new_bg_imgs = [first_bg, ]
            for img in self.bg_imgs[1:]:
                width_close = abs(first_bg.shape[1] - img.shape[1]) < abs(first_bg.shape[0] - img.shape[0])
                if width_close:
                    # resize
                    height = int(first_bg.shape[1] / img.shape[1] * img.shape[0])
                    width = first_bg.shape[1]
                    img = cv2.resize(img, (width, height), interpolation=cv2.INTER_AREA)
                    # crop and fill
                    if img.shape[0] > first_bg.shape[0]:
                        crop_num = img.shape[0] - first_bg.shape[0]
                        crop_top = crop_num // 2
                        crop_bottom = crop_num - crop_top
                        img = np.delete(img, range(crop_top), axis=0)
                        img = np.delete(img, range(img.shape[0] - crop_bottom, img.shape[0]), axis=0)
                    elif img.shape[0] < first_bg.shape[0]:
                        fill_num = first_bg.shape[0] - img.shape[0]
                        fill_top = fill_num // 2
                        fill_bottom = fill_num - fill_top
                        img = np.concatenate([np.zeros([fill_top, width, 3]), img, np.zeros([fill_bottom, width, 3])], axis=0)
                else:
                    width = int(first_bg.shape[0] / img.shape[0] * img.shape[1])
                    height = first_bg.shape[0]
                    img = cv2.resize(img, (width, height), interpolation=cv2.INTER_AREA)
                    # crop and fill
                    if img.shape[1] > first_bg.shape[1]:
                        crop_num = img.shape[1] - first_bg.shape[1]
                        crop_top = crop_num // 2
                        crop_bottom = crop_num - crop_top
                        img = np.delete(img, range(crop_top), axis=1)
                        img = np.delete(img, range(img.shape[1] - crop_bottom, img.shape[1]), axis=1)
                    elif img.shape[1] < first_bg.shape[1]:
                        fill_num = first_bg.shape[1] - img.shape[1]
                        fill_top = fill_num // 2
                        fill_bottom = fill_num - fill_top
                        img = np.concatenate([np.zeros([fill_top, width, 3]), img, np.zeros([fill_bottom, width, 3])], axis=1)
                new_bg_imgs.append(img)
            self.bg_imgs = new_bg_imgs
            assert all(img.shape[0] == first_bg.shape[0] and img.shape[1] == first_bg.shape[1] for img in self.bg_imgs), "背景图片宽和高不一致"
            self.frame_width = self.bg_imgs[0].shape[1]
            self.frame_height = self.bg_imgs[0].shape[0]
        else:
            self.frame_width = frame_width  # 窗口宽度
            self.frame_height = frame_height  # 窗口高度
        self.center_x = self.frame_width / 2
        self.center_y = self.frame_height / 2
        self.main_curve_width = -1
        self.main_curve_height = -1

        self.frame_points = []  # 每帧动态点坐标
        self.frame_num = frame_num  # 帧数
        self.seed_num = seed_num  # 伪随机种子,设置以后除光晕外粒子相对位置不动(减少内部闪烁感)
        self.seed_points_num = seed_points_num  # 主图粒子数
        self.scale = scale  # 缩放比例
        self.wait = wait

    def curve_function(self, curve):
        curve_dict = {
            "heart": self.heart_function,
            "butterfly": self.butterfly_function,
            "star": self.star_function,
        }
        return curve_dict[curve]

    def heart_function(self, t, frame_idx=0, scale=5.20):
        """
        图形方程
        :param frame_idx: 帧的索引,根据帧数变换心形
        :param scale: 放大比例
        :param t: 参数
        :return: 坐标
        """
        trans = 3 - (1 + self.periodic_func(frame_idx, self.frame_num)) * 0.5  # 改变心形饱满度度的参数

        x = 15 * (np.sin(t) ** 3)
        t = np.where((pi < t) & (t < 2 * pi), 2 * pi - t, t)  # 翻转x > 0部分的图形到3、4象限
        y = -(14 * np.cos(t) - 4 * np.cos(2 * t) - 2 * np.cos(3 * t) - np.cos(trans * t))

        ign_area = 0.15
        center_ids = np.where((x > -ign_area) & (x < ign_area))
        if np.random.random() > 0.32:
            x, y = np.delete(x, center_ids), np.delete(y, center_ids)  # 删除稠密部分的扩散,为了美观

        # 放大
        x *= scale
        y *= scale

        # 移到画布中央
        x += self.center_x
        y += self.center_y

        # 原心形方程
        # x = 15 * (sin(t) ** 3)
        # y = -(14 * cos(t) - 4 * cos(2 * t) - 2 * cos(3 * t) - cos(3 * t))
        return x.astype(int), y.astype(int)

    def butterfly_function(self, t, frame_idx=0, scale=5.2):
        """
        图形函数
        :param frame_idx:
        :param scale: 放大比例
        :param t: 参数
        :return: 坐标
        """
        # 基础函数
        # t = t * pi
        p = np.exp(np.sin(t)) - 2.5 * np.cos(4 * t) + np.sin(t) ** 5
        x = 5 * p * np.cos(t)
        y = - 5 * p * np.sin(t)

        # 放大
        x *= scale
        y *= scale

        # 移到画布中央
        x += self.center_x
        y += self.center_y

        return x.astype(int), y.astype(int)

    def star_function(self, t, frame_idx=0, scale=5.2):
        n = self.n_star / self.m_star
        p = np.cos(pi / n) / np.cos(pi / n - (t % (2 * pi / n)))

        x = 15 * p * np.cos(t)
        y = 15 * p * np.sin(t)

        # 放大
        x *= scale
        y *= scale

        # 移到画布中央
        x += self.center_x
        y += self.center_y

        return x.astype(int), y.astype(int)

    def shrink(self, x, y, ratio, offset=1, p=0.5, dist_func="uniform"):
        """
        带随机位移的抖动
        :param x: 原x
        :param y: 原y
        :param ratio: 缩放比例
        :param p:
        :param offset:
        :return: 转换后的x,y坐标
        """
        x_ = (x - self.center_x)
        y_ = (y - self.center_y)
        force = 1 / ((x_ ** 2 + y_ ** 2) ** p + 1e-30)

        dx = ratio * force * x_
        dy = ratio * force * y_

        def d_offset(x):
            if dist_func == "uniform":
                return x + np.random.uniform(-offset, offset, size=x.shape)
            elif dist_func == "norm":
                return x + offset * np.random.normal(0, 1, size=x.shape)

        dx, dy = d_offset(dx), d_offset(dy)

        return x - dx, y - dy

    def scatter(self, x, y, alpha=0.75, beta=0.15):
        """
        随机内部扩散的坐标变换
        :param alpha: 扩散因子 - 松散
        :param x: 原x
        :param y: 原y
        :param beta: 扩散因子 - 距离
        :return: x,y 新坐标
        """

        ratio_x = - beta * np.log(np.random.random(x.shape) * alpha)
        ratio_y = - beta * np.log(np.random.random(y.shape) * alpha)
        dx = ratio_x * (x - self.center_x)
        dy = ratio_y * (y - self.center_y)

        return x - dx, y - dy

    def periodic_func(self, x, x_num):
        """
        跳动周期曲线
        :param p: 参数
        :return: y
        """

        # 可以尝试换其他的动态函数,达到更有力量的效果(贝塞尔?)
        def ori_func(t):
            return cos(t)

        func_period = 2 * pi
        return ori_func(x / x_num * func_period)

    def gen_points(self, points_num, frame_idx, shape_func):
        # 用周期函数计算得到一个因子,用到所有组成部件上,使得各个部分的变化周期一致
        cy = self.periodic_func(frame_idx, self.frame_num)
        ratio = 10 * cy

        # 图形
        period = 2 * pi * self.m_star if self.curve == "star" else 2 * pi
        seed_points = np.linspace(0, period, points_num)
        seed_x, seed_y = shape_func(seed_points, frame_idx, scale=self.scale)
        x, y = self.shrink(seed_x, seed_y, ratio, offset=2)
        curve_width, curve_height = int(x.max() - x.min()), int(y.max() - y.min())
        self.main_curve_width = max(self.main_curve_width, curve_width)
        self.main_curve_height = max(self.main_curve_height, curve_height)
        point_size = np.random.choice([1, 2], x.shape, replace=True, p=[0.5, 0.5])
        tag = np.ones_like(x)

        def delete_points(x_, y_, ign_area, ign_prop):
            ign_area = ign_area
            center_ids = np.where((x_ > self.center_x - ign_area) & (x_ < self.center_x + ign_area))
            center_ids = center_ids[0]
            np.random.shuffle(center_ids)
            del_num = round(len(center_ids) * ign_prop)
            del_ids = center_ids[:del_num]
            x_, y_ = np.delete(x_, del_ids), np.delete(y_, del_ids)  # 删除稠密部分的扩散,为了美观
            return x_, y_

        # 多层次扩散
        for idx, beta in enumerate(np.linspace(0.05, 0.2, 6)):
            alpha = 1 - beta
            x_, y_ = self.scatter(seed_x, seed_y, alpha, beta)
            x_, y_ = self.shrink(x_, y_, ratio, offset=round(beta * 15))
            x = np.concatenate((x, x_), 0)
            y = np.concatenate((y, y_), 0)
            p_size = np.random.choice([1, 2], x_.shape, replace=True, p=[0.55 + beta, 0.45 - beta])
            point_size = np.concatenate((point_size, p_size), 0)
            tag_ = np.ones_like(x_) * 2
            tag = np.concatenate((tag, tag_), 0)

        # 光晕
        halo_ratio = int(7 + 2 * abs(cy))  # 收缩比例随周期变化

        # 基础光晕
        x_, y_ = shape_func(seed_points, frame_idx, scale=self.scale + 0.9)
        x_1, y_1 = self.shrink(x_, y_, halo_ratio, offset=18, dist_func="uniform")
        x_1, y_1 = delete_points(x_1, y_1, 20, 0.5)
        x = np.concatenate((x, x_1), 0)
        y = np.concatenate((y, y_1), 0)

        # 炸裂感光晕
        halo_number = int(points_num * 0.6 + points_num * abs(cy))  # 光晕点数也周期变化
        seed_points = np.random.uniform(0, 2 * pi, halo_number)
        x_, y_ = shape_func(seed_points, frame_idx, scale=self.scale + 0.9)
        x_2, y_2 = self.shrink(x_, y_, halo_ratio, offset=int(6 + 15 * abs(cy)), dist_func="norm")
        x_2, y_2 = delete_points(x_2, y_2, 20, 0.5)
        x = np.concatenate((x, x_2), 0)
        y = np.concatenate((y, y_2), 0)

        # 膨胀光晕
        x_3, y_3 = shape_func(np.linspace(0, 2 * pi, int(points_num * .4)),
                                             frame_idx, scale=self.scale + 0.2)
        x_3, y_3 = self.shrink(x_3, y_3, ratio * 2, offset=6)
        x = np.concatenate((x, x_3), 0)
        y = np.concatenate((y, y_3), 0)

        halo_len = x_1.shape[0] + x_2.shape[0] + x_3.shape[0]
        p_size = np.random.choice([1, 2, 3], halo_len, replace=True, p=[0.7, 0.2, 0.1])
        point_size = np.concatenate((point_size, p_size), 0)
        tag_ = np.ones(halo_len) * 2 * 3
        tag = np.concatenate((tag, tag_), 0)

        x_y = np.around(np.stack([x, y], axis=1), 0)
        x, y = x_y[:, 0], x_y[:, 1]
        return x, y, point_size, tag

    def get_frames(self, shape_func):
        for frame_idx in range(self.frame_num):
            np.random.seed(self.seed_num)
            self.frame_points.append(self.gen_points(self.seed_points_num, frame_idx, shape_func))

        frames = []

        def add_points(frame, x, y, size, tag):
            highlight1 = np.array(self.highlight_points_color_1, dtype='uint8')
            highlight2 = np.array(self.highlight_points_color_2, dtype='uint8')
            base_col = np.array(self.base_color, dtype='uint8')

            x, y = x.astype(int), y.astype(int)
            frame[y, x] = base_col

            size_2 = np.int64(size == 2)
            frame[y, x + size_2] = base_col
            frame[y + size_2, x] = base_col

            size_3 = np.int64(size == 3)
            frame[y + size_3, x] = base_col
            frame[y - size_3, x] = base_col
            frame[y, x + size_3] = base_col
            frame[y, x - size_3] = base_col
            frame[y + size_3, x + size_3] = base_col
            frame[y - size_3, x - size_3] = base_col
            # frame[y - size_3, x + size_3] = color
            # frame[y + size_3, x - size_3] = color

            # 高光
            random_sample = np.random.choice([1, 0], size=tag.shape, p=[self.highlight_rate, 1 - self.highlight_rate])

            # tag2_size1 = np.int64((tag <= 2) & (size == 1) & (random_sample == 1))
            # frame[y * tag2_size1, x * tag2_size1] = highlight2

            tag2_size2 = np.int64((tag <= 2) & (size == 2) & (random_sample == 1))
            frame[y * tag2_size2, x * tag2_size2] = highlight1
            # frame[y * tag2_size2, (x + 1) * tag2_size2] = highlight2
            # frame[(y + 1) * tag2_size2, x * tag2_size2] = highlight2
            frame[(y + 1) * tag2_size2, (x + 1) * tag2_size2] = highlight2

        for x, y, size, tag in self.frame_points:
            frame = np.zeros([self.frame_height, self.frame_width, 3], dtype="uint8")
            add_points(frame, x, y, size, tag)
            frames.append(frame)

        return frames

    def draw(self, times=10):
        frames = self.get_frames(self.curve_function(self.curve))

        for i in range(times):
            for frame in frames:
                frame = cv2.cvtColor(frame, cv2.COLOR_RGB2BGR)
                if len(self.bg_imgs) > 0 and self.set_bg_imgs:
                    frame = cv2.addWeighted(self.bg_imgs[i % len(self.bg_imgs)], self.bg_weight, frame, self.curve_weight, 0)
                cv2.imshow(self.title, frame)
                cv2.waitKey(self.wait)


if __name__ == '__main__':
    import yaml
    settings = yaml.load(open("./settings.yaml", "r", encoding="utf-8"), Loader=yaml.FullLoader)
    if settings["wait"] == -1:
        settings["wait"] = int(settings["period_time"] / settings["frame_num"])
    del settings["period_time"]
    times = settings["times"]
    del settings["times"]
    heart = HeartSignal(seed_num=5201314, **settings)
    heart.draw(times)
其中也要到这个py文件的相同的文件夹里引入settings.yaml文件:
# 颜色:RGB三原色数值 0~255
# 设置高光时,尽量选择接近主色的颜色,看起来会和谐一点

# 视频里的蓝色调
#base_color: # 主色  默认玫瑰粉
#  - 30
#  - 100
#  - 100
#highlight_points_color_1: # 高光粒子色1 默认淡紫色
#  - 150
#  - 120
#  - 220
#highlight_points_color_2: # 高光粒子色2 默认淡粉色
#  - 128
#  - 140
#  - 140

base_color: # 主色  默认玫瑰粉
  - 228
  - 100
  - 100
highlight_points_color_1: # 高光粒子色1 默认淡紫色
  - 180
  - 87
  - 200
highlight_points_color_2: # 高光粒子色2 默认淡粉色
  - 228
  - 140
  - 140

period_time: 1000 * 2  # 周期时间,默认1.5s一个周期
times: 5 # 播放周期数,一个周期跳动1次
frame_num: 24  # 一个周期的生成帧数
wait: 60  # 每一帧停留时间, 设置太短可能造成闪屏,设置 -1 自动设置为 period_time / frame_num
seed_points_num: 2000  # 构成主图的种子粒子数,总粒子数是这个的8倍左右(包括散点和光晕)
highlight_rate: 0.2 # 高光粒子的比例
frame_width: 720  # 窗口宽度,单位像素,设置背景图片后失效
frame_height: 640  # 窗口高度,单位像素,设置背景图片后失效
scale: 9.1  # 主图缩放比例
curve: "butterfly"  # 图案类型:heart, butterfly, star
n_star: 7 # n-角型/星,如果curve设置成star才会生效,五角星:n-star:5, m-star:2
m_star: 3 # curve设置成star才会生效,n-角形 m-star都是1,n-角星 m-star大于1,比如 七角星:n-star:7, m-star:2 或 3
title: "Love Li Xun"  # 仅支持字母,中文乱码
background_img_dir: "src/center_imgs" # 这个目录放置背景图片,建议像素在400 X 400以上,否则可能报错,如果图片实在小,可以调整上面scale把爱心缩小
set_bg_imgs: false # true或false,设置false用默认黑背景
bg_img_scale: 0.6 # 0 - 1,背景图片缩放比例
bg_weight: 0.4 # 0 - 1,背景图片权重,可看做透明度吧
curve_weight: 1 # 同上

# ======================== 推荐参数: 直接复制数值替换上面对应参数 ==================================
# 蝴蝶,报错很可能是蝴蝶缩放大小超出窗口宽和高
# curve: "butterfly"
# frame_width: 800
# frame_height: 720
# scale: 60
# base_color: [100, 100, 228]
# highlight_points_color_1: [180, 87, 200]
# highlight_points_color_2: [228, 140, 140]
演示:
