在平时项目开发中,肯定有很多小伙伴会需要实现定时向某个页面推送消息的功能,为了解决大家无从下手的问题,加哥今天展示一套简单的代码解决方案。
1.创建WebSocketConfig配置类
在这个类中注入ServerEndpointExporter,这个bean会自动注册使用了@ServerEndpoint注解声明的Websocket endpoint。
package org.example.demo2.config;

import org.springframework.context.annotation.Bean;
import org.springframework.context.annotation.Configuration;
import org.springframework.web.socket.server.standard.ServerEndpointExporter;

@Configuration
public class WebSocketConfig {

    /**
     * 	注入ServerEndpointExporter,
     * 	这个bean会自动注册使用了@ServerEndpoint注解声明的Websocket endpoint
     */
    @Bean
    public ServerEndpointExporter serverEndpointExporter() {
        return new ServerEndpointExporter();
    }
}
2.创建WebSocket配置类
在这个类中定义WebSocket的链接成功调用、链接关闭调用的方法、收到客户端消息后调用的方法、发送错误时的处理、消息推送方法。
package org.example.demo2.websocket;

import lombok.extern.slf4j.Slf4j;
import org.slf4j.Logger;
import org.slf4j.LoggerFactory;
import org.springframework.stereotype.Component;

import javax.websocket.*;
import javax.websocket.server.PathParam;
import javax.websocket.server.ServerEndpoint;
import java.util.concurrent.ConcurrentHashMap;
import java.util.concurrent.CopyOnWriteArraySet;

@Component
@Slf4j
@ServerEndpoint("/websocket/{userId}")
public class WebSocket {
    //与某个客户端的连接会话,需要通过它来给客户端发送数据
    private Session session;
    /**
     * 用户ID
     */
    private String userId;

    //concurrent包的线程安全Set,用来存放每个客户端对应的MyWebSocket对象。
    //虽然@Component默认是单例模式的,但springboot还是会为每个websocket连接初始化一个bean,所以可以用一个静态set保存起来。
    //  注:底下WebSocket是当前类名
    private static CopyOnWriteArraySet<WebSocket> webSockets =new CopyOnWriteArraySet<>();
    // 用来存在线连接用户信息
    private static ConcurrentHashMap<String,Session> sessionPool = new ConcurrentHashMap<String,Session>();

    /**
     * 链接成功调用的方法
     */
    @OnOpen
    public void onOpen(Session session, @PathParam(value="userId")String userId) {
        try {
            this.session = session;
            this.userId = userId;
            webSockets.add(this);
            sessionPool.put(userId, session);
            log.info("【websocket消息】有新的连接,总数为:"+webSockets.size());
        } catch (Exception e) {
        }
    }

    /**
     * 链接关闭调用的方法
     */
    @OnClose
    public void onClose() {
        try {
            webSockets.remove(this);
            sessionPool.remove(this.userId);
            log.info("【websocket消息】连接断开,总数为:"+webSockets.size());
        } catch (Exception e) {
        }
    }
    /**
     * 收到客户端消息后调用的方法
     *
     * @param message
     */
    @OnMessage
    public void onMessage(String message) {
        log.info("【websocket消息】收到客户端消息:"+message);
    }

    /** 发送错误时的处理
     * @param session
     * @param error
     */
    @OnError
    public void onError(Session session, Throwable error) {

        log.error("用户错误,原因:"+error.getMessage());
        error.printStackTrace();
    }


    // 此为广播消息
    public void sendAllMessage(String message) {
        log.info("【websocket消息】广播消息:"+message);
        for(WebSocket webSocket : webSockets) {
            try {
                if(webSocket.session.isOpen()) {
                    webSocket.session.getAsyncRemote().sendText(message);
                }
            } catch (Exception e) {
                e.printStackTrace();
            }
        }
    }

    // 此为单点消息
    public void sendOneMessage(String userId, String message) {
        Session session = sessionPool.get(userId);
        if (session != null&&session.isOpen()) {
            try {
                log.info("【websocket消息】 单点消息:"+message);
                session.getAsyncRemote().sendText(message);
            } catch (Exception e) {
                e.printStackTrace();
            }
        }
    }

    // 此为单点消息(多人)
    public void sendMoreMessage(String[] userIds, String message) {
        for(String userId:userIds) {
            Session session = sessionPool.get(userId);
            if (session != null&&session.isOpen()) {
                try {
                    log.info("【websocket消息】 单点消息:"+message);
                    session.getAsyncRemote().sendText(message);
                } catch (Exception e) {
                    e.printStackTrace();
                }
            }
        }
    }
}
3.创建定时器WebSocketScheduled类
在定时器里面创建WebSocketScheduled类,在里面定义一个方法并15秒调用一次消息推送。目前加哥设定的是15秒推送一次,你可以具体按照自己的预期修改cron值。
package org.example.demo2.scheduled;

import net.sf.json.JSON;
import net.sf.json.JSONObject;
import net.sf.json.JSONString;
import org.example.demo2.Student;
import org.example.demo2.websocket.WebSocket;
import org.springframework.beans.factory.annotation.Autowired;
import org.springframework.scheduling.annotation.EnableScheduling;
import org.springframework.scheduling.annotation.Scheduled;
import org.springframework.stereotype.Component;

import java.util.ArrayList;
import java.util.HashMap;
import java.util.List;

@EnableScheduling
@Component
public class WebSocketScheduled {
    @Autowired
    private WebSocket webSocket;

    @Scheduled(cron = "0/15 * * * * ?")
    public void heartbeat() {

        Student student=new Student();
        student.setId(1);
        student.setStudenName("纷纷");
        student.setStudentNo("0001");
        List<Student> list=new ArrayList<>();
        list.add(student);

        //
        HashMap map=new HashMap();
        map.put("num",1);
        map.put("list",list);
        webSocket.sendAllMessage("有3条未上传报告"+JSONObject.fromObject(map).toString());
    }
}
4.启动项目后,使用WebSocket在线测试工具进行测试Websocket在线测试-Websocket接口测试-Websocket模拟请求工具
在里面输入测试请求:ws://127.0.0.1:8080/websocket/1

下面是定时推送的消息展示

然后你可以在定时器里面写自己的业务逻辑即可,将自己需要推送的消息封装发送至页面上。
5.项目结构
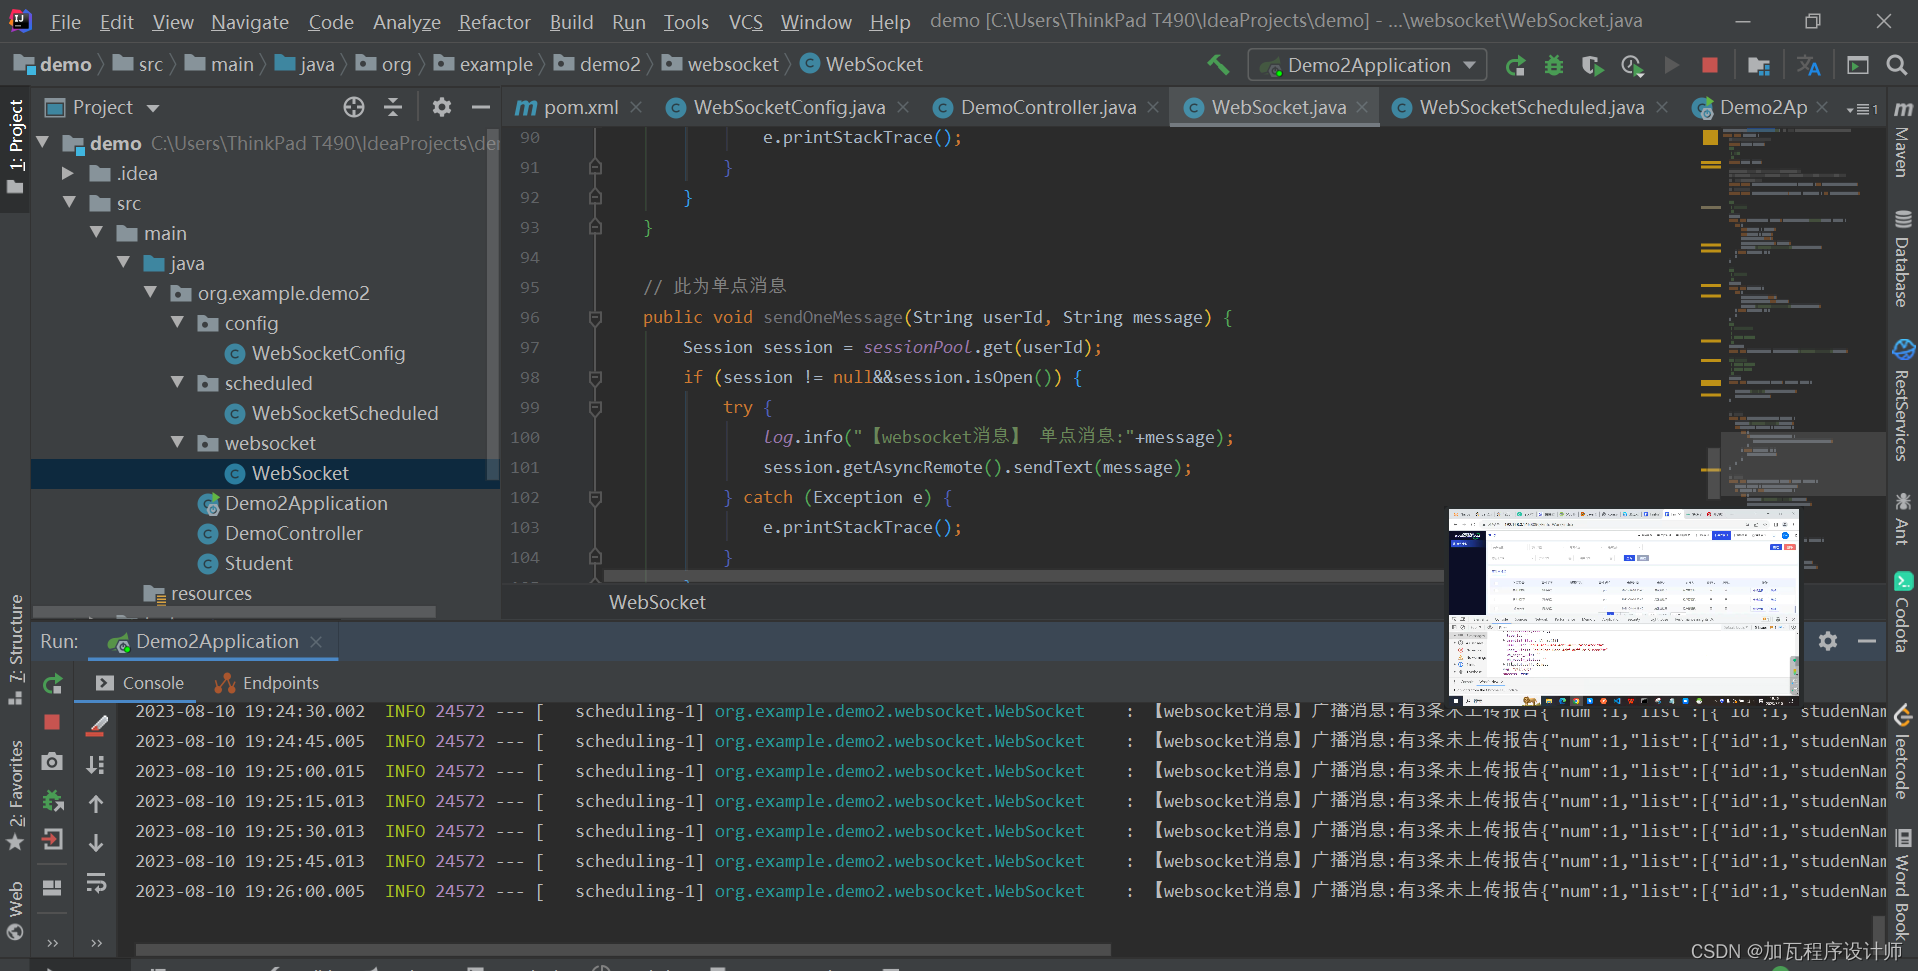
注意:ws在前端页面配置一定不要出错,写成自己的。如果在cloud项目使用,注意跨域问题和网关的配置路径,防止链接失败找不到自己想要的。今天的分享就这些,如果想要源码项目或者有问题也可以随时和加哥沟通交流。


