环境
> 192.168.50.53 k8s-master
> 192.168.50.51 k8s-node1
> 192.168.50.50 k8s-node2
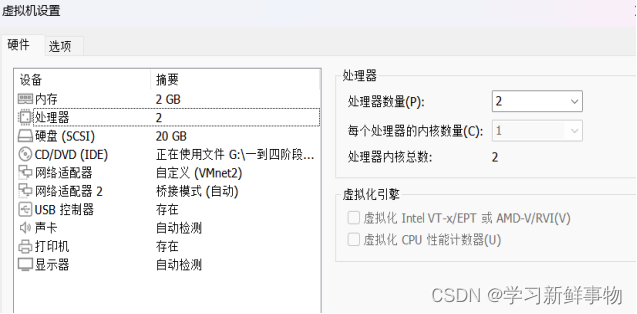
必须不能少于两核两G
所有主机共同操作
主机初始化配置
所有主机配置禁用防火墙和selinux
[root@server ~]# setenforce 0
[root@server ~]# iptables -F
[root@server ~]# systemctl stop firewalld
[root@server ~]# systemctl disable firewalld
Removed symlink /etc/systemd/system/multi-user.target.wants/firewalld.service.
Removed symlink /etc/systemd/system/dbus-org.fedoraproject.FirewallD1.service.
[root@server ~]# systemctl stop NetworkManager
[root@server ~]# systemctl disable NetworkManager
Removed symlink /etc/systemd/system/multi-user.target.wants/NetworkManager.service.
Removed symlink /etc/systemd/system/dbus-org.freedesktop.nm-dispatcher.service.
Removed symlink /etc/systemd/system/network-online.target.wants/NetworkManager-wait-online.service.
[root@server ~]# sed -i '/^SELINUX=/s/enforcing/disabled/' /etc/selinux/config
所有配置主机名并绑定hosts,不同主机名称不同
[root@localhost ~]# hostname k8s-master
[root@localhost ~]# bash
[root@k8s-master ~]# cat << EOF >> /etc/hosts
> 192.168.50.53 k8s-master
> 192.168.50.51 k8s-node1
> 192.168.50.50 k8s-node2
> EOF
同样cp给其他主机
[root@k8s-master ~]# scp /etc/hosts 192.168.50.51:/etc
The authenticity of host '192.168.50.51 (192.168.50.51)' can't be established.
ECDSA key fingerprint is SHA256:KUnDzA9EBdTNT0UE3pDB18XcdeWBK780vEkpfsZR7PI.
ECDSA key fingerprint is MD5:f6:96:4e:cc:7f:5d:73:60:d6:e3:22:7c:00:25:32:3a.
Are you sure you want to continue connecting (yes/no)? yes
Warning: Permanently added '192.168.50.51' (ECDSA) to the list of known hosts.
root@192.168.50.51's password:
hosts 100% 231 157.4KB/s 00:00
[root@k8s-master ~]# scp /etc/hosts 192.168.50.50:/etc
The authenticity of host '192.168.50.50 (192.168.50.50)' can't be established.
ECDSA key fingerprint is SHA256:uKH7ye1aHQKJfn7ZNWRV5wXzO2ytvvej9Ei/dBr0WOk.
ECDSA key fingerprint is MD5:6b:84:8c:a8:d8:2f:25:96:38:a5:72:06:3b:56:41:2b.
Are you sure you want to continue connecting (yes/no)? yes
Warning: Permanently added '192.168.50.59' (ECDSA) to the list of known hosts.
root@192.168.50.59's password:
hosts 100% 231 226.1KB/s 00:00
所有主机配置初始化
[root@k8s-master ~]# yum -y install vim wget net-tools lrzsz
[root@k8s-master ~]# swapoff -a
[root@k8s-master ~]# sed -i '/seap/s/^/#/' /etc/fstab
[root@k8s-node1 ~]# cat << EOF >> /etc/sysctl.conf
> net.bridge.bridge-nf-call-ip6tables = 1
> net.bridge.bridge-nf-call-iptables = 1
> EOF
[root@k8s-node1 ~]# sysctl -p
net.bridge.bridge-nf-call-ip6tables = 1
net.bridge.bridge-nf-call-iptables = 1
[root@localhost ~]# hostname k8s-node2
[root@localhost ~]# bash
部署docker环境
所有主机上部署 Docker 环境,因为 Kubernetes 对容器的编排需要 Docker 的支持。
[root@k8s-master ~]# wget -O /etc/yum.repos.d/CentOS-Base.repo http://mirrors.aliyun.com/repo/Centos-7.repo
--2023-08-09 13:40:53-- http://mirrors.aliyun.com/repo/Centos-7.repo
正在解析主机 mirrors.aliyun.com (mirrors.aliyun.com)... 失败:未知的名称或服务。
wget: 无法解析主机地址 “mirrors.aliyun.com”
[root@k8s-master ~]# wget -O /etc/yum.repos.d/CentOS-Base.repo http://mirrors.aliyun.com/repo/Centos-7.repo
--2023-08-09 13:42:37-- http://mirrors.aliyun.com/repo/Centos-7.repo
正在解析主机 mirrors.aliyun.com (mirrors.aliyun.com)... 42.202.208.242, 42.202.208.243, 42.202.208.241, ...
正在连接 mirrors.aliyun.com (mirrors.aliyun.com)|42.202.208.242|:80... 已连接。
已发出 HTTP 请求,正在等待回应... 200 OK
长度:2523 (2.5K) [application/octet-stream]
正在保存至: “/etc/yum.repos.d/CentOS-Base.repo”
100%[=============================================================>] 2,523 --.-K/s 用时 0.001s
2023-08-09 13:42:41 (1.63 MB/s) - 已保存 “/etc/yum.repos.d/CentOS-Base.repo” [2523/2523])
[root@k8s-master ~]# yum install -y yum-utils device-mapper-persistent-data lvm2
作为依赖被安装:
libxml2-python.x86_64 0:2.9.1-6.el7_9.6 python-chardet.noarch 0:2.2.1-3.el7
python-kitchen.noarch 0:1.1.1-5.el7
完毕!
使用 YUM 方式安装 Docker 时,推荐使用阿里的 YUM 源。阿里的官方开源站点地址是:https://developer.aliyun.com/mirror/,可以在站点内找到 Docker 的源地址。
[root@k8s-node1 ~]# yum-config-manager --add-repo https://mirrors.aliyun.com/docker-ce/linux/centos/docker-ce.repo
已加载插件:fastestmirror
adding repo from: https://mirrors.aliyun.com/docker-ce/linux/centos/docker-ce.repo
grabbing file https://mirrors.aliyun.com/docker-ce/linux/centos/docker-ce.repo to /etc/yum.repos.d/docker-ce.repo
[root@k8s-node1 ~]# yum clean all && yum makecache fast
(9/9): epel/x86_64/primary_db | 7.0 MB 00:03:58
元数据缓存已建立
[root@k8s-node1 ~]# yum -y install docker-ce
已加载插件:fastestmirror
作为依赖被安装:
audit-libs-python.x86_64 0:2.8.5-4.el7 checkpolicy.x86_64 0:2.5-8.el7
container-selinux.noarch 2:2.119.2-1.911c772.el7_8 containerd.io.x86_64 0:1.6.22-3.1.el7
docker-buildx-plugin.x86_64 0:0.11.2-1.el7 docker-ce-cli.x86_64 1:24.0.5-1.el7
docker-ce-rootless-extras.x86_64 0:24.0.5-1.el7 docker-compose-plugin.x86_64 0:2.20.2-1.el7
fuse-overlayfs.x86_64 0:0.7.2-6.el7_8 fuse3-libs.x86_64 0:3.6.1-4.el7
libcgroup.x86_64 0:0.41-21.el7 libsemanage-python.x86_64 0:2.5-14.el7
policycoreutils-python.x86_64 0:2.5-34.el7 python-IPy.noarch 0:0.75-6.el7
setools-libs.x86_64 0:3.3.8-4.el7 slirp4netns.x86_64 0:0.4.3-4.el7_8
完毕!
启动并设置开机自启
[root@k8s-node1 ~]# systemctl start docker
[root@k8s-node1 ~]# systemctl enable docker
Created symlink from /etc/systemd/system/multi-user.target.wants/docker.service to /usr/lib/systemd/system/docker.service.
镜像加速器(所有主机配置)
[root@k8s-node1 ~]# cat << END > /etc/docker/daemon.json
> {
> "registry-mirrors":[ "https://nyakyfun.mirror.aliyuncs.com" ]
> }
> END
很多镜像都是在国外的服务器上,由于网络上存在的问题,经常导致无法拉取镜像的错误,所以最好将镜像拉取地址设置成国内的。目前国内很多公有云服务商都提供了镜像加速服务。将镜像加速地址直接写入/etc/docker/daemon.json 文件内,如果文件不存在,可直接新建文件并保存。通过该文件扩展名可以看出,daemon.json 的内容必须符合 json 格式,书写时要注意。同时,由于单一镜像服务存在不可用的情况,在配置加速时推荐配置两个或多个加速地址,从而达到冗余、高可用的目的。
重载启动服务
[root@k8s-node1 ~]# systemctl daemon-reload
[root@k8s-node1 ~]# systemctl restart docker
部署kubernetes集群
组件介绍
三个节点都需要安装下面三个组件
- kubeadm:安装工具,使所有的组件都会以容器的方式运行
- kubectl:客户端连接K8S API工具
- kubelet:运行在node节点,用来启动容器的工具
配置阿里云yum源
[root@k8s-master ~]# cat <<EOF > /etc/yum.repos.d/kubernetes.repo
> [kubernetes]
> name=Kubernetes
> baseurl=https://mirrors.aliyun.com/kubernetes/yum/repos/kubernetes-el7-x86_64/
> enabled=1
> gpgcheck=0
> repo_gpgcheck=0
> gpgkey=https://mirrors.aliyun.com/kubernetes/yum/doc/yum-key.gpg
> https://mirrors.aliyun.com/kubernetes/yum/doc/rpm-package-key.gpg
> EOF
安装kubelet kubeadm kubectl
所有主机配置
[root@k8s-master ~]# yum -y install kubelet-1.20.0 kubeadm-1.20.0 kubectl-1.20.0
[root@k8s-master ~]# systemctl enable kubelet
Created symlink from /etc/systemd/system/multi-user.target.wants/kubelet.service to /usr/lib/systemd/system/kubelet.service.
kubelet 刚安装完成后,通过 systemctl start kubelet 方式是无法启动的,需要加入节点或初始化为 master 后才可启动成功。
如果在命令执行过程中出现索引 gpg 检查失败的情况, 请使用 yum install -y --nogpgcheck kubelet kubeadm kubectl 来安装。
Master操作
配置init-config.yaml
Kubeadm 提供了很多配置项,Kubeadm 配置在 Kubernetes 集群中是存储在ConfigMap 中的,也可将这些配置写入配置文件,方便管理复杂的配置项。Kubeadm 配内容是通过 kubeadm config 命令写入配置文件的。
在master节点安装,master 定于为192.168.50.53,通过如下指令创建默认的init-config.yaml文件:
[root@k8s-master ~]# kubeadm config print init-defaults > init-config.yaml
[root@k8s-master ~]# ll
总用量 8
-rw-------. 1 root root 1417 6月 19 21:55 anaconda-ks.cfg
-rw-r--r--. 1 root root 830 8月 9 14:10 init-config.yaml
其中,kubeadm config 除了用于输出配置项到文件中,还提供了其他一些常用功能,如下所示。
- kubeadm config view:查看当前集群中的配置值。
- kubeadm config print join-defaults:输出 kubeadm join 默认参数文件的内容。
- kubeadm config images list:列出所需的镜像列表。
- kubeadm config images pull:拉取镜像到本地。
- kubeadm config upload from-flags:由配置参数生成 ConfigMap。
init-config.yaml配置
[root@k8s-master ~]# vim init-config.yaml
[root@k8s-master ~]# cat init-config.yaml
apiVersion: kubeadm.k8s.io/v1beta2
bootstrapTokens:
- groups:
- system:bootstrappers:kubeadm:default-node-token
token: abcdef.0123456789abcdef
ttl: 24h0m0s
usages:
- signing
- authentication
kind: InitConfiguration
localAPIEndpoint:
advertiseAddress: 192.168.50.53
bindPort: 6443
nodeRegistration:
criSocket: /var/run/dockershim.sock
name: k8s-master
taints:
- effect: NoSchedule
key: node-role.kubernetes.io/master
---
apiServer:
timeoutForControlPlane: 4m0s
apiVersion: kubeadm.k8s.io/v1beta2
certificatesDir: /etc/kubernetes/pki
clusterName: kubernetes
controllerManager: {}
dns:
type: CoreDNS
etcd:
local:
dataDir: /var/lib/etcd
imageRepository: registry.aliyuncs.com/google_containers
kind: ClusterConfiguration
kubernetesVersion: v1.20.0
networking:
dnsDomain: cluster.local
serviceSubnet: 10.244.0.0/16
scheduler: {}
安装master节点
拉取所需镜像
[root@k8s-master ~]# kubeadm config images list --config init-config.yaml
registry.aliyuncs.com/google_containers/kube-apiserver:v1.20.0
registry.aliyuncs.com/google_containers/kube-controller-manager:v1.20.0
registry.aliyuncs.com/google_containers/kube-scheduler:v1.20.0
registry.aliyuncs.com/google_containers/kube-proxy:v1.20.0
registry.aliyuncs.com/google_containers/pause:3.2
registry.aliyuncs.com/google_containers/etcd:3.4.13-0
registry.aliyuncs.com/google_containers/coredns:1.7.0
[root@k8s-master ~]# kubeadm config images pull --config=init-config.yaml
[config/images] Pulled registry.aliyuncs.com/google_containers/kube-apiserver:v1.20.0
[config/images] Pulled registry.aliyuncs.com/google_containers/kube-controller-manager:v1.20.0
[config/images] Pulled registry.aliyuncs.com/google_containers/kube-scheduler:v1.20.0
[config/images] Pulled registry.aliyuncs.com/google_containers/kube-proxy:v1.20.0
[config/images] Pulled registry.aliyuncs.com/google_containers/pause:3.2
[config/images] Pulled registry.aliyuncs.com/google_containers/etcd:3.4.13-0
[config/images] Pulled registry.aliyuncs.com/google_containers/coredns:1.7.0
安装matser节点
[root@k8s-master ~]# echo "1" > /proc/sys/net/ipv4/ip_forward
[root@k8s-master ~]# kubeadm init --config=init-config.yaml 初始化安装K8S
To start using your cluster, you need to run the following as a regular user:
mkdir -p $HOME/.kube
sudo cp -i /etc/kubernetes/admin.conf $HOME/.kube/config
sudo chown $(id -u):$(id -g) $HOME/.kube/config
Alternatively, if you are the root user, you can run:
export KUBECONFIG=/etc/kubernetes/admin.conf
You should now deploy a pod network to the cluster.
Run "kubectl apply -f [podnetwork].yaml" with one of the options listed at:
https://kubernetes.io/docs/concepts/cluster-administration/addons/
Then you can join any number of worker nodes by running the following on each as root:
kubeadm join 192.168.50.53:6443 --token abcdef.0123456789abcdef \
--discovery-token-ca-cert-hash sha256:c10b72d9a9b83d9ff1352b24cb02921ecadae96426efca21a8454016ba3e3e3d
成功
kubeadm init 主要执行了以下操作:
l [init]:指定版本进行初始化操作
l [preflight] :初始化前的检查和下载所需要的Docker镜像文件
l [kubelet-start] :生成kubelet 的配置文件”/var/lib/kubelet/config.yaml”,没有这个文件kubelet无法启动,所以初始化之前的kubelet 实际上启动失败。
l [certificates]:生成Kubernetes 使用的证书,存放在/etc/kubernetes/pki 目录中。
l [kubeconfig] :生成 Kubeconfig 文件,存放在/etc/kubernetes 目录中,组件之间通信需要使用对应文件。
l [control-plane]:使用/etc/kubernetes/manifest 目录下的YAML 文件,安装 Master 组件。
l [etcd]:使用/etc/kubernetes/manifest/etcd.yaml 安装Etcd 服务。
l [wait-control-plane]:等待control-plan 部署的Master 组件启动。
l [apiclient]:检查Master组件服务状态。
l [uploadconfig]:更新配置
l [kubelet]:使用configMap 配置kubelet。
l [patchnode]:更新CNI信息到Node 上,通过注释的方式记录。
l [mark-control-plane]:为当前节点打标签,打了角色Master,和不可调度标签,这样默认就不会使用Master 节点来运行Pod。
l [bootstrap-token]:生成token 记录下来,后边使用kubeadm join 往集群中添加节点时会用到
l [addons]:安装附加组件CoreDNS 和kube-proxy
Kubeadm 通过初始化安装是不包括网络插件的,也就是说初始化之后是不具备相关网络功能的,比如 k8s-master 节点上查看节点信息都是“Not Ready”状态、Pod 的 CoreDNS无法提供服务等。
根据提示操作
kubectl 默认会在执行的用户家目录下面的.kube 目录下寻找config 文件。这里是将在初始化时[kubeconfig]步骤生成的admin.conf 拷贝到.kube/config
[root@k8s-master ~]# mkdir -p $HOME/.kube
[root@k8s-master ~]# sudo cp -i /etc/kubernetes/admin.conf $HOME/.kube/config
[root@k8s-master ~]# sudo chown $(id -u):$(id -g) $HOME/.kube/config
安装node节点
根据master安装时的提示信息
node1
[root@k8s-node1 ~]# kubeadm join 192.168.50.53:6443 --token abcdef.0123456789abcdef \
> --discovery-token-ca-cert-hash sha256:86298acd695d69555d30972005742018093d59bc2791b5397cf0edb777197330
[preflight] Running pre-flight checks
[WARNING IsDockerSystemdCheck]: detected "cgroupfs" as the Docker cgroup driver. The recommended driver is "systemd". Please follow the guide at https://kubernetes.io/docs/setup/cri/
[WARNING SystemVerification]: this Docker version is not on the list of validated versions: 24.0.5. Latest validated version: 19.03
[preflight] Reading configuration from the cluster...
[preflight] FYI: You can look at this config file with 'kubectl -n kube-system get cm kubeadm-config -o yaml'
[kubelet-start] Writing kubelet configuration to file "/var/lib/kubelet/config.yaml"
[kubelet-start] Writing kubelet environment file with flags to file "/var/lib/kubelet/kubeadm-flags.env"
[kubelet-start] Starting the kubelet
[kubelet-start] Waiting for the kubelet to perform the TLS Bootstrap...
This node has joined the cluster:
* Certificate signing request was sent to apiserver and a response was received.
* The Kubelet was informed of the new secure connection details.
Run 'kubectl get nodes' on the control-plane to see this node join the cluster.
node2
[root@k8s-node2 ~]# kubeadm join 192.168.50.53:6443 --token abcdef.0123456789abcdef \
> > --discovery-token-ca-cert-hash sha256:86298acd695d69555d30972005742018093d59bc2791b5397cf0edb777197330
accepts at most 1 arg(s), received 2
To see the stack trace of this error execute with --v=5 or higher
[root@k8s-node2 ~]# kubeadm join 192.168.50.53:6443 --token abcdef.0123456789abcdef > --discovery-token-ca-cert-hash sha256:86298acd695d69555d30972005742018093d59bc2791b5397cf0edb777197330
accepts at most 1 arg(s), received 2
To see the stack trace of this error execute with --v=5 or higher
[root@k8s-node2 ~]# kubeadm join 192.168.50.53:6443 --token abcdef.0123456789abcdef \
> --discovery-token-ca-cert-hash sha256:86298acd695d69555d30972005742018093d59bc2791b5397cf0edb777197330
[preflight] Running pre-flight checks
[WARNING IsDockerSystemdCheck]: detected "cgroupfs" as the Docker cgroup driver. The recommended driver is "systemd". Please follow the guide at https://kubernetes.io/docs/setup/cri/
[WARNING SystemVerification]: this Docker version is not on the list of validated versions: 24.0.5. Latest validated version: 19.03
[preflight] Reading configuration from the cluster...
[preflight] FYI: You can look at this config file with 'kubectl -n kube-system get cm kubeadm-config -o yaml'
[kubelet-start] Writing kubelet configuration to file "/var/lib/kubelet/config.yaml"
[kubelet-start] Writing kubelet environment file with flags to file "/var/lib/kubelet/kubeadm-flags.env"
[kubelet-start] Starting the kubelet
[kubelet-start] Waiting for the kubelet to perform the TLS Bootstrap...
This node has joined the cluster:
* Certificate signing request was sent to apiserver and a response was received.
* The Kubelet was informed of the new secure connection details.
Run 'kubectl get nodes' on the control-plane to see this node join the cluster.
master查看
[root@k8s-master ~]# kubectl get nodes
NAME STATUS ROLES AGE VERSION
k8s-master NotReady control-plane,master 51m v1.20.0
k8s-node1 NotReady <none> 47m v1.20.0
k8s-node2 NotReady <none> 8s v1.20.0
前面已经提到,在初始化 k8s-master 时并没有网络相关配置,所以无法跟 node 节点通信,因此状态都是“NotReady”。但是通过 kubeadm join 加入的 node 节点已经在k8s-master 上可以看到。