192.168.136.55 服务端
192.168.136.56 客户端
一、服务端
1.1 安装lamp环境
#关闭防火墙以及SELINUX
systemctl disable firewalld
systemctl stop firewalld
sed -i 's/SELINUX=enforcing$/SELINUX=disabled/g' /etc/selinux/config
setenforce 0

设置yum源
yum install epel-release -y   设置epel源为清华源
#若失败,使用wget -O /etc/yum.repos.d/epel.repo http://mirrors.aliyun.com/repo/epel-7.repo
sed -e 's!^metalink=!#metalink=!g' \
    -e 's!^#baseurl=!baseurl=!g' \
    -e 's!//download\.fedoraproject\.org/pub!//mirrors.tuna.tsinghua.edu.cn!g' \
    -e 's!//download\.example/pub!//mirrors.tuna.tsinghua.edu.cn!g' \
    -e 's!http://mirrors!https://mirrors!g' \
    -i /etc/yum.repos.d/epel*.repo

设置mysql源
vi /etc/yum.repos.d/mysql.repo
[mysql]
name=mysql5.7
baseurl=https://mirrors.tuna.tsinghua.edu.cn/mysql/yum/mysql-5.7-community-el7-x86_64/
gpgcheck=0

yum -y install httpd php php-mysqlnd php-gd

#安装mysql最好单独yum,有报错信息可以及时查询,且不建议-y
yum install mysql-community-server
1.2 安装zabbinx3.4
如果源失效了请自行更换,zabbix官方的源比较慢,建议用国内的,更换版本只需要改一下3.4的位置。
#这里会比较慢,一分钟左右,不要中断
rpm -Uvh https://repo.zabbix.com/zabbix/4.0/rhel/7/x86_64/zabbix-release-4.0-2.el7.noarch.rpm

#注释原生的源,添加阿里云源baseurl属性,需要添加三处,此处可以自定义版本,此处是4.0版本,我改成3.4版本了
vi /etc/yum.repos.d/zabbix.repo
[zabbix]
name=Zabbix Official Repository - $basearch
#baseurl=http://repo.zabbix.com/zabbix/4.0/rhel/7/$basearch/
baseurl=https://mirrors.aliyun.com/zabbix/zabbix/3.4/rhel/7/$basearch/
enabled=1
gpgcheck=1
gpgkey=file:///etc/pki/rpm-gpg/RPM-GPG-KEY-ZABBIX-A14FE591

yum clean all

#由于缺少iksemel报错,如没有报错请跳过
yum install http://springdale.math.ias.edu/data/puias/unsupported/7/x86_64/iksemel-1.4-6.sdl7.x86_64.rpm

yum install zabbix-proxy-mysql
yum install zabbix-web-mysql
zabbix_server -V 查看版本
1.3 配置数据库
systemctl start mysqld
systemctl enable mysqld

mysql #进入SQL命令行

如果进入失败,则是mysql给了一个初始密码,此处初始密码:D(TGyn9up_xu
grep password /var/log/mysqld.log
2023-04-24T15:27:23.624968Z 1 [Note] A temporary password is generated for root@localhost: D(TGyn9up_xu
2023-04-24T15:28:20.088182Z 2 [Note] Access denied for user 'root'@'localhost' (using password: NO)

更改root初始密码,否则无法操作
set global validate_password_policy=LOW;
ALTER USER USER() IDENTIFIED BY 'zabbix1234';

create database zabbix character set utf8 collate utf8_bin;
create user zabbix@localhost identified by 'zabbix1234';
create user zabbix@'%' identified by 'zabbix1234';
grant all privileges on zabbix.* to zabbix@localhost;
grant all privileges on zabbix.* to zabbix@'%';
quit;

mysql -u zabbix -p'zabbix1234'   测试账户是否创建成功
用zabbix自带的SQL文件导入到数据库
zcat /usr/share/doc/zabbix-server-mysql-4.0.37/create.sql.gz |mysql -uzabbix -p'zabbix1234' zabbix
进入数据库查看是否导入成功。
[root@zabbix-s]# mysql -uzabbix -p'zabbix1234'

mysql> show databases;
+--------------------+
| Database           |
+--------------------+
| information_schema |
| zabbix             |
+--------------------+
2 rows in set (0.00 sec)

mysql> use zabbix
Reading table information for completion of table and column names
You can turn off this feature to get a quicker startup with -A

Database changed
mysql> use zabbix;
Database changed
mysql> show tables;
+----------------------------+
| Tables_in_zabbix           |
+----------------------------+
| acknowledges               |
| actions                    |
| alerts                     |
| application_discovery      |
| application_prototype      |
| application_template       |
...
1.4 为 Zabbix server/proxy 配置数据库
# vi /etc/zabbix/zabbix_server.conf
       DBHost=localhost
       DBName=zabbix
       DBUser=zabbix
       DBPassword=<password>
1.5 启动 Zabbix server 进程
systemctl start zabbix-server
systemctl enable zabbix-server
systemctl status zabbix-server
1.6 配置php
添加末行同步时间
vi /etc/httpd/conf.d/zabbix.conf

php_value max_execution_time 300
       php_value memory_limit 128M
       php_value post_max_size 16M
       php_value upload_max_filesize 2M
       php_value max_input_time 300
       php_value always_populate_raw_post_data -1
       php_value date.timezone Asia/Shanghai
1.7 安装Zabbix-Agent
# yum install zabbix-agent
# systemctl start zabbix-agent
# systemctl status zabbix-agent

systemctl enable zabbix-server zabbix-agent httpd
1.8 访问测试
curl或者浏览器打开,访问成功

二、客户端/被监控端
安装插件zabbix_agent
#这里会比较慢,一分钟左右,不要中断
rpm -Uvh https://repo.zabbix.com/zabbix/4.0/rhel/7/x86_64/zabbix-release-4.0-2.el7.noarch.rpm

#注释原生的源,添加阿里云源baseurl属性,需要添加三处,此处可以自定义版本,此处是4.0版本,我改成3.4版本了
vi /etc/yum.repos.d/zabbix.repo
[zabbix]
name=Zabbix Official Repository - $basearch
#baseurl=http://repo.zabbix.com/zabbix/4.0/rhel/7/$basearch/
baseurl=https://mirrors.aliyun.com/zabbix/zabbix/3.4/rhel/7/$basearch/
enabled=1
gpgcheck=1
gpgkey=file:///etc/pki/rpm-gpg/RPM-GPG-KEY-ZABBIX-A14FE591

yum clean all

#由于缺少iksemel报错,如没有报错请跳过
yum install http://springdale.math.ias.edu/data/puias/unsupported/7/x86_64/iksemel-1.4-6.sdl7.x86_64.rpm

yum install zabbix-agent
更改服务端、客户端zabbix_agentd.conf
vi /etc/zabbix/zabbix_agentd.conf服务端配置文件 192.18.136.56
Server=127.0.0.1
ServerActive=127.0.0.1
Hostname=Zabbix server
客户端配置文件 192.168.136.55
Server=192.168.136.55
ServerActive=192.168.136.55
Hostname=192.168.136.56
systemctl restart zabbix-server
systemctl enable zabbix-server
服务端测试连接,报错说明agent.conf配置错误
[root@zabbix-s ~]# zabbix_get -s 192.168.136.56 -k system.cpu.num
1
查看进程
[root@zabbix-c ~]# ps -aux|grep agent
zabbix     1008  0.0  0.0  80856  1232 ?        S    00:56   0:00 /usr/sbin/zabbix_agentd -c /etc/zabbix/zabbix_agentd.conf
zabbix     1009  0.0  0.0  80856  1384 ?        S    00:56   0:08 /usr/sbin/zabbix_agentd: collector [idle 1 sec]
zabbix     1010  0.0  0.1  80856  2240 ?        S    00:56   0:03 /usr/sbin/zabbix_agentd: listener #1 [waiting for connection]
zabbix     1011  0.0  0.1  80856  2200 ?        S    00:56   0:00 /usr/sbin/zabbix_agentd: listener #2 [waiting for connection]
zabbix     1012  0.0  0.1  80856  2200 ?        S    00:56   0:00 /usr/sbin/zabbix_agentd: listener #3 [waiting for connection]
zabbix     1013  0.0  0.1  80988  2232 ?        R    00:56   0:02 /usr/sbin/zabbix_agentd: active checks #1 [idle 1 sec]
root       1683  0.0  0.0 112808   964 pts/0    R+   06:55   0:00 grep --color=auto agent
三、初始化
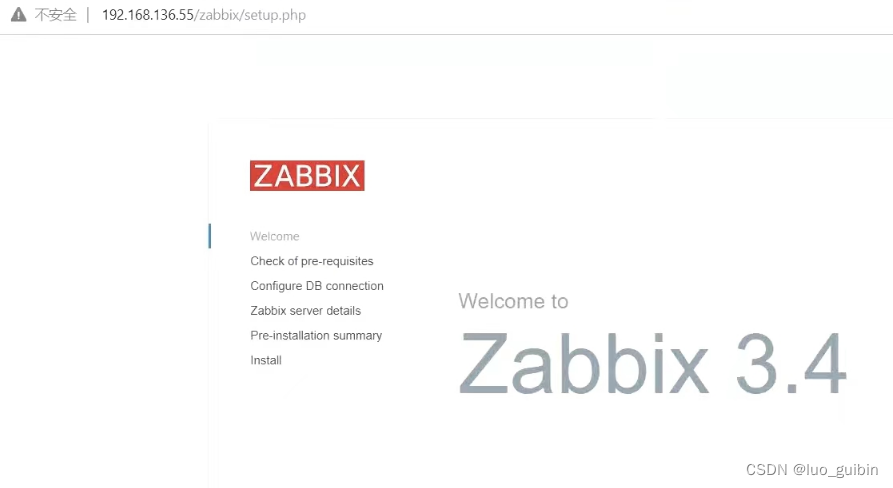
192.168.136.55/zabbix/setup.php
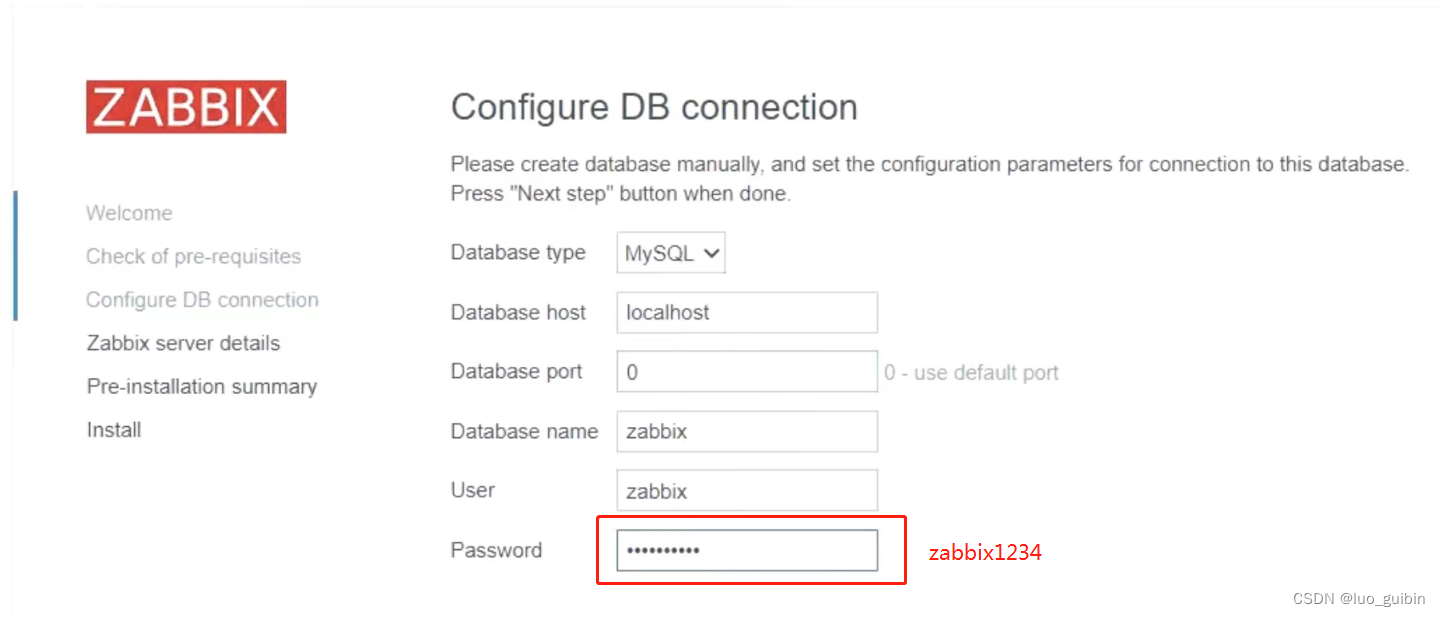
端口不用改,会自动帮你选3306
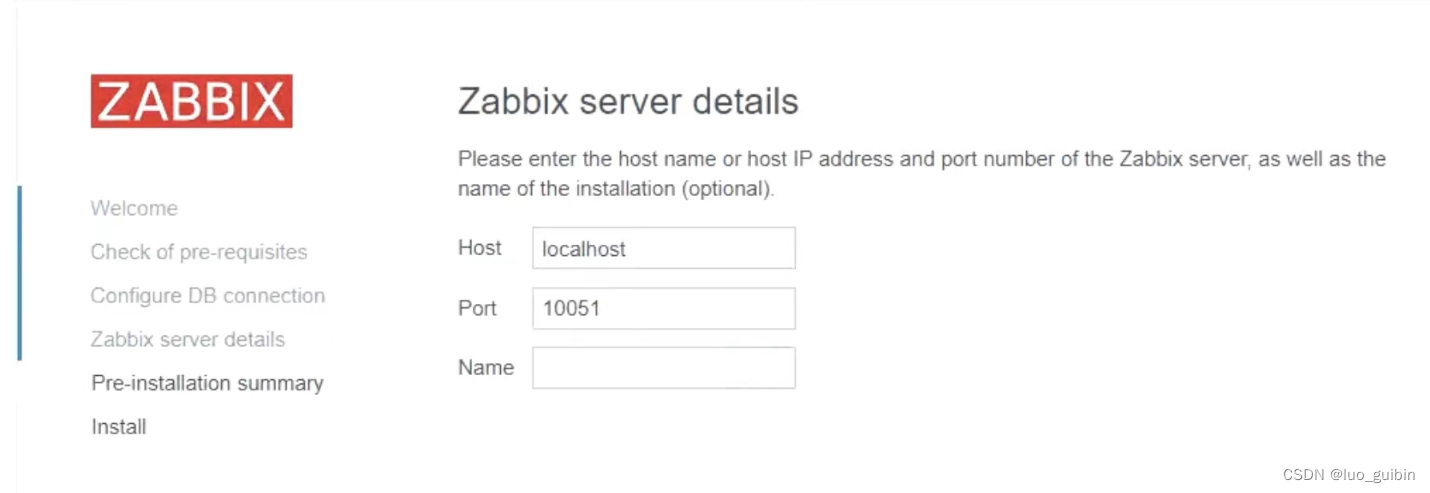
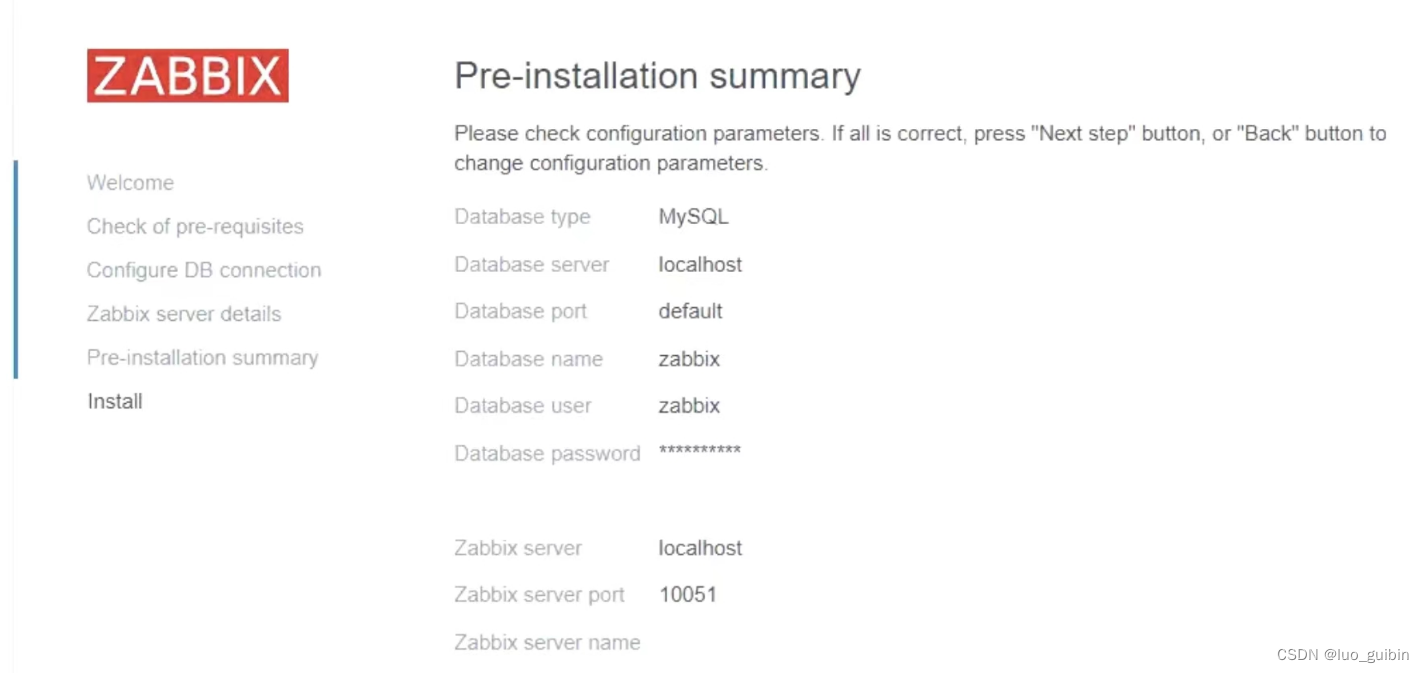
此步骤忽略,直接next
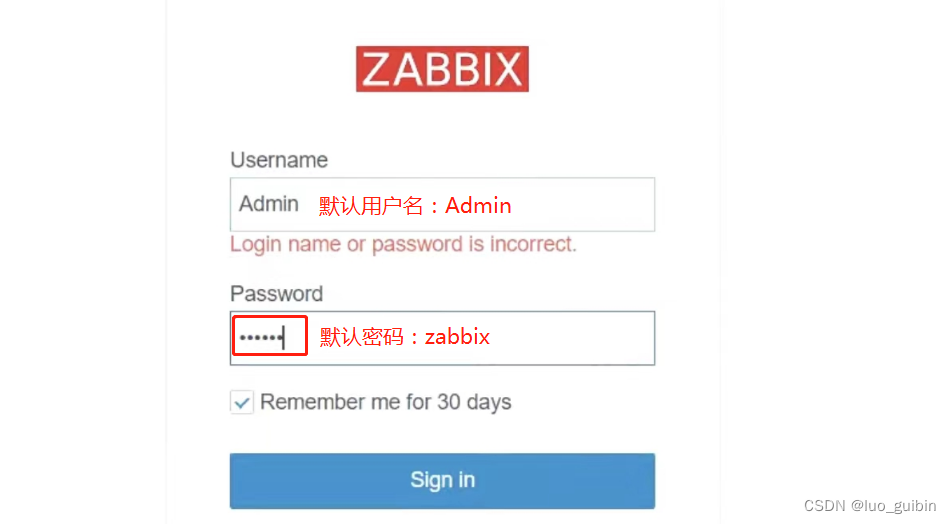
登录,默认用户名Admin,默认密码zabbix
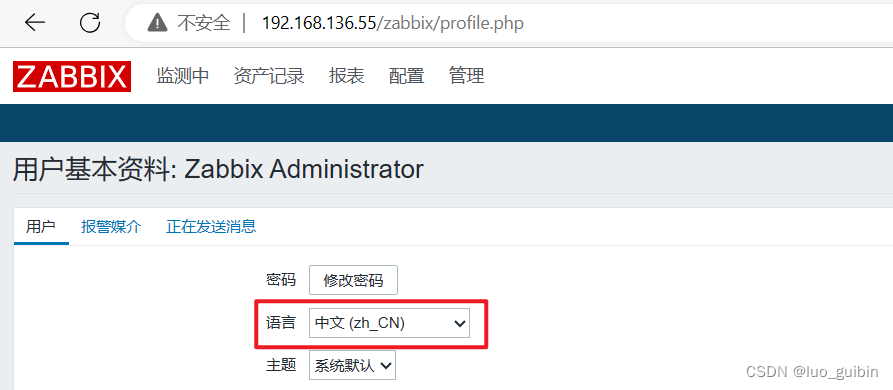
进入主页

在右上角的设置中可更改语言
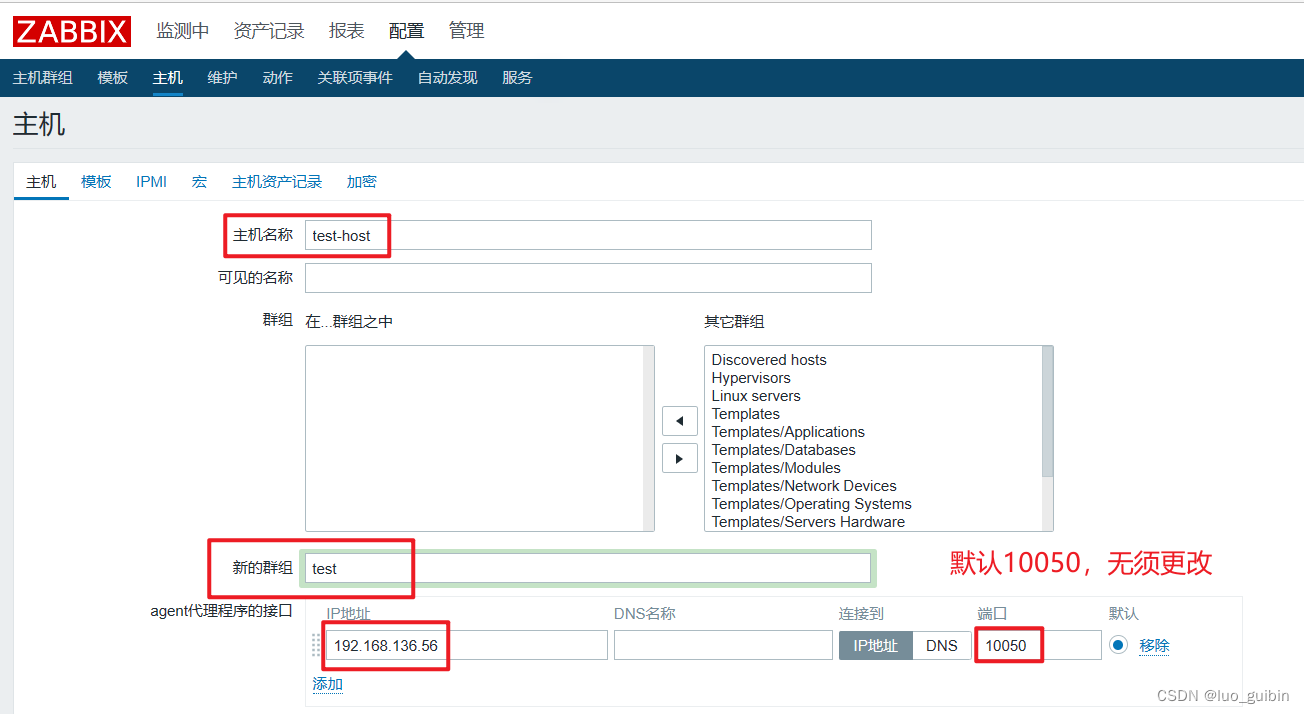
新建主机

主机参数
名称、群组、ip、端口
创建完成,如果你的ZBX为灰色,代表还没有任何监控项被检测到,是正常现象。我的是因为添加了监控项,但被我删除了,所以呈绿色。

新建监控项

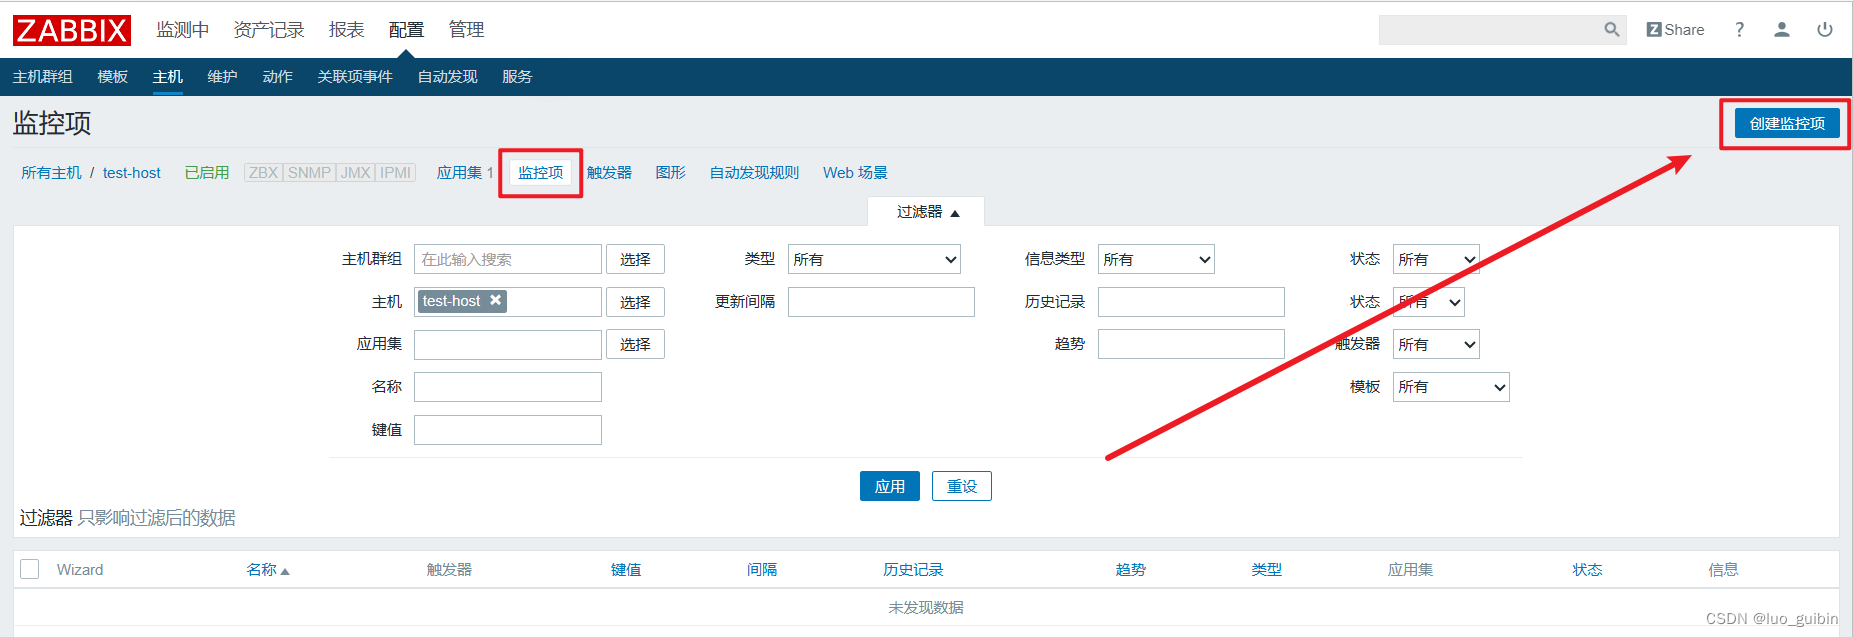
填写名称、选择键值、ip及端口

选择键值,可以使用“ctrl+f”检索快速定位
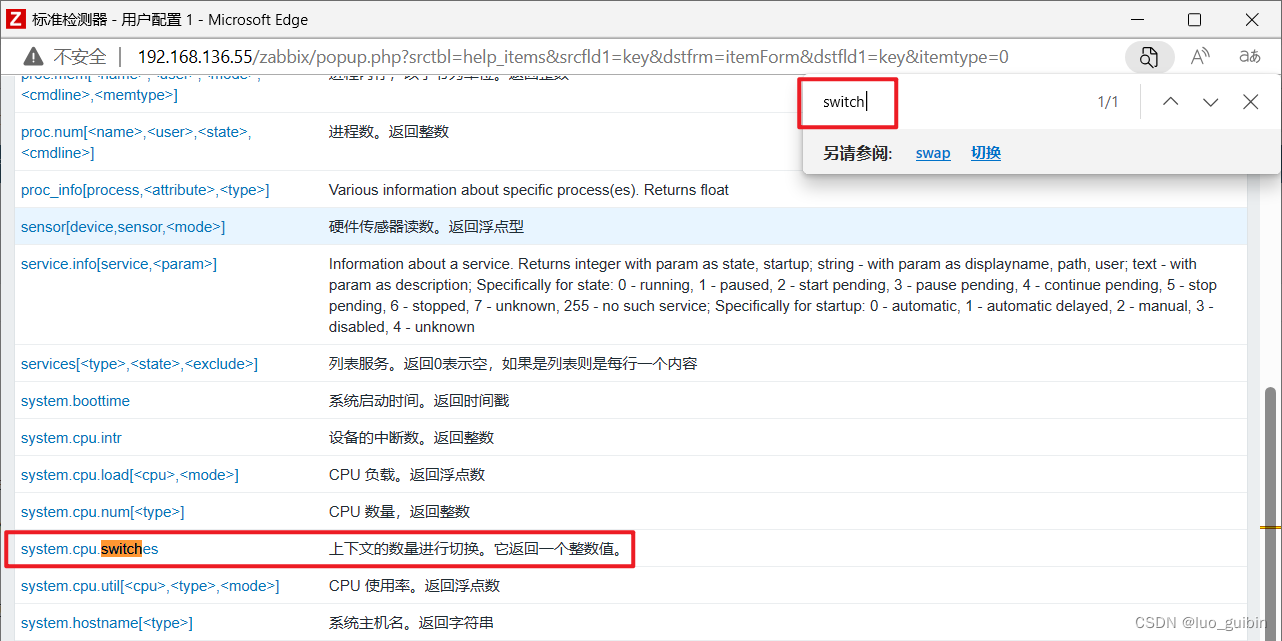
本质上这个监控项就相当于在监控端使用zabbix_get命令。
###监控端
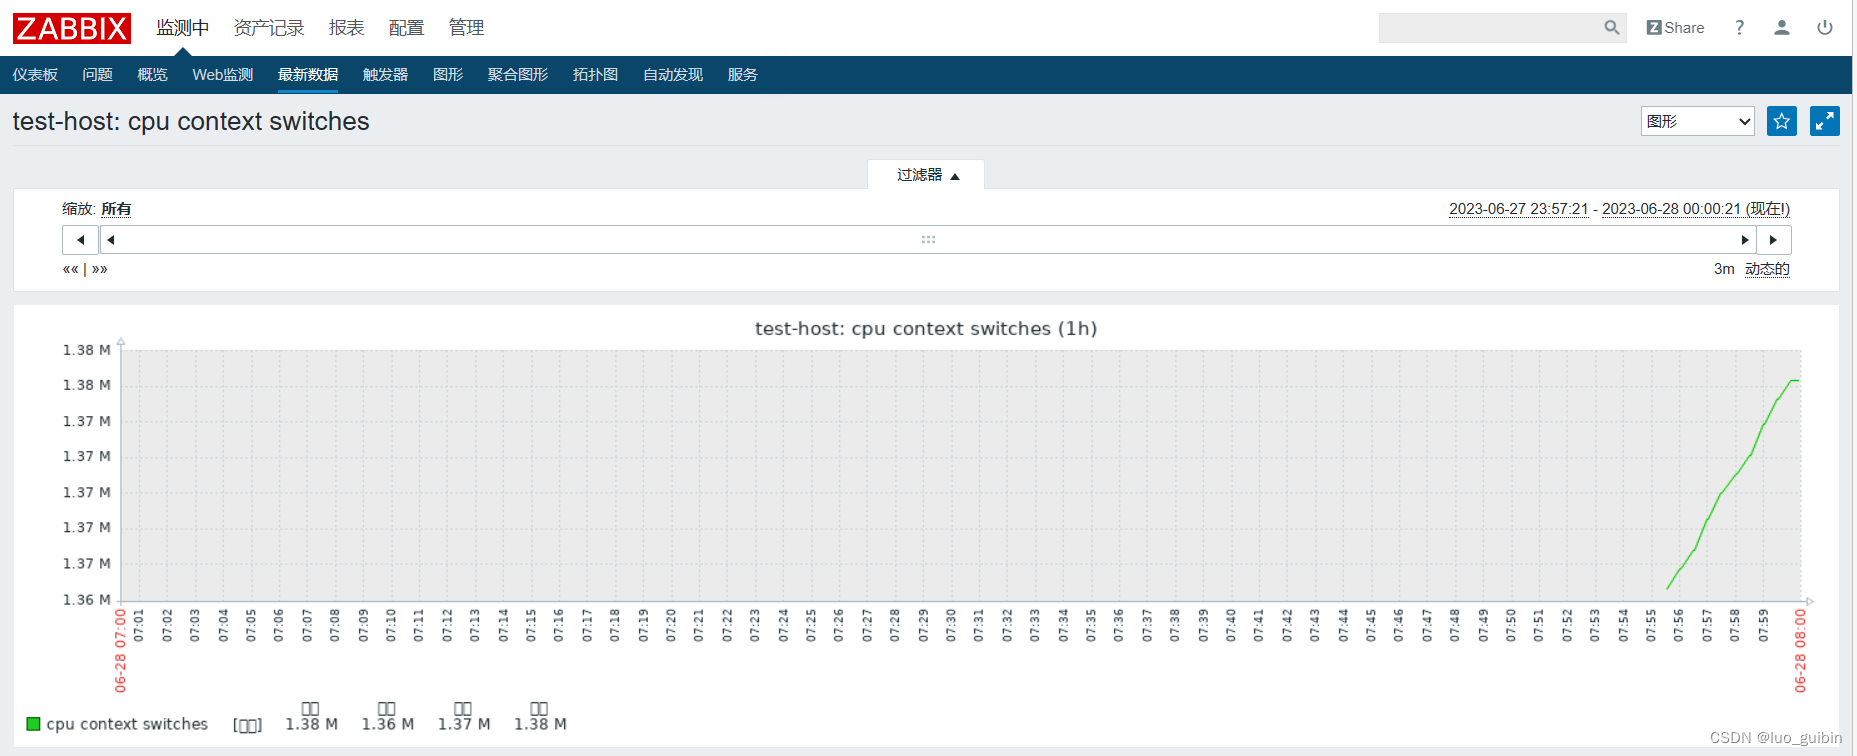
[root@zabbix-s ~]# zabbix_get -s 192.168.136.56 -k system.cpu.switches
1323248
[root@zabbix-s ~]# zabbix_get -s 192.168.136.56 -k system.cpu.switches
1323406
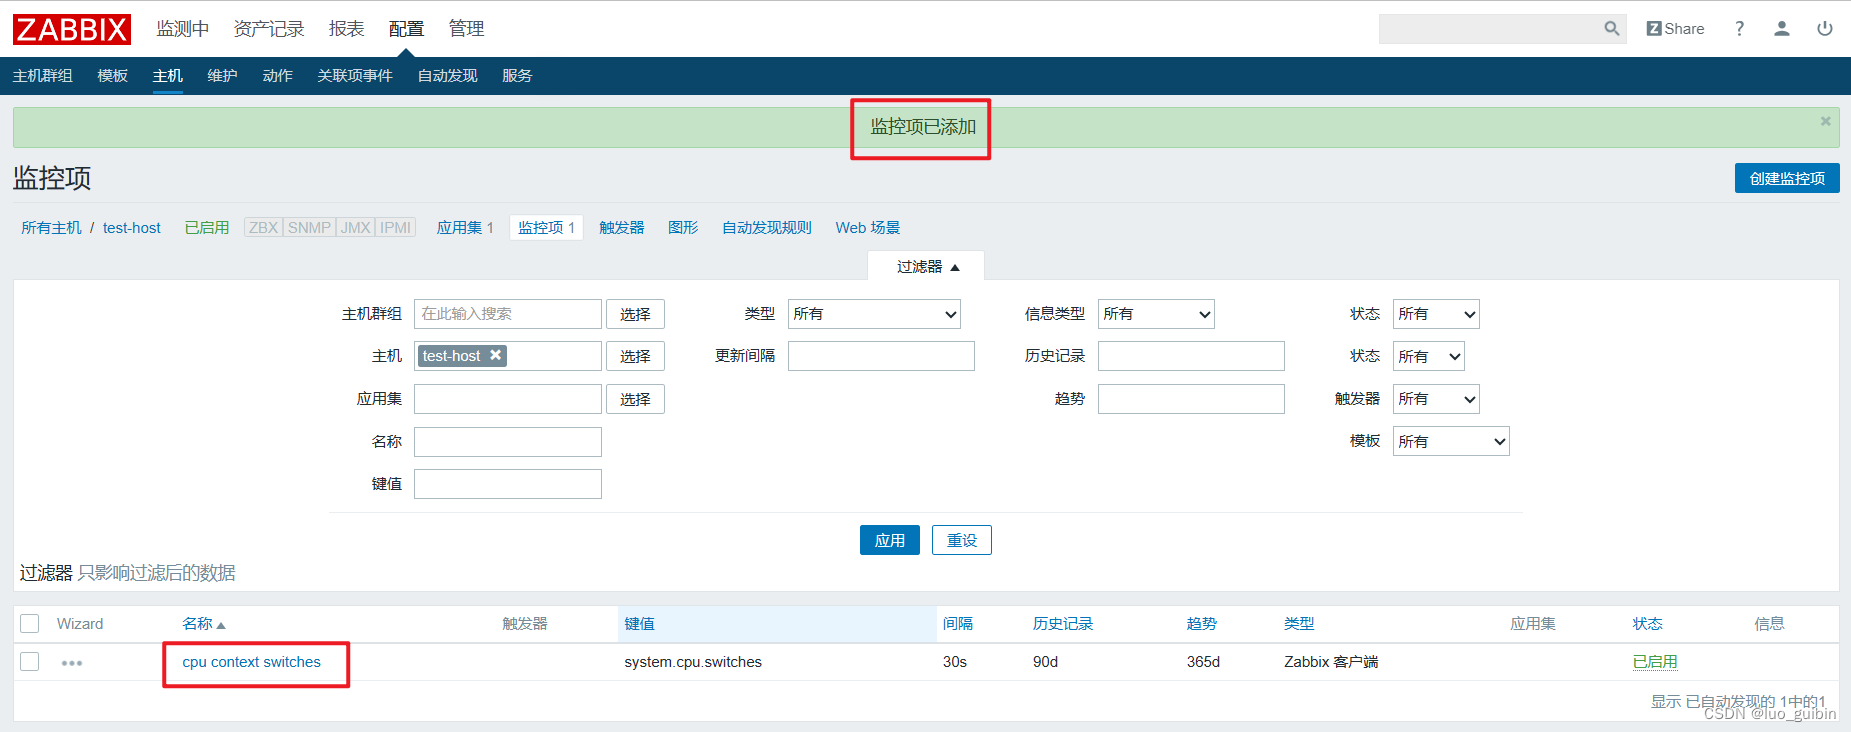
监控项创建成功


图形界面
添加带参数的监控项
vfs.fs.size[/,pused] 表示显示当前磁盘所占用的百分比
vfs.fs.size[/,used] 表示显示当前磁盘所占用的空间,单位为B
vfs.fs.size[/,free] 表示显示当前磁盘所剩余的空间,单位为B
[root@zabbix-s ~]# zabbix_get -s 192.168.136.56 -k vfs.fs.size[/,used]
1875718144
[root@zabbix-s ~]# zabbix_get -s 192.168.136.56 -k vfs.fs.size[/,free]
37628334080
[root@zabbix-s ~]# zabbix_get -s 192.168.136.56 -k vfs.fs.size[/,pused]
4.748166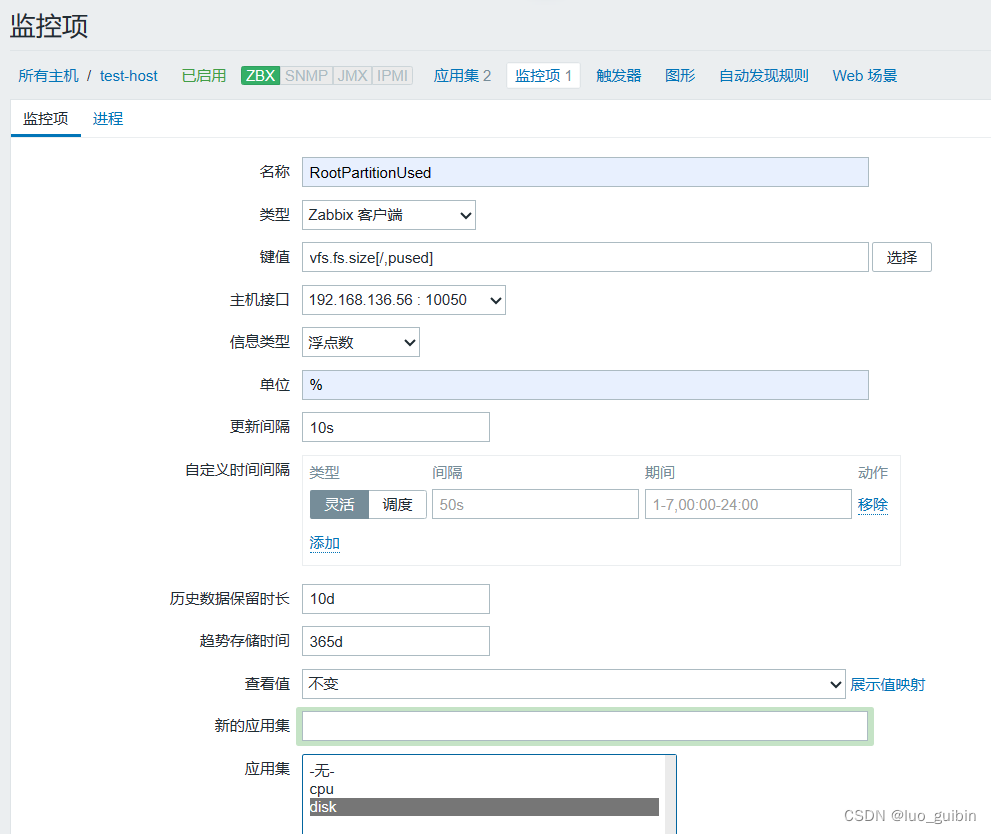

刚开始点击“图形”,有时纵坐标最大值是是“1.2”或者“1.2%”,系统反应会比较慢,需要等待一小段时间,纵坐标才会正常显示。


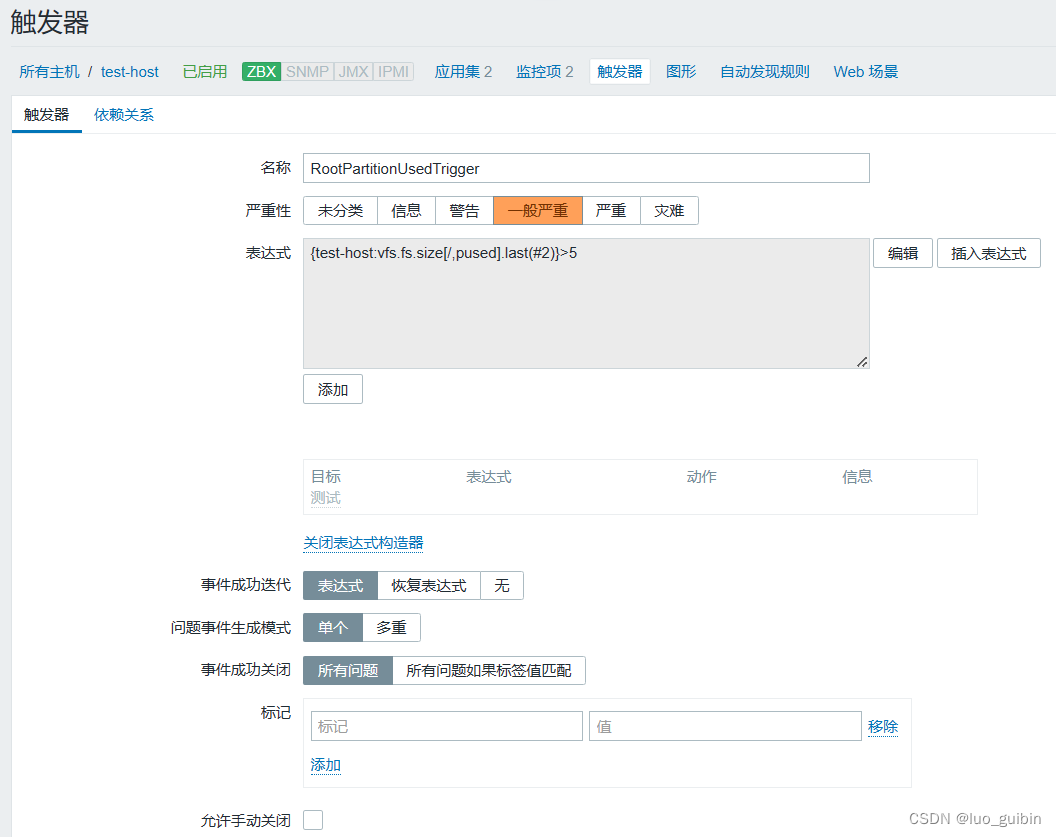
设置触发器,本质就是设置一个阈值,当某项指数超过这个阈值就会报警。
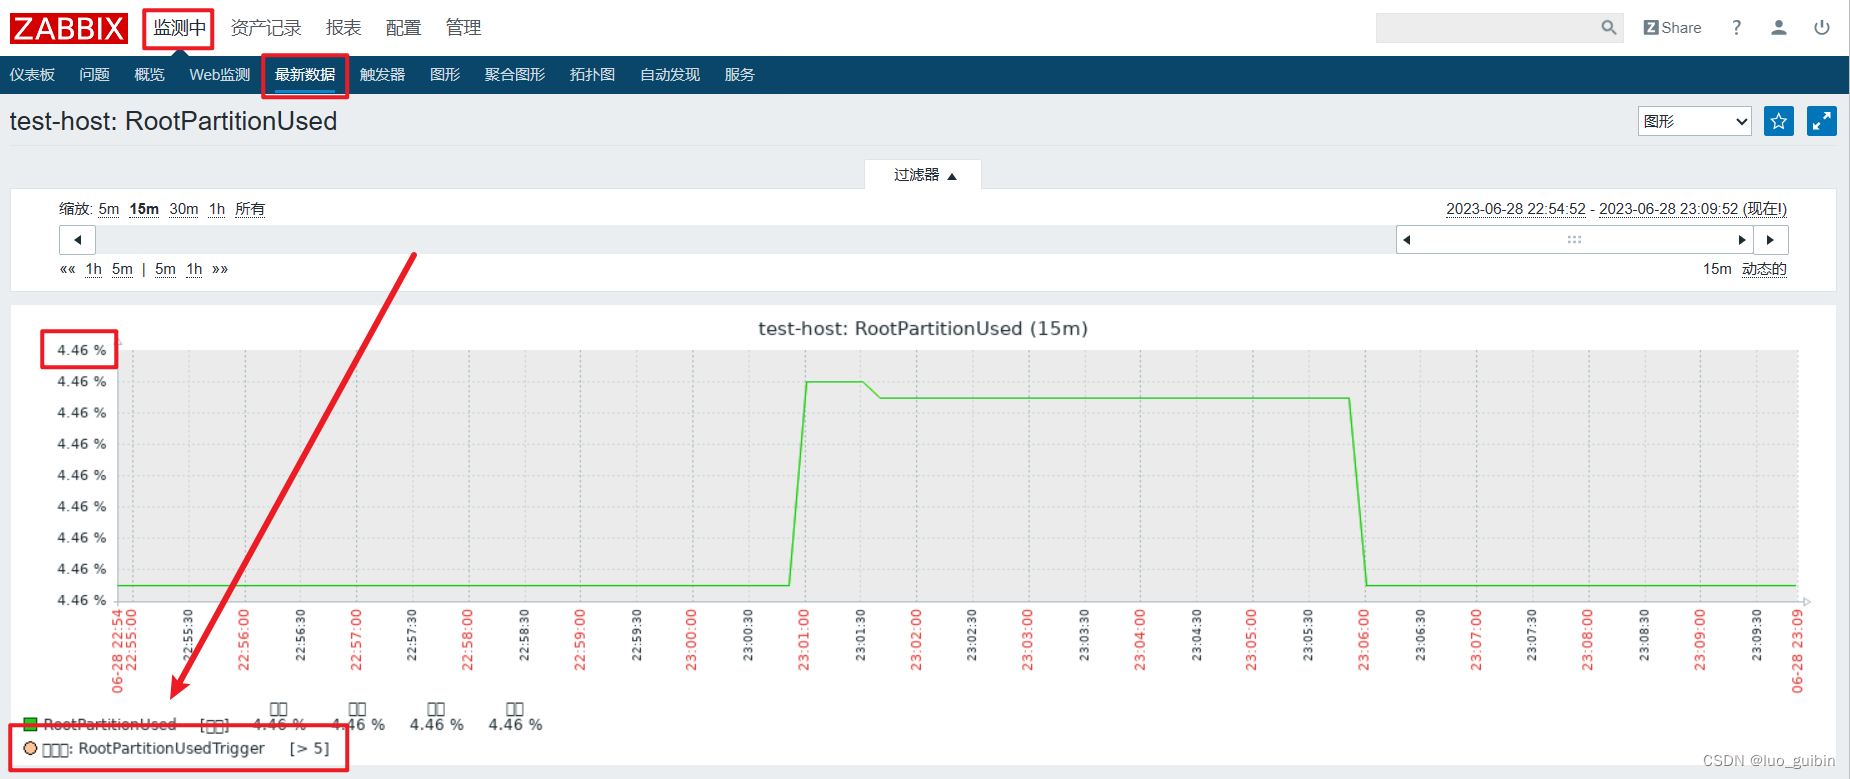
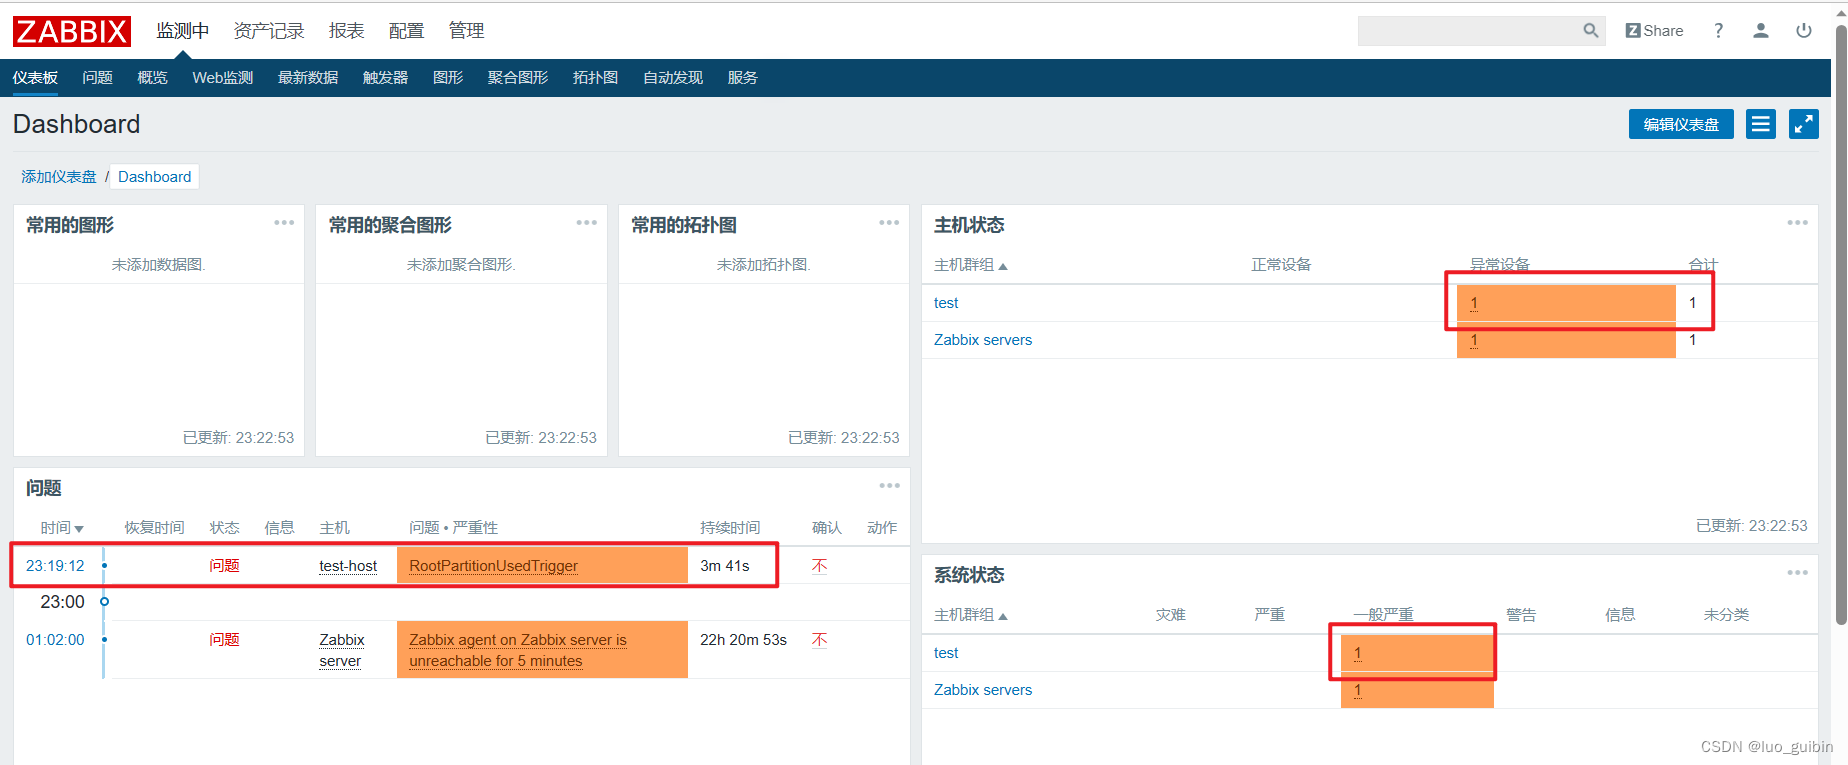
当前test主机集群是没有任何问题的,因为我们没有设置触发器的不会报警。
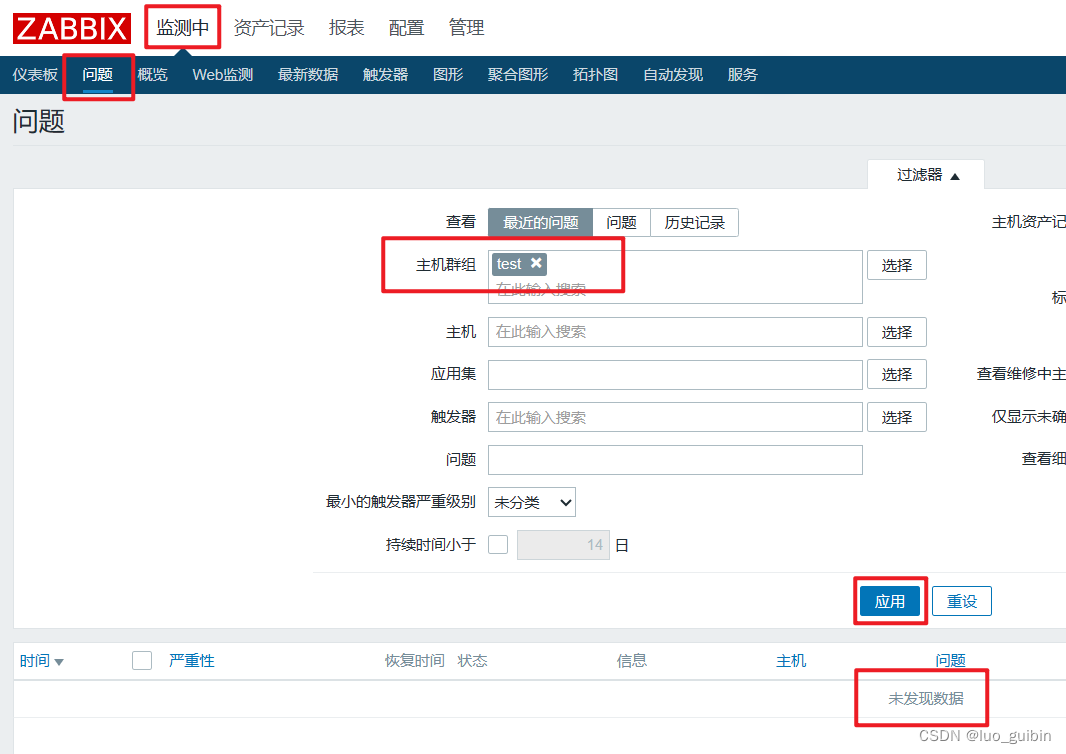
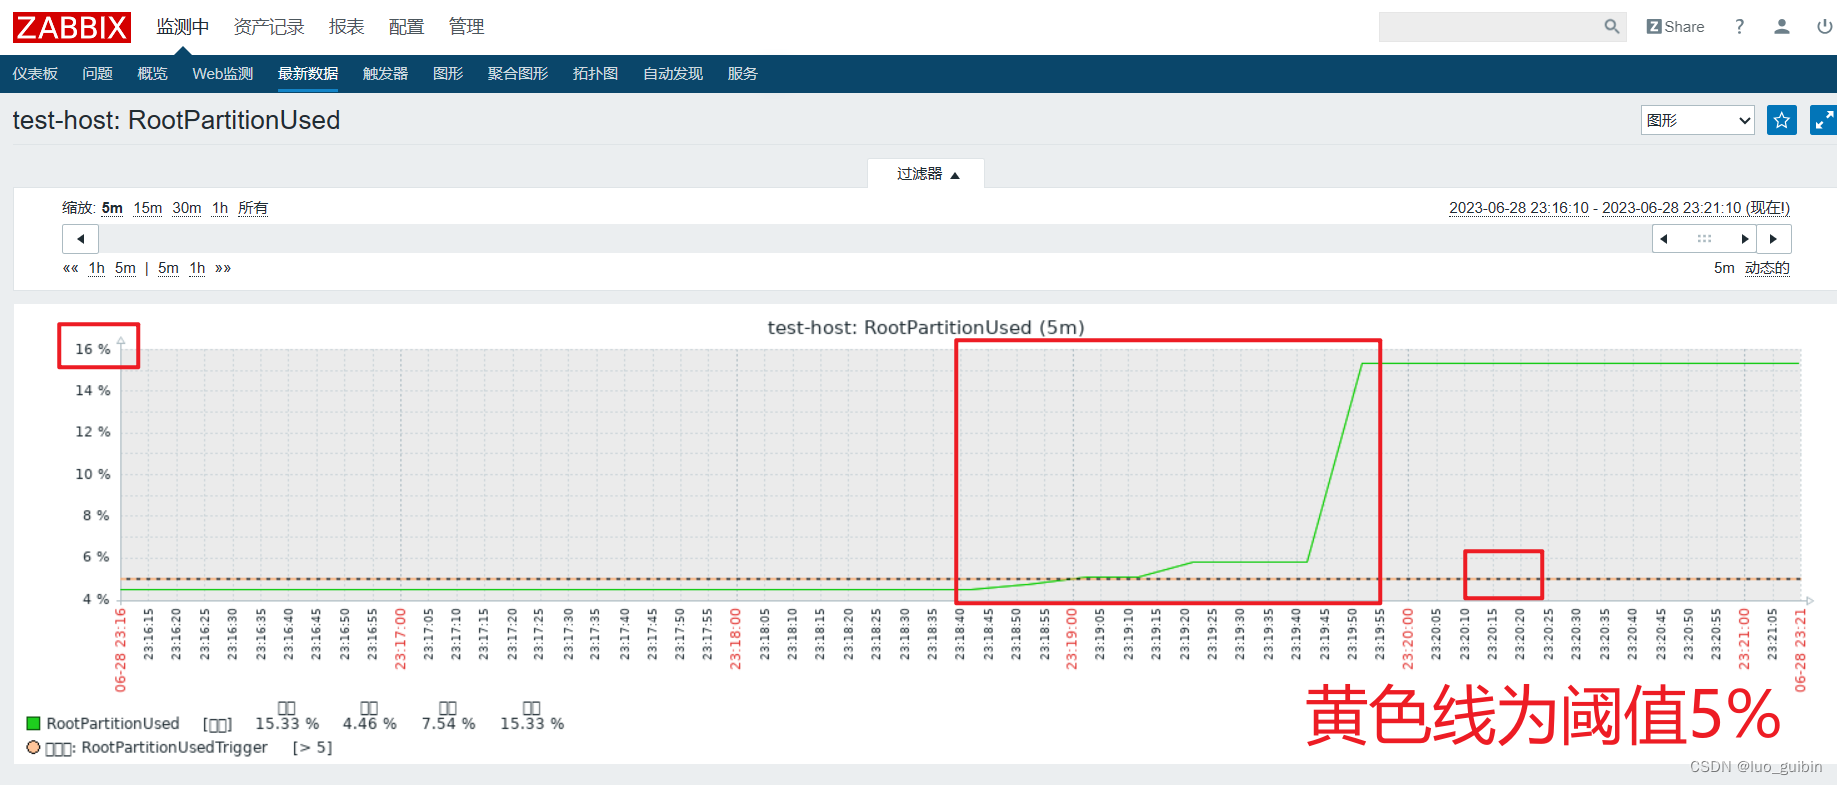
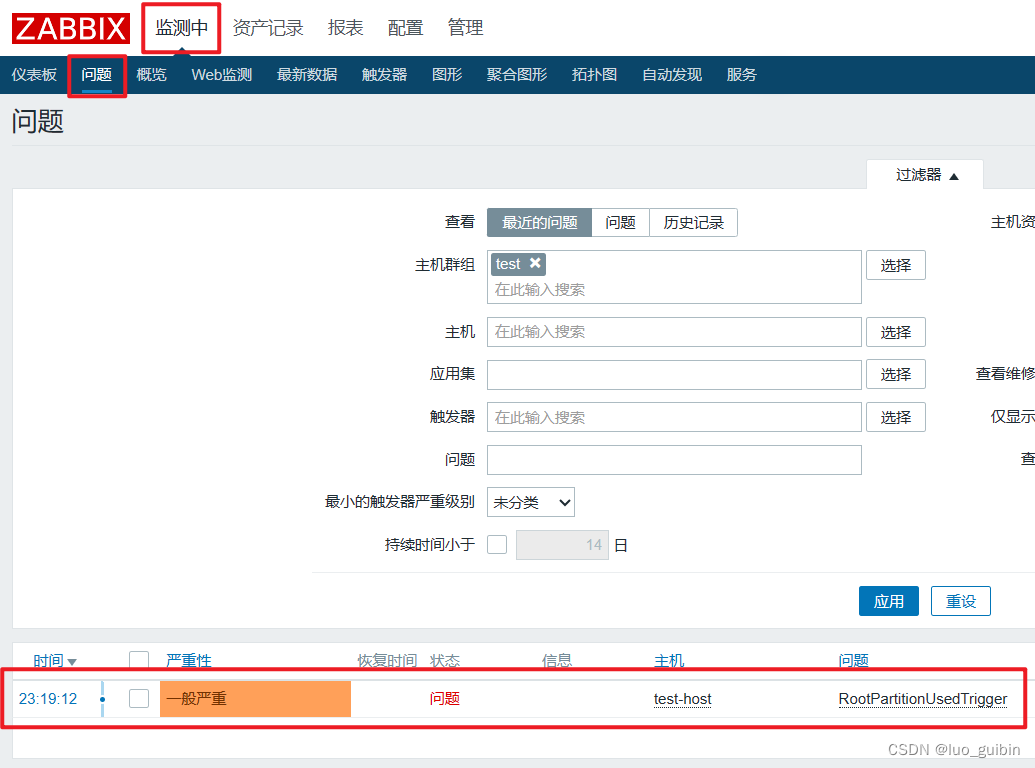
将硬盘占用设置为5%阈值,然后新建一个大容量文件,观察zabbix报警信息。
设置阈值为5%
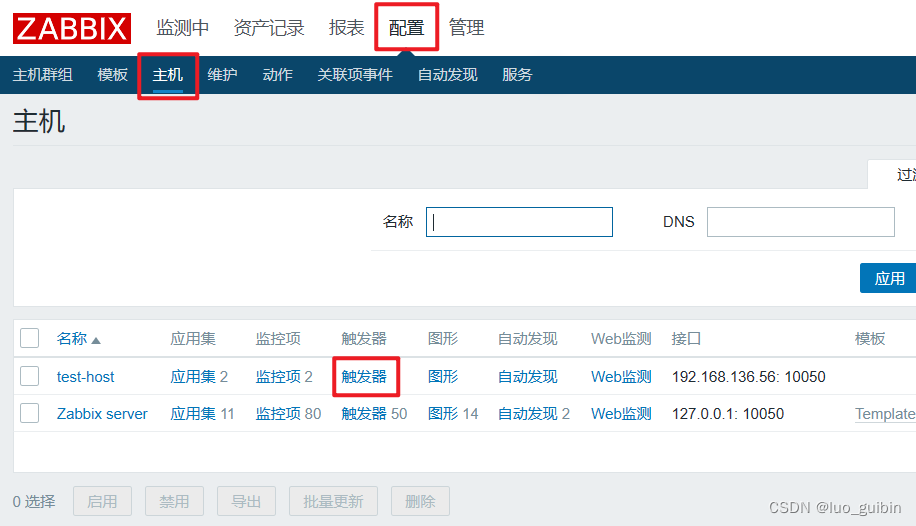

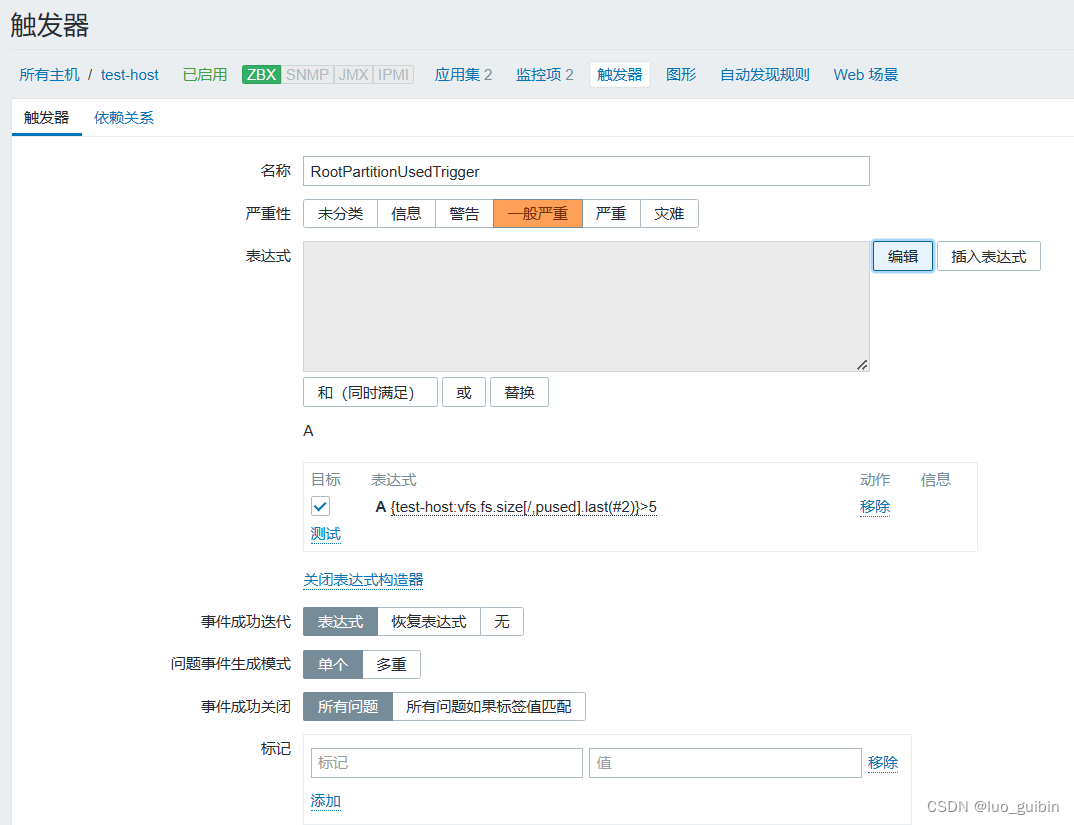
添加表达式
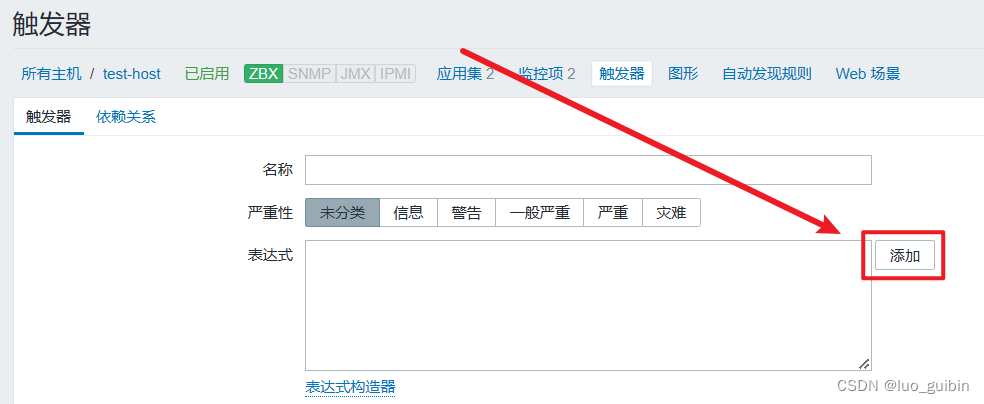
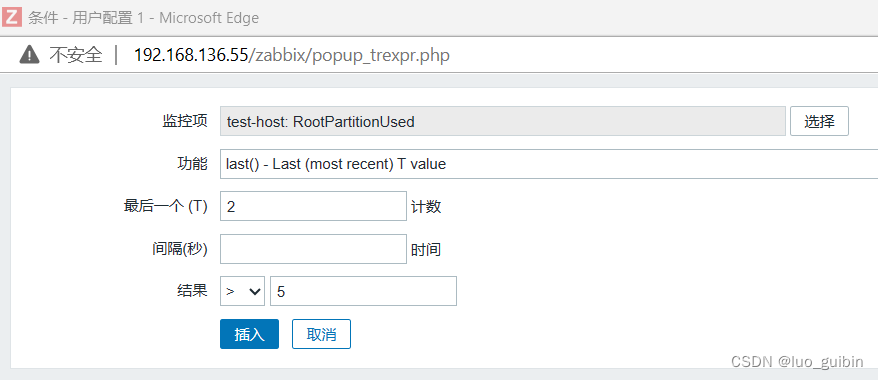
会形成一个表达式


数据正常
新建一个大文件,内存从4%上升到16%
###该命令表示创建test文件,该文件由四块1G的硬盘组成,所以实际zero占用硬盘真实空间是4G。

[root@zabbix-c /]# dd if=/dev/zero of=/test count=4 bs=1G
4+0 records in
4+0 records out
4294967296 bytes (4.3 GB) copied, 98.39 s, 43.7 MB/s
[root@zabbix-c /]# df -h
Filesystem               Size  Used Avail Use% Mounted on
devtmpfs                 898M     0  898M   0% /dev
tmpfs                    910M     0  910M   0% /dev/shm
tmpfs                    910M  9.5M  901M   2% /run
tmpfs                    910M     0  910M   0% /sys/fs/cgroup
/dev/mapper/centos-root   37G  5.7G   32G  16% /
/dev/sda1                197M  129M   69M  66% /boot
tmpfs                    182M     0  182M   0% /run/user/0

[root@zabbix-c dev]# cd /
[root@zabbix-c /]# du -sh test
4.0G	test
查看视图
仪表盘报警
问题面板同样报警
参考:
zabbix4.0安装部署_Wangsh@的博客-CSDN博客
zabbix监控,ansible和zabbix_ansible zabbix_淡泪无痕的博客-CSDN博客
zabbix从放弃到入门(4):在zabbix中添加监控项-朱双印博客
模板:
zabbix自带模板监控CPU,磁盘和内存_zabbix监控主机硬盘容量_小数苗小数苗的博客-CSDN博客


